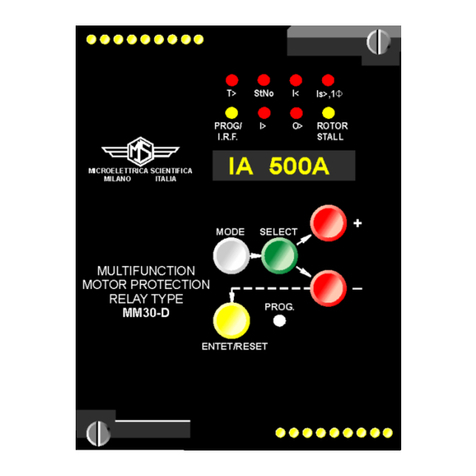
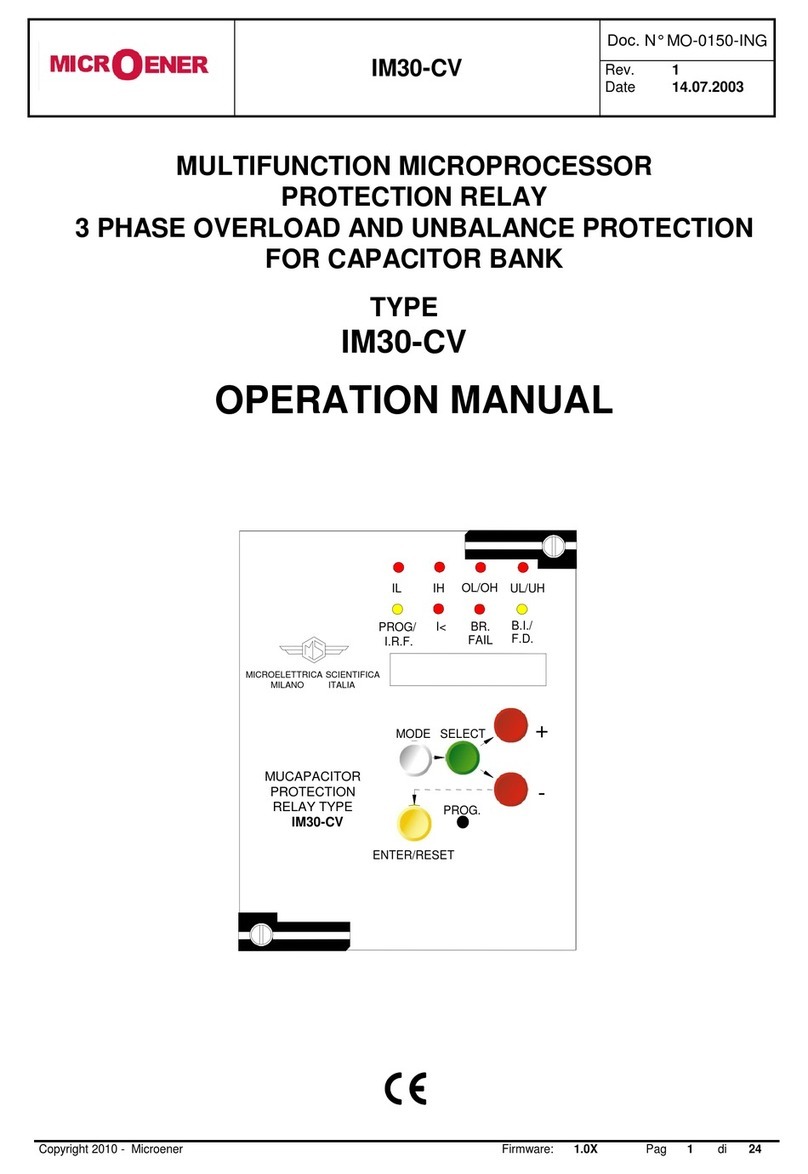
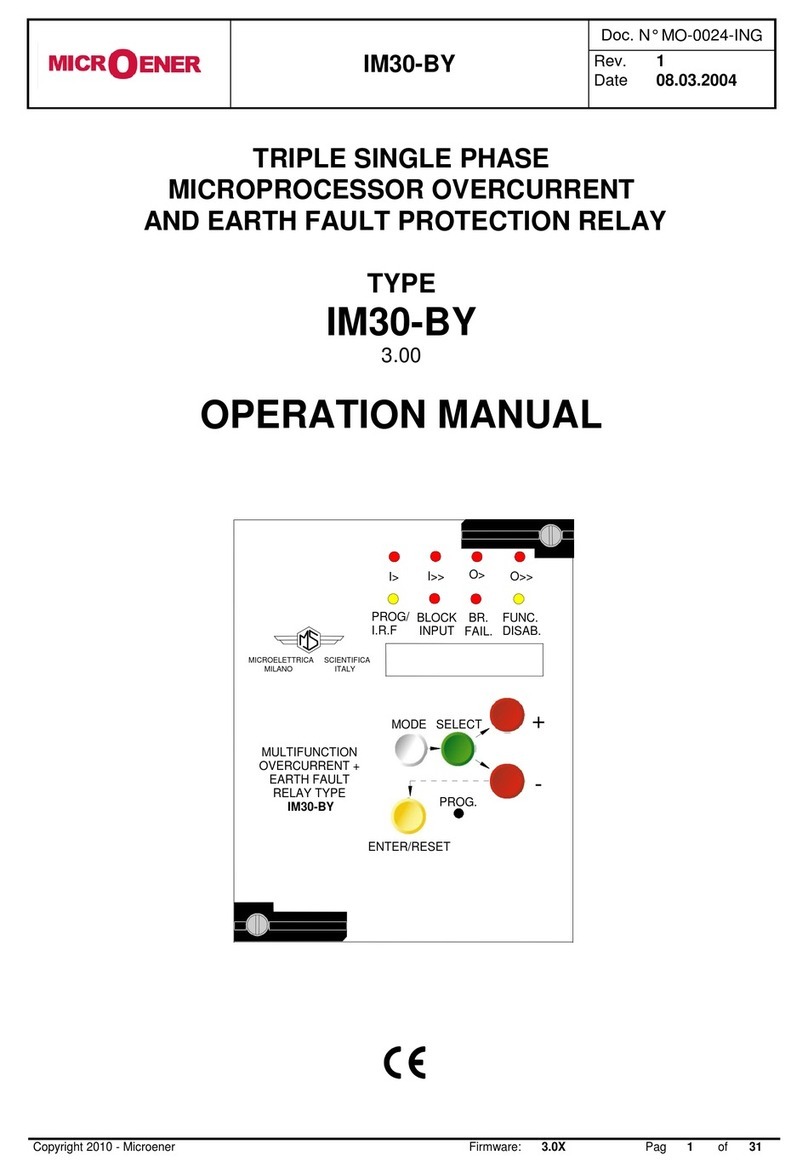
MICROENER MM30-DK User manual

MM30-DK
Doc. N° MO-0050-ING
Rev. 2
Pag. 1 of 36
Copyright - 2010 - Microener
MICROPROCESSOR
MOTOR PROTECTION RELAY
WITH DIRECTIONAL EARTH FAULT ELEMENT
TYPE
MM30-DK
OPERATION MANUAL
MULTIFUNCTION
MOTOR PROTECTION
RELAY TYPE
MM30-DK
MODE
SELECT
+
-
T>
St.No
I<
Is>,1
PROG/
I.R.F.
I>
ROTOR
STALL
MICROELETTRICA SCIENTIFICA
MILANO ITALY
ENTER/RESET
PROG.
O>

MM30-DK
Doc. N° MO-0050-ING
Rev. 2
Pag. 2 of 36
Copyright - 2010 - Microener
INDEX
1 General utilization and commissioning directions _____________________________________________________ 3
1.1 Storage and transportation_____________________________________________________________________ 3
1.2 Installation__________________________________________________________________________________ 3
1.3 Electrical connection__________________________________________________________________________ 3
1.4 Measuring inputs and power supply______________________________________________________________ 3
1.5 Outputs loading______________________________________________________________________________ 3
1.6 Protection earthing___________________________________________________________________________ 3
1.7 Setting and calibration_________________________________________________________________________3
1.8 Safety protection_____________________________________________________________________________ 3
1.9 Handling___________________________________________________________________________________ 3
1.10 Maintenance________________________________________________________________________________ 4
1.11 Fault detection and repair______________________________________________________________________ 4
2 General characteristics and operation_______________________________________________________________ 4
2.1 Power supply________________________________________________________________________________4
2.2 Operation an Algorithms_______________________________________________________________________ 5
2.2.1 Reference input variable__________________________________________________________________ 5
2.2.2 Input quantities_________________________________________________________________________ 5
2.2.2.1 Mains Frequency_________________________________________________________________ 5
2.2.2.2 Phase current inputs_______________________________________________________________5
2.2.2.3 Earth Fault current and voltage inputs_________________________________________________ 6
2.2.3 Function and Setting_____________________________________________________________________ 7
2.2.3.1 F49 –Thermal image______________________________________________________________ 7
2.2.3.2 F51LR –Locked Rotor Protection (Rotor jam)___________________________________________ 8
2.2.3.3 F46 –Current Unbalance (Negative Sequence current) protection___________________________ 8
2.2.3.4 F47 –Single Phasing______________________________________________________________ 8
2.2.3.5 F37 –No-Load Running protection____________________________________________________8
2.2.3.6 F51 –Overcurrent protection________________________________________________________ 9
2.2.3.7 F64 –Earth Fault protection_________________________________________________________ 9
2.2.3.8 Limitation of the Stats Number_______________________________________________________ 10
2.2.3.9 Starting Sequence control__________________________________________________________ 10
2.2.3.10 Autosetting______________________________________________________________________ 11
2.3 Operational of the directional Earth Fault Element___________________________________________________12
2.4 Clock and Calendar___________________________________________________________________________13
2.4.1 Clock synchronization_____________________________________________________________________ 13
2.4.2 Date and time setting_____________________________________________________________________ 13
2.4.3 Time resolution__________________________________________________________________________ 13
2.4.4 Operation during power off_________________________________________________________________ 13
2.4.5 Time tolerance___________________________________________________________________________ 13
3 Controls and measurements_______________________________________________________________________ 14
4 Signalization_____________________________________________________________________________________15
5 Output relays____________________________________________________________________________________ 16
6 Serial communication_____________________________________________________________________________ 17
7 Digital inputs____________________________________________________________________________________ 18
8 Test____________________________________________________________________________________________ 18
9 Keyboard and display operation____________________________________________________________________ 19
10 Reading of measurements and recorded parameters___________________________________________________ 20
10.1 ACT. MEAS (Actual measure)_____________________________________________________________ 20
10.2 MAX VAL (Max values)_________________________________________________________________ 20
10.3 LASTTRIP (Last trip)____________________________________________________________________21
10.4 TRIP NUM (Trip number)_________________________________________________________________21
11 Reading of programmed settings and relay’s configuration_____________________________________________ 21
12 Programming____________________________________________________________________________________ 22
12.1 Programming of functions settings__________________________________________________________ 22
12.2 Programming the configuration of output relay_________________________________________________ 24
13 Manual and automatic test operation________________________________________________________________ 25
13.1 Mode “ TESTPROG “ subprogram “ W/O TRIP “_______________________________________________ 25
13.2 Mode “ TESTPROG “ subprogram “ With TRIP “_______________________________________________ 25
14 Maintenance_____________________________________________________________________________________ 25
15 Power frequency insulation test_____________________________________________________________________25
15 Electrical characteristics___________________________________________________________________________26
16 Connection diagram (Standard Output)_______________________________________________________________ 27
16.1 Connection Diagram (Double Output)___________________________________________________________ 27
17 Wiring the serial communication bus________________________________________________________________ 28
18 Change phase rated input 1A or 5A__________________________________________________________________ 28
19 Thermal image curves_____________________________________________________________________________29
20 Inverse time unbalance protection element___________________________________________________________ 30
21 Direction for pcb’s draw-out and plug-in_____________________________________________________________ 31
21.1 Draw-out______________________________________________________________________________ 31
21.2 Plug-in________________________________________________________________________________ 31
22 Overall dimensions / Mounting_____________________________________________________________________ 32
23 Keyboard operational diagram______________________________________________________________________ 33
24 Setting’s form____________________________________________________________________________________34

MM30-DK
Doc. N° MO-0050-ING
Rev. 2
Pag. 3 of 36
Copyright - 2010 - Microener
1. General utilization and commissioning directions
Always make reference to the specific description of the product and to the Manufacturer's instruction.
Carefully observe the following warnings.
1.1 - STORAGE AND TRANSPORTATION,
must comply with the environmental conditions stated on the product's instruction or by the applicable
IEC standards.
1.2 - INSTALLATION,
must be properly made and in compliance with the operational ambient conditions stated by the
Manufacturer.
1.3 - ELECTRICAL CONNECTION,
must be made strictly according to the wiring diagram supplied with the Product, to its electrical
characteristics and in compliance with the applicable standards particularly with reference to human
safety.
1.4 - MEASURING INPUTS AND POWER SUPPLY,
carefully check that the value of input quantities and power supply voltage are proper and within the
permissible variation limits.
1.5 - OUTPUTS LOADING,
must be compatible with their declared performance.
1.6 - PROTECTION EARTHING
When earthing is required, carefully check its effectiveness.
1.7 - SETTING AND CALIBRATION
Carefully check the proper setting of the different functions according to the configuration of the
protected system, the safety regulations and the co-ordination with other equipment.
1.8 - SAFETY PROTECTION
Carefully check that all safety means are correctly mounted, apply proper seals where required and
periodically check their integrity.
1.9 - HANDLING
Notwithstanding the highest practicable protection means used in designing M.S. electronic circuits,
the electronic components and semiconductor devices mounted on the modules can be seriously
damaged by electrostatic voltage discharge which can be experienced when handling the modules.
The damage caused by electrostatic discharge may not be immediately apparent but the design
reliability and the long life of the product will have been reduced. The electronic circuits reduced by
M.S. are completely safe from electrostatic discharge (8 KV IEC 255.22.2) when housed in their
case; withdrawing the modules without proper cautions expose them to the risk of damage.

MM30-DK
Doc. N° MO-0050-ING
Rev. 2
Pag. 4 of 36
Copyright - 2010 - Microener
a. Before removing a module, ensure that you are at the same electrostatic potential
as the equipment by touching the case.
b. Handle the module by its front-plate, frame, or edges of the printed circuit board.
Avoid touching the electronic components, printed circuit tracks or connectors.
c. Do not pass the module to any person without first ensuring that you are both at
the same electrostatic potential. Shaking hands achieves equipotential.
d. Place the module on an antistatic surface, or on a conducting surface which is at
the same potential as yourself.
e. Store or transport the module in a conductive bag.
More information on safe working procedures for all electronic equipment can be found
in BS5783 and IEC 147-OF.
1.10 - MAINTENANCE
Make reference to the instruction manual of the Manufacturer ;
maintenance must be carried-out by specially trained people and in strict conformity
with the safety regulations.
1.11 - FAULT DETECTION AND REPAIR
Internal calibrations and components should not be altered or replaced.
For repair please ask the Manufacturer or its authorised Dealers.
Misapplication of the above warnings and instruction relieves the Manufacturer of any liability.
2. GENERAL
Input currents are supplied to 3 current transformers: - two measuring phase current (the third current is
computed as vector summation of the two others) - one measuring the earth fault zero-sequence
current.
Phase current rated input can be 1 or 5A (Selectable by movable bridges on relay card)
Zero sequence rated input is 1A.
Zero sequence voltage input is supplied to one voltage transformer.
Rated input voltage 100V –50/60Hz.
Make electric connection in conformity with the diagram reported on relay's enclosure.
Check that input currents are same as reported on the diagram and on the test certificate.
The auxiliary power is supplied by a built-in interchangeable module fully isolated an self protected.
2.1 POWER SUPPLY
The relay can be fitted with two different types of power supply module :
24V(-20%) / 110V(+15%) a.c. 80V(-20%) / 220V(+15%) a.c.
a) - b) -
24V(-20%) / 125V(+20%) d.c. 90V(-20%) / 250V(+20%) d.c.
Before energising the unit check that supply voltage is within the allowed limits.

MM30-DK
Doc. N° MO-0050-ING
Rev. 2
Pag. 5 of 36
Copyright - 2010 - Microener
2.2 –Operation and Algorithms
2.2.1 –Reference input variables
Display
Description
Setting Range
Step
Unit
NodAd 1
Identification number for connection serial communication
1 - 250
1
1
Fn 50 Hz
Mains frequency
50 - 60
10
Hz
In 500Ap
Rated primary current of the phase C.Ts.
1 - 9999
1
A
On 500Ap
Rated primary current of the C.Ts. or of the tore C.T.
detecting earth fault current
1 - 9999
1
A
Im 1.0In
Motor full-load current (p.u. of phase C.Ts. rated current)
0.1 –1.5
0.01
In
Ist 6Im
Motor starting current (p.u. of motor full load current)
0.5 –10
0.1
Im
tst 5s
Motor starting time
1 –120
1
s
Itr0.5Ist
Switch-over current for control of two-step motor starter
(p.u. of motor starting current)
Dis –0.1 –1
0.1
Ist
tTr 6s
Max switch-over time from start-up
0.5 –50
0.1
s
2.2.2 –Input quantities
2.2.2.1 –Mains Frequency
The relay can operate either in 50Hz or 60Hz systems.
The rated Mains Frequency “ Fn “ must be set accordingly.
2.2.2.2 –Phase Current inputs
The relay directly displays the r.m.s. value of the Phase Currents “ IA “, “ IB ”, “ IC ” flowing in the
Primary of the input Current Transformers and refers all its measurements to that value.
To make the relay properly working with any C.T., when programming the relay settings we have
to input the value of the Rated Primary Current “ In “ of the phase C.Ts.
For the Phase Current inputs, 1A or 5A configuration can be selected by moving the jumpers J1
and J2 provided on the C.T. input card (See § 19).
Example :
Phase CTs 1500/5A and Core Balance CT 100/1A
Set In = 1500A and On = 100A
Configure CT input card with jumpers J1, J2 in the 5A position.
Only phase A and C currents are measured, whereas the current of the phase B is computed as
vector summation of the currents of the other two phases.
The algorithm is based on the following considerations coming from well-known vector relations
among the three-phase currents and the zero sequence current.
-In any circumstance –currents balanced or not, sinusoidal or not –it is always true that:
0IIII10CBA
-When no Earth Fault exists (I0= 0)
CABCBA III0III2
The earth fault protection element is independently supplied by the residual current coming either
from the residual connection of the 3 system C.Ts. or from the core balance C.T.
If any Earth Fault is experienced (I0 0) the Earth Fault Protection Element trips independently
from the phase current measuring elements.

MM30-DK
Doc. N° MO-0050-ING
Rev. 2
Pag. 6 of 36
Copyright - 2010 - Microener
If no Earth Fault is present (I0 = 0), the equation (2) is valid, no matter if currents are balanced or
not, sinusoidal or not.
The third phase current is calculated, in real time, as vector summation of the other two-phase
currents.
Similarly, the Positive Sequence Current Component “ Id “ and Negative Sequence component
“ Is “, with no Earth Fault, are computed according to the normal equations of the system
symmetrical components, using two currents only:
In case of Earth Fault the Earth Fault Element trips before tripping of the unbalance element.
- During Faults
A) Single phase to earth Fault
Trip of the earth fault element directly measuring the Residual Current.
B) Two Phase Fault
In any case one of the currents directly measured is involved, so the relay trips correctly.
C) Two Phase to Earth Fault
Same as A + B
D) Three Phase Fault
All the three currents are correctly measured (in any case two directly).
2.2.2.3 –Earth Fault Current and Voltage Inputs
The real-time measurement of the r.m.s. Earth Fault Current is displayed as percent of the rated
current of the Zero sequence Current measuring C.T. (Io= xxxx %On).
The input of the Earth Fault element is supplied by a separated Core Balance C.T., with 1A rated
Secondary Current.
The Earth Fault element can operate as a normal Zero Sequence O/C element or as a Directional
Zero Sequence O/C element.
In this case to discriminate the direction the relays uses as polarizing quantity the Zero Sequence
Residual voltage supplied by the Open-Delta windings of the system P.Ts.
The display directly gives the measurement “ Uo “ of the Secondary Zero sequence voltage and
the measurement “ o ” of the phase displacement of the Zero Sequence Current Fasor from the
Zero Sequence Voltage Fasor.
120
AC
120
AC
2
A
2
C
2
AC
2
C
A
II3Id
II3Is
IdII
IsII
IsIdI
IsIdI
j
j
e
e
ααα
ααα
αα

MM30-DK
Doc. N° MO-0050-ING
Rev. 2
Pag. 7 of 36
Copyright - 2010 - Microener
2.2.3 –Functions and Settings
2.2.3.1 –F49 –Thermal Image (See curves § 20)
The current “ I“ producing motor warming-up is computed as a conventional composition of
Positive Sequence “ Id “ and Negative Sequence “ Is “ components of the motor current.
-Computed current:
-Allowed overloading time (See Curve § 19)
The trip time delay “ t“ of the thermal element, depends on the warming-up time constant
“ tm “ of the motor, on the previous thermal status (Ip), on the admissible continuous overload
(Ib) and, of course, on the actual load (I)
tm
=
(1-60)min.
I
=
computed current
Ip
=
preheating current
Ib
=
continuously admissible current
(1-1.3)Im, step 0.01Im
Im
=
motor rated current
(0.1-1.5)In, step 0.1In
-Steady motor cooling-down time constant: to = (1-10)tm, step 1tm
The cooling-down time constant of the motor when running is “tm”; it is automatically changed
to " to " when the motor current drops below 0.1 lm (running/steady motor discrimination
level).
-Thermal prealarm : Ta/n = (50-110)%Tn, step 1%Tn
An alarm signal is issued when the simulated warming exceeds the set percentage of the
motor rated temperature Tn.
Automatic 1% drop out percentage.
-Restart inhibition: Ts/n = (40-100)%Tn, step 1%Tn
To inhibit a new motor starting before cooling down to 99% Ts/n, reset after tripping of the
thermal element takes places when T< 0.99[Ts].
22 3IsIdI
22
22
(Ib/Im)(I/Im) (Ip/Im)(I/Im)
Intmt

MM30-DK
Doc. N° MO-0050-ING
Rev. 2
Pag. 8 of 36
Copyright - 2010 - Microener
2.2.3.2 –F51LR –Locked Rotor Protection (Rotor jam)
At motor starting this function is disabled for the set time “ 2tSt “ : when this time has elapsed, if
current exceeds the set level “ ILR ”, the relay trips with a delay of “ tLR ” sec.
-Current level :
ILR = (1-5)Im, step 0.1Im. lf ILR = DIS. the function is disactivated.
tLR = (1-25)s, step 1s
-Inhibition time of the locked rotor function:
2tSt
tSt = (1-120)s, step 1s = motor start-up time
2.2.3.2 - F46 - Current Unbalance (Negative Sequence Current) protection (See curve 21)
Besides its contribution to the thermal image algorithm, current unbalance also controls another
inverse time element
-Minimum Negative Sequence current operation level
Is> = (0.1-0.8)Im, step 0.1lm. lf ls> = DIS. the function is disactivated.
-Time current curve
tIs> = (1-8)s, step 1s
Actual trip time delay is given by:
“ Is ” is the actual Negative Sequence Current
2.2.3.4 –F47 –Single Phasing
When the relay detects the loss of the current of one phase while the currents of the other two
phases are present, the Single Phasing element “ 1“ is tripped with a fixed 3 sec. time delay.
2.2.3.5 - F37 - No-Load Running protection
This function performs the protection against no-load running: it is activated by motor under
current.
-Under current level
I< = (0.15-1)Im, step 0,01Im. lf I< = DIS. the function is disactivated.
When current is below 0.1lm in all phases the function is activated.
-Trip time delay = 3 sec.
Im)Isattimetrip(tIstIs
0.1Is/Im
0.9
t

MM30-DK
Doc. N° MO-0050-ING
Rev. 2
Pag. 9 of 36
Copyright - 2010 - Microener
2.2.3.6 - F51 - Overcurrent protection
-Minimum Pick-up Current level in at least one phase :
I> = (1-5)Ist, step 0.1 Ist (limited to 20 times In)
Ist (motor locked rotor current) = (0.5-10)Im, step 0.1Im
lf I> = DIS. the function is disactivated
-Trip time delay
tI> = (0.05-1)s, step 0,01s.
Any of the output relays can be associated to the time delayed element “tI>” as well as to the
instantaneous element “I>” of this function for signalling or for blocking other relays. The
output relay controlled by the I> level remains energized for the time tI> + tBO.
After this delay the relay it is anyhow reset.
tBO = (0.05-0.5)s, step 0.05s.
2.2.3.7 - F64 - Earth Fault protection
-Minimum Pick-up Zero Sequence Residual Current level :
O> = (0.1 - 4)%On, step 0.1%On. lf O> = DIS. the function is disactivated.
-Trip time delay:
tO> = (0.05-5)s, step 0.01s.
-Minimum Residual Voltage level to enable the operation of the Zero Sequence O/C element
when in the Directional mode:
Uo> = (2-25)secondary V, step 1V.
-Max torque angle in the Directional operation mode (see § 2.3):
= (0-359-Dis)°, step 1°.
When “ “ is set to Dis, the Earth Fault element works as normal non directional Overcurrent
relay and the “ Uo “ level is disregarded.
As for function F51, any of the output relays can be associated to the instantaneous element
of “O>” as well as to the time delayed element “ tO> “.

MM30-DK
Doc. N° MO-0050-ING
Rev. 2
Pag. 10 of 36
Copyright - 2010 - Microener
2.2.3.8 - Limitation of the Starts Number
-Allowed Number of startings:
St No = (1-60), step 1 lf St No = DIS the number of startings is unlimited.
-Time interval in which the StNo is counted:
tStNo = (1-60)min. step 1 min.
lf during the time “tStN” the “StNo” is attained, a new start is inhibited for the time tBst.
-Restart Inhibition time:
tBst = (1-60)min., step 1min.
On the set tBst= 0 the inhibition is disactivated
On the set tBst= Rm the inhibition is permanent until the RESET key is operated.
2.2.3.9 - Starting Sequence Control
During start-up of the motor, the unit can control an output relay used to operate the switch-over of
motor starter (star-delta, resistance or impedance, autotransformer, etc...) thus allowing to
automatically manage the starting transition by controlling the following parameters:
-Switch-over (transition) current:
ITr = (0.1-1)Ist, step 0.1Ist
-Maximum switch-over (transition) time delay:
tTr = (0.5-50)s, step 0.1s.
At motor start counting of “ tTr “ begins. If during “ tTr ” the motor current drops below “ ltr “,
switching-over is operated; if motor current stays above “ ltr “ longer than “ tTr “, the Locked Rotor
element is activated.

MM30-DK
Doc. N° MO-0050-ING
Rev. 2
Pag. 11 of 36
Copyright - 2010 - Microener
2.2.3.10 - Autosetting
The complexity of properly set a motor protection, frequently produces undesired tripping or
non-operation of some of the functions.
The relay MM30-DK can automatically select the best setting of the parameters according to motor
and system basic data. These data are:
-
System frequency
=
Fn
=
50 o 60
Hz
-
Rated primary current of phase C.Ts.
=
In
=
0-9999
A
step 1A
-
Rated primary current of earth fault C.T
=
On
=
0-9999
A
step 1A
-
Motor rated current
=
lm
=
0.1-1.5
In
step 0.01In
-
Motor starting current
=
lst
=
0.5-9.9
Im
step0.1 Im
-
Starting time
=
tst
=
1-120
s
step 1s
-
Transition current level
=
ITr
=
0.11
Ist
step 0.1 Ist
-
Transition time
=
tTr
=
0.5-50
s
step 0,1s
Once these settings have been programmed, the “AUTOSET” function can be activated by the key
"ENTER" and all the parameters are computed and automatically set at values suitable for a
normal duty of the motor.
Particularly the motor warming-up time constant “tm” is computed so that the motor, when stopped
after having run continuously at Rated Power (Rated current Im), can be immediately restarted at
least one time.
The parameters can anyhow be manually modified if different setting is needed.

MM30-DK
Doc. N° MO-0050-ING
Rev. 2
Pag. 12 of 36
Copyright - 2010 - Microener
2.3 - OPERATION OF THE DIRECTIONAL EARTH FAULT ELEMENT
It is assumed :
O>
=
Set minimum pick-up residual current : (3Io)
Uo>
=
Set minimum residual voltage (3Uo) to enable Is pick-up
o
=
Set characteristic angle (max. torque displacement of residual current 3Io from residual
voltage 3Uo).
3Io
=
Actual earth fault relay’s input current
3Uo
=
Actual earth fault relay’s input voltage
o
=
Displacement of 3Io from 3Uo
Io
=
Component of 3Io in the direction
Io= 3Io cos(o-o)
The relay measurement is:
3Io x cos( o -o) = Io
The relay trips (3Uo>[Uo>]) when Io>[O>] (fig.2) i.e, when the component of the input current in the
measuring direction of the relay exceeds the set trip level Is. [O>]
Operation is enabled only if the input zero-sequence voltage 3Uo is above the set level [Uo>].
The sensitivity of the relay is then proportional to cos(o -o), it is maximum when o= o
and its operation field is limited within the range:
(o - 90°) < o < (+ 90) (fig.1)
The characteristic angle of the relay must be selected according to the kind of earthing of the installation
which has to be protected against earth fault; typical setting are:
UNEARTHED NEUTRAL
o
=
90°
NEUTRAL EARTHED VIA RESISTOR
o
=
0°
SOLIDLY EARTHED NEUTRAL
o
=
60°

MM30-DK
Doc. N° MO-0050-ING
Rev. 2
Pag. 13 of 36
Copyright - 2010 - Microener
2.4 CLOCK AND CALENDAR
The unit features a built in clock calendar with Years, Months, Days, Hours, Minutes, Seconds,
Tenths of seconds and Hundredths of seconds.
2.4.1 Clock synchronization.
The clock can be synchronized via a digital input (terminals 1 –14) or the serial communication
interface. The following synchronization periods can be set: 5, 10, 15, 30, 60 minutes.
Synchronization can also be disabled, in which case the only way to modify the current date and
time is via the front panel keyboard (SETTINGS menu) or the serial communication interface.
In case synchronization is enabled, the unit expects to receive a sync signal at the beginning of
every hour and once every Tsyn minutes. When a sync signal is received, the clock is
automatically set to the nearest expected synchronization time.
For example: if Tsyn is 10min and a sync signal is received at 20:03:10 January the 10th, 98, then
the clock is set to 20:00:00 January the 10th, 1998.
On the other hand, if the same sync signal were received at 20:06:34, the clock would be set to
20:10:00, January the 10th 98.
Note that if a sync signal is received exactly in the middle of a Tsyn period, the clock is set to the
previous expected synchronization time.
2.4.2 Date and time setting.
When the PROG/SETTINGS menu is entered, the current date is displayed with one of the
groups of digits (YY, MMM or DD) blinking.
The DOWN key operates as a cursor. It moves through the groups of digits in the sequence
YY => MMM => DD => YY => …
The UP key allows the user to modify the currently blinking group of digits.
If the ENTER button is pressed the currently displayed date is captured.
On the other hand pressing the SELECT button leaves the current date unchanged and scrolls
the SETTINGS menu. Current time can now be modified using the same procedure described
above. If synchronization is enabled and the date (or time) is modified, the clock is stopped until
a sync signal is received (via digital input or the serial port). This allows the user to manually set
many units and have them to start their clocks in a synchronized fashion.
On the other hand if synchronization is disabled the clock is never stopped.
Note that the setting of a new time always clears 10ths and 100ths of sec.
2.4.3 Time resolution.
The clock has a 10ms resolution. This means that any event can be time-stamped with a 10ms
resolution, although the information concerning 10ths and 100ths of sec. can be accessed only
via the serial communication interface.
2.4.4 Operation during power off.
The unit has an on board Real Time Clock which maintains time information for at least 1 hour in
case of power supply failure.
2.4.5 Time tolerance.
During power on, time tolerance depends on the on board crystal (+/-50ppm typ, +/-100ppm
max. over full temperature range).
During power off, time tolerance depends on the RTC’s oscillator (+65 –270 ppm max over full
temperature range).

MM30-DK
Doc. N° MO-0050-ING
Rev. 2
Pag. 14 of 36
Copyright - 2010 - Microener
3. CONTROLS AND MEASUREMENTS
Five key buttons allow for local management of all relay's functions.
A 8-digit high brightness alphanumerical display shows the relevant readings (xxxxxxxx)
(see synoptic table fig.1)
FIG.1
MEASURES
MAX VAL.
LASTTRIP
TRIP NUM
ACT MEAS
Actual measurement values
Max. values measured
Values measured at last five events
N° of tripping for each function
Measurements
display
SET DISP
SETTINGS
FRELAY
Display of setting
Display of configuration of output relay
Setting Program
display
PROGR
SETTINGS
FRELAY
Setting of parameters
Configuration of output
relays
Set Programming
PRO
G
TEST PRG
W/O TRIP
WithTRIP
Functional Test
Test with operation of signals and output relays
Test with operation of signals
only
Test activation
by the key ENTER
Paramater scanning
by the key
SELECT
Parameter modification
by the key “+” “-”
Set validation
by the key ENTER
Scanning of
the menus by
the key
“+” “-”
MODE
SELECT
ENTER
+ -
(*) Enabled only if input current is zero
(*)
(*)
ENTER/RESET
MODE
SELECT
+
-
PROG.
The SELECT button chooses
which category of values within the
chosen mode to display
Pressing this button progressively
selects between
Measurements Display,
Setting Display, Programming,
and Test modes
When in Program mode, this
button stores the newly selected
value. If not in Program mode and
the relay has tripped, this button
resets the relay and all output
contacts. If not tripped, this button
restores the default display.
The + and - buttons are used to
select the actual measurement or
display desired when in
Measurements Display or Settings
Display modes. When in Program
mode, these buttons increase or
decrease the value of the
displayed setting.
When in Program mode, and when
all input currents are zero,
pressing this recessed button
places the relay into active
programming mode, allowing any
or all of the relay’s settings to be
altered.

MM30-DK
Doc. N° MO-0050-ING
Rev. 2
Pag. 15 of 36
Copyright - 2010 - Microener
4. SIGNALIZATIONS
Eight signal leds (normally off) are provided:
a)
Red
LED
T>
Flashing when the motor heating “T” exceeds the set alarm level [Ta].
Illuminated on over-temperature trip. –Also illuminated on activation of RTD
input.
b)
Red
LED
St No
Flashing on tripping of the element for limitation of the number of
consecutive startings.
Illuminated at the end of [tBSt].
c)
Red
LED
I<
Flashing as soon as motor current drops below the set level [I<]
Illuminated at the end of trip time delay.
d)
Red
LED
Is>,1
Flashing as soon as motor unbalance exceeds the set level [Is>]
Illuminated on trip after [tIs>] time delay or on tripping of the single phasing
element.
e)
Yellow
LED
PROG/
I.R.F.
Flashing when in PROGRAM MODE
Illuminated when relay internal fault is detected.
f)
Red
LED
I>
Flashing when motor current exceeds the set level [I>]
Illuminated on trip after [tI>] time delay.
g)
Red
LED
O>
Flashing when earth fault current exceeds the set level [O>]
Illuminated on trip after [tO>] time delay.
h)
Yellow
LED
ROTOR
STALL
Illuminated on trip of the Locked Rotor element (I>ILR) and/or on activation
of the Speed Control input SpC.
The reset of the leds takes place as follows:
Leds
a
From flashing to off automatically when motor heating drops below
the alarm level [Ta].
From steady light to off by the Reset control (front button or serial
command) provided motor heating is below the restart temperature
[Ts].
Leds
b
From flashing to off by the Reset control (front button or serial
command) only when the restart inhibition time is set to “manual”:
[tBSt]=Rm.
From illuminated to off when [tBSt] has expired.
Leds
c,d,e,f,g
From flashing to off, automatically when the lit-on cause disappears.
From ON to OFF, by "ENTER/RESET" push button only if the
tripping cause has disappeared.
Leds
h
From flashing or illuminated to off, automatically when the lit-on
cause disappears.
T>
StNo
I<
Is>,1
ROTOR
STALL
PROG/
I.R.F.
I>
a
b
c
d
e
f
g
h
O>

MM30-DK
Doc. N° MO-0050-ING
Rev. 2
Pag. 16 of 36
Copyright - 2010 - Microener
In case of auxiliary power supply failure the status of the leds is recorded and reproduced when power
supply is restored.
5. OUTPUT RELAYS
The unit MM30-DK includes four (R1, R2, R3, R4) user programmable plus one diagnostic (R5) output
relays.
In the version MM30-DKX the number of output relays can be increased by the addition of one or two
optional Relay Expansion modules REX-8.
The modules REX-8 are for protruding mounting and are controlled by the master module MM30-DKX
via a screened twisted pair of cables connecting dedicated RS485 serial ports (see diagram herebelow).
The module REX-8 includes eight (RA, RB, RC, RD, RE, RF, RH, RG) user programmable plus one
(R-Diag) diagnostic output relays
The master module MM30-DK can control altogether up to sixteen output relays
-4 internal R1 –R2 –R3 –R4
-8 from the first optional REX-8 module RA –RB –RC –RD –RE –RF –RG –RH
-4 from a second optional REX-8 module RI(RA+RB) –RJ(RC+RD) –RK(RE+RF) –RL(RG+RH)
This second unit REX-8 is configured (by internal Dip-Switch) to operate the eight relays two by two in
parallel (only four user programmable outputs with double number of available contacts)

MM30-DK
Doc. N° MO-0050-ING
Rev. 2
Pag. 17 of 36
Copyright - 2010 - Microener
Any of the functions featured by the MM30-DK can be programmed to control up to four out of the
sixteen user programmable output relays

MM30-DK
Doc. N° MO-0050-ING
Rev. 2
Pag. 18 of 36
Copyright - 2010 - Microener
The user programmable relays (all but R5, RDIAG) are normally deenergized, i.e. energized on trip.
These relays pick-up as soon as the tripping cause appears (relays controlled by the instantaneous
functions) or at the end of the set trip time delay (relays controlled by time delayed functions).
The reset after trip takes place automatically as soon as the relevant tripping cause has been cleared.
The relays R5, R DIAG are not user programmable; they are normally energized and get deenergized
on :
- internal fault of MM30-DK - Internal fault of REX-8
R5 - MM30-DK power supply failure R DIAG - REX-8 power supply failure
- during the programming - Interruption/fault on the serial
control communication
6. SERIAL COMMUNICATION
The relays fitted with the serial communication option can be connected via a cable bus or (with proper
adapters) a fiber optic bus for interfacing with a Personal Computer (type IBM or compatible).
All the operations which can be performed locally (for example reading of measured data and changing
of relay’s settings) are also possible via the serial communication interface.
Furthermore the serial port allows the user to read the demand recording data.
The unit has a RS232 / RS485 interface and can be connected either directly to a P.C. via a dedicated
cable or to a RS485 serial bus, thus having many relays to exchange data with a single master P.C.
using the same physical serial line. A RS485/232 converter is available on request.
The communication protocol is MODBUS RTU (only functions 3, 4 and 16 are implemented).
Each relay is identified by its programmable address code (NodeAd) and can be called from the P.C.
A dedicated communication software (MSCOM) for Windows 95/98/NT4 SP3 (or later) is available.
Please refer to the MSCOM instruction manual for more information Microelettrica Scientifica.

MM30-DK
Doc. N° MO-0050-ING
Rev. 2
Pag. 19 of 36
Copyright - 2010 - Microener
7. DIGITAL INPUTS
The relay is fitted with three digital inputs activated when the relevant terminals are shorted by a cold
contact :
-
R.T.
(terminals 1-2)
Remote Trip control.
Activation of the input R.T. (Terminals 1-2 shorted) produces the
following operation :
The output relay associated to the function R.T. is energized
The Trip Number Counter R.T. is incremented by 1 unit
The event recording is activated and shows “CAUSE: RT”
-
S.p.C.
(terminals 1-3)
Switch speed Control.
The Speed Control input is connected to an external N/O contact which
closes as soon as the motor is running. If the contact does not close
within the set start time [tst] from the moment the motor is energised,
the Locked Rotor function is tripped. The relay and the signal led
associated to ILR are energised, the recording on Last Trip will show
cause SpC and trip N° LR will be increased.
If the Speed Control function is not used, it must be disactivated by
programming the variable [Spc] = OFF (see § 12.1)
-
RTD
(terminals 1-14)
Thermal probe.
This function is enabled by programming the variable
[RTD] = ON (see § 12.1)
If the function is enabled, the input RTD is activated when the resistance
connected to the terminals 1-14 exceeds the limits 50> R1-14 > 2900.
This limits respectively correspond to “Shorted Probe” (<50) or to
“Overtemperature” (R>2900)
The activation of the input 1-14 produces the following operation:
The relay associated to R.T. is energized
The Led T> is lit-on.
The counter of Trip Number of the function T> is incremented
LastTrip recording shows : "CAUSE RTD"
8. TEST
Besides the normal "WATCHDOG" and "POWERFAIL" functions, a comprehensive program of self-test
and self-diagnostic provides:
Diagnostic and functional test, with checking of program routines and memory's content, run every
time the aux. power is switched-on: the display shows the type of relay and its version number.
Dynamic functional test run during normal operation every 15 min. (relay's operation is suspended
for less than 10 ms). If any internal fault is detected, the display shows a fault message, the Led
"PROG/IRF" illuminates and the relay R5 is deenergized.
Complete test activated by the keyboard or via the communication bus either with or without tripping
of the output relays.

MM30-DK
Doc. N° MO-0050-ING
Rev. 2
Pag. 20 of 36
Copyright - 2010 - Microener
9. KEYBOARD AND DISPLAY OPERATION
All controls can be operated from relay's front or via serial communication bus.
The keyboard includes five hand operable buttons (MODE) - (SELECT) - (+) - (-) - (ENTER/RESET)
plus one indirect operable key (PROG) (see synoptic table a fig.1):
a)
-
White key
MODE
:
when operated it enters one of the following operation modes
indicated on the display :
MEASURES
=
Reading of all the parameters measured and of those recorded
in the memory
SET DISP
=
Reading of the settings and of the configuration of the output
relays as programmed.
PROG
=
Access to the programming of the settings and of relay
configuration.
TEST PROG
=
Access to the manual test routines.
b)
-
Green key
SELECT
:
When operated it selects one of the menus available in the
actual operation MODE
c)
-
Red key
“+”AND “-“
:
When operated they allow to scroll the different information
available in the menu entered by the key SELECT
d)
-
Yellow key
ENTER/RESET
:
It allows the validation of the programmed settings
the actuation of test programs
the forcing of the default display indication
the reset of signal Leds.
e)
-
Indirect key
:
Enables access to the programming.
ENTER/RESET
MODE
SELECT
+
-
PROG.
Table of contents
Other MICROENER Computer Hardware manuals
Popular Computer Hardware manuals by other brands
Freescale Semiconductor
Freescale Semiconductor TWR-WIFI-G1011MI user manual

Alphacool
Alphacool NexXxoS GPX-N 1080pro-M21 instruction manual
GIGAIPC
GIGAIPC QBiP-1165G7A user manual

Symbol
Symbol LA-5030 user guide
Texas Instruments
Texas Instruments TPS65910 EVM user guide
ZALMAN
ZALMAN CNPS9X OPTIMA user manual
Intellinet
Intellinet 524056 user manual
AMX
AMX AXD-MSP32 Schematic diagram
Z3 Technology
Z3 Technology Z3-Q603-RPS user guide
Victron energy
Victron energy VE.Direct Bluetooth Smart Dongle manual
Teradici
Teradici PCoIP Zero TER1206003 Administrator's guide
Alphacool
Alphacool EISBLOCK AURORA ACRYL GPX-A RADEON RX 6700 XT REFERENCE INCL.... manual
