back in normal operating mode. The maximum number of levels is 5, but not all sequences use all 5; if level
5 in the table is blank, the CPU LED will light continously after level 4 is accepted.
Programming changes are accepted only when the CPU LED lights solid at the end of the sequence. If a
mistake is made mid way through a sequence, switch the receiver off to abort.
Programming Examples
These examples assume MR603 is in as-received configuration and a Micron transmitter with toggle switch on
R/C channel 3. Tx24v2 transmitters have a variable control on R/C channel 3 - the Reverser; the equivalent
actions are:
Action Tx with toggle switch Tx24v2 type transmitter
Increment flash count: toggle down Reverser fully CCW (reverse) and back to centre
Accept flash count: toggle up Reverser fully CW (forward) and back to centre
1. Set P4 as servo on R/C channel 7
program sequence: 2, 4, 1, 6
enter programming mode
LED shows 1-flash (level 1, 1=ESC)
toggle down and release once, LED shows 2-flash (level 1, 2=servo)
toggle up and release, LED shows 1-flash (level 2, 1=P1)
toggle down and release 3 times, LED shows 4-flash (level 2, 4=P4)
toggle up and release, LED shows 1-flash (level 3, 1=servo)
toggle up and release, LED shows 1-flash (level 4, 1=R/C chan 1 - P4 was prevously a momentary
on/off output)
toggle down and release 6 times, LED shows 7-flash (level 4, 7=R/C chan 7)
toggle up and release, LED shows 1-flash (level 5, 1=normal speed)
toggle up and release, LED lights continously and servo on P4 responds to R/C channel 7
2. Reverse servo on P4
program sequence: 2, 4, 7, 1
enter programming mode
LED shows 1-flash (level 1, 1=core)
toggle down and release once, LED shows 2-flash (level 1, 2=servo)
toggle up and release, LED shows 1-flash (level 2, 1=P1)
toggle down and release 3 times, LED shows 3-flash (level 2, 4=P4)
toggle up and release, LED shows 1-flash (level 3, 1=normal servo)
toggle down and release 6 times LED shows 7-flash (level 3, 7=adjust servo
toggle up and release, LED shows 1-flash (level 4, 1=reverse servo direction)
toggle up and release, LED lights continously and servo on P4 rotates in the opposite direction
3. Set D/F4 as momentary on/off output, on when R/C channel 4 is low
program sequence: 3, 10, 1, 4, 1
enter programming mode
toggle down and release 2 times, LED shows 3-flash (level 1, 3=On/Off Configuration)
toggle up and release, LED shows 1-flash (level 2, 1=P1)
toggle down and release 9 times, LED shows 10-flash (level 2, 10=F4/D)
toggle up and release, LED shows 1-flash (level 3, 1=momentary)
toggle up and release, LED shows 1-flash (level 4, 1=R/C chan 1)
toggle down and release 3 times, LED shows 4-flash (level 4, 4=R/C chan 4)
toggle up and release, LED shows 1-flash (level 5, 1=idle off, on when ch is low)
toggle up and release, LED lights continously and D/F4 switches on when Tx20v2 F2 or Tx22X S2
are pressed)
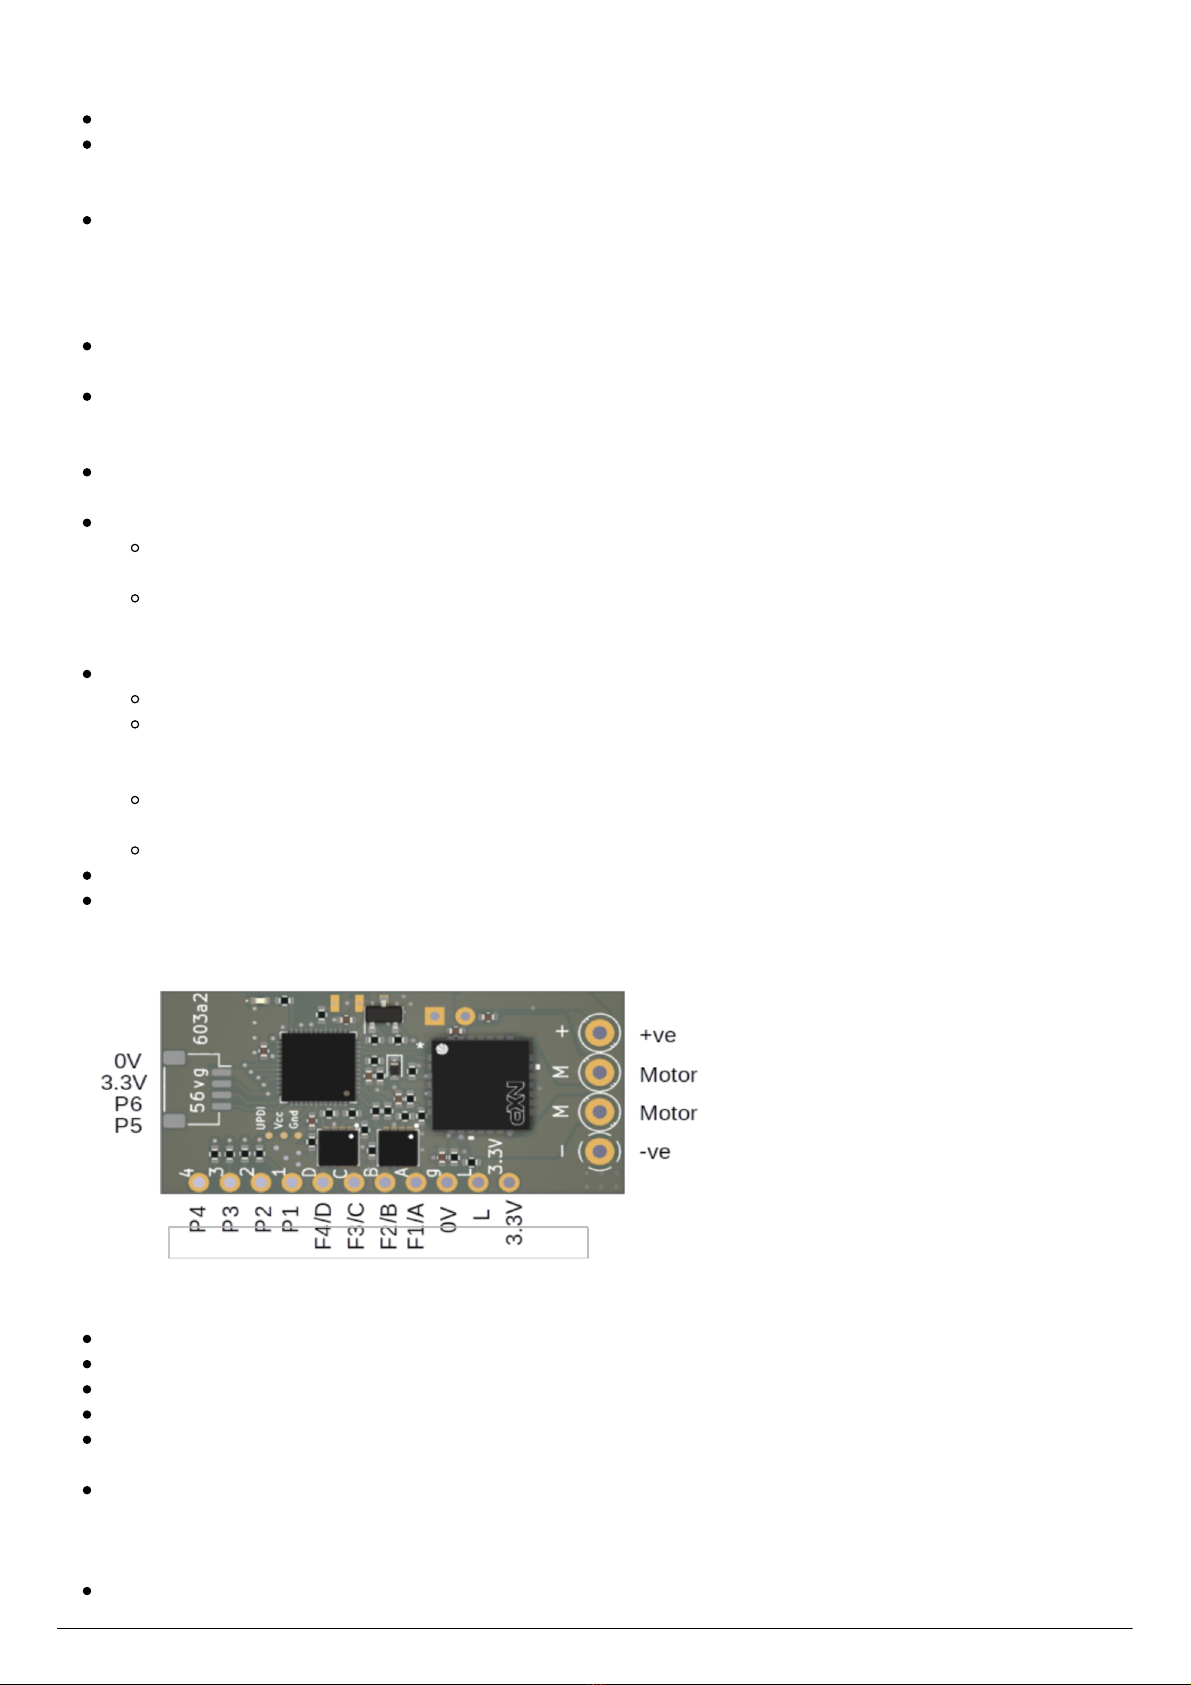
The programming table for MR603 can be found at micronrc.co.uk/mr6xx_progtable.
Servo Throw Adjustment
Servo throws (low and high end points) can be configured using a bound transmitter, the servo centre
position will always be at the mid-point of the low and high travel. To adjust a servo, the servo output is
selected first and then the travel adjusted using either the throttle control or direction toggle if the throttle
servo is being adjusted.
The steps below assume a Micron transmitter is being used. If the transmitter is an aeroplane type stick
transmitter then the elevator stick corresponds to the direction toggle.


