3344
1
2
4
5
3
9
10
11
12
13
8
6
7
5
6
7
8
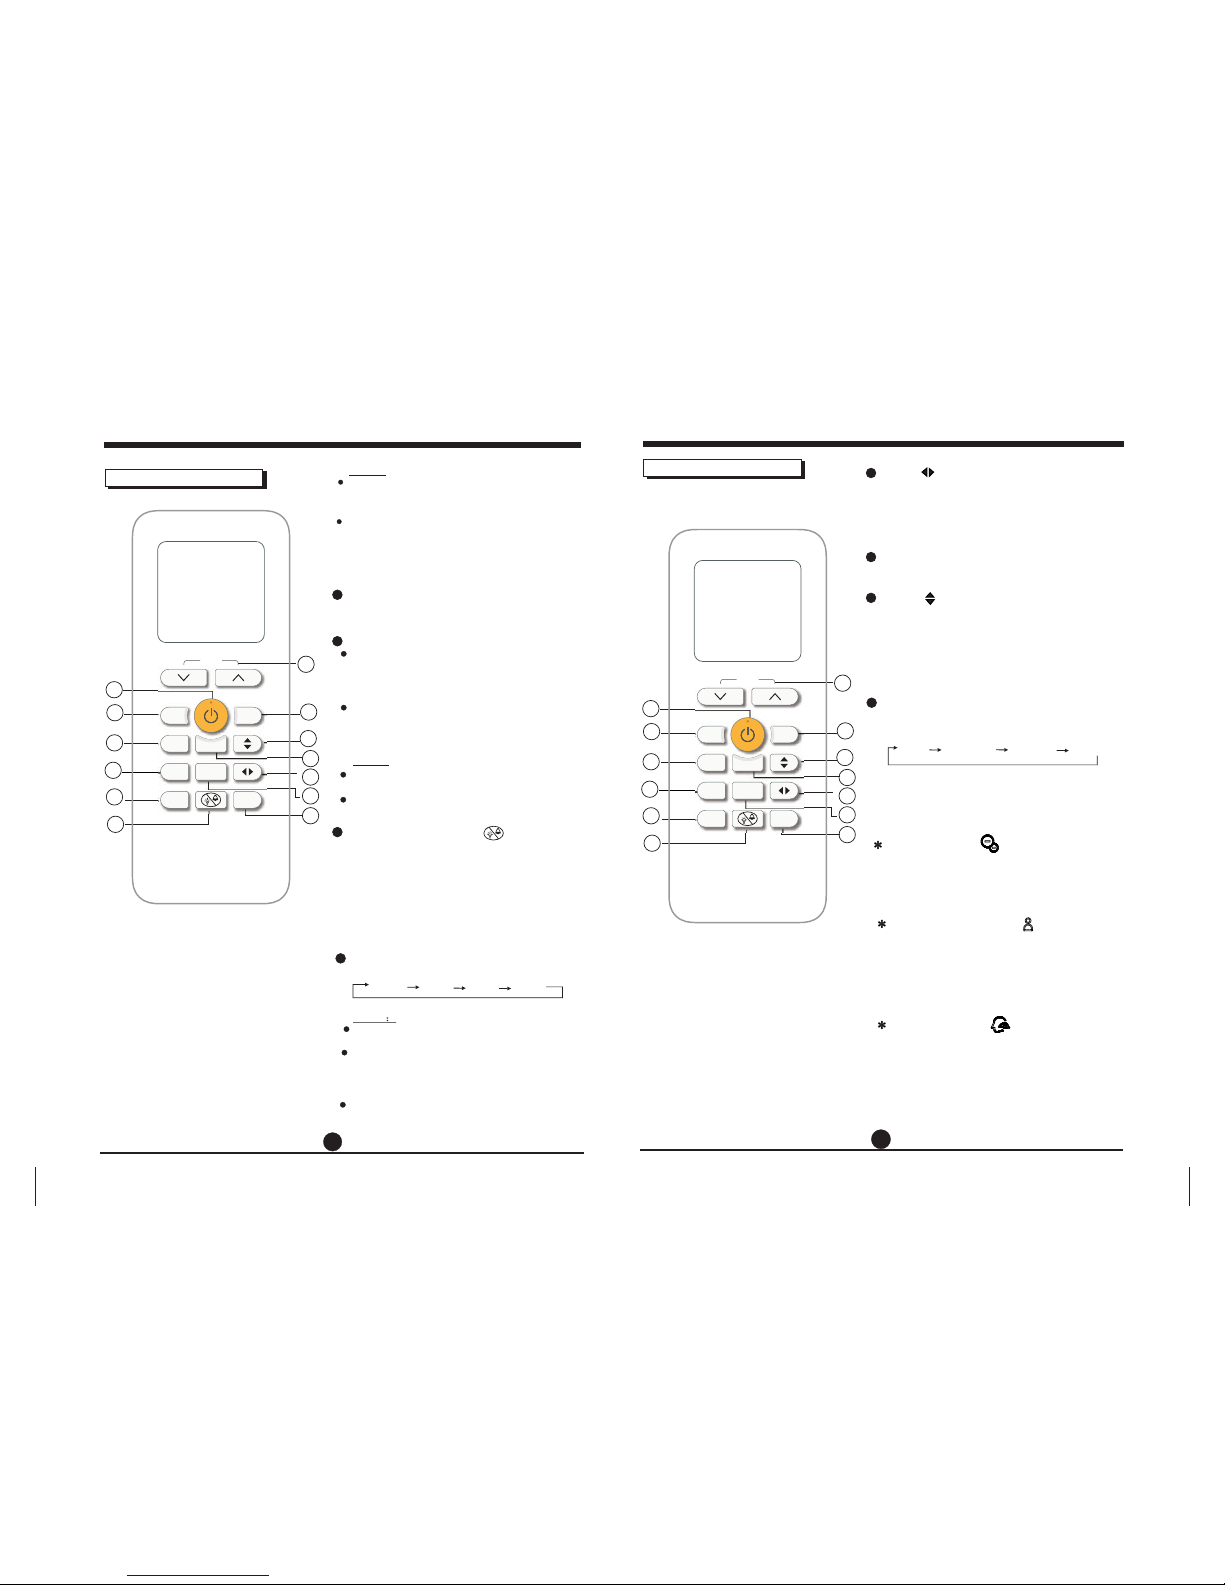
Operation of buttons
Temp
Mode Fan
OK
Timer
ECO
Super Gear
Options
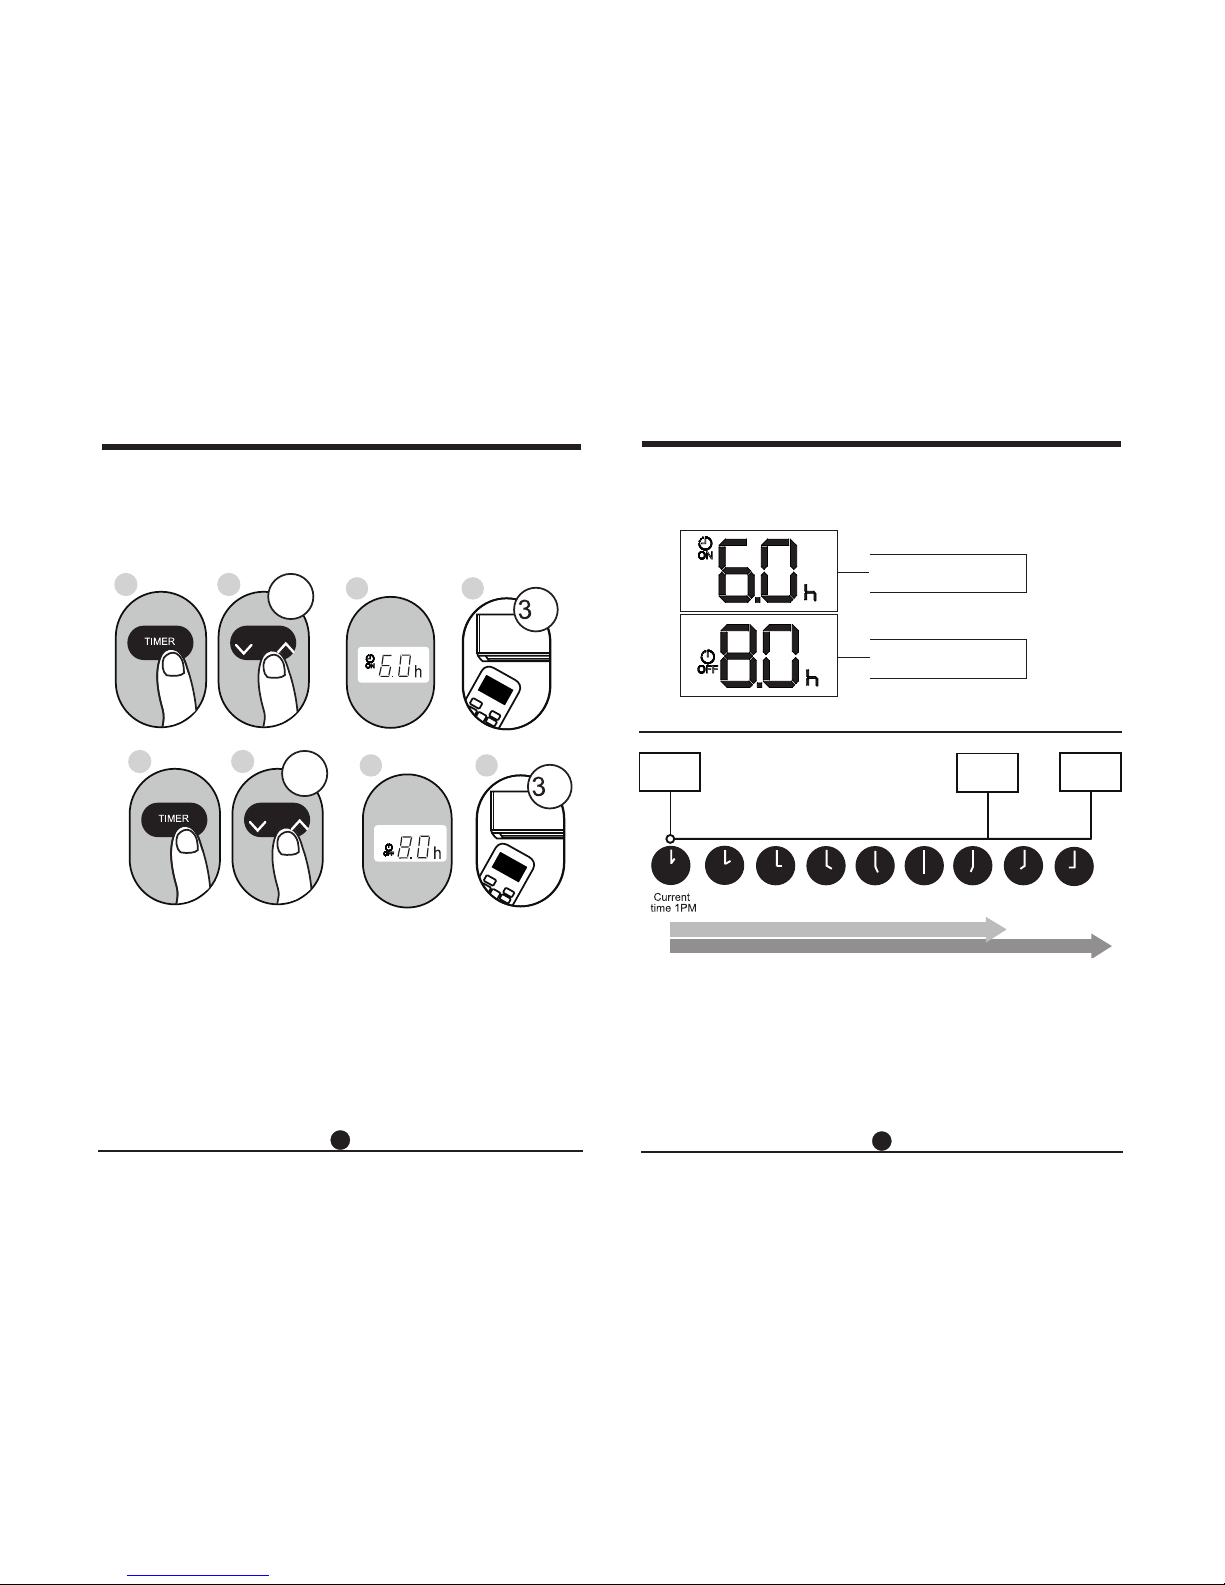
Timer Button
Super Button
Press this button to initiate the auto-on/
auto-off time sequence.
Press this button under cooling operation,
O
the set temperature will change to 17 C,
the fan speed shift to high and bring faster
cooling operation.
Press this button under heating operation,
O
the set temperature will change to 30 C,
the fan speed shift to high and bring faster
heating operation.
NOTE:
This function is not available under AUTO,
DRY,FAN,Self Clean or Comfort mode.
Press MODE,FAN,SLEEP or ECO button
will cancel Super function.
RG70E/BGEF
NOTE:
Pressing the SLEEP button, or modifying the
mode or adjusting the set temperature to
O
less than 24 C will stop ECO operation.
Under ECO operation, the set temperature
O
should be 24 C or more. it may result in
insufficient cooling. If you feel uncomfortable,
just press the ECO button again to stop it.
Do Not Disturb Button( )
Used to select the fan speed in four steps:
AUTO LOW MED HIGH
Fan Button
You can not switch the fan speed in AUTO
or DRY mode.
Press Fan, MODE, Sleep, ON/OFF ,ECO or
Gear button will cancel the Silent function.
NOTE
Hold down this button for at least 2 seconds
to activate/cancel Silent mode. Due to low
frequency operation of compressor, it may result
in insufficient cooling and heating capacity.
Operation of buttons
9
10
11
1
2
4
5
3
9
10
11
12
13
8
6
7
Temp
Mode Fan
OK
Timer
Sleep
Super Fav.
Options
RG70A/BGEF
Swing Button
OK Button
Swing Button
Used to confirm the optional fucntions.
Used to stop or start horizontal louver move-
ment or set the desired up/down air flow
direction. The louver changes 6 degree in
angle for each press. If keep pushing more
than 2 seconds, the louver will swing up and
down automatically.
Used to stop or start vertical louver movement
and set the desired left/right air flow direction.
The louver changes 6 degree in angle for each
press. If keep pushing more than 2 seconds,
the louver will swing up and down automatically.
Options Button
12
Press this button to select the air conditioner
function in a sequence of following:
Self clean
Follow me
Fresh
Press the Options button to select the desired
function, the selected symbol will flash on
the display area, then press the OK button
to confirm.
Comfort
FRESH function( )
When the FRESH function is initiated, the
Ionizer/Plasma Dust Collector(depending on
models) is energized and will help to
remove pollen and impurities from the air.
FOLLOW ME function( )
Comfort function( )
When the FollowMe function isactivated,
the remote displayis actual temperature
at its location.The remote control will send
this signal tothe air conditionerevery 3
minutes interval untilpress the FOLLOW
ME button again.
When the Comfortfunction is activated,
O
the air conditionerwill be setat 23 C
automatically. It is not available under
fan mode.
Press this button to turn off the indoor screen
display, and also turn off the Air conditioner
buzzer, the fan speed shifts to low, which
create a comfortable and quiet environment.
Press it again to cancel this function.
Under Do Not Disturb mode, the display
will illuminate for 10 seconds while adjusting
the mode, set temperature or fan speed, etc.