manuals.online logo
Brands
  1. Home
  2. •
  3. Brands
  4. •
  5. Midland
  6. •
  7. Two-way Radio
  8. •
  9. Midland T20 User manual

Midland T20 User manual

T20 Series
QUICK START GUIDE
1. Install 4 AAA Batteries
2. To turn the radio on, press and hold the MENU/POWER
Button for 3 seconds
3. To select a channel, press and release the MENU button
once, then press the
UP/CALL or DOWN/LOCK buttons to select 1 of the 22
FRS channels
* Press the PTT button to exit the MENU
4. Press and hold the PTT button to talk
1
2 3 4 5
6
7
8
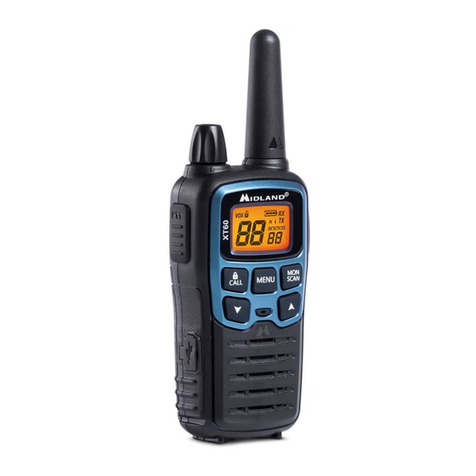
LCD DISPLAY
1. CHANNEL NUMBER – Changes from
1~22 on FRS band (1~10 on Weather
Band).
2. VOX ICON – Indicates when VOX mode
is active.
3. KEY LOCK ICON – Indicates KEY LOCK
mode is on.
4. NOAA WEATHER (WX) BAND ICON –
Indicates when the radio is in Weather
Band mode.
5. BATTERY METER – Indicates the battery
level.
6. RECEIVE (RX) ICON – Indicates radio is
receiving a transmission.
7. TRANSMIT (TX) ICON – Indicates radio
is transmitting a signal.
8. PRIVACY CODE – Indicates Privacy
Code selected by user (oF~38).
9. MIC – Built-in microphone.
10. MENU/Power Button – Press to enter
the Menu mode. Press and hold to turn
the radio on/off.
11. PTT Button – Press and hold to transmit
voice communication.
12. DOWN/LOCK Button – Press to adjust
the volume, or to scroll through the menu.
Press and hold to lock the keypad
13. SPEAKER – Built-in speaker.
14. UP/CALL Button – Press to adjust the
volume, or to scroll through the menu.
Press and hold to send a call tone
15. MONITOR/SCAN Button – Press to
enter SCAN mode. Press and hold to
enter MONITOR mode.
16. ANTENNA
PTT
MENU
CALL
MON
SCAN
9
10
11
12
13
14
15
16
MONITOR
Pressing and holding the MONITOR/SCAN button for 3 seconds will let you hear
noise so you can adjust the volume level of the radio when not receiving a signal.
This could also be used to check any activity on your current channel before
transmitting. Press and hold the MONITOR/SCAN button for 3 seconds again to
get out of MONITOR mode.
ABOUT RANGE
Your radios are designed to give you maximum range under optimum
conditions.
Optimum Conditions are:
* Over water
* Open rural areas without obstructions
* Flat areas where you can see the other person
To ensure you get maximum range:
* Be sure to use fresh batteries - low batteries will cause reduced range.
T20 SERIES MENU Quick Reference Chart
MENU Channel VOX
1~22
CTCSS
Roger Beep
On/O
Silent Operation
On/O
WX Channel
1~10
WX Alert
On/Off
Press and hold the down
and up buttons for 3
seconds
oF~38
oF/1/2/3
CHANNEL SELECTION (FRS BAND)
Press the MENU button once, and then press the UP/CALL or
DOWN/LOCK buttons to select one of the 22 FRS channels. To confirm the
selection, press the PTT button or press the MENU button again to move to the
next feature setting.
SETTING PRIVACY CODES
Your radio has 38 Privacy Codes available. The selected Privacy Code may be
different for each channel. To select a Privacy Code for the current channel press
the MENU button twice, and then press the UP/CALL or DOWN/LOCK buttons to
select one of the 38 CTCSS Codes. The Privacy
Code icon on the display will indicate the CTCSS code that was selected. To con-
firm the selection, press the PTT button or press the MENU button again to move
to the next feature setting.
Note: Selecting a Privacy Code of “oF” will disable the Privacy feature. To
communicate between two radios, all radios in your group must be set to the
same channel and/or Privacy Code selections.
VOX
To set VOX, press the MENU button until the display shows “VOX.” A flashing icon
will appear to the right of the CHANNEL NUMBER. Select “oF/1~3” by pressing
the UP/CALL or DOWN/LOCK buttons, with 1 being the most sensitive. Push the
PTT key, or press the MENU button again to move to the next feature setting.
ROGER BEEP (end of transmission) TONE
When the PTT button is released, the radio will beep to confirm to other users that
your transmission has finished. To set the ROGER BEEP tone, press the MENU
button until the display shows an “rb” icon. Select “on” or “oF” by pressing the UP/
CALL or DOWN/LOCK buttons. Push the PTT key to exit, or press the MENU
button to move to the next feature setting.
SILENT OPERATION
Your radio has a SILENT OPERATION mode. In this mode, all “beeps” and “tones”
are disabled. To set SILENT OPERATION, press the MENU button until the
display shows a “bP” icon. Select “on” or “oF” by pressing the UP/CALL or DOWN/
LOCK buttons. Push the PTT key to exit, or press the MENU button to move to
the next feature setting.
NOAA WEATHER RADIO
Your radio has a NOAA WEATHER RADIO function to enable the user to receive
weather reports from designated NOAA stations. To turn the NOAA WEATHER
RADIO on, press and hold the DOWN/LOCK and the UP/CALL buttons for 3
seconds while in FRS mode. The radio will go to the Weather Band mode. To set
the channel in Weather Mode, press the MENU button, the display will show the
current WX Band channel. While in WX Band mode press the UP/CALL or DOWN/
LOCK buttons to select one of the 10 NOAA WEATHER (WX) BAND channels.
To confirm, press the PTT button or press the MENU button to move to the next
feature setting. To turn the NOAA WEATHER RADIO off, press the PTT button.
The current FRS radio setting will be displayed and the Weather icon will go off,
unless alert is set.
NOAA WEATHER ALERT
Your radio has a NOAA WEATHER ALERT function, to enable you to automati-
cally receive weather alerts from designated NOAA stations. To turn the NOAA
WEATHER (WX) ALERT on while in Weather Radio mode, press the MENU button
twice while in Weather Radio mode. The display shows “AL,” while on the right
an “oF” icon appears blinking. Select “on” by pressing the UP/CALL or DOWN/
LOCK buttons. To confirm, press the PTT button or press MENU button. The radio
will return to Weather Radio mode and the icon will continue blinking. If the radio
receives a WX ALERT signal from a designated NOAA station while in FRS Radio
mode, the radio will beep for 20 seconds while the display will automatically switch
to Weather Radio mode. To turn the NOAA WEATHER (WX) ALERT off, press the
MENU button twice while in Weather Radio mode. The display shows “AL,” while
on the right an “on” icon appears blinking. Select “oF” by pressing the UP/CALL
or DOWN/LOCK buttons. To confirm, press the PTT button or press the MENU
button.
BATTERY LEVEL INDICATOR
Your radio has a BATTERY LEVEL METER that shows the battery power level.
The greater the number of bars visible, the stronger the battery level. When the
battery level is low, the Battery Shell icon will flash in the display indicating your
batteries should be replaced.
POWER ON/OFF AND VOLUME
Press the POWER/MENU button for at least 3 seconds to turn the radio on/off.
During Power On, the radio will beep once, the LCD will display all icons for 1
second and then the LCD display will indicate the last channel selected.
To increase/decrease the volume level, press the up or down arrow buttons during
RX or STANDBY mode
RESTORING YOUR RADIO TO THE ORIGINAL SETTING
To reset your radio to the original (default) setting, turn on the radio while pressing
and holding the PTT button. The LCD display will reset to standby mode on chan-
nel 1 with no Privacy Code, VOX Off, Roger Beep On, and Key Beep On.
TRANSMITTING AND RECEIVING A CALL
To communicate, all radios in your group must be set to the same channel and/or
Privacy Code.
1. For maximum clarity, hold the radio at least 1 inch (2.5 cm) from your mouth.
2. Press and hold the PTT button and speak in a normal voice into the
microphone. The TX icon will appear continuously on the LCD display while
transmitting.
3. To receive a call, release the PTT button. The RX icon will appear on the
display when your radio is receiving a transmission.
o3 Bars = Full Ba�ery
o2 Bars = 2/3 Ba�ery
o1 Bar = 1/3 Ba�ery
oNo bar = ba�ery low
(Flashing)
CALL ALERT
Your radio can transmit a call alert. To send a call alert, press the
UP/CALL button for 3 seconds. The TX icon will appear while transmitting a call
alert and a tone can be heard on the speaker for confirmation.
KEYPAD LOCK
To avoid accidentally changing the radio setting, press the DOWN/LOCK button for
3 seconds. The icon will appear on the display. The PTT and CALL buttons will still
be active. Repeat the same procedure to unlock the keypad.
SCAN
Your radio can scan all 22 channels for activity. To enter scan mode press and
release the MONITOR/SCAN button. Repeat the same procedure to exit. Your ra-
dio will rapidly scan each of the 22 channels and stop on any active channel for 6
seconds before resuming scan. When you press the PTT button to transmit on an
active channel, the scanning function will stop and remain on the active channel.
To resume scanning, press and release the MONITOR/SCAN button.
* If the UP/CALL button or the DOWN/LOCK button are pressed while the radio
is scanning, the scan direction will change to increasing or decreasing
depending on which button was pressed.
* If a CTCSS code is currently set for a channel, that specific channel will be
scanned with the CTCSS code that was set
This device complies with Part 15 of the FCC Rules. Operation is subject to the
following two conditions: (1) this device does not cause harmful interference, and
(2) this radio must accept any interference that may cause undesired operation.
To maintain compliance with FCC’s RF exposure guidelines, for body-worn
operation, this radio has been tested and meets the FCC RF exposure guidelines
when used with Midland Radio Corp. accessories supplied or designated for
this product. Use of other accessories may not ensure compliance with FCC RF
exposure guidelines.
T20 Series
Exposure To Radio Frequency Energy
Your Midland radio is designed to comply with the following national and
international standards and guidelines regarding exposure of human beings to
radio frequency electromagnetic energy:
- United States Federal Communications Commission, Code of Federal
Regulations: 47 CFR part 2 sub-part J
- American National Standards Institute (ANSI)/Institute of Electrical & Electronic
Engineers (IEEE) C95. 1-1992
- Institute of Electrical and Electronic Engineers (IEEE) C95. 1-1999 Edition
- National Council on Radiation Protection and Measurements (NCRP) of the
United States, Report 86, 1986
- International Commission on Non-lonizing Radiation Protection (ICNIRP) 1998
To control your exposure and ensure compliance with the general population or
uncontrolled environment exposure limits, transmit no more than 50% of the time.
The radio generates measurable RF energy exposure only when transmitting.
Body-Worn Operation
If you wear the radio on your body when transmitting always use Midland
supplied or approved belt clip, holster, case, or body harness for this product. Use
of any accessories not supplied or approved by Midland may exceed FCC/Health
Canada RF exposure guidelines. If you do not use any accessories supplied or
approved by Midland, ensure the radio and its antenna are at least 1 inch
(2.5cm) from your body when transmitting.
LIMITED WARRANTY (United States and Canada)
Subject to the exclusions set forth below, Midland Radio Corporation will repair or replace, at its
option without charge, any Midland FRS transceiver which fails due to a defect in material or work-
manship within One Year following the initial consumer purchase. This warranty does not apply to
water damage, battery leak, abuse or misuse of unauthorized accessories, unauthorized service
or modification or altered products. Accessories have a 90 day warranty from date of purchase,
including any chargers, microphones, and cables. This warranty does not include the cost of labor
for removal or re-installation of the product in a vehicle or other mounting.
ANY IMPLIED WARRANTIES, INCLUDING, WITHOUT LIMITATION THE IMPLIED WARRANTIES OF
MERCHANTABILITY AND FITNESS FOR A PARTICULAR PURPOSE, SHALL BE LIMITED AS SET FORTH
HEREIN AND TO THE DURATION OF THE LIMITED WARRANTY, OTHERWISE THE REPAIR OR RE-
PLACEMENT AS PROVIDED UNDER THIS EXPRESS LIMITED WARRANTY IS THE EXCLUSIVE REMEDY
OF THE CONSUMER AND IS PROVIDED IN LIEU OF ALL OTHER WARRANTIES, EXPRESS OR IMPLIED.
IN NO EVENT SHALL MIDLAND BE LIABLE, WHETHER IN CONTRACT OR TORT (INCLUDING BUT NOT
LIMITED TO NEGLIGENCE, GROSS NEGLIGENCE, BODILY INJURY, PROPERTY DAMAGE AND DEATH)
FOR DAMAGES IN EXCESS OF THE PURCHASE PRICE OF THE PRODUCT OR ACCESSORY, OR FOR
ANY INDIRECT, INCIDENTAL, SPECIAL OR CONSEQUENTIAL DAMAGES OF ANY KIND, OR LOSS OF
REVENUE OR PROFITS, LOSS OF BUSINESS, LOSS OF INFORMATION OR DATA OR OTHER
FINANCIAL LOSS ARISING OUT OF OR IN CONNECTION WITH THE ABILITY OR INABILITY TO USE
THE PRODUCTS OR ACCESSORIES TO THE FULL EXTENT THESE DAMAGES MAY BE DISCLAIMED
BY LAW.
For Product Purchased in the USA:
Performance of any obligation under this warranty may be obtained by returning the warranted
product, prepaid freight, along with proof of purchase to:
Midland Radio Corporation
Warranty Service Department
5900 Parretta Drive
Kansas City, MO 64120
This warranty gives you specific legal rights, and you may also have other rights, which vary from
state to state.
Note: The above warranty applies only to merchandise purchased in the United States of America
or any of the territories or possessions thereof, or from a U.S.Military exchange.
For Product Purchased in Canada:
Performance of any obligation under this warranty may be obtained by returning the warranted
product, along with proof of purchase, to your place of purchase in Canada. This warranty gives
you specified legal rights. Additional warranty rights may be provided by law in some areas within
Canada.
SPECIFICATIONS
Channels 22 FRS Channels +38 Privacy Codes
10 NOAA Weather (WX) Band Channels
Operating Frequency UHF 462.5500 ~ 467.7125 MHz
Power Source 4 AAA Alkaline batteries
CH. No CH. Freq. CH. No CH. Freq.
1462.5625
2462.5875
3462.6125
11 467.6375
4462.6375
12 467.6625
5462.6625
13 467.6875
21 462.7000
6462.6875
14 467.7125
22 462.7250
7462.7125
15 462.5500
8467.5625
16 462.5750
9467.5875
10 467.6125
17 462.6000
18 462.6250
19 462.6500
20 462.6750
NOAAWEATHER (WX) RADIO FREQUENCY CHART (MHz)
CH. No CH. Freq. CH. No CH. Freq.
1 162.5506 162.500
2 162.4007 162.525
3 162.4758 161.650
4 162.4259 161.775
5 162.45010 163.275
PRIVACY CODES FREQUENCY CHART (Hz)
Code Freq. Code Freq. Code Freq. Code Freq. Code Freq.
1 67.0 9 91.5 17 118.8 25 156.7 33 210.7
2 71.9 10 94.8 18 123.0 26 162.2 34 218.1
3 74.4 11 97.4 19 127.3 27 167.9 35 225.7
4 77.0 12 100.0 20 131.8 28 173.8 36 233.6
5 79.7 13 103.5 21 136.5 29 179.9 37 241.8
6 82.5 14 107.2 22 141.3 30 186.2 38 250.3
7 85.4 15 110.9 23 146.2 31 192.8
8 88.5 16 114.8 24 151.4 32 203.5
* Channels 8, 9 and 10 are designated Canadian Marine Frequencies
* Channels 8~14 are low-power FRS channels
FRS FREQUENCY CHART (MHz)
TROUBLESHOOTING GUIDE
PROBLEM SOLUTION
No Power - Check battery installation and/or replace batteries.
Cannot Receive
Messages
- Confirm the radios have the same channel
settings.
- Make sure that you are within range of the other
transceivers.
- Buildings and other structures may interfere with
your communication.
Radio is not responding
to button presses
- Make sure key lock is not on
- Radio might need to be reset. Turn radio off. Turn
the Radio on while pressing the PTT button.
Display is dim - Replace the batteries.
USE AND CARE
1. Use a soft damp cloth to clean the radio.
2. Do not use alcohol or cleaning solutions to clean the radio.
3. Do not immerse the radio in water.
4. Dry the radio with a dry lint-free cloth should it get wet.
5. Turn off the radio and remove the batteries during long-term
storage.
FEATURES
- 22 FRS Channels
- 38 Privacy Codes (CTCSS)
- VOX, Voice Activated Microphone
- Call Alert
- NOAA Weather Radio
- NOAA Weather Alert
- Scan Function
- Monitor Function
- Roger Beep Tone
- Silent Operation
- Key Pad Lock
- Battery Meter / Battery Low Indicator
IMPORTANT: Changes or modifications to this unit not expressly approved by
MIDLAND RADIO CORP. could void your right to operate this unit. Your radio is
set up to transmit a regulated signal on an assigned frequency. It is against the
law to alter or adjust the settings inside the COMMUNICATOR to exceed those
limitations. Any adjustment to your radio must be made by qualified technicians.
BATTERY INSTALLATION
Your radio operates with 4 AAA alkaline batteries. The belt clip should be removed
(see below) to ease installation or removal of the batteries.
To install the batteries:
1. With the back of the radio facing you, remove the belt clip (see diagram
below) then remove the Battery Cover by pressing down on the top center
and sliding it down from the radio.
2. Insert 4 AAA batteries observing the polarity as shown. Installing the batteries
incorrectly will prevent the unit from operating or may damage the unit.
3. Return the Battery Cover by sliding it up on the radio. Replace the belt clip,
making sure it locks into place.
BELT CLIP
LATCH
BELT CLIP
LOCK TAB
BATTERY
COMPARTMENT
BATTERY
DOOR
Press here and
press down to open
INSTALLING THE BELT CLIP
To install the BELT CLIP, slide the clip down into the slot on the back of the radio
until the BELT CLIP LATCH clicks. To remove the BELT CLIP, pull the LOCK TAB
away from the radio, then gently pull the belt clip up toward the top of the radio.
IMPORTANT: This device complies with Industry Canada licence-exempt RSS
standard(s). Operation is subject to the following two conditions: (1) this device
may not cause interference, and (2) this device must accept any interference,
including interference that may cause undesired operation of the device.
If you have a problem which you believe requires service, please
call first and speak with a service technician at 816-241-8500. Many
problems can be remedied over the phone without returning the unit
for service.
IMPORTANT: Le présent appareil est conforme aux CNR d'Industrie Canada
applicables aux appareils radio exempts de licence. L'exploitation est autorisée
aux deux conditions suivantes: (1) l'appareil ne doit pas produire de brouillage, et
(2) l'utilisateur de l'appareil doit accepter tout brouillage radioélectrique subi même
si le brouillage est susceptible d'en compromettre le fonctionnement.
For a PDF of the T20 Series Manual visit
www.midlandusa.com

Other manuals for T20

1

Other Midland Two-way Radio manuals

Midland MXT115 User manual

Midland

Midland MXT115 User manual

Midland X-TRA TALK MXT100 User manual

Midland

Midland X-TRA TALK MXT100 User manual

Midland GXT720 Series User manual

Midland

Midland GXT720 Series User manual

Midland Micro Mobile MXT100 User manual

Midland

Midland Micro Mobile MXT100 User manual

Midland G9 Manual

Midland

Midland G9 Manual

Midland PMR 446 Manual

Midland

Midland PMR 446 Manual

Midland LXT600 Series User manual

Midland

Midland LXT600 Series User manual

Midland G15 User manual

Midland

Midland G15 User manual

Midland P-20 User manual

Midland

Midland P-20 User manual

Midland MXT275J User manual

Midland

Midland MXT275J User manual

Midland BR02 Manual

Midland

Midland BR02 Manual

Midland X-TRA TALK LXT110 Series Manual

Midland

Midland X-TRA TALK LXT110 Series Manual

Midland G-225 User manual

Midland

Midland G-225 User manual

Midland BIZTALK MB400 User manual

Midland

Midland BIZTALK MB400 User manual

Midland X-Tra Talk GXT881 User manual

Midland

Midland X-Tra Talk GXT881 User manual

Midland GXT2000 Series User manual

Midland

Midland GXT2000 Series User manual

Midland ALAN 507 SpeakEasy User manual

Midland

Midland ALAN 507 SpeakEasy User manual

Midland X-tra talk LXT560 series User manual

Midland

Midland X-tra talk LXT560 series User manual

Midland G9 PRO Manual

Midland

Midland G9 PRO Manual

Midland MICRO MOBILE MXT500 User manual

Midland

Midland MICRO MOBILE MXT500 User manual

Midland MXT575 User manual

Midland

Midland MXT575 User manual

Midland GXT300 Series User manual

Midland

Midland GXT300 Series User manual

Midland Micro Mobile MXT105 User manual

Midland

Midland Micro Mobile MXT105 User manual

Midland 70-1526A/B User manual

Midland

Midland 70-1526A/B User manual

Popular Two-way Radio manuals by other brands

Cobra microTALK PR2552VPC owner's manual

Cobra

Cobra microTALK PR2552VPC owner's manual

Doro WT87 user manual

Doro

Doro WT87 user manual

Kenwood TK-2170 SERIES Function reference

Kenwood

Kenwood TK-2170 SERIES Function reference

Motorola ASTRO MT 1500 Model 1 user guide

Motorola

Motorola ASTRO MT 1500 Model 1 user guide

Albrecht Tectalk Easy 2 user manual

Albrecht

Albrecht Tectalk Easy 2 user manual

Retevis RA685 user manual

Retevis

Retevis RA685 user manual

Kenwood NEXEDGE NX-720G instruction manual

Kenwood

Kenwood NEXEDGE NX-720G instruction manual

JRC JHS-770S - instruction manual

JRC

JRC JHS-770S - instruction manual

switel WTC590 operating instructions

switel

switel WTC590 operating instructions

Baofeng UV-B5 user manual

Baofeng

Baofeng UV-B5 user manual

Motorola CP185 Series Quick reference guide

Motorola

Motorola CP185 Series Quick reference guide

Motorola TWO WAY RADIO manual

Motorola

Motorola TWO WAY RADIO manual

Curtis FRS 1400 owner's manual

Curtis

Curtis FRS 1400 owner's manual

Motorola TALKBOUT T5210 user guide

Motorola

Motorola TALKBOUT T5210 user guide

Cobra MT 975 user manual

Cobra

Cobra MT 975 user manual

Alinco DJ-D15 manual

Alinco

Alinco DJ-D15 manual

Oricom PMR3000R Operation manual

Oricom

Oricom PMR3000R Operation manual

Cobra 29 WX ST operating instructions

Cobra

Cobra 29 WX ST operating instructions

manuals.online logo
manuals.online logoBrands
  • About & Mission
  • Contact us
  • Privacy Policy
  • Terms and Conditions

Copyright 2025 Manuals.Online. All Rights Reserved.