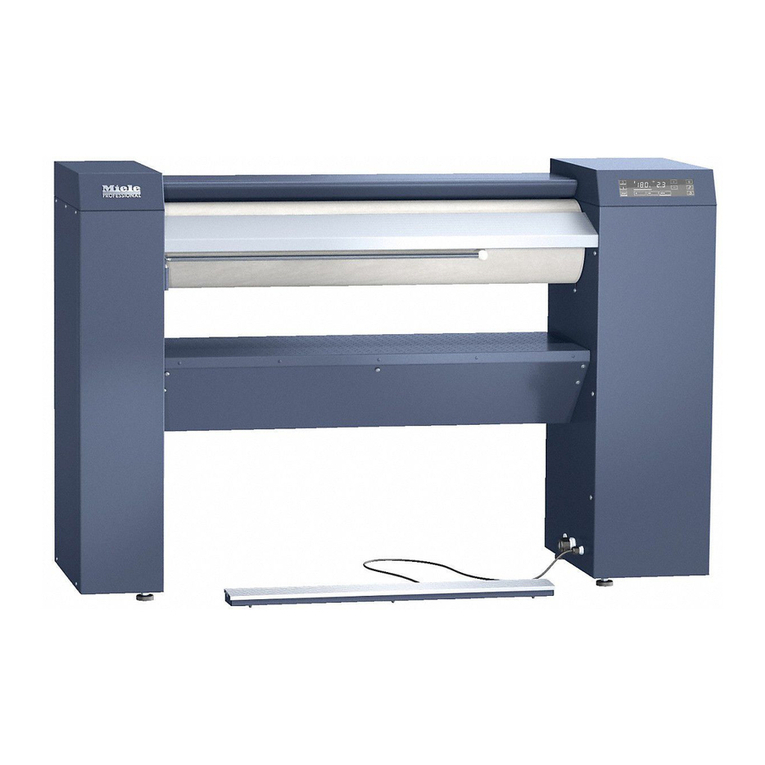
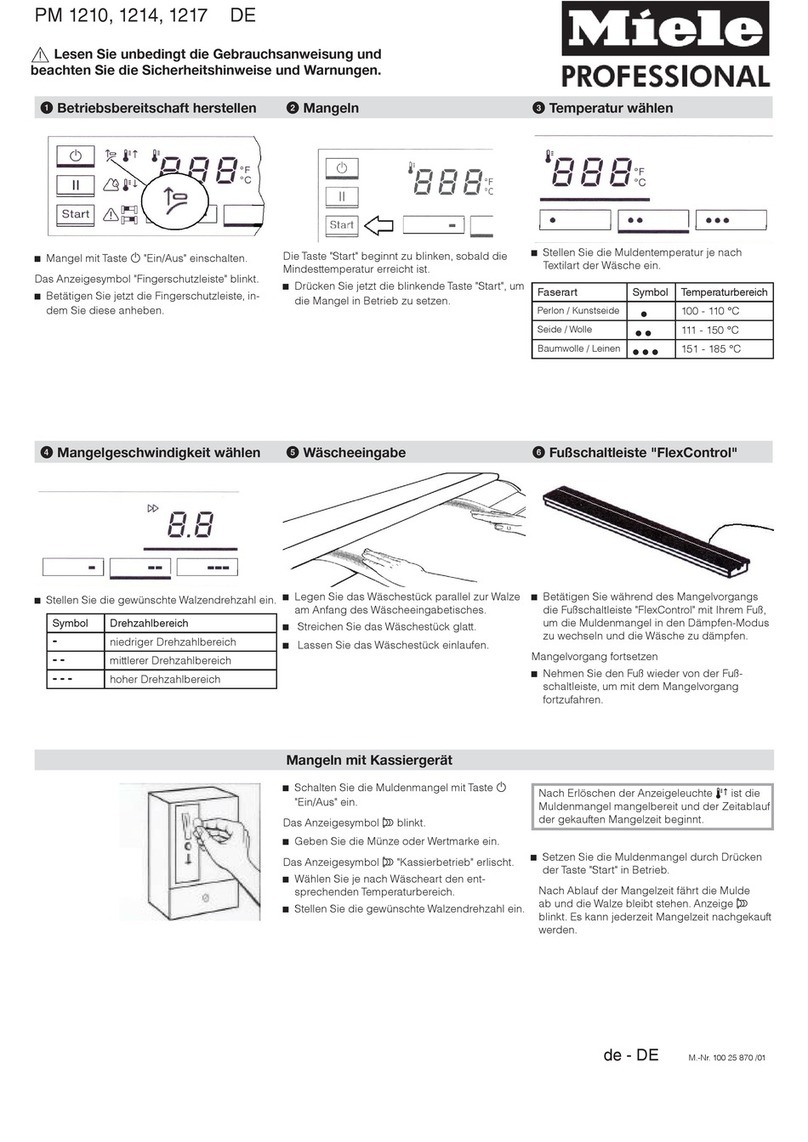
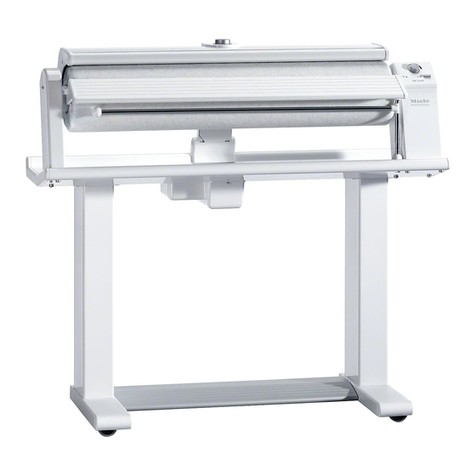
Miele professional PRI418 User manual

Operating and installation instructions
Commercial flatwork ironer
PRI318
PRI418
PRI421
To avoid the risk of accidents or damage to the
machine, it is essential to read these instructions
before it is installed and used for the first time.
en-GB
M.-Nr. 11 445 510

Contents
2
Warning and Safety instructions........................................................................................4
Appropriate use..................................................................................................................... 4
Take these safety precautions if you smell gas ............................................................... 4
Technical and electrical safety ............................................................................................. 5
Use of the appliance ............................................................................................................. 5
Using accessories ................................................................................................................ 6
Notes on the use of this ironer ............................................................................................. 6
Caring for the environment ................................................................................................8
Guide to the machine..........................................................................................................9
Appliance overview ............................................................................................................... 9
Touch display ...................................................................................................................... 10
Display symbols .................................................................................................................. 12
Finger guard ........................................................................................................................ 13
Emergency switch-off ......................................................................................................... 14
Using for the first time ......................................................................................................15
Cleaning and waxing before use......................................................................................... 15
Preparing the laundry........................................................................................................16
Only iron suitable fabrics..................................................................................................... 16
Residual moisture................................................................................................................ 16
Sorting the laundry .............................................................................................................. 16
Using the ironer .................................................................................................................17
Making the appliance ready for use .................................................................................... 17
Ironing.................................................................................................................................. 17
Ironing temperature ........................................................................................................ 17
Setting the ironing temperature...................................................................................... 18
Changing the value of a temperature selection button .................................................. 18
Speed of ironer............................................................................................................... 18
Setting the ironer speed ................................................................................................. 19
Changing the value of a roller speed selection button................................................... 19
Saving and loading favourites ........................................................................................ 19
Feeding in laundry .......................................................................................................... 20
Picking laundry out of the ironer .................................................................................... 20
Pausing the ironing process ........................................................................................... 21
ECO mode...................................................................................................................... 21
Standby mode................................................................................................................ 21
“FlexControl” foot switch ............................................................................................... 21
Stopping ironing .................................................................................................................. 21
Preventing running while unloaded ..................................................................................... 22
Continuing ironing after a power outage............................................................................. 22
Fault messages ................................................................................................................... 22
Cleaning and care .............................................................................................................23
Cleaning the heater plate .................................................................................................... 23
Starting the cleaning programme ................................................................................... 23
Using the cleaning cloth................................................................................................. 23
Waxing the heater plate....................................................................................................... 25
Starting the waxing programme ..................................................................................... 25
Using the ironer waxing cloth and ironing wax .............................................................. 25
Padding instructions............................................................................................................ 26

Contents
3
Removing the ironing cloth (only for steel-wool roller covering) .................................... 26
Fitting the ironing cloth (only for steel-wool roller covering) .......................................... 27
Padding instructions for rollers with steel-wool padding ............................................... 27
Padding instructions for rollers with leaf-spring padding............................................... 28
Cleaning the laundry pickers............................................................................................... 28
Ironing cloth washing (when soiled) .................................................................................... 28
Maintenance for gas-heated ironers ................................................................................... 28
Miele Customer Service Department .................................................................................. 29
Installation and connection ..............................................................................................30
Installation requirements ..................................................................................................... 30
Storage ................................................................................................................................ 30
Operating conditions ........................................................................................................... 30
Installation ........................................................................................................................... 30
Securing the machine.......................................................................................................... 31
Fitting the laundry outfeed table ......................................................................................... 31
1. Unscrew the laundry outfeed table ............................................................................ 31
2. Remove the rails from the side columns .................................................................... 32
3. Fit the rails to the insides of the side columns ........................................................... 33
4. Fit the laundry outfeed table ...................................................................................... 34
Fitting the laundry box......................................................................................................... 35
Removing the transport safety device................................................................................. 38
Store the transport safety device in the side column.......................................................... 38
Electrical connection ........................................................................................................... 39
Ducting ................................................................................................................................ 39
Gas connection (only for gas-heated flatwork ironers) ....................................................... 40
Waste gas duct .............................................................................................................. 40
After installation................................................................................................................... 41
Levelling .............................................................................................................................. 41
Optional accessories ........................................................................................................42
Flexible laundry return feed................................................................................................. 42
Changing the ironer over for laundry return feed ........................................................... 42
Extension for outfeed table ................................................................................................. 43
Peak load/energy management........................................................................................... 43

Warning and Safety instructions
4
Read the operating instructions carefully before using the flatwork ironer. They contain
important information on safety, installation, use and maintenance.
To avoid the risk of accidents or damage, it is essential to read the operating instructions
before using the ironer for the first time.
If other persons are being shown how to operate the ironer, they must be given or made
aware of these important safety instructions.
Miele cannot be held liable for injury or damage caused by non-compliance with these
instructions.
Keep these operating instructions in a safe place and pass them on to any future owner.
Appropriate use
This flatwork ironer must be used as described in these instructions and must be checked
on a regular basis to make sure it is functioning correctly.
This flatwork ironer is only intended for ironing clean fabrics that were washed in water.
Check fabric care labels to verify that the articles are suitable for machine ironing.
This flatwork ironer is intended for use in commercial settings. The flatwork ironer is not
intended for domestic use. If the flatwork ironer is used in a publicly accessible place, it is
the supervisor's responsibility to ensure suitable measures are in place to protect users
from any source of risk or danger.
Gas-heated flatwork ironers are not suitable for use in publicly accessible places.
The flatwork ironer is not intended for outdoor use.
This flatwork ironer should not be installed or operated in any area where there is a risk
of explosion.
Take these safety precautions if you smell gas
These precautions apply only to gas-heated flatwork ironers.
– Extinguish any open flames and put out any cigarettes immediately.
– Do not carry out any actions which produce electrical sparks. Do not operate any light
switches, device power switches or bells. Do not pull any electrical plugs from sockets.
Do not use your telephone or mobile phone.
– Immediately open all windows and doors and ensure adequate ventilation.
– Close the gas line shut-off valves.
– If you smell gas in a room, under no circumstances should you enter that room carrying
an open flame.
– Do not strike any matches or ignite a cigarette lighter.
– Contact the relevant gas supply company.

Warning and Safety instructions
5
Technical and electrical safety
The flatwork ironer must not be operated in the same room as dry-cleaning equipment
using perchloroethylene or solvents containing CFCs.
The flatwork ironer may only be operated in a suitable dry room.
Only operate the flatwork ironer when all removable outer panels are in place so that it is
impossible to touch an electrical component, moving part or hot machine parts.
Do not damage, remove or bypass the safety features or control elements of the flat-
work ironer.
Do not make any alterations to the flatwork ironer unless explicitly authorised to do so
by Miele.
If the control elements or the electrical cabling insulation has been damaged, the flat-
work ironer must not be used until such damage has been repaired.
Repairs may only be carried out by suitably qualified personnel. Incorrect repairs can
cause considerable danger to users.
Faulty components may only be replaced by genuine Miele spare parts. Miele can only
guarantee that the flatwork ironer fully complies with safety requirements if Miele genuine
replacement parts are used.
The electrical safety of this flatwork ironer can only be guaranteed if it is correctly
earthed. It is essential that this standard safety requirement is observed and regularly
tested. If in any doubt, please have the electrical installation inspected by a qualified elec-
trician. Miele cannot be held liable for damages arising from an absent or faulty earth con-
nection.
The flatwork ironer is only completely isolated from the electricity supply if switched off
at the mains isolator, or if the on-site mains fuse is disconnected.
Electrostatic charge may occasionally build up whilst using the flatwork ironer, depend-
ing on the type of fabric and residual moisture.
Use of the appliance
The flatwork ironer must not be operated unsupervised.
The flatwork ironer can be used by people with reduced physical, sensory or mental
capabilities, or lack of experience and knowledge, only if they are supervised whilst using
it, or have been shown how to use it in a safe way and recognise and understand the
dangers of such use.
Always supervise any children in the vicinity of the flatwork ironer. Never allow children
to play with the flatwork ironer.
While the flatwork ironer is switched on and heated, there is a risk of burning if the edge
of the heater plate on the laundry output side is touched.
Do not set the ironing temperature higher than the temperature given on the care label of
the laundry item you intend to iron. The laundry could ignite if the ironing temperature is set
too high.

Warning and Safety instructions
6
When ironing double-layered laundry items, do not put your hands between the layers
when trying to stretch the item. There is a danger that you do not move your hands out of
the way of the hot heater plate in time. This also applies to inserting your hands in pockets
whose open sides are facing the hot heater plate.
The flexible laundry feed mechanism for reverse laundry removal (optional) may only be
turned from the front.
Do not iron items with fringes, thin ties and straps, etc. on flatwork ironers with feed-in
belts. These could get tangled in the feed-in belts and cause a fault.
While using the ironer, keep your hands away from the areas between the side columns
and the roller. There is a danger of squashing your fingers in the rotating roller.
Ensure the room in which the flatwork ironer is being used is sufficiently lit.
The flatwork ironer must be switched off when not in use.
Keep the working area around the flatwork ironer free from clutter.
Make sure that a fire extinguisher is in the direct vicinity and can be used at any time.
There is a risk of fire if the ironing temperature is set too high, the laundry is not suitable for
ironing or the laundry was not cleaned in water!
The installation of the flatwork ironer in non-stationary locations (for example, on ships)
may be performed only by specialised companies/specialists if they can guarantee the
prerequisites for the safe use of the flatwork ironer.
The country-specific safety regulations and provisions, as well as standards, must be
taken into consideration.
Using accessories
Accessory parts may only be fitted when expressly approved by Miele. Using spare
parts or accessories from other manufacturers will invalidate the warranty, and Miele can-
not accept liability.
Notes on the use of this ironer
Only responsible people over the age of 16 years who have been fully trained in the use
of the ironer should use the infeed table.
When working with the ironer, always wear close fitting clothes and keep long hair tied
back. Wide sleeves, apron straps, scarves and ties etc. could be taken in by the roller.
Remove rings and bracelets before ironing.
Smooth out folds as far away from the infeed on the infeed table as possible. Feed pil-
low cases and duvet covers into the ironer with the open end first. Do not take hold of the
corners from the inside. Do not take hold of straps or ties etc. from the inside of garments
Check daily that safety devices are correctly set. This ironer must only be used if all
safety features are functioning correctly. This way you will avoid the danger of burns,
squashed fingers and even loss of hands.
Before switching to reverse make sure that nobody is endangered.

Warning and Safety instructions
7
If other persons are being shown how to operate the ironer, they must be given or made
aware of these important safety instructions.
Pass these instructions on to any future users/owners of the ironer.

Caring for the environment
8
Disposal of the packing material
The packaging is designed to protect the appliance from damage during transportation.
The packaging materials used are selected from materials which are environmentally
friendly for disposal and should be recycled.
Recycling the packaging reduces the use of raw materials in the manufacturing process
and also reduces the amount of waste in landfill sites.
Disposing of your old appliance
Electrical and electronic appliances often contain valuable materials. They also contain
specific materials, compounds and components, which were essential for their correct
function and safety. These could be hazardous to human health and to the environment if
disposed of with your domestic waste or if handled incorrectly. Please do not, therefore,
dispose of your old appliance with your household waste.
Please dispose of it at your local community waste collection / recycling centre for elec-
trical and electronic appliances, or contact your dealer or Miele for advice. You are also re-
sponsible (by law, depending on country) for deleting any personal data that may be stored
on the appliance being disposed of. Please ensure that your old appliance poses no risk to
children while being stored prior to disposal.

Guide to the machine
9
Appliance overview
1
2
3
4
5
6
7
8
5
9
10
11
aControl field (touch display)
bFinger guard
cRoller with ironing cloth
dOutfeed table
eEmergency switch-off
(on the front of the left side column and
on the back of the right side column)
fLaundry infeed table
(with or without feed-in belts, depending
on the model)
gLaundry box
For preparation and pre-sorting of laundry
items.
h“FlexControl” foot switch
iExtension for outfeed table
(Optional)
jLaundry picker band
kGas burner light (for gas-heated ironers
only)
Lights up when the gas burner is active.

Guide to the machine
10
Touch display
The buttons on the touch display can be selected by pressing lightly. The button that is
currently selected will be highlighted with a bar underneath.
Display in the ironing temperature selection mode
abutton
Switches the ironer on and off.
bbutton
Pauses the ironing process.
cbutton
Begins the ironing process once the set
ironing temperature is reached. Flashes
when the ironing process can be started.
dbutton
Ironing temperature selection mode.
eTemperature selection button
For nylon and artificial silk.
fTemperature selection button
For silks and woollens.
gTemperature selection button
For cottons and linen.
hbutton
Raises the ironing temperature.
ibutton
Lowers the ironing temperature.
jbutton
Favourites programme
kbutton*
Service position for carrying out mainten-
ance work. This button must be held
down for at least 3seconds in order to
activate or deactivate it.
*Depending on the model, this button is
displayed or hidden
lbutton
Heater plate cleaning and waxing mode.
This button must be held down for at least
3seconds in order to activate or deactiv-
ate it.

Guide to the machine
11
Display in the roller speed selection mode
abutton
Switches the ironer on and off.
bbutton
Pauses the ironing process.
cbutton
Begins the ironing process once the set
ironing temperature is reached. Flashes
when the ironing process can be started.
d.button
Switches to the roller speed selection
mode
eSpeed selection button
Low speed range
fSpeed selection button
Medium speed range
gSpeed selection button
High speed range
hbutton
Increases the roller speed
ibutton
Decreases the roller speed
jbutton
Favourites programme
kbutton*
Service position for carrying out mainten-
ance work. This button must be held
down for at least 3seconds in order to
activate or deactivate it.
*Depending on the model, this button is
displayed or hidden
lbutton
Heater plate cleaning and waxing mode.
This button must be held down for at least
3seconds in order to activate or deactiv-
ate it.

Guide to the machine
12
Display symbols
1
Activate the finger guard
2
The current temperature of the heater
plate is lower than the setpoint temperat-
ure. The temperature of the heater plate is
raised.
3
Service display for cleaning and waxing
(see “Cleaning and care”)
4
The current temperature of the heater
plate is higher than the setpoint temperat-
ure. The temperature of the heater plate is
lowered.
5
Fault present
6or
Continuous laundry infeed on the left ()
or the right () side of the ironer (see
“Feeding in laundry”).
7
Pre-selection and display of temperature
in°C/°F
8
Pre-selection and display of roller speed
9//
Roller speed range
10
Payment system mode (see “Ironing
with a payment system”)
11 °C/°F
Display of ironing temperature in °C or
°F. This can be altered by the
MieleCustomer Service Department.

Guide to the machine
13
Finger guard
The finger guard is a safety feature that must be checked daily for proper functioning be-
fore the machine is used.
Risk of injury due to lack of finger guard function.
A malfunctioning finger guard function can lead to serious injury.
Shut down the flatwork ironer immediately.
Contact the Miele Customer Service Department without delay.
Ensure that the flatwork ironer is not put into operation by other persons and draw atten-
tion to the potential hazard.
After being switched on, the ironer will only switch to normal operating mode if the finger
guard has been activated properly after switching on the ironer. Otherwise, the ironer will
switch off again after a short amount of time.
“Finger guard” display symbol
If the display symbol is flashing, gently press the underside of the finger guard once.
If fingertips become trapped between the roller and the finger guard, the ironer will be
stopped immediately and the heater plate disengaged. At the same time, the symbol will
light up continuously. Press the button to switch the ironer back on.
While the ironer is operating, do not use the finger guard intentionally to interrupt the
ironing process.
Press the button to interrupt the ironing process.

Guide to the machine
14
Emergency switch-off
The emergency off switch puts the ironer into a safe state in the event of danger or in order
to prevent danger.
The ironer features two emergency off switches – one on the front of the left side column
and one on the back of the right side column.
Emergency stop switches on the side columns
Pressing the emergency stop switch will immediately stop the roller and disengage the
heater plate from the roller. appears in the display.
Once the emergency stop switch has been pressed, twist it in a clockwise direction to re-
lease it again.
Do not use the emergency off switch to switch off the flatwork ironer normally.
The emergency stop switches are intended for use only in hazardous situations.

Using for the first time
15
Cleaning and waxing before use
It is essential to clean and wax the heater plate before it is used for the first time (see
“Cleaning the heater plate” and “Waxing the heater plate” in “Cleaning and care”).
Clean the heater plate by passing the cleaning cloth offset through the ironer across the
entire width of the roller multiple times.
After cleaning the heater plate, wax it using the ironer waxing cloth and suitable ironing
wax. Use the ironing wax sparingly to avoid the ironing cloth becoming too smooth.

Preparing the laundry
16
Only iron suitable fabrics
Only clean fabrics that have been washed using water may be ironed. Before ironing, make
sure the fabrics are suitable for the ironing process. Suitable fabrics can be identified as
such by the corresponding care symbol on the label (, or ).
Residual moisture
Laundry items with 25–50% residual moisture are perfect for ironing because this ensures
an excellent finish. The residual moisture is absorbed by the fabric fibres, which makes
them easier to smooth.
The ideal level of residual moisture depends on the fabric’s properties.
If the laundry is rinsed in the final cycle using warm water, the laundry will still be warm and
will have lower residual moisture. Therefore, laundry rinsed with warm water takes less
time and energy to iron.
Sorting the laundry
Sort the laundry according to type and fabric before starting to iron. At the same time,
please observe the instructions on the laundry care label. We recommend sorting the
laundry in the following order:
Type of material Symbol Temperature
Nylon and other synthetics 100–110°C
then
Woollens, silks 111–150°C
followed by
Cotton, linen 151–185°C
Always follow the instructions on the care label when ironing laundry.
Starched laundry should always be ironed last.
Otherwise, any remaining starch residue on the heater plate may have a negative effect
when ironing other laundry items.

Using the ironer
17
Making the appliance ready for use
Turn on the on-site main switch for the power supply.
Press the button to switch on the ironer.
The red symbol flashes.
Now gently press the underside of the finger guard.
The ironer switches to normal operating mode.
The ironer is only ready for use if the finger guard has been actuated properly. Otherwise,
the ironer will switch off again after a short amount of time.
The red symbol will appear in the display and the heater plate will heat up.
Risk of burns when touching the hot heater plate.
When the machine has heated up, there is a danger of burns on the edge of the heater
plate. Warning labels on the outer casing of the heater plate indicate the danger of
burns.
Avoiding touching the edges of the heater plate.
Wait until the selected temperature has been reached.
The button begins to flash as soon as the minimum temperature has been reached.
The flatwork ironer is ready for operation when the set temperature is reached and the
symbol no longer appears in the display.
Now press the flashing button to start up the ironer.
The ironer is now ready for use.
Ironing
Whilst ironing, the laundry is fed into the ironer using the laundry infeed table. The ironed
laundry is removed from the other side. The laundry pickers pick off the laundry from the
roller after ironing. The laundry can then be folded together on the outfeed table.
Risk of burning due to hot laundry and hot edges of the heater plate outfeed.
While the ironer is in use, the heater plate becomes very hot. Ironed laundry may also be
very hot when it emerges from the heater plate.
Always take care when removing ironed laundry from the appliance.
Do not touch the edges of the heater plate outfeed.
Ironing temperature
The ironing temperature should be selected according to the type of fabric being ironed.
Fabric Symbol Temperature Preset value
Nylon/artificial silk 100–110°C 110°C
Silks/woollens 111–150°C 125°C
Cottons/linens 151–185°C 180°C

Using the ironer
18
Temperature selection buttons
The ironer temperature can be set either via the temperature selection buttons (//) or
alternatively via the or –buttons.
When adjusting the machine from a higher ironing temperature to a lower ironing temperat-
ure, the heater plate must cool down first. In this case, the heater element for the ironer is
switched off. The red symbol indicates that the current ironer temperature is still too
high. When the symbol goes out, this indicates that the selected temperature has been
reached.
Setting the ironing temperature
Press the button on the control panel to access the ironing temperature selection
mode.
The button will then be highlighted with a bar underneath.
Now press one of the threetemperature selection buttons.
(For example, temperature selection button)
The selected temperature selection button will be highlighted with a bar underneath and
the heater plate heated / cooled to the appropriate temperature.
Changing the value of a temperature selection button
Press the temperature selection button you want to change the value for.
When keeping the button pressed, the bar will light up underneath it and the current tem-
perature value will appear in the display.
Press the or –button to set the temperature you want to save for that button.
Then press and hold the temperature selection button highlighted with a bar underneath
until it flashes once.
The new temperature value is now saved for that temperature selection button.
Speed of ironer
Iron type Symbol Speed range m/min
Preset value
PRI318:
Low speed range 1.5–2.4 2.0
Medium speed range 2.5–3.4 3.0
High speed range 3.5–4.6 4.0
PRI418/421:
Low speed range 1.5–2.9 2.0
Medium speed range 3.0–3.9 3.5
High speed range 4.0–5.4 4.5

Using the ironer
19
Roller speed selection buttons
The roller speed can be set either via the roller speed selection buttons (//) or al-
ternatively via the or –buttons.
Setting the ironer speed
Press the .button to access the roller speed selection mode.
The button will then be highlighted with a bar underneath.
Now press one of the three roller speed selection buttons.
(For example, button)
The selected roller speed selection button will be highlighted with a bar underneath and
the ironer speed will be adopted as the button value.
Changing the value of a roller speed selection button
Press the roller speed selection button you want to change the value for.
The bar will light up underneath the selected button and the current roller speed value will
appear in the display.
Press the or –button to set the roller speed you want to save for that button.
Press and hold the roller speed selection button until it flashes once.
The new roller speed is now saved for that button.
Saving and loading favourites
The following steps describe how to save and load the most frequently used combinations
of ironing temperature and roller speed on the button.
Saving favourites
First set the desired ironing temperature and roller speed (see “Ironing” in “Using the
ironer”).
Then press and hold the button until it flashes once.
The set combination of ironing temperature and roller speed is then saved to the button.
Loading favourites
Tap the button to load a favourite.
The ironer’s roller speed and ironing temperature are then set to the combination of values
saved to the button.

Using the ironer
20
Exiting favourites
Tap the button to exit a favourite setting.
The set ironing temperature and roller speed set previously are loaded.
Feeding in laundry
Press the button to start the ironing process.
The heater plate engages and the roller begins to rotate.
Risk of damage as a result of incorrect laundry in-feed.
If laundry items with buttons are incorrectly fed into the ironer, they may be damaged or
torn off when the item is passed into the heater plate.
Laundry with buttons must be inserted into the ironer so that the buttons are facing the
roller and can be pressed into the roller’s ironing cloth during ironing.
Place a cloth over zips, metal buttons and metal hooks before ironing to protect the
heater plate.
Never iron metal or plastic clasps of any kind, or very bulky buttons (e.g. ball-shaped
buttons).
Align the laundry item parallel to the roller on the laundry infeed table.
Smooth the item of laundry.
Feed the item of laundry evenly into the ironer.
Do not feed small items of laundry into the ironer on only one side.
If laundry in-feed is on just one side, the heat will only be used on one side and the load
only exerted on the roller padding on one side. If the laundry in-feed continues to be on
one side only, this will be indicated by an audible signal and the red symbol or
symbol appearing in the display.
Use the entire roller width wherever possible and distribute small items of laundry evenly
on the laundry in-feed table.
Picking laundry out of the ironer
Risk of burning due to hot edges of the heater plate outfeed.
While the ironer is in use, the heater plate becomes very hot. Ironed laundry may also be
very hot when it emerges from the heater plate.
Always take care when removing ironed laundry from the appliance.
Do not touch the edges of the heater plate outfeed.
The picker springs on the laundry picker band separate the ironed laundry from the roller.
The laundry can then be removed from the ironer.
Risk of fire due to laundry self-ignition.
Hot laundry could self-ignite and cause a fire.
Allow the ironed laundry to cool down before packing or stacking it.
If a picker spring is loosened from its position, the ironer must be switched off. The picker
spring then needs to be moved by hand to the original position of the laundry picker band.
This manual suits for next models
2
Table of contents
Other Miele professional Iron manuals

Miele professional
Miele professional PM 1210 User manual

Miele professional
Miele professional PM 1210 User manual

Miele professional
Miele professional PM 1210 User manual

Miele professional
Miele professional HM 16-83 User manual

Miele professional
Miele professional HM 21-100 User manual

Miele professional
Miele professional PM 1214 User manual

Miele professional
Miele professional PM 1210 User manual