Miele G 7764 SUPER-COMBI User manual

Operating instructions
G 7764 SUPER-COMBI
Commercial dishwasher
It is essential to read these
operating instructions before Q
installing or using the machine,
to avoid the risk of accident
or damage to the machine. M.-Nr. 03 640 811

Contents
Guide to the machine. . . . . . . . . . . . . . . . . . . . . . . . . . . . . . . . . . . . . . . . . . . . . . . 3
Warning and Safety instructions . . . . . . . . . . . . . . . . . . . . . . . . . . . . . . . . . . . . . 5
Warning and Safety instructions (detachable). . . . . . . . . . . . . . . . . Centre pages
Description of the machine. . . . . . . . . . . . . . . . . . . . . . . . . . . . . . . . . . . . . . . . . . 8
Setting the water softener. . . . . . . . . . . . . . . . . . . . . . . . . . . . . . . . . . . . . . . . . . . 9
Opening and closing the door . . . . . . . . . . . . . . . . . . . . . . . . . . . . . . . . . . . . . . 11
Loading the dishwasher . . . . . . . . . . . . . . . . . . . . . . . . . . . . . . . . . . . . . . . . . . . 12
Rinse aid . . . . . . . . . . . . . . . . . . . . . . . . . . . . . . . . . . . . . . . . . . . . . . . . . . . . . . . . 16
Adding detergent . . . . . . . . . . . . . . . . . . . . . . . . . . . . . . . . . . . . . . . . . . . . . . . . . 18
Programme selection. . . . . . . . . . . . . . . . . . . . . . . . . . . . . . . . . . . . . . . . . . . . . . 19
Programme chart . . . . . . . . . . . . . . . . . . . . . . . . . . . . . . . . . . . . . . . . . . . . . . . . 20
Switching the machine on and off . . . . . . . . . . . . . . . . . . . . . . . . . . . . . . . . . . . 22
Programming special functions . . . . . . . . . . . . . . . . . . . . . . . . . . . . . . . . . . . . . 24
Reactivating the water softener . . . . . . . . . . . . . . . . . . . . . . . . . . . . . . . . . . . . . 26
Cleaning and Care . . . . . . . . . . . . . . . . . . . . . . . . . . . . . . . . . . . . . . . . . . . . . . . . 28
Correcting minor faults . . . . . . . . . . . . . . . . . . . . . . . . . . . . . . . . . . . . . . . . . . . . 30
Installation . . . . . . . . . . . . . . . . . . . . . . . . . . . . . . . . . . . . . . . . . . . . . . . . . . . . . . 31
Electrical Connection U.K. . . . . . . . . . . . . . . . . . . . . . . . . . . . . . . . . . . . . . . . . . 33
Plumbing. . . . . . . . . . . . . . . . . . . . . . . . . . . . . . . . . . . . . . . . . . . . . . . . . . . . . . . . 34
Caring for the environment. . . . . . . . . . . . . . . . . . . . . . . . . . . . . . . . . . . . . . . . . 36
Technical data. . . . . . . . . . . . . . . . . . . . . . . . . . . . . . . . . . . . . . . . . . . . . . . . . . . . 37
Contents
2

Guide to the machine
1 “Check water inlet/outlet” indicator
light
2 "Reactivate water softener"
indicator light
3 "Add liquid detergent"
indicator light (only for special
version with externally connected
DOS module)
4 "Add rinse aid" indicator light
5 Programme sequence indicator
6 Indicator display field
7 Door release
8 On-off push button (I-0)
9 Programme selectors (touchpads)
•
•
•
DOS
°C
min
••
•
••
•
•
•
•
•
•
•
•
•
I-O
1234 5 6 7 8 9
•
•
Guide to the machine
3

Description of the machine
10 Connection for DOS dispenser pump
module (at rear)
11 Filter combination
12 Dispenser for powder detergent
13 Salt reservoir connection socket
(Water softener)
14 Dispenser for liquid rinse
aid with dosage selector
15 Level indicator
10 11 12 13 14 15
Guide to the machine
4

Warning and Safety instructions
This machine conforms to current
safety requirements. Inappropriate
use can however lead to personal
injury and damage to property.
Read the operating instructions
carefully before starting to use this
machine.
This way you will avoid the risk of
accidents, and damage to the ma-
chine.
Keep these instructions in a safe
place for future reference.
Correct usage
This machine is designed for com-
mercial use and for specialised ap-
plications only, as described in these
Operating Instructions. Using it for pur-
poses other than those for which it was
designed would be unauthorised and
could cause harm.
The manufacturer cannot be held re-
sponsible for damage caused by im-
proper use.
Please pay attention to the following
notes, to maintain safe procedures.
The machine should be commis-
sioned and then maintained only by
the Miele Service Department, an auth-
orised Miele Service Dealer or other ap-
proved competent person.
Do not install the machine in an
area where a danger of explosion
may be present, or sub-zero tempera-
tures may occur.
Children and untrained personnel
should not be allowed access to
the machine or its controls.
The electrical safety of this ma-
chine can only be guaranteed if
connected to a correctly installed ear-
thing system on site. It is most import-
ant that this basic safety requirement is
met and complies with local and na-
tional regulations. It should be checked
by an expert if necessary.
The manufacturer cannot be held re-
sponsible for damage such as electric
shock caused by missing or defective
earthing.
A damaged machine is dan-
gerous. Switch off at the mains im-
mediately and call an authorised Miele
service dealer, or suitably competent
engineer.
Any repair work may only be car-
ried out by a suitably competent
person authorized by Miele. Repairs by
unqualified persons could be dan-
gerous for the user.
Take care when handling liquids
such as detergents, wetting
agents, or neutralising agents. These
may contain irritant or corrosive ingre-
dients, acids or alkalis. On no account
use any organic solvent, as there may
be the danger of an explosion occur-
ring. Follow the chemical manufac-
turer’s instructions and relevant safety
procedures carefully. Wear protective
gloves and goggles.
Avoid inhalation of powder
cleaners. Irritant ingredients can
cause burning in the mouth and throat
is swallowed, or inhibit breathing.
The water in the machine must not
be used as drinking water.
Warning and Safety instructions
5

Do not sit or lean on the open door,
or rest objects on it. This could
cause the machine to tip and be dam-
aged.
Be careful when sorting items with
sharp pointed ends and position-
ing them in the machine so that you do
not hurt yourself or create danger for
other operators.
When using this machine at higher
temperatures be especially careful
not to scald or burn yourself. Baskets
and inserts must first cool down. Any
water which may remain in containers
will be very hot and must be emptied
into the wash cabinet.
Do not touch the heating elements
during or directly after the end of a
programme. You could burn yourself.
Never use an ordinary or a high
pressure hose on or in the vicinity
of the machine.
Before any maintenance or repair
work is undertaken, the machine
must be disconnected from the mains
supply, by switching off at the mains
isolator, or withdrawing the mains fuse.
The following points should be ob-
served to maintain standards, and
avoid damage to the machine and
the loads being cleaned.
Only use cleaning agents formu-
lated for special processes and ap-
proved by Miele for use with this ma-
chine. Use of unsuitable cleaning
agents could adversely affect the load
and the machine.
For pre-treatment and / or cleaning
only use low-foaming detergents
and disinfecting agents which have
been approved by Miele. Foam can
have an adverse effect on the disinfec-
tion and cleaning process.
Where a chemical additive is rec-
ommended on technical applica-
tion grounds (for example with a clean-
ing agent), this does not imply that the
manufacturer of the machine takes re-
sponsibility for the effect of the chemi-
cal on the material of the items being
cleaned. Please be aware that changes
in formulation, storage conditions etc,
which may not be publicised by the
chemical producer, can have a nega-
tive effect on the cleaning result.
Always follow the instructions of
the chemical manufacturer when
using cleaning agents and special ap-
plication chemicals. Only use such
chemicals for the purpose and in the
situation specified, to the exclusion of
other chemicals, to avoid such dangers
as chemical reactions and material
damage.
The machine is designed only for
operation with water and additive
cleaning agents. Organic solvents
must not be used in the machine, as
there is the danger under certain cir-
cumstances of explosion. (Although
this is not the case with all organic sol-
vents, other problems could arise with
their use, for example damage to rub-
ber and synthetic materials).
Warning and Safety instructions
6

In critical applications where very
stringent requirements have to be
met, it is strongly recommended that all
the relevant factors for the process,
such as cleaning agent, quality of
water are discussed with the Miele Ap-
plication Technology specialists.
If the cleaning result is subject to
these particularly stringent require-
ments (e.g. chemical analysis, spe-
cialised processes), a regular quality
control test should be carried out by
the user to ensure that required stand-
ards of cleanliness are being achieved.
Use special inserts in accordance
with the instructions provided.
Empty any containers or utensils
before arranging them in the ma-
chine.
Do not allow any remains of acids
or solvents, or chloride solutions to
get into the wash cabinet. Similarly
avoid any materials with a corrosive ef-
fect. The presence in compounds of
any solvents should be minimal, (espe-
cially those in hazard class A1).
Ensure that solutions or steam con-
taining acid salts do not come into
contact with the steel outer casing of
the machine, to avoid any corrosion
damage.
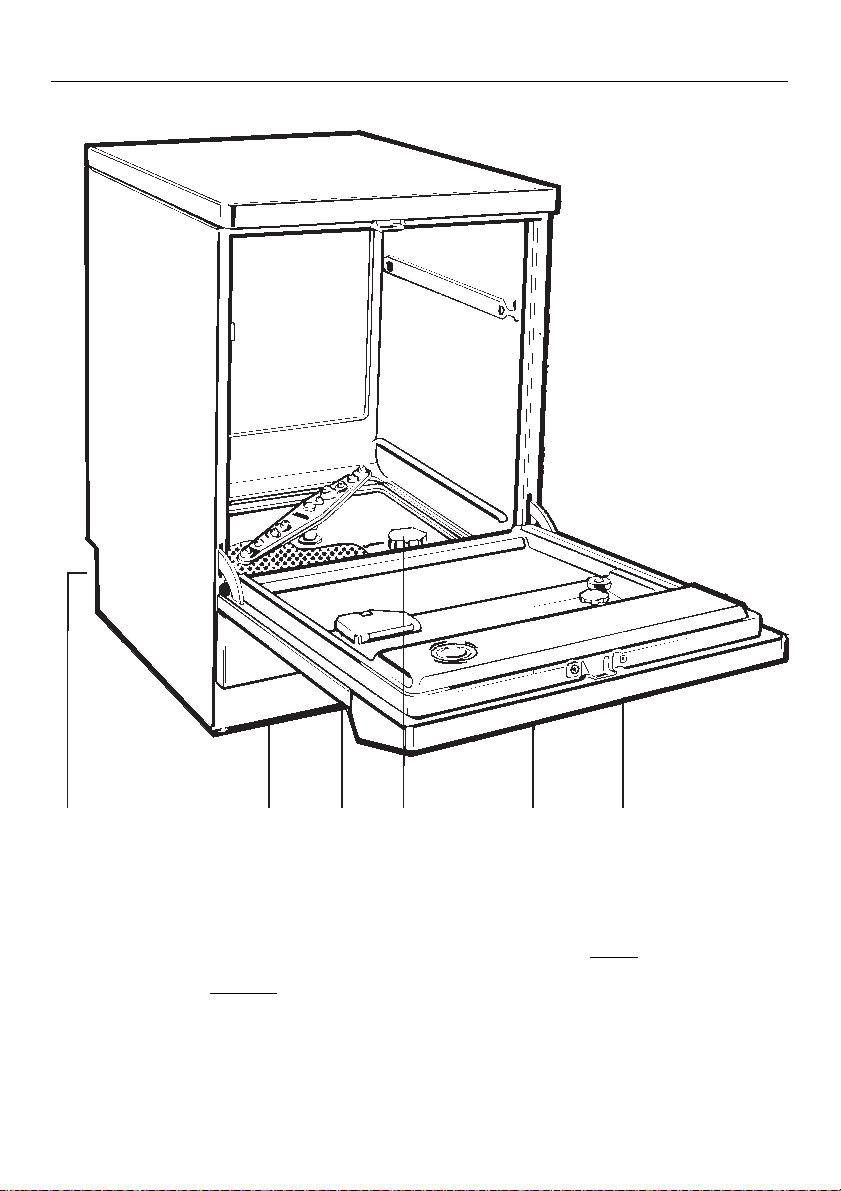
Follow both the installation instruc-
tions in this booklet, and also the
separate instructions with diagrams.
Accessories
The only accessories to be used
with the special commercial ma-
chine must be those supplied or ap-
proved by MIELE for the specific appli-
cation. Consult your dealer or the Miele
Professional department for advice.
Disposal of an old machine
When disposing of an old machine
first make it unusable. Disconnect,
cut off the cable and any plug from the
cable. For environmental and safety
reasons ensure the machine is com-
pletely drained of any residue water
and cleaning agent. (Observe safety
regulations and wear safety goggles
and gloves). Make the door lock inoper-
ative, so that children cannot acciden-
tally shut themselves in. The simplest
way to do this is to remove the locking
pin (2 cross-slotted screws above the
door). Make appropriate arrangements
for the safe disposal of the machine.
For tank system machines ensure that
any water is emptied out of the tank.
In countries where there are areas
which may be subject to infestation
by cockroaches or other vermin, pay
particular attention to keeping the ma-
chine and its surroundings in a clean
condition at all times. Any damage
which may be caused by cock-
roaches or other vermin will not be
covered by the machine guarantee.
The manufacturer cannot be held re-
sponsible for any damage caused
through non-observance of these
Warning and Safety instructions.
Warning and Safety instructions
7

Description of the machine
This machine is a front-loading commer-
cial dishwasher with very short batch
times especially suitable for washing
up in guest houses, cafés, fast food out-
lets, boarding houses, etc.
This machine is fitted with a water sof-
tener as standard.
Description of the machine
8

Setting the water softener
To avoid the build-up of calcium de-
posits on crockery and in the dish-
washer the water needs to be softened,
if it is harder than 107 ppm.
To ensure a steady supply of soft water
the water softener unit must be:
– correctly set, and
– the salt reservoir in the floor of the
wash cabinet must be topped up
with dishwasher reactivating salt
as soon as the klight comes on.
The water softener must always be set
to correspond with the water hardness
the first time the machine is used.
Your local water authority will advise
you on the water hardness in your area.
Setting the water softener
The hardness range is divided into 18
time settings and a zero position. The
dishwasher is set at the factory for a
water hardness setting "8", correspond-
ing to 339 ppm.
If your water supply is harder or softer
than this, then:
Use the touchpads on the control
panel to change the setting, (see
table).
Timed
set-
ting
°d mg/l ° f °e ppm
CaCO3
18
17
16
15
14
13
12
11
10
9
8
7
6
5
4
3
2
1
0
6
7
8
9
10
11
12
13
15
17
19
22
24
28
32
38
48
71
107
125
142
160
178
196
214
231
267
303
338
392
427
498
570
676
854
1264
10,7
12,5
14,3
16,0
17,9
19,6
21,4
23,2
26,8
30,4
33,9
39,3
42,8
50,0
57,1
67,8
85,7
126,7
7,5
8,8
10,0
11,3
12,5
13,8
15,0
16,3
18,8
21,3
23,8
27,5
30,0
35,0
40,0
47,6
60,1
88,9
107
125
143
160
179
196
214
232
268
304
339
393
428
500
571
678
857
1267
Press qand ctouchpads simulta-
neously, and whilst depressed,
switch the machine on using the
main switch "I-0".
"PO.."will appear in the display field.
Press ktouchpad. The "P" will dis-
appear and setting "0" will appear
in the display field. The setting "0"
can now be changed if necessary.
To do this:
Press ctouchpad as many times
as is necessary for the desired value
to appear in the display field.
Press htouchpad. "SP" appears.
Press htouchpad once more. The
setting will now be stored. The dis-
play field clears.
The machine is now ready for oper-
ation.
Setting the water softener
9

Setting the water softener
If the water hardness in your area is
permanently below 107 ppm:
Select "0" setting.
The indicator light kwill not come
on and the water softener does not
need to be activated.
"Reactivating the water softener" see
page 26.
Setting the water softener
10

Opening and closing the door
To open the door a
Press the door release catch as far
as it will go and, at the same time,
grasp the door grip and open the
door.
The door should only be opened dur-
ing operation for emergencies: e.g. if
articles are knocking together, (see "In-
terrupting a programme)".
Do not touch the heating elements if
the door is opened after operation.
You could still burn yourself.
To close the door
Lift the door upwards and push until
it clicks into position. Do not press
the door release catch.
Opening and closing the door
11

Loading the dishwasher
Preparation
Empty loose remains from crockery
prior to loading.
Notes
Load the crockery so that water will
come into contact with all surfaces.
This ensures that they will be
properly cleaned.
Do not place crockery and cutlery in-
side other pieces where they may be
concealed.
Hollow items such as cups, glasses,
pots, etc, must be inverted in the
basket, so the water can run off
freely.
Deep-based items should be placed
at such an angle that water runs off
them freely.
Tall, narrow, hollow pieces should be
placed in the centre of the basket to
ensure good coverage of water.
Normally place cups and small
pieces on the cup racks, but do not
obsure them by larger items be-
neath. If necessary place bowls on
the top rack and cups below them
so that water reaches all pieces.
Do not cover the funnel to the spray
arm in the middle of the upper bas-
ket.
The spray arms must not be blocked
by items which are too high for the
basket or which hang down in its
path. If necessary, manually rotate
the arm to test it.
Loading the upper basket
The upper basket accommodates
small, light items such as cups,
saucers, glasses, dessert bowls,
small bowls and heat-resistant plas-
ticware.
Loading the bottom basket
The bottom basket accommodates
bigger items such as plates, serving
platters,saucepans, bowls. Glasses
may only be cleaned in the bottom
basket if it is fitted with a special
glassware insert.
Cutlery
Unsorted cutlery should be placed
in the cutlery basket, handles point-
ing downwards.
For loading examples see next page.
Loading the dishwasher
12

Loading the dishwasher
Loading example:
O 181 Upper basket
for 20 cups, 24 saucers or 12 dessert
plates.
U 180 Bottom basket
with 2 x E 216 half-inserts each for 15
plates Ø 240 mm and 2 x E 165 cutlery
baskets for mixed cutlery.
Individual upper and bottom baskets
O 189 Upper basket carrier
to take various inserts, e.g. containers
for cutlery and glasses.
U 180 Bottom basket
with E 184 insert 1/1 for 21 Trays,
stands, portion dishes etc.
Loading the dishwasher
13

Loading the dishwasher
Glass-Set GG/F-GL
O 182 Upper basket
for 27 Glasses Ø 65 mm.
U 180 Bottom basket
with 2 x E 205 half-inserts each for 14
Glasses Ø 65 mm.
Loading the dishwasher
14

Loading the dishwasher
Adjusting the upper basket
The upper basket can be adjusted
above and below the middle position
by 2 cm. It is set in the middle position
on delivery.
In this position the upper basket will ac-
commodate:
plates up to approx. 19 cm diameter,
and the bottom basket:
plates up to approx. 25 cm diameter.
For further plate size combinations
see the chart below.
Upper bas-
ket position
upper
basket cm
Ø
bottom
basket cm
Ø
top 17 27
middle 19 25
bottom 21 23
To adjust the upper basket:
Pull out the upper basket until a re-
sistance is felt, lift from the runners
and remove.
Unscrew the knurled nuts (roller bear-
ings) on both sides of the basket
with a suitable spanner, and reposi-
tion as required.
Items not suitable for
dishwashers
Cutlery with wooden or horn handles.
Wooden or plastic boards.
Glued items, eg old knives with
handles which have been glued on.
Hand-made craft items.
Copper or tin items.
Plastic items which are not heat-resis-
tant.
Please note
Silver and aluminium items can suf-
fer some discolouration.
Colours painted over a glaze may
fade after a number of washes.
Clouding may occur on glasses after
frequent washing.
Our recommendations
Wash delicate glassware by hand.
When purchasing new glasses,
dishes and cutlery make sure they
are dishwasher safe.
Loading the dishwasher
15

Rinse aid
Rinse aid is poured into a storage con-
tainer in the door with a capacity of ap-
proximately 200 ml. The required
amount of liquid rinse aid (e.g. Miel-
clear, or an agent containing citric acid
for plastic items) is dispensed automati-
cally.
Exception: Rinsing in cold water with-
out rinse aid can be selected in the
"Glassware" programme by choosing
“Special function” (see Programming
special functions).
Adding rinse aid
If the indicator light H"rinse aid" on
the control panel comes on:
Undo the screw cap.
Pour rinse aid into the storage con-
tainer until the level indicator is dark
(see arrow in illustration). Use a fun-
nel if necessary.
Firmly tighten the screw cap. Mop
up any spilt rinse aid.
Rinse aid
16

Rinse aid
Setting the rinse aid dosage
The dosage adjuster in the opening
has settings from 1-6 (1-6 ml). It is set
to "3" (3 ml) at the factory.
Use a higher setting if spots are left
on glasses after drying.
If smearing appears on crockery,
use a lower setting.
Rinse aid
17

Adding detergent
Use only detergents for specialist
machines. Do not use detergent for
domestic dishwashers.
Powder detergents must be placed in
the detergent container prior to every
programme (except SUPER-SHORT).
Press the opening catch on the con-
tainer flap forwards. The flap will
spring open. (The flap is always
open at the end of a programme).
Fill the dispenser with the detergent.
Dosage: approx. 3 g/l, corresponding
to approx. 30 g per load.
Follow manufacturer’s instructions.
Close the dispenser lid.
Under certain circumstances, ie, spe-
cial soiling, different combinations of
detergents and other additions may be
necessary. Miele Professional Service
Department will be pleased to advise
you.
Adding detergent
18

Adding detergent Programme selection
"SUPER SHORT " programme
For this programme:
Add powder detergent directly to the
inside of the door.
Note
This machine can also be fitted with a
"DOS Module C 60" (dosage pump for
liquid detergent) This is connected ex-
ternally.
A separate User Instruction is included
with the Installation diagram for the
DOS module.
Take great care when handling liq-
uid agents. They may contain acids,
leaches or disinfectant. Please fol-
low the safety instructions.
Wear protective goggles and
gloves if necessary.
Choose your programme according to
the crockery type and the degree of
soiling.
The different programme types and
their uses are described overleaf in the
Programme chart.
Adding detergent Programme selection
19

Programme chart
Programme When to use Detergent
(When not using liquid
detergent)
Take the manufacturer’s
recommendations into
account.
GUNIVERSAL For normal loads with higher temperature for
stubborn, dried-on particles.
30 grammes in the powder
dispenser.
oGLASSWARE Special programme for glasses. 30 grammes in the powder
dispenser.
sSHORT "Quick programme " for lightly soiled crockery. 30 grammes in the powder
dispenser.
bMINI As for "SHORT" but for heat-sensitive loads. 30 grammes in the powder
dispenser.
JSUPER-
SHORT
Short programme for crockery in continuous
use.
30 grammes on the right
hand side door interior.
nINTENSIVE-
PLUS
For heavily soiled crockery with stubborn
particles of food.
30 grammes in the powder
dispenser.
**) Important information for the "SUPER-SHORT" Programme
After completion of this programme, the final rinse water is not drained away. It will be used as the
wash water for an immediately following "SUPER-SHORT" Programme.
If operation is interrupted for longer periods of time, or if a different programme is required:
• select additional programme q"Drain", and the final rinse water drains automatically.
Programme chart
20
Table of contents
Other Miele Dishwasher manuals

Miele
Miele G2182SC User manual

Miele
Miele PG 8081i User manual

Miele
Miele Integrated slimline dishwasher User manual

Miele
Miele Touchtronic Premier Plus G 698 User manual

Miele
Miele G 6575 User manual

Miele
Miele HG07 User manual

Miele
Miele INSPIRA G 2140 User manual

Miele
Miele Dishwasher User manual

Miele
Miele G 7591 User manual

Miele
Miele G 4920 User manual

Miele
Miele Incognito G 818 SCVi User manual

Miele
Miele G 5605 User manual

Miele
Miele G 2872 User manual

Miele
Miele G 5050 C SCVi Active User manual

Miele
Miele G 5690 User manual

Miele
Miele G 6860 User manual

Miele
Miele G 5970 User manual

Miele
Miele Inspira G2141 User manual

Miele
Miele G 6993 User manual

Miele
Miele ProfiLine PG 8083 User manual