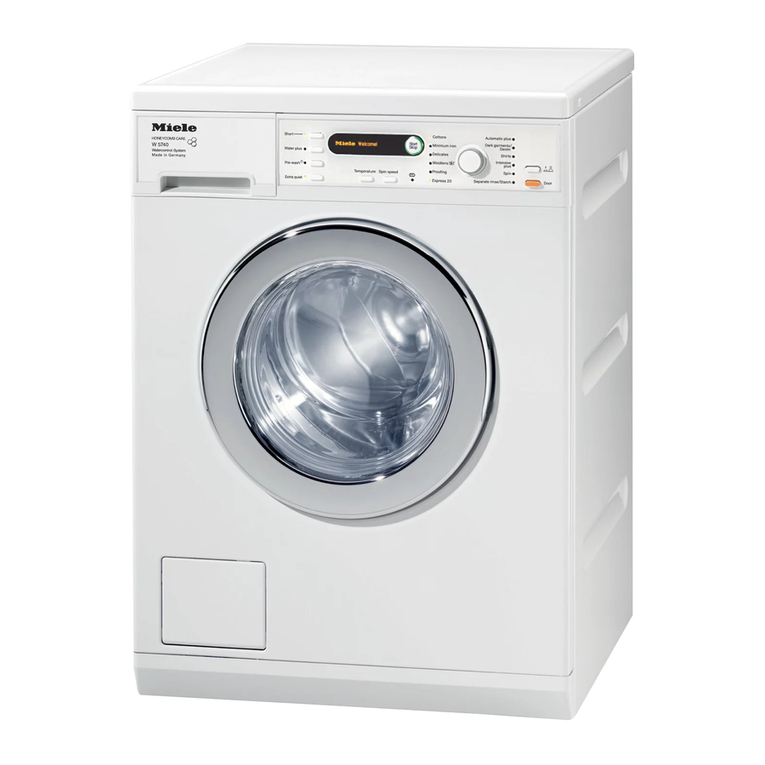
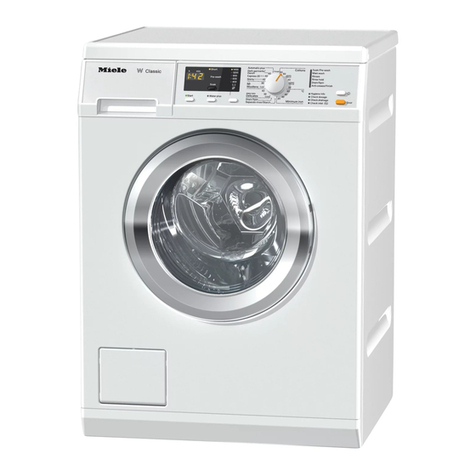
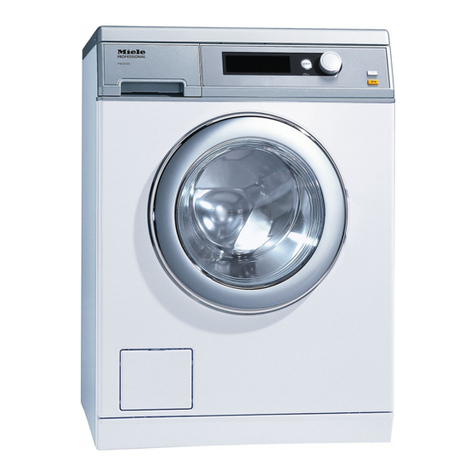
Miele PWM 514 User manual

Connector-Box
PWM514/520/912/916/920
PWM509/511/909
en-US Operating and Installation Instructions
en-AU,
NZ
Operating and installation instructions
el-GR Οδηγίες χρήσης και τοποθέτησης
ja-JP 取扱説明書
ko-KR 사용 및 설치 설명서
zh-CN 操作和安装说明
uk-UA Інструкція з монтажу й експлуатації
sk-SK Návod na použitie a montáž
ru-RU Инструкция по эксплуатации и монтажу Коммуникационная
коробка Connector-Box
M.-Nr. 12 182 860

2
en-US ................................................................................................................................ 4
en-AU, NZ ......................................................................................................................... 21
el-GR ................................................................................................................................. 38
ja-JP .................................................................................................................................. 56
ko-KR ................................................................................................................................ 71
zh-CN ................................................................................................................................ 86
uk-UA ................................................................................................................................101
sk-SK ................................................................................................................................118
ru-RU ................................................................................................................................135

en-US - Contents
3
Caring for the environment ............................................................................................ 4
IMPORTANT SAFETY INSTRUCTIONS .......................................................................... 5
Technical safety................................................................................................................. 5
Functional description .................................................................................................... 7
How it works...................................................................................................................... 7
Installation........................................................................................................................ 8
Current carrying capacity of the inputs and outputs......................................................... 10
Installing a payment system.............................................................................................. 10
Coding 1 function and current carrying capacity table..................................................... 12
Coding 2 function and current carrying capacity table..................................................... 14
Electrical connection ...................................................................................................... 16
Electrical connection......................................................................................................... 16
...................................................................................................................................... 17
(Timed operation) ....................................................................................................... 18
(Program operation) ................................................................................................. 19

en-US - Caring for the environment
4
Disposal of the packaging material
The packaging material protects the Connector Box from transport
damage. The packaging materials used are selected from materials
which are environmentally friendly for disposal and can therefore be
recycled.
Recycling the packaging material reduces the use of raw materials in
the manufacturing process and also reduces the amount of waste in
landfill sites. Your dealer will take the packaging material away.
Disposal of your old appliance
Electrical and electronic appliances contain valuable materials. They
also contain certain substances, compounds and components which
were essential for the proper functioning and safe use of the equip-
ment. Handling these materials improperly by disposing of them in
your household waste can be harmful to your health and the environ-
ment. Therefore, please do not dispose of your old appliance with
regular household waste and follow local regulations on proper dis-
posal.
Consult with local authorities, dealers or Miele in order to dispose of
and recycle electrical and electronic appliances. Miele assumes no
responsibility for deleting any personal data left on the appliance be-
ing disposed. Please ensure that your old appliance is kept away
from children until removal. Observe safety requirements for appli-
ances that may tip over or pose an entrapment hazard.

en-US - IMPORTANT SAFETY INSTRUCTIONS
5
This Connector Box complies with all relevant current safety re-
quirements. Inappropriate use can, however, lead to personal injury
and material damage.
First read these operating and installation instructions for the Con-
nector Box. They contain important information on the safety, use,
and maintenance of the Connector Box. This prevents both per-
sonal injury and damage to the machine.
Keep these operating and installation instructions in a safe place
and pass them on to any future owner.
Appropriate use
The Connector Box is intended to be used solely to establish a
connection between a Miele Professional Washing Machine and ex-
ternal hardware, such as a peak-load negotiation system, a coin-pay-
ment device, an additional fan, an exhaust valve, or dispenser
pumps. Any other applications may be dangerous.
Miele cannot be held liable for damage resulting from incorrect or im-
proper use or operation.
The Connector Box is intended to be used exclusively in conjunc-
tion with Miele Professional Machines with a connection coupling that
has been installed at the factory.
Technical safety
The Connector Box must only be installed and assembled by quali-
fied electricians who have made sure that the conditions for its cor-
rect use are met.
Before installation, check the Connector Box for visible signs of
damage. Do not install or use a damaged Connector Box.
The Connector Box must not be repaired in the event that it dis-
plays a defect or damage.
In such cases, the Connector Box must be replaced by a new one.
The Connector Box is only disconnected from the power supply if
the Miele Professional Washing Machine has been disconnected in
accordance with the specifications provided in the operating and in-
stallation instructions.
The connection cables between the Miele Professional Washing
Machine and Connector Box must not become trapped.
The Connector Box must be assembled on site or mounted on the
washing machine with a special machine attachment (optional acces-
sory).
The Connector Box must be accessible after being mounted on a
wall to enable service work to be carried out.
The connection cables for the Connector Box must be assembled
and routed correctly.

en-US - IMPORTANT SAFETY INSTRUCTIONS
6
The cable strain-relief fixtures as well as the cable glands and
counter nuts supplied by the factory to connect external hardware
must be used.

en-US - Functional description
7
How it works
The Connector Box allows external hardware from Miele and other
suppliers to be connected to the Miele Professional Washing Ma-
chine. External hardware includes payment systems, dispensing sys-
tems, peak-load systems, pressure sensors, and external exhaust
valves.
Connector Box functions:
Connector Box coding 1 Connector Box coding 2
- Dispensing 1–6 - Dispensing 7–12
- Container empty signal 1–6 - Container empty signal 7–12
- Flow rate 1–3 - Flow rate 4–6
- Peak-load negotiation - Water recycling
- Payment system - Program signals
- Program signals
Up to 2 boxes can be connected to a washing machine. The washing
machine is equipped as standard with a connection for a Connector
Box. To use a second Box, the APWM020 kit must be ordered and
installed by a qualified electrician.
The Connector Boxes can be connected to both connections of the
washing machine, as only the coding decides which Connector Box
is used. In the washing machine, the connections are connected in
parallel and are therefore identical in terms of signaling.
The Connector Boxes must be coded for operation. The coding de-
termines the function (see tables on coding 1/2 functions and current
carrying capacity). Coding is also required when using one Box.
The Connector Boxes are coded as standard with the wire jumper
plugged into connection 8.3. For the functions of Connector Box 1
(see tables on coding 1 functions and current carrying capacity), the
wire jumper is plugged into connection 8.1. For the functions of Con-
nector Box 2 (see tables on coding 2 functions and current carrying
capacity), the wire jumper is plugged into connection 8.2.
For more information on how to activate the machine control, refer to
the operating instructions of the washing machine. (“Supervisor level”
chapter)
These operating and installation instructions primarily describe how
to connect payment devices. Connections for external hardware other
than payment devices must be made by persons authorized by the
hardware manufacturer.

en-US - Installation
8
Before securing the Connector Box
- The Connector Box must be screwed into place properly on site.
The dimensions of the holes to be drilled into the wall are quoted in
Fig. in the “”chapter at the end of these operating and instal-
lation instructions.
- Alternatively, the Connector Box can be attached to the wall using
the adhesive strips provided. If you choose this option, please note:
– The adhesive strips are attached along the outer edges and in
the center of the rear panel. See Fig. in the “”chapter at
the end of these operating and installation instructions.
– The surface of the wall must be smooth and solid with no
traces of grease or dust.
– It must not be covered with textured wallpaper, textured plas-
ter, or any other surface finish with inadequate adhesion prop-
erties.
– The maximum mounting height must not exceed 4.9 ft (1.5m).
Do not install the Connector Box above uncovered water holes,
drain channels, or similar systems.
Risk of electric shock caused by the Connector Box falling
down off the wall and into water.
If it is not secured properly and correctly, the Connector Box can
fall down off the wall, causing an electric shock.
If a Connector Box falls down off the wall, it must be taken out of
service immediately. Replace the Connector Box with a new one or
have it checked by Miele Customer Service.
Carrying out the installation
Service and repair work must only be carried out by a suitably quali-
fied electrician in accordance with all appropriate local and national
safety requirements.
Disconnect the Miele Professional Washing Machine from the volt-
age.
Attach the Connector Box to the wall using the 4screws (4x40)
and plugs (S6) provided. See Fig. in the “”chapter.
Alternatively, the Connector Box can be attached to the wall using
the adhesive strips provided. See Fig. in the “”chapter.
Establish the connection between the Connector Box and the Miele
Professional Washing Machine and the external hardware (e.g.,pay-
ment device).
When connecting external hardware provided by other manufactur-
ers, the cable cross-section must not be less than 1/16" (1mm)2
with a maximum cable length of 8.2 ft (2.5m).

en-US - Installation
9
Mounting the cable strain relief
The connection cables of external hardware must be fastened to the
Connector Box using cable glands and cable strain-relief fixtures. See
Fig. in the “”chapter at the end of these operating and installa-
tion instructions.
Remove the lid from the Connector Box (remove the 2screws).
Remove one or more of the cable strain-relief fixtures a.
Stand the Connector Box on its narrow end so that the sealed con-
nection holes are at the top.
Using a screwdriver, press out the round indentation in the connec-
tion hole b.
Tip: Pierce through the groove round the edge at several places using
a screwdriver.
Insert the counter nut c.
Screw on the threaded fitting d.
Tip: Slide the screw cap e over the end of the connection cable for
the external hardware.
Guide the connection cable through the threaded fitting and into the
Connector Box.
Tighten the screw cap.
The screw cap provides protection against moisture and dust.
Secure the connection cable with the strain relief f.
Make the required connections for the external hardware in the
Connector Box.
Close the lid on the Connector Box (screw in the 2screws).
Key for cable strain relief in Fig. in the “”chapter
aCable strain-relief fixtures
bConnection hole
cCounter nut
dThreaded fitting
eScrew cap
fCable strain relief with screws
Programming
Once the Connector Box has been installed, the settings for the ex-
ternal functions have to be made on the corresponding Miele Profes-
sional Washing Machine.
Follow the instructions provided in the operating and installation in-
structions for the Miele Professional Washing Machine.
To enable communication with external hardware (payment device,
dispensing unit, etc.), settings/configurations need to be made on the
Miele Professional Washing Machine.

en-US - Installation
10
Current carrying capacity of the inputs and outputs
During installation, make sure that the current consumption of the
additional components to be connected does not exceed the per-
missible individual currents and total current consumption in the
neutral conductor.
During installation, make sure that connecting the washing ma-
chine/tumble dryer in combination with the Connector Box and the
associated hardware does not exceed the total fuse rating of the
electricity supply.
The inputs and outputs are designed specifically for currents, as de-
scribed in the “Current carrying capacity table” section.
The switching element for contact 3.3 is designed in such a way that
a fan and frequency converter can be connected.
When connecting external hardware provided by other manufactur-
ers, the cable cross-section must not be less than 1/16" (1mm)2 with
a maximum cable length of 8.2 ft (2.5m).
Empty sensing Empty sensing is connected to terminals 4.1 and 4.2. These meet
safety extra-low voltage requirements (class III).
The specifications of the sensor manufacturer must be observed.
The cables must be routed separately from all other cables.
Installing a payment system
Payment system
in timed operation The wiring diagram is provided at the end of these operating and in-
stallation instructions in section (“Timed operation”).
- C4030, C4031, C4065, C4070, C4080
- C5003
Payment system
in program opera-
tion
The wiring diagram is provided at the end of these operating and in-
stallation instructions in section (“Program operation”).
- C4030, C4031, C4060, C4065, C4070, C4080
- C5002, C5004

en-US - Installation
11
Legend
1 6
2 7 5
3 4
7-pin coupling of the payment device
The 7-pin coupling of the payment device can be removed
to connect the cables directly with the Connector-Box ter-
minals.
Connec-
tor Box
Terminal sockets of the Connector Box
CSchematic diagram of the electrical circuit in the payment
device
Timed operation
Program operation
Symbol for PE terminal (ground)

en-US - Installation
12
Coding 1 function and current carrying capacity table
App
lication
Terminal
assign
ment
Signal Signal
direction
Current
carrying
capacity
Description and function
Ground
wire
PE PE Ground wire
PE PE Ground wire
PE PE Ground wire
PE PE Ground wire
Peak-load
negotiation
1.1 L' 1.0A a Output switch-on message
1.2 N' 1.0A b Output heating demand
1.3 L' cInput heating enable
1.4 N' d Neutral conductor
Payment system
2.1 L' 0.5A Machine ready for operation
2.2 L' 0.5A Program status
2.3 L' Program buying impulse
2.4 N' Time buying signal
2.5 N' Voltage
2.6 L'
Dispensing
3.1 N' 1.0A Ext. power supply
3.2 L' 1.0A
3.3 L' 1.0A Dispensing 1
3.4 N' 1.0A
3.5 L' 1.0A Dispensing 2
3.6 N' 1.0A
Dispensing
3.7 L' 1.0A Dispensing 3
3.8 N' 1.0A
3.9 L' 1.0A Dispensing 4
3.10 N' 1.0A
Dispensing
3.11 L' 1.0A Dispensing 5
3.12 N' 1.0A
3.13 L' 1.0A Dispensing 6
3.14 N' 1.0A
Program signals
4.1 L' Program stop output
4.2 N'
4.3 L' Block end output
4.4 N'
4.5 Switching
signal
Reference
potential for
4.5
Program stop input
(Voltage source)
4.6

en-US - Installation
13
App
lication
Terminal
assign
ment
Signal Signal
direction
Current
carrying
capacity
Description and function
Dispensing
5.1 L' Container empty signal 1
5.2 N'
5.3 L' Container empty signal 2
5.4 N'
5.5 L' Container empty signal 3
5.6 N'
Dispensing
5.7 L' Container empty signal 4
5.8 N'
5.9 L' Container empty signal 5
5.10 N'
5.11 L' Container empty signal 6
5.12 N'
Dispensing
6.1 +13V
Flow rate dis16.2 FM1
6.3 GND
6.4 +13V
Flow rate dis26.5 FM2
6.6 GND
Dispensing
6.7 +13V
Flow rate dis36.8 FM3
6.9 GND
6.10 +13V
Flow rate dis46.11 FM4
6.12 GND
Dispensing
6.13 +13V
Flow rate dis56.14 FM5
6.15 GND
6.16 +13V
Flow rate dis66.17 FM6
6.18 GND
Water inlet
7.1 +13V
Flow meter 17.2 FRZ1
7.3 GND
7.4 +13V
Flow meter 27.5 FRZ2
7.6 GND
Water
inlet
7.7 +13V
Flow meter 37.8 FRZ3
7.9 GND
Coding
8.1 COD1 Jumper from 8.1to 8.3
8.2 COD2 Not used
8.3 GND Jumper from 8.1to 8.3
L' = switched phase, N' = switched neutral conductor
* see section “Current carrying capacity of the inputs and outputs”
Total current load of electronic: see section “Installation”.

en-US - Installation
14
Coding 2 function and current carrying capacity table
App
lication
Terminal
assign
ment
Signal Signal
direction
Current
carrying
capacity
Description and function
Ground
wire
PE PE
Ground wire
PE PE
PE PE
PE PE
WRG
1.1 L' 1.0A WRG pump ON
1.2 N' 0.5A WRG valve
1.3 L' Not used
1.4 N' Not used
WRG
2.1 L' 0.5A WRG drainage
2.2 L' 0.5A WRG intake
2.3 L' Not used
2.4 N' WRG pos. closed
2.5 N' Not used
2.6 L' Not used
Dispensing
3.1 N' 1.0A Ext. power supply
3.2 L' 1.0A
3.3 L' 1.0A Dispensing 7
3.4 N' 1.0A
3.5 L' 1.0A Dispensing 8
3.6 N' 1.0A
Dispensing
3.7 L' 1.0A Dispensing 9
3.8 N' 1.0A
3.9 L' 1.0A Dispensing 10
3.10 N' 1.0A
Dispensing
3.11 L' 1.0A Dispensing 11
3.12 N' 1.0A
3.13 L' 1.0A Dispensing 12
3.14 N' 1.0A
Program signals
4.1 L' Not used
4.2 N'
4.3 L' Not used
4.4 N'
4.5 Switching
signal
Reference
potential for
4.5
Not used
4.6

en-US - Installation
15
App
lication
Terminal
assign
ment
Signal Signal
direction
Current
carrying
capacity
Description and function
Dispensing
5.1 L' Container empty signal 7
5.2 N'
5.3 L' Container empty signal 8
5.4 N'
5.5 L' Container empty signal 9
5.6 N'
Dispensing
5.7 L' Container empty signal 10
5.8 N'
5.9 L' Container empty signal 11
5.10 N'
5.11 L' Container empty signal 12
5.12 N'
Dispensing
6.1 +13V
Flow rate dis76.2 FM1
6.3 GND
6.4 +13V
Flow rate dis86.5 FM2
6.6 GND
Dispensing
6.7 +13V
Flow rate dis96.8 FM3
6.9 GND
6.10 +13V
Flow rate dis106.11 FM4
6.12 GND
Dispensing
6.13 +13V
Flow rate dis116.14 FM5
6.15 GND
6.16 +13V
Flow rate dis126.17 FM6
6.18 GND
Water inlet
7.1 +13V
Flow meter 47.2 FRZ1
7.3 GND
7.4 +13V
Flow meter 57.5 FRZ2
7.6 GND
Water
inlet
7.7 +13V
Flow meter 67.8 FRZ3
7.9 GND
Coding
8.1 Code1 Not used
8.2 Code2 Jumper from 8.2to 8.3
8.3 GND Jumper from 8.2to 8.3
L' = switched phase, N' = switched neutral conductor
* see section “Current carrying capacity of the inputs and outputs”
Total current load of electronic: see section “Installation”.

en-US - Electrical connection
*INSTALLATION*
16
Electrical connection
The Connector Box is supplied with voltage by the Miele Professional
Washing Machine.
The Connector Box does not have an additional On/Off switch.
Damage to the Connector Box due to incorrect connection.
Excess current can damage the Connector Box.
The Connector Box must not be connected to an external voltage.
Technical data
Voltage 200V–240V
Frequency 50Hz/60Hz
Temperature
range for operation
36°F-95°F (2°C–35°C)

17

(Timed operation)
18
C4030, C4031, C4065, C4070, C4080
2.1
2.2
2.3
2.4
2.5
2.6
3.1
3.2
Connector Box
C
1 2 3 4 5 6 7
–>
–>
–>
N´
–>
–>
–>
L
N´
L
1 6
2 7 5
3 4
C5003
2.1
2.2
2.3
2.4
2.5
2.6
3.1
3.2
Connector Box
C
1 2 3 4 5 6 7
N NL
1 6
2 7 5
3 4
–>
–>
–>
–>
–>
–>

(Program operation)
19
C4030, C4031, C4065, C4070, C4080
2.1
2.2
2.3
2.4
2.5
2.6
3.1
3.2
Connector Box
C
1 2 3 4 5 6 7
–>
–>
–>
N´
–>
–>
–>
L
N´
L
–>
–>
1 6
2 7 5
3 4
C4060, C5002, C5004
2.1
2.2
2.3
2.4
2.5
2.6
3.1
3.2
Connector Box
C
1 2 3 4 5 6 7
N L
1 6
2 7 5
3 4
–>
–>
–>
–>
–>
–>
–>
–>
L

en-AU, NZ - Contents
20
Caring for the environment ............................................................................................ 21
Warning and Safety instructions.................................................................................... 22
Technical safety................................................................................................................. 22
Functional description .................................................................................................... 24
How it works...................................................................................................................... 24
Installation........................................................................................................................ 25
Current carrying capacity of the inputs and outputs......................................................... 27
Installing a payment system.............................................................................................. 27
Coding 1 function and current carrying capacity table..................................................... 29
Coding 2 function and current carrying capacity table..................................................... 31
Electrical connection ...................................................................................................... 33
Electrical connection......................................................................................................... 33
...................................................................................................................................... 34
(Timed operation) ....................................................................................................... 35
(Programme operation) ............................................................................................ 36
Other manuals for PWM 514
5
This manual suits for next models
7
Table of contents
Languages:
Other Miele Washer manuals

Miele
Miele PW 6241 User manual

Miele
Miele Distinction 500 User manual

Miele
Miele PWM 912 User manual

Miele
Miele W 3364 WPS User manual

Miele
Miele W 1724 User manual

Miele
Miele PWM 916 SI/SD User manual

Miele
Miele PWM 912 EL User manual

Miele
Miele WCE 330 User manual

Miele
Miele W 1724 User manual

Miele
Miele W 969 User manual

Miele
Miele PW 6163 EL/D User manual

Miele
Miele PG 8591 User manual

Miele
Miele WKH 120 WPS User manual

Miele
Miele WDB 030 User manual

Miele
Miele PFD 104 SCVi User manual

Miele
Miele WSD164 User manual

Miele
Miele W 4802 Manual

Miele
Miele PWM 514 User manual

Miele
Miele W 2809i User manual

Miele
Miele WDB020 Eco User manual