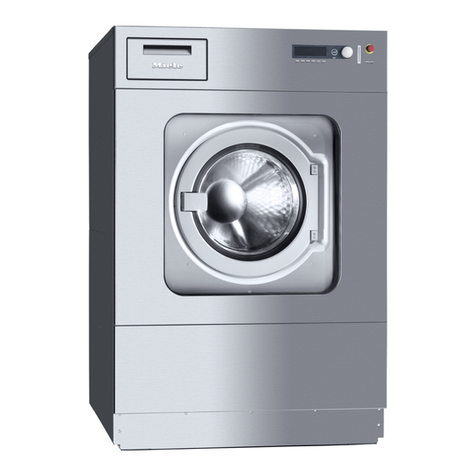
Miele W 6073 (MC 23) User manual

Operating instructions
Washer-Extractor
W 6073 (MC 23)
To avoid the risk of accidents or damage to the machine it is en - GB
essential to read these instructions before installing,
commissioning and using it for the first time. M.-Nr. 06 006 842

2 M.-Nr. 06 006 842

Warning and Safety Instructions . . . . . . . . . . . . . . . . . . . . . . . . . . . . . . . . . . . . . . . . . . . . . . . 4
Caring for the environment . . . . . . . . . . . . . . . . . . . . . . . . . . . . . . . . . . . . . . . . . . . . . . . . . . . . 7
Guide to the machine. . . . . . . . . . . . . . . . . . . . . . . . . . . . . . . . . . . . . . . . . . . . . . . . . . . . . . . . . 8
Washing. . . . . . . . . . . . . . . . . . . . . . . . . . . . . . . . . . . . . . . . . . . . . . . . . . . . . . . . . . . . . . . . . . . 12
Before using for the first time . . . . . . . . . . . . . . . . . . . . . . . . . . . . . . . . . . . . . . . . . . . . . . . . . . . 12
Preparing the wash load . . . . . . . . . . . . . . . . . . . . . . . . . . . . . . . . . . . . . . . . . . . . . . . . . . . . . . 12
Programme selection . . . . . . . . . . . . . . . . . . . . . . . . . . . . . . . . . . . . . . . . . . . . . . . . . . . . . . . . . 13
Opening the drum door at the end of the programme. . . . . . . . . . . . . . . . . . . . . . . . . . . . . . . . 14
Dispensing detergent. . . . . . . . . . . . . . . . . . . . . . . . . . . . . . . . . . . . . . . . . . . . . . . . . . . . . . . . 15
Bleaching agents/Fabric conditioner/ Starch . . . . . . . . . . . . . . . . . . . . . . . . . . . . . . . . . . . . . . . . 15
Additional functions. . . . . . . . . . . . . . . . . . . . . . . . . . . . . . . . . . . . . . . . . . . . . . . . . . . . . . . . . 17
Selecting a programme with a coin unit in use . . . . . . . . . . . . . . . . . . . . . . . . . . . . . . . . . . . . . 18
Delay Start . . . . . . . . . . . . . . . . . . . . . . . . . . . . . . . . . . . . . . . . . . . . . . . . . . . . . . . . . . . . . . . . . 18
Programme changes . . . . . . . . . . . . . . . . . . . . . . . . . . . . . . . . . . . . . . . . . . . . . . . . . . . . . . . . 19
Cleaning and Care . . . . . . . . . . . . . . . . . . . . . . . . . . . . . . . . . . . . . . . . . . . . . . . . . . . . . . . . . . 22
Problem solving guide. . . . . . . . . . . . . . . . . . . . . . . . . . . . . . . . . . . . . . . . . . . . . . . . . . . . . . . 25
Opening the drum door in the event of a power failure . . . . . . . . . . . . . . . . . . . . . . . . . . . . . . . 25
Possible reasons for increased levels of foaming . . . . . . . . . . . . . . . . . . . . . . . . . . . . . . . . . . . 27
After sales service . . . . . . . . . . . . . . . . . . . . . . . . . . . . . . . . . . . . . . . . . . . . . . . . . . . . . . . . . . 28
Explanation of symbols on the data plate . . . . . . . . . . . . . . . . . . . . . . . . . . . . . . . . . . . . . . . 29
Notes for the installer. . . . . . . . . . . . . . . . . . . . . . . . . . . . . . . . . . . . . . . . . . . . . . . . . . . . . . . . 30
Transit fittings . . . . . . . . . . . . . . . . . . . . . . . . . . . . . . . . . . . . . . . . . . . . . . . . . . . . . . . . . . . . . . . 30
Connection to water supply . . . . . . . . . . . . . . . . . . . . . . . . . . . . . . . . . . . . . . . . . . . . . . . . . . . .31
Electrical connection . . . . . . . . . . . . . . . . . . . . . . . . . . . . . . . . . . . . . . . . . . . . . . . . . . . . . . . . . 32
EU Declaration of Conformity . . . . . . . . . . . . . . . . . . . . . . . . . . . . . . . . . . . . . . . . . . . . . . . . . 33
Guarantee . . . . . . . . . . . . . . . . . . . . . . . . . . . . . . . . . . . . . . . . . . . . . . . . . . . . . . . . . . . . . . . . .35
Contents
M.-Nr. 06 006 842 3
The washer-extractor must be installed by an approved
service technician or an authorised Service Dealer.

Please read the operating instructions
before using this machine for the first
time. They contain important information
about the safety, use and maintenance of
the machine. This will avoid the risk of
accidents and damage to the machine.
Appropriate use of the machine
This washer extractor is only intended for
items of laundry which have not been
impregnated with dangerous or inflammable
substances.
Only machine wash articles which
possess a care label stating they are
suitable for machine washing.
It is the operator’s responsibility to
ensure that the standard of disinfection
in thermal as well as chemo thermal
procedures is maintained (in accordance
with § 18 IFSG) by carrying out suitable
validation tests. These procedures should
be checked on a regular basis, either
thermo-electrically using loggers, or
bacteriologically with bio indicators. The
operator must pay particular attention to
maintaining the correct parameters in the
procedure, including temperature and with
chemo thermal programmes the chemical
concentration used. Disinfection
programmes must not be interrupted, as this
can have a limiting effect on the disinfection
result.
On no account must solvents of the kind
used for dry cleaning be used in this
machine. There may be the danger of fire or
explosion.
Never use or store petrol or petroleum
based substances or any easily
inflammable substances near the machine.
Do not use the machine lid as a resting
place.
Danger of fire or explosion
Technical and electrical safety
The electrical safety of this machine can
only be guaranteed when continuity is
complete between it and an effective
earthing system which complies with local
and national safety regulations.
It is most important that this basic safety
requirement is regularly tested by a qualified
electrician. The manufacturer cannot be held
liable for the consequences of an
inadequate earthing system.
Do not damage, remove or bypass the
safety features and controls on the
machine.
Where there is any damage to the
machine or to the cable insulation the
machine must not be used until it has been
repaired.
Any removable outer panels must be in
place, and all moving or electrical parts
shielded before the machine is operated.
The machine is only completely isolated
from the electricity supply either when
switched off at the wall isolator, or the mains
fuse is withdrawn from the socket.
Repairs should only be undertaken by a
suitably qualified service engineer to
ensure safety. Unauthorised repairs could be
dangerous.
Faulty components should only be
exchanged for Miele original spare parts.
Only when these parts are fitted can the
safety standards of the machine be
guaranteed.
The very best materials are used in the
manufacture of this machine, and every
care is taken in its manufacture. However,
with time, deterioration of parts can occur,
especially with rubber components such as
hoses. Check the inlet hoses regularly for
signs of deterioration and replace in good
time, to avoid leaks and subsequent
damage.
Warning and Safety Instructions
4 M.-Nr. 06 006 842
Use of the machine
This washer extractor is not intended for
use by persons (including children) with
reduced physical, sensory or mental
capabilities, or lack of experience or
knowledge, unless they have been given
supervision or instruction concerning its use
by a person responsible for their safety.
Never allow children to play in, on or
near the washer extractor, or to operate it
themselves. Please supervise its use by the
elderly or infirm.
Remember that the door porthole glass
can become hot during the operation of
the machine. Do not let children touch it.
When washing with high temperatures
steam can be emitted from the venting
slot behind the machine.
Do not grip between the suspended
drum unit and the seal of the front panel
cut-out during spin.
Always make sure the drum is stationary
before reaching in to remove washing.
Reaching into a moving drum is extremely
dangerous.
Water used for washing and rinsing must
not be used as drinking water. It must be
discharged into a proper drainage system.
The machine should only be operated
unsupervised when there is a floor drain
(gully) in the direct vicinity of the machine.
To avoid flooding:
If hooking the hose into a sink make sure
that the water can flow away freely to avoid
flooding.
Secure the hose against slipping. The
pressure of the water flowing out can push
an unsecured hose out of the sink.
Disinfecting and cleaning agents often
have compounds containing chlorides in
them. If these agents dry on to stainless
steel surfaces, the residual chlorides will
attack the steel and can cause rusting.
To protect your machine from rust damage,
we recommend only using chloride free
disinfecting and cleaning agents for washing
and disinfecting programmes and for
cleaning stainless steel surfaces of the
machine itself.
If you are not sure about a particular agent,
contact the manufacturer of that agent for
advice.
If you accidentally spill an agent containing
chlorides on the machine it should be rinsed
off with water and dried using a soft cloth.
Proprietary dyes, dye removers and
descaling agents may only be used in
this machine if the manufacturer expressly
states that they are suitable for use in a
washing machine. Follow the instructions on
the packaging.
Laundry that was soiled with biological
oils or fat should be washed using a
suitable detergent and/or wash programme.
It must also be inspected after washing. If
oils or fat are not sufficiently removed they
could cause the laundry to self ignite during
the drying process.
Always follow the instructions of the
chemical manufacturer when using a
combination of cleaning agents and special
application chemicals. Only use such
chemicals for the purpose and in the
situation specified by the manufacturer in
order to avoid the danger of adverse
chemical reactions and material damage.
If in doubt check the suitability of the
product for use in this machine with the
manufacturer before using it.
Warning and Safety Instructions
M.-Nr. 06 006 842 5

Where a chemical cleaning agent is
recommended on technical application
grounds, this does not imply that the
manufacturer of the machine takes
responsibility for the effect of the chemical
on the material of the items being cleaned or
on the machine.
Please be aware that changes in
formulation, storage conditions etc., which
may not be publicised by the chemical
producer, can have a negative effect on the
cleaning result.
On no account use pressure washers or
hose down the machine to clean it.
Use of accessories
Accessory parts may only be fitted when
expressly approved by Miele. If other
parts are used, guarantee, performance and
product liability claims may be invalidated.
Chlorine and component damage
Notes on using chlorine bleach and
perchlorethylene
Frequent use of chlorine increases the
risk of component damage.
The use of agents containing chlorine, such
as sodium hypochlorite and chlorine bleach
in powder form, can damage the protective
surface of stainless steel and cause
corrosion. Factors affecting this are chlorine
concentration levels, contact time and
temperature. It is therefore advisable to
avoid the use of such agents. Oxygen based
bleaching agents should be used instead.
If, however, chlorine based bleaching
agents have to be used for particular types
of soiling, then anti-chlorine measures must
also be carried out. If this is not done
irreparable damage can occur to
components in the machine and to laundry.
Anti-chlorine treatment
Anti-chlorine treatment has to be carried out
immediately after chlorine bleach has been
used. Hydrogen peroxide and oxygen based
cleaning and bleaching agents must only be
used in programmes specified for their use.
Any wash performance problems should be
discussed with the manufacturer of the
cleaning / bleaching product in the first
instance.
With thiosulfate, especially when used with
hard water, gypsum can form, which can
lead to incrustations on laundry or deposits
in the machine.
The exact quantity of additives and the
treatment temperatures required must be set
and tested on site in accordance with the
dosage recommendations of the detergent
and additive manufacturers. The laundry
must also be tested to make sure it contains
no active chlorine residues after processing.
Disposal of old machines
When disposing of an old washer-
extractor first make it unusable.
Disconnect from all services.
Make the door lock inoperative, so that
children cannot accidentally shut
themselves in. Make appropriate
arrangements for the safe disposal of the
machine.
All personnel working with this machine
must be fully trained in all aspects of its
use and safety.
Keep these instructions in a safe place
Warning and Safety Instructions
6 M.-Nr. 06 006 842

Disposal of the packing material
The transport and protective packing has
been selected from materials which are
environmentally friendly for disposal and can
normally be recycled. Packaging e.g. cling
film, polystyrene and plastic wrappings must
be kept out of the reach of babies and
young children. Danger of suffocation.
Rather than just throwing these materials
away, please ensure that they are recycled.
Disposal of your old machine
Electrical and electronic machines often
contain materials which, if handled or
disposed of incorrectly, could be potentially
hazardous to human health and to the
environment. They are, however, essential
for the correct functioning of your machine.
Please do not therefore dispose of it with
your household waste.
Please dispose of it at your local community
waste collection/recycling centre, and
ensure that it presents no danger to children
while being stored for disposal.
It should be unplugged or disconnected
from the mains electricity supply by a
competent person.
Caring for the environment
M.-Nr. 06 006 842 7

W 6073 washer extractor with drain valve or drain pump option
This machine is constructed in accordance with IEC 60204-1:2005
1-Detergent dispenser box 7-Cable entry for extra equipment
2-Control panel 8-Cable entry for dispenser pumps
3-Drum door 9-Cable entry for power supply
4-Front panel 10 -Venting socket
5-Access flap for suds filter/drainage system 11 -Cold water connection
and emergency door release 12 -Hot water connection
6-Four adjustable screw feet 13 -Openings for dispenser hoses
14 -Drainage hose (for drain pump version)
15 -Back wall
16 -Drainage (for dump valve version)
17 -Air gap (United Kingdom only)
Control panel
12 3 4 5
1-Spin speed selector
2-Temperature and time left display, Delay start
3-Push button switches
4-Programme sequence indicator lights
5-Programme and Temperature selector
Guide to the machine
8 M.-Nr. 06 006 842

Push button switches
aDoor
Opens the drum door, releases the
"With pre-wash" or "Starch" or "No final
spin" buttons, if any of these had been
pushed in.
+iwith Pre-wash
Can be selected with programmes
A,B,C,E
mStarch
Can be selected with programmes
A,B,E,F
wNo final spin
Can be selected with programmes
A,B,C,D,E,F
hStart
Starts the programme
Display
Time display h(rs)/min(s)
This display shows how long the wash
programme still has to run or with "Delay
start" the period of delay.
Indicator light mmin lights up.
or
Temperature oC
From 20 oC the temperature is shown rising
in 5 oC increments.
Indicator light p°C lights up.
mmin Time left
p°C Temperature
dDelay start
The start of a programme can be delayed up
to a maximum of 24 hours.
Guide to the machine
M.-Nr. 06 006 842 9
h min / °C

Programme sequence indicator lights
Spin speed (rpm) selector
Spin speeds of 800, 1000 or 1200 rpm can
be chosen for the final spin.
Maximum spin speed per programme
ACottons
DWool
EShort programme
GSeparate spin
1200 rpm.
BMinimum iron
FSeparate rinse 900 rpm.
CDelicates/Synthetics 600 rpm.
Programme and Temperature selector
Programmes
ACottons
BMinimum iron
CDelicates/Synthetics
DWoollens
EShort programme
FSeparate Rinse
GSeparate Spin
HSeparate Drain
Guide to the machine
10 M.-Nr. 06 006 842
On/Start
Pre-wash
Main wash
Rinses
Rinses
Rinses/Starch
Drain
Final spin
End
Water inlet/drain

Detergent dispenser compartments
Compartment i- Pre-wash
Compartment j- Main wash
Compartment x- Liquid bleach
Compartment p- Fabric conditioner
Guide to the machine
M.-Nr. 06 006 842 11

Before using for the first time
The first commissioning of the machine
should be carried out only by a Miele
service technician or an authorised Miele
Service Dealer.
It is essential that the machine is installed
and connected to power, water and
drainage correctly.
Flushing out the machine
Any residual lubricants and water from
testing still in the machine should be flushed
out as follows:
^Do not load any laundry in the machine.
^Add a little detergent to compartment j.
^Turn the programme selector switch to the
"ACottons 60°C" programme.
^Press the" hStart" button.
^At the end of the proramme turn the
programme and temperature selector to
the " rEnd" position.
Preparing the wash load
^Empty all pockets.
Foreign objects, (eg nails, coins, paper
clips etc) can cause damage to textiles
and components in the machine.
Sort the laundry
Most garments have a textile care label in
the collar or side seam. Sort the laundry by
care label symbols.
Only wash items in this machine which are
stated by the manufacturer to be machine
washable on the textile care label.
Dark textiles often contain excess dye, and
should be washed separately several times
before being included in a mixed load.
Delicate textiles should be washed
separately in a delicates programme.
Loading the drum
Unfold laundry and load loosely in the drum.
For best results make up mixed loads of
large and small items. This improves the
washing effect and distributes the load
better for spinning.
Overloading reduces the wash result and
causes more creasing.
Washing
12 M.-Nr. 06 006 842

Maximum load (weight of dry washing):
ACottons 7.5 kg
BMinimum iron 3.0 kg
CDelicates/Synthetics 1.5 kg
DWoollens 1.5 kg
EShort programme 7.5 kg
^Shut the drum door
Grasp the door in the open position and
slam it shut, (mind your fingers).
At first the door may shut with difficulty.
This eases in due course.
Make sure no items of washing are caught
when the door is closed, or they could be
damaged.
^Open the on-site stopcock.
^Switch on the on-site main switch.
^Add detergent for the main wash to
compartment j- and if required
detergent for the pre-wash to compartment
i, fabric conditioner to compartment p
and liquid bleach to compartment x.
Programme selection
^Select programme and temperature (e.g.
programme ACottons 95 oC).
Washing
M.-Nr. 06 006 842 13

^Additionally select pre-wash if required but
only with programmes A,B,C,E.
Press the "+iwith pre-wash" button.
^Press the " hStart" button.
- The indicator light " mmin" goes out and
the indicator light "p°C" lights up. -
- The wash programme starts.
Temperature display
After the programme start the current suds
temperature for the main wash is shown in
5 °C increments until the set temperature
has been reached.
The indicator light " p°C Temperature" lights
up.
Time display (Time left)
Once the temperature set for the main wash
has been reached the time left for the
programme to run shows in the display in
hours and minutes.
The " mmin time" indicator lights up.
The time left counts down in 1 minute
intervals.
Opening the drum door at the end
of the programme
After the " rEnd " indicator lights up:
^Press the " aOpen door" button
- the drum door opens.
^Take out the laundry.
Only remove laundry from the machine once
the drum has stopped turning, otherwise you
may seriously injure yourself.
Make sure the drum is empty, otherwise,
when the machine is next used items may
become damaged (e.g. shrink) or cause
other laundry to discolour.
If no more laundry is to be done:
^leave the drum door open.
^switch the machine off, and switch off at
the mains.
^turn off the stopcock(s).
Washing
14 M.-Nr. 06 006 842
?
?

Water hardness levels
Hardness
range Water
quality
Hardness
level in
mmol/l
German
hardness
level °d
I soft 0 – 1.3 0 - 7
II medium 1.3 – 2.5 7 - 14
III hard 2.5 – 3.8 14 - 21
IV very hard over 3.8 over 21
If you do not know the hardness level of the
water in your area you should contact your
local water authority for information.
Dispensing detergent
Add the right amount of detergent as
recommended on the packaging. It is
important to avoid overdosing as it can lead
to excessive foam. Use a low foaming
detergent.
The amount dispensed will depend on the
following:
– the quantity of laundry
– the water hardness level
– the level of soiling.
Too little detergent results in the
following:
–The laundry will not be properly clean and
will in time become grey and hard to
touch.
–Greasy particles cling to the laundry.
–Lime deposits on the heater elements.
Too much detergent results in the
following:
–Excessive foam.
–Low level of agitation.
–Poor washing, rinsing and spin results.
Bleaching agents/Fabric conditioner/
Starch
Bleaching agents
Only use bleaching agents on textiles with
the symbol xon the care label.
Liquid bleaching agents must only be added
to the compartment marked x. The agent
will then be dispensed automatically during
the 2nd rinse (cold bleaching).
Liquid bleaching agents should only be
used with coloureds if the textile
manufacturer’s care label states that the
textile is colour fast and suitable for
bleaching.
For cold bleaching the 4th rinse must be
programmed, (see Programmable
functions).
Fabric conditioner
Dispense according to the manufacturer’s
recommendations:
^Open the lid of compartment p.
^Add fabric conditioner, but do not exceed
the max. level mark.
^Close the compartment lid.
The conditioner is automatically dispensed
in the last rinse. At the end of the
programme a small amount of water remains
in the fabric conditioner compartment.
Dispensing detergent
M.-Nr. 06 006 842 15

Powder and liquid starch
^Prepare and dispense the starch solution
as stated on the packaging.
Automatic dispensing of liquid starch
^Pour the liquid starch into compartment
p(do not exceed the marker level).
^Close the compartment lid.
Adding liquid or powder starch by hand
^Select the programme required and also
push in the "Starch m" button. The
programme, and the "time left" indicator
will pause before the last rinse.
The starch "m" indicator light comes on.
^Add starch formulation to compartment
i.
^Press the "mStarch" button to release it
for the programme to continue.
"wNo final spin" can be selected to keep
creasing to a minimum. The water is drained
away, and the load can be taken dripping
wet from the drum.
Dispensing detergent
16 M.-Nr. 06 006 842
By pressing one or more buttons
programmes can be adapted to offer
additional functions.
+i"With pre-wash"
For heavily soiled or stained textiles in
programmes A,B,C,E.
m"Starching"
For freshly washed textiles such as table
cloths, napkins, work wear etc., in
programmes A,B,E,F.
w"No final spin"
Washing which is not to be spun but taken
dripping from the machine in programmes
A,B,C,D,E,F.
Changing programme sequence
The programme can be changed at any time
where it makes sense.
^Turn the programme selector to the
required programme. The new programme
will carry on at the relevant stage.
Exceptions:
If the programme selector has been turned
through "rEnd".
Opting into or out of the following
programmes:
–FSeparate rinse
–GSeparate spin or
–HSeparate drain
breaks off the programme. The "hStart"
button must be pressed in again to start the
required programme.
When working through a coin unit or coin
counter the programme is locked after 3
minutes and no changes are possible.
Cancelling a programme
Turn the programme selector to " rEnd".
The indicator lights flash through the other
programme stages until the " rEnd" light is
reached.
To omit a programme stage
^Turn the programme selector to " rEnd".
As soon as the programme sequence light
for the stage at which the programme should
continue starts flashing:
Turn the selector switch to the appropriate
programme within 3 seconds.
To repeat a programme stage
A programme stage must have been
finished before it can be repeated:
^turn the programme selector switch to
"rEnd".
When" rEnd" illuminates in the sequence
display:
^Select the new programe required.
^Press the " hStart" button.
^After approx. 5 seconds, turn the
programme selector switch to " rEnd"
again.
As soon as the indicator light of the
programme stage to be repeated starts
flashing:
^turn the programme selector switch to the
appropriate programme within a period of
3 seconds.
Additional functions
M.-Nr. 06 006 842 17
Programmable functions
It is possible to programme additional
functions or change programme sequences.
See Programme changes.
Any changes to the standard machine
version must be noted on the Programme
change chart in this booklet as a record for
any subsequent servicing work. This is of
particular importance for the service
technician, when electronic units may need
to be exchanged.
Coin operating mechanism / coin unit
Selecting a programme with a coin
unit in use
^Open the on-site stopcock(s). Switch on
the on-site mains switch.
^Select a programme and temperature.
m"Starching", w""No final spin" and
d"Delay start" are not available with coin
operation.
^Add detergent and fabric conditioner.
^Insert coins/tokens.
^Press the " hStart" button.
Coin unit C 5002, C 5003, C 4060
Coins or tokens are "lost" if any of the
following are done after the coins have been
inserted but before the " hStart" button has
been pressed:
–the machine door is opened,
–the programme selector has been turned
past " rEnd" to another programme.
–a programme is interrupted for more than
20 seconds with the coin time counter.
Note for the supervisor:
Coins and tokens should be emptied on a
regular basis to ensure the coin box does
not get jammed full.
Delay Start
After the drum door has been shut and a
programme chosen the "mmin" light flashes
as a reminder of the "Delay start" option.
With the "dDelay start" button a delay of up
to 9 hours 30 minutes can be pre-selected,
in 30 minute steps, and beyond this in
one-hour steps up to 24 hours.
After the delay start time has been set, press
the "hStart" button to confirm the
command. The time display counts down
showing how many hours and minutes it is
until the programme starts automatically.
"Delay start" can be cancelled before the
"hStart" button has been pressed by
turning the programme selector to "rEnd".
At the end of the delay period the
programme starts and the "mmin" indicator
light goes out. The "Time min." /
"Temperature oC" display shows the water
temperature until the drain valve opens at
the end of the Main wash. From this moment
to the end of the programme the time left is
shown.
Additional functions
18 M.-Nr. 06 006 842

To change individual programmes by
re-programming
Programmes can be changed individually to
accommodate different wash processes and
methods.
20 Programmable functions can be changed
with up to 4 Options.
Before starting:
The on-site mains switch must be switched
on.
A previous programme must be completed.
The drum door must be open.
All the other buttons must be inoperative, i.e.
not pushed in.
The programme selector must be at the
"rEnd" position. Spin speed selector can
be at any position.
To access programming mode
^After the drum door is shut the "+iwith
pre-wash" button must be pressed in and
released twice within 4 seconds.
- A " " (for Programming) will appear in the
display after 4 seconds.
- The programme sequence indicators
"Pre-wash" and "Main wash" flash.
- Re-programming can be carried out (see
example).
Programme changes
M.-Nr. 06 006 842 19
?

Example:
Changing the temperature holding time in
the main wash
The temperature holding time can be
changed from 10 minutes to 5 or 15 or 20
minutes.
15 minutes is required.
Option 3 corresponds to 15 mins.; see
Programme Change Chart No.8 / B95
Temperature holding time in minutes.
^Turn the programme selector to B/ 95 oC.
"" flashes in the display.
^Press the " hStart" button 3 times.
The following appear one after another in the
display
(10 minutes), (5 minutes),
(15 minutes).
^Press the " a" open door button.
- Pressing the " a" open door button saves
the change in memory and completes the
programming process.
^Please enter this programming change in
the table on the following page.
^Turn the programme selector to the
"rEnd" position.
See the next page for further possible
programming changes.
Programme changes
20 M.-Nr. 06 006 842
?
?
Table of contents
Other Miele Washer manuals

Miele
Miele WWF 060 User manual

Miele
Miele W 211 User manual

Miele
Miele PWM 916 SI/SD User manual

Miele
Miele PW 5065 OS User manual

Miele
Miele W 3740 User manual

Miele
Miele W 5741 User manual

Miele
Miele W 463 User manual

Miele
Miele W 487 WPS User manual

Miele
Miele W 1203 WASHING MACHINE User manual

Miele
Miele W 3652 WPS User manual

Miele
Miele WMB 120 User manual

Miele
Miele PW 6065 OS User manual

Miele
Miele Paragon Plus User manual

Miele
Miele NOVOTRONIC W 1966 User manual

Miele
Miele PW 6321 User manual

Miele
Miele WCA020 WCS Active User manual

Miele
Miele W 5965 WPS User manual

Miele
Miele W 1926 WASHING MACHINE - OPERATING User manual

Miele
Miele W 5902 Premium Plus User manual

Miele
Miele WDB 030 ECO User manual