MIGEL GBC 5 User manual


1
GBC 5
100-240V~50/60Hz
5V 1200 mA
)Li-Ion(

2

3

4


6
0
7

8

1
GBC 5
Dear customer!
Thanks for your worthful choice and condence to Migel brand.We
really hope that you enjoy operating this product.
Charger)input(: 100-240V~50/60Hz
Charger)output(: 5V 1200mA
Battery type: Li-Ion
1. For you continued safety and to reduce the risk of injury or electric
shock,please follow all the safety precautions listed below .
2. This appliance is not intended for use by persons )including children(
with reduced physical, sensory or mental capabilities, or lack of experience
and knowledge, unless they have been given supervision or instruction
concerning use of the appliance by a person responsible for their safety.
- Children should be supervised to ensure that they do not play with the
appliance.
4. Always check the blades for alignment before use .
5. Do not use the appliance if the teeth are damaged.
The appliance can become hot during use,only use for a maximum of 15
minutes then allow t cool of 15 minutes .
6. The appliance is only intended for clipping human hairs,Do not use this
appliance for any other purpose.
7. Always check the appliance for damage prior to use .if any damage is
observed,do not use the appliance.
8. This appliance and charger have no user serviceable parts.Do not
attempt to access the appliance covers.
9. This appliance is for personal use only.It is not suitable for commercial
use.
10. Do not place the appliance on or near a heat sensitive surface.
11. Keep the appliance dry.
12. Do not use the appliance or handle the charger with wet hands.
Safety warning
Technical Data
English

2
Recharge the appliance using the supplied charger only.Do not use the
supplied charger to charge any other appliance.
13. Switch o the appliance before connecting it to the charger.
Switch o and unplug the appliance after use .
14. To protect against electric shock,never allow the appliance or charger
to come into contact with water or any other liquid.
15. Never reach for any appliance the has fallen into water.Switch o the
charger at the mains immediately and unplug.Do not re-use until the
product has been inspected and approved by a qualied electrician.
16. Never leave the appliance unattended when connected to the mains
power supply.
17. DO not attempt to replace the battery.
18. Lubricating oil must be placed away from re sources and out of the
reach of children.
19. Avoid your eyes from contacting the lubricating oil.
20. If lubricating oil enters the eyes,lay the person down,gently wash the
eyes with cold water from a container for 15 minutes,then seek medical
help.
21. Do not use the appliance on a damaged or broken skin.
22. Do not allow the appliance to be exposed to rain or moisture during
use or storage.
23. Do not expose the appliance excessive moisture,dust or dirt.
24. The appliance is intended for indoor use only. The appliance is only to
be used with the charger supplied with the appliance .
25. DO not throw away the appliance with the normal household waste at
the end of its life,but hand it in at an ocial collection point for recycling.
By doing this ,you help to preserve the environment.

3
Unpacking
In the box you will nd your hair clipper and the attachments.remove
all the acking from these and retain the packaging.if you dispose of it
.please do so according to any recycling regulations.if items are missing
or damaged,contact your nearest store for assistance.Read and retain this
instruction manual.if you pass the hair clipper to a third part,make sure to
include this instruction manual.
Product Overview
1. Clipper blades
2. Cutting length control :
0.8/1.2/1.6/2.0/2.5mm
3. ON/o switch
4. LCD charging display
5. Charging socket
6. Guide comb:12mm cut
7. Guide comb: 9mm cut
8. Guide comb:6mm cut
9. Guide comb:3mm cute
10. Cleaning brush
11. Lubricating oil
12. Charger
13. Base
Charging
Before using the clipper charger,ensure that the voltage of yore electricity
supply is the same as that indicated on the charger.Youre clipper contains
detachable re-chargeable batteries and may be used cordless for more
than 90 minutes when the batteries are fully charged .
IMPORTANT NOTE:The batteries must be charged for a minimum of 2.5
hours for the rst charge cycle. This will ensure the maximum life for the
batteries.
1
2
3
4
5
6
7
8
9
10
11
12
13

4
Operating instructions
WARNING: NEVER USE THE HAIR CLIPPER ON WATER HAIR.IT IS ONLY
DESIGNED FOR USE ON DRY HAIR.
When using this hair clipper for the rst time it is advisable to experiment
initially on an area of your light hair growth.
Fit a comb attachment
1. The comb attachments each cut hair to a dierent length.The cutting length is
marked on the comb.
2. Select the comb attachment for the cutting length you require.Fit one of the comb
attachments by sliding it onto the clipping blade as shown until it is fully engaged.
NOTE: it is advisable to start with the longest cut 12mm and cut again with a
dierent comb if a shorter cut is requires.
Setting the cutting length
To set the cutting length,rotate the cutting length control ring to youre
desired cutting length 0.8/1.2/1.6/2.0/2.5mm.The cutting length is marked
on the cutting length control ring as shown.
Cutting hair
1. Before starting,comb the hair in the direction of your hair growth as shown.
2. Switch on the clipper by sliding the On/O swith to“O”position.When the
clipper has adequate power,the LCD display will illuminate. If the LCD display
ashed red,the clipper should be recharged at the rst opportunity.
3. Pressing the comb against the head,start by clipping the sides from the
bottom of the head upwards.Slowly move the clipper up towards the top of
the head cutting small amounts at a time .
4. Repeat step 3 around both sides and the back.
5. Clip the top of the head from front to back.
NOTE: Do not push the clipper or force the clipper through the hair.
To Contour the neckline and area around the ears
WARNING:The clipper blades are very sharp when unguarded.
CAUTION:Care should be taken when using the clipper without the guid comb
tted as the clipper will remove any hair that comes into contact with the blades.
1. Switch o the clipper.
2. Remove the comb attachment.
3. Switch on the clipper. 5
To remove the cutting blades
Periodically it is advisable to remove the blade assembly for more thorough
cleaning.
1. ensure that the ON/o switch is set to“1”position.
2. Using your thumb from the front of the clipper,press back against the cutting
blades.the blade assembly will snap out of the blade holding base.
6
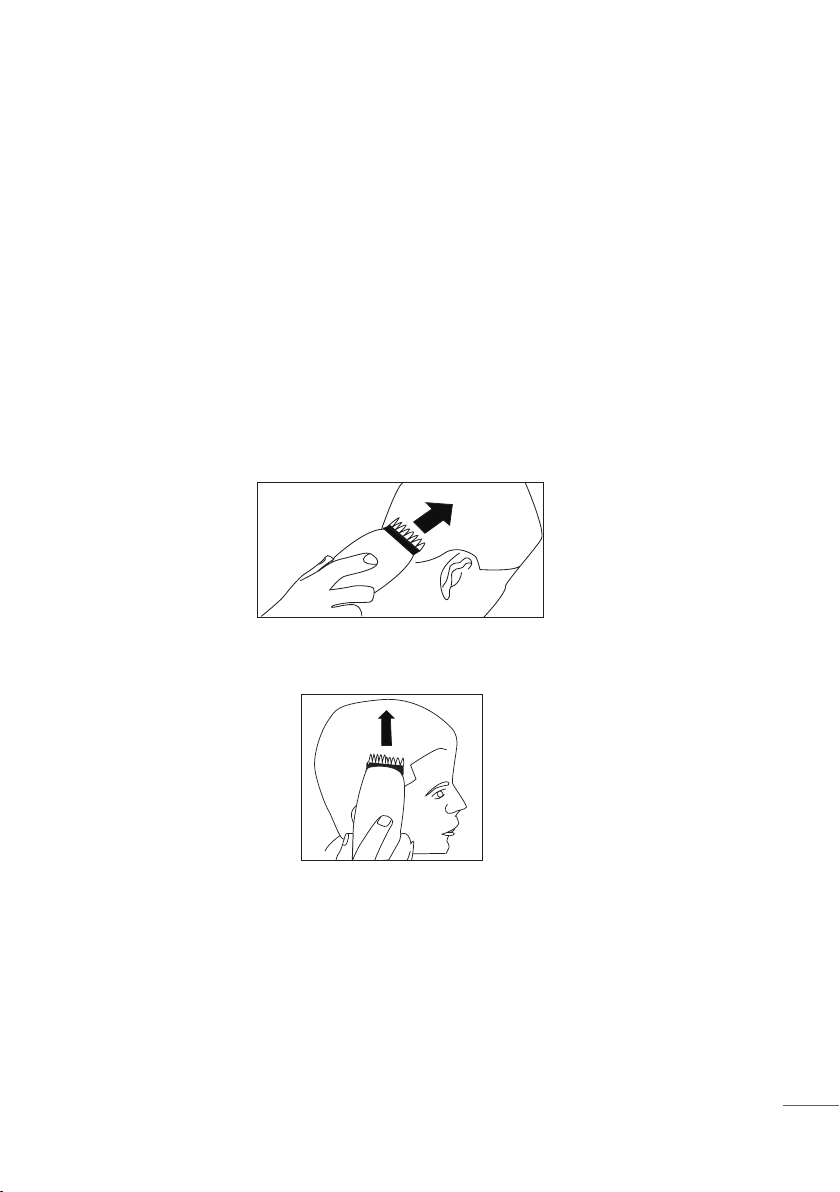
4. Position the clipper so that only one edge contacts the hair.
5. Slowly shape the hair arounr the ears and contours the neckline by positioning
the blades against the neck and moving downwards.
6. For nal trimming of the hair,fringe or beard,use scissors not supplied.
After use
When you have nished,switch o the clipper by setting the on/o switch
to “1”position,Always clean the blades after use .
Care and cleaning
The hair clipper must be unplugged before cleaning.
1. Remove the comb attachment if tted.
2. Clean the blades and comb attachments with the cleaning brush
supplied to remove remaining loose hair clippings.
3. Clean the housings of the clipper with a soft,dry cloth.
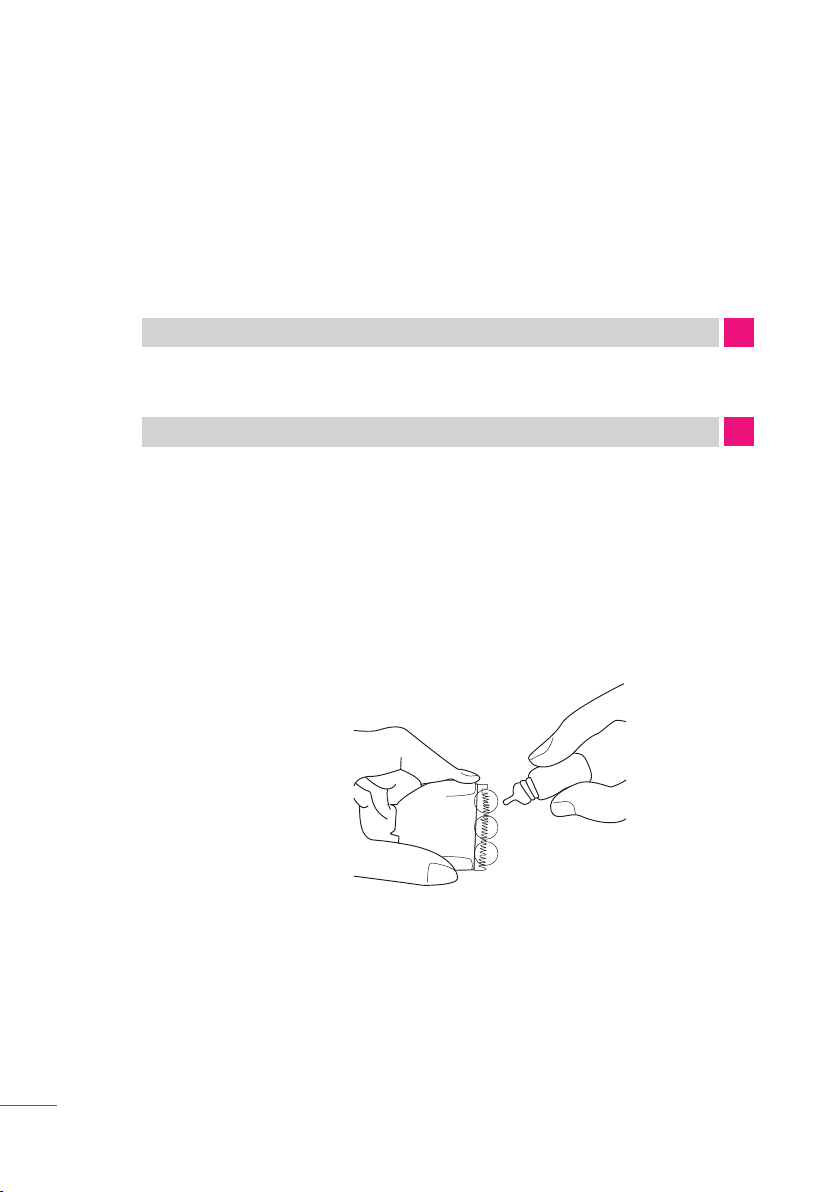
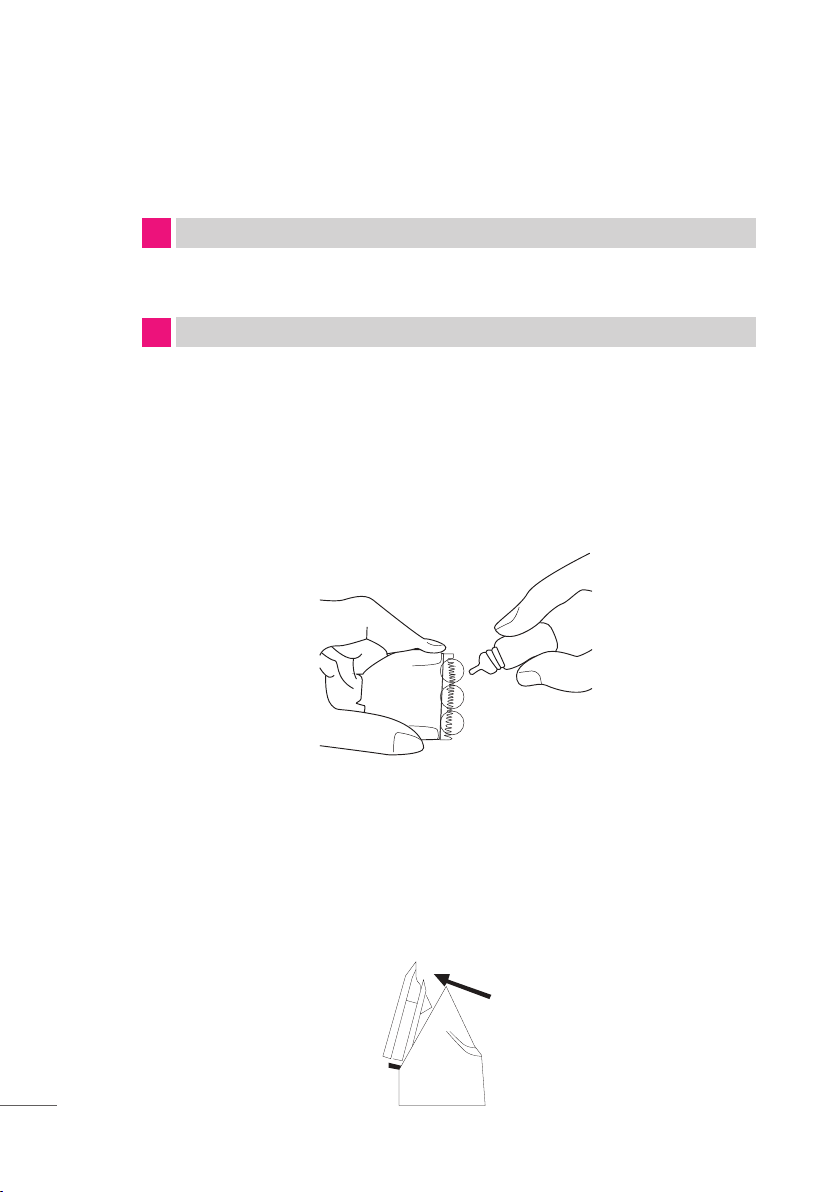
4. The cutting blades should be lightly oiled with the oil provided once
every few haircuts ad shown.

3. Clean the blade assembly and inside the blade holding base thoroughly with
the cleaning brush supplied
4. re-assemble the blade assembly by engaging the bottom latch,then pressing
the top into the blad holding base.
Do not use any harsh detergents,abrasives,solvents or cleaners. Never immerse in
water to clean.
5. Dry thoroughly before use .
Storage
The hair clipper should never be stored whilst hot or whilst still connected to the
mains. Always ensure the hair clipper is switched o, unplugged from the charger
and have cooled down before storing.
7
Disposal
In accordance with European Directive 2012/19/EC
)WEEE(, the scrapped appliance must be disposed of
appropriately at the end of its life cycle. This
concerns the recycling of useful parts of the appliance
and allows a reduction in the environmental impact.
For more information, please contact your local
waste disposal facility or appliance retailer.

Table of contents
Languages:
Other MIGEL Electric Shaver manuals


