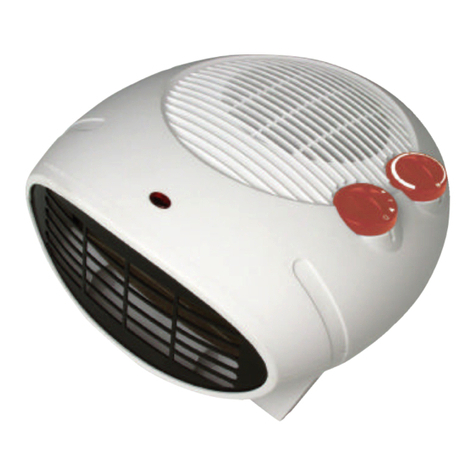
MIGEL GTH 201 User manual


1
GTH 201

2

3
/ 10A
10A230V
220-240/VAC
PTC
35˚C15˚C

4

5

6
•
•
•
•

7
25˚C
ECO
•
•
ECO
ECOECO•
18˚C18˚C
22˚C
22˚C•
ECO•
22˚C•

8
•
•
•
•
•
•
SET˚C
35˚C15˚C
•
•

9
EE60˚•
LO-10˚•
HI40˚C•
•
•
•
50˚C
•
•


GTH 201
English
Dear customer!
Thanks for your worthful choice and condence to Migel
brand.We really hope that you enjoy operating this product.
Warning
1
In order to use the product more conveniently and avoid any danger
caused by wrong operation, please pay close attention to the warnings
and instructions in this manual.
1. This appliance is not intended for use by persons (including children)
with reduced physical,sensory or mental capabilities, or lack of experience
and knowledge, unless they have been given supervision or instruction
concerning use of the appliance by a person responsible for their safety.
2. Children should be supervised to ensure that they do not play with the
appliance
3. Do not use this heater if it has been dropped .
4. Do not use if there are visible signs of damage to the heater
5. Use this heater on a horizontal and stable surface.
WARNING: Do not use this heater in small rooms when they are occupied
by persons not capable of leaving the room on their own, unless constant
supervision is provided.
WARNING: To reduce the risk of re, keep textiles, curtains, or any other
ammable material a minimum distance of 1 m from the air outlet.
6. CAUTION — Some parts of this product can become very hot and cause
burns. Particular attention has to be given where children and vulnerable
people are present.
7. If the supply cord is damaged, it must be replaced by the manufacturer,
its service agent or similarly qualied persons in order to avoid a hazard.
8. WARNING: In order to avoid overheating, do not cover the heater.
Technical Data
Power: 2000W
Voltage: 220-240V
Frequency: 50Hz

2
9. The heater must not be located immediately below a socket outlet.
10. Do not use this heater in the immediate surroundings of a bath, a
shower or a swimming pool.
11. The fan heater can only be used under supervision.
12. The air input/output must never be covered. Keep a distance of at least
1 m in front and 50 cm behind the fan.
13. With any indication of malfunction, contact service center repairs.
Do not attempt to disassemble the product or replace faulty parts with
unauthorized components because it will damage the unit.
14. Disassemble and transformation without authorized will aect the
safety of the product.
15. Please don’t touch the plug by wet hands, it may lead to electric shock.
16. Please don’t put the wood or metal stick into the air inlet or outlet. it
may lead to electric shock, or product damage.
17. Do not use pesticide or other ammable spray around the product, as
it will damage the device.
18. Please don’t have the wind blow to the children directly for a long time,
it may inuence the children’s health.
19. Please do not pull out the power plug by pulling the power cord, it may
cause the power cord damage or electric shock.
20. Make sure there is no abnormal items in the wire, and the plug is
absolutely plug in, otherwise it will cause creepage.
21. If there is abnormal smell or noise when uses the product, please stop
using and pull out the power cord immediately.
22. Do not operate the appliance with a damaged cord or plug. Send the heater
to a suitably qualied or appointed service agent for inspection and repair.
23. Please don’t put heavy unit onto the power cord or fold the power cord,
it may lead to electric shock.
24. If not use the device for a long period, please disconnect the plug.
25. Should avoid using the device, if there is any child or animal or disable
people or people who is lack of self-control.
26. Using the power outlet that meets the inspection requirements and
the carrying capacity of the socket is no less than 10A/230V.

3
Product features
• Product structure
27. Ensure the power supply voltage is consistent with the specied
voltage in the machine (220-240VAC).
28. Make sure the service voltage when relocation.
29. Do not use the device directly below a power outlet.
30. When using the heater, keep combustible materials or explosive
objective, away from heater.
31. In order to avoid overheating, do not cover the heater.
32. Never place any objects in the device.

4
1. Front Cover 2. Wind outlet
3. Fireplace display window 4. Swing holder
5. Base 6. Power cord
7. Power switch 8. Remote control
• Control panel
• Display panel
• Remote control operation panel
Power Button Simulation re button
Timer+(up)button Temp+(up)button
Timer+(down)button Temp +(down)button
Swing button
Mode button(HI/LOW/ECO)

5
Product Operation introduction
•Installation method
1. Take the devices out of the bubble bag, including the following three
parts; heater, base, remote controller.
2. Put the heater on a desktop, with the bottom reaching out. Connect the
base with the heater.
3. Press Power switch which is in the back of the device to turn on.
•Remote control operation panel
1. Pull out the battery panel at the back side of remote control.
2. Pay attention to the battery polarity, and insert the battery(CR2032) to
the tray of the panel.
3. Push the battery panel into the remote control.
4.The batteries contain materials, which are hazardous to the environment;
they must be removed from the appliance before it is scrapped and that
they are disposed of safely.
•The function of buttons
As long as the heater is in working condition, the fan is in working state. If
the heater stops working, then fan will stop working after 10s.
1. After connecting to power supply and switching on the power, you
will hear a “BiBi” sound, the heater enters to Standby Mode. The power
indicator Led_ lights up.
2. Under standby model, press key to turn on/o the heater,the display
panel will countdown the heater (from 10 to 0 second) after turning o the
machine.

3. The default setting after turn on shows as below:
a) heater: low power, Led _ lights up.
b) swing: o, Led_ lights o.
c) timer: 0h, Led_ lights o.
d) fan: turned on.
e) temperature setting: the default temperature setting is 25˚C.
f) replace display: turned on, Led_ lights up.
g) ECO: turned o, Led_ lights o.
4. In working condition, press to shift the power between low level and
high level.
a) Low power: Led_ lights up.
b) High power: Led_ lights up.
5. In working condition, press key to enter into the ECO mode, Led_
lights up, press it again to quit this mode.
c) ECO mode: the default temperature setting is 22˚C,when the room
temperature is lower than 18˚C,the machine works with high power; when
the room temperature is between 18˚C and 22˚C,the machine works
with low power; when the room temperature is above 22˚C,the heating
element will be turned o.
d) when the ECO function is operating, the button is not active.
e) when the room temperature is above 22˚C ,the heater and swing
function will also be turned o.
6. In working condition, press button to turn on/o the swing function,
Led_ will light up/o accordingly.
7. In working condition, press or button to set the timer.
a) timer: press or key, and Led_ will display, press +/- key to set
the timer (within a range of 0-24 hours), the time will increase or decrease
1h for every press.
b) After entering into timer by pressing or button, the time you
set before will not be changed. But you can reset the time by pressing +/-
key, no operation to the keys after 5 seconds and the time that you have
reset will be eective at once.
c) If there is no operation to the keys after 5 seconds or press other keys 6

except +/-,the display panel will shift to show the setting temperature
immediately.
f) When time was set except “0”, it will decrease 1h per time, if the timer
turns to value 0, then the device will turn o at once, and enter into standby
mode.
g) If the timer set as “0”, it means that no timer is set.
8. In working condition, press or button to set the temperature.
a) Temperature setting function: press or key, and Led_
SET °C will display, press +/- key to set the temperature, The range of
the temperature is from 15°C to 35°C, the temperature will increase or
decrease 1°C for every press.
b) After entering into temperature setting by pressing or button,
the temperature you set before will not be changed. You can reset the
temperature by pressing +/-key, no operation to the keys after 5 seconds
and the temperature that you have reset will be eective at once.
9. When both the time and temperature are set, the LED display shows the
setting temperature and timer display interactively for each 30 seconds.
When the time is not set, it only shows the setting temperature.
10. When turn on the heater or under standby mode, press button to
turn on/o the replace function, the LED will light up/o accordingly.
a) turn on replace function: replace motor works, Led_ lights up,
b) turn o replace function: replace motor stops to work, Led_ lights
o.
11. Memory function in standby mode:
When the heater is turned on except the rst time, and under the standby
mode, press key, and the unit will memorize the previous settings(except
timer setting) of last using and work accordingly.
12. After working for 1 minute, the brightness of the LED display will
reduce to 1/3 of the normal brightness, in order to avoid the problem of
LED display dazzling at night. It will resume to the normal brightness after
operation.
13. There is a tip-over switch inside the heater, it will disconnect the heater
automatically if the machine falls down on the ground.
7

14. Remarks:
h) when the heater sensor is actived (temperature is above 60°),the LED
will display“EE”, and can not set the temperature at the moment.
i) When the environment temperature lower than -10°C, the LED will
display“LO”
j) When the environment temperature higher than 40°C, the LED will
display“HI”
Maintenance & Cleaning
•Please must turn o the power and pull out the plug before cleaning,
otherwise, it’s possible to cause electric shock.
•Before maintaining, please pull out the plug, and make sure the heater
has become cool.
•Please use soft cloth to wipe the dust on the heater’s surface; If the
surface is very dirty, use a soft cloth to wipe it with the water lower than
50°C mixed with neutral detergent.
•Don’t use the gasoline, thinner or other chemicals that can damage the surface.
•Before storing this heater,let it cool down and place in a dry and ventilated area.
•Warning: any other servicing should be performed by an authorized
service representative
8
Disposal
This marking indicates that this product should not be
disposed with other household wastes throughout the EU. To
prevent possible harm to the environment or human health
from uncontrolled waste disposal, recycle it responsibly to
promote the sustainable reuse of material resources. To return
your used device, please use the return and collection systems
or contact the retailer where the product was purchased. They
can take this product for environmental safe recycling.

Table of contents
Languages:

