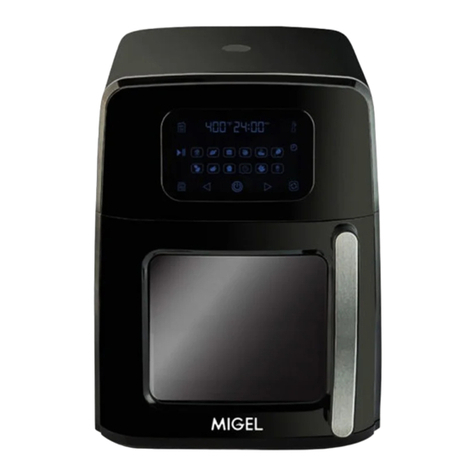
MIGEL GFD 500 User manual


GFD 500
OFF

•
•
•
•

ON
"-""+"
"-""+"Temp
OFF

•
•
•
•
•
•
•
•
•
•
•

•
•
•
•
•


Important safety instructions warning
Important safety instructions warning
GFD 500
Before usng ths oven, please read ths nstructon manual
completely.
English
1
IT IS NECESSARY TO PUT HEAT-RESISTING MATERIAL (CERAMIC TILES,THICK
BOARD ETC.) UNDER THE APPLIANCE DURING USE OR PUTTHE APPLIANCE
ON TO THE HEAT-RESISTANT SURFACETO AVOID POSSIBLE DAMAGE.
1. Do not work the appliance longer than 48 hours running. After nishing
uninterrupted work of the appliance during 48 hours,turn o the appliance
(Press the“OFF”button), unplug the appliance and let it cool down.
2. Improper use of the appliance can cause damage and injury to the user.
3. Use the appliance only for its intended use and always follow the manual
guidelines.
4. Unplug the appliance when it is not in use.
5. Keep the power base away from water. Do not switch on the appliance if its
surfaces are wet.
5. Do not use appliance with damaged electric cord, plug, after appliance is
dropped or with other damages. If it has happened contact service center.
6. Do not allow children to play near the appliance when in use.
7. Unplug the appliance before cleaning it.
8. Never yank cord to disconnect from outlet, instead grasp plug and pull
to disconnect.
9. This appliance is for domestic use only
10. Do not cover the appliance.
11. Do not leave the appliance unattended while in use.
12. Put the appliance only on to the at surface.
13. This appliance is not intended for use by persons (including
children) with reduced physical, sensory or mental capabilities, or
instruction concerning use of the appliance by a person responsible for
their safety.
14. Young children should be supervised to en sure that they do
Input power: 500Watt
Voltage-Frequency: 230V-50Hz

2
not play with the appliance.
15. Do not place on or near a hot gas or electric burner, or heated oven.
16. Do not allow the mains lead to hang over the edge of a table or a
counter or become a hazard. Children shall not play with the appliance.
17. Cleaning and user maintenance shall not be made by children
with supervision
18. Cleaning and user maintenance shall not be made by children
unless they are older than 8 and supervised
19. Keep the appliance and its cord out of reach of children less than 8 years
20. If the supply cord is damaged, it must be replaced by the
manufacturer, its service agent or similarly qualied persons in order to
avoid a hazard.
21. The appliances are not intended to be operated by means of an
external timer or separate remote control system
22. This appliance can be used by children aged from 8 years and above
and persons with reduced physical, sensory or mental capabilities or lack
of experience and knowledge if they have been given supervision or
instruction concerning use of the appliance in a safe way and understand
the hazards involved.
Before using the rst time:
1. Unpack the appliance.
2. Wash all parts of the appliance
3. Before use make sure that the electric parameters of your dehydrator,
indicated on rating label found on the base of the appliance
4.Wash lids and sections of appliance.Wash sections in warm water adding
a small quantity of detergent for washing dishes. Clean the power base
using a damp cloth, (NEVER SUBMERSE THE BASE IN ANY LIQUID).
Functions
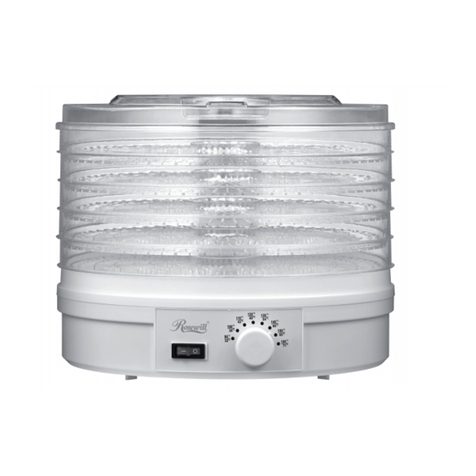
Warmair ofa xedcontrollabletemperaturecirculatesfreely insidethe appliance
between upper and lower lids, separate controllable removable sections and
power base. That is why the foods which are situated on the sections of the
appliance are drying even and with minimum losses of health-giving vitamins.
So you can enjoy fruits, vegetables and mushrooms, which are prepared without
using unhealthy substances, the whole year round. You can also dry owers,
medicinal plants, prepare cereals with the help of this appliance.

3
Use of the appliance
1. Prepare the food that you intend to dry by slicing in thin and even shapes & sizes.
Then place the food into the trays of the appliance. Ensure that there is adequate
spacing between each piece of food.We recommend approximately 0.5cm.
2. Put each of the sections on to a power base.
3. Put the upper lid on the appliance. During drying the upper lid should always
be on the appliance. Plug and Press the“ON”button, the appliance is rotating. Just
mean in working . The machine initial setting is 50C degree and 10H.The timer is
from 30min to 48H adjust . but the initial setting is 10h begin. you could press the
timer button rst. then you could press“+”or“-“ button . also if you require fast up
or down. you could keep the press“+”or“-“. all controlled by NTC .The temp is from
35C to 70C adjust .but the initial setting is 50C begin. you could press the temp
button rst. then you could press “+” or “-“ button . also if you require fast up or
down. you could keep the press“+”or“-“. All controlled by NTC.
4. When you nish using the appliance press the button "OFF". Let the products
cool down. Put dried products into a container/package for keeping food and put
it into a freezer.
5. Unplug the appliance.
NOTE: it is recommended to put all 6 sections on to the appliance
during use, no matter how many sections are empty.
Examples:
1.The products are on the rst upper section, other 5 section are
empty. Make sure that the upper lid is on the appliance.
2.The products are on the rst 2 sections, other 4 sections are
empty. Make sure that the upper lid is on appliance.empty. Make sure that the
upper lid is on the appliance.
Aditional instruction
Wash products before putting in the appliance. Do not put wet
products into appliance, rub it dry.
ATTENTION! Do not put sections with products if there is water in it.
Cut o the spoiled parts of products. Slice the products in such a way to
situate it freely between the sections.The duration of drying products
depends on the thickness of pieces into which it is sliced etc.You can change

4
Drying fruits
• Wash the fruits.
• Take out the pit and cut o the spoiled parts.
• Slice into pieces which you can place freely between the sections.
• You can put the fruits down to natural lemon or pine apple juice not to
let them fade
• If you want your fruits to smell pleasantly, you can add cinnamon or coconut
Drying vegetables
• Wash the vegetables.
• Take out the pit and cut o the spoiled parts.
• Slice into pieces which you can place freely between the sections.
• It is better to boil vegetables for about 1-5minutes and then put it to cold
water and then dry.
Drying medicinal plants
• It is recommended to dry leaves,
• After drying it is better to put medicinal plants in paper bags or glass cans
and place it in dark cool place.
the position of the sections if not all products on it dried well. You can put
upper sections down, closer to power base, and lower sections you can put
it place of upper sections. Some of the fruits can be covered by its natural
protective layer and that is why the duration of drying may increase. To avoid
this matter. it is better to boil products for about 1-2 minutes and then put it
to cold water and rug after that.
NEED TO KNOW: THE DURATION OF DRYING STATED IN THIS
INSTRUCTION IN APPROXIMATE.
The duration of drying depends on the temperature and humidity of the
room, the level of humidity of products, thickness of the pieces etc.
Storage of drying fruits
• Containers for storage the dried products should be clean and dry.
• For better storage of dried fruits use glass containers with metal lids and
put it into a dark dry place where the temperature should be 5-20 degrees.
• During rst week after drying it is better to check if there is any moisture
in container. If yes, it means that products are not dried well and you
should dry it again.

5
Making yogurt
Fruit Leather
Preliminary preparing of the fruits
• Pour 0.5 liter milk in a container (full fat milk makes the yogurt better) and
add two spoons of yogurt to it.
• Mix the yogurt with milk in a way it is thoroughly dissolved in the milk.
(If the temperature of the used milk is on boiling point, wait until the milk
temperature gets warm and then add the yogurt to the milk)
• Pour the mixed dairy products into the yogurt glass and close its lid.
• Place one of the fruit trays at the bottom of the appliance and take two of
the plates out for putting the yogurt glass into the appliance.
• Set the temperature to 40˚C and set the timer to 5 hours.
• To make the yogurt thick, put the yoghurt glass in the refrigerator just
after working with the appliance is done.
• At rst, peel and puree the fruit.
• Heat the pureed fruits in a pot until the fruit liquid is completely evaporated.
• As the fruits are thicken and the liquid is completely evaporated, add
some salt or any kind of additives as much as your taste, then place the
fruit-leather tray on one of the plates of the appliance and ll the tray up
with pureed fruits and make it at with a spoon .
NOTE: It is better to put more fruits in the tray to thicken the layer of the
fruits, because when the fruits are dehydrated, its volume becomes less
and thinner.
• Place the lid onto the appliance, set the temperature to 70 ˚C and set the
timer to 9 hours. (Temperature and time can be varied compared to the
desired type and thickness.)
Preliminary preparing of the fruits saves its natural color, taste and avor.
Below you can see some useful recommendations how is better to prepare fruits
for drying:
Take 1/4 glass of juice (natural preferably).Remember that the juice, which
you take, should correspond to the fruit which you prepare .For example for
ATTENTION! Do not place hot or even warm products into containers
for storage.

6
Table of preparing the fruits for frying
Duration of
drying(hours)
Condition after
drying
PreparingName
13-23SoftSlice it and take out the pitApricot
8-16FragileCut it to long stripesOrange peel
8-16Hard
Peel it and slice into pieces or
square parts
Pine
(apple(fresh
8-16SoftPour out the juice and dry it
Pine
(apple(tinned
8-16CrispyPeel it and slice to roundBanana
pieces(3-4mm thickness)
8-16
No need to cut
it Soft
No need to cut itGrapes
It is not necessary to take out
the pit(you can take it
(out when cherry is half-dried
Cherry
8-16SoftPeel it and slicePear
8-26HardSlice itFig
8-16SoftNo need to cutCranberry
8-16Soft
Cut into 2 pieces and take
out the pit when the fruits is
half-dried
peach
8-16HardTale out the pit and sliceDate-fruit
8-12Soft
Peel it, take out the heart, slice it
into round pieces or
segments
Apple
NOTICE: Time and ways of preliminary processing of the fruits which are
described in the table only fact-nding. Personal preferences of customers
can dier of the describled in the table.
preparing apples you should take apple juice.
Mix the juice with 2 glasses of water.Than immerse preliminary processed fruits,
(see“table of preparing the fruits for drying”into prepared liquid for 2 hours.

7
Preliminary preparing of the vegetables
1. It is recommended to boil green beans, cauliower, broccoli, asparagus
and potato, because those vegetables often are preparing for rst and
second dishes, it saves its natural color.
How to boil: put the preliminary prepared vegetables into a saucepan
with boiling water for about 3-5 minutes. Then pour out the water and put
vegetable into the appliance.
2. If you want to add a smack of lemon to green beans, asparagus etc., just
put it into a lemon juice for about 2 minutes.
NOTICE: THE RECOMMENDATIONS ABOVE ARE ONLY GUIDE LINES AND
IT IS NOT NECESSARY TO FOLLOW THEM.
Table of preparing the fruits for drying
Duration of
drying(hours)
Condition
after drying
PreparingName
8-13fragile
Cut it to stripes
(3-4mmthickness)
Artichoke
8-12Fragile
Peel it and slice it
into pieces(6-12mm
(thickness
Egg-plant
8-16Fragile
Peel it and cut it. steam it for
.about3-5min
Broccoli
8-14Hard
Slice it for dry it whole(small
(mushrooms
Mushrooms
8-20Fragile
Cut it and boil till become
transparent
Green beans
8-14Fragile
Slice it into pieces(6mm
thickness)
Vegetable
marrows
8-14Hard
Peel it and cut into stripes(3mm
thickness)Take out the heart
Cabbage
8-30Crispy
Cut the stems into
pieces 2
Brussels
sprouts
8-16HardBoil till becomes softCauliower
8-16CrispySlice it, boil for about 8-10minPotato
8-14CrispySlice it into thin round piecesOnion

8
8-14Crispy
Boil till becomes soft. shred it or
slice into round pieces
Carrot
8-18Hard
Peel it and slice into round
pieces(12mm thickness)
Cucumber
8-14crispy
Cut it to stripes or
to round
Sweet pepper
pieces(6mm thickness).Take
out the heart
8-14
HardNo need to cut it
Piquant
pepper
6-10CrispyPut the leafs into sectionsparsley
8-24Hard
Peel it. Cut it into pieces or
into round pieces
Tomato
8-18
Loss of
humidity in
a vegetable
Peel it and slice it into
pieces(3mm thickness)
Rhubarb
8-16Crispy
Boil it, let it cool down, cut
.o the roots and the tops
Slice it to round pieces
Beetroot
8-14
Crispy
Slice it into pieces
(6mm thickness)
Celery
8-10CrispyShred it
Spring
onion
8-14
Crispy
Slice it into pieces
(2.5mm thickness)
Asparagus
8-16Crispy
Peel it and slice into round
pieces
Garlic
Table of contents
Languages:
Other MIGEL Kitchen Appliance manuals
