Mikona MHDBT10267 User manual

MHDBT10267
USER GUIDE
10.1 inch tablet


3
Contents
Safety Information 4
Safety Instructions 5
Features & Specications 6
Supplied in the box 6
User Controls & Connections 7
Getting Started 8
Battery charging 8
Switching on for the rst time 9
The Home Screen 10
Connecting to Wi-Fi 12
Sign In 13
Settings 14
Network & Internet 14
Connected Devices 15
Apps & Notications 15
Battery 16
Display 17
Sound 18
Storage 18
DuraSpeed 19
Security & Location 19
Users & Accounts 20
Accessibility 20
Google 21
System 21
Installing Applications 22
Connecting to a PC 23
Troubleshooting 24
Care & Support 26
4
Safety Information
This product depends on third-party technology and therefore no guarantee can be made regarding the
compatibility of specic applications, software or accessories. Mikona take no responsibility for incompatibility
of this product with any third-party products or software.
Android™, Google™, Google Play™ and other marks are trademarks of Google Inc.
Correct disposal of this Product
Waste Electrical & Electronic Equipment (WEEE)
The crossed out wheelie bin is intended to show that this appliance must not be placed
with ordinary household waste at the end of its useful life. To prevent possible harm to the
environment or human health from uncontrolled waste disposal, please keep separate from
other household waste and recycle it responsibly to promote the sustainable reuse of material
resources.
Household users should contact either the retailer where you purchased the product, or their
local government ofce for details of where and how you can take this item for environmentally
safe recycling.
Business users should contact their supplier and check the terms and conditions of the
purchase contract. This product must not be mixed with other commercial wastes for disposal.
This appliance complies with European Safety & Electrical Directives
Mains power adaptor supplied is a Class II appliance.
Only use the power adaptor supplied. Do not use power adaptor with other equipment.
The exclamation point within an equilateral triangle is intend to alert
the user to the presence of important operating and maintenance
(servicing) instructions in the literature accompanying the appliance.
Do not open, or attempt to open, the casing: there are no user-serviceable parts
inside. Failure to adhere to the instructions provided will invalidate the warranty.
This product features an internal Lithium Polymer battery, please treat with care.
WARNING
THIS PRODUCT FEATURES AN LCD SCREEN.
DO NOT BEND, TWIST OR SUBJECT THE PRODUCT
TO ANY SHOCKS. THIS WILL CAUSE DAMAGE TO
THE SCREEN.

5
Safety Instructions
PLEASE READ THE BELOW SAFETY INFORMATION
FAILURE TO DO SO MAY RESULT IN DAMAGE TO YOUR PRODUCT
NEVER leave your tablet in direct sunlight or in a hot
vehicle or expose to heat.
NEVER use the tablet in a damp, humid or dusty
environment. Do not expose to moisture or liquids.
NEVER allow the tablet to be subjected to heavy vibrations
or shocks, especially the screen.
NEVER cross the road or drive whilst wearing headphones.
AVOID listening to excessively loud music or audio on
headphones, this can permanently damage your hearing.
ALWAYS use the supplied charger and/or USB cable for
charging the battery.
ALWAYS ensure the tablet is adequately ventilated to
avoid overheating.
WARNING: This product features a Lithium Polymer
battery. Improper charging or use may result in re,
personal injury and damage to property. The battery is not
removable.
CAUTION: The tablet may become hot during use,
especially during heavy use such as games, this is normal,
however always ensure the tablet is adequately ventilated
to avoid overheating.

6
Features & Specications
• 10.1” Multipoint Touchscreen IPS Display
• Android™ 8.1.0 (Oreo) Operating System
• Screen Resolution: 1920 x 1200 pixels
• Processor: MediaTek MTK8167 Quad Core
• Graphics: IMG GE8300
• RAM: 2GB DDR3
• Bluetooth connectivity
• 16GB* Internal Flash Memory
• Micro SD Card support (up to 32GB)
• Wi-Fi 802.11 b/g/n
• Accelerometer: 3-axis
• Front Camera: 2.0 Megapixel
• Rear Camera: 5.0 Megapixel
• Headphone Socket (3.5mm)
• Micro USB Socket
• Micro HDMI Socket
• Battery: Lithium-Polymer 3.7V 5800mAh
• Video: AVI, MKV, MP4, MPG, FLV, 3GP, Xvid, Divx, WMV
• Audio: MP3, WMA, M4A, AAC, FLAC, APE, WAV
• Text: TXT, RTF, DOC, XLS, PPT, PDF
• Dimensions (mm): 244 x 172 x 9.5
*Available memory after formatting will be less
Supplied in the box
• 10.1” touch screen tablet
• Mains power adaptor
• USB cable
• User Guide
• Quick Start Guide
PLEASE NOTE
Your tablet screen is tted with a protective lm which may be removed by gently peeling from
one of the corners. Do not use any sharp implements to remove the lm as this may damage
the screen.

7
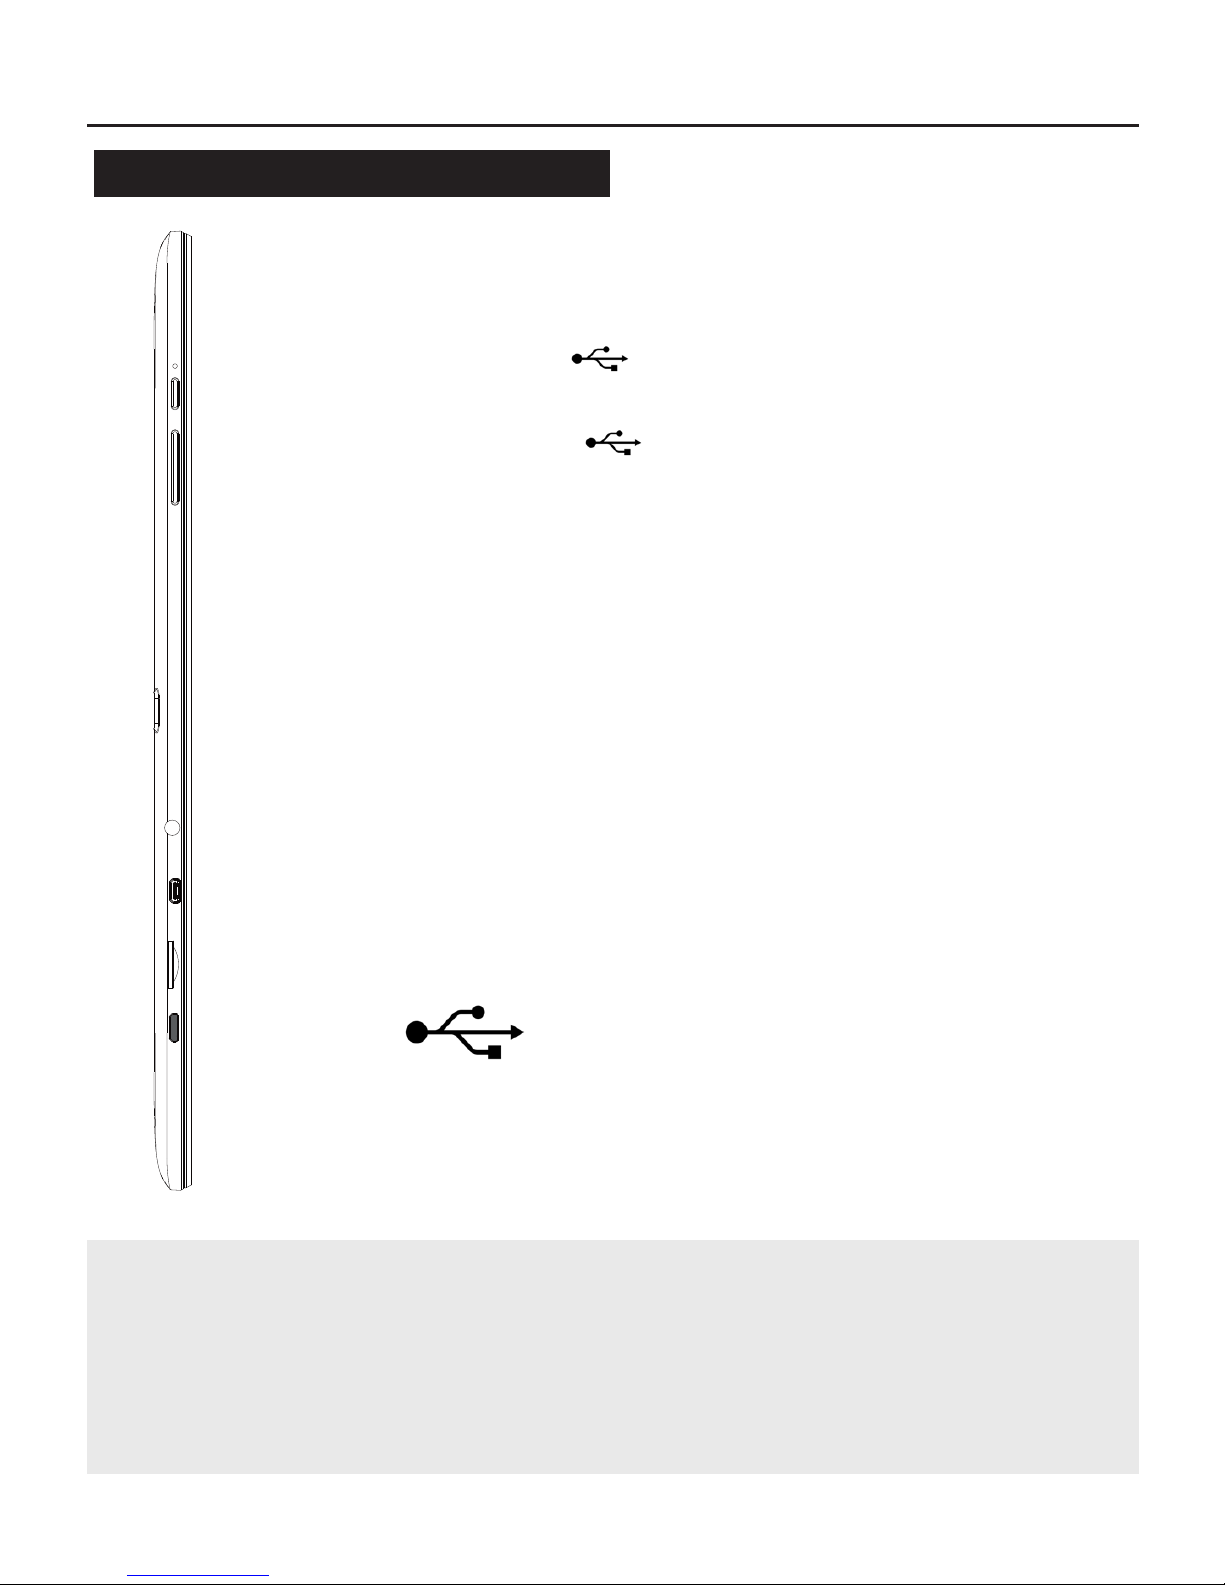
User Controls & Connections
Buttons & Connections
Micro SD
Insert Micro SD card to expand
storage (up to 32GB, not supplied).
q POWER
Press and hold to switch On or Off.
Press momentarily to switch in/out of
standby.
V+ V-
Press to adjust volume
(Micro USB)
Connect to supplied USB power
adaptor to charge battery.
Connect to computer to transfer les.
HEADPHONES (3.5mm)
Insert headphone jack to listen, main
speaker will cut out when connected.
R
Reset tablet if unresponsive.
CAMERAS (rear and front)
For video calling and taking pictures.
HDMI (micro)
Connect to a TV or monitor
V−V+HDMI
Model: MHDBT10267-B
Power: 5V DC 2A Max
Made in China
RMicro SD
8
Getting Started
Battery charging
To charge your tablet connect the mains power
adaptor to using the supplied cable.
Or connect to an available USB socket on
your computer.
Your tablet may be partially charged when rst
switched on, please fully charge as soon as
possible to ensure you get the best from your
battery.
!
Tip
Charging using the mains power adaptor may be much faster than
charging via a computer USB socket.
Look after your battery: do not leave plugged in for long periods, regularly
allow to discharge completely.
9
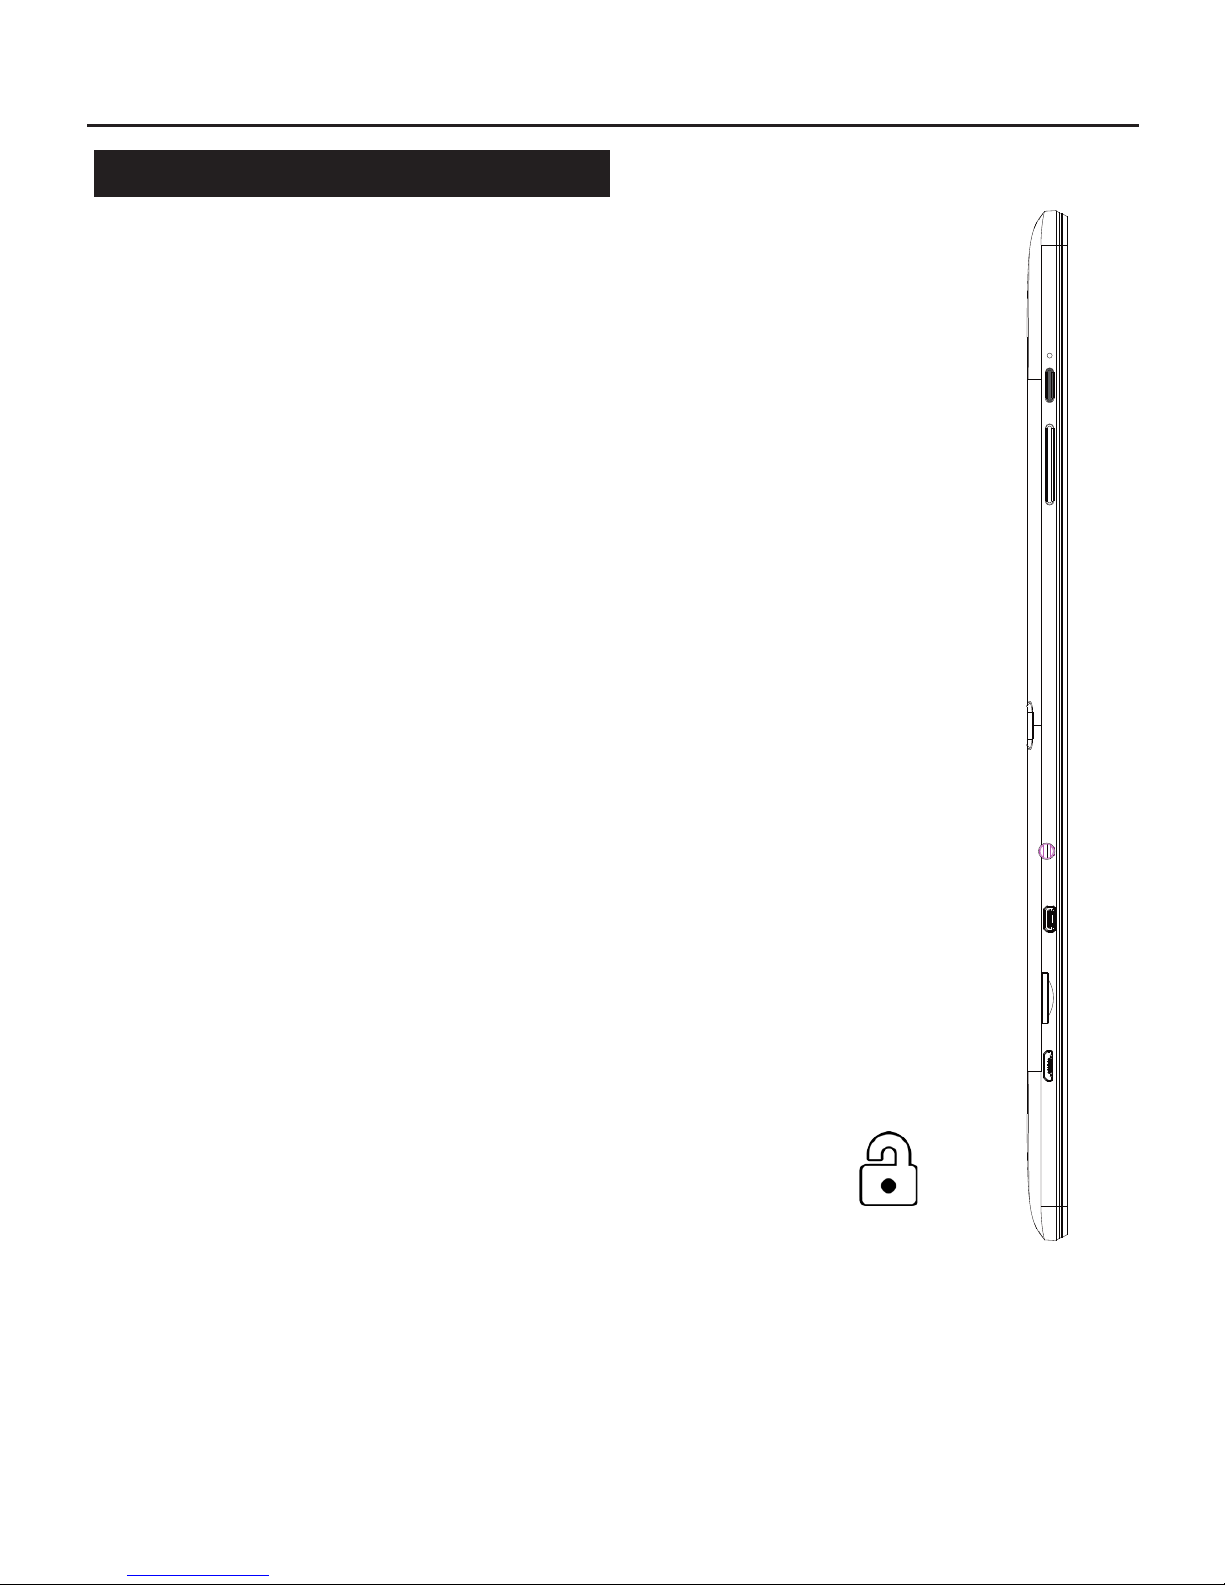
Getting Started
Switching on for the rst time
To begin, press and hold the
q power button
After a few seconds the screen will
display the loading screen.
Loading will take a minute or so.
Once loaded, follow the on-screen
guide to:
• Set the language
• Connect to Wi-Fi
• Sign in to or create a new
account
• Set up security
!
q
A quick press on the qPOWER button switches the screen On
and Off
A long press on the qPOWER button switches the tablet On and
Off
The screen will lock when switched off.
To unlock, swipe up on the padlock
P

10
Getting Started
The Home Screen
HOME
Press to return to Home
screen
RECENT
Display recently used apps
ALL APPS
Swipe up from bottom
of screen to display all
installed applications
BACK
Press to return to previous
screen or exit app
ˆ

11
Getting Started
The Home Screen
Your Home Screen is where you can place all your favourite apps,
shortcuts and widgets.
All Apps
Swipe up from the bottom of the screen to access all your
currently installed apps.
To place an app on your home screen press & hold the required
app icon - the app will then transfer over to the home screen -
move into place then release.
To place a widget on your home screen, press & hold anywhere on
the home screen background until the WIDGETS icon is displayed,
press to open, press & hold a widget to transfer to home screen.
To remove an app or widget from the home screen, press and hold
the icon, then move towards wither Remove or Uninstall.
Notication and Quick Link Areas
Dragging down from anywhere at the top of the screen will display
your Notications and Quick Link functions.
Notications can be tapped to view, or swiped to dismiss.
The Quick Link area displays various useful functions such as
Brightness/Wi-Fi/Rotation-Lock/Settings/Airplane Mode.
Battery Status
The battery status is shown on the top bar:
Full Charging
Empty

12
Getting Started
Connecting to Wi-Fi
Your tablet is supplied ready-to-use with several apps, however
connecting to the internet and Google Play Store gives you access
to thousands of apps and games, and also books, music and
lms.
To connect to the internet you will need access to a Wi-Fi
broadband connection.
• Press Settings
• Press Network & Internet
• Switch Wi-Fi ON by sliding switch
• Select appropriate Wi-Fi network
• Enter password
• Press Connect
The appropriate network should show Connected after a few
seconds.
The Wi-Fi icon, next to battery, displays the current Wi-Fi strength
and condition:
Connected, full signal
Connected, very low signal
Not connected or searching for signal
Try using the web browser app to access a web page to conrm
you are connected. For any problems consult the troubleshooting
guide on Page 24.

13
Getting Started
Sign In
Once you are connected to the internet you will need to sign in to
your Google™ account, if you do not have a Google account you
can always create one, it is free and easy.
• Press Settings
• Press Users & accounts
• Select + Add Account
• If you have a Gmail account select Existing
• If you do not have a Gmail account select Create
• Follow the on-screen instructions to login to or set up your
account

14
Settings
Network & Internet
Wi-Fi
Available networks displayed. Press network name to connect,
enter security password if required.
Wi-Fi Preferences: View advanced Wi-Fi options
Data Usage
Display the amount of data applications have used.
Tethering
For use with 3G (not available).
VPN
Virtual Private Network set up, contact your network administrator
for details.
Aeroplane Mode
Disable Wi-Fi and Bluetooth for use during air travel.

15
Settings
Connected Devices
Bluetooth
Switch on to display all available Bluetooth devices nearby. Press
on the appropriate device name to connect.
Cast
Connect to compatible casting devices.
Printing
Connect to and add printing services.
Apps & Notications
App Info
View, edit and uninstall all installed apps.
Notications
View and edit all app notications.
App Permissions
View and enable/disable all app permissions to access
microphone, camera, contacts, etc.

16
Settings
Battery
Monitor battery usage statistics, press for individual settings (app
dependent).
Power Management
Intelligent power saving standby: Enable/disable power saving
when in standby
Battery saver: Enable/disable battery saver reducing
background data usage to improve battery life
Battery percentage: Enable/disable battery percentage
displaying
Sleep: Adjust screen timeout - 15 seconds to 30 minutes
Battery

17
Settings
Display
Brightness Level
Drag slider to adjust screen brightness.
Wallpaper
Choose a new wallpaper for home and lock screens.
Sleep
Adjust screen timeout - 15 seconds to 30 minutes
Advanced
Auto-rotate screen: Enable/disable screen rotation
Font size: Adjust on-screen text size
Display size: Adjust on-screen object size
Screensaver: Adjust screensaver options
HDMI settings: Adjust HDMI video resolution

18
Settings
Sound
Media / Alarm / Notication volume
Drag slider to adjust the volume for different actions.
Do not disturb preferences
Adjust all options for disabling notications and alarms when do
not disturb is enabled.
Advanced
Default notication sound: Set default notication sound
Default alarm sound: Set default alarm sound
Screen-locking sounds: On or Off
Charging sounds: On or Off
Touch sounds: On or Off
Sound enhancement: On or Off
Storage
Storage display
Displays current usage of internal storage memory.
Free up space: Displays older les for removal to increase
available memory.
Storage manager: Enable/disable automatic storage manager
to maximise available memory.

19
Settings
DuraSpeed
Select which apps can run in the background to speed up access
and notications.
Security & Location
Security status
Google Play Protect: Automatically checks apps for harmful
behaviour
Find my device: Enable/disable device location (if installed)
Security update: Check for system updates
Device security
Screen lock: Select screen locking method - swipe, pattern,
PIN or password
Lock screen preferences: Select which notications are visible
when screen locked. Also set message to be displayed on lock
screen
Privacy
Location: Set location permissions and settings
Show passwords: Enable/disable password character display
Device admin apps: Set device admin apps
Data protection: Set data protection options
Encryption & credentials: Enable/disable device encryption and
credentials management

20
Settings
Users & Accounts
Users
Display and manage all user accounts and add guests.
Accounts
Display and manage all email and app accounts
Automatically sync data: Enable/disable data sync
Add users from lock screen: Enable/disable adding users while
device is locked
Accessibility
Display and manage accessibility options
Volume key shortcut: Enable/disable accessibility shortcut
Downloaded services: Enable/disable any downloaded
accessibility services
Screen readers: Manage text-to-speech settings
Display: Manage font and display size and screen
magnication
Interaction controls: Manage screen and interaction options
Audio & on-screen text: Enable/disable mono audio and on-
screen captions
Experimental: Enable/disable visual effects such as high-
contrast text, colour correction and colour inversion
Table of contents
Other Mikona Tablet manuals


Popular Tablet manuals by other brands

Manta
Manta PowerTab GPS MID12 user manual

Prentke Romich Company
Prentke Romich Company Accent 1400 Getting started

ViewSonic
ViewSonic V1100 - Tablet PC Travel Bundle quick start guide

Samsung
Samsung Galaxy Tab A SM-T357T Getting started guide

Samsung
Samsung Galaxy Tab 4 NOOK user manual

Venturer
Venturer Challenger 10 Pro user manual


