manuals.online logo
Brands
  1. Home
  2. •
  3. Brands
  4. •
  5. Milnor
  6. •
  7. Washer
  8. •
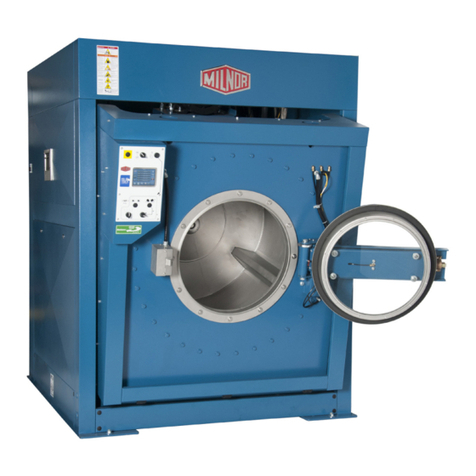
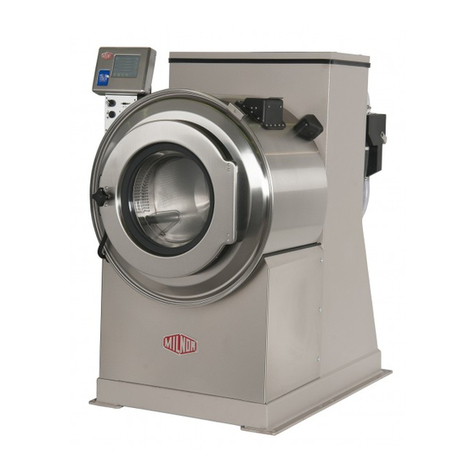
  9. Milnor 36026X8R User manual

Milnor 36026X8R User manual

Published Manual Number/ECN: ME6HX8R1AE/2021312B
• Publishing System: TPAS2
• Access date: 07/26/2021
• Document ECNs: Latest
Schematic/Electrical Parts
30022 & 36026X8R
42026 & 42032X7R
MILTOUCH-EX (TM) CONTROLS
PELLERIN MILNOR CORPORATION POST OFFICE BOX 400, KENNER, LOUISIANA 70063-0400, U.S.A.
Table of Contents
ME6HX8R1AE/21312B
Page Description Document
1 Component Parts List W6X8RSPL/2021054N
7 Limited Standard Warranty BMP720097/2019036
8 How to Get the Necessary Repair Components BIUUUD19/20081231
9 How to Use Milnor® Electrical Schematic Diagrams BIUUUK01/20130308
22 Sample Schematic BMP010012/2018343
24 3 Phase Motor Connection Diagram BMP850029/1999362B
25 3P Motor Diagram-Multivolt W80008/2001253A
26 Control Box Layouts W6X8RSTG1/2017434B
28 Board to Board Wiring W6X8RSBW/2017434B
30 Flushing Supplies W6X8RSCF/2021302B
32 Liquid Supplies-Interpret Relays W6X8RSCP/2014112B
34 Flushing Supplies 6 through 15 W6X8RSCX/2014112B
36 Optional Sample Door W6X8RSDS/2014112B
38 Extract Speed Limit W6X8RSEC/2021312B
40 Electric Valves W6X8RSEV/2021084B
42 Flashing Signal Light W6X8RSFS/2018345B
44 Microprocessor Inputs W6X8RSI1A/2016166B
46 Control Circuit Transformer W6X8RSLV/2018486B
48 Optional 20 Programmable Outputs W6X8RSOP/2014112B
50 Start Circuit for 30022X8R W6X8RSS+/2021254B
52 Start Circuit for 36X8R/42X7R W6X8RSS+A/2021254B
C O M P O N E N T P A R T S L I S T W6X8RSPL/2021054N
COMPONENT FUNCTION OF THIS WHERE TO FIND
NUMBER COMPONENT NUMBER THIS COMPONENT MILNOR P/N DESCRIPTION LOCATION
>>>COMPONENT LOCATIONS
001 DETAIL-36/42 CONTROL BOX W6X8RSTG1 B2T2014008 TAG:36/42 CONTROL BOX CONTROL BOX
002 DETAIL-CONTROL BOARDS INPUTS/OUTPUTS W6X8RSTG1 B2T2014013 TAG:MIILTOUCH-EX INPUTS/OUTPUTS CONTROL BOX
003 DETAIL-POWER SUPPLY SETTINGS W6X8RSTG1 B2T2014012 TAG:MILTOUCH-EX POWER SUPPLIES CONTROL BOX
AC >>>ACCELORMETER
ACBA ACCELORMETER- EXACT EXTRACT W6X8RSEC EACCLRM3 ASSY:ACCEL O-5VOC OP STAPH 42 MOTOR RAIL
BA >>>PRINTED CIRCUIT BOARDS
BAD-1 BOARD-ANALOG TO DIGITAL CONVERTER W6X8RSBW 08BSADCT BD: SERIAL A-D CONVERT->TEST CONTROL BOX
BAFR<11/20 BOARD FUSE/RELAY W6X8RSS+ 08BHFRCT BD-T/V/X START CIRCUIT->TEST CONTROL BOX
BAFR>11/20 BOARD FUSE/RELAY W6X8RSS+ 08BHFRDT BD-T/V/X START CIRCUIT->TEST CONTROL BOX
BAS BOARD-16 SNUBBER CIRCUITS W6X8RSCF 08BNCMBT COIN MACHINE SNUBBER->TESTED CONROL BOX
BAS BOARD-16 SNUBBER CIRCUITS W6X8RSEV 08BNCMBT COIN MACHINE SNUBBER->TESTED CONROL BOX
BAS BOARD-16 SNUBBER CIRCUITS W6X8RSS+ 08BNCMBT COIN MACHINE SNUBBER->TESTED CONROL BOX
BAS BOARD-16 SNUBBER CIRCUITS W6X8RSS+A 08BNCMBT COIN MACHINE SNUBBER->TESTED CONROL BOX
BBAD-1 BOARD-ACCELORMETER EXACT EXTRACT W6X8RSEC 08BSBADCTE SR BALANCE A-D BD EXTACTR-TEST CONTROL BOX
BDA-1 BOARD-DIGITAL TO ANALOG CONVERTOR W6X8RSBW 08BSDACHT BD:HI-RES SERIAL D-A->TEST CONTROL BOX
BIO-1 BOARD-8OUTPUT/16INPUT #1 W6X8RSBW 08BS816CHT BD 8OUT-16IN HIGH SPD->TEST CONTROL BOX
BIO-2 BOARD-8OUTPUT/16INPUT #2 W6X8RSBW 08BS816CHT BD 8OUT-16IN HIGH SPD->TEST CONTROL BOX
BLB BOARD-LEVEL TRANSDUCER W6X8RSBW 08BNLTT LEVEL TRANSDUCER BD->TEST CONTROL BOX
BMTH BOARD-6 CHANNEL MOTHER W6X8RSBW 08BS3MTHAT SER 3 CARD MOTHER BD->TEST CONTROL BOX
BO24-1 BOARD-24 OUTPUT #1 W6X8RSBW 08BSO24AT BD:SERIAL 24 OUTPUT->TEST CONTROL BOX
BO24-2 BOARD-24 OUTPUT #2 W6X8RSBW 08BSO24AT BD:SERIAL 24 OUTPUT->TEST CONTROL BOX
BPB < 2/5/16 BOARD-ARM9 PROCESSOR+TOUCHSCREEN W6X8RSBW 08BHA9D3ET ASSY:ARM9 PROC+OPTREX DSP>REVE-TES
T
PROCESSOR BX
BPB > 2/5/16 BOARD-ARM9 PROCESSOR+TOUCHSCREEN W6X8RSBW 08BHA9E3GT ASSY:ARM9 PROC+OPTREX DSP>REVG-TES
T
PROCESSOR BX
BSP BOARD-SPEED SENSING W6X8RSBW 08BNDSRAT BD DRY SAFETY ROTATION->TEST CONTROL BOX
CD >>>RELAY-DELAY
CDSD DELAY-SAMPLE DOOR W6X8RSDS 08TF090A71 ELECT ADJ RELAY 1-90 230V 60C CONTROL BOX
CL >>>RELAY-LATCH
CLA LATCH-DOOR SEAL W6X8RSS+A 09CL2C-C71 RELAY-LATCH DPDT 240V 2-COIL CONTROL BOX
CP >>>PHOTOEYE
CPSP PHOTOEYE-SPEED W6X8RSBW 09RPE013 SENSOR E-Z BEAM DC MAIN PULLEY
CR >>>RELAY-PILOT OR CONTROL
CRC01 RELAY-INTERPERT #1 W6X8RSCP 09C024D71 RELAY 4PDT DIFGLD 14PIN 240V INTERPRET BOX
Page 1 of 6
1
C O M P O N E N T P A R T S L I S T W6X8RSPL/2021054N
COMPONENT FUNCTION OF THIS WHERE TO FIND
NUMBER COMPONENT NUMBER THIS COMPONENT MILNOR P/N DESCRIPTION LOCATION
CRC02 RELAY-INTERPERT #2 W6X8RSCP 09C024D71 RELAY 4PDT DIFGLD 14PIN 240V INTERPRET BOX
CRC03 RELAY-INTERPERT #3 W6X8RSCP 09C024D71 RELAY 4PDT DIFGLD 14PIN 240V INTERPRET BOX
CRC04 RELAY-INTERPERT #4 W6X8RSCP 09C024D71 RELAY 4PDT DIFGLD 14PIN 240V INTERPRET BOX
CRC05 RELAY-INTERPERT #5 W6X8RSCP 09C024D71 RELAY 4PDT DIFGLD 14PIN 240V INTERPRET BOX
CRC06 RELAY-INTERPERT #6 W6X8RSCP 09C024D71 RELAY 4PDT DIFGLD 14PIN 240V INTERPRET BOX
CRC07 RELAY-INTERPERT #7 W6X8RSCP 09C024D71 RELAY 4PDT DIFGLD 14PIN 240V INTERPRET BOX
CRC08 RELAY-INTERPERT #8 W6X8RSCP 09C024D71 RELAY 4PDT DIFGLD 14PIN 240V INTERPRET BOX
CRC09 RELAY-INTERPERT #9 W6X8RSCP 09C024D71 RELAY 4PDT DIFGLD 14PIN 240V INTERPRET BOX
CRC10 RELAY-INTERPERT #10 W6X8RSCP 09C024D71 RELAY 4PDT DIFGLD 14PIN 240V INTERPRET BOX
CRC11 RELAY-INTERPERT #11 W6X8RSCP 09C024D71 RELAY 4PDT DIFGLD 14PIN 240V INTERPRET BOX
CRC12 RELAY-INTERPERT #12 W6X8RSCP 09C024D71 RELAY 4PDT DIFGLD 14PIN 240V INTERPRET BOX
CRC13 RELAY-INTERPERT #13 W6X8RSCP 09C024D71 RELAY 4PDT DIFGLD 14PIN 240V INTERPRET BOX
CRC14 RELAY-INTERPERT #14 W6X8RSCP 09C024D71 RELAY 4PDT DIFGLD 14PIN 240V INTERPRET BOX
CRC15 RELAY-INTERPERT #15 W6X8RSCP 09C024D71 RELAY 4PDT DIFGLD 14PIN 240V INTERPRET BOX
CRD RELAY-OK TO OPEN DOOR W6X8RSS+ 09C024D71 RELAY 4PDT DIFGLD 14PIN 240V BAFR BOARD
CRD RELAY-DOOR UNLATCH W6X8RSS+A 09C024D71 RELAY 4PDT DIFGLD 14PIN 240V CONTROL BOX
CRDL RELAY-DOOR CLOSED AND LOCKED W6X8RSS+ 09C024D71 RELAY 4PDT DIFGLD 14PIN 240V BAFR BOARD
CRE RELAY-OK TO LOCK DOOR W6X8RSS+ 09C024D71 RELAY 4PDT DIFGLD 14PIN 240V BAFR BOARD
CRS+ RELAY-START 3-WIRE W6X8RSS+ 09C024D71 RELAY 4PDT DIFGLD 14PIN 240V CONTROL BOX
CRS+ RELAY-START 3-WIRE W6X8RSS+A 09C024D71 RELAY 4PDT DIFGLD 14PIN 240V CONTROL BOX
CRSAD RELAY-DISABLE DOOR W6X8RSDS 09C024D71 RELAY 4PDT DIFGLD 14PIN 240V CONTROL BOX
CRSAE RELAY-SAMPLE DESIRED W6X8RSDS 09C024D71 RELAY 4PDT DIFGLD 14PIN 240V CONTROL BOX
CRSDR RELAY-SAMPLE DOOR RELEASE W6X8RSDS 09C024D71 RELAY 4PDT DIFGLD 14PIN 240V CONTROL BOX
CRSG RELAY-SIGNAL (OPITONAL FLASHING LIGHT) W6X8RSS+ 09C024D71 RELAY 4PDT DIFGLD 14PIN 240V CONTROL BOX
CRSG RELAY-SIGNAL (OPITONAL FLASHING LIGHT) W6X8RSS+A 09C024D71 RELAY 4PDT DIFGLD 14PIN 240V CONTROL BOX
CS >>>CONTACTOR-MOTOR STARTER
CSR CONTACTOR-RECIRCULATE W6X8RSEV 09MC04E371 32A 3P CONT.NR 240V5/6 IEC CONTROL BOX
CSVS CONTACTOR-INVERTER 3022X8 W6X8RSS+ 09MC08C371 16A 3P MCS CONT NR 240V5/6 CONTROL BOX
CSVS CONTACTOR-INVERTER 36X8, 42X7 W6X8RSS+A 09MC08G371 37A 3P MCS CONT NR 240V5/6 CONTROL BOX
EB >>>BUZZER OR AUDIBLE SIGNAL
EBSG BUZZER-SIGNAL AUDIBLE W6X8RSS+ 09H016 BUZZ. 230V W/6-32 CTR+6" LEADS SWITCH PANEL
EBSG BUZZER-SIGNAL AUDIBLE W6X8RSS+A 09H016 BUZZ. 230V W/6-32 CTR+6" LEADS SWITCH PANEL
EF >>>FUSE OR FUSE HOLDER
Page 2 of 6
2
C O M P O N E N T P A R T S L I S T W6X8RSPL/2021054N
COMPONENT FUNCTION OF THIS WHERE TO FIND
NUMBER COMPONENT NUMBER THIS COMPONENT MILNOR P/N DESCRIPTION LOCATION
EF01 FUSE-CONTROL CIRCUIT W6X8RSLV 09FF006AMA FUSE BK/ABC 6 AMP 250V BUSS CONTROL BOX
EF02 FUSE-CONTROL CIRCUIT W6X8RSLV 09FF006AMA FUSE BK/ABC 6 AMP 250V BUSS CONTROL BOX
EF1 FUSE-PRIMARY INCOMING VOLTAGE W6X8RSLV 09FF005AWN BUSE BUSS KTK 5AMP 600V=HPS HOLDER CONTROL BOX
EF2 FUSE-PRIMARY INCOMING VOLTAGE W6X8RSLV 09FF005AWN BUSE BUSS KTK 5AMP 600V=HPS HOLDER CONTROL BOX
EF >>FLASHING LIGHT
EFSG FLASHING LIGHT-LED W6X8RSFS 09H025V12 BEACON ROTARY AMBER LED 12VDC SWITCH PANEL
EL >>>LIGHT-PILOT OR INDICATOR
ELSAO LIGHT-OK TO OPEN SAMPLE DOOR W6X8RSDS 09J060WH71 LAMP 1/2" WHITE 240VAC TABS SAMPLE SWPNL
ELSDR LIGHT-SAMPLE DESIRED W6X8RSDS 09J060A71 LAMP 1/2" AMB 250V IDI 1051QC3 SAMPLE SWPNL
ELSES LIGHT-ILLUMINATED EMERGENCY STOP W6X8RSS+A 09N507E ESTOP SWITCH HEAD RED CLEAR NEEDS 09
N
SWITCH PANEL
ELSG LIGHT-SIGNAL VISUAL W6X8RSS+ 09J060A71 LAMP 1/2" AMB 250V IDI 1051QC3 SWITCH PANEL
ELSG LIGHT-SIGNAL VISUAL W6X8RSS+A 09J060A71 LAMP 1/2" AMB 250V IDI 1051QC3 SWITCH PANEL
EM >>>ELECTROMAGNET AND SOLENOID
EMDL SOLENOID-DOOR LATCH W6X8RSS+ 09K063C24 DOOR LOCK SOLENOID 24V DOOR LATCH
EMDL SOLENOID-DOOR LATCH W6X8RSS+A 09K062A71 SOLENOID 240/60--220/50 = ILOC DOOR LATCH
EMHR METER-RUN TIME W6X8RSFS 38C203 HOUR METER 3.8IN 3 HOLE MTG 230V/60C CONTROL BOX
ES >>>POWER SUPPLY-ELECTRONIC
ESPS POWER SUPPLY-CARD CAGE W6X8RSBW 08PSS3401T 40 WATT POWER SUPPLY TESTED CONTROL BOX
ESPS2 POWER SUPPLY-PROCESSOR W6X8RSBW 08PSS2401T PWR SUPY 40WATT 120/240V TO 12V TESTE
D
CONTROL BOX
ET >>>THERMAL OVERLOAD DEVICES
ETDB OVERLOAD-DYNAMIC BRAKE W6X8RSS+ 09F024A OL RELAY 1P SZ1 SQD #9065-C01 CONTROL BOX
ETDB OVERLOAD-DYNAMIC BRAKE W6X8RSS+A 09F024A OL RELAY 1P SZ1 SQD #9065-C01 CONTROL BOX
ETR OVERLOAD-RECIRCULATION MOTOR W6X8RSS+ 09FTD0016T E1 PLUS OL RELAY 1.0-5.0A CONTROL BOX
ETR OVERLOAD-RECIRCULATION MOTOR W6X8RSS+A 09FTD0016T E1 PLUS OL RELAY 1.0-5.0A CONTROL BOX
ETVS OVERLOAD LOAD-VARIABLE SPD W6X8RSS+ 09FTD0037T E1 PLUS OL RELAY 3.2-16A CONTROL BOX
ETVS OVERLOAD- INVERTER 36X8R, 42X7R W6X8RSS+A 09FTD0121T E1 PLUS OL RELAY 9-45A CONTROL BOX
EX >>>TRANSFORMERS
EX37 TRANSFORMER-INCOMING VOLT.120VAC W6X8RSLV MESSAGE EW SEE EX37-1, OR -2 FOR VOLTAGE CONTROL BOX
EX37-1 TRANSFORMER-208 TO 240V W6X8RSLV 98CMCR0902 AUTOXFMR 208V-230V 250VA CONTROL BOX
EX37-2 TRANSFORMER-380/480 TO 240VAC W6X8RSLV 09UA025AAB XFMR 380-480PRI/120-240SEC250V CONTROL BOX
MT >>>MOTORS
MTD MOTOR-DRIVE W6X8RSS+ MESSAGE SO SEE SPECIFIC COMPONENT+NAMEPLATE MACHINE
MTD MOTOR-DRIVE W6X8RSS+A MESSAGE SO SEE SPECIFIC COMPONENT+NAMEPLATE MACHINE
Page 3 of 6
3
C O M P O N E N T P A R T S L I S T W6X8RSPL/2021054N
COMPONENT FUNCTION OF THIS WHERE TO FIND
NUMBER COMPONENT NUMBER THIS COMPONENT MILNOR P/N DESCRIPTION LOCATION
MTLF FILTER-INVERTER/MOTOR POWER W6X8RSS+ 09MVFILTR1 INCOME POWER FILTER CAP CONTROL BOX
MTLF FILTER-INVERTER/MOTOR POWER W6X8RSS+A 09MVFILTR1 INCOME POWER FILTER CAP CONTROL BOX
MTR MOTOR-RECIRCULATION W6X8RSS+ MESSAGE SO SEE SPECIFIC COMPONENT+NAMEPLATE MACHINE
MTR MOTOR-RECIRCULATION W6X8RSS+A MESSAGE SO SEE SPECIFIC COMPONENT+NAMEPLATE MACHINE
MTVS FAN-INVERTOR COOLING W6X8RSS+ 13AF235A71 FAN 235CFM 230V 50/60 BACK C-BOX
MTVS FAN-INVERTOR COOLING W6X8RSS+A 13AF235A71 FAN 235CFM 230V 50/60 BACK C-BOX
MV >>>MOTOR POWER INVERTERS
MVDBR RESISTOR-DYNAMIC BRAKE W6X8RSS+ 09MV100RES RESIST 100 OHM 225WATT ADJ BELOW C-BX
MVDBR RESISTOR-DYNAMIC BRAKE W6X8RSS+A 09MV100RES RESIST 100 OHM 225WATT ADJ BELOW C-BX
MVFLT INV FILTER-DRIVE W6X8RSS+ 09MVFILTR1 INCOME POWER FILTER CAP CONTROL BOX
MVFLT INV FILTER-DRIVE W6X8RSS+A 09MVFILTR1 INCOME POWER FILTER CAP CONTROL BOX
MVINR-H INV IN LINE REACTOR 380-480V 3022 MODEL W6X8RSS+ 09MX100A96 REACTOR 10HP 460V 16A CONTROL BOX
MVINR-H INV IN LINE REACTOR 280-4800V 36/42MODELS W6X8RSS+A 09MX250A96 REACTOR 25HP 460V 35A CONTROL BOX
MVINR-L INV IN LINE REACTOR 200-240V 3022 MODEL W6X8RSS+ 09MX100A74 REACTOR 25HP 230V 35A CONTROL BOX
MVINR-L INV IN LINE REACTOR 200-240V 36/42MODELS W6X8RSS+A 09MX200A74 REACTOR 20HP 230V 55A CONTROL BOX
MVINV-H INVERTER-3022X8R 380-600 V W6X8RSS+ 09MWB00996 V1000 INVERTER 9.2AMP 460V CONTROL BOX
MVINV-H INVERTER-36" X8R 380-600 VOLTS W6X8RSS+A 09MWB01896 V1000 INVERTER 18AMP 460V CONTROL BOX
MVINV-H INVERTER-42" X7R 380-600 VOLTS W6X8RSS+A 09MWA02496 F7 INVERTER 24 AMP CONTROL BOX
MVINV-L INVERTER-3022X8R 200-240V W6X8RSS+ 09MWB01774 V1000 INVERTER 17.5AMP 230V CONTROL BOX
MVINV-L INVERTER-36" X8R 200-240VOLTS W6X8RSS+A 09MWB03374 V1000 INVERTER 33AMP 230V CONTROL BOX
MVINV-L INVERTER-42" X7R 200-240VOLTS W6X8RSS+A 09MWA04574 F7 INVERTER 45 AMP CONTROL BOX
PS >>POWER SUPPLY-ELECTRONIC
PSFL POWER SUPPLY-FLASHING LIGHT (OPTIONAL) W6X8RSFS 08PSS3401T 40 WATT POWER SUPPLY TESTED CONTROL BOX
RS >>RESISTORS
RS01 RESISTOR 16OHM 25W W6X8RSBW ECEUMTRES LOAD RESISTOR ASSY MILTOUCH EX LOW VOLT BOX
SH >>>SWITCH-HAND OPERATED
SH01 SWITCH-208-240V SELECT W6X8RSLV 09N050 TOGSW SPDT NO OFF 10A250V CONTROL BOX
SHDOH SWITCH-OPEN DOOR W6X8RSI1A 09N405PB12 SWASS PB BLUE 1NO/2NC SWITCH PANEL
SHDOH SWITCH-DOOR OPEN W6X8RSS+ 09N405PB12 SWASS PB BLUE 1NO/2NC SWITCH PANEL
SHDOH SWITCH-DOOR OPEN W6X8RSS+A 09N405PB12 SWASS PB BLUE 1NO/2NC SWITCH PANEL
SHSAD SWITCH-SAMPLE DESIRED W6X8RSDS 09N400CBNO CONTACT BLK ONLY 1-NO SQD#ZB2BE101 SAMPLE SWPL
SHSAR SWITCH--SAMPLE DOOR RESET W6X8RSDS 09N400CBNC CONTACT BLKONLY 1-NC SQD#ZB2BE102 SAMPLE SWPL
SHSMA SWITCH-MASTER W6X8RSS+ 09N405M210 SWASS M2W 1NO SWITCH PANEL
Page 4 of 6
4
C O M P O N E N T P A R T S L I S T W6X8RSPL/2021054N
COMPONENT FUNCTION OF THIS WHERE TO FIND
NUMBER COMPONENT NUMBER THIS COMPONENT MILNOR P/N DESCRIPTION LOCATION
SHSMA SWITCH-MASTER W6X8RSS+A 09N405M210 SWASS M2W 1NO SWITCH PANEL
SHSOE SWITCH-EMERGENCY STOP W6X8RSS+ 09N505 SW ASSY EMER STOP SWITCH PANEL
SHSOE SWITCH-EMERGENCY STOP (OPTION) W6X8RSS+ 09N507G ESTOP LIGHT ONLY 240VAC NEEDS 09N507F
A
SWITCH PANEL
SHSOE SWITCH-EMERGENCY STOP W6X8RSS+A 09N505 SW ASSY EMER STOP SWITCH PANEL
SHSOE SWITCH-EMERGENCY STOP (OPTION) W6X8RSS+A 09N507G ESTOP LIGHT ONLY 240VAC NEEDS 09N507F
A
SWITCH PANEL
SM >>>SWITCH-MECHANICAL OPERATED
SMDE SWITCH-SECONDARY DOOR CLOSED W6X8RSS+A 09RM01212S CAPSW 12' 180DEG ROLLER SILVER SHELL FRONT
SMEB SWITCH-EXCURSION W6X8RSI1A 09R008A MICSW SPDT BZE6-2RN183 UNDER SHELL
SMPLL SWITCH-DOOR CLOSED W6X8RSS+ 09R014A MINI-SW SPDT STAKON #V15G1C26 DOOR LATCH
SMPLL SWITCH-DOOR CLOSED W6X8RSS+A 09R012 MICSW SPDT PAINTED BZE6-RN 01 DOOR LATCH
SMSDC SWITCH-SAMPLE DOOR W6X8RSDS 09RM01212S CAPSW 12' 180DEG ROLLER SILVER SAMPLE DOOR
SMWVB SWITCH-VIBRATION W6X8RSS+ 09R020 SWITCH NC VIBR#WZ-2RW84429-P52 CONTROL BOX
SMWVB SWITCH-VIBRATION W6X8RSS+A 09R020 SWITCH NC VIBR#WZ-2RW84429-P52 CONTROL BOX
SP >>>SWITCH-PRESSURE OPERATED
SPA PRESSURE SW-AIR PRESSURE AVAILIBLE W6X8RSS+A 09N082A PRESSW NASON CLOSE @ 62 LB. CONTROL BOX
SPD PRESSURE SW-LEVEL OK TO OPEN DOOR W6X8RSS+A 09N082B10 PRESSW NASON CLOSE @ 10 LB CONTROL BOX
VE >>>VALVE-ELECTRIC OPERATED
VEC01 VALVE-CHEMICAL #1 FLUSH W6X8RSCF 96P013B71 3/4" 2WAYPLASTICVAL 240V60C SUPPLY INJEC
VEC02 VALVE-CHEMICAL #2 FLUSH W6X8RSCF 96P013B71 3/4" 2WAYPLASTICVAL 240V60C SUPPLY INJEC
VEC03 VALVE-CHEMICAL #3 FLUSH W6X8RSCF 96P013B71 3/4" 2WAYPLASTICVAL 240V60C SUPPLY INJEC
VEC04 VALVE-CHEMICAL #4 FLUSH W6X8RSCF 96P013B71 3/4" 2WAYPLASTICVAL 240V60C SUPPLY INJEC
VEC05 VALVE-CHEMICAL #5 FLUSH W6X8RSCF 96P013B71 3/4" 2WAYPLASTICVAL 240V60C SUPPLY INJEC
VEC06 VALVE-CHEMICAL #6 FLUSH W6X8RSCX SUPPLIED BY OTHERS
VEC07 VALVE-CHEMICAL #7 FLUSH W6X8RSCX SUPPLIED BY OTHERS
VEC08 VALVE-CHEMICAL #8 FLUSH W6X8RSCX SUPPLIED BY OTHERS
VEC09 VALVE-CHEMICAL #9 FLUSH W6X8RSCX SUPPLIED BY OTHERS
VEC10 VALVE-CHEMICAL #10 FLUSH W6X8RSCX SUPPLIED BY OTHERS
VEC11 VALVE-CHEMICAL #11 FLUSH W6X8RSCX SUPPLIED BY OTHERS
VEC12 VALVE-CHEMICAL #12 FLUSH W6X8RSCX SUPPLIED BY OTHERS
VEC13 VALVE-CHEMICAL #13 FLUSH W6X8RSCX SUPPLIED BY OTHERS
VEC14 VALVE-CHEMICAL #14 FLUSH W6X8RSCX SUPPLIED BY OTHERS
VEC15 VALVE-CHEMICAL #15 FLUSH W6X8RSCX SUPPLIED BY OTHERS
VEDL VALVE-DOOR UNLATCH 36+42 W6X8RSS+A 96R301B71 1/8" AIRPILOT 3W NC 240V VALVE BOX
Page 5 of 6
5
C O M P O N E N T P A R T S L I S T W6X8RSPL/2021054N
COMPONENT FUNCTION OF THIS WHERE TO FIND
NUMBER COMPONENT NUMBER THIS COMPONENT MILNOR P/N DESCRIPTION LOCATION
VEDRR VALVE-REUSE DRAIN W6X8RSEV 96R301A71 1/8" AIRPILOT 3W NC 240V50/60 AIR VALVE BX
VEDRS VALVE-DRAIN W6X8RSEV 96D350A71 DRINVAL 3"MTRDR 240V 50/60C REAR OF MACH
VEFL VALVE-FLUSH W6X8RSCF 96P056A71 3/4" NC 230V50/60 W/LEADS BURK SUPPLY INJEC
VEPPO VALVE-DOOR SEAL 36&42 W6X8RSS+A 96R301A71 1/8" AIRPILOT 3W NC 240V50/60 AIR VALVE BX
VESDL VALVE-SAMPLE DOOR LATCH W6X8RSDS 96R301A71 1/8" AIRPILOT 3W NC 240V50/60 AIR VALVE BX
VESTM VALVE-STEAM 30" W6X8RSEV 96TDC2BA71 1/2" N/C 2WAY 240V50/60C STEAM INLET PIPE
VESTM VALVE-STEAM 36" & 42" W6X8RSEV 96P040A71 3/4"STEAMVAL240V50/60C 150PSI REAR RT LEG
VEWC VALVE-COLD WATER 30" W6X8RSEV 96P057A71 1/2"NPT X 1/2"ORIFICE 240V 5/6 REAR OF MACH
VEWC VALVE-COLD WATER 36" W6X8RSEV 96P056A71 3/4" NC 230V50/60 W/LEADS BURK REAR RT LEG
VEWC VALVE-COLD WATER 42" W6X8RSEV 96P152A71 1+1/4"NC 240V W/LEADS BURK REAR RT LEG
VEWH VALVE-HOT WATER 30" W6X8RSEV 96P057A71 1/2"NPT X 1/2"ORIFICE 240V 5/6 REAR OF MACH
VEWH VALVE-HOT WATER 36" W6X8RSEV 96P056A71 3/4" NC 230V50/60 W/LEADS BURK REAR RT LEG
VEWH VALVE-HOT WATER 42" W6X8RSEV 96P152A71 1+1/4"NC 240V W/LEADS BURK REAR RT LEG
VEWVX VALVE-EXTRA WATER 30022 W6X8RSEV 96P057A71 1/2"NPT X 1/2"ORIFICE 240V 5/6 REAR OF MACH
VEWVX VALVE-EXTRA WATER 36026 W6X8RSEV 96P056A71 3/4" NC 230V50/60 W/LEADS BURK REAR OF MACH
VEWVX VALVE-EXTRA WATER 42026 & 42032 W6X8RSEV 96P152A71 1+1/4"NC 240V W/LEADS BURK REAR OF MACH
Page 6 of 6
6
BMP720097/19036
PELLERIN MILNOR CORPORATION
LIMITED STANDARD WARRANTY
We warrant to the original purchaser that MILNOR machines including electronic hardware/software
(hereafter referred to as “equipment”), will be free from defects in material and workmanship for a
period of one year from the date of shipment (unless the time period is specifically extended for
certain parts pursuant to a specific MILNOR published extended warranty) from our factory with no
operating hour limitation. This warranty is contingent upon the equipment being installed, operated
and serviced as specified in the operating manual supplied with the equipment, and operated under
normal conditions by competent operators.
Providing we receive written notification of a warranted defect within 30 days of its discovery, we
will—at our option—repair or replace the defective part or parts, EX Factory (labor and freight
specifically NOT included). We retain the right to require inspection of the parts claimed defective in
our factory prior to repairing or replacing same. We will not be responsible, or in any way liable, for
unauthorized repairs or service to our equipment, and this warranty shall be void if the equipment is
tampered with, modified, or abused, used for purposes not intended in the design and construction
of the machine, or is repaired or altered in any way without MILNOR's written consent.
Parts damaged by exposure to weather, to aggressive water, or to chemical attack are not covered
by this warranty. For parts which require routine replacement due to normal wear—such as gaskets,
contact points, brake and clutch linings, belts, hoses, and similar parts—the warranty time period is
90 days.
We reserve the right to make changes in the design and/or construction of our equipment (including
purchased components) without obligation to change any equipment previously supplied.
ANY SALE OR FURNISHING OF ANY EQUIPMENT BY MILNOR IS MADE ONLY UPON THE EXPRESS
UNDERSTANDING THAT MILNOR MAKES NO EXPRESSED OR IMPLIED WARRANTIES OF
MERCHANTABILITY OR FITNESS FOR ANY PARTICULAR USE OR PURPOSE OR ANY OTHER
WARRANTY IMPLIED BY LAW INCLUDING BUT NOT LIMITED TO REDHIBITION. MILNOR WILL NOT
BE RESPONSIBLE FOR ANY COSTS OR DAMAGES ACTUALLY INCURRED OR REQUIRED AS A RESULT
OF: THE FAILURE OF ANY OTHER PERSON OR ENTITY TO PERFORM ITS RESPONSIBILITIES, FIRE
OR OTHER HAZARD, ACCIDENT, IMPROPER STORAGE, MIS-USE, NEGLECT, POWER OR
ENVIRONMENTAL CONTROL MALFUNCTIONS, DAMAGE FROM LIQUIDS, OR ANY OTHER CAUSE
BEYOND THE NORMAL RANGE OF USE. REGARDLESS OF HOW CAUSED, IN NO EVENT SHALL
MILNOR BE LIABLE FOR SPECIAL, INDIRECT, PUNITIVE, LIQUIDATED, OR CONSEQUENTIAL COSTS
OR DAMAGES, OR ANY COSTS OR DAMAGES WHATSOEVER WHICH EXCEED THE PRICE PAID TO
MILNOR FOR THE EQUIPMENT IT SELLS OR FURNISHES.
THE PROVISIONS ON THIS PAGE REPRESENT THE ONLY WARRANTY FROM MILNOR AND NO OTHER
WARRANTY OR CONDITIONS, STATUTORY OR OTHERWISE, SHALL BE IMPLIED.
WE NEITHER ASSUME, NOR AUTHORIZE ANY EMPLOYEE OR OTHER PERSON TO ASSUME FOR US,
ANY OTHER RESPONSIBILITY AND/OR LIABILITY IN CONNECTION WITH THE SALE OR FURNISHING
OF OUR EQUIPMENT TO ANY BUYER.
7
How to Get the Necessary Repair Components
PELLERIN MILNOR CORPORATION
BIUUUD19 (Published) Book specs- Dates: 20081231 / 20081231 / 20081231 Lang: ENG01 Applic: UUU
How to Get the Necessary Repair Components
This document uses Simplified Technical English.
Learn more at http://www.asd-ste100.org.
You can get components to repair your machine from the approved supplier where you got this
machine. Your supplier will usually have the necessary components in stock. You can also get
components from the Milnor®factory.
Tell the supplier the machine model and serial number and this data for each necessary component:
• The component number from this manual
• The component name if known
• The necessary quantity
• The necessary transportation requirements
• If the component is an electrical component, give the schematic number if known.
• If the component is a motor or an electrical control, give the nameplate data from the used
component.
To write to the Milnor factory:
Pellerin Milnor Corporation
Post Office Box 400
Kenner, LA 70063-0400
UNITED STATES
Telephone: 504-467-2787
Fax: 504-469-9777
Email: [email protected]
— End of BIUUUD19 —
8
How to Use Milnor®Electrical Schematic Diagrams
PELLERIN MILNOR CORPORATION
BIUUUK01 (Published) Book specs- Dates: 20130308 / 20130308 / 20130308 Lang: ENG01 Applic: PCR UUU
How to Use Milnor®Electrical Schematic Diagrams
Milnor®electrical schematic manuals contain a table of contents/component list and a set of
schematic drawings. These documents are cross referenced and must be used together.
The table of contents/components list shows, for every component on every schematic in the
manual, the component item number (explained in detail below), statement of function, parent
schematic number, part number, description and electric box location. In older manuals, two
component lists are provided: List 1 sorts the components by function, and List 2 by type of
component. Newer schematic manuals include only the list sorted by component number.
The schematic drawings use symbols for each electromechanical component, and indicate the
function of each. Integrated circuits are not shown, but the function of each microprocessor input
and output is stated. Certain electrical components not pertinent to circuit logic, such as wire
connectors, are not represented on the schematic.
Most machines require several schematics to describe the complete control system and all the
options available on the included models. In most manuals there are some schematic pages that
don't apply to your specific machine because certain options and configurations are mutually
exclusive or are not necessary in all markets. You may find it helpful to mark or remove such
pages. A schematic page that only applies to a subset of machines will normally state, in the title,
which models and/or options it covers. Compare this with the nameplate on your machine and
with your purchase records.
Each schematic is devoted to circuits with common functions (e.g., microprocessor inputs, motor
contactors). Schematics appear in the manual in alphanumeric order.
1. Component Prefix Classifications and Descriptions
Component item numbers consist of up to six characters and appear as part of a component's
symbol on the schematic. The first two characters indicate the general class of component, and
the remaining characters are a mnemonic for the function. For example, “CD” is the code for all
time delay relays, and “SR” stands for safety reset. Thus, CDSR is a time delay relay that serves
as a safety reset.
The following are descriptions of electrical components used in Milnor®machines. Descriptions
are in alphabetical order by the component class code (two character prefix).
Note 1: Some component class codes do not have a corresponding symbol, but are represented by a box
and an accompanying note describing the component. Examples of such codes are BA (printed circuit
board), ED (electronic display), and ES (electronic power supply).
BA=Printed Circuit Board—Insulating substrate on which a thin pattern of copper conductors
has been formed to connect discrete electronic components also mounted on the board.
CB=Circuit Breaker (Figure 1)—Automatic switch that opens an electric circuit in abnormal
current conditions (e.g., an overload).
Figure 1: Circuit Breaker (CB)
CD=Control, Time Delay Relay (Figure 2)—A relay whose contacts switch only after a fixed
or adjustable delay, once voltage has been applied to its coil. The contacts switch back to
normal (de-energized state) immediately when the voltage is removed.
9
How to Use Milnor®Electrical Schematic Diagrams
PELLERIN MILNOR CORPORATION
Figure 2: Time Delay Relay (CD)
Coil and Contacts Legend
.
A. Coil
B. Contacts
CL=Control, Latch Relay (Figure 3)—A relay which latches in an energized or set position
when operated by one coil (the latch/set coil). The relay stays latched even though coil voltage
is removed. The relay releases or unlatches when voltage is applied to a second coil (the
unlatch/reset coil).
Figure 3: Latch Relay (CL)
Coils and Contacts Legend
.
A. Coils
B. Contacts
CR=Control, Relay (Figure 4)—A relay whose contacts switch immediately when voltage is
applied to its coil and revert to normal when the voltage is removed.
Figure 4: Standard Relay (CR)
Coils and Contacts Legend
.
A. Coil
B. Contacts
CP=Control, Photo-Eye (Figure 5)—Photo-eyes sense the presence of an object without direct
physical contact. Photo-eyes consist of a transmitter, receiver, and output module. These
components may be housed in one assembly with the transmitter bouncing light off of a
reflector to the receiver, or these components can be housed in two separate assemblies with
the transmitter pointed directly at the receiver. The photo-eye can be set to turn on its output
either when the light beam becomes blocked (dark operate) or when it becomes un-blocked
(light operate).
10
How to Use Milnor®Electrical Schematic Diagrams
PELLERIN MILNOR CORPORATION
Figure 5: Photo-eye (CP)
Symbols Legend
.
A. Example of single
assembly
B. Example of two separate
assemblies
CS=Control, Contactor/Motor Starter (Figure 6)—A relay capable of handling heavier
electrical loads, usually a motor.
Figure 6: Other Control Symbols
EB=Electric Buzzer (Figure 6)—An audible signaling device.
EC=Electric Clutch (Figure 6)—A clutch consists of a coil and a rotor. The rotor has two
separate rotating plates. These plates are free to rotate independent of each other until the coil
is energized. Once energized the two plates turn as one.
ED=Electronic Display—A visual presentation of data, such as an LCD (liquid crystal display),
LED (light emitting diode) display, or VFD (vacuum florescent display).
EF=Electric Fuse (Figure 6)—A fuse is an over-current safety device with a circuit opening
fusible member which is heated and severed by the passage of over-current through it.
EL=Electric Light (Figure 6)—Indicator lights may be either incandescent or fluorescent.
EM=Electro Magnet Solenoid—A device consisting of a core surrounded by a wire coil through
which an electric current is passed. While current is flowing, iron is attracted to the core (e.g.,
a pinch tube drain valve solenoid).
ES=Electronic Power Supply—A device that converts AC (alternating current) to filtered and
regulated DC (direct current). The input voltage to the power supply is usually 120 or 240
VAC. The output is +5, +12, and -12 VDC.
ET=Thermal Overload (Figure 7)—A safety device designed to protect a motor. A thermal
overload consists of an overload block, heaters, and an auxiliary contact. The auxiliary contact
is normally installed in a safety (three-wire) circuit that stops power to the motor contactor
coil when a motor overload occurs.
11
How to Use Milnor®Electrical Schematic Diagrams
PELLERIN MILNOR CORPORATION
Figure 7: Thermal Overload (ET)
Schematic Symbol Legend
.
A. Heater (one per phase)
B. Overload relay; contacts open if overload
condition exists
EX=Electrical Transformer (Figure 8)—A device that transfers electrical energy from one
isolated circuit to another, often raising or lowering the voltage in the process.
KB=Keyboard—Device similar to a typewriter for making entries to a computer.
MN=Electronic Monitor (CRT)—A cathode ray tube used for visual presentation of data.
MR=Motors (Figure 9)—Electromechanical device that converts electrical energy into
mechanical energy.
Figure 8: Transformer (EX) Figure 9: Electric Motor (MR)
MV=Motor (Variable Speed) Inverter—To vary the speed of an AC motor, the volts to
frequency ratio must be kept constant. The motor will overheat if this ratio is not maintained.
The motor variable speed inverter converts three phase AC to DC. The inverter then uses this
DC voltage to generate AC at the proper voltage and frequency for the commanded speed.
Note 2: Switch symbols used in the schematics and described below always depict the switch in its un-
actuated state.
PX=Proximity Switch (Figure 10)—A device which reacts to the proximity of an target without
physical contact or connection. The actuator or target causes a change in the inductance of the
proximity switch which causes the switch to operate. Proximity switches can be two-wire
(AC) or three-wire (DC) devices.
12
How to Use Milnor®Electrical Schematic Diagrams
PELLERIN MILNOR CORPORATION
Figure 10: Proximity Switches (PX)
Switch Symbols Legend
.
A. Alternating current
proximity switch
B. Direct current proximity
switch
SC=Switch, Cam Operated (Figure 11)—A switch in which the electrical contacts are opened
and/or closed by the mechanical action of a cam(s). Applications include 35-50 pound timer
operated machines, Autospot, timer reversing motor assembly, and some balancing systems.
SH=Switch, Hand Operated (Figure 12)—A switch that is manually operated (e.g., Start
button, Master switch, etc.).
Figure 11: Cam Switch (SC) Figure 12: Hand Operated Switch
(SH)
SK=Switch, Key Lock (Figure 13)—A switch that requires a key to operate. This prevents
unauthorized personnel from gaining access to certain functions (e.g., the Program menu).
SL=Switch, Level Operated (Figure 14)—A switch connected to a float that causes the switch
to open and close as the level changes.
Figure 13: Key Switch (SK) Figure 14: Level Switch (SL)
SM=Switch, Mechanically Operated (Figure 15)—A switch that is mechanically operated by a
part of or the motion of the machine (e.g., door closed switch, tilt limit switches, etc.)
SP=Switch, Pressure Operated (Figure 16)—A switch in which a diaphragm presses against a
switch actuator.
13
How to Use Milnor®Electrical Schematic Diagrams
PELLERIN MILNOR CORPORATION
Figure 15: Mechanical Switch (SM) Figure 16: Pressure Switch (SP)
ST=Switch, Temperature Operated (Figure 17)—A switch that is actuated at a preset
temperature (e.g., dryer safety probes) or has adjustable set points (e.g., Motometers or
Combistats).
TB=Terminal Board (Figure 18)—A strip or block for attaching or terminating wires.
Figure 17: Temperature Switch
(ST) Figure 18: Terminal Board (TB)
VE=Valve, Electric Operated (Figure 19)—A valve operated by an electric coil to control the
flow of fluid. The fluid can be air, water or hydraulic.
Figure 19: Electrically Operated
Valve (VE)
ZF=Rectifier (Figure 20)—A solid state device that converts alternating current to direct
current.
14
How to Use Milnor®Electrical Schematic Diagrams
PELLERIN MILNOR CORPORATION
Figure 20: Bridge Rectifier (ZF)
Component Symbol Legend
.
A. Alternating current input
B. Direct current output
Figure 21: Bridge Rectifier
Component Legend
.
A. Alternating current in
B. Negative direct current
out
C. Positive direct current out
WC=Wiring Connector—A coupling device for joining two cables or connecting a cable to an
electronic circuit or piece of equipment. Connectors are male or female, according to whether
they plug into or receive the mating connector.
2. Component Terminal Numbering
CAUTION 1 : Risk of Mis-wiring—Due to electrical component manufacturing
inconsistencies, the pin numbers imprinted on components such as connectors and relay bases
used on Milnor machines often do not correspond to the pin numbers shown in the schematics.
• Ignore pin numbers imprinted on in-line connectors (e.g., Molex connectors) and relay
bases.
• Use the pin identification illustrations herein to identify pins on these components.
15
How to Use Milnor®Electrical Schematic Diagrams
PELLERIN MILNOR CORPORATION
Figure 22: Plug-in Relays
11-pin Relay with Grey Base Legend
14-pin Relay with Grey Base (older)
14-pin Relay with Black Base (newer)
14-pin Relay with Beige Base (rare)
.
Left. View of
relay
and
base
Right. Same
view,
show-
ing pin
num-
bers
16

Other manuals for 36026X8R

1

This manual suits for next models

3

Other Milnor Washer manuals

Milnor 60044SR2 Manual

Milnor

Milnor 60044SR2 Manual

Milnor 36021V5Z Assembly instructions

Milnor

Milnor 36021V5Z Assembly instructions

Milnor 30 Series User manual

Milnor

Milnor 30 Series User manual

Milnor 60044WP3 User manual

Milnor

Milnor 60044WP3 User manual

Milnor 30022H7J Installation and operating manual

Milnor

Milnor 30022H7J Installation and operating manual

Milnor BICWUT01 Operating instructions

Milnor

Milnor BICWUT01 Operating instructions

Milnor System 7 User manual

Milnor

Milnor System 7 User manual

Milnor MWF C Series Installation and operating manual

Milnor

Milnor MWF C Series Installation and operating manual

Milnor 30022V8Z User manual

Milnor

Milnor 30022V8Z User manual

Milnor 60044 SG3 User manual

Milnor

Milnor 60044 SG3 User manual

Milnor MWR12X5 Quick start guide

Milnor

Milnor MWR12X5 Quick start guide

Milnor MWR36J4 Manual

Milnor

Milnor MWR36J4 Manual

Milnor Mark II User manual

Milnor

Milnor Mark II User manual

Milnor 30022H8J User manual

Milnor

Milnor 30022H8J User manual

Milnor Staphguard 42026 QHP User manual

Milnor

Milnor Staphguard 42026 QHP User manual

Milnor MWF18J8 User manual

Milnor

Milnor MWF18J8 User manual

Milnor 52038 WP1 Assembly instructions

Milnor

Milnor 52038 WP1 Assembly instructions

Milnor 72044 WP2 Assembly instructions

Milnor

Milnor 72044 WP2 Assembly instructions

Milnor Q4J Series User manual

Milnor

Milnor Q4J Series User manual

Milnor 36026X8J Manual

Milnor

Milnor 36026X8J Manual

Milnor 30022V8Z Manual

Milnor

Milnor 30022V8Z Manual

Milnor 76028 G3 CBW Manual

Milnor

Milnor 76028 G3 CBW Manual

Milnor 42044WR2 Quick start guide

Milnor

Milnor 42044WR2 Quick start guide

Milnor 48040F7D Manual

Milnor

Milnor 48040F7D Manual

Popular Washer manuals by other brands

Magic Chef MCSTCW09W2 user manual

Magic Chef

Magic Chef MCSTCW09W2 user manual

Atos AF2 Operating	 instruction

Atos

Atos AF2 Operating instruction

LG F1400HT1B owner's manual

LG

LG F1400HT1B owner's manual

Haier HWM68VA user manual

Haier

Haier HWM68VA user manual

Fagor FFT-96-106-116 NOTICE D’INSTALLATION, D’UTILISATION ET D’ENTRETIEN

Fagor

Fagor FFT-96-106-116 NOTICE D’INSTALLATION, D’UTILISATION ET D’ENTRETIEN

Samsung WD6122CKC user manual

Samsung

Samsung WD6122CKC user manual

Whirlpool AUTOMATIC WASHER Use & care guide

Whirlpool

Whirlpool AUTOMATIC WASHER Use & care guide

Smeg A64AP.2 Istruzioni per l'installazione e l'uso

Smeg

Smeg A64AP.2 Istruzioni per l'installazione e l'uso

Haier HWM-802P user manual

Haier

Haier HWM-802P user manual

Parmco PW-F7-W Installation and operating instructions

Parmco

Parmco PW-F7-W Installation and operating instructions

THOMSON TW BI 814 operating instructions

THOMSON

THOMSON TW BI 814 operating instructions

LG F14A8TDA Series owner's manual

LG

LG F14A8TDA Series owner's manual

LG WM2688H*M Service manual

LG

LG WM2688H*M Service manual

AEG LR8E70480 user manual

AEG

AEG LR8E70480 user manual

Prima LPR 710 Instruction booklet

Prima

Prima LPR 710 Instruction booklet

LG F4J6TMP0W owner's manual

LG

LG F4J6TMP0W owner's manual

Indesit IWC 61281 Instructions for use

Indesit

Indesit IWC 61281 Instructions for use

LG WGT9532VH Service manual

LG

LG WGT9532VH Service manual

manuals.online logo
manuals.online logoBrands
  • About & Mission
  • Contact us
  • Privacy Policy
  • Terms and Conditions

Copyright 2025 Manuals.Online. All Rights Reserved.