manuals.online logo
Brands
  1. Home
  2. •
  3. Brands
  4. •
  5. Milwaukee
  6. •
  7. Rotary Hammer
  8. •
  9. Milwaukee 5311 User manual

Milwaukee 5311 User manual

Installing and Removing Drill Bits and Chisels
(Fig. 1)
For Cat. No. 5313 only
1. Insert the bit or chisel into the nose of the tool.
2.Rotate bit slowly until it aligns with locking mechanism.
3. Push bit into tool until it locks.
4. Check to see that bit is locked by pulling on it.
5. To remove bits and chisels pull bit release collar toward
rear of tool and remove bit.
Use caution when handling hot bits and chisels.
For Cat. No. 5311 & 5316 only
1. Place bit lock in unlocked position.
2. Insert the bit or chisel into the nose of the tool. If you are
using a chisel, make sure that the notch in the shank faces
toward the bit lock.
3.Push the bit lock to the locked position.
4. To remove bits and chisels place bit lock in unlock position
and remove bit or chisel.
Use caution when handling hot bits and chisels.
Adjusting the Side Handle Position (Fig. 2)
Loosen the handle slightly, rotate it to the desired position and
tighten it securely.
Side handle can be used at the rear of the tool. Remove and
install in one of the positions provided on either side. Use the
side handle knob (packaged with the tool) in the front handle
position to secure the depth gauge assembly.
Setting the Depth Gauge (Fig. 3)
1. Loosen the depth rod adjustment knob.
2. Slide the depth gauge rod backward or forward until it is set
for the desired depth. The drilling depth is the distance
between the tip of the bit and the tip of the depth gauge rod.
3. Tighten the depth gauge rod adjustment knob securely.
Milwaukee Tool
1-1/2” Heavy-Duty Rotary Hammers
Model Numbers: 5311, 5313, 5316
Operating Instructions
Page 1
RenTrain INC RenTrain INC
To reduce the risk of injury, always unplug tool
before attaching or removing accessories. Use
only specifically recommended accessories.
Others may be hazardous.
WARNING!
ASSEMBLY
max
SDS
Fig. 2
Fig. 3
Fig. 1
Handle
Depth gauge rod
adjustment knob
Depth gauge rod
Bit release collar
Bits
Nose
Rear side handle mount
Operating Instructions (continued)
Page 2
RenTrain INC RenTrain INC
Removing the Depth Gauge System from Tool
(Fig. 4)
To remove the entire depth gauge system depress depth gauge
system lock tab and slide depth gauge system off the tool.
Selecting Action (Fig. 5)
MILWAUKEE 1-1/2” Heavy Duty Rotary Hammers feature a
stop rotation knob with three settings: hammering only, chisel
position mode and hammering with rotation.
1. For hammering only, see Fig. 5a. (For Model Nos. 5313 &
5316)
2. For chisel position mode, see Fig. 5b. (For Model No.
5313 only)
3. For hammering with rotation, see Fig. 5c. (For Model
Nos. 5313 & 5316)
Note: To engage the ham-
mering action, apply pres-
sure to the bit. When the
pressure on the bit is
released, the hammering
action will stop.
Starting, Stopping &
Controlling Speed
To start the tool, pull the
trigger. To stop the tool,
release the trigger.
All models feature a variable
speed trigger. To vary the
speed, simply increase
or decrease pressure on the
trigger.
Cold Starting
If this tool is stored for a long period of time or at cold tem-
peratures, it may not hammer initially because the lubrication
has become stiff. To warm up the tool,
1. Insert and lock a bit or chisel into the tool. (See page 10
for installing bit instructions)
2. Turn the tool on, applying force to the bit or chisel against
a concrete or wood surface.
3. Turn the tool on and off every few seconds. In a short
time, the tool will start hammering.
Operating
Position the tool, grasp handles firmly and pull trigger. Always
hold the tool securely using both handles, and maintain con-
trol. This tool has been designed to achieve top performance
with only moderate pressure. Let the tool do the work.
The MILWAUKEE 1-1/2” Heavy Duty Rotary Hammers have
vibration isolating handles that provide for operator comfort
without sacrificing power or performance.
The main handle has a pivot at the bottom and vibration iso-
lating mechanism at the top. Fig. 6
Ideal operator force compresses the bellows
slightly and allows
the tool to work
aggressively while
the handle remains
steady. Fig. 6a
Excessive force com-
presses the bellows
significantly and
reduces vibration iso-
lation. Users will be
able to feel the differ-
ence and should
adjust the force to the
handle accordingly.
Fig. 6b
The side handle
works in a similar
fashion, where mod-
erate operator force
isolates vibration and
excessive force
reduces this effect.
If the speed begins to drop off when drilling deep holes, pull the
bit partially out of the hole while the tool is running to help clear
dust. Do not use water to settle the dust since it will clog the bit
flutes and tend to make the bit bind in the hole. If the bit should
bind, a built-in, nonadjustable clutch prevents damage to the tool.
If this occurs, stop the tool, free the bit and begin again.
OPERATION
Depress locking tab
Fig. 4
Fig. 5
Fig. 6
Fig. 6a
Fig. 6b
Fig. 5a
Fig. 5c
Fig. 5b
(Model No. 5313 only)
Ideal
applied
force
Excessive
applied
force
Using Rotary Percussion Core Bits
Core bits are useful for drilling large holes for conduit and
pipe. MILWAUKEE Heavy-Duty Thin Wall Core Bits have
heat treated steel bodies with durable carbide tips. They are
specially designed for fast, accurate drilling with combined
hammering and rotary action.
1. Clean and lubricate the threads on the adapter and core bit
to make later removal easier. Screw the threaded end of the
adapter into the rear of the core bit.
2. Push the guide plate onto the pointed end of the center pin.
Insert the center pin and guide plate assembly into the core bit.
Be sure the small end of the center pin is securely placed into
the hole in the center of the core bit. Fig. 7
3. Insert the adapter into the nose of the tool as described on
page 1. Set the stop rotation knob to hammering with rotation.
4. Press the center pin firmly against your center mark,
hold the tool firmly and pull the trigger. Fig. 8
NOTE: Center pins and guide pins are not required for 1” and
1-1/8” core bits. To make starting these bits easier, use a tem-
plate or notched board as shown. Fig. 9
5. After drilling to about the depth of the core bit teeth,
remove the center pin and guide plate from the core bit. Then
resume drilling.
6. After you have finished drilling the hole, hold the tool
upwards, pointing it away from your body as shown, and run
it briefly to loosen the core bit from the adapter. Fig. 10
MILWAUKEE Heavy-Duty Thin Wall Core Bits drill holes up
to 3” deep. Thick Wall Core Bits drill holes up to 4 3/8” deep.
To make deeper holes, remove the bit, break and remove the
core. Then resume drilling.
Chiseling & Chipping
MILWAUKEE 1-1 /2” Heavy Duty Rotary Hammers may be
used for light chipping and chiseling. A variety of accessories
are available.
Bushing Tools
Used to surface concrete.
Mortar Cutting Chisels
For removing old mortar for tuck pointing or caulking.
Operating Instructions (continued)
Page 3
RenTrain INC RenTrain INC
Fig. 7
Fig. 10
Fig. 8
Fig. 9
Bull Points
For light demolition work.
Cold Chisels
For edging, chipping or channeling.
Scaling Chisels
For removing weld spatter or scale and cutting between drilled
holes in concrete for large openings.
Slotting Chisel
For slotting and cutting between drilled holes in concrete and
masonry.
When chiseling, hold the tool at an angle to the workpiece.
Work from a corner or close to the edge of the workpiece,
breaking off one small area at a time rather than attempting too
large an area.
Setting Self-Drilling Anchors
The MILWAUKEE 1-1/2” Heavy Duty Rotary Hammers fea-
ture a stop rotation knob which is helpful for setting
self-drilling anchors up to 7/8”. MILWAUKEE Tooth Anchor
Chucks require a “B” taper adapter.
1. Place the proper size tooth anchor chuck into the “B” taper
adapter. Then insert the “B” taper adapter into the tool and lock
it into place as described on page 1.
2. Insert the anchor into the tooth anchor chuck. Set the stop
rotation knob for hammering only. Then set the anchor on your
mark and hammer until the teeth have penetrated the concrete.
Fig. 11
3. Switch the stop rotation knob for rotary hammering and
drill until the chuck is 1/8” above the concrete. Fig. 12
NOTE: It may be necessary to clean dust and cuttings from the
anchor several times while drilling the hole.
4. Remove the anchor from the hole while the tool is running.
Clean the dust and cuttings from the anchor by pointing it
downward and turning the tool on and off several times. Clean
the dust out of the hole with a vacuum cleaner or blowout bulb.
Fig. 13
5. Place the expansion plug into the anchor and insert the
anchor into the hole. Switch the stop rotation knob back to
Hammering Only, and hammer the anchor firmly into the hole.
Fig. 14
6. Snap the head off of the anchor. To remove the head of an-
chors up to 5/8”, grasp the handles firmly and pull the tool
sharply towards you. Fig. 15
To remove the head of 5/8” to 7/8” anchors, remove the ham-
mer from the shank of the adapter and snap off the anchor head
with a hand hammer as shown. The anchor is now ready to
receive a bolt. Fig. 16
7. To remove the tooth anchor chuck, remove the “B” taper
adapter from the nose of the tool. Insert the drift pin supplied
with the adapter into the hole on the side of the “B” taper
adapter and strike it sharply to force out the tooth anchor
chuck. To remove the anchor head wedged in the tool anchor
chuck, use drift pin 48-86-0100.
Operating Instructions (continued)
Page 4
RenTrain INC RenTrain INC
To reduce the risk of personal injury and damage to
the tool or work:
•Always use the “hammering only” selection to
set the anchor. Never use the “hammering with
rotation” selection to set the anchor.
•Never switch the tool to “hammering with
rotation” until after the anchor has been set and
the tooth anchor chuck has been removed from
the anchor.
WARNING!
Fig 11
Fig 12
Fig 13
Fig 14
Fig 15
Fig 16
1/8”
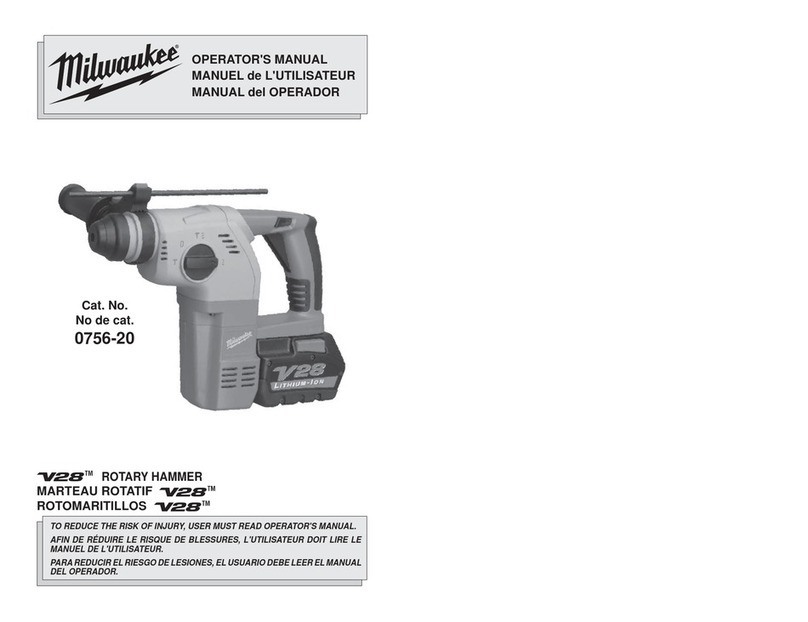
This manual suits for next models

2

Other Milwaukee Rotary Hammer manuals

Milwaukee 5315-21 User manual

Milwaukee

Milwaukee 5315-21 User manual

Milwaukee M18 FUEL 2717-20 User manual

Milwaukee

Milwaukee M18 FUEL 2717-20 User manual

Milwaukee 5262-59 User manual

Milwaukee

Milwaukee 5262-59 User manual

Milwaukee HD28 HX User manual

Milwaukee

Milwaukee HD28 HX User manual

Milwaukee PLH 28 E User manual

Milwaukee

Milwaukee PLH 28 E User manual

Milwaukee M18CHPX-502X User manual

Milwaukee

Milwaukee M18CHPX-502X User manual

Milwaukee sds 5363-21 User manual

Milwaukee

Milwaukee sds 5363-21 User manual

Milwaukee M18 FUEL Guide

Milwaukee

Milwaukee M18 FUEL Guide

Milwaukee M18 CHPX User manual

Milwaukee

Milwaukee M18 CHPX User manual

Milwaukee M12 H User manual

Milwaukee

Milwaukee M12 H User manual

Milwaukee 5361-20 User manual

Milwaukee

Milwaukee 5361-20 User manual

Milwaukee 5359-21 User manual

Milwaukee

Milwaukee 5359-21 User manual

Milwaukee 2713-20 User manual

Milwaukee

Milwaukee 2713-20 User manual

Milwaukee 5300 User manual

Milwaukee

Milwaukee 5300 User manual

Milwaukee PH 26 User manual

Milwaukee

Milwaukee PH 26 User manual

Milwaukee M12 DE User manual

Milwaukee

Milwaukee M12 DE User manual

Milwaukee PFH 26 User manual

Milwaukee

Milwaukee PFH 26 User manual

Milwaukee 5268-21 User manual

Milwaukee

Milwaukee 5268-21 User manual

Milwaukee Fuel SDS PLUS M18 FH User manual

Milwaukee

Milwaukee Fuel SDS PLUS M18 FH User manual

Milwaukee 5316-20 User manual

Milwaukee

Milwaukee 5316-20 User manual

Milwaukee M12 CH User manual

Milwaukee

Milwaukee M12 CH User manual

Milwaukee M18 FUEL 2713-20 User manual

Milwaukee

Milwaukee M18 FUEL 2713-20 User manual

Milwaukee M18 User manual

Milwaukee

Milwaukee M18 User manual

Milwaukee M12 Fuel User manual

Milwaukee

Milwaukee M12 Fuel User manual

Popular Rotary Hammer manuals by other brands

EINHELL RT-RH 26 Original operating instructions

EINHELL

EINHELL RT-RH 26 Original operating instructions

ETC Tools 989882 user manual

ETC Tools

ETC Tools 989882 user manual

Makita HR5201C instruction manual

Makita

Makita HR5201C instruction manual

BTI Profiline BTI-BH 36 VLI operating instructions

BTI

BTI Profiline BTI-BH 36 VLI operating instructions

Hitachi DH40MRY - 1-9/16 Inch EVS SDS-Max Rotary Demolition... instruction manual

Hitachi

Hitachi DH40MRY - 1-9/16 Inch EVS SDS-Max Rotary Demolition... instruction manual

AEG KH 26 XE Original instructions

AEG

AEG KH 26 XE Original instructions

Hilti TE1 Original operating instructions

Hilti

Hilti TE1 Original operating instructions

Bosch 11250VSR Operating/safety instructions

Bosch

Bosch 11250VSR Operating/safety instructions

Makita HR4001C instruction manual

Makita

Makita HR4001C instruction manual

Fein ASCS 4.8 Repair instructions

Fein

Fein ASCS 4.8 Repair instructions

Makita HR2420 instruction manual

Makita

Makita HR2420 instruction manual

DeWalt DC212 instruction manual

DeWalt

DeWalt DC212 instruction manual

Bort BHD-1050? user manual

Bort

Bort BHD-1050? user manual

GMC Magnesium MRHD1500CF Brochure & specs

GMC

GMC Magnesium MRHD1500CF Brochure & specs

Hitachi DH 30PC2 Handling instructions

Hitachi

Hitachi DH 30PC2 Handling instructions

Makita BHR240 technical information

Makita

Makita BHR240 technical information

Makita M8700G instruction manual

Makita

Makita M8700G instruction manual

Bosch Uneo Original instructions

Bosch

Bosch Uneo Original instructions

manuals.online logo
manuals.online logoBrands
  • About & Mission
  • Contact us
  • Privacy Policy
  • Terms and Conditions

Copyright 2025 Manuals.Online. All Rights Reserved.