12 13
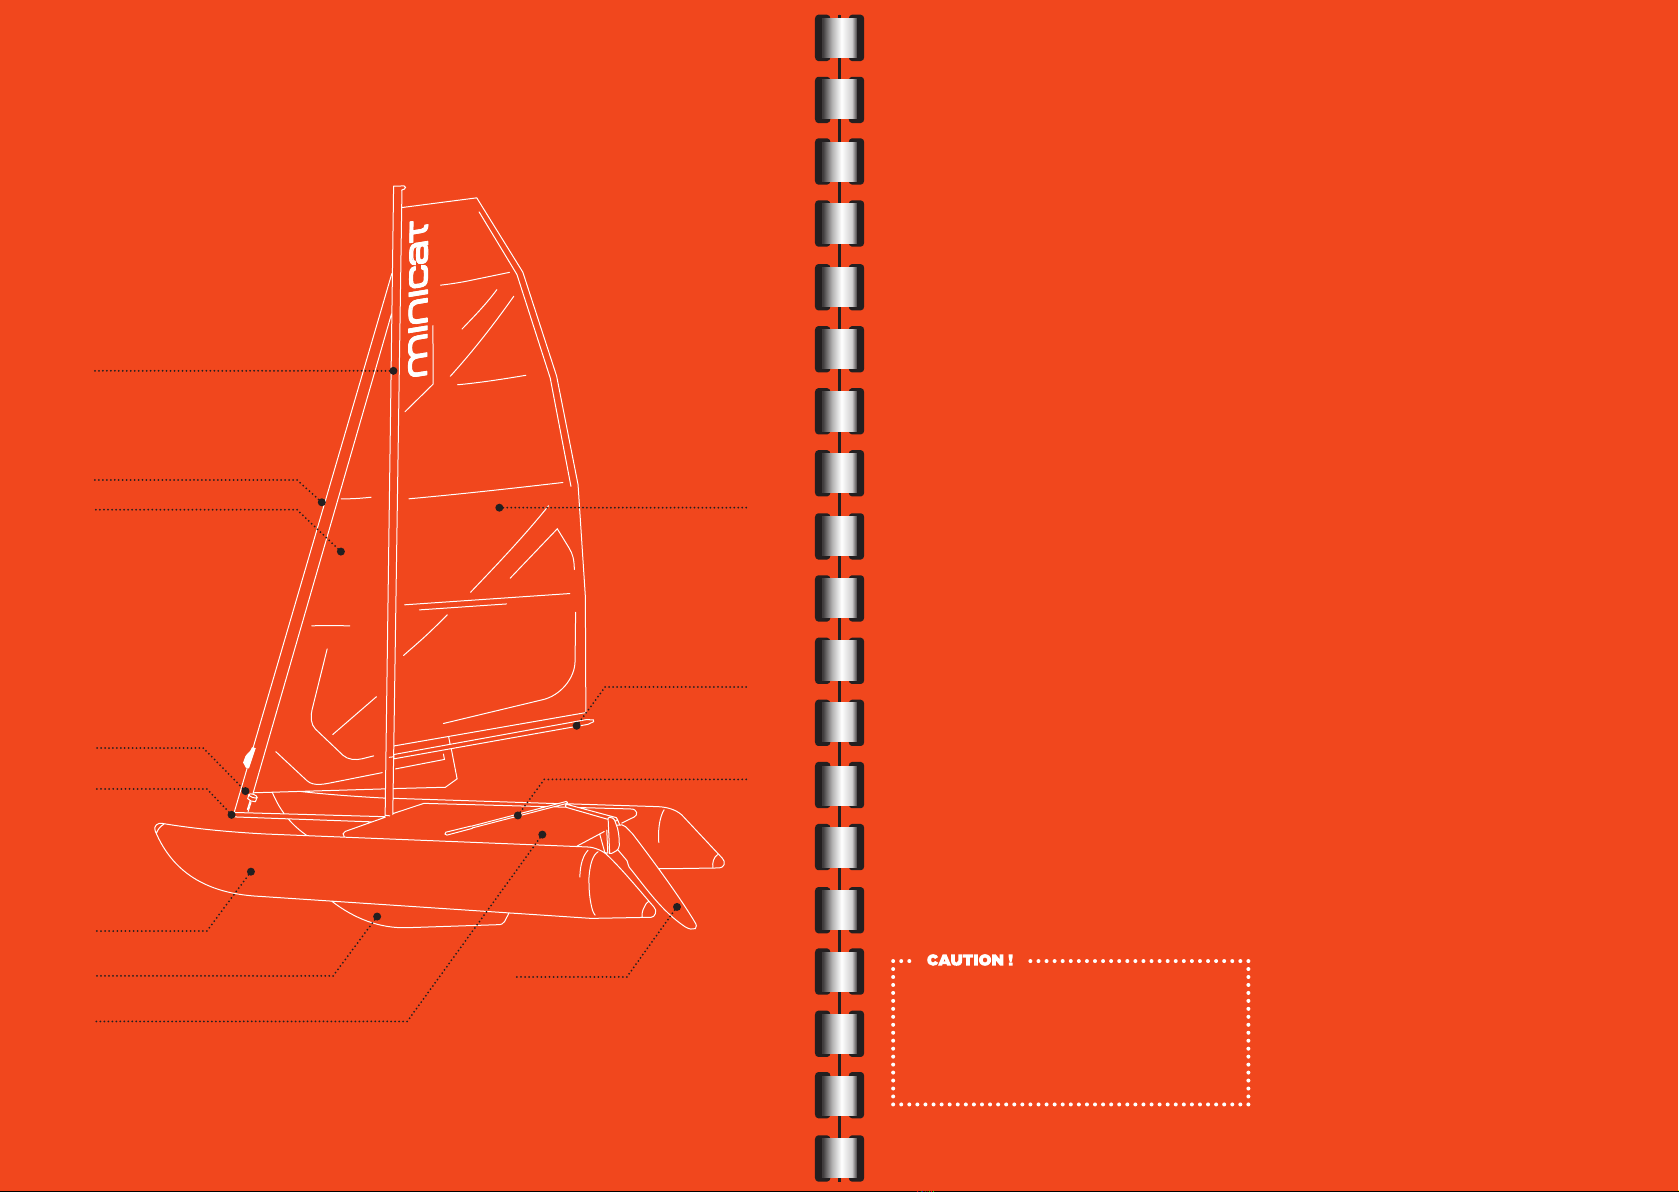
MINICAT 420 USER‘S GUIDE
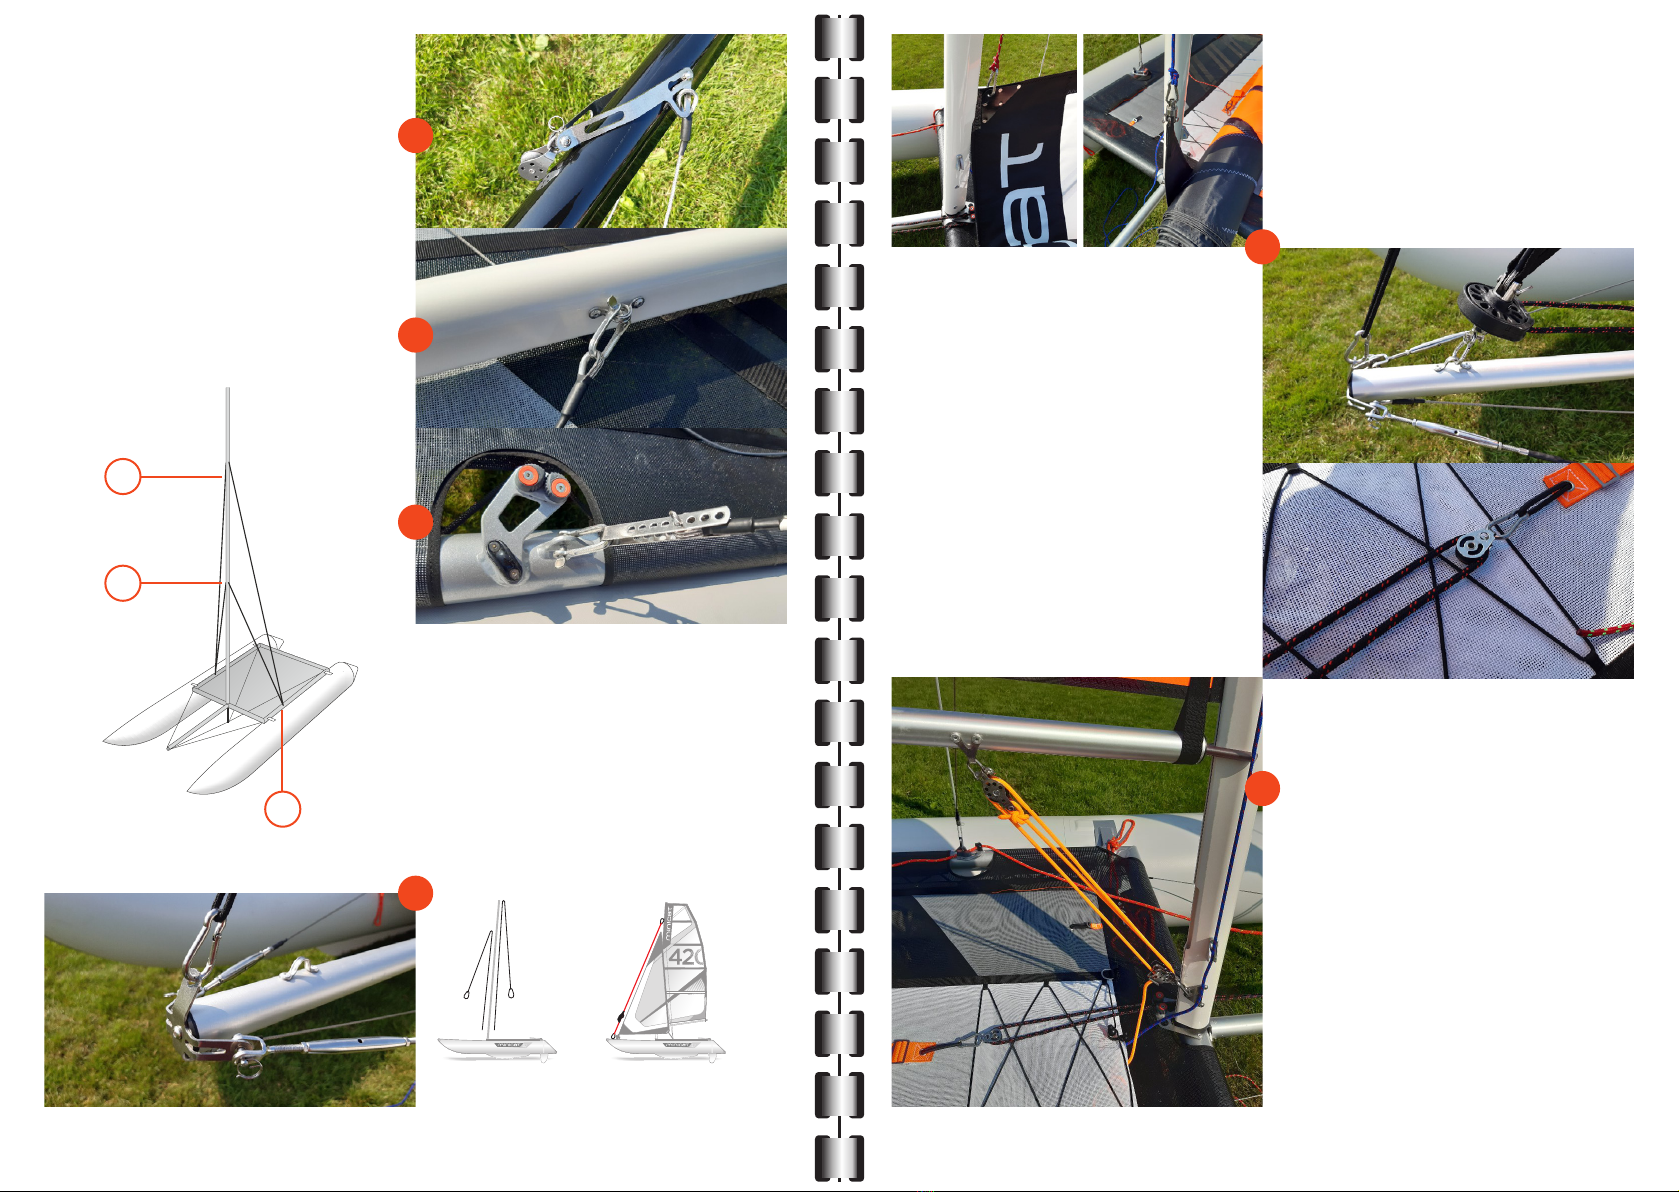
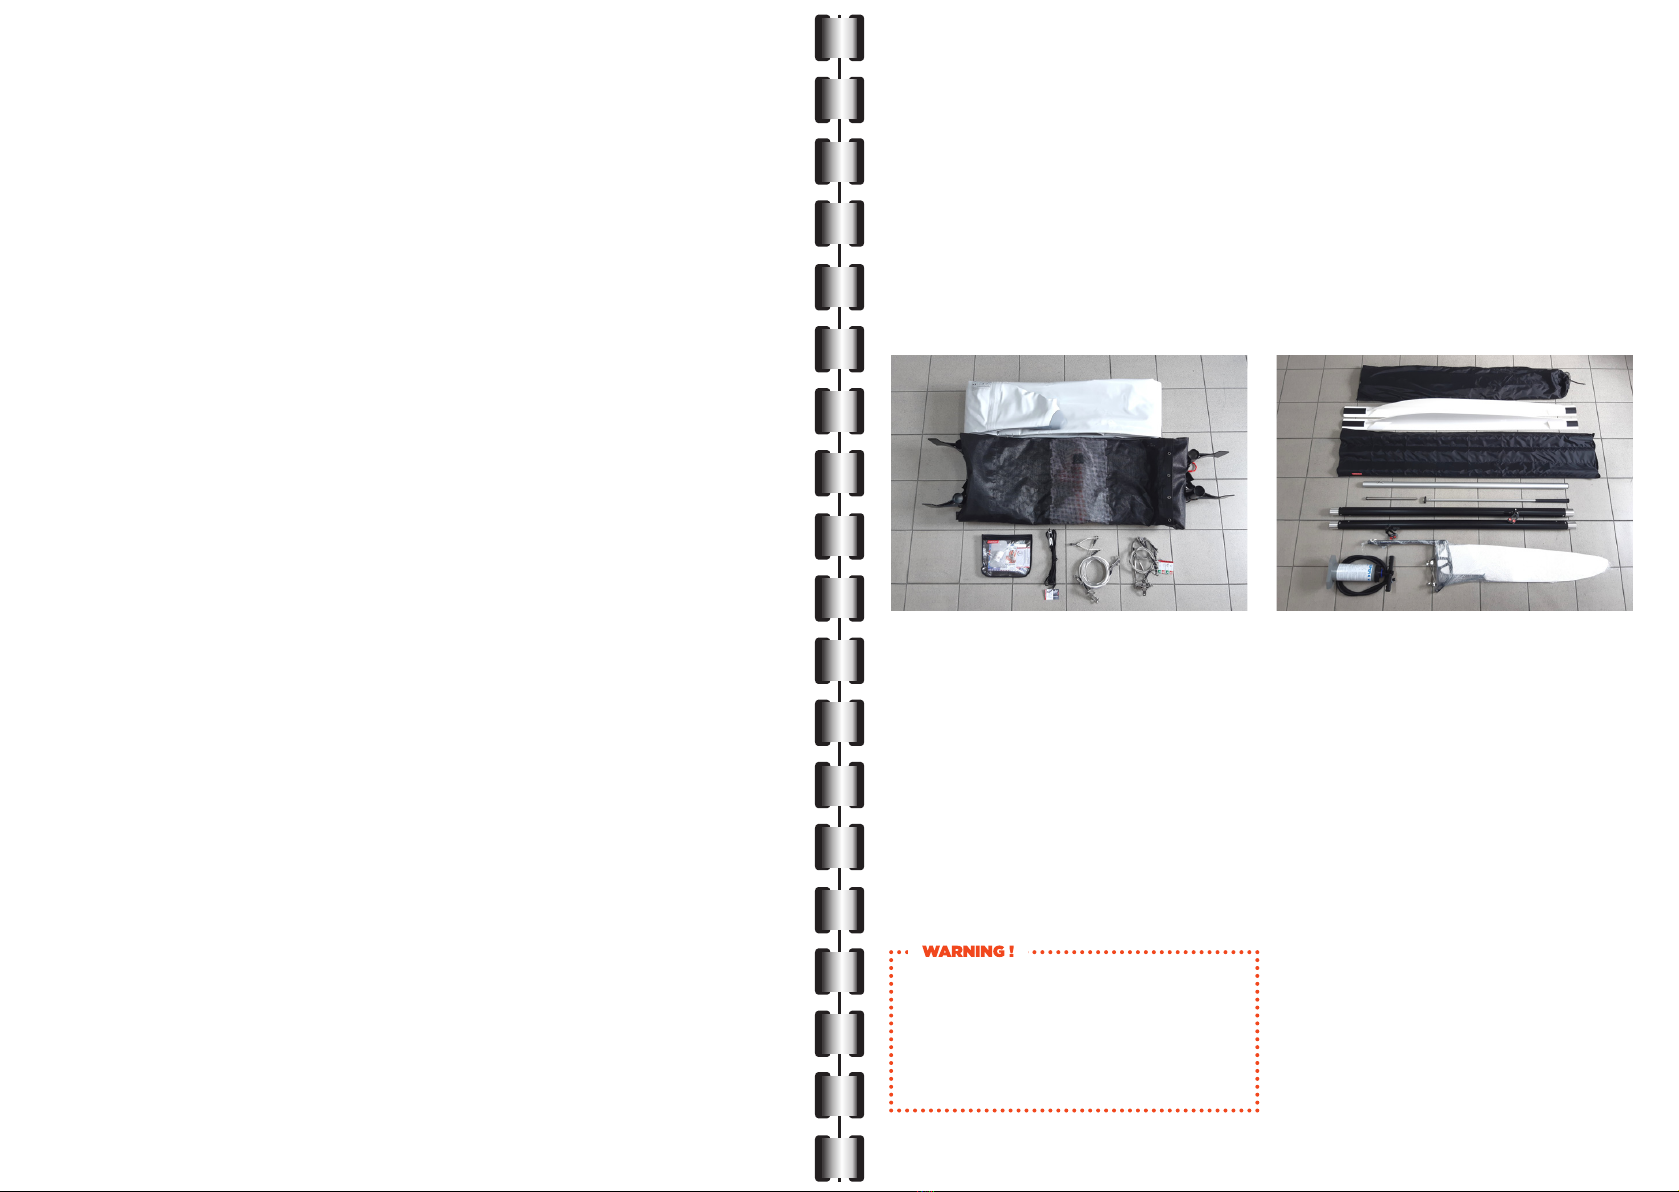
Mount the rudder. Attach the
rudder assembly to the frame
simply by running two spigots
with safety locks to secure.
Attach the stays of the mainsheet
to the sail using a Carabine
15
16
It is recommended after
each sailing, to treat the
connections of the mast
using silicone oil.
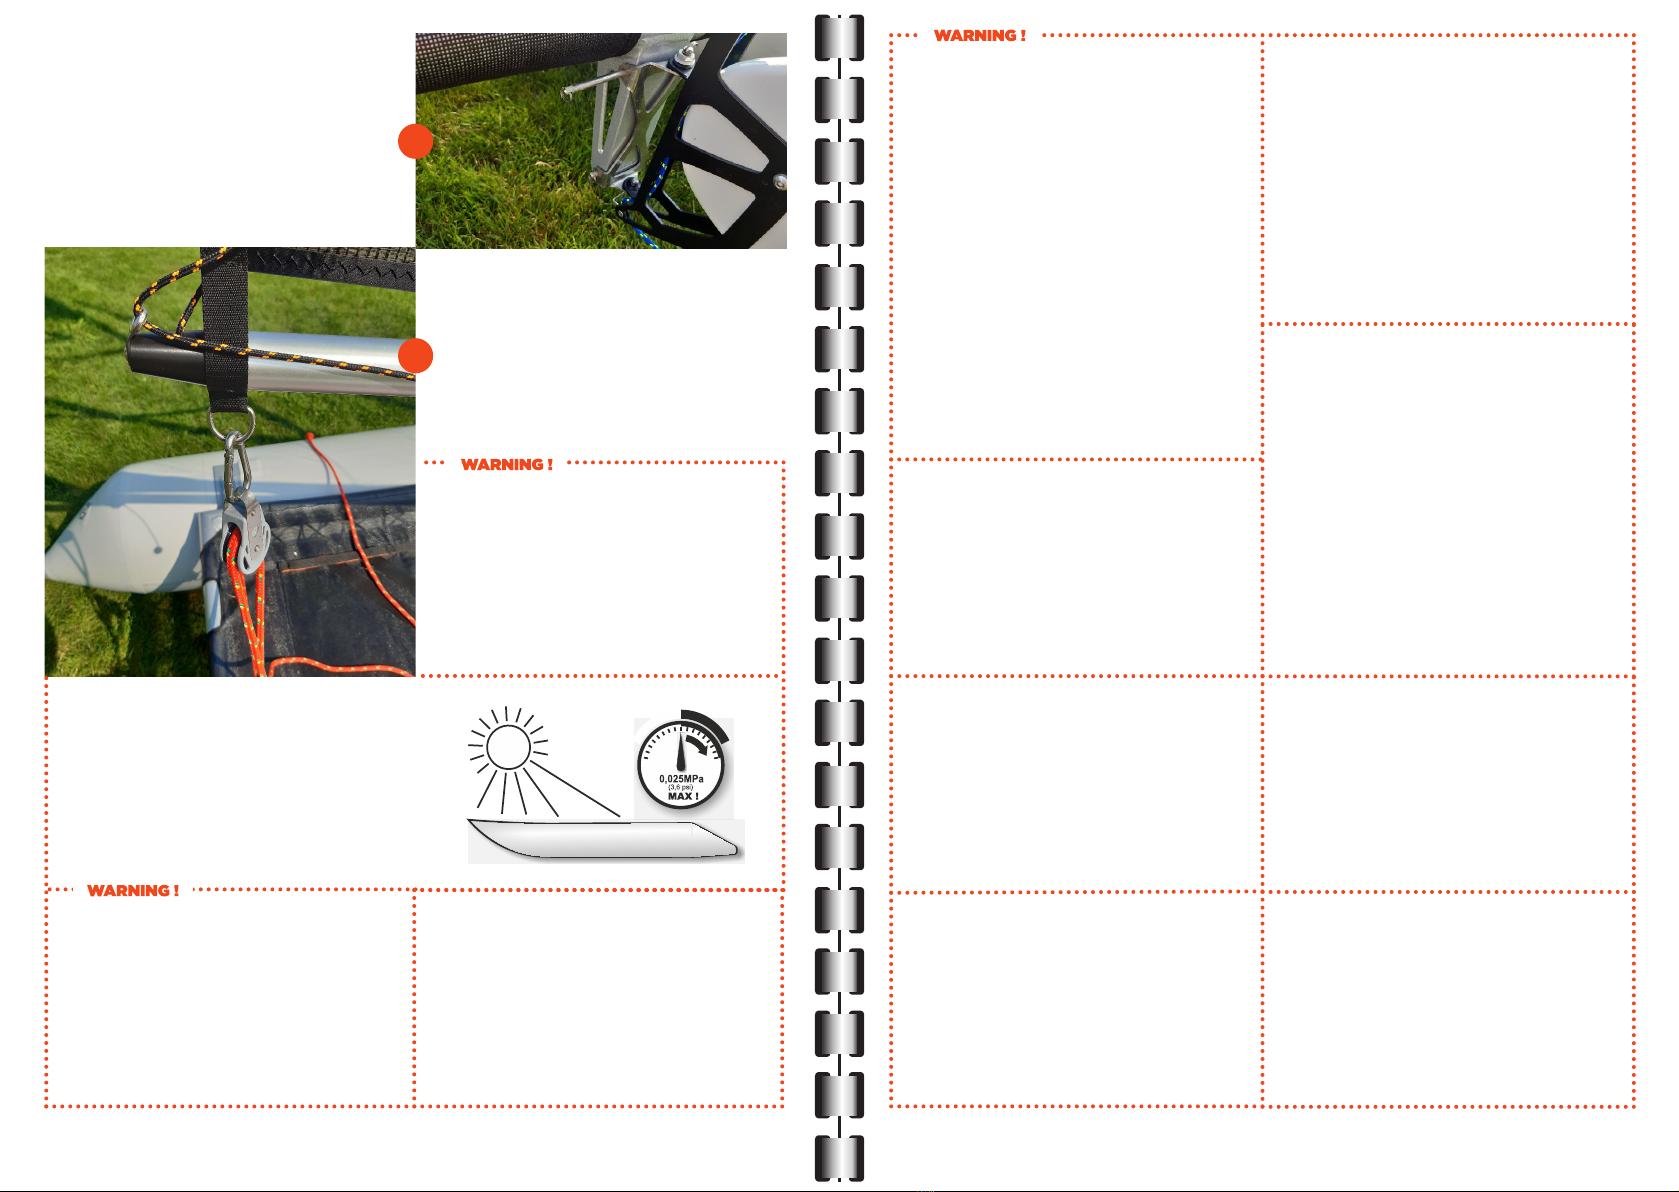
When exposed to the
sun, the pressure in floats
increases - let air out
gradually!
If you experience a loss of
pressure of 20% of operating
pressure inside a 24 hour period
when external temperature is
constant it is considered to
be completely normal and no
reason for a complaint to the
manufacturer or a warranty
claim.
Water should never come
inside of the tubes. In case this
happens please empty as soon
as possible and dry throughout
Water inside of the tubes can
cause a damage to the inner
rubber of the tube and this can
cause I-beam damages as well.
If the boat is standing still on
a shore for a longer periods
of time, please dismantle the
keel fins or use the special
stands (see our Spare Parts &
Accessories Catalogue) under
the floats which will prevent
the pressure on the floats. You
will avoid a possible damage
of the keel fins and floats. We
also recommend the purchase
of the boat cover accessory to
protect your boat whilst being
left assembled
If the boat is standing still on
a shore for a longer periods
of time, please dismantle the
keel fins or use the special
stands (see our Spare Parts &
Accessories Catalogue) under
the floats which will prevent the
pressure on the floats. You will
avoid possible damage of the
keel fins and floats..
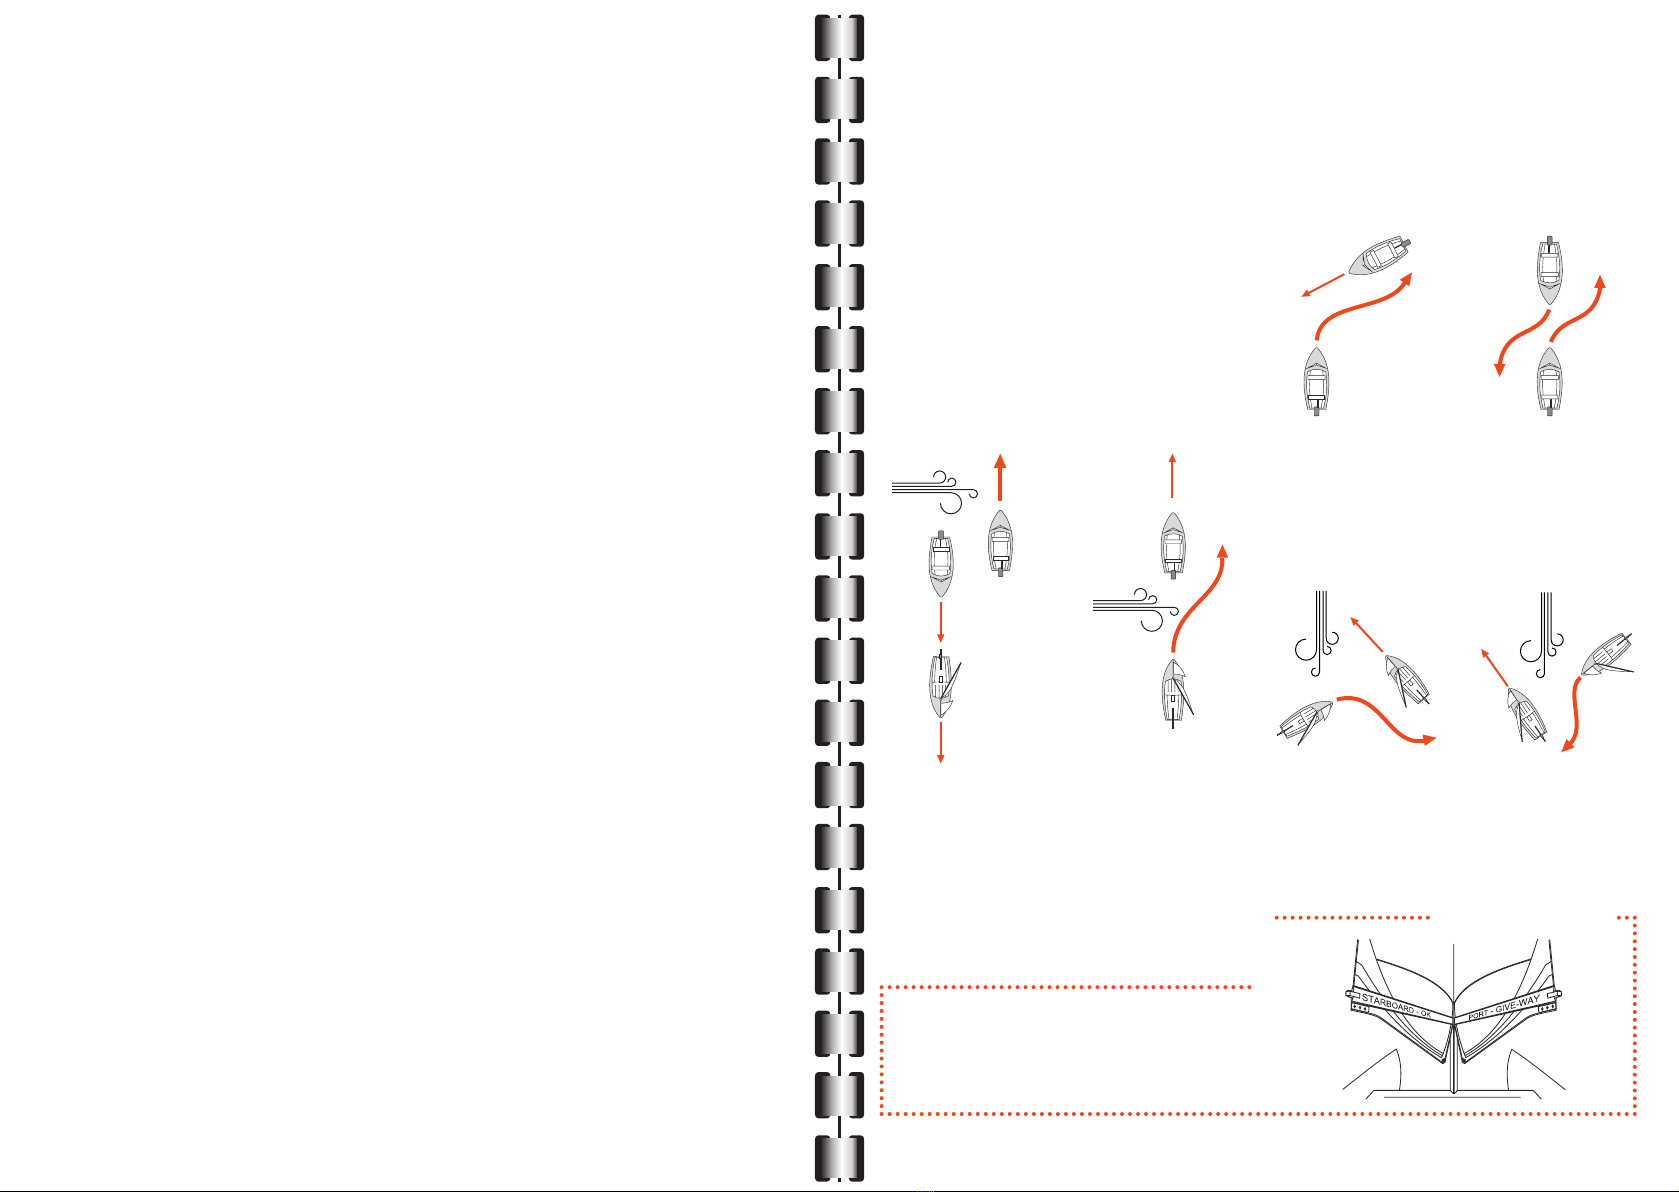
When sailing on large open
water (sea, lake) pay close
attention to the wind directly
from the coast. It is possible to
be blown oshore.
MINICAT must not be used in
bad conditions, for example,
low visibility, night, fog, rain.
ALWAYS SAFETY FIRST.
MINICAT is not intended to
be towed behind a motorised
craft. It must not be towed,
slide moved, or otherwise
extensively loaded.
Any sharp objects must be
securely packaged.
Valuable items and personal
eects must be placed in
a waterproof package and
placed in the pockets on the
trampoline. We recommedn
your purchase of the additional
front trampoline.
Bright sunlight will eventually
have a deteriorating eect on
the rubber surface of the floats,
therefore wherever possible
when your MINICAT is not in use
it is advisable to leave the boat
out of direct strong sunlight.
We recommend your purchase
of the optional boat cover.
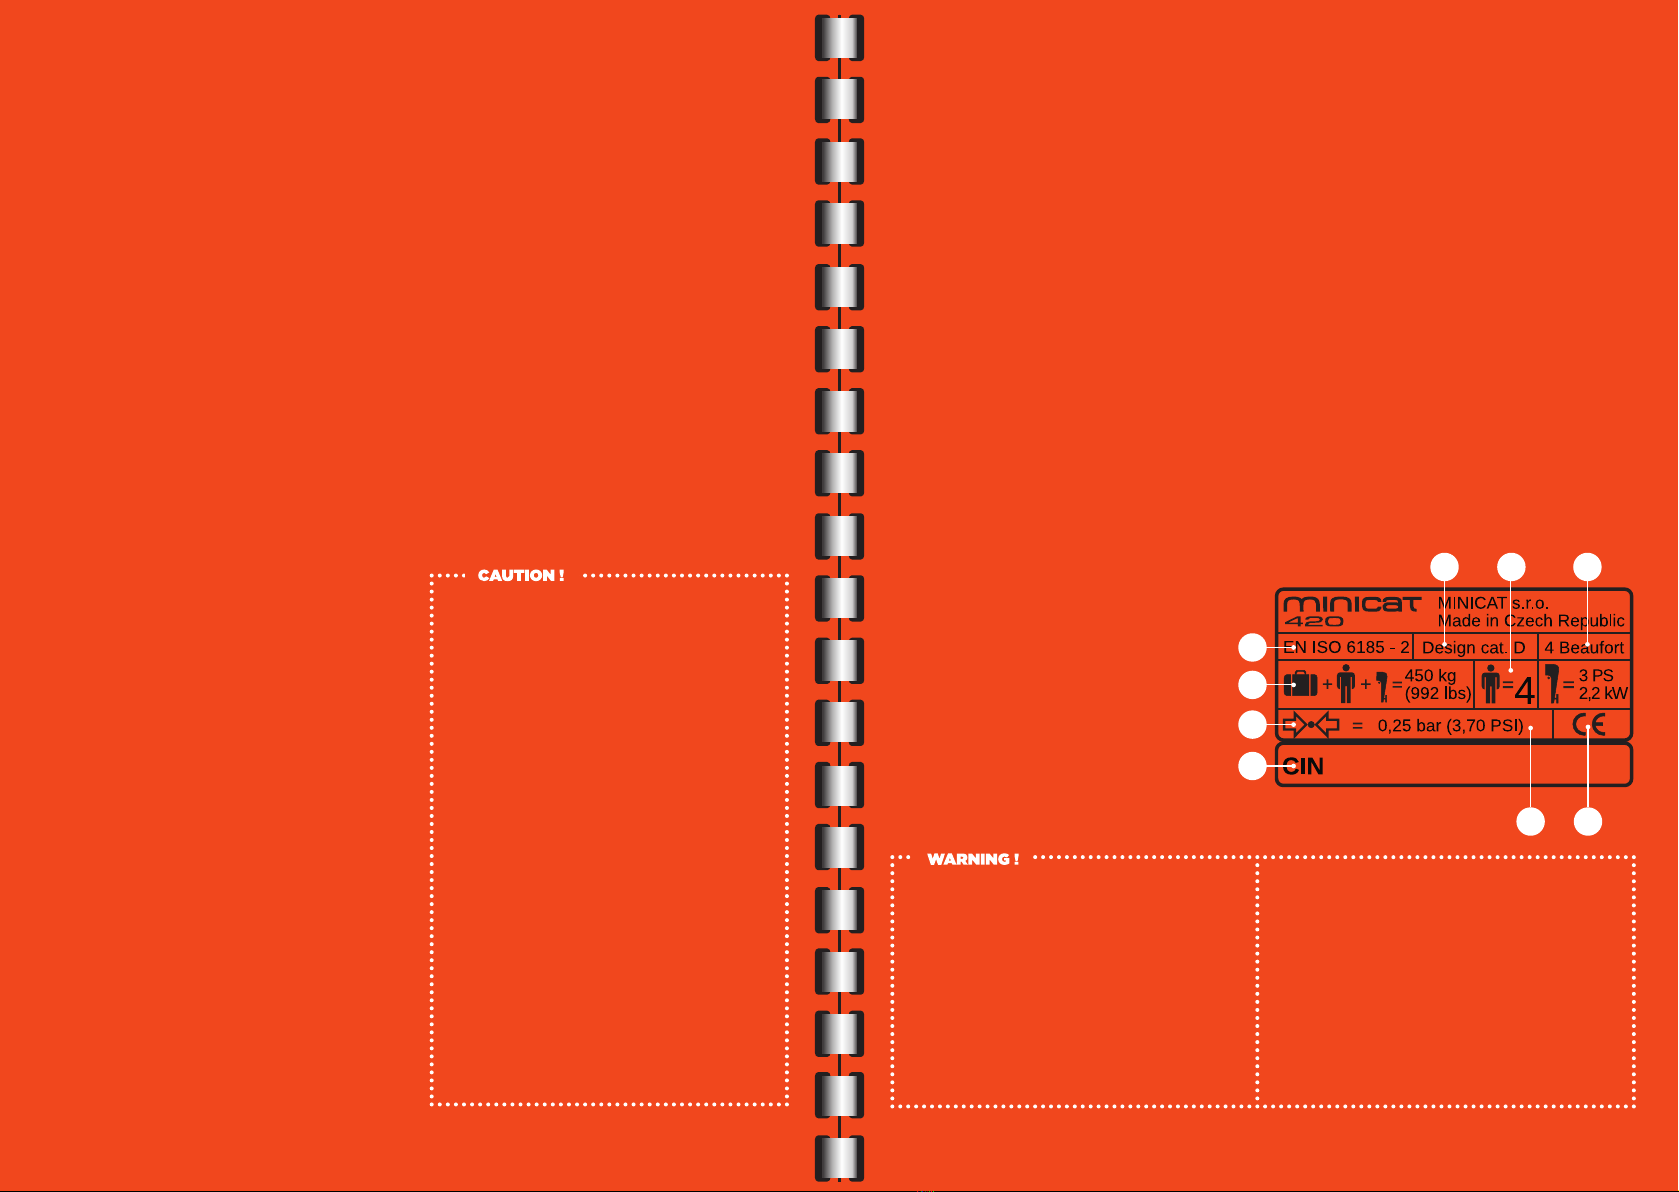
Maximum operating pressure
in the floats (air chambers) is
0.025 MPa (3.6 psi). If there is
an increase of the ambient air
temperature (due to the heat of
the sun) the air pressure inside
the floats can increase. The air
pressure of the floats should
be checked and air released
if necessary to avoid eventual
damage.
Before setting sail it is advisable
to familiarise yourself with any
local regulations or restrictions
for the piece of water in which
you intend to operate.
There is a possibility that the flat
valve can become a little lose
after the first few inflations, and
that can result in a little air escape
around the valve (being a result of
the stretching and contracting of
the boat skin). In case this happens
with your boat, it is sucient to
turn the valve with the valve key
by about one quarter to one half a
turn until the resistance becomes
too great.