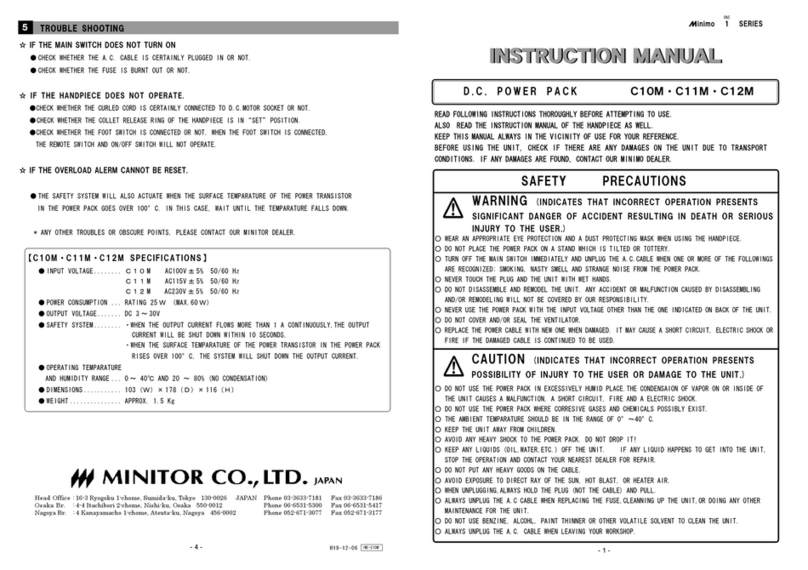
MINIMO ONE Series User manual

POLYTOR POWER PACK
P30
OPERATION MANUAL
Products are subject to change without notice.

Thank you very much for purchasing Minimo ONE Series POLYTOR Power Pack.
This product is the polytor power pack for polytor handpieces. Read carefully this instruction
manual before use. Also read carefully the instruction manuals of handpieces. Please keep this
instruction manual near the power pack for any operators to refer to whenever operating this
system. If you lost your instruction manual, download it from our website.
Introduction
1 2
Caution
Warning
■For your ear protection, wearing earplugs on work is recommended while using ultrasonic devices.
○Unexpected damage may occur caused by loud sound while working.
■Do not turn the ULTRASONIC ON/OFF switch and hand switch on if the SENTAN TOOL was not fixed firmly.
○Reduction of output voltage and overheating of handpiece may result in fire and malfunction.
●Read the precautions below to ensure safe use and handling. These precautions are intended to
protect you and others around you. Read and follow them carefully to avoid injury, damage to the
product or damage to property.
●User may bear administrative responsibilities for operation and maintenance.
■ About Warning and Caution
Safety instructions are classified as Warning and Caution in accordance with the risk.
Warning Caution
■ About Symbols
This symbol denotes that an instruction must
be obeyed at all times. This symbol denotes that the action is prohibited.
The symbols have the following meanings.
Cautions for handling and operation
This indicates that incorrect
operation presents significant
danger of accident, resulting in
death or serious injury to users.
This indicates that incorrect
operation presents possibility of
injury to users or damage to the
product.
Warning
■If each cords are damaged, replace it with new cords(separately sold).
○Failure to do so could result in fire, electric shock, and/or failure.
■Keep the main switch off when connecting handpieces to power pack.
○Failure to do so could result in fire, electric shock, and/or failure.
■Keep away from cutting fluids, water and/or oil mist.
○Failure to do so could result in fire, electric shock, and/or failure.
■Do not plug in and out with wet hands.
○Wet hands could result in electric shock.
■If the power cord is damaged, replace it with new power cord (separately sold).
○Failure to do so could result in fire and/or electric shock.
■Plug the power cord to a grounded outlet.
○
Plugging into an outlet without ground could result in electric shock, static electricity injury, network disturbance, noise breakout and/or etc.
■Do not use the power pack with any input voltage except the voltage instructed on power pack.
○Failure to do so could result in fire and/or electric shock.
■Do not close the air holes on the top of the power pack.
○Failure to do so could result in increasing temperature inside of the power pack, resulting in fire and/or failure.
■Always wear safety glasses and a mask for dust.
○Chips and/or dust left after grinding/polishing process could result in unexpected injury.
■Always ask us for repair.
○Failure to do so could result in fire, electric shock, and/or failure.
○Also this may have a significant impact on its safety and performance.
■Do not modify and/or disassemble the power pack.
○Failure to do so could result in fire, electric shock, and/or failure.
○Also this may have a significant impact on its safety and performance.
■
In case of abnormal noise, smoke, and/or bad smell, turn off the main power and unplug the power cord.
○Failure to do so could result in fire and/or electric shock.
■Do not use in a place with corrosive gas such as chlorine gas, hydrogen sulfide and/or sulfurous acid gas.
○Failure to do so could result in fire, electric shock, and/or failure.
■Do not drop and/or hit.
○Failure to do so could result in malfunction and/or failure.
■Do not use in a place near machines remarkably emitting electric noise.
○Failure to do so could result in malfunction and/or failure.
■Do not use electronic apparatus, signal cable and such equipments near this product.
○Noise may affect operation of the device.
■Use the power pack in a place without condensation.
○Failure to do so could result in fire, electric shock, and/or failure.
■Use in temperature between 0 - 40℃.
○Failure to do so could result in malfunction and/or failure.
■Do not put heavy things on the power cord.
○The damaged power cord may result in fire, electric shock, and/or failure.
■Do not put the power cord near heater.
○Failure to do so could result in fire, electric shock, and/or failure.
■Do not pull the power cord when unplugging.
○The damaged power cord could result in fire, electric shock, and/or failure.
■For maintenance, unplug the power cord for safety.
○Failure to do so could result in electric shock and/or failure.
■
For disposal of this power pack, please follow the instruction of your local government or the shop you purchased the product.
■Do not allow children to use this product. Also, keep away from children.
■Be careful for dust, oil, water not to enter the inside of the power pack.
If entering, turn off the main switch and unplug the power cord. Then, ask us for repair.
○Failure to do so could result in fire, electric shock, and/or failure.
■When you leave the workshop, turn off the main switch and unplug the power cord from the outlet for safety.
■
Do not touch joint part of holder, holder and SENTAN TOOL while handpiece is in operation and immediately after stopping.
○There is a risk of burn and injury due to high temperature.
Please make sure of standard equipments and accessories inside.
*AC Power Cord is NOT included (sold separately).
Confirmation of this product
1.
3 4
Contents
Introduction ・・・・・・・・・・・・・・・・・・・・・・・・・・・・・・・・・・・・・・・・・・・・・・・・・・・・・・・・・・・・・・・・・・・・・・・・・・・・・・ 1
Safety Precautions・・・・・・・・・・・・・・・・・・・・・・・・・・・・・・・・・・・・・・・・・・・・・・・・・・・・・・・・・・・・・・・・・・・・・・ 1~2
Contents ・・・・・・・・・・・・・・・・・・・・・・・・・・・・・・・・・・・・・・・・・・・・・・・・・・・・・・・・・・・・・・・・・・・・・・・・・・・・・・・・・ 3
1. Confirmation of this product ・・・・・・・・・・・・・・・・・・・・・・・・・・・・・・・・・・・・・・・・・・・・・・・・・・・・・・・・・・・・・・ 4
2. Product Features ・・・・・・・・・・・・・・・・・・・・・・・・・・・・・・・・・・・・・・・・・・・・・・・・・・・・・・・・・・・・・・・・・・・・・・・ 4
3. Specifications ・・・・・・・・・・・・・・・・・・・・・・・・・・・・・・・・・・・・・・・・・・・・・・・・・・・・・・・・・・・・・・・・・・・・・・・・・・ 4
4. Names and Functions of Each Component ・・・・・・・・・・・・・・・・・・・・・・・・・・・・・・・・・・・・・・・・・・・・・・・ 5~6
5. Operating Procedure ・・・・・・・・・・・・・・・・・・・・・・・・・・・・・・・・・・・・・・・・・・・・・・・・・・・・・・・・・・・・・・・・・・・・ 7
5-1 Without Foot Switch
5-2 With Foot Switch
6. Explanation for Drive Modes of Handpiece ・・・・・・・・・・・・・・・・・・・・・・・・・・・・・・・・・・・・・・・・・・・・・・・・・・ 8
7. Confirmation Method for Vibration Condition of Handpiece ・・・・・・・・・・・・・・・・・・・・・・・・・・・・・・・・・・・・・ 8
8. Trouble Shooting ・・・・・・・・・・・・・・・・・・・・・・・・・・・・・・・・・・・・・・・・・・・・・・・・・・・・・・・・・・・・・・・・・・・・・・・ 9
9. Accessories ・・・・・・・・・・・・・・・・・・・・・・・・・・・・・・・・・・・・・・・・・・・・・・・・・・・・・・・・・・・・・・・・・・・・・・・・・・ 10
10. Before Asking for Repair・・・・・・・・・・・・・・・・・・・・・・・・・・・・・・・・・・・・・・・・・・・・・・・・・・・・・・・・・・・・・・・ 11
11. Maintenance and Inspection ・・・・・・・・・・・・・・・・・・・・・・・・・・・・・・・・・・・・・・・・・・・・・・・・・・・・・・・・・・・・ 12
12. Others ・・・・・・・・・・・・・・・・・・・・・・・・・・・・・・・・・・・・・・・・・・・・・・・・・・・・・・・・・・・・・・・・・・・・・・・・・・・・・ 12
2.
Product Features
●Supporting wide input voltage
This product can be used with voltage range 100V AC - 230V AC.
●2 Driving modes of handpiece can be selected.
・ STROKE CONTROL : Driving with constant voltage.
・ VOLTAGE CONTROL : Driving with fixed amplitude amount.
●POWER MODE
The power may be enhanced by increasing of maximum drive voltage (on STROKE CONTROL mode only).
●Digital Display of Frequency
Indicating vibration frequency of handpiece.
●Error Code Display Function
To warn abnormality of the powerpack and handpieces by displaying error codes.
●LED Level Meter
Indicating amplitude amount of handpiece by 8 LED lights.
●Resume Function
Previous drive mode may be resumed when restarting.
※POWER MODE may not be resumed.
3.
Specifications
●Input Voltage
●Power Consumption
●Output
●Tracking Resonance Frequency
●Output Voltage
●Output Adjustment
●
Operating temparature and humidity range
●Dimensions
●Weight
fig-1
AC100V ~ 240V 50/60Hz
40W max.
27W max.(STROKE CONTROL, POWER MODE:ON)
18W max.(STROKE CONTROL, POWER MODE:OFF)
18W max.(VOLTAGE CONTROL)
20k ~ 32kHz
90V max.(STROKE CONTROL, POWER MODE:ON)
60V max.(STROKE CONTROL, POWER MODE:OFF)
60V max.(VOLTAGE CONTROL)
Continuously Variable
0 ~ 40℃ and 20 ~ 80%(No condensation)
144(W)×218(D)×116(H)
1.3kg(About)
POLYTOR POWER PACK
◆P30
Rubber Cradle
◆RM11
Manual
◆IMW-P30

⑬
4.
Names and Functions of Each Component
5 6
①Main Switch
To perform ON/OFF of the main power source(l:ON ○:OFF)
②Display
Vibration frequency is indicated when operating handpiece and error content is indicated when occurring error.
◆Handpiece in stop …… Lights-out
◆Handpiece in operation …… Indicating vibration frequency of handpiece in kHz.
③Level Light
LEDs are lighted from the left side proportionally to amplitude amount of handpiece.
◆Handpiece in stop …… Number of lighted LED is increased/decreased proportionally to the position of
indicator on power control knob.
◆Handpiece in operation …… Number of lighted LED is increased/decreased proportionally to the vibration
frequency.
④Power Controlling Knob
◆On STROKE CONTROL …… For setting of amplitude amount.
◆On VOLTAGE CONTROL …… For setting of drive voltage.
⑤DRIVE MODE Switch ・ STROKE CONTROL Light ・ VOLTAGE CONTROL Light
For setting drive mode of handpiece.
◆STROKE CONTROL …… Driving with fixed amplitude amount.
◆VOLTAGE CONTROL …… Driving with constant voltage.
※Select drive mode while handpiece is NOT in operation. Unable to select drive mode while handpiece is in operation.
The lamp of set drive mode is lighted.
Error number will be indicated on display while pressing the switch when error occurred.
⑥POWER MODE Switch ・ POWER MODE Light
Setting ON/OFF of POWER MODE (on STROKE CONTROL mode only).
LED light is on while POWER MODE is activated.
If POWER MODE was activated, maximum drive voltage is increased and power to sustain amplitude amount becomes
stronger.
※POWER MODE switch does not work on VOLTAGE CONTROL mode.
※POWER MODE switch is always off when turning on the main power supply switch.
⑦ULTRA SONIC ON/OFF Switch・ULTRA SONIC Output Light
To use and control On/Off of a handpiece
Pressing the ULTRA SONIC On/Off switch will run a handpiece and then pressing the switch again stop the handpiece.
The colors of the ULTRA SONIC output light indicate the followings:
Light-Off - Handpiece is in stop.
Blue - Handpiece is in operation.
Red - Errors occur
⑧ULTRA SONIC Socket
Sockets for the plug of a handpiece to be connected
⑨AC Socket
Use the right cable for the right power pack
⑩Foot Switch Socket
The socket for the plug of foot switch
⑪Buzzer Trimmer
To adjust volumes of switch operation sound, switch operation no-effect sound, and error sounds.
Use a Phillips head screwdriver to adjust the volumes. ( Clockwise for volume up, counterclockwise for volume down)
◆Error sounds
●Switch operation sound - one pip sound ●Switch operation no-effect sound - two pip sounds
●Error sounds - continuous pip sound
⑫Tapped Hole for Fixing Power Pack
Powerpack has φ3.2mm holes under the rubber legs.In order to fix a powerpack, remove the rubber legs and use
self-tapping screws (M4).Use the self-tapping screws (M4) with its insertion length under 15mm to the powerpack.
⑬Carrying Handle
Retractable handle for carrying a power pack
fig-2 fig-3
fig-4 fig-5
⑫
⑪
Frontside Backside
Base
①
②
③
④
⑤
⑥
⑧
⑦⑩
⑨

7 8
5-1 Without Foot Switch
(1)
Always confirm that the AC power cord has been fully inserted into the socket of the power pack, and plug it in an outlet.
(2)Fully connect the plug of the curl cord of a handpiece with the ULTRA SONIC socket.
(3)
Turn the power control knob all the way to the left (counter-clockwise).
(4)Turn the main switch on (Power light will be on).
(表示器等のランプが点灯します
※After the main switch is on, all the lights are also on. Follow the next step when all these lights become in normal.
※Do not use handpiece if "oH" indicating that handpiece is overheating was flashing on display; display is normally off when handpiece
is NOT in operation. Error may occur if activating handpiece even though it is overheating.
(5)Select drive mode by DRIVE MODE switch.
5.
Operating Procedure
5-2 With Foot Switch
(1)Put the foot switch plug into the foot switch socket on the back.
※An error occurs if plug in and out while the main switch is on.In order to cancel the error, turn the main switch off.
(2) Follow the same procedures form(1)~(6)of "without Foot Switch".
(3)Motor will start running by pressing foot switch.
(4)In order to stop the handpiece, turn the foot switch off.
※In case that errors occur due to overload or something, turn the foot switch off and the errors are canceled.
If the errors of the 90s occur, turn the main switch off to cancel.
<With FS201>
Aamplitude amount or drive voltage are adjusted by power control knob.
・Select STROKE CONTROL mode in normal use.
・Select VOLTAGE MODE in case stable vibration with light and constant load is desired.
(6)Set amplitude amount or drive voltage of handpiece by power control knob.
(7)Handpiece will start running by pressing the hand switch or the ULTRA SONIC On/Off Switch on the powerpack.
(8)Press hand switch or the ULTRA SONIC On/Off Switch on the powerpack again to stop the running Handpiece.
※In case errors occur, press the hand switch or the ULTRA SONIC On/Off Switch on the powerpack and then the errors will be canceled.
If the errors of the 90s occur, turn the main switch off to cancel.
●STROKE CONTROL
Voltage is increased/decreased for stable amplitude amount of handpiece.
STROKE CONTROL mode is suitable for heavy-load works such as deburring and rough finishing because it tries to keep
constant amplitude amount.
POWER MODE is effective for heavy-load works because it tries to keep constant amplitude amount.
Use VOLTAGE CONTROL mode or decrease amplitude amount in case mounted tool was burned and/or fractured.
<Cautions>
Amplitude amount might not reach to the set value depending on tool to use. Handpiece may be overheated in case handpiece is in operation
with maximum voltage if lighted number of LEVEL meter when handpiece is activating was less than number of lighted LEVEL meter when handpiece
is deactivating.
If occurred above, decrease amplitude amount or use VOLTAGE CONTROL to make number of LEVEL meter when handpiece is deactivating less number
of LEVEL meter when handpiece is activating. Do not turn the POWER MODE on because there is a possibility to further increase overheating of
handpiece. If handpiece was overheated by the POWER MODE, turn the POWER MODE off.
●VOLTAGE CONTROL
Handpiece is activated by constant drive voltage.
Amplitude amount of handpiece is decreased by loading due to the constant voltage; because vibration is stable
comparing STROKE CONTROL, it is suitable to use for light-load work such as mirror finishing and fine finishing.
Amplitude amount is excessive when all LED lights are on in operation of handpiece. Voltage will be suppressed by
protective function. Protective function will be activated to suppress working voltage.
6.
Explanation for Drive Modes of Handpiece
(1)Remove the mounted SENTAN TOOL on handpiece.
(2)Press DRIVE MODE switch to set VOLTAGE CONTROL.
(3)Adjust power control knob to the position as lighting 3 lamps of LEVEL meter.
(4)Activate handpiece.
<What to Check>
1.Confirm if value from 28 to 31of vibration frequency was indicated on display.
2.Confirm if all lights of LEVEL meter could be on.
7.
Confirmation Method for Vibration Condition of Handpiece
Caution
■Ask for repair if ALL of the above were NOT confirmed.
■Confirm above when temperature of handpiece is in range from 0 to 40℃.

9.
Accessories
(※1)In case overheating occurred, "OH" indicating overheating flashes on display if inside of Power Pack was not
cooled down enough. Wait to use handpiece untill "OH" is not indicated on display.
fig-6.<Trouble Shooting>
Error
No.
Simple
Display
Cause Trouble Error cancel / Corrective Action
Output voltage is too high.
Unable to turn output voltage
off from handpiece.
Output voltage is too high when
the handpiece stops.
POWER PACK
POWER PACK
POWER PACK Turn off the main switch and ask us for repair.
Turn off the foot switch.
Foot switch is already on immediately
after turning main power supply switch on.
Footswitch
Handpiece Malfunction of sensor signal
from handpiece.
Overload Overloaded by overcurrent to a
handpiece.
Overheating
Temperature inside Power Pack
is too high.
Sensor signal voltage from
handpiece rises too high.
POWER PACK
Errors of the preset commands
■In case that errors occur, the error information will be displayed on the front panel.
■This information is provided first by「E.-」showing error occurrence. Then, simple displays such as「OL」(Overload)
appear on the front panel for its cause of the error. These information are alternately displayed.
■Pressing and holding the DRIVE MODE switch during the error displays「E.-」and error No. alternately.
■In case errors occur, press the hand switch or the ULTRA SONIC On/Off Switch on the powerpack and then the errors
will be canceled.
When using a foot switch, turn the foot switch off to cancel the error.
If the errors of the 90s occur, turn the main switch off to cancel.
8.
Trouble Shooting
9 10
POWER PACK
Malfunction on behavior of Power
Pack was detected (restarted forcibly).
Press ULTRASONIC ON/OFF switch or hand switch.
POWER PACK are detected.
Malfunction on panel substrate
was detected.
POWER PACK
Press ULTRASONIC ON/OFF switch or hand switch.
Press ULTRASONIC ON/OFF switch or hand switch, turn the foot
switch off, mount SENTANTOOL certainly or insert plug of
handpiece certainly.
Press ULTRASONIC ON/OFF switch or hand switch, turn the foot
switch off.
Press ULTRASONIC ON/OFF switch or hand switch, turn the foot
switch off.
And wait until the power pack temperature goes down.
(※1)
Press ULTRASONIC ON/OFF switch or hand switch, turn the foot
switch off.
Footswitch The plug of foot switch is
plugged and unplugged.
Turn off the main switch.
If you use the foot switch, fully insert the plug of foot
switch and turn on the main switch.
Turn off the main switch. Ask us for repair if the same error occurs
altough the main switch is turned ON again.
Turn off the main switch. Ask us for repair if the same error occurs
altough the main switch is turned ON again.
Turn off the main switch.
Confirm if there were accretion and/or
deposit such as dust and oil on front panel. Accretion and/or
deposit may cause to keep switches on.
Ask us for repair if the
same error occurs altough the main switch is turned ON again.
Foot Switch cord length:1.5m
FS201
Extension Cord cord length:3m
CB311
◆Straight extension cord for connecting the
POWER PACK and the curled cord(CC811)
※Two or more ectension cords can not be
connected.
CA11
AC Power Cord cord length:2m
CA10 CA12
◆InputVoltageAC100V ◆InputVoltageAC115V ◆InputVoltageAC230V
ON/OFF type
Switch is ON while stepping on.

11 12
11.
Maintenance and Inspection
●Please check if there is some damage or not on the case and cord.
●Please check if there is accumulated dust, oil, water and so on.
※Please make sure to perform maintenance and inspection properly.
■Neglecting maintenance and inspection could result in accident and/or failure.
Warning
※
If the symptom is not improved after corrective action, the handpiece might be defective. Please ask for repair.
※Any other troubles or obscure points, please contact our minitor dealer.
10.
.
Before Asking for Repair
Condition Investigation Corrective action
Power is not ON.
Please plug an AC cord.Is an AC cord unplug?
The handpiece does not work.
Insert the cord securely.
Is the cord of handpiece connected to the Power Pack properly?
Wait until cooling down because power supply
of Power Pack is overheated.
Is "oH" indicated on display?
You can use foot switch only.
Does a foot switch connect with a power pack?
Display does not turn on.
Is handpiece working?
Display does not turn on while handpiece is not working.
"oH" is indicated on display
while handpiece is not working.
Is power supply of Power Pack becoming hot? Wait until cooling down because power supply
of Power Pack is overheated.
Is lamp of ULTRASONIC ON/OFF switch
lighting as blue?
If NOT, press ULTRASONIC ON/OFF switch,
press hand switch or turn foot switch on.
Is power control knob indicating min. position? Turn and adjust the position of power control
knob.
Is there any slackness of installation on tool
or holder?
Make sure that tool and holder are installed
certainly.
Is tool other than metal installed on
handpiece?
No vibration or weak vibration.
Metal tools can transmit vibration better than
tools other than metal. Decrease value
indicated by power control knob to prevent
heating or use VOLTAGE CONTROL mode.
Is there any slackness of installation on tool
or holder?
Make sure that tool and holder are installed
certainly.Decrease value indicated by power
control knob if tool and holder loosened frequently.
Vibration becomes weak while
working.
Is there any damage such as burn and crack
on tool?
Form tool or change to new tool. Decrease
value indicated by power control knob if tool
and holder were damaged frequently.
"HP" is indicated on display
when turning handpiece on.
Is there any slackness of installation on tool
or holder?
Make sure that tool and holder are installed
certainly.
Is value of amplitude amount or drive voltage
too high?
Decrease value indicated by power control knob
or use VOLTAGE CONTROL mode.
Tool is easily damaged.
Is there any damage such as burn and crack
on tool?
Form tool or change to new tool. Decrease
value indicated by power control knob if tool
and holder were damaged frequently.
Handpiece makes abnormal noise
while working.
Is there any slackness of installation on tool
or holder?
Make sure that tool and holder are installed
certainly.Decrease value indicated by power
control knob if tool and holder loosened frequently.
Is temperature of tool too high? Decrease value indicated by power control
knob.
Is there any problem on above 3 checking
questions?
In case there is no problem on 3 points to be
checked, decrease value indicated by power
control knob.
12.
Others
●This product is using switching power supply and transformer is driven by high frequency.
Mechanical sound may be heard from transformer and other parts, but it is not abnormal.
"oL" is indicated on display
frequently.
Is there any slackness of installation on tool
or holder?
Is POWER MODE activated?
Make sure that tool and holder are installed certainly.
Or, use handpiece with turning POWER MODE off and
decrease value indicated by power control knob.
Insert the cord securely.
Is the cord of handpiece connected to the Power Pack properly?
This manual suits for next models
1
Table of contents
Other MINIMO Power Pack manuals