Minolta Electroflash 132x User manual

MINCLTA
h\tt'
OWNER'S
MANUAL
MANUAL
DEINSTRUCCIONES

.
.Your Minolta Auto Electroflash
128 or 132X isacompact,versatile
unit that will make
pre'cise
flash exposuresautomatically over a wide range or can be used manually. lts
movableflash head
swings
upward for automatic bounceflash,
aswell asdirect. A special
check lamp indicates
when reflectedflashbrightness
isenough
for correctexposure.
Each
unit attachescordlesslywith a hot shoe or with its attachablesync. cord. Coverageis
sufficient for lenses
down to 28mm wideangle
on full-frame 35mm cameras;
an optional
diffuser extends coverageto 24mm lenses.To thesebasicfeatures,the Auto Electroflash
132X adds
greater
power, selectionof two apertures
for auto operation
and LED indicators
that light behind applicableautoflash
f-numbers
on the unit's illuminated
computerdial.
Whenever
mounted on a Minolta XD or XG camera
and charged,
a signalto the camera
through a specialcontact on the 132X's mounting bracket startsan LED flash-ready
signal
blinking in the viewfinder and electronicallysetsthe camerafor X-sync,
speedwhen the
shutterisreleased.

Su Minolta Auto Electroflash 128, o el 132X, es una compacta
y vers6til
unidad que
hace exactasexposicionesde flash automSticamente
dentro de una ampl
ia gama,o que
puede usarse
tambi6n manualmente.
Su cabezalm6vil seorienta hacia
arribaparaflash
de
rebote automdtico, e igual para flash directo. Una lSmparaespecial
de chequeo indica
cu5ndo la luz reflejada
del flashes
suficiente
parauna exposici6n
correcta.Cadaunidadse
acopfa sin cord6n a una zapata directa, o con su cord6n de sincornizaci6n acoplable. La
cobertura
es
suficiente
para
objetivos
gran-angulares
de hasta
28mm con c5marasde35mm
de formato entero; un difusor opcional amplia la cobertura hastaobjetivosde 24mm. A
estascaracteristicas
bSsicas
el Auto Electroflash
132X afiade
gran
potencia,
selecci6ndedos
aberturas
para operaci6n automStica,e indicadores
LED que se enciendendetr5sde los
n0meros-f
del autoflash
apl
icableen el dial computador ilumir::do de launidad.
Cuandose
monta en una c5maraMinolta XD 6 XG, y secarga,una sefrala la c5maraa trav6sde un
contacto especialen el soporte de montaje del 132X, hace
que un LED de "f lash
a punto"
parpadee
en el visor y electr6nicamente
pongalac6mara
para
velocidad
sincro.-X
cuando
el
obturador esliberado.

CONTENTS
NOTESONTHISMANUAL .... 7
NAMESOFPARTS ......8
SUMMARYOF OPERATION . . .10
BATTER
IES
Installing 1
3
Cold-weatheroperation ...... 15
ATTACHING
TO CAMERA 17
SETTING
FILM
SPEED 19
SETTINGSYNC.
AND SHUTTER . .. . 20
POWER
SWITCH
AND
MONITOR
LAMP ..... 22
Dial
illumination
and
autof-numberindication ... 24
DIRECT
FLASH \.
Auto operation
Auto flashran$e
Flash-distance
checklamp
Manual
operation
WIDEANGLE
DIFFUSER
AUTO BOUNCEFLASH
FILL-IN
F
LASH
OPENFLASH
OPTIONAL
ACCESSORIES
1.Ni-Cd
ChargerNC-2
2. Wideangle
DiffuserW2 . .
3. Color Filter Set
SPECIFICATIONS
CAREAND STORAGE
26
28
29
33
36
40
46
48
50
52
52
54
60

INDICE
NOTAS
SOBRE
ESTE
MANUAL.... .. 7
NOMBREDELAS
PARTES ..... 8
SUMARIO
DE
OPERACION
.. ..
.
.
....10
PI
LAS
Instalaci6n .......13
Operaci6n
con
tiempo-frio. ....15
ACOPLAMIENTO
A LACAMARA
,...17
PUESTADE
LASENSIBILIDAD
PELTCULA ......19
PUESTA
SINCRO.
Y
OBTURADOR....2O
CONMUTADOR
DE
ENERGIA
Y
LAMPARA
MONITOR ...22
lluminaci6n
Diale
f
ndicador
Autom5tico
N0mero-f
.. . .25
FLASH DIRECTO
Operaci6n
Autom5tica ...26
Gamadel
Autoflash... .......28
Ldmparachequeo
flash-distancia
. . . ..29
Operaci6n
manual ..,....33
DIFUSORGRAN-ANGULAR ...36
FLASH DE REBOTE
AUTOMATICO.. .40
FLASHDERELLENO
.. ... ....46
FLASHABIERTO ........48
ACCESORIOS
OPCIONALES
l.CargadorNi-Cd
NC-2. ......50
2.Difusorgran-angularW2
. ....52
3.Juegofiltroscolor. ....52
DETALLESTECNICOS
. .......57
ATENCIONESYCUIDADOS ....60

NOTES
ON THIS MANUAL
This is a combined instruction manual
for use
with the Auto Electroflash
128 and
132X. For this reason some illustrations
may show features dif
ferent from your
model, and somesectionsmay not apply to
thg one you own. Proper operation is
indicated for both models, however, and
differences
between them are clearly indi-
catedin instructions
andspecifications.
Unlessotherwise
indicated,illustrations
in this booklet show the Auto Electroflash
132X, the modelwith the full complement
of features,
with appropriate
notes
to adapt
them for use with the Auto E
lectroflash
128.
/
NOTAS
SOBRE
ESTEMANUAL
Este
esun manual
de instrucciones
com-
binado para uso con los modelos Auto
Electroflash 128 V 132X. Por tal raz6n,
algunas ilustraciones
puede que muestren
caracteristicas
diferentesa las del modelo
que ustedposee,y algunassecciones
pueden
no seraplicables
adicho
modelo.
Sin
embar-
go, la operaci6n apropiada est6 indicada
paraambos
modelos,
y las
difbrenciasentre
ellos estdn claramente expuestas en las
instrucciones
y especi
ficaciones.
A menos gue se diga otra cosa, las
ilustraciones
en el folleto muestran
el Auto
Electroflash 132X (que es el modelo que
refne la
totalidadde lascaracteristicas),
con
notas apropiadaspara adaptarlas
al Auto
Electroflash
128.

NAMES
OF PARTS
NOMBRE
DE LAS PARTES
@Ftash
tube and reflector
with guard
window
@Flash
head
@Battery-ch
ambe
r cover
@Sensor
window
@Open-f
lash
/test button
@Bracket clamp
@Sync.contact
@Camera-control
contact
(
132X
only
)
€)Attaching bracket
CTubo-ftash y reflector
con ventanilla
protectora
@Cabezal
del flash
@Tapa delalojamiento
de
la
pila
@Ventanilla
delsensor
@Bot6n flash-
abierto/comprobaci6n
@Sujetador
delsoporte
@Contactosincro.
@Contacto
c6mara-control
(s6lo
132X)
@Acoplamientodelsoporte

@ Auto aperture/range
indicato
rs
@Distance
scale
@Aperture scale
@Computer
dial
e Fi
lm-speedsetting
grip
@Film-speed
indicator
@Flash-distance
check
lamp
@Monitor
lamp
@Power switch
@Mode selector
@Sync.-cord
socket
@
|
ndicadores
abertu
ra-
auto/gama
@Escala
dedistancia
@Escala
deabertura
@Dial computador
@una de puesta
sensibilidad
pelicula
@l
ndicador
sensibilidad
pelicu
la
@L6mpara
comprobaci6n
f
lash-d
istancia
@L6mpara
monitor
@Conmutador deenergia
@Selector
de modalidad
(]Enchufe cord6n
sincronizaci6n

1o SUMMARY OF OPERATION (fordirectautoflash)
SUMARIO DE OPERACION (paraautoflash
directo)
1. With serviceable
bat-
teries installed (see
pp.12 and 50), attach
and lock unit on
camera (P.
17), using
sync. cord if necessary.
Con las pilasen buen
estado de servicio (ver
p5gs. 12 y 5Ol, acoPle
la unidada lac5mara
Y
bloqu6ela
lp6g.
17l
usando cord6n de sin-
cronizaci6n,
si es nece-
sano.
2. Set applicable film
speedon computer dial
of flashunit (p.
19).
Ajuste
la
sensibilidad
de
pelicula
aplicable
en el
dial computador del
flash
(p5g.
19).
Make sure
camera
is
set
for proper sync. and
shutter speed (p.20).
Aseg0
rese de que la
c5maraest6puestapara
sincronizaci6n
y velo-
cidad de obturador ap-
ropiadas
(p69.
20).
3.

4. Move power switch to
"oN" lP' 22l. and set
mode selector
to red
or
yellow "AUTO" posi-
tion (p.
26).
Mueva a "ON" el con-
mutador de energia
(pils.22l y ponga el
selector de modalidad
en "AUTO", rojo o
amarillo
(p69.
26).
5. Set camera lens aper-
ture to f-number oppo-
site the matching-
colored
arrow.
Ponga la abertura del
objetivo de la
c5mara
al
n0mero-f opuesto a la
flecha coloreada de
coincidencia.
With monitor lamp
glowing and flash head
facing straight
forward,
push shutter release
to
photograph subject
within the flash range
(p.
28).
Con la
l5mpara
monitor
encendida y la cabeza
del flash
encarada
hacia
adelante,
aPriete
el dis-
parador parafotograf
i
ar
el sujeto dentro de la
gama
del flash
(p6g,
28).
6.

12 BATTE
R
I
ES
PILAS
Your Auto Electroflash 128 or 132X is
designed to be powered by four AA
(penlight)-size batteries. These may be of
the non-rechargeable carbon-zinc, alkaline-
-manganese ("AM" or "alkaline") type or
the rechargeable nickel-cadmium ("Ni-Cd"
or "nicad") type, information on loading
and the former type is given here. For
information on Ni-Cd's and charging, see
p.
50.
Su Auto Electroflash 128 6 132X fue
disefrado para ser alimentado por cuatro
pilas "pen-light" tamafio AA. Estas
pueden
ser de carb6n-cincno-recargables,
alcalino-
manganeas
("AM" o "alkaline"),
o baterias
de niquel-cadmio ("Ni-Cd" o "nicad").
Damos
aqui informaci6n
del primer
tipo y
sucarga.
Para
Ni-Cd
y carga,
verpdg.
50.

Installing
Instalacion
1. Remove the battery-chamber cover by
slid
ing it of
f in the direction of the
arrow toward the front of the unit.
Saque la tapa del alojamiento de pilas
deslizdndola hacia afuera en direccion de
la f
lechahacia
el frente de la unidad.
After wiping
terminalswith a clean,dry
cloth, insertf
ou
r carbon
-zinc,
alkalineor
Ni-Cd batteries
as specified
on p.50,
making
sure
that
plus
(+)
and
minus
(-)
ends are positioned
as indicated
inside
thechamber.
Tras de limpiar los terminalescon un
pafio seco
y limpio, inserte
cuatropilas
de carb6n-cinc,o alcalinas,o bateriasde
n
iquel-cadmio,como se especif
ica
en la
p5g.
50, asegurdndosede que los signos
"m5s" (+) y "menos" (-) est5n
puestos
como se indicaen el interior del aloja-
m
iento.
13
2.

3. Close the chamber by aligning the cover
carefully, depressing ends of batteries
slightly with it, and sliding
it toward the
rear of the unit until it snapssecurely in
place.
Cierre el alojamiento alineando con cui-
dado la tapa, apretando los bordes de las
pilas ligeramente con ella y desliz5ndola
hacia la parte trasera de la unidad, hasta
que quede bien emplazada y segura.
Cold-weather operat ion
Batteries generally tend to decrease in
capacity as the temperatu re goes down.
Though considerably better than the
ordinary or sealed carbon-zinc type in this
respect, alkaline batteries are no exception.
It is thus recommended that batteries be
fresh if they are to be used in the Auto
Electroflash 128 or 132X in cold weather
and that you carry fresh spares in a warm
inside coat pocket for replacement if
necessary
during such operation.
With Ni-fr batteries, p. 50, no particular
care is necessary in cold weather.

l
I
I
I
Operaci6ncon tiempo-frio
Las pilas generalmente
tienden a dis-
minuir su capacidadde acci6nconforme la
temperatura clim5tica se hace m6s baja.
Aunque considerablementemejores
que las
de carb6n-cinc blindadas, las alcalinas
no
son una excepci6n a este respecto.Por lo
que recomendamos
que las pilas sean
fres-
cas, si han de ser usadas con el Auto
Electroflash 128 6 132X en tiempo frio,
aconsejandoadem6s llevar pilas frescas
de
repuesto
en el bolsillo,
al calordel cuerpo,
por sise
necesitan
durante
laoperaci6n.
Con baterias Ni-Cd (pr5g.
50), no es
necesario ning0n cuidado especial con
tiempo frio.
l,
CAUTION
o When replacing batteries, be su
re to
change
all four batteries
at onetime, lf
exhausted batteriesare usedwith fresh
ones,or if different types
of batteries
are
used together, these is a possibility of
leakage
or explosion.
o Do not attempt to charge
alkal
ine or
carbon-zinc
batteries
asthis could cause
leakage
or explosion.
o lf theflash
unit isnotto beusedfor two
weeks or more, batteries
should be re-
moved.

PR
ECAUCION
o Cuando cambie las pilas,
aseg0rese
de
cambiar las cuatro a la vez. Si se usan
pilas f
rescasmezcladas con pilas ex-
haustas,o de diferentes
tipos, hay posi-
bilidad
dederrame
o exPlosi6n.
o No intente
cargar
las
pilas
alcalinas
o las
de carb6n-cinc;
podria
tambi6n
ser
moti-
vo de
derrame
o explosi6n.
o Si el flash no va a usarse
durante dos
semanas
o m6s,
deberia
quitar las
pilas.

ATTACHING
TO CAMERA
ACOPLAMIENTO
A LA CAMARA
With cameras wired for cordless flash,
simply slide the attaching bracket of the
flash unit as far asit willgo into the camera
hot shoe and tu rn the bracket clamp as
shown to secure it there.
With other cameras, secure the bracket
in the accessory or flashgun shoe in the
same way; insert the single-prong plug on
one end of the attachable sync.-cord pro-
vided into the electroflash's sync.-cord
socket until it snaps in place; and plug the
PC connectlon on the other end into the
camera terminal for "X" synchronization.
Con cdmaras preparadas para flash sin
cord6n, simplemente deslice a fondo el
soporte de acoplamiento en la zapata directa
de f
a c6mara,
y gire
el acoplamiento,
seg0n
se
muestra,
para
asegurarlo
bien.
Con otras c6maras,
asegureel soporteen
la zapata de accesorios
o del flash de la
misma manera;
ajustela clavijade un solo
v5stago
de uno de los extremos
del cord6n
de sincronizaci6n acoplable suministrado
hasta
que quedebien emplazado;
y enchufe
la conexi6n PC del otro extremo en el
terminal de la camarapara sincronizaci6n
ttxrr.

NOTE
Whenever the sync. cord is used to
connect the Auto Electroflash 132X to
either a Minol
ta XD or XG camera,the
correct shutter speed
for flash must be set
manually
asthe flash's
camera-control
con-
tactwill bedisconnected.
NOTA:
Cuando se usa el cord6n de sincroniza-
ci6n para conectar el Auto Electrof
lash
132X a cualquiera
de las
c5marasXD 6 XG,
lavelocidad
deobturadorcorrecta
para
flash
debe
serpuesta
manualmente
y desconecta-
do el contactocdmara-control
delflash.
*:*"'t

SETTING
FILM
SPEED
PUESTA
DE LA SENSIBILIDADDE LA PELICULA
By means of the grip provided, move the
film-speed scaleuntil the indication for the
film in use clicks into place opposite the
triangular index. Marks between those for
numbers on the scale
indicate f
ilm speeds
as
follows:
Por medio del mando aprop6sito, mueva
la escala de sensibilidad del film hasta la
indicaci6n, para que el film en uso haga
"clic" en el lugar opuesto al indicador
triangular. Las marcas entre los n0meros en
la escala,indican sensibilidades,como sigue:

20 SETTING
SYNC.
AND SHUTTER
PUESTA
SINCRO
Y OBTURADOR
With either the Minolta XD and XG
camerasat any electronic
setting,
the Auto
Electroflash 132X starts the f
lash-ready
signal
in the camera's
viewfinderblinking
and automatically setsthe camera's
shutter
for X sync.
whenever
the unit ischargedand
readyto fire.
Con las c5maras Minolta XD Y XG a
cualquier puesta
electr6nica,
el Auto Elec-
troffash 132X inicia el parpadeo-sefial
de
"flash-a-punto" en el visor de la c5mara
y
automSticamente pone el obturador para
sincronizaci6n
X, si launidadest6cargada
y
lista
para
actuar.
With the Auto Electroflash132X or 128
on all other cameras:
Con el Auto Electroflash 132X 6 el128
entodas
lasdem5s
c5maras:
1. Make surethat the camerais set for X
synchronizationand/or that the flashis
properly connected with the X-sync.
terminal of the camera.
Aseg0rese
de que la c5mara est6puesta
para sincronizaci6nX Vlo que el flash
est6conectado apropiadamente al termi-
nalsincro.
X de la
c5mara.

2. Alsomake surethat the camera
isnot set
for a shutter speed faster than the
manufacturer's recommendation for
electronicflash
(usually
the special
"X"
setting or 1/60 sec. or slower for full-
frame 35mm cameras
having
horizontal-
run f
ocal-plane shutters; between-the-
lensshutters
with X-sync.
canbe used
at
allspeeds).
Tambi6,n
aseg0rese
de que la c6mara
no
est6
puesta
para
unavelocidad
deobtura-
dor m6s r5pida
de lo que recomienda
el
fabricante para flash elect16nico
(corri-
entemente
la sincronizaci6n
"X" 6 1160
de seg., o m5s baja, para c5maras
de
35mm formato entero,
con obturador de
plano-focal y recorrido horizontal; los
obturadores centrales
con sincronizaci6n
X, pueden usarse
a todas las velocida-
des.
)
This manual suits for next models
1
Table of contents
Other Minolta Camera Accessories manuals
Minolta
Minolta MC-DG200 User manual

Minolta
Minolta MOTOR DRIVE 1 User manual

Minolta
Minolta MC-DG100 User manual

Minolta
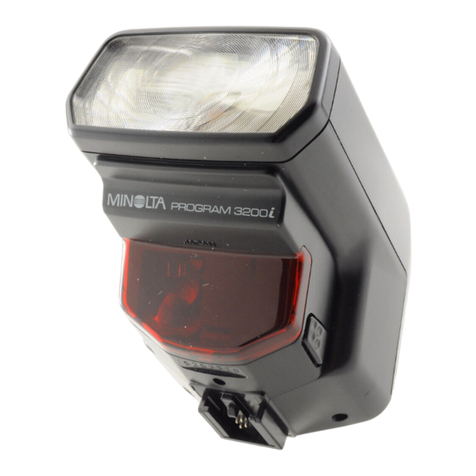
Minolta MACRO TWIN FLASH 2400 User manual

Minolta
Minolta VC-700 User manual

Minolta
Minolta data memory back dm9 User manual
Minolta
Minolta VC-7 - IR REMOTE CONTRO LRC-3 User manual

Minolta
Minolta VC-7D - IR REMOTE CONTRO LRC-3 User manual

Minolta
Minolta DS-100 User manual

Minolta
Minolta Extension Tube II User manual