manuals.online logo
Brands
  1. Home
  2. •
  3. Brands
  4. •
  5. Minolta
  6. •
  7. Camera Flash
  8. •
  9. Minolta 118x User manual

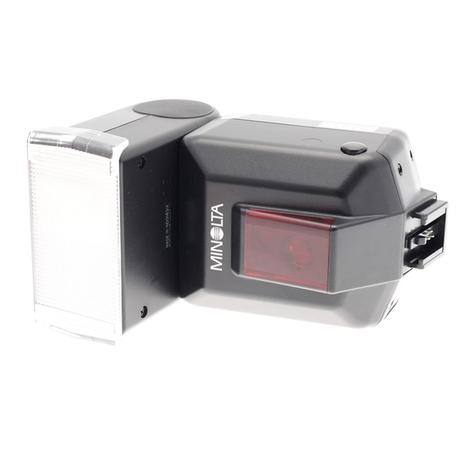
Minolta 118x User manual

This manual is for reference and historical purposes, all rights reserved.
This creation is copyright© by M. Butkus, NJ, U.S.A.
These creations may not be sold or distributed without the expressed permission of the producer
I have no connection with any camera company
On-line camera manual library
If you find this manual useful, how about a donation of $2 to:
M. Butkus, 29 Lake Ave., High Bridge, NJ 08829-1701
and send your e-mail address so I can thank you.
Most other places would charge you $7.50 for a electronic copy or
$18.00 for a hard to read Xerox copy.
This will allow me to continue this site, buy new manuals and pay their shipping costs.
It'll make you feel better, won't it?
If you use Pay Pal, go to my web site
www.orphancameras.com and choose the secure PayPal donation icon.
www.orphancameras.com
All manuals and user guides at all-guides.com
all-guides.com
AUTOELECTROFTASH
II8X
OWNER'SMANUAL
BEDIENUNGSANLEITUNG
MODED'EMPLOI
MANUALDEINSTRUCCIONES
www.orphancameras.com
All manuals and user guides at all-guides.com
NAMESOF PARTS
BEZEICHNUNG
DER TEILE
NOMENCLATURE
NOMBRE
DE
LAS
PARTES
O wtode selector
@ S"nror window
@f tash
tube and reflector
with guard window
@svnc. contact
@camera-co ntro I contact
@ Attach ing brack et
www.orphancameras.com
All manuals and user guides at all-guides.com
eFunktionswdhler @ Mittenkontakt fUr kabellosen
S€lecteur de mode AnschluB
Selector Modalidad Contact de synchronisation
Contacto Sincro
@ Senso16ffnu ng
Fenotre de la cellule @Kamera-Steuerkontakt
Ventanilla Sensor Contact de contrOle de l'appareil
Co
ntacto contro l-c6mara
@Blitzrbhre und Beftektor mit
Schutzscheibe
Tube f rash, r6frecteur, et @Aufsterfl*.,".
6cran de protection soporte de acopramiento
Tubo-flash y reflector
con ventanilla protectora
www.orphancameras.com
All manuals and user guides at all-guides.com
@ nuto aperture/range indicators
@ o istance scale
@ a pertu,re sca
le
@Computer dial
@r llm-speed scale
@Monitor lamp
@Po*er switch
@ eutof lash
table
@ g"ttery-chamber cover
@ O
pen-f lash/test butto n
www.orphancameras.com
All manuals and user guides at all-guides.com
@ Anzeige der Automatikbereiche @ Blitzbereitschafts lampe
lndicateur d'ouvertures Lampe t6moi n
. Indicadores abertura-auto/gama L5mpara monitor
@ Entfernungsskala @ Ein-/Aus-Schalter
Echelle des distances Interrupteur
, Escala
de distancia Conmutador de energia
@ Blendenskala @ Automatik-Blitzbereichstabelle
Echelle des ouvertures Couvercle du compartiment des piles
Escarade abertura Tabla Autof lash
@ computerscheibe @ Batteriekammerdeckel
Cadran indicateur Couvercle du compartiment des pilas
Dial computador Tapa alojamiento baterias
@ Handausliisetaste
@ Fitmempfindlichkeits skala Test lash
Echelle de sensibilit6 des f
ilms Bot6n flash-abierto/
Escala
sensibilidad
pelicula comprobaci6n
www.orphancameras.com
All manuals and user guides at all-guides.com
all-guides.com
10 BATTER
I
ES
BATTERIEN
LES
PILES
BATERIAS
Your Auto Electroflash 118X is
designed to be powered by two AA
(penlight)-size batteries. These may
be of the non-rechargeable carbon-
zinc, alkalinemanganese ("eV" or
"alkaline") type or the rechargeable
nickel-cadmium ("Ni-Cd" or "nicad")
type. information on loading and
the former type is given here. For
information on Ni-Cd's and charging,
see p. 43,
Als Stromquelle k6n nen beim
Auto-Electrof lash 1
18X zwei Mignon-
batterien oder zwei wiederauf ladbare
NC-Ak kus verwendet werden,
Ndheres 0ber die Batterien und das
Einsetzen der Batterien und Akkus
lesen Sie nachstehend. Einzelheiten
Ober NC-Akkus und das Aufladen
erfahren Sie auf Seite 43.
Votre Auto Electrof lash 118X
fonctionne avec deux triles AA
(penlight). Elles peuvent 6tre en
carbonezinc (nonrechargeables),
alkaline mangandse ("AM" ou "alka-
line") ou de type nickel-cadmium
(rechargeables) ("Ni-Cd" ou
,,Nicad"). Vous trouverez ci-aprls les
instructions pour la mise en place des
piles. Les informations pour les piles
Ni-cd setrouvent p. 43.
El Auto Electrof lash 118X fue
disefiado para ser alimentado por dos
pilas "penlight" tamailo AA. Estas
pueden ser de carb6n-cinc no recarga-
bles, alcalino-manganesas ("AM" o
alcaline), o baterias recargables de
niquel-cadmio ("Ni-Cd" o "nicad").
Damos aqui informaci6n del primer
tipo y su carga. Para Ni-Cd y carga,
ver p6gina 43.
www.orphancameras.com
All manuals and user guides at all-guides.com
Installing
Einsetzen der Batterien
Mise en place
Instalaci6n
1. Remove the battery-chamber cover
by sliding it off in the direction of
the arrow toward the bottom of
the unit.
Oter le couvercle de l'emplacement
des piles en le glissant dans le sens
de la flEche, vers l'avant du flash.
Batteriekammerdeckel in Pfei
lrich-
tu ng zur Gerdteu nterseite hin
sch
ieben u
nd abnehm en.
Saque la tapa del alojamiento de
pilas desliz6ndola hacia afuera,
hacia el fondo de la unidad, €tr
direcci6n de la f
lecha.
2. After wiping terminals with a
clean,
dry cloth, insert two carbon-zinc,
alkaline or Ni-Cd batteries as
specified on p. 43, mak ing sure
that plus (+) and minus (-) ends
are positioned as indicatecf inside
the chamber.
Kontakte mit einem sau
beren u
nd
trockenen Tuch reinigen und zwei
Mignonbatterien oder N
C-Akkus
(wie auf Seite 43 angegeben) ein-
setzen. Darauf achten, daB die
Plus (+) - und Minus (-) - Pole
gemSB den Zeichen in der Batterie-
kam
mer liegen.
11
s
.*
S,
s.
E
#
*
*
\{
ft
www.orphancameras.com
All manuals and user guides at all-guides.com
12 Aprds en avoir essuy6 les extr6-
mit6s avec un chiffon doux et sec,
introduire les deux triles carbone-
zinc, alkaline manganbse ou Ni-Cd
comme indiqu6 a la page 43 et
s'assurer que les ploles (+) et (-)
sont plac6s comme indiqu6 a
l'int6rieur de leur emplacement.
Tras de limpiar los terminales con
un pafro seco y limpio, inserte dos
pilas de carb6n-cinc, o alcalinas,
o
bater ias
de n
iquel-cadmio, como se
especifica en la pdgina 43, asegu-
r6ndose de que los signos "m6s"
(+) y "menos" (-) est6n puestos
como se indica en el interior del
alojamien
to.
3. Close the chamber by aligning
the cover carefully, depressingends
of batteries slightly with it, and
sliding it toward the top of the
unit until it snapssecurely in place.
Batteriekammerdeckel wieder
sorgfd
ltig aufsetzen, dabei Batterien
leicht andriicken u
nd Deckel in
R
ichtu ng Gerbteoberseite schieben,
bis er fest einrastet.
Fermer le logement en rem ettant
en place le couvercle, pousser
169Arement
les piles
vers l'int6rieur,
jusqu'i ce qu'un l6ger d6clic vous
assure dg sa bonne mise en place.
Cierre el alojamiento alineando con
cuidado la tapa, apretando los
bordes de las pilas ligeramente con
ella y desliz5ndola hacia la parte de
arriba de la unidad hasta
que quede
bien emplazada y segura.
www.orphancameras.com
All manuals and user guides at all-guides.com
Cold-weather operation
Kaltebstraeb
Emploi par temps froid
Operaci6n con tiempo frio
Batteries generally tend to decrease
in capacity as the temperature goes
down. Though considerably better
than the ordinary or sealed carbon-
zinc type in this respect, alkaline
batteries are no exception. lt isthus
recommended that alkaline batteries
be fresh if they are to be used in this
unit in cold weather and that you
carry fresh spares in a warm inside
coat pocket for replacement if
necessary during such operation.
With Ni-Cd batteties, p. 43, no
particular care is necessaiy in cold
weather.
Batterien neigen von Natur aus
dazu, bei niedrigen Temperaturen in
ihrer Kapazitdt nachzulassen.
Obwohl
die Alkali-Mangan-Batterien in dieser
Hinsicht erheblich gilnstiger sind als
0bliche Batterien, machen sie hierin
trotzdem keine generelle Ausnahme.
Deshalb sollten vor einem geplanten
Kdltebetrieb frische Alkali-Mangan-
Batterien eingelegt und auBerdem,
falls niStig, frische Ersatzbatterien-
zum Auswechseln in einer warmen
Innentasche miggef0hrt werden.
NC-Akkus kbnnen bei kaltem
Wetter ohne besondere Vorkehrung-
en verwendet werden (Seite 431,
, Les piles ont g6n6ralement
tendance d se d6charger quand la
temp6rature baisse. Bien que large-
ment sup6rieures aux piles carbone-
zinc ou aux piles ordinaires dans ce
domaine, les piles alkaline mangandse
ne font pas exception i cette ten-
dance. Nous vous conseillons donc
d'employer des piles neuves si vous
devez vous servir de votre Auto
Electroflash 118X par temps froid,
ainsi que de disposer de piles de
rechange dans un endroit assezchaud
pour pouvoir remplacer les
premidres
si cela se presentait,
Avec les piles Ni-Cd (p.43), au-
cune pr6caution n'est d prendre pas
temps froid.
13
I
www.orphancameras.com
All manuals and user guides at all-guides.com
14 Las pilas generalmente tienden a
dism inuir su capacidad de acci6n
conforme la temperatura clim5tica se
hace m6s baja. Aunque considerable-
mente mejores que lasde carb6n-cinc
blindadas, las alcalinas no son una
excepci6n a este respecto, Por lo que
recomendamos que las pilas sean
frescas, si han de ser usadas con el
Auto Electroflash 118X en tiempo
frio, aconsejando adem6s llevar pilas
frescas de repuesto en el bolsillo, al
calor del cuerpo, por si se necesitan
durante la operaci5n.
Con baterias Ni-Cd (pag. 43), no
es necesario ning0n cuidado especial
con tiempo frio.
CAUTION
ACHTUNG
ATTENTION
PRECAUCION
oWhen replacing batteries, be sure
to change both batteries at one
time. lf exhausted battery is used
with fresh one, or if different types
of batteries are used together,
there is a possibility of battery
leakage
or explosion.
. Do not attempt to charge alkaline
or carbon-zinc batteries as this
could cause battery leakage or
explosion.
. lf the f lash unit is not to be used
for two weeks or more, batteries
should be removed.
a Beide Batterien mOssen immer
gleichzeitig ausgetauscht werden.
Wenn alte und frische Batterien
zusammenkommen, ist die Leist-
ung schlecht und es besteht
Auslauf- und Explosionsgefahr.
o Versuchen Sie nicht, Mignon-
batterien aufzuladen. Sie Lonnten
dabei auslaufen oder sogar explo-
dieren.
. Wird das Blitzgerdt ldnger als zwei
Wochen nicht benutzt, ist es
ratsam, die Batterien herauszune-
hmen.
o Ouand vous changez les piles,
veiller i toujours changer les
deux
en m€me temps. Si vous utilisez
une pile d6ja usag6e avec une
www.orphancameras.com
All manuals and user guides at all-guides.com
all-guides.com
neuve, ou si vous utilisez des
piles de diff6rents types en mefne
temps, ces derni6res peuvent fuir
our exp loser.
N'essayez pas de charger des
piles alkaline manganlse ou
carbone-zinc, car cela peut pro-
voguer des fuites ou des ex-
plosions.
Si vous devez ne pas vous servir
de votre f lash pendant deux
semaines ou plus il est conseil16
d'enlever les
piles.
Cuando cambie las pilas, aseg0rese
de cambiar las dos a la vez. Si se
usan pilas frescas mezcladas con
pilas exhaustas, o de diferentes
tipos, hay posibilidad de'derrame
o explosi6n.
No intente cargar las pilas alca-
linas o las de carb6n-cinc; podria
tambi6n ser motivo de derrame o
ex
plosi6n.
Si el flash no va a usarse durante
dos semanas
o m6s, deberia quitar
las
pilas.
ATTACHING
TO CAMERA
MONTIERENDES
BLITZ-
GERATESAUF DER
KAMERA
MISEENPLACE
SUR
L'APPAREIL
PHOTO.
GRAPHIOUE
ACOPLAMIENTO
A LA
CAMARA
With the Minolta XD, XG or 11O
Zoom Mark II cameras or other cam-
eras having a hot shoe, simply slide
the attaching bracket of the 118X as
far as it will go into the camera's hot
shoe.
15
www.orphancameras.com
All manuals and user guides at all-guides.com
16 Bei Minolta XD-, XG- und 11O
Zoom Mark II Kameras sowie anderen
Kameras mit kabellosem Mittenkon-
takt wird einfach der AufsteckfuB
des Blitzgerdtes bis zum Anschlag in
den Kameraschuh geschoben.
Avec les
appareils
Minolta XD, XG
ou 11O Zoom Mark II ou d'autres
appareils
6qu
ip6s
d'une griffe, il suffit
d'introduire le sabot du flash dans la
griff
e de l'appareil.
Con lasc6m
arasMino
lta X D, X
G 6
1
1O Zoom M
ark II y otras tamb i6n
dotadas de zapata d
irecta, simple-
mente deslice a fondo en la zapata el
soporte de acoplamiento del 118X,
SETTING
FILM
SPEED
EINSTELLEN
DER FILM-
EMPFINDLICH
KEIT
AFFICHAGEDE
LA
SENSI-
BILITEDU
FILM
PUESTA
DELA
SENSIBILIDAD
DE
LAPELICULA
Turn the computer dial to align
the exposure-rating number of the
f
ilm you are using
with the triangular
white index. (Vtarks
between numbers
on the film-speed scale represent
ASA ratings of 32, 40 ,64,8C , 125,
160, 25O, 32O, respectively from left
to right.
)
www.orphancameras.com
All manuals and user guides at all-guides.com
Drehen Sie die Computerscheibe
So, daB die Empfindtichkeit des ver-
wendeten F
ilms dem weiBen I
n-
dexpfei I gegenUbersteht.
Tourner le cadran indicateur
jusqu'i ce que le chiffre de sensibilit6
du film soit align6 avec le petit
triangle blanc. (
Les marques situ6es
entre les degr6s de sensibilit6 du film
sont les indications en ASA, respect-
ivement 32-40-64-80- 125- 1
60-250-
32O, de gau
che b droite).
Gire el dial computador para
alinear el n0mero de tasa de exposi-
ci6n de la pelicula que est6 usando,
con el indicador triangular blanco.
(Las marcas entre los nimeros en la
escala de sensibilidad de la pelicula
representan tasas ASA de 32, 40, 64,
80, 125, 160, 25O y 32O, respectiva-
mente, de izquierda a derecha.)
SETTING
SYNC.
AND
SHUTTE
R
EINSTELLENVON SYNCHRO.
NISATION
UND VERSCHLUSS
REGLAGEDE
LA
SYNCHRONISATION
DE
L'OBTURATEUR
PUESTA
SINCROY OBTU-
RADOR
With the Minolta XD, XG and 11O
Zoom Mark II cameras at any elec-
tronic setting, the Auto Electroflash
118X starts the flash-ready signal in
the camera's viewfinder blinking
whenever the unit is charged and
ready to fire and automatically sets
the camera for X sync. when the
shutter is released.
Wird der Auto-Electroflash 118X
zusammen m it der.
X D-, XG- oder 11O
Zoom Mark II Kamera verwendet,
blinkt (bei jeder elektronischen Ein-
stellung) ein LED-Signal im Sucher
als B
litzbereitschaftssignal, und der
17
"27
25 26
www.orphancameras.com
All manuals and user guides at all-guides.com
18 VerschluB wird automatisch fiir X-
Synchronisation umgeschaltet, wenn
BIitzbereitschaft besteht.
Avec un appareil 6lectronique
Minofta XD, XG ou 110 Zoom Mark
II, l'Auto Electrof
lash 118X indique
par une petite lumidre clignotante
dans le viseur que le flash est pr6t d
fonctionner et programme auto-
matiquement la vitesse d'obturation
en synchronisant l'appareil lorsque le
ffash est charg6 et pr€t ii fonctionner.
Con lasc6maras
Minolta XD, XG y
110 Zoom Mark II a cualquier puesta
electr6n ica, el Auto E
lectrof lash
118X inicia el parpadeo-sefial de
"f lash a pu
nto" en el visor de la
c6mara, y automSticamente pone el
obturador para sincronizaci6n-X, si la
unidad est5 cargada y lista para actuar.
With the Auto Electroflash 118X
on all other cameras:
Bei allen anderen Kameras gilt:
Avec l'Auto Electrof lash 1
18X
sur d'autres apparei ls:
Con el Auto Electroflash 118X en
todas lasdemds cSmaras:
1. Make sure that the camera is set
for X sync. Synchronization will
not be correct with such types or
sync. delays as M or FP.
Vergewissern Sie sich, daB die
Kamera auf X-Synchronisation
geschaltet wurde.
S'assurer que l'appareil est 16gl6
pou r une sy
nchronisatio
n "X" . La
synchronisation ne sera pas cor-
recte si l'appareil est en position
ttMt' ou "FP".
Aseg0rese de gue la cdmara est6
puesta para sincronizaci6n-X. La
sincronizaci6n no ser5correcta con
tipos de retardos sincro tales como
M6FP.
2. Also make sure that the camera is
not set for a shutter speed faster
than the manuf acturer's recom-
mendation fpr electronic flash
www.orphancameras.com
All manuals and user guides at all-guides.com
(usually 1/60 or slower for full-
frame 35mm cameras having hori-
zo
ntal ru
n focal-plane shutters) .
Achten Sie darauf, daB Oie Versch-
luBzeit den Empfehlungen des
Kameraherstellers fiir E
lektronen-
blitzauf nahmen entspricht (bei
Kleinbildkameras mit Schlitzver-
schluB normalerweise die spezielle
X-Einstellung bzw. U6Os oder
lSnger).
S'assurer 6galement que l'appareil
n'est pas 16g16 sur une vitesse
sup6rieure e celle recommand6e
par le fabricant pour un flash
6lectronique (habitu
ellement le
rdgf
age "X" est au 1/6Oe de
seconde, ou plus lent, sur des
appareils 35 mm i obturateurs plan
focaux ).
Tamb i6n asegO
rese de que la
c5mara no est6 puesta para una
velocidad de obturador mds r5pida
de lo que recomienda el fabricante
para flash elect16nico (corriente-
mente 1/60 o m5s baja, para
c5maras de 35mm de f
ormato
entero, con obturador de plano-
focal y recorrido horizontal).
POWER
SWITCHAND MONITOR
19
LAMP
EIN.I
AUS.SCHALTER
UND
BLITZBE REITSCHAFTSANZ E
I
G
E
CONMUTADORDEENERGIA
Y LAMPARA
MONITOR
INTERRUPTEURGENERAL
ETTEMOINLUMINEUX
To turn the unit on and charge its
capacitor with alkaline, sealedcarbon-
zinc or Ni-Cd batter ies, move power
switch to "ON."
The monitor lamp should light to
indicate recycling as shown in the
table.
www.orphancameras.com
All manuals and user guides at all-guides.com
all-guides.com

Other Minolta Camera Flash manuals

Minolta MAXXUM FLASH 3500XI - PART 2 User manual

Minolta

Minolta MAXXUM FLASH 3500XI - PART 2 User manual

Minolta MAXXUM_FLASH_5400HS - PART 2 User manual

Minolta

Minolta MAXXUM_FLASH_5400HS - PART 2 User manual

Minolta MAXXUM FLASH 2800AF - PART 2 User manual

Minolta

Minolta MAXXUM FLASH 2800AF - PART 2 User manual

Minolta MAXXUM DYNAX FLASH 3200I - PART 2 User manual

Minolta

Minolta MAXXUM DYNAX FLASH 3200I - PART 2 User manual

Minolta 5200I PROGRAM FLASH User manual

Minolta

Minolta 5200I PROGRAM FLASH User manual

Minolta 5600HS (D) User manual

Minolta

Minolta 5600HS (D) User manual

Minolta 280PX User manual

Minolta

Minolta 280PX User manual

Minolta 280PX User manual

Minolta

Minolta 280PX User manual

Minolta AUTO ELECTROFLASH 360PX User manual

Minolta

Minolta AUTO ELECTROFLASH 360PX User manual

Minolta AUTO ELECTROFLASH 450 User manual

Minolta

Minolta AUTO ELECTROFLASH 450 User manual

Minolta VECTIS 25 User manual

Minolta

Minolta VECTIS 25 User manual

Minolta PROGRAM FLASH 2500 User manual

Minolta

Minolta PROGRAM FLASH 2500 User manual

Minolta AUTO ELECTROFLASH 450 User manual

Minolta

Minolta AUTO ELECTROFLASH 450 User manual

Minolta Maxxum Flash 400AF User manual

Minolta

Minolta Maxxum Flash 400AF User manual

Minolta MAXXUM FLASH 4000AF - PART 2 User manual

Minolta

Minolta MAXXUM FLASH 4000AF - PART 2 User manual

Minolta 3600HS D User manual

Minolta

Minolta 3600HS D User manual

Popular Camera Flash manuals by other brands

Canon Speedlite 430 EZ instructions

Canon

Canon Speedlite 430 EZ instructions

Godox V1C instruction manual

Godox

Godox V1C instruction manual

Godox Thinklite TT350O instruction manual

Godox

Godox Thinklite TT350O instruction manual

Profoto B10 user guide

Profoto

Profoto B10 user guide

Metz MECABLITZ 44 AF-1 Operating	 instruction

Metz

Metz MECABLITZ 44 AF-1 Operating instruction

Nikon autofocus speedlight SB-900 manual

Nikon

Nikon autofocus speedlight SB-900 manual

Nikon MACRO COOL-LIGHT SL-1 instruction manual

Nikon

Nikon MACRO COOL-LIGHT SL-1 instruction manual

Panasonic DMW-FL360L operating instructions

Panasonic

Panasonic DMW-FL360L operating instructions

Bolt VC-310N user manual

Bolt

Bolt VC-310N user manual

Sealife Sea Dragon SL963 instruction manual

Sealife

Sealife Sea Dragon SL963 instruction manual

Metz Mecablitz 34 BCT 2 operating instructions

Metz

Metz Mecablitz 34 BCT 2 operating instructions

Godox A1 instruction manual

Godox

Godox A1 instruction manual

Bolt VS-260F user manual

Bolt

Bolt VS-260F user manual

Nikon SB-16A/B Specification sheet

Nikon

Nikon SB-16A/B Specification sheet

Pentax AF400FTZ manual

Pentax

Pentax AF400FTZ manual

CULLMANN CUlight FR 60F manual

CULLMANN

CULLMANN CUlight FR 60F manual

Nikon SB-24 instruction manual

Nikon

Nikon SB-24 instruction manual

Xit XTDF18 instruction manual

Xit

Xit XTDF18 instruction manual

manuals.online logo
manuals.online logoBrands
  • About & Mission
  • Contact us
  • Privacy Policy
  • Terms and Conditions

Copyright 2025 Manuals.Online. All Rights Reserved.