Before installing your CISS you must create an appropriate air balance inside
each tank. The shipping will have caused the ink to move inside the tanks and
you can easily remedy this by following the installation instructions below.
Preparing the MBOX V.2 tanks
( after install the cartridges please do this step)
1. Turn the tanks onto their side.
2. Remove each top cover by inserting your finger under the tab and lifting the
cover off. You will see the names of the colours facing up on each tank.
3. Using your finger and thumb in a tissue, remove each ‘travel plug’ and keep
them in a safe place. (The tissue will prevent any drops of ink from getting on
your fingers). If you travel with the unit you’ll need to put them back in for the
travel and then remove them again to use the CISS. Also, if you plan not to use
the printer for more than one month, it is a good idea to put the plugs back in and
take them out again when you want to use the printer. This is to protect the ink
closest to the plug holes.
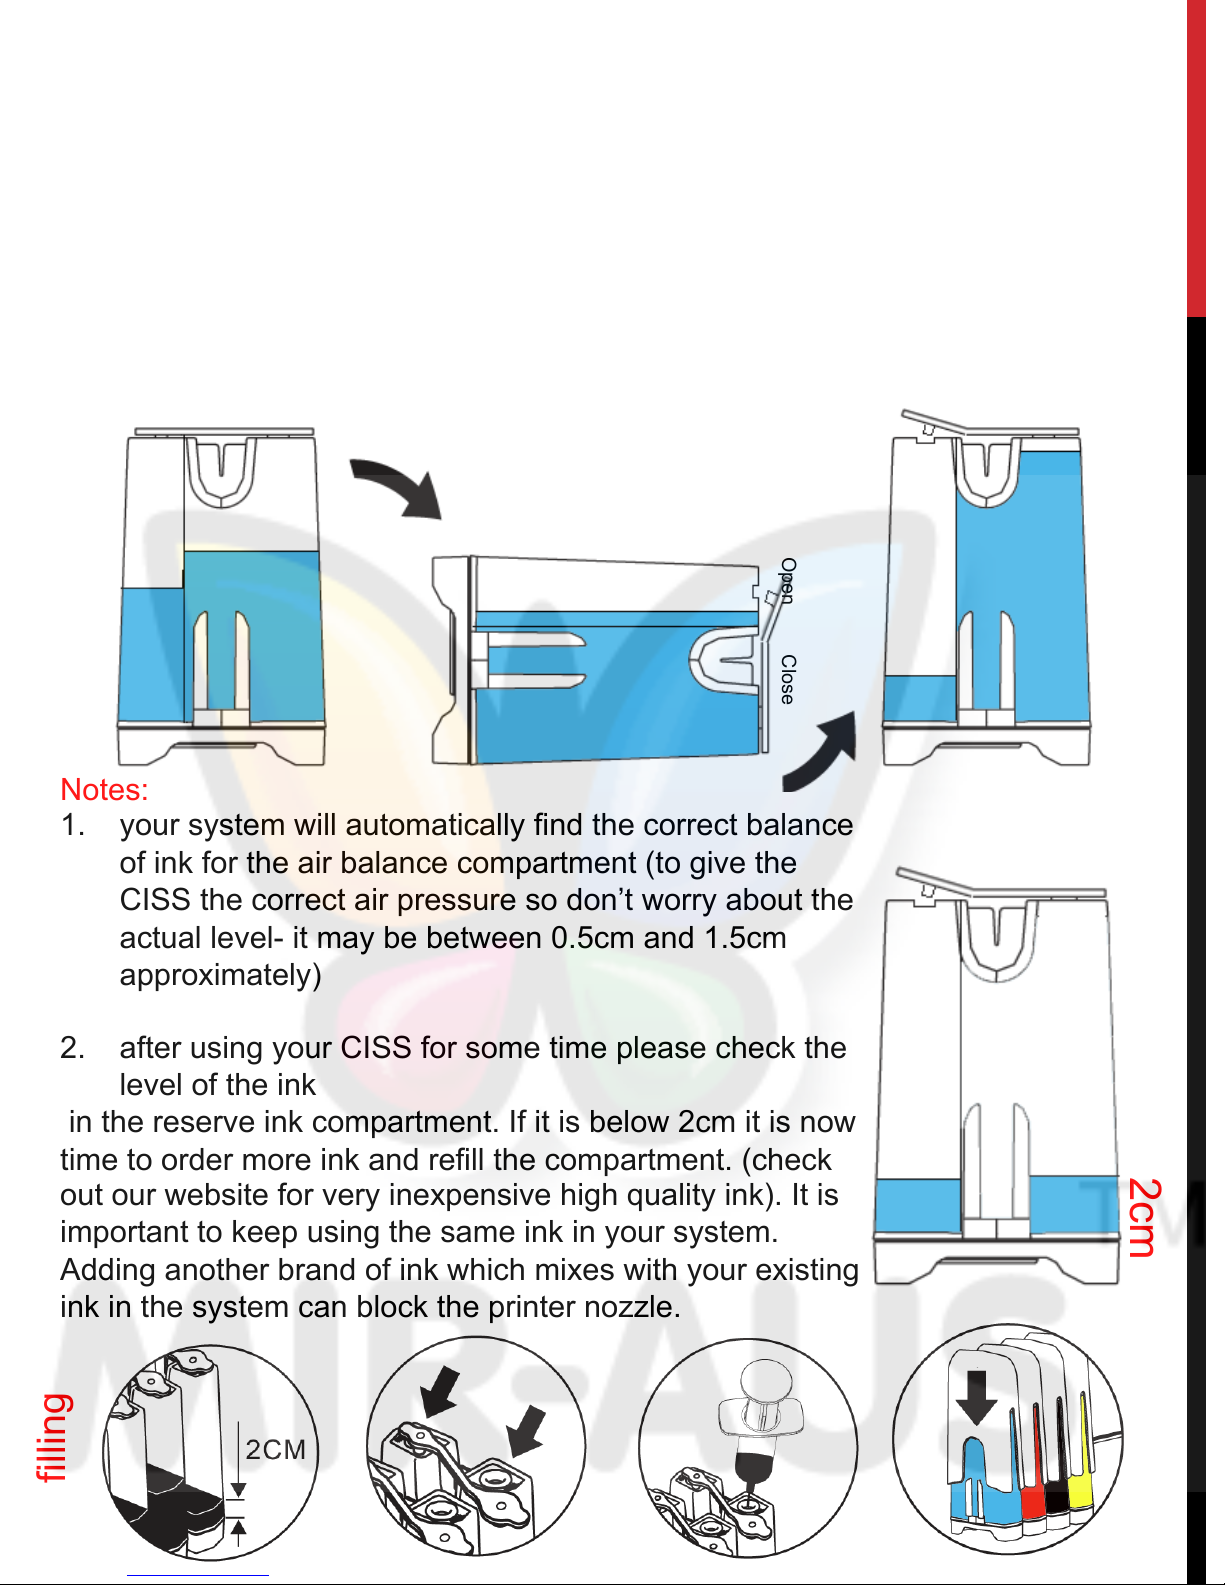
4. Leave the tanks on their side for 3 seconds to create the appropriate air
balance you’ll need to operate the CISS. This air balance is important for the flow
of the ink from the tanks to the cartridges
5. Put the covers back onto each tank. The covers are important to protect the
high quality ink from exposure to light
6. Sit the tanks back up but be careful never to knock the tanks over onto their
plug-hole side as if you lay them down on this side, ink will escape from the open
plug-holes. For this reason it is important to sit the tanks to the side of your
printer (but level with the printer) in an area where you won’t knock it over
Remove each ‘travel plug’