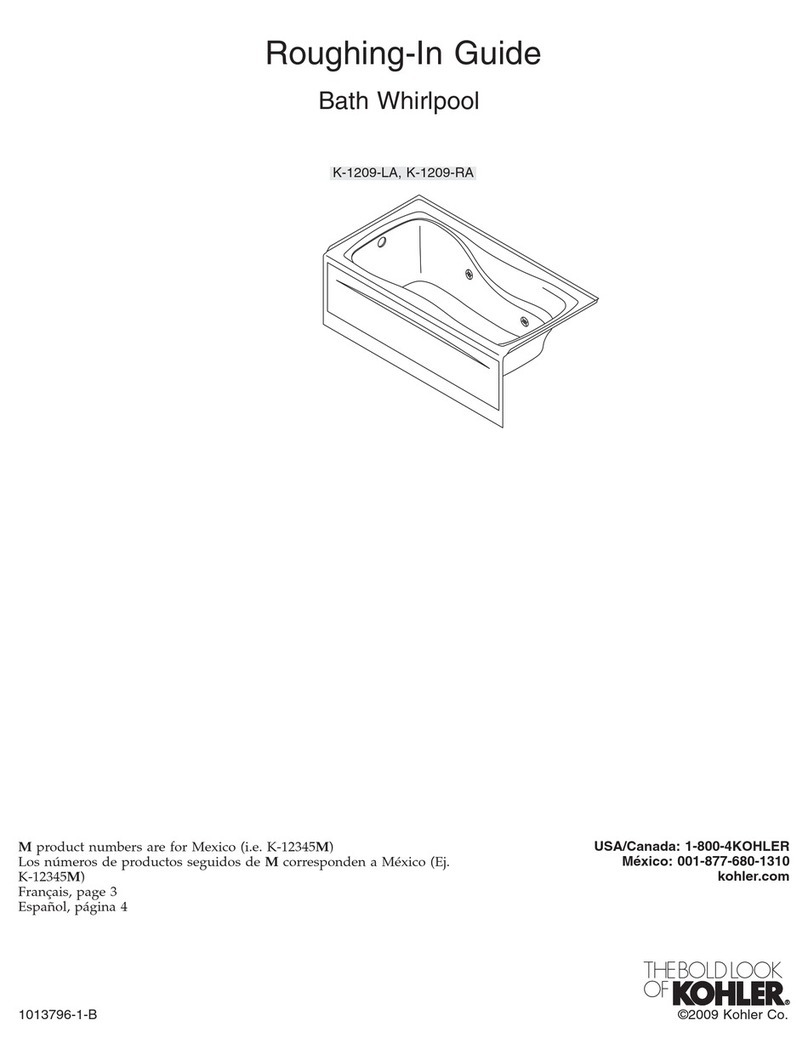
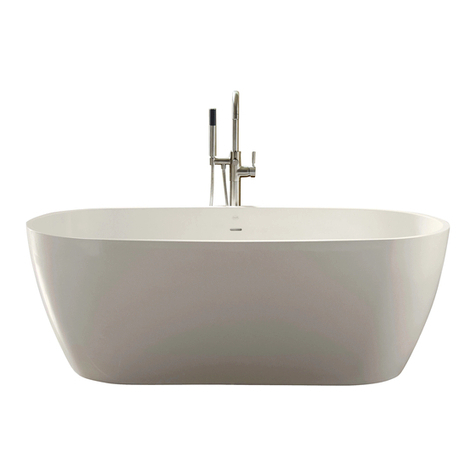
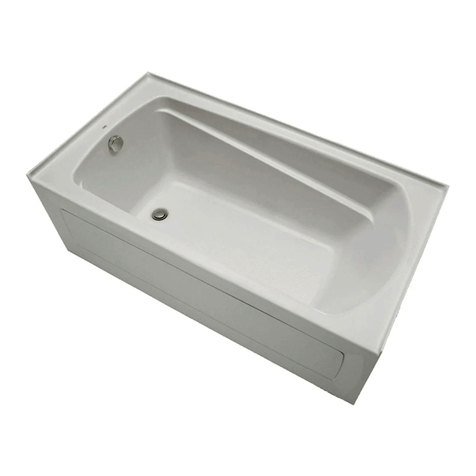
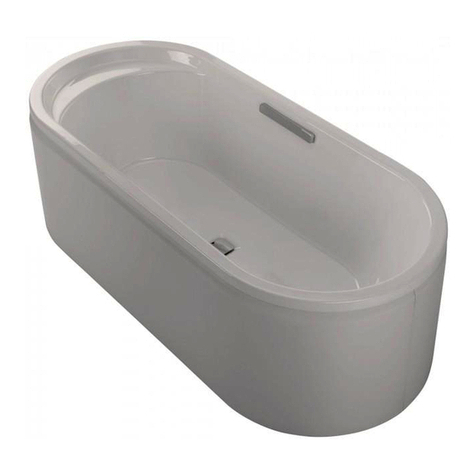
Mirabelle BRADENTON Series User manual

www.mirabelleproducts.com
INSTALLATION AND OPERATING MANUAL
READ THESE INSTRUCTIONS COMPLETELY BEFORE INSTALLING THE PRODUCT. FOR PRODUCT OR
INSTALLATION QUESTIONS PLEASE CALL CUSTOMER SERVICE AT 1-800-221-3379.
YOU MUST FOLLOW ALL INSTRUCTIONS IN THIS MANUAL: FAILURE TO DO SO WILL RESULT IN YOUR
ASSUMPTION OF LIABILITY AND WILL VOID WARRANTY AND CAN RESULT IN PRODUCT DAMAGE OR
PERSONAL INJURY.
FAILURE TO USE A SUITABLE SETTING COMPOUND WILL VOID THE WARRANTY.
THIS PRODUCT IS DESIGNED TO BE INSTALLED BY A LICENSED TRADESMAN. LICENSED PLUMBERS AND
ELECTRICIANS SHOULD BE EMPLOYED TO INSURE PROPER INSTALLATION. INSTALLERS ASSUME ALL LIABILITY
FOR THE CORRECT INSTALLATION PROCEDURES.
Only accessories authorized by the manufacturer should be used with this product. This product is designed for
residential use and use by healthy individuals.
IMPORTANT SAFETY INSTRUCTIONS: WARNING! WHEN USING THIS PRODUCT, BASIC PRECAUTIONS SHOULD
ALWAYS BE FOLLOWED. READ AND FOLLOW ALL INSTRUCTIONS PERTAINING TO RISK OF FIRE, ELECTRIC
SHOCK, OR INJURY TO PERSONS.
INSTALLER: LEAVE THIS MANUAL FOR HOMEOWNER.
HOMEOWNER: READ THIS MANUAL AND KEEP FOR FUTURE REFERENCE.

TABLE OF CONTENTS
Important Safety Information 1
Recommended Tools and Material 2
Inspection & Testing 2
Electrical Requirements & Information 3
Framing & Installation 5
Rough-in Dimensions 7
Care & Cleaning/Maintenance 9
Operating Instructions 9
Troubleshooting 12
Warranty 12
Cut-Out Templates 13
www.mirabelleproducts.com

www.mirabelleproducts.com 3
IMPORTANT SAFETY INSTRUCTIONS
SAVE THIS MANUAL: RETAIN FOR CONSUMER’S USE. READ THESE INSTRUCTIONS
COMPLETELY BEFORE INSTALLING THE PRODUCT: FOR PRODUCT OR INSTALLATION
QUESTIONS PLEASE CALL CUSTOMER SERVICE AT 1-800-221-3379.
YOU MUST FOLLOW ALL INSTRUCTIONS IN THIS MANUAL: FAILURE TO DO SO WILL RESULT
IN YOUR ASSUMPTION OF LIABILITY AND WILL VOID WARRANTY AND CAN RESULT
IN PRODUCT DAMAGE OR PERSONAL INJURY. FAILURE TO USE A SUITABLE SETTING
COMPOUND WILL VOID THE WARRANTY.
THIS PRODUCT IS DESIGNED TO BE INSTALLED BY A LICENSED TRADESMAN. LICENSED
PLUMBERS AND ELECTRICIANS SHOULD BE EMPLOYED TO INSURE PROPER INSTALLATION.
INSTALLERS ASSUME ALL LIABILITY FOR THE CORRECT INSTALLATION PROCEDURES.
Only accessories authorized by the manufacturer should be used with this product.
This product is designed for residential use and use by healthy individuals.
IMPORTANT SAFETY INSTRUCTIONS
WHEN USING THIS PRODUCT, BASIC PRECAUTIONS SHOULD ALWAYS BE FOLLOWED.
READ AND FOLLOW ALL INSTRUCTIONS PERTAINING TO RISK OF FIRE, ELECTRIC SHOCK,
OR INJURY.
IMPORTANT SAFETY INSTRUCTIONS
INSTRUCTIONS PERTAINING TO A RISK OF FIRE, ELECTRIC SHOCK OR INJURY TO PERSONS
READ AND FOLLOW ALL INSTRUCTIONS!
Risk of personal injury. Do not permit children to use this unit without adult supervision.
Risk of personal injury. Do not operate this unit without the guard over the suction tting.
Risk of electric shock. Do not permit electrical appliances (hair dryer, telephone, radio, etc.)
within 60 inches (1524mm) of this unit.
Risk of hyperthermia and possible drowning. People using medications and/or having adverse
medical history should consult a physician before using this product.
Risk of personal injury. Do not overll unit before entering. Entering tub when lled more than
2/3 can cause overow and slippery conditions. Exercise caution when entering and exiting.
No Food or Alcoholic Beverages. Use of your bathtub immediately after meals is not
recommended. Avoid alcohol consumption before or during bathing. Alcoholic beverages can
cause drowsiness or hyperthermia resulting in loss of consciousness or even drowning.
Pregnancy. If you are or think you may be pregnant, consult your physician before using the
bathtub. Never drop or insert any object into any opening. Use this unit only for its intended use
as described in this manual. Do not use any attachments not recommended by Mirabelle.
This equipment is intended for indoor use only.
WARNING
WARNING
WARNING
WARNING
WARNING
WARNING
WARNING
WARNING
WARNING
WARNING

www.mirabelleproducts.com
4
The unit must be connected only to a supply circuit that is properly protected by a 20 amp ground-fault circuit interrupter (GFCI). Such a GFCI
should be provided by the installer and should be tested on a routine basis. To test the GFCI, push the test button. The GFCI should interrupt
power. Push the reset button. Power should be restored. If the GFCI fails to operate in this manner, the GFCI is defective. If the GFCI interrupts
power to the bathtub without the test button being pushed, a ground current is owing, indicating the possibility of an electric shock. Do not
use this total massage, whirlpool or air bathtub. Disconnect The total massage, whirlpool or air bathtub and have the problem corrected by a
licensed electrician before using.
A pressure wire connector is provided on the exterior of the motor unit to permit connection of a no. 8 AWG solid copper bonding
conductor between this unit and all other electrical equipment and exposed metal in the vicinity, as needed to comply with local
requirements. To reduce the risk of an electric shock, connect this connector to the grounding terminal of your electric service or supply panel
with a conductor equivalent in size to the circuit conductors supplying this unit. Use supply wires that are suitable for 167°F (75°C), including
the temperature rating of the supply conductors to be used. Building materials and wiring should be routed away from the motor/pump or
blower or other heat producing components of this unit.
Recommended Tools and Material
Important Safety Instructions
• Silicone sealant
• Tape measure
• Pencil
• Safety glasses
• Pipe wrench
• Level
• Conventional woodworking
tools and materials
• Drop cloth
• 2x4’s
• Mortar
• Optional: construction adhesive
Inspection and Testing
Each bath arrives ready for installation, completely equipped with the pump and plumbing necessary for operation. However, a drain/
overow kit is required for each bath and it is not included.
The variety of installations for this bath may require framing procedures other than those shown.
Locate studs as required. Ensure roughing-in dimensions (see pg. 11) are proper, plumb, and square.
Inspection:
• Remove the bath from the carton. Retain the shipping carton until satisfactory inspection of the product has been made. Do not lift the bath
by the plumbing at any time; handle by the shell only. All bath units are factory tested for proper operation and watertight connections
prior to shipping.
• Inspect the shell and bathtub components. Should inspection reveal any damage or defect in the nish or visible damage to any
components, do not install the bathtub. Damage or defect to the nish claimed after the bathtub is installed is excluded from the warranty.
• Inspect the tub components for loose ttings.
Testing:
• Prior to installation and before enclosing with wallboard, tile, etc., the bath must be lled with water and operated to check for leaks that
may have resulted from shipping damage or mishandling.
• It is the responsibility of the installer to thoroughly test the tub prior to completing installation. Place the tub on a level surface, ensure
drain is sealed and ll the bathtub with water to the bottom of the overow. Allow water to sit in tub for at least 5 minutes as a static test. If
installing a system tub, plug in the motor/ pump and turn it on. Conrm all features function correctly. Visually inspect all joints for leaks.
DO NOT install tub if any leaks are detected or system functions do not work properly.

www.mirabelleproducts.com 5
Electrical Requirements and Information
ALL CONNECTIONS MUST BE GFCI (Ground Fault Circuit Interrupted) PROTECTED
1. Whirlpool and Total Massage units require dedicated 20 Amp,
120V service.
2. You must provide a receptacle with a 20-amp conguration.
3. See local codes for proper wire size. If not specied, use #12 Copper only wire.
4. Optional In-Line Heater requires its own dedicated 20 amp service.
The unit must be connected to a circuit interrupter (GFCI) provided by the installer. The (GFCI) breaker should be
tested on a routine basis.
To test the (GFCI) breaker, push the test button. The GFCI should interrupt power. To restore power, push the RESET
button. If the GFCI fails to operate in this manner there is ground current owing, indicating the possibility of an
electrical shock. Do not use the unit. Disconnect the unit and have the problem corrected by a qualied service
representative before using.
DANGER
DANGER
RISK OF ELECTRICAL SHOCK. All pumps and blowers must be connected
to a ground fault circuit interrupter (GFCI) protected outlets. Standard Line
Total Massage units can be operated on a single service. All heaters must be
connected to a ground fault circuit interrupter (GFCI) protected outlets, separate
from the pump and/or blower.
Electrical outlet must be mounted 4” (101mm) above the oor line and 12’’
max (305mm) inside from the edge of the bathtub, or in accordance with local
building and electrical codes.
• Risks of component over heat. Do not use electric extension cord to power
the unit. Operating the pump without enough water in bathtub can cause
permanent damage to the pump/motor.
• If CFGI unit indicates a malfunction, per manufacturer’s instructions, turn OFF
power and do not attempt to use the bathtub until the source of the problem
has been identied and corrected.

www.mirabelleproducts.com
6
Electrical Congurations
TOTAL MASSAGE CIRCUIT WITH OPTIONAL HEATER
PUMP FLOW
CONTROLL VALV E
0.5 AMP
BACK OF 6 BTN CONTROL
PIGGY BLOWER
9.5 AMP
TMS - VARIABLE
CONTROL
TMS-P/TIMER
CONTROL
ON / OFF PUMP
9 AMP
OPTIONAL
120V, 60 HZ
20 AMP GFCI
120V / 20AMP
MALE PLUG
GFCI GFCI
ELECTRICAL
FEED
120V, 60 HZ
20 AMP GFCI
HEATER
AIR SPEED WAVE SPEEDJETS WAVE
WHIRLPOOL CIRCUIT WITH OPTIONAL HEATER
PUMP FLOW
CONTROLL VALV E
0.5 AMP
TMS-P/TIMER
CONTROL
ON / OFF PUMP
9 AMP
OPTIONAL
HEATER
120V, 60 HZ
20 AMP GFCI
120V / 20AMP
MALE PLUG
GFCI GFCI
ELECTRICAL
FEED
120V, 60 HZ
20 AMP GFCI
BACK OF 3 BUTTON CONTROL
AIR MASSAGE CIRCUIT
PIGGY BLOWER
9.25 AMP
TMS - VARIABLE
CONTROL
120V, 60 HZ
20 AMP GFCI
GFCI GFCI
ELECTRICAL
FEED
120V, 60 HZ
20 AMP GFCI
GFCI GFCI
ELECTRICAL
FEED
BACK OF 3 BUTTON CONTROL
120V, 60 HZ
20 AMP GFCI
GFCI GFCI
ELECTRICAL
FEED
120V, 60 HZ
9.25 AMP
HEATER
PIGGY BLOWER
9.5 AMP
AIR SWITCH
ON / OFF PUMP
9 AMP
AIR SWITCH
CONTROL BOX
CONTROL BOX
PIGGY BLOWER
9.5 AMP
PUMP / MOTOR
120V, 60 HZ
20 AMP GFCI
GFCI GFCI
ELECTRICAL
FEED
AIR SWITCH
AIR SWITCH
BRADENTON & PROVINCETOWN TOTAL MASSAGE
CIRCUIT WITH OPTIONAL HEATER
BRADENTON & PROVINCETOWN
AIR BATH CIRCUIT
BRADENTON & PROVINCETOWN WHIRLPOOL
WITH INSTALLED AIR SWITCH
POWER SPEED WAVE
POWER SPEED WAVE

www.mirabelleproducts.com 7
Framing and Installation
Structural measurements should be veried against the actual bath received to ensure proper t.
• Never lift the tub by the plumbing. Doing so can result in leaks.
• Check if the oor is level and of good quality. An uneven oor may impede proper installation of the tub.
• Clean installation area of any debris or trash.
Locate studs as needed. Ensure roughing-in dimensions are proper, plumb and square. Provisions must be made in all installations for an
access opening for servicing the pump and controls on the pump or blower side.
An access opening of at least 18’’ x 24’’ must be provided or warranty service will not be performed. It is strongly recommended that an
additional opening be provided for access to the drain components. The apron should not be used as the primary access opening.
If the suboor is not level, you must level the entire surface prior to installing the bathtub.
Ensure that the entire oor is level and can support a load of 80lbs. per square foot.
The bathtub must remain level in order for it to drain properly and must make contact with the leveling material.
1. Position the tub into the installation opening and level the deck in both directions, shimming the base of the tub if necessary. Mark the nal
position of the underside of the deck by tracing a line on to the studs (see Figure 1).
2. Remove the tub and attach a 1 x 4 stringer to the studs, with the top of the stringer touching the traced line. Never support the tub by its
deck lip or stringers (see gure 2).
3. Install drain components to the tub following the drain installation instructions. Note that this requires a cutout in the oor. Before replacing
your tub for nal installation, bathtubs require a 6’’ x 12’’ oor opening for the 1-1/2” drain and waste & overow kit. The drain/overow of
the bath extends below the bottom of the bath.
The bath must be supported along its entire bottom. Do not remove foam base & pad from the bottom of the tub. Use 1-1/2’’ to 2’’ of mortar
as bedding material (do not use sand or foam). After the mortar has been poured, and before it sets, position tub within recess until the rim is
leveled against the leveling stringers (see below).
FIGURE 1
STRINGER INSTALLATION
TYPICAL DROP-IN TYPE INSTALLATION
REFERENCE FOR DROP-IN INSTALLATION
FIGURE 2
TYPICAL ALCOVE INSTALLATION
18"
(457.2mm)
24"
(609.6mm)
24"
(609.6mm)
LEVELING
STRINGERS
ACCESS PANEL MUST BE LOCATED
ON THE SAME SIDE AS THE MOTOR.
ALLOW OPEN FRAMING ON
PUMP MOTOR END FOR SERVICE.
ACCESS PANELS NOT REQUIRED
FOR NON-SYSTEM TUBS.
NOTE:
FRONT EDGE OF BATH
MUST BE SUPPORTED
BY STUD WALL.
HEIGHT
TO LIP
TILE
WALLBOARD
G
CUTOUT
18"
(457.2MM)
AS DESIRED
MOUNTING
SURFACE
WATERPROOF
SEALANT
BATH
AS DESIRED
F
CUTOUT
C
SILICONE
1" X 4" JOIST
STUD
AIR GAP 1/4" OR MORE
UNLESS AS ACCESS OPENING OF AT LEST 18" X 24"
IS PROVIDED, WARRANTY SERVICE WILL NOT BE PERFORMED.
ACCESS PANEL MUST BE LOCATED
ON THE SAME SIDE AS THE MOTOR.
ALLOW OPEN FRAMING ON
PUMP MOTOR END FOR SERVICE.
ACCESS PANELS NOT REQUIRED
FOR NON-SYSTEM TUBS.
UNLESS AS ACCESS OPENING OF AT LEST 18" X 24"
IS PROVIDED, WARRANTY SERVICE WILL NOT BE PERFORMED.
E
C
D
W

www.mirabelleproducts.com
8
Allow the mortar material to completely harden before applying weight to the rim or bottom of the bath. Any nish material such as tile or
wall board must be self supporting if it contacts the deck of the bath.
Verify that the product is lever by checking the tub deck surface in all directions.
For system tubs ensure blower and or pump cords are properly plugged into the dedicated 120V/20A GFCI outlet to supply electrical power
to the system (Please reference pg. 6) for electrical requirement information. To test run the bath, ll the tub with water at least 3” above the
highest jet and operate the bath for 5 minutes. Check all bath and piping connections for leaks.
POST INSTALLATION CLEAN-UP
Remove all construction debris from bath. Do not use wire brushes or any other metal implement on bath surface.
Post installation clean-up generally can be completed using warm water and liquid dishwashing detergent.
Stubborn dirt or stains may be removed using granular Spic and Span® mixed with water. Painter’s Naphtha can be used to remove excess
adhesives and/or wet oil-base paint.
Reference for correct tile ange installation
Use drawing below as a reference guide for rough-in measurements
DRAIN CLEARANCE
11”
12”
PUMP ACCESS
STUD
SUGGESTED WHIRLPOOL/BATH
INSTALLATION METHOD
WATERPROOF DRYWALL
OR CEMENT BOARD
TILE
ROOFING NAIL
SEALANT
TUB
1 X 4 (25mm X 76mm)
WOOD STINGER FULL LENGTH
FIGURE 1
STRINGER INSTALLATION
TYPICAL DROP-IN TYPE INSTALLATION
REFERENCE FOR DROP-IN INSTALLATION
FIGURE 2
TYPICAL ALCOVE INSTALLATION
18"
(457.2mm)
24"
(609.6mm)
24"
(609.6mm)
LEVELING
STRINGERS
ACCESS PANEL MUST BE LOCATED
ON THE SAME SIDE AS THE MOTOR.
ALLOW OPEN FRAMING ON
PUMP MOTOR END FOR SERVICE.
ACCESS PANELS NOT REQUIRED
FOR NON-SYSTEM TUBS.
NOTE:
FRONT EDGE OF BATH
MUST BE SUPPORTED
BY STUD WALL.
HEIGHT
TO LIP
TILE
WALLBOARD
G
CUTOUT
18"
(457.2MM)
AS DESIRED
MOUNTING
SURFACE
WATERPROOF
SEALANT
BATH
AS DESIRED
F
CUTOUT
C
SILICONE
1" X 4" JOIST
STUD
AIR GAP 1/4" OR MORE
UNLESS AS ACCESS OPENING OF AT LEST 18" X 24"
IS PROVIDED, WARRANTY SERVICE WILL NOT BE PERFORMED.
ACCESS PANEL MUST BE LOCATED
ON THE SAME SIDE AS THE MOTOR.
ALLOW OPEN FRAMING ON
PUMP MOTOR END FOR SERVICE.
ACCESS PANELS NOT REQUIRED
FOR NON-SYSTEM TUBS.
UNLESS AS ACCESS OPENING OF AT LEST 18" X 24"
IS PROVIDED, WARRANTY SERVICE WILL NOT BE PERFORMED.
E
C
D
W
Framing and Installation

www.mirabelleproducts.com 9
Series Soaker Air Whirlpool Total Massage L W D H A B
Bradenton MIRBDS6030 (L/R) NA NA NA 59.75" 30" 18.88" 17.88" 11" 12"
Bradenton MIRBDS6032 MIRBDA6032 MIRBDW6032 MIRBDT6032 60" 32" 20" 18.5" 11" 16"
Bradenton MIRBDS6032 (L/R) MIRBDA6032 (L/R) MIRBDW6032 (L/R) MIRBDT6032 L/R) 59.75” 32" 21" 20" 11" 16"
Boca Raton MIRBRS6640V MIRBRA6640V MIRBRW6640V MIRBRS6640V 66" 40" 22" 20.5" 35.75" 10"
Boca Raton MIRBRS7242V MIRBRA7242V MIRBRW7242V MIRBRS7242V 71.5" 42" 22" 20.5" 35.75" 10"
Sitka MIRSKS6030 (L/R) MIRSKA6030 (L/R) MIRSKW6030 (L/R) NA 60" 30" 19.5" 19.25" 8.75" 15"
Sitka MIRSKS6032 (L/R) MIRSKA6032 (L/R) MIRSKW6032 (L/R) NA 60" 32" 19.5" 19.25" 8.75" 16"
Sitka MIRSKS6032 MIRSKA6032 MIRSKW6032 NA 60" 32" 19.5" 18.5" 8.75" 16"
Sitka MIRSKS6036 MIRSKA6036 MIRSKW6036 MIRSKT6036 60" 36" 23" 22" 8.75" 18
Sitka MIRSKS6636 MIRSKA6636 MIRSKW6636 MIRSKT6636 66" 36" 23" 22" 8.75" 18""
Sitka MIRSKS7236 MIRSKA7236 MIRSKW7236 MIRSKT7236 72" 36" 23" 22" 8.75" 18"
Galatia MIRGAS6042 MIRGAA6042 MIRGAW6042 MIRGAT6042 60" 42" 21" 19.5" 10.25" 21"
Galatia MIRGAS7242 MIRGAA7242 MIRGAW7242 MIRGAT7242 72" 42" 21" 19.5" 10.25" 21"
Key West MIRKWS6036 MIRKWA6036 MIRKWW6036 MIRKWT6036 60" 36" 22" 20.5" 9.5" 18"
Key West MIRKWS7236 MIRKWS7236 MIRKWW7236 MIRKWT7236 72" 36" 22" 20.5" 8.25" 18"
Provincetown MIRPRS6032 (L/R) MIRPRA6032 (L/R) MIRPRW6032 (L/R) MIRPRT6032 (L/R) 60" 32" 21" 20" 9" 16"
Provincetown MIRPRS6032 MIRPRA6032 MIRPRW6032 MIRPRT6032 59.75” 32" 20" 18.5" 9" 16"
St. Augustine MIRSAS6042 MIRSAA6042 MIRSAW6042 MIRSAT6042 60" 42" 22" 20.5" 8.75" 30"
St. Augustine MIRSAS7242 MIRSAA7242 MIRSAW7242 MIRSAT7242 70" 42" 22" 20.5" 8.5" 36"
Rough-in Dimensions

www.mirabelleproducts.com
10
Deck-to-oor dimensions are measured through the drain hole to give a more consistent measurement. The dimensions are achieved by
laying a straight edge across the deck; the distance was then measured from the oor at the drain opening to the bottom of the straight
edge. (See illustration below). The lip height is then subtracted to give a more consistent oor to lip height. There may be height dimension
variations of plus minus ¼” from the stated dimension in the table, which is a standard production tolerance. Leave adequate clearance with
framing for side mounted controls.
Use drawing below as a guide for rough-in measurements
Height
to Top
Height
to Deck
Tape Measure
Straightedge or Wood Board
Floor
Measure from
Straightedge to Floor
Through Drain
MEASURE FROM THE
FLOOR TO THE STRAIGHT
EDGE THROUGH THE
DRAIN HOLE TO OBTAIN
A CONSISTENT HEIGHT
TO DECK DIMENSION.
D
B
L
W
A
H
L
L
L
L
L
B
B
B
A
AA
A
W
W
W
C
W
W
B
D
B
L
W
A
H
L
L
L
L
L
B
B
B
A
AA
A
W
W
W
C
W
W
B
D
B
L
W
A
H
L
L
L
L
L
B
B
B
A
AA
A
W
W
W
C
W
W
B
D
B
L
W
A
H
L
L
L
L
L
B
B
B
A
AA
A
W
W
W
C
W
W
B

www.mirabelleproducts.com 11
Care and Cleaning
The use of bath oils and bath salts is not recommended due to the difculty in cleaning the systems and doing so will void the consumer's
warranty.
Air and Total Massage Baths are equipped with an Automatic Purge Cycle for the air blower only. The air blower has a pre-programmed
purge cycle built in to expel the remaining water in the air channels. It activates within 20 minutes after the Air Bath is turned off and then
blows for about 2 to 3 minutes.
After the cycle is completed it will shut off automatically. There is nothing to be alarmed about if you hear a blowing noise coming from
the tub after the tub has been turned off. The noise you hear is the cleaning cycle in operation. It is recommended to activate the air bath
routinely to purge water from the air channel when tub is used as a soaker or shower only. Purge cycle is only activated when blower has
been used.
Pump and pipe circulation system should be ushed before rst use and on a monthly basis when product is under normal use.
Below are the recommended procedures for cleaning:
DO NOT use powdered cleaners unless cleaner is fully dissolved in water.
DO NOT RUN WHIRLPOOL DRY. Fill the tub with hot water 2-3 inches above the jets and add 2-3 teaspoons of low foaming detergent
such as dish washing machine detergent.
DO NOT use full strength bleach of ammonia cleaning solutions. Chemically active cleaning solution can damage the bath surface.
• Switch on whirlpool and run for 10 minutes.
• Drain tub completely.
• Fill tub with cold water above jets.
• Switch on whirlpool and run for 5 minutes.
• Drain tub completely.
DO NOT USE ABRASIVE CLEANERS as they will scratch and dull the surface of the acrylic and void the consumer warranty. Plaster can
be removed using a sharpened wooden stick.
DO NOT USE METAL SCRAPERS, WIRE BRUSHES OR OTHER HARSH ABRASIVE TOOLS.
Usually a mild detergent will remove construction debris. More stubborn debris may be removed with denatured alcohol, or Clorox Soft
Scrub® cleaner. Light scratches and dulled areas may be restored to original luster by rubbing with an automotive type cleaning compound
such as DuPont White Polishing Compound®.
Note: To restore dull or scratched units: Apply white automotive polishing with a clean rage. Rub scratches and dull areas vigorously. Wipe off
residue. Follow with a coat of white automotive paste wax.
DO NOT wax areas where you walk or stand. For crack and major surface damage, call customer service at 1-800-221-3379 for repair
recommendations.
Operating Instructions
1. Fill the bath to at least 3 inches above the jets before activating the pump. DO NOT turn on whirlpool unless jets are completely
submersed in water.
2. The air bath blower and/or whirlpool pump is activated by pushing the control panel buttons (Provincetown and Bradenton system tubs
air/whirlpool is turned on by depressing the actuator button) . DO NOT repeatedly depress the switch in rapid order if you do not see
the whirlpool function right away, as it may take a few seconds before you can see it fully operating. Please see air bath control or Total
Massage Control instructions on the following page for operation and features.
3. If any factory installed ttings are removed; do not operate the unit. A safety hazard may occur.
4. Do not use bubble bath when you operate the whirlpool pump. This might cause excessive foaming.
5. Bath oils should not be used when you operate the whirlpool. If used while soaking, please drain and clean the tub thoroughly prior to
activating the whirlpool system.
6. The use of bath salts is not recommended and doing so will VOID THE CONSUMER’S WARRANTY.
7. Both air and whirlpool systems are plumbed in a way that water will drain from the plumbing easily.
8. The air system is designed to purge within 20 minutes after use (see details on previous page).
9. There are no user serviceable parts located under the tub. If a problem develops, call 1-800-221-3379

www.mirabelleproducts.com
12
Jet Operation and Adjustment
The jets can be easily adjusted by pointing the jet-nozzle in the
desired direction. The strength of the water ow and air induction
can be regulated through twisting the jet- nozzle. Twisting the
nozzle counter-clockwise will decrease the water ow of that
particular jet. If the nozzle is twisted clockwise then the water ow
will increase up to its maximum ow. Only a 1/4 turn or 90° turn is
required from the lowest ow position to the fully OPEN position.
The jets can be easily adjusted by pointing the jet-nozzle in the
desired direction. The strength of the water ow and air induction
can be regulated through twisting the jet- nozzle. Twisting the
nozzle clockwise will decrease the water ow of that particular jet
If the nozzle is twisted counter-clockwise then the water ow will
increase up to its maximum ow. Only a 1/4 turn or 90° turn is
required from the lowest ow position to the fully OPEN position.
Mirabelle Boca Raton, Bradenton, Galatia, Key West,
Provincetown and St. Augustine jets
Mirabelle Sitka jets
The whirlpool is controlled by a three button control.
1. The rst button switches the water-pump on or off. The other features will not operate unless the pump is turned on.
2. The second button sets the power level of the pump. Holding the button depressed will cycle the pump power from low to high in a
continuous cycle. When the desired level is reached, remove your nger quickly from the button to maintain that power setting.
3. The third button is a three step wave action button. Once activated, the jets expel water in a slow pulsating ow called wave action.
There are 3 levels for wave strength.
a. Level 1: operates the pump at
a steady ow.
b. Level 2: quick wave action.
c. Level 3: slower wave action.
Whirlpool Control Center Features
Whirlpool
POWER SPEED WAVE

www.mirabelleproducts.com 13
The air bath is controlled by a three button control.
1. The rst button switches the blower on or off. The other features will not operate unless the blower is turned on.
2. The second button sets the power level of the blower. Holding the button depressed will cycle the blower power from low to high in a
continuous cycle. When the desired level is reached, remove your nger quickly from the button to maintain that power setting.
3. The third button is a three step wave action button. Once activated, the air holes expel air in a slow pulsating ow called wave action. There
are 3 levels for wave strength.
a. Level 1: operates the blower at a steady ow.
b. Level 2: quick wave action.
c. Level 3: slower wave action.
Air Bath Control Center Features
Air
POWER SPEED WAVE
Total Massage units are a combination of whirlpool and air massages. The left three buttons on the control panel. Operate the whirlpool
and the right three buttons operate the air system. The whirlpool and air massage systems may be used at the same time if desired. The
whirlpool and air bath operations are explained in section above.
Total Massage Control Center Features
Total Massage
AIR JETSPEED SPEEDWAVE WAVE
In-Line heater operation
If your unit has an in-line heater installed, operation is automatic only during the use of the whirlpool function. The in-line heater will maintain
the water temperature only while the whirlpool is in operation.
Operating Instructions for Provincetown and Bradenton
Whirlpool baths: Equipped with on/off air switch actuator. Each depression of the switch will activate the pump. If off, one depression will turn
the pump on. if on, the next depression will turn it off.
Air baths: Equipped with a three-speed air switch actuator. Each depression of the switch will change the ow of air. The forth depression will
turn off the air pump.
Total massage baths: Equipped with both an on/off air switch actuator for whirlpool function and three-speed air switch actuator for air
function. See above for operation details.

www.mirabelleproducts.com
14
PROBLEM CAUSES SOLUTION
Motor will not start - Circuit breaker may be tripped
- Lose/Bad wire connection
- GFCI is tripped
- Incorrect electrical installation
- Jets are closed
- Make sure it is a 20 Amp circuit breaker with nothing else tied to the circuit
- Check for incorrect or lose wire connections, and pump/heater has been
properly grounded
- Reset if necessary
- Insure each motor/ in-line heater uses its own 20 Amp circuit breaker and GFCI
plug
- Make sure that jets are fully operational and water is owing
Motor overheating and
cycling
on and off
- Lose/Bad wire connection
- Incorrect Amp usage
- Air supply to motor
- Check for incorrect or loose wire connections
- Check for low voltage supply
- Make sure motor gets fresh air supply and vents are not clogged
Pump/motor operates
but jets/ air is not fully
function
- Jets are closed
- Suction/ strainer may be clogged
- Air valves are closed
- Open jets fully
- With pump off, remove the suction cover/ strainer and
remove any debris.
- Open all air control valves
Motor makes humming
noise but won’t start
- Jets are closed
- Pump does not have space
to operate
- Debris in pump
- Incorrect Amp usage
- Make sure jets are fully open
- Make sure the motor shaft turns free
- Check for jammed impeller or an obstruction on the
(volute) casing.
- Check for low voltage and undersized wire
Low water ow - Clogged pipe
- Incorrect electrical installation
- Check for clogged plumbing lines
- Check for low voltage
Water leaks - Leak in the plumbing - Check compression ttings (union connections) making sure
they are properly aligned and secured. Hand tighten only.
Do not use any tools.
- Make sure the o-ring is properly seated and not damaged.
Troubleshooting
FIVE-YEAR LIMITED WARRANTY
All Mirabelle Whirlpools and Bathing Systems are warranted in accordance with the following Limited Warranty: Mirabelle Whirlpools and Bathing Systems
are warranted against defects in material and workmanship for a period of ve (5) years from the date of the rst consumer purchase. This Warranty shall
apply to defective acrylic surfaces which crack, fade or blister, and any defect in whirlpool and bathing system components. The Warranty extends to the rst
consumer purchaser and not to subsequent owners, transferees or users other than the rst purchaser. This warranty does not extend to products previously
utilized as display models. This Warranty shall apply to products installed and used only for personal, family or household purposes and which are installed
and maintained in accordance with Mirabelle Whirlpool and Bathing Systems’ recommended installation and maintenance procedures. This Warranty does
not extend to defects or damage caused, in whole or in part, by any unauthorized or unreasonable use. No liability shall exist for incidental or consequential
damages caused in whole or part by any defects in Mirabelle Whirlpools and Bathing Systems. No warranty, expressed or implied, including any warranty of
merchantability or tness for a particular purpose, shall apply after the warranty period described above.
Some states do not allow the exclusion or limitation of incidental or consequential damages or limitations on how long an implied warranty lasts. The above
limitation may not apply to you.
In the event of a defect in material or workmanship of a Mirabelle Whirlpool or Bathing System during the Warranty period, defective products will be
repaired or replaced as Mirabelle, at its sole and absolute discretion, determines. However, Mirabelle shall not be liable for the expense for removing
defective products or installing replacement products. In certain circumstances, some states do not allow the limitation of liability for removal, transportation
and reinstallation expenses. The above limitation may not apply to you.
Only Mirabelle is authorized to perform its warranty obligation. If you wish to obtain performance of the Mirabelle warranty obligation you should contact
Mirabelle, at (800) 221-3379. Other information about performance of the Mirabelle Whirlpool and Bathing Systems’ warranty obligation may be obtained at
the same address and telephone number. This Warranty gives you specic legal rights and you may also have other rights which vary from state to state.

www.mirabelleproducts.com 15
Cut-Out Templates
INSTALLING AN OVAL TUB WITH A TEMPLATE
The back section of the installation manual contains oval cut out instructions. Use pencil and tape measure to plot the coordinates and draw
the cut out. Take special care to place tub carefully in the platform cutout, because the tub might break and the ensuing warranty limitations
would become void. For additional questions on installing your tub read “installation procedures” above or call customer service at 800-221-
3379.
Cutout for Galatia Tubs
DROP-IN
CUT OUT LINE UNDERMOUNT
CUT OUT LINE
6042 GALATIA TEMPLATE
58.2
54.753
36.891
40.2
DROP-IN
CUT OUT LINE UNDERMOUNT
CUT OUT LINE
7242 GALATIA TEMPLATE
70
66.729
36.885
39.999
30
39.5
19.75
69.5
R19.75
R19.75
25
37.5
18.75
63.5
R18.75
R18.75
DROP-IN
CUT OUT LINE UNDERMOUNT
CUT OUT LINE
6042 GALATIA TEMPLATE
58.2
54.753
36.891
40.2
DROP-IN
CUT OUT LINE UNDERMOUNT
CUT OUT LINE
7242 GALATIA TEMPLATE
70
66.729
36.885
39.999
30
39.5
19.75
69.5
R19.75
R19.75
25
37.5
18.75
63.5
R18.75
R18.75
Mirabelle Cut-Out Template
Use for Boca Raton 7242
Mirabelle Cut-Out Template
Use for Boca Raton 6640
DROP-IN
CUT OUT LINE UNDERMOUNT
CUT OUT LINE
6042 GALATIA TEMPLATE
58.2
54.753
36.891
40.2
DROP-IN
CUT OUT LINE UNDERMOUNT
CUT OUT LINE
7242 GALATIA TEMPLATE
70
66.729
36.885
39.999
30
39.5
19.75
69.5
R19.75
R19.75
25
37.5
18.75
63.5
R18.75
R18.75
DROP-IN
CUT OUT LINE UNDERMOUNT
CUT OUT LINE
6042 GALATIA TEMPLATE
58.2
54.753
36.891
40.2
DROP-IN
CUT OUT LINE UNDERMOUNT
CUT OUT LINE
7242 GALATIA TEMPLATE
70
66.729
36.885
39.999
30
39.5
19.75
69.5
R19.75
R19.75
25
37.5
18.75
63.5
R18.75
R18.75

www.mirabelleproducts.com
05/16 165789

www.mirabelleproducts.com
MANUEL D’INSTALLATION ET D’UTILISATION DU MATÉRIEL MIRABELLE
LISEZ COMPLÈTEMENT CES INSTRUCTIONS AVANT D’INSTALLER LE PRODUIT : POUR TOUTE QUESTION
CONCERNANT LE PRODUIT OU L’INSTALLATION, VEUILLEZ APPELER LE SERVICE À LA CLIENTÈLE AU 1-800-
221-3379.
VOUS DEVEZ RESPECTER TOUTES LES INSTRUCTIONS FOURNIES DANS CE MANUEL : LE NON-RESPECT
DE CES INSTRUCTIONS PEUT IMPLIQUER VOTRE ACCEPTATION DE LA RESPONSABILITÉ ET ANNULER LA
GARANTIE ET ENDOMMAGER LE PRODUIT OU ENTRAÎNER DES BLESSURES.
NE PAS UTILISER UN COMPOSÉ SOLIDIFIANT ADÉQUAT ANNULERA LA GARANTIE.
CE PRODUIT EST CONÇU POUR ÊTRE INSTALLÉ PAR UN PROFESSIONNEL AGRÉÉ. L’INSTALLATION DOIT
ÊTRE EFFECTUÉE PAR DES PLOMBIERS ET DES ÉLECTRICIENS AGRÉÉS POUR S’ASSURER QU’ELLE EST FAITE
CORRECTEMENT. LES INSTALLATEURS SONT RESPONSABLES POUR S’ASSURER QUE LES PROCÉDURES
D’INSTALLATION UTILISÉES SONT CORRECTES.
Seuls des accessoires autorisés par le fabricant doivent être utilisés avec ce produit. Ce produit est conçu pour un
usage résidentiel et par des personnes en bonne santé.
CONSIGNES DE SÉCURITÉ IMPORTANTES : AVERTISSEMENT! LORSQUE VOUS UTILISEZ CE PRODUIT,
CERTAINES PRÉCAUTIONS DE BASE DOIVENT TOUJOURS ÊTRE RESPECTÉES. VEUILLEZ LIRE ET RESPECTER
TOUTES LES INSTRUCTIONS RELATIVES AUX RISQUES D’INCENDIE, DE CHOC ÉLECTRIQUE ET DE BLESSURES.
INSTALLATEUR: VEUILLEZ LAISSER CE MANUEL AU PROPRIÉTAIRE DE LA MAISON.
PROPRIÉTAIRE: VEUILLEZ LIRE CE MANUEL ET LE CONSERVER POUR VOUS Y RÉFÉRER ULTÉRIEUREMENT.

TABLE DES MATIÈRES
Clauses de non-responsabilité liées à la sécurité 1
Outils et matériel 2
Inspection et tests 2
Exigences et renseignements électriques 3
Support et installation 5
Dimensions entre le mur et le drain 7
Entretien et nettoyage 9
Consignes d’utilisation 9
Résolution des problèmes de base 12
Garantie 12
Modèles de découpe 13
www.mirabelleproducts.com

www.mirabelleproducts.com 3
RENSEIGNEMENTS IMPORTANTS CONCERNANT LA SÉCURITÉ
CONSERVEZ CE MANUEL : METTEZ-LE À LA DISPOSITION DES CONSOMMATEURS. LISEZ COMPLÈTEMENT
CES INSTRUCTIONS AVANT D’INSTALLER LE PRODUIT : POUR TOUTE QUESTION CONCERNANT LE
PRODUIT OU L’INSTALLATION, VEUILLEZ APPELER LE SERVICE À LA CLIENTÈLE AU 1-800-221-3379.
VOUS DEVEZ RESPECTER TOUTES LES INSTRUCTIONS FOURNIES DANS CE MANUEL : LE NON-RESPECT
DE CES INSTRUCTIONS PEUT IMPLIQUER VOTRE ACCEPTATION DE LA RESPONSABILITÉ ET ANNULER
LA GARANTIE ET ENDOMMAGER LE PRODUIT OU ENTRAÎNER DES BLESSURES. NE PAS UTILISER UN
COMPOSÉ SOLIDIFIANT ADÉQUAT ANNULERA LA GARANTIE. (Clarke et Jacuzzi vérier si nous avons besoin)
CE PRODUIT EST CONÇU POUR ÊTRE INSTALLÉ PAR DES PROFESSIONNELS AGRÉÉS. L’INSTALLATION DOIT
ÊTRE EFFECTUÉE PAR DES PLOMBIERS ET DES ÉLECTRICIENS AGRÉÉS POUR S’ASSURER QU’ELLE EST FAITE
CORRECTEMENT. LES INSTALLATEURS SONT RESPONSABLES POUR S’ASSURER QUE LES PROCÉDURES
D’INSTALLATION UTILISÉES SONT CORRECTES.
Seuls des accessoires autorisés par le fabricant doivent être utilisés avec ce produit.
Ce produit est conçu pour un usage résidentiel et par des personnes en bonne santé.
CONSIGNES DE SÉCURITÉ IMPORTANTES :
LORSQUE VOUS UTILISEZ CE PRODUIT, CERTAINES PRÉCAUTIONS DE BASE DOIVENT TOUJOURS
ÊTRE RESPECTÉES. VEUILLEZ LIRE ET RESPECTER TOUTES LES INSTRUCTIONS RELATIVES AUX RISQUES
D’INCENDIE, DE CHOC ÉLECTRIQUE ET DE BLESSURES
CONSIGNES DE SÉCURITÉ IMPORTANTES
INSTRUCTIONS RELATIVES AUX RISQUES D’INCENDIE, DE CHOC ÉLECTRIQUE ET DE BLESSURES VEUILLEZ
LIRE ET RESPECTER TOUTES LES INSTRUCTIONS!
Risque de blessure. Ne pas laisser des enfants utiliser cette baignoire sans la supervision d’un adulte.
Risque de blessure. Ne pas faire fonctionner cette baignoire sans la protection sur le raccord d’aspiration.
Risque de choc électrique. Ne pas laisser d’appareils électriques (sèche-cheveux, téléphone, radio, etc.) à
moins de 1,5 mètre (60 pouces) de cette baignoire.
Risque d’hyperthermie et de noyade. Les personnes qui prennent des médicaments ou qui ont des
antécédents médicaux doivent consulter un médecin avant d’utiliser ce produit.
Risque de blessure. Ne pas trop remplir cette baignoire avant d’y entrer. Entrer dans cette baignoire lorsqu’elle
est remplie à plus des 2/3 peut provoquer un débordement et des conditions glissantes. Faire preuve de
prudence en entrant et en sortant de la baignoire.
Pas de nourriture ni boissons alcoolisées. L’utilisation de votre baignoire immédiatement après un repas n’est
pas recommandée. Éviter la consommation d’alcool avant et pendant le bain. La consommation de boissons
alcoolisées peut causer de la somnolence ou une hyperthermie et provoquer une perte de conscience, voire la
noyade.
Grossesse. Si vous êtes enceinte ou pensez l’être, consultez votre médecin avant d’utiliser la baignoire. Ne
jamais faire tomber ou insérer aucun objet dans les ouvertures. Utiliser ce produit uniquement aux ns pour
lesquelles il est prévu, comme décrit dans ce manuel. Ne pas utiliser d’accessoires non recommandés par
Mirabelle.
Cet équipement a été conçu pour être utilisé à l’intérieur uniquement.
PRECAUCIÓN
PRECAUCIÓN
PRECAUCIÓN
PRECAUCIÓN
PRECAUCIÓN
PRECAUCIÓN
PRECAUCIÓN
PRECAUCIÓN
La baignoire doit être raccordée uniquement à un circuit d’alimentation correctement protégé par un disjoncteur-détecteur de fuites à la
terre (DDFT) de 20 A. Ce disjoncteur DDFT doit être fourni par l’installateur et doit être testé régulièrement. Pour tester le disjoncteur DDFT,
appuyer sur le bouton de test. Le DDFT doit couper l’alimentation. Appuyer ensuite sur le bouton de réinitialisation. L’alimentation doit être
restaurée. Si le disjoncteur DDFT ne fonctionne pas de cette manière, il est défectueux. Si le disjoncteur DDFT interrompt l’alimentation
électrique de la baignoire sans avoir appuyé sur le bouton de test, un courant de fuite à la terre existe, indiquant un risque de choc
électrique. N’utilisez pas cette baignoire de massage total, de bain à remous ou à jets d’air. Débranchez votre baignoire de massage total, de
bain à remous ou à jets d’air et faites réparer le problème par un électricien agréé avant de l’utiliser.
Un capuchon de connexion à pression est fourni à l’extérieur du bloc-moteur, an de permettre le raccordement d’un conducteur de
mise à la masse en cuivre de calibre 8 AWG entre la baignoire et tous les autres équipements électriques et parties métalliques exposées
alentour, comme requis par les codes locaux. Pour réduire le risque de choc électrique, raccordez ce connecteur à la borne de terre de
votre alimentation électrique ou de votre panneau électrique en utilisant un conducteur de taille équivalente à celle des conducteurs du
circuit alimentant cette baignoire. Utilisez des ls électriques qui sont adaptés à une température de 75 °C (167 °F), y compris la cote de
température des conducteurs d’alimentation utilisés. Tout le matériel et les câblages doivent être acheminés à distance sufsante du moteur,
de la pompe, de la soufante et de tout autre composant de la baignoire susceptible de produire de la chaleur.

www.mirabelleproducts.com
4
Outils et matériel
• Produit d’étanchéité en silicone
• Ruban à mesurer
• Crayon
• Lunettes de sécurité
• Clé à tube
• Niveau
• Outils et matériel habituels pour le
travail du bois
• Toile de peintre
• Chevrons de 5x10 cm
• Mortier
• Facultatif : adhésif de construction
Inspection et tests
Chaque baignoire est livrée prête à être installée, complètement équipée avec la pompe et la tuyauterie nécessaire à son fonctionnement.
Cependant, une trousse de vidange et de débordement est requise pour chaque baignoire; elle n’est pas incluse.
La variété d’installations possibles pour cette baignoire peut nécessiter des procédures de support différentes de celles présentées.
Localisez les solives, selon les besoins. Assurez-vous que la distance entre le mur et le drain (voir page 11) est correcte, d’aplomb et droite.
Inspection:
• Retirez la baignoire de son carton d’emballage. Conservez le carton d’emballage utilisé pour l’expédition jusqu’à ce que le produit ait été
inspecté. Ne jamais soulever la baignoire par ses éléments de tuyauterie, la soulever toujours par la coque. Toutes les baignoires sont testées en
usine avant l’expédition, an de vérier qu’elles fonctionnent correctement et que leurs connexions sont étanches.
• Inspectez la coque et les composants de la baignoire. Si l’inspection révèle des dommages ou des défauts quelconques dans la nition de la
surface ou dans l’un des composants, n’installez pas la baignoire. Toute réclamation concernant un défaut ou un dommage de la nition après
que la baignoire est installée ne sera pas prise en compte par la garantie.
• Inspectez les composants de la baignoire pour vérier que tous les raccords sont bien serrés.
Testing:
• Avant de procéder à l’installation et avant d’emprisonner la baignoire dans un mur, des carrelages, etc., remplissez la baignoire avec de l’eau et
inspectez-la pour vérier l’absence de fuites qui pourraient résulter de dommages pendant le transport ou à cause d’une mauvaise manipulation.
• L’installateur est responsable de tester complètement la baignoire avant de poursuivre son installation. Placez la baignoire sur une surface
plane, assurez-vous que son drain est bien fermé, puis remplissez la baignoire avec de l’eau jusqu’en-dessous du trop-plein. Laissez l’eau dans la
baignoire pendant au moins 5 minutes comme un essai statique. Si vous installez une baignoire avec un système à remous, branchez la pompe
et le moteur, puis mettez-le en route. Conrmez que toutes les fonctions fonctionnent correctement. Inspectez visuellement tous les joints pour
vérier qu’ils ne fuient pas.
N’installez pas la baignoire si des fuites sont détectées ou si certaines fonctions du système ne fonctionnent pas correctement.
Other manuals for BRADENTON Series
1
This manual suits for next models
72
Table of contents
Languages:
Other Mirabelle Bathtub manuals