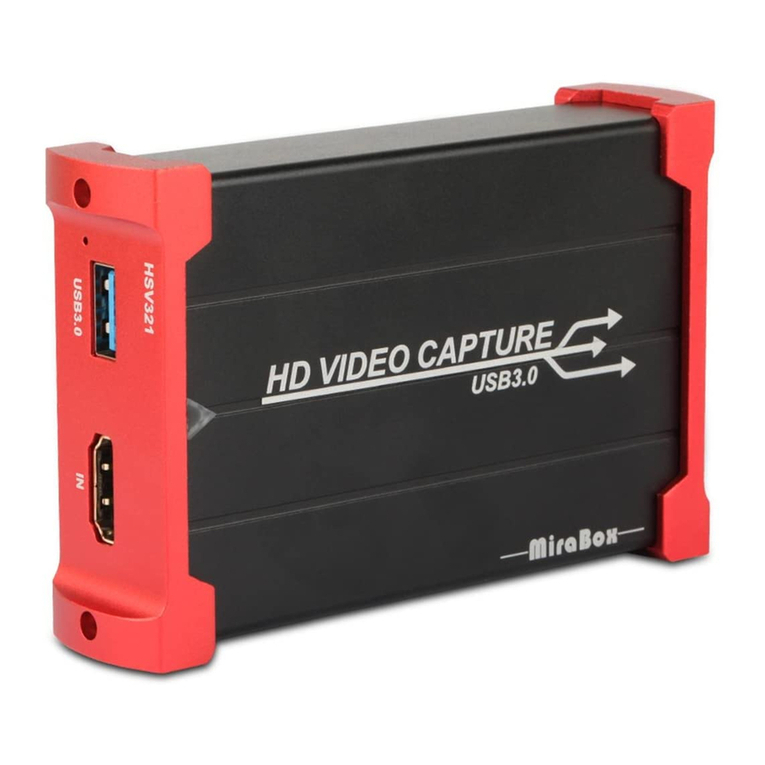
MiraBox HSV3203 User manual

1
HSV3203 4K User manual
Video Capture BOX
ⅠDescription
The HD video capture card can input the video data or audio and video mixed data of
the video signal output from the camera, PC, set-top box, game console into the
computer, and convert it into computer-recognizable digital data, which is stored in the
computer and becomes editable video data file or live stream to the server.

2
ⅡConnect and Operate
1.Connect the signal sources such as Blu-Ray Player , Play Station , audio/video
receiver ,satellite receivers with HD output interfaces with a HD cable to the device HD
input .
2.Insert the type-c cable head to type-c interface , the other side of the cable into your
computer`s USB3.0 or type-c interface .
3.HD to USB3.0 video capture Device is based on UVC(USB video class) , UAC(USBaudio
class) STANDARD , without having to install drivers and settings.user can connect an
external monitor or TV to the HD Loopout. with which can watch HD video
simultaneously .
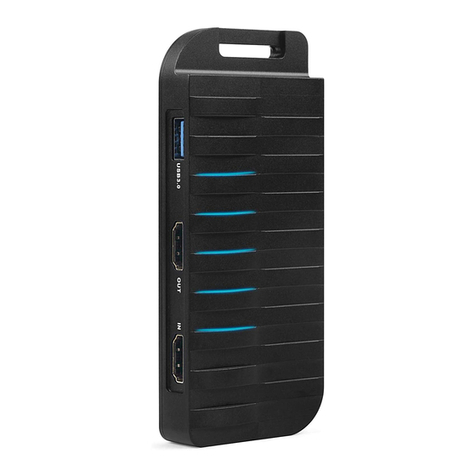
1.Type-c
2.Input:This slot is where you connect the A/V source output from DVD,PS3,Set-top Box
and Note Book.
3.Loopout:signal local output port
4.Audio
5.Mic
3
2
4
5
1

3
How to Set Capture Card in PotPlayer(Windows)
Install "PotPlayer" application software on the computer;
2. Double click " PotPlayer" shortcut to open the application
3. Clickupper left corner "PotPlayer”--- “Open”--- “Device setting”--- ”
Analog Tv”page
Select “MiraBox Video Capture”in Video Capture Device item.
Select “Capture”in Type item.
Select “HDMI”in input item.
Select suitable capture resolution in Format item.
Select "Digital Audio interface (MiraBox Video Capture) " in Audio
Capture Device item.
Click “Open device”to open the capture interface.
4. Click "Pot player”---
“Video”---“Video
recorder" or use shortcut
key"Alt+C"to open Video
recorder page.
Select storage position;
Set video and audio capture
setting;
Start to capture video and
audio;
5. Start video recording.

4
How to Set Capture Card in Mac (OBS)
1.Open Mac System preferences, choose MiraBox Vedio Capture, as picture
2. Open OBS software, click "+"
to add Audio input capture from
sources opetion , then choose
Mirabox Audio Capture, as
picture.
3. Click setting to choose advanced in the Mixer window, Audio input capture item
choose" Monitor and Output”
4.Add“MiraBox Video Capture”from sources
option in the OBS window, choose your
resolution and frame rate, as picture.
5.Click OK.

5
How to Set Capture Card in Windows (OBS)
1. Open OBS → Click "+" to choose "Video Capture Device" .
2. Creat source → OK.
3. Properties for Video Capture
Device → Device(Mirabox Video
Capture) → Resolution/FPS Type
(Custom) →
Resolution(1920*1080) → FPS
(30pfs) → Video Format (YUY2)→
Audio Out Mode(Output desktop
audio(WaveOut)) → √Use custom
audio device → Audio
Device(MiraBox Audio Capture) →
OK.
4.Setting → Stream → choose your Live service (YouTube/Twitch...), input you channel
stream key → OK.
5. Start streaming or start recording

6
FAQs & Solutions:
1. No Capture
Q: Fail to capture the verification methods of video images if OBS or other APPs are used
on the PC
a. Confirm whether videos on the signal source end have been transmitted to our
capture card (if computer is the signal source, you can find two display icons on screen
resolution; otherwise, please connect to the loop out port to check whether images are
normal);
b. Confirm whether PC has properly recognized MiraBox Video Capture (check
whether the device is normal in PC’s Device Manager, and no icons such as exclamation
points are found);
c. If the above-mentioned two methods are normal, suggest customers changing a
USB3.0 port and test again;
d. Confirm whether the port is properly connected;
e. Confirm whether APP’s setting parameters are correct;
2. Audio Issue
Q: Fail to capture the verification methods of sound if OBS or other APPs are used on the
PC
a. Confirm whether our capture card is selected by the audio input device on the
signal source (if computer is the signal source: right click the audio device on the
bottom right corner of computer to select; otherwise, please connect to the loop out
port to check whether audio is normal);
b. Confirm whether PC has properly recognized MiraBox Video Capture (check
whether the device is normal in PC’s Device Manager, and no icons such as exclamation
points are found);
c. Confirm whether soundwave line is wavy on the PC (click the audio icon on the
bottom right corner of computer – recording device – select our capture card to check);
d. If it still fails to capture audio, suggest customers adding an audio input capture on
OBS, then set Monitor and Input in the advanced audio settings;
e. Customer also can click the audio icon on the bottom right corner of computer –
select our capture card in the recording device – monitor our capture card to check
whether it can normally capture audio;
f. If sound received by customers is fitful or in case of other sound issues, please right
click the audio icon on the bottom right corner of computer – select our capture card in
the recording device – right click Advanced Attributes in computer attributes to confirm
whether 48KHz is fixed as its audio
3. Image issue
Q: Solution for green tint images or vertical bars occurred on the OBS.
a. To solve such issue, please update to the newest APP;
Q: Solution for green or red tint images occurred on the loop out end.
a. YUV format is set as the screen’s color space, which will lead to such issue. Please
change its color space to RGB format.
Q: Solution for video lag or high audio delay
a. If customers do experience video lag or audio delay, there may be a problem with
computer configuration, or two same devices are used which occupies the APP.

7
HSV3203 説明書
ビデオキャプチャーボード
一.前書き
HDビデオキャプチャカードは、カメラ、PC、セットトップボックス、およびゲー
ム機から出力されるビデオ信号またはビデオ信号のオーディオおよびビデオ混合デ
ータをコンピュータに入力し、それらをコンピュータ可読デジタルデータに変換する
ことができるビデオデータファイルを編集するか、サーバーに生放送。
二.パッケージ内容
本体(HD to USB 3 . 1 ビデオキャプチャカード)- ----1 台
USB 3 . 0 ケーブル ------------------------- --- 1本
説明書 ----------------------------------------1部
保証書 ----------------------------------------1枚

8
三.特徴
*ドライバをインストールする必要はありません。本当の Pn P です。
* Windows、Linux、Mac OS X オペレーティングシステムにコンパチブルできます。
* USB 3 . 0、300 - 350 MB / s のスループット、USB 2 . 0 にコンパチブルできます。
*映像とオーディオの処理はドングルで行われ、CPU を占用しません。
*シングルチャンネルの HD ビデオ信号をキャプチャすることができます。
*自動的に入力ビデオフォーマットをチェックしたり、出力サイズとフレームレート
を調整したりすることができます。
*入力出力ビデオ信号は 4K / 60 Hz に達し、UVC ビデオキャプチャおよび YUV 422 ビ
デオ出力にコンパチブルできます。
* HD Loopout は外部のモニターと接続を認識し、視聴することができます。
四.仕様
ホストインタフェース
USB3.0 ,* 300-350MB/s, USB2.0 ,*40MB/s
入力インタフェース
HD インタフェース
HD 入力フォーマット:
480i , 480P , 576i , 576P , 720p50 ,720p60 , 1080i50 , 1080i60 ,
1080p24/25/30/50/60,4K60 ;
フレームレート:
25/29.97/30/50/59.94/60fps
オーディオとビデオ
のキプチャ
標準の要件は UVC とUAC 一貫
OS のサポート
Windows 7 ,Windows Server 2008 R2,Linux
(Kernel version 2.6.38 and above),OS X(10.8 and above)
ソフトウェアの互換性: OBS
Windows Media Encoder(Windows)
Adobe Flash Media Live Encoder(Windows,OS X)
Real Producer Plus(Windows)
VLC(Windows,OS X, Linux) QuickTime
Broadcaster(OS X)
QuickTime player(OS X) Wire cast(Windows,OS
X) Pot player(Windows)and etc.
開発インターフェイスの互換性:
DirectShow(Windows) ,
DirectSound(Windows) ,
V4L2(Linux) OS X (QuickTime)
サイズ:
105*68*25(L/W/H , mm)
電力消費:
≤2.5W
作業温度:
0-50 deg C
貯蔵温度:
-20-70 deg C
貯蔵湿度:
5%-90%

9
五.接続と操作
1.HD 出力インターフェースを持つ Blu- Ray Player、Play Station、オーディオ/ビデオ
レシーバー、サテライトレシーバーなどの信号ソースを HD ケーブルでデバイスの
HD 入力に接続します。
2.USB 3 . 0 ケーブルヘッドの一端を USB 3 . 0 インターフェースに差し込み、ケーブ
ルの別の端をコンピュータの USB 3 . 0 インターフェースに接続します。
3.HD to USB 3 . 0 ビデオキャプチャ BOX は、UVC(USB ビデオクラス)、UAC(USB
オーディオクラス) の標準に基づき、ドライバと設定をインストールする必要はあ
りません。ユーザーは外部モニタや TV をHD Loopout に接続できます。同時に HD ビ
デオを視聴することができる。
1.USB3.1 type-C
2.入力: ②は、DVD、PS 3、セットトップボックスとノートブックの A /
Vソース出 力を接続する場所です。
3.Loopout:④信号本地出力ポート
4.Audio
5.Mic
3
2
4
5
1

10
六.ソフトウェアのコマンド
Windows でPotPlayer を設定する方法
1.コンピュータに "PotPlayer"アプリケーションソフトウェアをインストールしま
す。
2.「PotPlayer」ショートカットをダブルクリックしてアプリケーションを開 きます
3. 左クリック "PotPlayer" --- "開く" --- "デバイス設定" --- "Analog
TV"ページ
>映像キャプチャデバイス項目で「MiraBox Video Capture」を選択します。
>出力項目で“ キャプチ
ャ”を選びます。
>入力項目で「HDMI」を選
択してください。
>形式項目で適切なキャプ
チャ解像度を選択します。
>音声キャプチャデバイス
項目で "デジタルオーディ
オインターフェイス
(MiraBox Video Capture)"
を選択してください。
>「適用」をクリックしてキ
ャプチャインターフェース
を開きます。
4. [PotPlayer] --- [映像] --- [ビ
デオのキャプチャ]をクリック
するか、ショートカットキー
[Alt + C]を使用してビデオレコ
ーダーページを開きます。
>貯蔵場所の選択。
>ビデオとオーディオのキャプ
チャの設定;
>ビデオとオーディオのキャプ
チャの開始;

11
Mac でOBS を設定する方法
1. 開 く Mac システムの設定、選択 MiraBox Video Capture、次の図のように。
2. 開く OBS、OBS ウィンドウの音
声入力キャプチャをソースから追加
するオプションを選択し、Mirabox
Audio Capture を選択します、次の図
のように。
3.設定をクリックして[ミキサー]ウィンドウの[オーディオの詳細プロパティ]を選
択します、音声入力キャプチャ項目はモニタと出力を選択します。
4. OBS ウィンドウの映像キャプチャデバイス
をソースから追加するオプションを選択し、
Mirabox Video Capture を選択します、次の図の
ように。
5.[ OK]をクリックします。

12
Windows でOBS を設定する方法
1. 開いている OBS → クリック “+" 追加する "映像キャプチャデバイス"
2. ソースを作成/選択 → OK
3. 映像キャプチャデバイスのプロパティ
→デバイス(Mirabox Video Capture) →
解像度/FPS タイプ (カスタム) →解
像度 (1920*1080)→ FPS (30)→映
像 フォーマット (YUY2)
→音声出力モ
ード(デスクトップ音声出力(WaveOut))
→ √カスタム音声デバイスを使用する →
音声デバイス(MiraBox Audio Capture) →
OK
4. 設定 → 配信 → サービスを選択 (YouTube/ Twitch...) → 入力ストリームキー
→OKstream key → OK.
5. 配信開始または録画開始

13
よくあるご質問と対策:
1.キャプチャーできない
Q:PC でOBS または他のアプリを使用している場合、ビデオ画像の検証方法をキャ
プチャーできない
a.信号ソースからのビデオがキャプチャーボードに送信されているかどうかを確認
します(信号ソースがパソコンの場合は、画面解像度に 2つのディスプレイロゴが表
示されます。信号ソースが別のデバイスの場合は、ループアウトを接続し、画像が正
しいかどうかを確認します)。
b.PC でキャプチャーする際、MiraBox Video Capture デバイスが正しく認識されてい
るかどうかを確認します(このデバイスは PC のデバイスマネージャーで正しく表示
され、感嘆符などの記号がありません)。
c.上記の 2つの方法が正しい場合は、USB3.0 ポートに交換してテストしてください。
d.ポートへの接続が正しいかどうかを確認してください。
e.アプリで設定されたパラメータが正しいかどうかを確認してください。
2.音声の問題
Q:PC でOBS または他のアプリを使用している場合、音声の検証方法をキャプチャ
ーできない。
a.信号ソース側のオーディオ出力デバイスにこのキャプチャーボードが選択されて
いることを確認します(信号ソースがパソコンの場合は、パソコンの右下隅にある再
生デバイスを右クリックして選択します。信号ソースが別のデバイスの場合は、ルー
プアウトを接続し、音声が正しいかどうかを確認します)。
b.PC でキャプチャーする際、MiraBox Video Capture デバイスが正しく認識されてい
るかどうかを確認します(このデバイスは PC のデバイスマネージャーで正しく表示
され、感嘆符などの記号がありません)。
c.PC でキャプチャーする際、音声変動バーが変動していることを確認します(パソコ
ンの右下隅にあるオーディオアイコンの録音デバイスでこのキャプチャーボードを
選択して確認できます)。
d.それでも音声をキャプチャーできない場合は、
OBS にオーディオ入力キャプチャー
を追加し、オーディオの詳細設定で監視・出力してください。
e.また、パソコンの右下隅にあるオーディオアイコンを右クリックし、録音デバイス
でこのキャプチャーボードを選択して検出し、このキャプチャーボードが音声を正し
くキャプチャーしているを確認します。
f.キャプチャーされた音声が途切れ途切れまたはその他の問題がある場合は、パソコ
ンの右下隅にあるオーディオアイコンを右クリックし、録音デバイスでこのキャプチ
ャーボードを選択し、プロパティ・詳細プロパティをクリックし、オーディオが 48KHz
であるかどうかを確認します。
3.画像の問題
Q:OBS 側でキャプチャーされた画像が緑がかっているか、縦線がある場合の対策。
a.この問題が発生した場合は、最新バージョンにアップグレードすると、解決できま
す。
Q:ループアウト側に緑がかったまたは赤みがかった画像がある場合の対策。
a.ディスプレイのカラースペースが YUV 形式に設定されているため、この問題が発生
しています。カラースペースを RGB 形式に設定すると、通常の状態に戻ります。
Q:ビデオ画面にラグが発生し、オーディオとビデオの遅延が高い場合。
a.パソコンのスペックが不足しているか、このアプリに 2つの同じデバイスを使用し
ているため、この問題が発生しています。

14
高清音视频采集卡
HSV3203 使用说明书
一、产品概述
高清视频采集卡可将摄像机,PC,机顶盒,游戏机等输出的视频信号的视频数据或者
音视频混合数据输入电脑,并转换为电脑可识别的数字数据,存储在电脑中,成为可编
辑处理的视频数据文件或直播上传到服务器。

15
二、产品特征
高清视频采集卡尺寸为长:112mm,宽:43mm,高:15m
支持高清视频信号输入
支持 TYPE-C 供电,不需要外加电源
支持高清视频环出
支持分辨率为 4K 以下所有标准高清视频协议
输出分辨率最高可达到 4K/60HZ
支持 48K 和44.1K 音频输入
支持 USB3.0 协议
工作功耗为 2.5W
支持 3.5mm 耳机音频输出,3.5mm 麦克风
三、端口名称
①TYPE-C 接口
② 高清视频 输入接口
③ 高清视频环出
④Audio
⑤Mic
3
2
4
5
1

16
使用连接示意图:
四、操作指南
1.将高清视频输入信号连接到高清视频输入接口;
2.将USB3.0 接口连接到电脑;
3.接上需要采集的设备,信号源可以通过视频环出
接口接上显示器。
4.以PotPlayer 软件使用为例如图 1,也可支持其他
软件 XO O
5. 点击 PotPlayer 菜单栏,点击打开,打开设备设置如图 2所示
图2

17
6.按照图 2所示,打开模拟 TV 设置,点击打开设备,高清视频采集卡开始正常工作,
如图 3所示:
图3
7. 如果想录制视频时,点击 PotPlayer 菜单栏,点击视频-视频录制-立即录制视频, 就
可以正常录制视频,如图 4所示。
图4

18
常见问题解决方法:
1,无采集
Q:如果 PC 端使用 OBS 或者其他的 APP 时,没有采集到视频图像的验证方式。
a,确认信号源端的视频是否已经传输到我们的采集卡中(如果信号源是电脑,可以在
屏幕分辨率中看到有两个显示器标识,如果信号源是其他的设备,可以让客户将环出接
上看看环出端突图像是否正常)。
b,确认采集 PC 端是否已经正确识别 MiraBox Video Capture 设备(在 PC 端的设备管
理器中查看此设备是正常的,没有任何感叹号之类的标识)。
c,如果前面两个方式都是正常的,请让客户更换一个 USB3.0 接口在测试一下。
d,确认客户的接口连接是否正确。
e,确认客户的 APP 的设置参数是否正确。
2,声音问题
Q:如果 PC 端使用 OBS 或者其他的 APP 时,没有采集到声音的验证方式。
a,确认信号源端的音频输出设备选择的是我们的采集卡(如果信号源是电脑,可以在
电脑右下角的右击播放设备中选择,如果信号源是其他的设备,可以让客户将环出接上
看看环出的声音是否正常)。
b,确认采集 PC 端是否已经正确识别 MiraBox Video Capture 设备(在 PC 端的设备管
理器中查看此设备是正常的,没有任何感叹号之类的标识)。
c,确认客户采集 PC 端的声音波动条是波动的(可以在电脑右下角的音频图标的录制
设备中选择我们采集卡看到)。
d,如果客户还是采集不到声音,可以让客户在 OBS 上添加一个音频输入捕获,然后在
音频高级设置中将监视与输出。
e,客户还可以右击电脑右下角的音频图标,选择录制设备中的我们的采集卡,然后将
我们的采集卡侦听一下,确认采集卡是正常采集到声音。
f, 如果客户的收到的声音是断断续续的,或者其他的声音问题,右击电脑右下角的音
频图标,选择录制设备中的我们的采集卡,然后点击属性中的高级属性中的 高级中的
音频是否固定为 48KHz。
3,图像问题
Q:如果客户 OBS 端采集的图像有偏绿或者是有竖条的现象的解决方法。
a,客户出现了这种现象是可以通过升级最新的程序来解决这个问题。
Q:如果客户的环出端出现了图像偏绿或者偏红的现象的解决方法。
a,客户出现了这种情况是因为客户的显示器的颜色空间设置成了 YUV 格式,客户将颜
色空间调成 RGB 格式就可以恢复正常。
Q:如果客户出现了视频画面卡顿,音视频延时高的问题。
客户出现了这种情况是因为客户的电脑配置不够造成的或者是客户使用了两个同样的
设备来占用此 APP。采集卡,然后点击属性中的高级属性中的 高级中的音频是否固定
为48KHz。
Table of contents
Languages:
Other MiraBox PCI Card manuals