manuals.online logo
Brands
  1. Home
  2. •
  3. Brands
  4. •
  5. Miranda
  6. •
  7. Amplifier
  8. •
  9. Miranda HDA-1832 Instruction Manual

Miranda HDA-1832 Instruction Manual

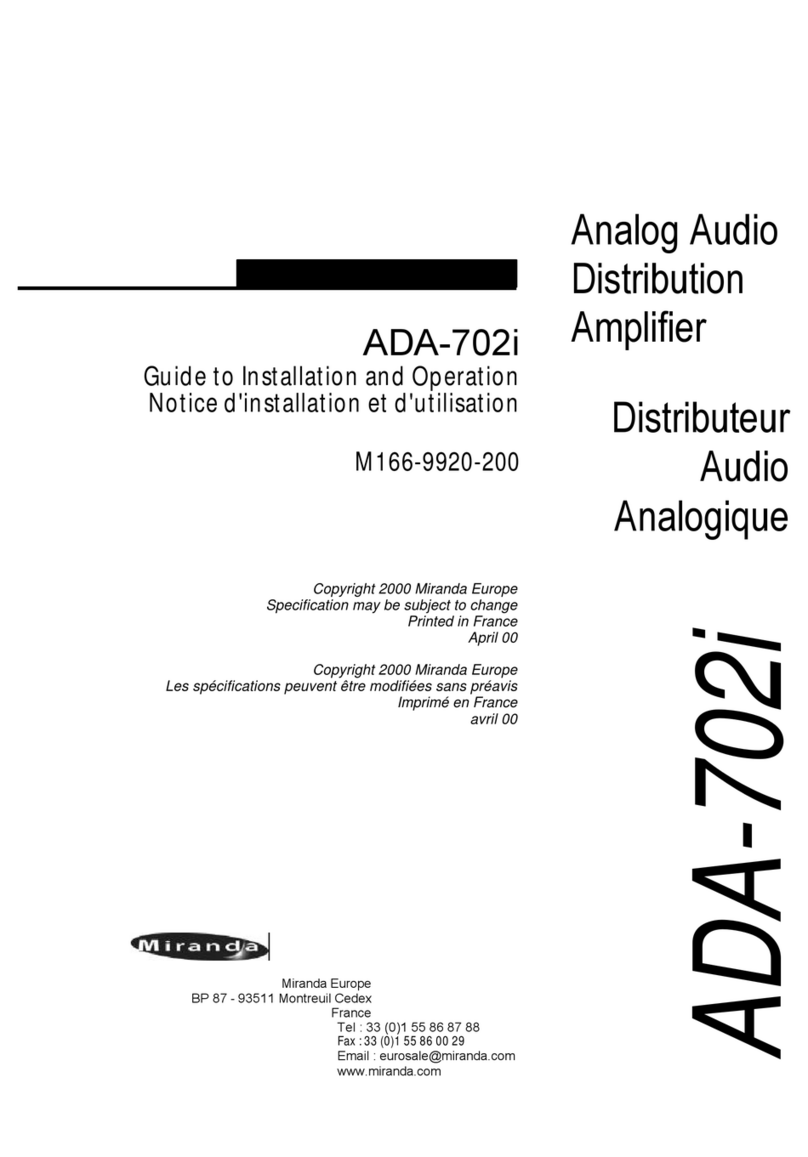
HDA-1832HD/SDReclockedDigitalVideoDA
GuidetoInstallationandOperation
M618-9700-101
(DENSITÉ) SERIES
January2005
HDA-1832 Page 1of4
HDA-1832
FUNCTIONALBLOCKDIAGRAM
DESCRIPTION
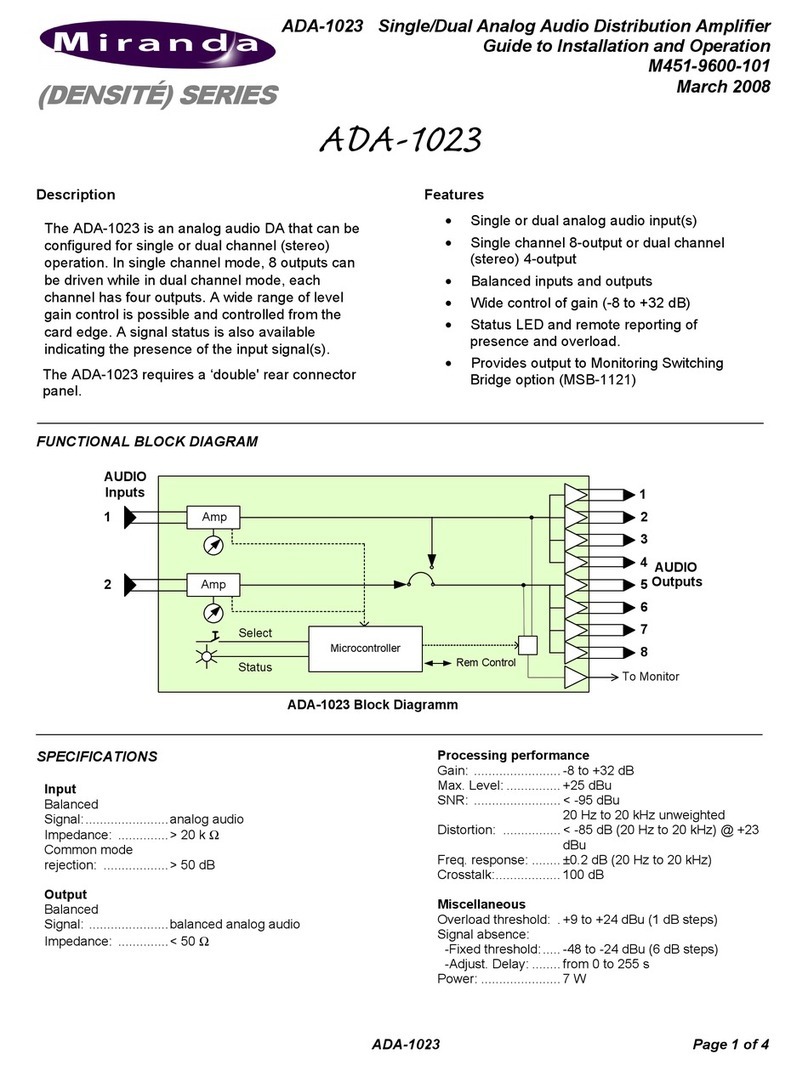
The HDA-1832is a reclocked high definition serial
digital video distribution amplifier. The HDA-1832
has one input, and 9 outputs, with automatic
equalization for up to 110 meters of cable (Belden
1694a) at 1.48 Gbps. The amplifier offers signal
presence detection and remote reporting, and
includes reclocking, providing an additional level of
signalintegrityin long cablelengthapplications.
Whileprimarilydesigned for distribution of HD
serial digital signals (SMPTE 292M), the HDA-1832
automatically detects and re-clocksnon-HD signals.
Thismulti-rate feature makes the HDA-1832ideal
forapplicationswhere HD and SDsignalsmay
coexist. TheHDA-1832 is designed for use in the
DENSITÉframe.
FEATURES
§HDSDIinput
§(9) HD SDI reclocked outputs
§Supports HD SDI (1.48 Gbps)
§Supports SD SDI (143-540 Mbps)
§110 m automatic cable equalization
§Signal presence detection with remote
reporting
SPECIFICATIONS
INPUT
Signal: HD-SDI SMPTE-292M
(1.48 Gbps)
SD-SDI SMPTE-259M-ACD
(143, 270, 360 Mbps)
EN50 83-9 DVI-ASI (270 Mbps)
Cable length: 110 m (360') up to 1.5 Gbps for
Belden 1694A
Return loss: > 15 dB up to 1.5 GHz
OUTPUTS (9)
Signal: HD-SDI SMPTE-292M
(1.48 Gbps)
SD-SDI SMPTE-259M-ACD
(143, 270, 360 Mbps)
EN50 83-9 DVI-ASI (270 Mbps)
(5 outputs only)
Return loss: > 15 dB up to 1.5 GHz
Jitter (wideband): < 0.2 UI p-p
PROCESSINGPERFORMANCE
Signal path: 10 bits
Processing delay: 6 ns
POWER 2.5W
Outputs
Input
Remote
1
2
3
6
7
8
9
Microcontroller
Attention
Status
Auto
EQ
4
5
HD Digital
Video IN Reclock
HDA-1832HD/SDReclockedDigitalVideoDA
GuidetoInstallationandOperation
Page 2of4HDA-1832
UNPACKING
Make sure the following items have been shipped
with your HDA-1832. If any of the following items are
missing, contact your distributor or Miranda
Technologies Inc.
*HDA-1832 HD/SD Reclocked Digital Video DA
*HDA-18NN-DRP or -SRP rear panel
INSTALLATION
The HDA-1832 must be mounted in a DENSITÉ
frame. The installation includes both the HDA-1832
module, and the rear panel module. It is not
necessary to switch off the frame’s power when
installing or removing the HDA-1832.
Detailed instructions for installing cards and their
associated rear panels in the Densité frame are given
in the Densité Frame manual.
Rear panel installation
Note that the HDA-1832 has nine outputs, and
making these available on BNC connectors at the
rear of the frame requires a double-width rear panel.
When a double–width rear panel is used, the module
must be installed in the right-most slot in order to
mate with the rear-panel connectors. If it is placed in
the wrong slot, the front panel LED will flash red.
Move the card to other slot for correct operation. No
damage will result to the card should this occur.
Should you require four or fewer outputs, you can
free up a slot in the frame for another card by using
the optional single-width rear panel HDA-18NN-SRP.
This panel brings outputs 1 to 4 to the four BNC
output connectors.
OPERATION
Overview
The HDA-1832 is equipped with an on-board LED
status indicator, mounted on the front edge of the
card so as to be visible from the front of the card
frame, even when the frame door is closed. The
functionality of this status monitor is described
below.The DENSITÉ frame incorporates a central
controller card, located in the center of the frame,
which is equipped with an LCD display. The card
handles error reporting and remote control for all
cards installed in the frame. The display shows the
error status of any card in the frame whose SELECT
button has been pushed.
HDA-1832
SDA-1101 - SD DIGITAL VIDEO DISTRIBUTION AMPLIFIER
Select
Status
Status LED
SELECT button Single Double
HDA-18NN Rear Connector Panel
HDA-1832HD/SDReclockedDigitalVideoDA
GuidetoInstallationandOperation
HDA-1832 Page 3of4
The HDA-1832 is also equipped with the remote
reporting and control capabilities of the DENSITÉ
series. Fault reporting is carried out on a frame-wide
basis. There is no individual rear-panel access to the
fault and status reporting port of the HDA-1832.
Interfacing to the outside world is handled by the
frame’s contoller card. The fault reporting protocol is
standardized across the DENSITÉ series of modules.
Status Monitor LED
The status monitor LED is located on the front card-
edge of the HDA-1832 module, and is visible through
the front access door of the DENSITÉ frame.
This multi-color LED indicates module status by
color, and by flashing/steady illumination, according
to the following chart. The chart also indicates fault
reporting for this card on the DENSITÉ frame’s serial
and GPI interfaces.
Status Indicator
REPORT COLOR (F=flashing)
SERIAL
GPI GYRFR
No errors µ
No Input
Signal µµ
No rear
panel µ
No lock
on input µµ
µ: Factory default.
NOTE: A “Flashing Yellow” Status LED indicates that
the SELECT button on the front panel has been
pushed, and the card is being accessed by the
controller. The LED color assignments for the various
error conditions can be reconfigured by the user.
User Interface
Push the SELECT button on the front edge of the
HDA-1832 to see a report of the current error status
on the DENSITÉ frame’s controller card display. The
HDA-1832 has three possible status messages:
STATUS SIGNAL UNKNOWN –NO LOCK -NO SIGNAL -143
Mb/s –270 Mb/s –360 Mb/s –540 Mb/s –1.48 Gb/s
NO REAR -SINGLE REAR -DOUBLE REAR
VERSION XXX
The STATUS LED will revert to it’s normal state upon
a second push of the button, or after a short delay
otherwise.
Example :
SELECT button pushed when the status LED is
green:
SELECT button pushed when there is no input
signal connected to the rear panel and the LED
is steady red:
The HDA-1832 has operating parameters which may
be adjusted using menus operated at the controller
card interface. After pressing the SELECT button on
the HDA-1832 card, use the keys on the local control
panel to step through the menu and adjust these
parameters. The menus, including the parameters
which can be adjusted, and the options which are
available, are shown on page 4.
CONFIG ALARM menu:
Allows the user to set the Status LED display for the
NO SIGNAL and NO LOCK conditions, and to
determine whether GPI alarmswill be triggered.
FACTORY DEFAULT restores the HDA-1832 to the
factory set-up conditions, shown underlined in the
menu.
The use of the local control panel is described in
more detail in the controller card manual.
H D A-1832
OKS TATUS
H D A-1832
ALNOSIGN
HDA-1832HD/SDReclockedDigitalVideoDA
GuidetoInstallationandOperation
Page 4of4HDA-1832
HDA-1832 Menus
(SIGNAL UNKNOWN –NO LOCK -NO SIGNAL -143 Mb/s –270 Mb/s –360 Mb/s –540 Mb/s
–1.48 Gb/s )
(NO REAR, SINGLE REAR, DOUBLE REAR)
(VERSION xxx)
(GREEN, YELLOW, RED, FLASH_RED)
(NONE, GPI)
(GREEN, YELLOW, RED, FLASH_RED)
(NONE, GPI)
(RESTORE)
COMPLIANCE
Radio Frequency Interference and Immunity
This unit generates, uses, and can radiate radio frequency energy. If the unit is not properly installed and used in accordance with this
guide, it may cause interference with radio communications. Operation with non-certified peripheral devices is likely to result in interference
with radio and television reception. This equipment has been tested and complies with the limits in accordance with the specifications in:
-FCC Part 15, Subpart B
-CE EN50081-1:1992
-CE EN50082-1:1992.
CONTACTMIRANDA
For technical assistance, please contact the Miranda Technical support centre nearest you:
Americas
Telephone:
+1-800-224-7882
e-mail:
[email protected]
Asia
Telephone:
+81-3-5730-2987
e-mail:
[email protected]
Europe, Middle East,
Africa, UK
Telephone:
+44 (0) 1491 820222
e-mail:
[email protected]
France (only)
Telephone:
+33 (0) 1 55 86 87 88
e-mail:
[email protected]
Visit our web site at www.miranda.com
STATUS
CONF
IG ALARM
FACTORY DEFAULT
NO SIGNAL
ALARM LEVEL
ALARM REPORT
ALARM REPORT
ALARM LEVEL
NO
LOCK

Other Miranda Amplifier manuals

Miranda DENSITE HDA-1851 Instruction Manual

Miranda

Miranda DENSITE HDA-1851 Instruction Manual

Miranda DENSITE series Instruction Manual

Miranda

Miranda DENSITE series Instruction Manual

Miranda Densite series DDA-1113 Instruction Manual

Miranda

Miranda Densite series DDA-1113 Instruction Manual

Miranda HDA-1811 Instruction Manual

Miranda

Miranda HDA-1811 Instruction Manual

Miranda ADA-702i Instruction Manual

Miranda

Miranda ADA-702i Instruction Manual

Miranda VDA-1001 Specification sheet

Miranda

Miranda VDA-1001 Specification sheet

Miranda DENSITE series Instruction Manual

Miranda

Miranda DENSITE series Instruction Manual

Miranda DDA-1112 Instruction Manual

Miranda

Miranda DDA-1112 Instruction Manual

Miranda Densite HDA-1861 Instruction Manual

Miranda

Miranda Densite HDA-1861 Instruction Manual

Miranda SDA-122 Instruction Manual

Miranda

Miranda SDA-122 Instruction Manual

Miranda ADA-1023 Instruction Manual

Miranda

Miranda ADA-1023 Instruction Manual

Miranda DENSITE series Instruction Manual

Miranda

Miranda DENSITE series Instruction Manual

Miranda imaging Series Instruction Manual

Miranda

Miranda imaging Series Instruction Manual

Miranda VEA-1002 Instruction Manual

Miranda

Miranda VEA-1002 Instruction Manual

Miranda HDA-1801 Instruction Manual

Miranda

Miranda HDA-1801 Instruction Manual

Miranda SDA-172p User manual

Miranda

Miranda SDA-172p User manual

Miranda DENSITE series Instruction Manual

Miranda

Miranda DENSITE series Instruction Manual

Miranda DENSITE series Instruction Manual

Miranda

Miranda DENSITE series Instruction Manual

Popular Amplifier manuals by other brands

Gryphon Essence Series owner's manual

Gryphon

Gryphon Essence Series owner's manual

Quad Electroacoustics QUAD 405 Service data

Quad Electroacoustics

Quad Electroacoustics QUAD 405 Service data

McIntosh C2300 datasheet

McIntosh

McIntosh C2300 datasheet

VINCENT SV-400 Instructions for use

VINCENT

VINCENT SV-400 Instructions for use

Ltech LT-123 manual

Ltech

Ltech LT-123 manual

Jensen XA2250 Install guide & user manual

Jensen

Jensen XA2250 Install guide & user manual

Futek IAA100 troubleshooting guide

Futek

Futek IAA100 troubleshooting guide

DAPAudio DSA-250 instruction manual

DAPAudio

DAPAudio DSA-250 instruction manual

Whelen Engineering Company Epsilon 2S9 installation guide

Whelen Engineering Company

Whelen Engineering Company Epsilon 2S9 installation guide

Hafler DH-200 instructions

Hafler

Hafler DH-200 instructions

Kenwood KAC-PS520 Service manual

Kenwood

Kenwood KAC-PS520 Service manual

TELETRONIX LA-2A operating instructions

TELETRONIX

TELETRONIX LA-2A operating instructions

Kicker 160ss owner's manual

Kicker

Kicker 160ss owner's manual

SDI PA-100 operating manual

SDI

SDI PA-100 operating manual

B&K ST1430 Series II owner's manual

B&K

B&K ST1430 Series II owner's manual

Phoenix Gold ZDA4.6 owner's manual

Phoenix Gold

Phoenix Gold ZDA4.6 owner's manual

Harman JBL GTR-1001/601 quick start guide

Harman

Harman JBL GTR-1001/601 quick start guide

Texas Instruments SLOU121 user guide

Texas Instruments

Texas Instruments SLOU121 user guide

manuals.online logo
manuals.online logoBrands
  • About & Mission
  • Contact us
  • Privacy Policy
  • Terms and Conditions

Copyright 2025 Manuals.Online. All Rights Reserved.