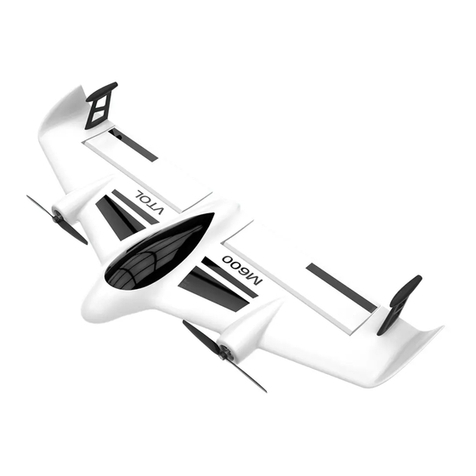
Mirarobot GV160 User manual

GV160

IINSTRUCTION MANUAL
(FPV/LED )
WANING: Read the ENTIRE instruction manual to become
familiar with the features of the product before operating .Failure to
operate the product correctly can result in damage to the product,
personal property and cause serious injury. This product is not
intended for use by children without direct adult supervision.Do not
attempt disassembly ,use with incompatible components or augment
product in any way without the approval of Wuxi Mirarobot Science
& Technology Co., Ltd.
Age Recommendation: Not for children under 14 years .This is not a
toy.
Safety Precautions and Warning

Always keep a safe distance in all directions around your model
to avoid collisions or injury. This model is controlled by a radio
signal subject to interference from many sources outside your
control. Interference can cause momentary loss of control.
Always operate your model in open spaces away from full-size
vehicles, traffic and people
Always carefully follow the directions and warnings for this and
any optional support equipment (chargers, rechargeable battery
packs, etc.).
Always keep all chemicals, small parts and anything electrical
out of the reach of children.
Never place any portion of the model in your mouth as it could
cause serious injury or even death.
Never operate your model with low transmitter batteries.
Always keep Ground Effect Vehicle in sight and under control
Always move the throttle fully down at rotor strike.
Always use fully charged batteries.
Always keep transmitter powered on while aircraft is powered.
Always remove batteries before disassembly.
Always keep moving parts clean.
Always let parts cool after use before touching.
Always remove batteries after use.
Never operate Ground Effect Vehicle with damaged wiring.
Never touch moving parts.
CONTENTS
Frame kit x1
Motor-8.5mm Brushed x 4
40mm propeller x4
Battery-500mAH 1S 3.8V 25C LiHV x1
Charger-1S USB Li-Po Charger x1
TransmitterX 1
25MW VTX 600TVL FPV Camera x1
SPECIFICATIONS

Length:198mm
Width:138mm
Height:93mm
Propeller Diameter:40mm
Flying Weight:78.7g
First Flight Preparation
inspect contents inside package
Begin charging the Ground Effect Vehicle battery
Assemble the Ground Effect Vehicle
Program your transmitter
Install the flight battery in the Ground Effect Vehicle
Bind your transmitter
Familiarize yourself with the controls
Find a suitable area for flying
Power on the Ground Effect Vehicle. The LED on the top of the
drone turns solid, indicating the initialization has completed.
Charging Warnings
WARNING:Failure to comply with the following warnings could
result in product malfunction, electrical issues, excessive heat, FIRE,
and ultimately injury and property damage.
Never leave charging batteries unattended.
Only use chargers specifically designed to charge the included
Li-Po battery
Never charge batteries overnight.
Never charge damaged batteries, If the battery begins to swell
during charging or use, discontinue immediately.
Always use included battery and charger. Disconnect the battery
after charging.
Charge batteries away from flammable materials in a well-
ventelated area.
Never charge, transport, or store batteries in hot, cold, or very
sunny places.(recommended between 5-49°C).
Charge the Ground Effect Vehicle Battery

CAUTION: Only use chargers specifically designed to
charge the included Li-Po battery. Failure to do so could result in
fire, causing injury or property damage.
Never exceed the recommended charge rate.
Inspect the battery to make sure it is not damaged e.g., swollen,
bent, broken or punctured. Charge only batteries that are cool to
the touch and are not damaged.
Insert the charger into a USB port.
Connect the battery to the charger as shown in the illustration
(Notice: Keep both red dots on the same side.) When you make
the connection successfully, the LED on the charger turns solid
red, indicating charging has begun. Charging a fully discharged
(not over-discharged) 500mAH battery takes approximately 60
minutes. The LED turns solid green when the charge is complete.
Always disconnect the flight battery from the charger
immediately upon completion of charging
CAUTION: Once charging is complete, immediately
remove the battery. Never leave a battery connected to the charger.
Installing the Propellers
Refer to the illustration for the proper motor rotation and
propeller location.
Install the propellers by pressing the center hub over the motor shaft,
being careful not to press it too far down on the shaft. The propeller
and motor should spin freely when installed correctly.

Transmitter
A、Power button
B、Transmitter calibrate button
C、Throttle
D、Beginner & Master Mode conversion Button
E、Throttle calibrate Mid-point button
F、Throttle calibrate ESC button
G、Front/Back Switcher
H、Rudder
I、Binding button

Flight Mode Selection
Through the buttons on the Transmitter control to select the flight
mode. For the first time connecting to the power as Beginner
Mode.Press D into master Mode,Press G could be convert between
Reverse Mode and Normal Mode.The LED light indicate different
flight mode.
Mode
LED light
Master Mode
(Press D,hear “Di”once)
Red light keep flashing
Beginner Mode
(Press D,hear “Di” twice)
Red&Green light keep flashing
Reverse Mode
(
Press G
)
Green light quick flashing
Beginner Mode: slower speed,Suitable For Beginner
Master Mode :faster speed,flexible turning, Suitable For
Experiencer
Reverse Mode:change to this Mode when the vehicle meet with
barrier,then adjusting into appropriate direction and keep moving.
How to use Throttle- Mid-point
Press button (B) and button (A) at the same time when the
transmitter has the power,then waiting for the LED quick flashing
(50Hz) enter into the learning state,as following:
1. Push all the throttle into the middle position,then Press
button(E), the software read the throttle’s median by default,
When it is finished ,the LED will be slower flashing (2.5Hz);
2. Rotate the two throttles along the inner side for cycles at the

same time,make sure the throttle can reach max&min position,then
Press button(F), the software can save the Max&Min data and
adjusting.When LED light keep flashing means exiting adjustment
Mode
Understand the Primary Flight Controls
If you are not familiar with the controls of your quadcopter, take
a few minutes to familiarize yourself with them before attempting
your first flight.
Low Voltage Cutoff (LVC)
Once the battery reaches 3V under load , the plane will
continuously low power supplied to the motor until complete
shutdown occurs. This helps present over-discharge of the Li-Po
battery . Land immediately Once the ESC activates LVC .Continuing
to fly after LVC can damage the battery , cause a crash or both .crash
damage and batteries damaged due to over-discharge are not covered
under warranty

Repeatedly flying the Ground Effect Vehicle until LVC activates
will damage the flight battery.
Disconnect and remove the Li-Pa battery from the aircraft after
use to prevent trickle discharge.
During storage, make sure the battery charge does not fall below
3V per cell.
Battery Status Indicator
Connecting the power, through the three color LED light on the
top position to shown the battery capacity class
LED Color Capacity class
Green 100%
Yellow Appr 50%
Red (Low voltage warning) Charging in time
FPV Camera and Video Transmitter
NOTICE: Consult local laws and ordinances before operating FPV
(first person view) equipment. In some areas, FPV operation may be
limited or prohibited. You are responsible for operating this product in
a legal and responsible manner.
NOTICE: The 25mW micro video transmitter range on your
Ground Effect Vehicle is less than your flight control transmitter
range. Ensure you have adequate video camera range for filming.
Tips: If you are flying with an FPV headset and are prone to motion
sickness, sit in a chair. If you start to suffer from motion sickness
while flying, lower your chin against your chest.

Fly in open areas, away from people, trees, cars, and buildings. The
range of the system can be impacted by any obstructions blocking
your signal. It is normal to see break up in the video going behind
trees and other obstacles.
Available Frequencies (MHz):
通
道
频段 CH1 CH2 CH3 CH4 CH5 CH6 CH7
A 5740 576
0
578
0
580
0
5820 584
0
5840
B 5845
584
5
582
5
580
5
5785
576
5
5745
C 5732
573
2
573
2
576
9
5806
584
3
5843
D 5733
575
2
577
1
579
0 5809
582
8 5847
Troubleshooting Guide
Problem Possible Cause Solution
Throttle no
respond
Throttle servo is lower or
without binding
Heighten the throttle.
Let transmitter
connect with Ground
Effect Vehicle.

Does not
function and
smells burnt
after
connecting the
Ground Effect
Vehicle battery
Ground Effect Vehicle
battery connected with the
wrong polarity
Replace The 3-in-1
board. Connect
Ground Effect
Vehicle battery
LED on
receiver flashes
rapidly and
Ground Effect
Vehicle will not
respond to
transmitter
(during
Binding )
1.Transmitter too near
Ground Effect Vehicle
during Binding process
1. Power off The
transmitter .move
The transmitter a
large distance from
The Ground Effect
Vehicle disconnect
and reconnect The
flight battery to The
Ground Effect
Vehicle. followThe
Binding instructions
2.Bind switch or button
was not held while
transmitter was powered
on
2.Power off
transmitter and
repeat bind process
3. Ground Effect
Vehicle or transmitter is
too close to large metal
object ,wireless source or
another transmitter
3.Move Ground
Effect Vehicle and
transmitter to
another location and
attempt binding
again
LED on the
receiver flashes
rapidly and the
1.Low voltage of the
transmitter batteries
1.Replace the
transmitter batteries

quadcopter will
not respond to
the transmitter
(after binding)
2.The Ground Effect
Vehicle is bound to a
different model memory
2.Select the correct
model memory on
the transmitter.
Disconnect and
reconnect the flight
battery to the
Ground Effect
Vehicle
3. Ground Effect Vehicle
battery charge is too low
3.Replace or
recharge batteries
4. Ground Effect Vehicle
or transmitter is too close
to large metal object,
wireless source or another
transmitter
4.Move Ground
Effect Vehicle and
transmitter to
another location and
attempt connecting
again.
Static in FPV
feed
Interference on chosen
channel
Change the video
transmitter and
receiver channel
WARNING
ALL INSTRUCTION AND PRECAUTIONS MUST BE READ
AND FOLLOWED EXACTLY.
Failure to exercise care while using this product and comply with
the following conditions and guidelines could result in product
malfunction, excessive heat, fire, property damage, and ultimately
injury.
Lithium Ion batteries are not toys. For the purposes of this
document Li-Ion, Li-Po or Li-Fe batteries will be described as
"Batteries."

Handling and Storage
• Never alter, puncture or impact Batteries or related components.
• Do not directly connect the terminals with metal objects. This will
short-circuit Batteries, resulting in heat and electrical discharge.
• Never store loose Batteries together, the Batteries' terminals may
contact one another causing a short circuit.
• Never expose Batteries to extreme temperatures or direct sunlight.
• Always disconnect Batteries when not in use.
Additional Guidelines and Warnings
•In the event of a crash ,always quickly and safely disconnect and
remove Batteries from the model. Then follow the previously listed
safety procedures.
•If the internal contents of Batteries come into contact with your
skin, wash the affected area(s) with soap and water immediately. If
•It comes into contact with your eye(s), flush them with generous
amounts of water for 15 minutes and seek immediate medical
attention.
Wuxi Mirarobot Science&Technology Co.,Ltd.
Qingyun Building5, No.99, Furongsan Road, Xishan Economic-
Technologic Development Zone, Wuxi, Jiangsu, China
Tel:0086-510-83781667
Fax:0086-510-83781609
Email: marketing@mirarobot.cn
www.mirarobot.com
Table of contents
Other Mirarobot Toy manuals
Popular Toy manuals by other brands

Elenco Electronics
Elenco Electronics SCROV-50 instruction manual

marklin
marklin H0 43542 manual

Bell
Bell 206L-4 Maintenance manual

Winfun
Winfun Stack 'N Learn Bee and Sunflowers manual

Thames & Kosmos
Thames & Kosmos Ooze Labs 575009 Instructions for use

roundhouse
roundhouse HBK18 Katie R/C Fittings Only Kit instruction manual

NINCOAIR
NINCOAIR EC-135 EUROCOPTER G 180 PALM G Handbook

Dancing Wings Hobby
Dancing Wings Hobby Sunbird instruction manual

Propel Trampolines
Propel Trampolines cloud quest Instruction booklet

Flight Model
Flight Model YAK-55 50CC Assembly manual

Eduard
Eduard Schwimmwagen manual

roco
roco 73913 operating manual