1PL / EN MIR1008
UWAGA! Przeczytaj uważnie instrukcje obsługi przed montażem. Prosimy o ścisłe przestrzeganie
instrukcji. Prosimy dokładnie sprawdzić, czy wszystkie części zawartości opakowania są nienaruszone.
Aby uniknąć obrażeń rękawice robocze są zalecane podczas montażu.
WARNING! Read the instructions manual carefully before assembly. Ensure you are assembling the house
according to this instruction manual. Ensure all parts are included in the contents of this packaging. To
avoid injury, protective gloves are recommended during assembly.
Importer:
F.H. Mirpol Emil Dudzik
ul. Ciasna 3, 35-232 Rzeszów, Polska
www.mirpol.rzeszow.pl
ZANIM ROZPOCZNIESZ MONTAŻ / BEFORE YOU START ASSEMBLING
Instrukcja obsługi:
Przed rozpoczęciem montażu, sprawdź lokalne przepisy
budowlane dotyczące fundamentów, lokalizacji i innych wymagań.
Przestudiuj i zrozum ten podręcznik montażu. Ważne informacje
i pomocne wskazówki sprawią, ze twoja praca stanie sie łatwiejsza
i przyjemniejsza.
Instrukcje składania:
Wskazówki zawarte w tej instrukcji zawierają wszystkie
odpowiednie informacje dla twojego modelu.
Przeczytaj całą instrukcję przed rozpoczęciem, a podczas montażu
dokładnie wykonaj sekwencje kroków, aby uzyskać właściwy
wyniki.
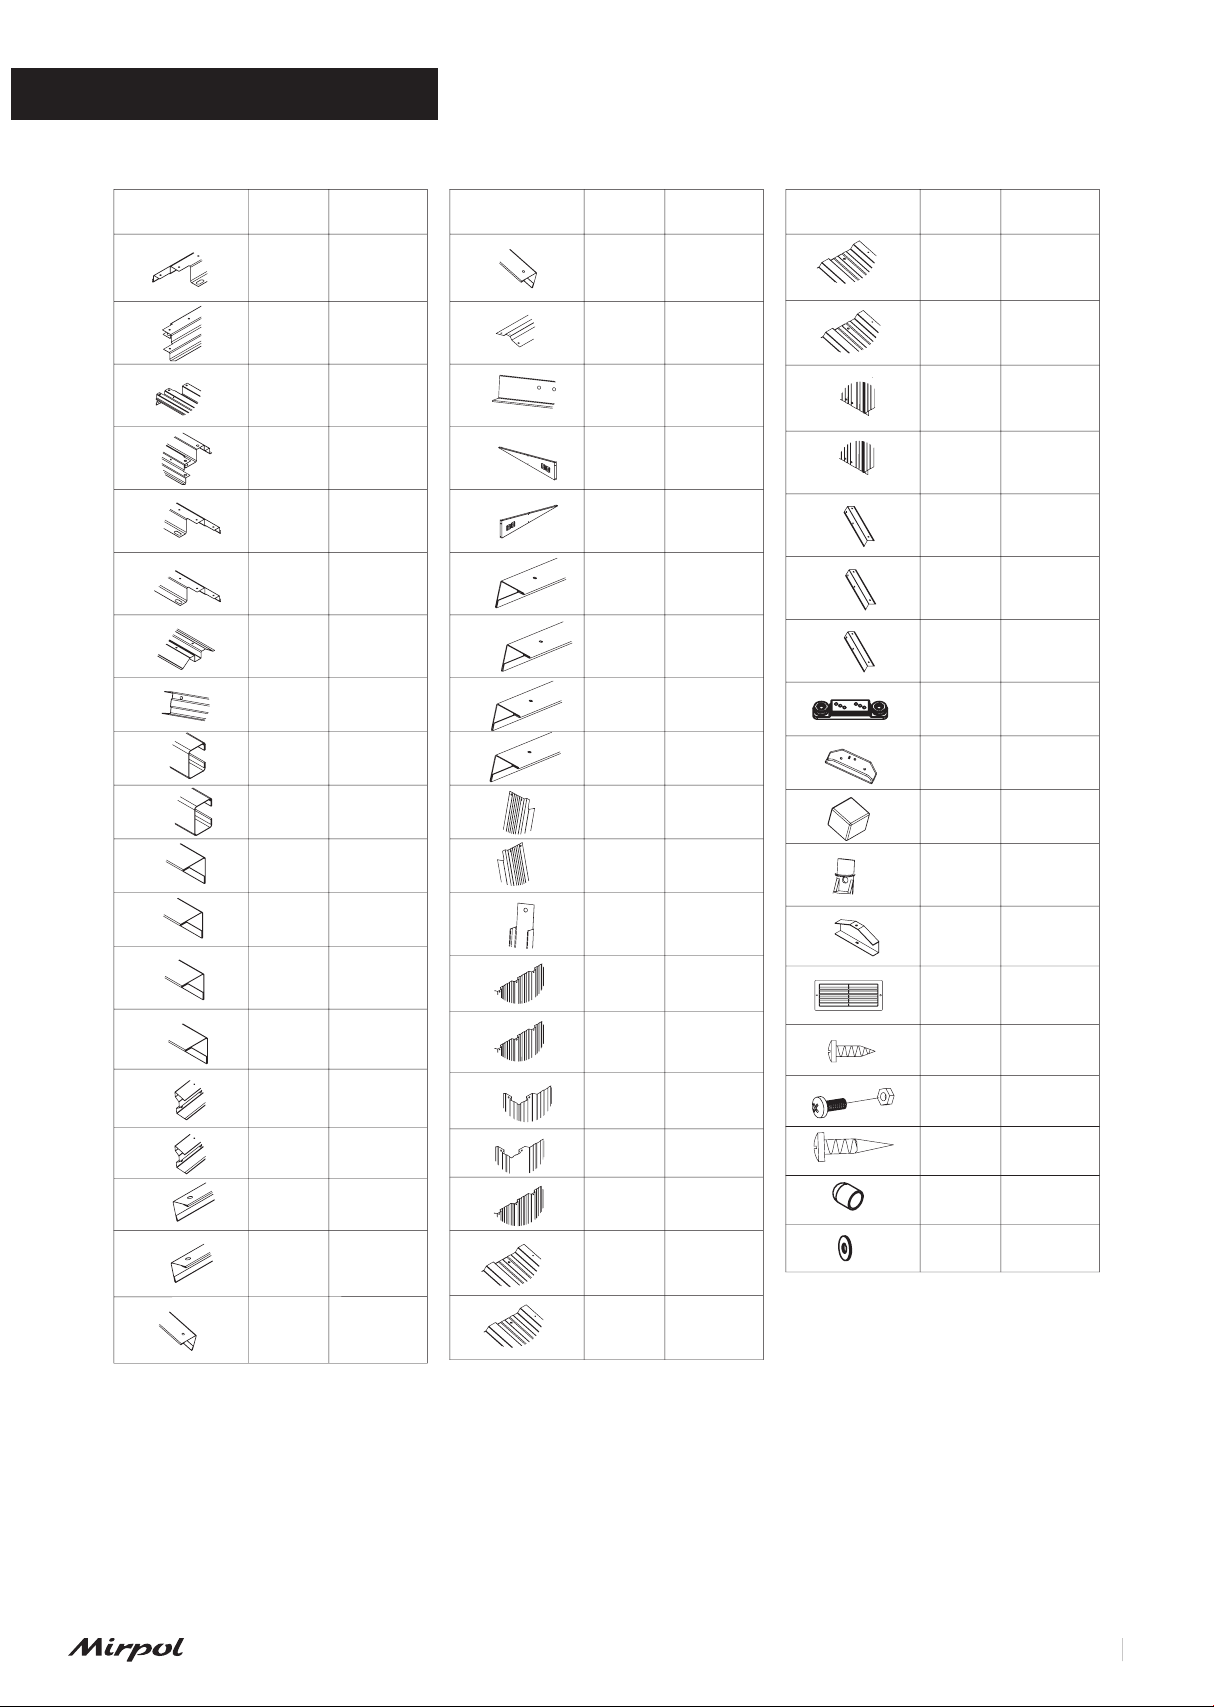
Lista części:
Sprawdź, czy masz wszystkie niezbędne części do budowy.
Rozdziel zawartość kartonu po numerach części podczas
przeglądania listy części.
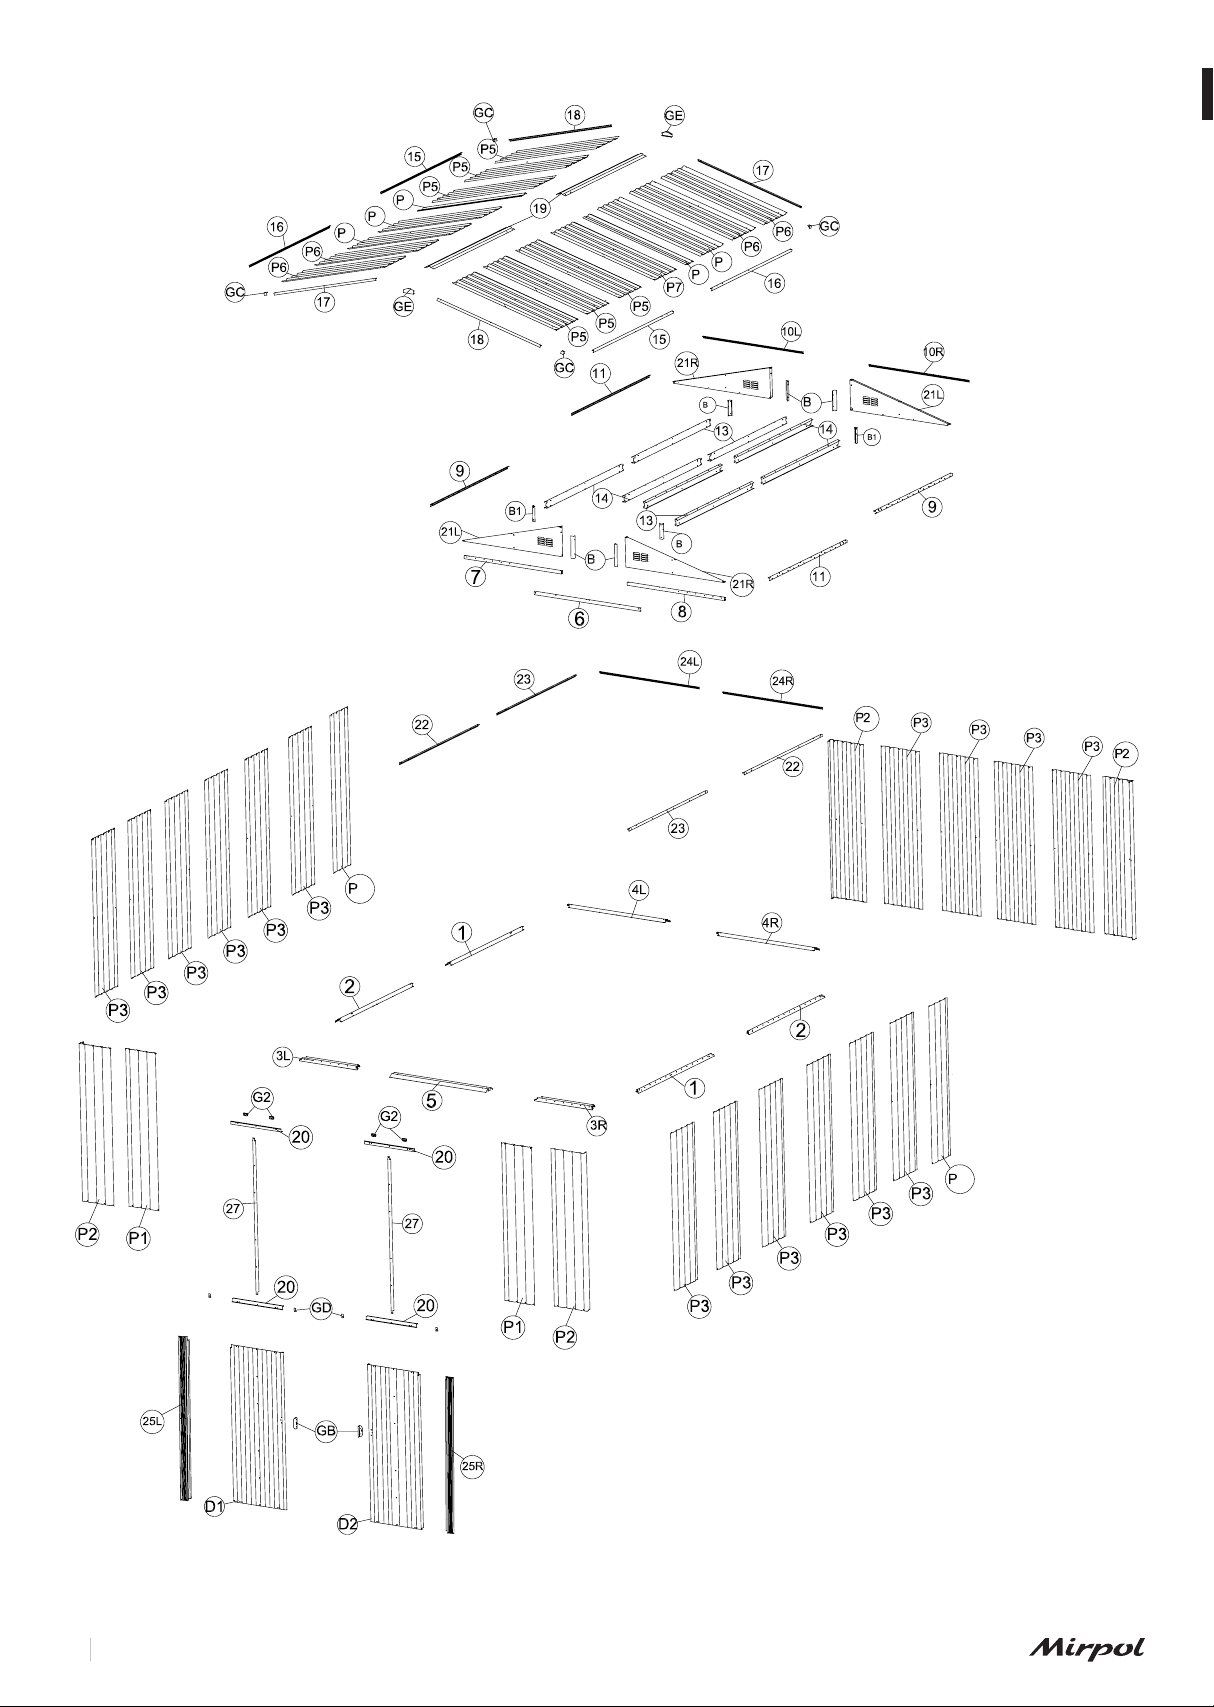
Pierwsze kilka kroków pokazuje, jak połączyć powiązane części,
aby utworzyć większe podzespoły, które będą później używane.
Zapoznaj sie ze sprzętem i łącznikami, aby ułatwić korzystanie z
nich podczas montażu. Są one pakowane w karton. Zwróć uwagę,
ze dodatkowe elementy zostały dostarczone dla Twojej wygody.
User manual:
Before starting the installation, check local building codes
regarding foundations, location and other requirements. Study
and understand this assembly manual. Important information and
helpful tips will make your work easier and more enjoyable.
Assembly instructions:
The instructions in this manual contain all the relevant information
for your model.
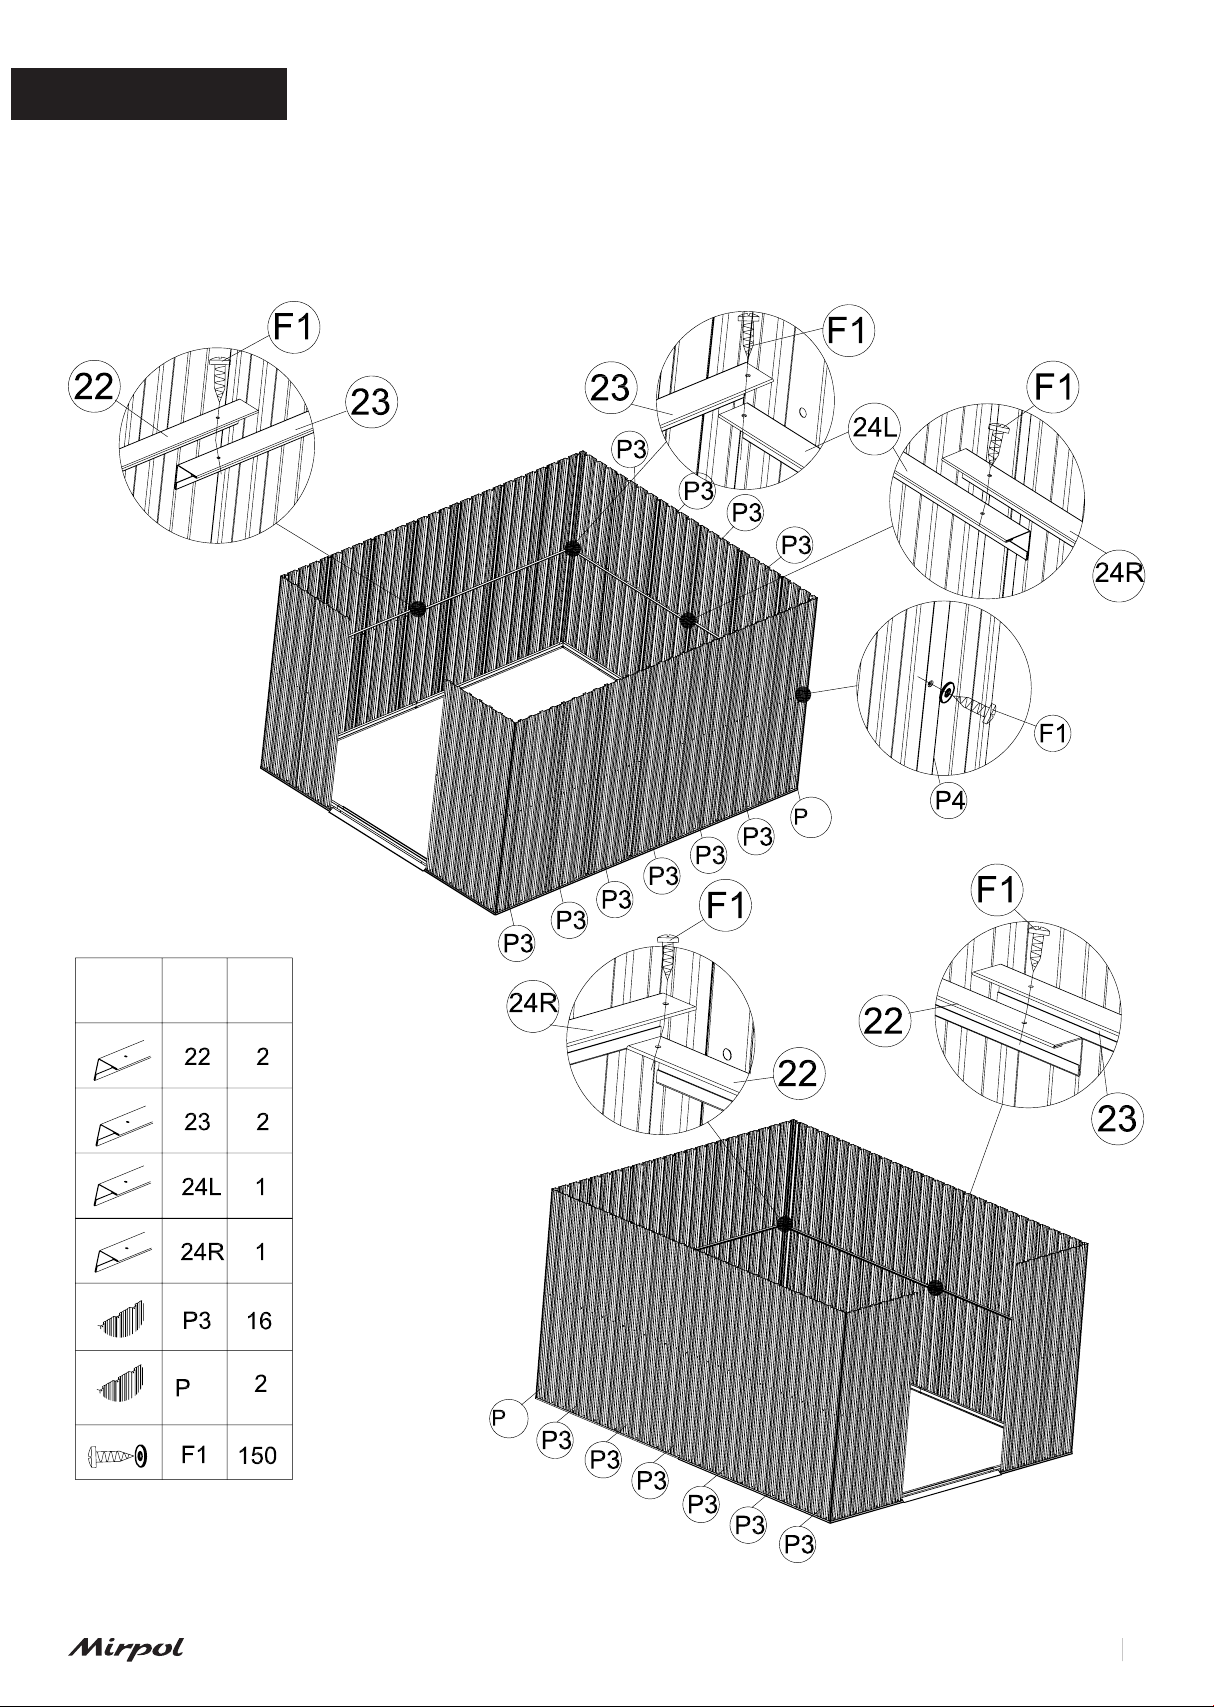
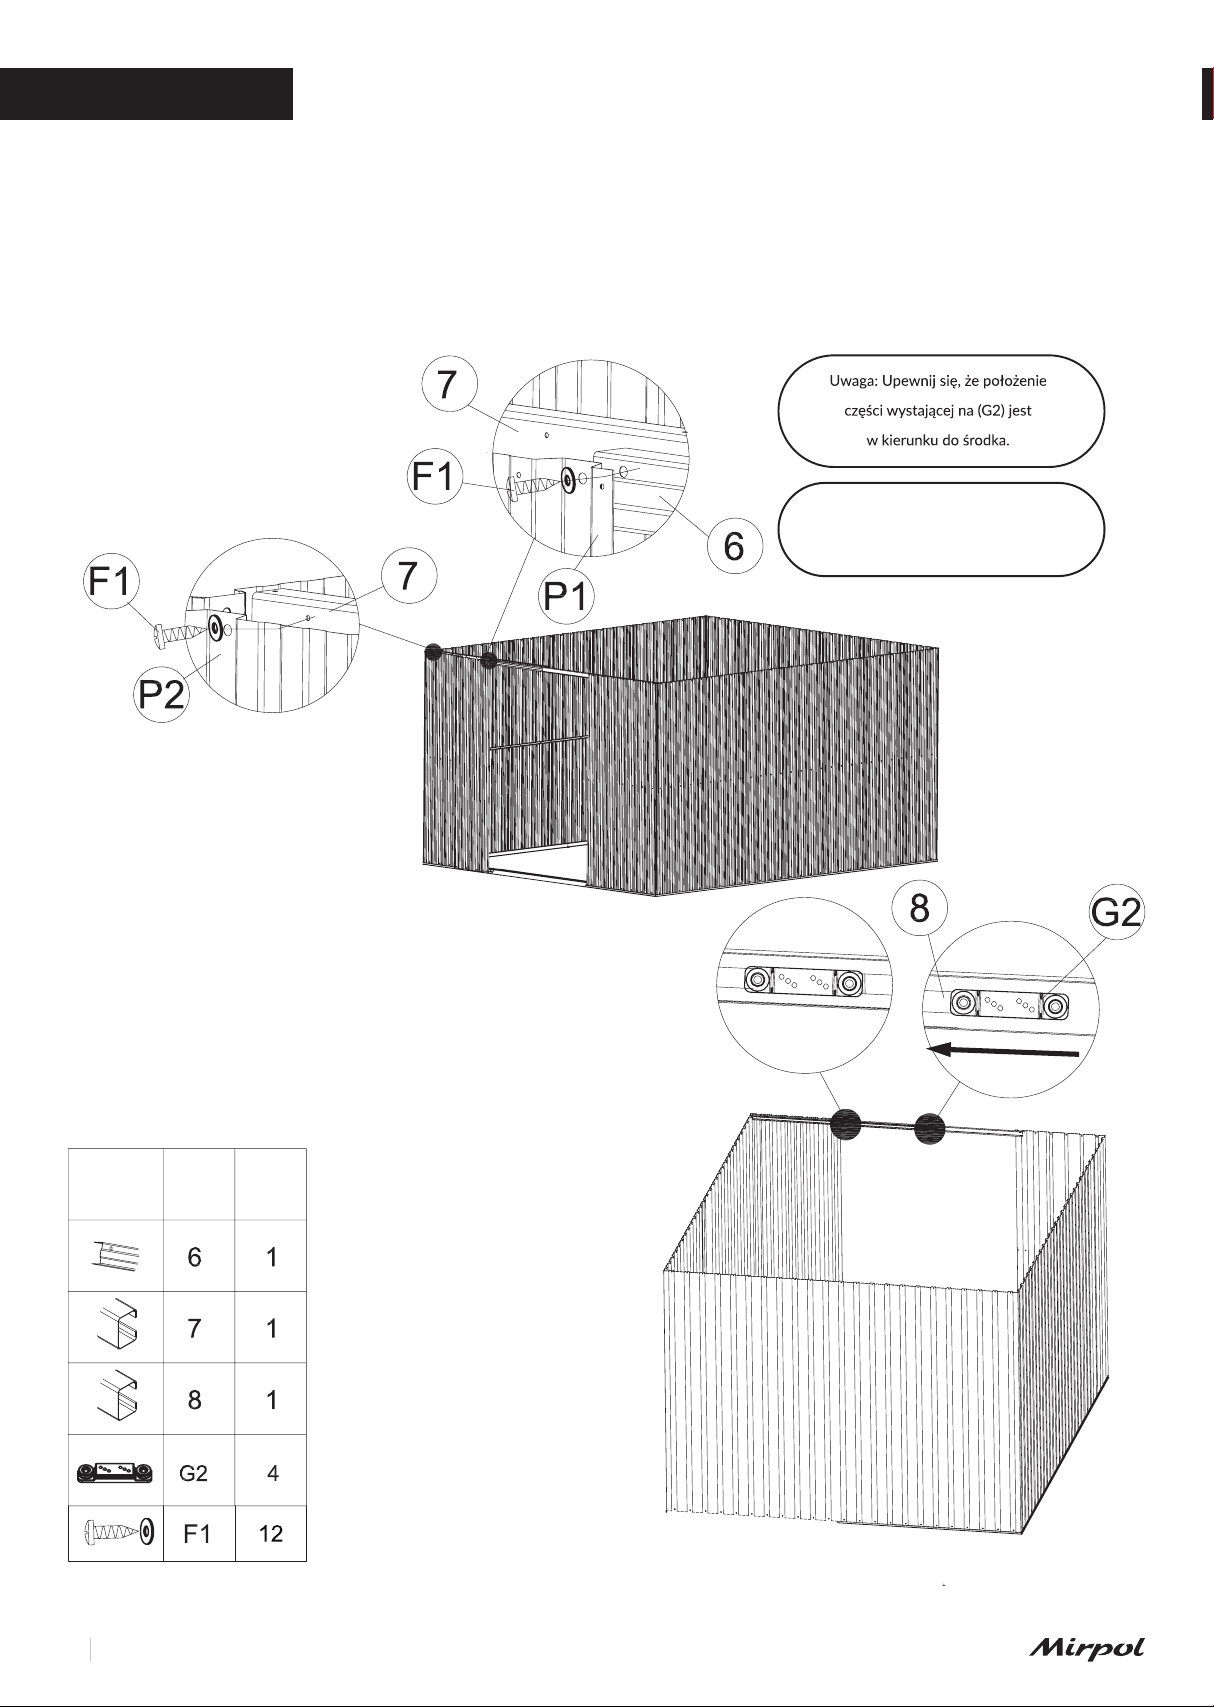
Read the entire manual before you start, and follow the sequence
of steps carefully during assembly to get the right results.
List of parts:
Make sure you have all the necessary parts for assembly.
Separate the contents of the carton by part number while viewing
the parts list.
The rst few steps show you how to connect related parts to
create larger subassemblies for use later.
Familiarize yourself with the equipment and ttings for easier use
during assembly. They are packed in a cardboard box. Please note
that additional items are provided for your
convenience.
PLANUJ NAPRZÓD / PLAN AHEAD
Obserwuj pogodę:
Upewnij sie, ze w dzień, w którym chcesz zainstalować swój domek,
jest sucho.
Nie próbuj montować domku w wietrzny dzień.
Praca zespołowa:
Gdy tylko jest to możliwe, dwie lub więcej osób powinno
współpracować, aby złożyć domek.
Jedna osoba może pozycjonować części lub panele, podczas gdy
druga jest w stanie poradzić sobie
z zapięciami i narzędziami.
Narzędzia i materiały:
Tylko podstawowe narzędzia i materiały są potrzebne do budowy
twojego domku.
Wybierz metodę kotwiczenia i rodzaj podłoża, kt6rego chcesz użyć
w celu utworzenia pełnej listy potrzebnych materiałów.
Observe the weather:
Make sure it is dry on the day you install your shed.
Do not try to assemble the shed on a windy day.
Team work:
Whenever possible, two or more people should work together to
assemble the shed.
One person can position the parts or panels while the other is able
to handle it with clasps and tools.
Tools and equipment:
Only basic tools and materials are needed to build your shed.
Select the anchoring method and the type of ground you want to
use to create the complete list materials needed.