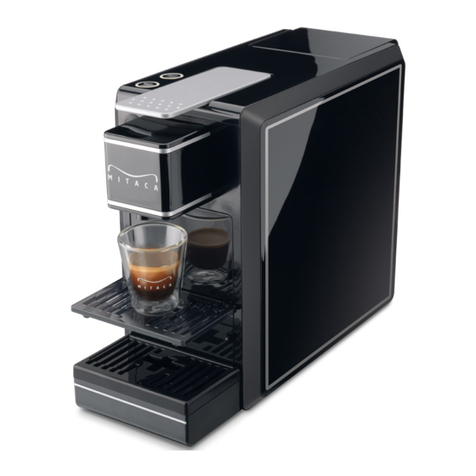
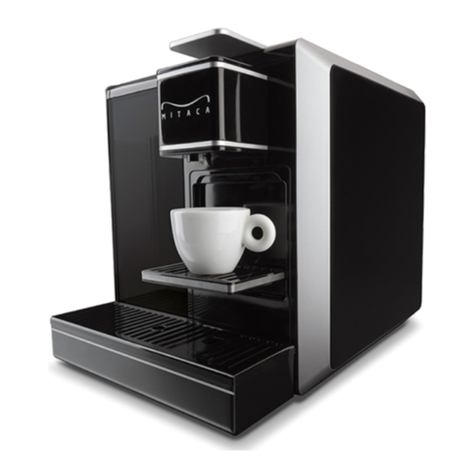
MITACA pod 1 plus User manual

PLUS
Made in Italy
INSTRUCTIONS FOR USE
MODE D’EMPLOI


INSTRUCTIONS FOR USE PAG. 2
MODE D’EMPLOI PAG. 16

2
General information
Caution. The manufacturer accepts no liability for damage caused by:
• Use which is improper or which does not conform to that which is intended;
• Repairs that are not carried out at an authorized service centre;
• Tampering with the power cable;
• Tampering with any component of the appliance;
• Use of non original parts and accessories.In such cases
the warranty shall be null and void.
Keep these operating instructions in a safe place and attach them to the machine just in case another
person should need to use them.
For more information, or for issues either not covered or not sufficiently covered in these instructions,
please contact a technician.
GENERAL DATA
Supply voltage 120 V / 60 Hz
Pump 48 W / 120 V CL . NSF
Safety thermal fuse
Boiler power 1000 W
Power cord length 1 m
Water tank capacity 1,5 l
Made in Italy
This machine conforms to European Directives
SAFETY DEVICES
Thermal fuse
Licensed products

3
WHERE TO PLACE THE COFFEE MACHINE
Place the coffee machine in a safe place, where nobody can tilt it or be harmed by it.
Do not use the coffee machine in the open air. Never leave the machine in areas where temperatures
are lower or equivalent to 5°C if it is filled with water.
Do not place the machine on hot surfaces or close to open flames, as this will damage the appliance.
CLEANING THE COFFEE MACHINE
Before attempting to clean the machine, turn all the switches off and unplug the appliance.Also,
allow the machine to cool down. Never plunge the coffee machine in water!
It is forbidden to dry any part of the machine in conventional and/or microwave ovens. It is strictly
forbidden to service the inner parts of the machine.
MACHINE CARE
After each use, turn off all the switches on the machine, unplug and empty the tank.
Store the machine in a dry place, out of the reach of children.
Protect the machine from dust and dirt.
• Construction and execution due to technological progress are subject to change without notice.
• This equipment conforms to European Directive.

4
IMPORTANT SAFEGUARDS
Basic safety precautions should always be followed when using electrical appliances,
including the following:
1.
2.
3.
4.
5.
6.
7.
8.
9.
10.
11.
12.
13.
Read all instructions before use.
Do not touch hot surfaces. Use handles or knobs.
To protect against electrical shock, do not immerse cord, plug or espresso
maker in water or any other liquid.
Close supervision is necessary when this appliance is used by or near
children. This appliance is not intented to be used by children.
Unplug from outlet when not in use and before cleaning. Allow to completely
cool before putting on or taking off any parts and before cleaning.
Do not operate this appliance with a damaged cord, plug or after the
appliance malfunctions or has been damaged in any manner. Return
appliance to the nearest authorized service facility for examination, repair
or adjustment.
The use of accessory attachments not recommended by the appliance
manufacturer may result in fire, electric shock or injury to persons.
Do not use outdoors.
Do not let cord hang over edge of table or counter, or touch hot surfaces.
Do not place on or near a hot gas or electrical burner or in a heated oven.
To disconnect, press the Power button to "OFF", then remove plug from wall
outlet.
Do not use appliance for anything other than its intended use.
Use extreme caution when using hot steam.
SAVE THESE INSTRUCTIONS
Product for Household Use Only.

5
SHORT CORD INSTRUCTIONS
1.
2.
3.
A short power-supply cord is provided to reduce risk resulting from becoming
entangled in or tripping over a longer cord.
Longer extension cords are available and may be used if care is exercised.
If a longer extension cord is used:
a. The marked electrical rating of the extension cord should be at least as
great as the electrical rating of the appliance.
This appliance is for household use only.
b. The longer cord should be arranged so that it will not drape over counter
or tabletop where it can be pulled by children or tripped over unintentionally.
c. If the appliance is of the grounded type, the extension cord should be
a groundig-type-3-wire cord

Legal notice
These instructions contain essential information for proper operation and accurate maintenance of
the appliance as well as information on machine functions.
Understanding such information and adhering to the instructions given in this booklet is critical for
hazardless, safe operation and maintenance of the appliance.
Please contact your local retailer or the manufacturer if you require further information or if you
encounter problems that you feel have not been adequately covered or explained clearly in these
instructions for use.
Also, please note that the contents of this instructions manual are not part of any earlier or existing
arrangement, legal agreement or contract and that no future arrangement, agreement or contract
will alter the substance of the contents in this manual.
All of the manufacturer’s obligations are contained in the appliance sale agreement, which also
contains the full and exclusive terms and conditions of guarantee.
All the terms of guarantee contained in the sale agreement are neither restricted nor extended by
way of these explanations.
• These instructions for use contain information protected by copyright.
• These instructions for use may not be photocopied or translated into another language
without the prior written permission of the Manufacturer.
Disposal of the appliance
• Appliances that are no longer in use should be made inoperative.
• Disconnect the plug from the electrical outlet and cut the electrical cable.
• Appliances no longer in use should be sent to an appropriate waste collection centre.
• Dispose of the product and its components in accordance with local regulations regarding the
disposal of electrical appliances.
6
Caution
The manufacturer accepts no liability for damage caused by:
•Use which is improper or which does not conform to that which is intended;
•Repairs that are not carried out at an authorized service centre;
•Tampering with the power cable;
•Tampering with any component of the appliance;
•Use of non original parts and accessories.
In such cases the warranty shall be null and void.
Unpacking:
Check the machine for damage after you have taken it out of its packing. If in doubt about
its integrity, do not use the appliance and contact the retailer. The packaging materials should never
be left within the reach of children since these materials can pose a hazard. They should be disposed
of or stored in accordance with local environment protection regulations.
Preparing the coffee machine ready for use

7
Machine components
12. Steam
nozzle
Model with cappuccino maker
Dispenser buttons:
A. No water
B. Steam control knob
C. Water delivery
D. Delivery of bigger quantity
E. Delivery of small quantity
1. Pods
loading lever
5. Drip grid
6. Drip tray and pods
receptacle(removable)
8. Water tank
(removable)
9. Main switch
10. Plug
7. Power lead
A. No water
D. Delivery of bigger
quantity
E. Delivery of small
quantity
Dispenser buttons:
4. Coffee
dispenser
nozzle
15. Extraction
door pods

8
Fill the tank
•Remove the tank (8) by pulling it outward
and lifting. (Fig.1)
• Fill the tank with water (max. 1,5
litres). (Fig.2)
• Reinstall the tank by slightly tilting and
resting it on the water valve. (Fig.3)
Operating the coffee machine
8
8
8
Fig. 2
NOTE:
When the water run-out light (A) illuminates, the tank is empty. Remove the tank (8) and fill it with
water.
Fig. 3
Fig. 1

9
Starting/warming up the coffee machine
• Use pods suitable for this model only.
• Insert the plug of the power cord into the electrical socket.
• Switch on the appliance with the main switch (9).(Fig.4)
• When the led (2) turns on, the coffee machine is ready for
use (Fig.4).
• The control buttons will start flashing. Once the right
temperature is reached, they will illuminate steadily, indicating
that the machine is ready for use (Fig.4).
The machine should be rinsed both at its very first use and
when it has been inoperative for a long spell of time. By
performing this quick procedure, you will ensure that all inner
circuits are rinsed.
•Ensure that there are no pods inside the unit; power on the
Rinsing the machine/inner circuits
• Remove the grid (5). (Fig. 5)
• Press button (D) (Fig. 7) and wait until delivery
is complete. Now the machine is rinsed.
NOTE
The grid height (5) can be adjusted depending on
the cup size. You can choose two different positions.
To adjust the grid to its maximum height, lift the support
(14), place it against the pods collection box, and
drive it into its seat (Fig. 5).
• To prepare espresso lungo, place the grid (5) at
its lower position (Fig. 6)
• To properly prepare an espresso, place the grid
(5) at its highest position (Fig. 7)
Fig.7
5
D
Dispenser buttons
9
Fig. 4
Fig.5
6
5
14
Fig.6

10
Programming the dispenser buttons
Large cup: press and hold the button (D). The machine
will dispense water. When the desired water quantity has
been reached, release the button (D). The machine will
stop delivering water and will store the quantity of water to
be dispensed from now on. (Fig.8)
Small cup: Use the same procedure as for large cups. Press
and hold the corresponding button (E).
The machine will start dispensing water. When the desired
level of water is reached, release button (E). The machine
will stop delivering water and will store the quantity of water
to be dispensed from now on. (Fig.8)
• Use pods suitable for this model only.
• Place a cup under the dispenser
• Lift the control lever backwards (up to the stop point) (1)
and make sure that the pods ejection hatch (15) is open.
(Fig.9)
ATTENTION: if the hatch (15) is closed,
open it manually (Fig. 10)
• Introduce the pad properly into its seat as shown on the figure
(Fig. 11)
• Fully lower the lever (1) and press either the large cup
(D) or small cup (E) dispenser button depending on personal
taste. (Fig. 12)
• To fully remove the pod, slowly lift the lever (1).
If the pod is not ejected, open the hatch (15) and remove it.
Preparation of coffee
1
Fig. 12 Fig. 11
Dispenser buttons:
9
Fig. 9
15
1
Fig. 10
15
UP
D
E
Fig. 8
D
E

11
• Press the steam control knob (B) (Fig. 13).
During the heating process, the steam control knob flashes. After a few seconds the steam will
come out from the dispenser nozzle. To stop the delivery, press the button again.
• Fill a cup half way with cold milk and dip the steam nozzle into the milk giving the milk a
creamy frothy appearance till it fills the cup (Fig. 14)
Procedure for making cappuccino
• Place the cup with frothy milk on the machine grid and make coffee, using the standard coffee-
making procedure.
WARNING:
- After a few seconds the steam will come out from the dispenser nozzle
and will stop automatically after 40 seconds.
N.B. Wait until the steam nozzle is cold before removing the outer part,
then wash it in lukewarm water to clean out any milk residues.
Model with cappuccino maker
USEFUL TIP:
• Use thick cups when preparing Espresso and try to heat them beforehand. This will keep your
coffee warm for longer.
• To dispense warm water, place a cup under the nozzle (Fig. 14) and press button (C)
After each steam delivery, the machine will automatically restore its proper coffee-making temperature
in a few minutes. A quicker method for restoring proper coffee-making temperature is to dispense
hot water through the steam nozzle or to run a rinse cycle making sure that there are no pod
inside the machine."
WARNING:
Before inserting the pod, lift slowly and completely the
control lever (1) placed on the upper side of the machine
and make sure that the pods hatch (15) is open. To
ensure the hygiene and the high quality of the product,
it is advisable to remove the pod right after the delivery.
115
Fig. 14Fig. 13
B
C

12
Once you have prepared coffee you can eject the used pod as follows:
1.Lift the control lever backwards (the pod will drop into the receptacle provided)
NOTE
Used pods may get stuck inside the machine if they are not ejected straight away. If that happens,
lift and lower the control lever to free the pod. -As much as 15 used pods can fit into the pod
receptacle. Empty the receptacle on a regular basis.
2. If you are going to make another cup of coffee/tea, introduce a new pod and repeat the coffee
making procedure. If you are finished, lower and lock the lever.
SAFETY AND ENERGY-SAVING TIPS:
- If you are going to be away from home for some time, remember to power off the machine at
the main switch (on the back). Do the same at night before going to bed. The coffee machine heats
up very rapidly and is normally ready for use in 1 minute after power-on. -If you plan not to use
the coffee machine for a long period of time, empty the tank and unplug the appliance.
Once coffee is prepared
Emptying the pods receptacle
• When the buttons (D), (E) are flashing,
means that 15 pods have been used and the pod
drawer (6) Is full. If that happens, the dispensing function
will be stopped.
Empty the cpods receptacle (6) and rinse. (Fig. 15).
Clean off any water and coffee residues from the drip
tray and the grid. Once clean, reintroduce the drawer
with the pods receptacle (Fig. 16).
Reset the buttons keeping the dispenser button (A)
pressed for 2 seconds or turn the machine off and on
again pressing the main switch (9).
Storing the coffee machine away
- Power off and unplug the machine if it is not going to
be used for a prolonged period of time.
- Store the coffee machine in a dry place, away from
dust and out of the reach of children.
- We would advise you to store the machine in its
original packaging.
- Temperatures in the storage area should not be lower
than 5°C, to avoid damage to the inner parts of the
machine from water freezing inside it.
Cleaning
The machine has to be cleaned as indicated at
page 22
6
6
9
Fig. 15
Fig. 16
ENERGY-SAVING FUNCTION
After 1 hour, when the buttons (D) and (E) are flashing every 2 seconds, the energy-saving
function is on. Pressing one of the two buttons the machine switches on heating back.

13
Appliances no longer in use should be returned free of charge to a point of sales to ensure that they
are disposed of properly. Appliances with a hazardous fault condition should be disposed of
immediately, making sure that they can no longer be used. Do not dispose of electrical appliances
as household waste (environment protection).
Disposal
In the event of malfunction, defects, or suspected failures after a fall, pull the plug out of the socket
and contact an authorised service centre. Never operate a defective machine.
Only authorised service centres can service or repair the appliance. The manufacturer disclaims
responsibility for any damage and/or injury that may result in the event of service that is carried
out in breach of the applicable safety regulations or is executed by unauthorised personnel.
Repair/maintenance
OPTIONAL WATER SOFTENING FILTER
• Fit the adapter into the tank as far as it will go (Fig.17)
• Fill the filter with water (Fig.18)
• Hook the filter into the adapter (Fig.19)
N.B.: replace the filter every 6 months
Fig. 19Fig. 18
Fig. 17

14
DE-SCALING
Scale will inevitably build up as a consequence of operating the coffee machine. De-scaling is
normally required every 5-6 months. If water is very hard, de-scale the machine at shorter intervals.
To de-scale your machine, you can use any commercially available non-toxic, non-harmful de-
scaling product.
1. Switch off the machine
2. Remove the tank and empty it
3. Fill the tank with the de-scaling solution following the instruction on the product package
4. Remove the grid
5. Switch on the machine
6. Dispense 100 ml of water without waiting for the machine to have warmed up
7. Switch off the machine
8. Leave the de-scaling solution in for about 10-15 minutes, with the machine off.
9. Repeat the procedure from point 5 to 7 till the de-scaling solution till the tank is empty
10. Remove the water tank, rinse it accurately and fill it again with fresh water
11. Switch on the machine
12. Dispense water without waiting for the machine to have warmed up
13. When the tank is empty, switch off the machine
14. Fill the water tank again and repeat the procedure from point 12
15. When the second rinsing cycle is complete, fill up the tank again. The machine will now be
ready for use.
N.B.: Using a water scale filter on a regular basis will dramatically reduce scale build-up.

15
WARRANTY LIMITATIONS
Warranty does not cover repairs caused by:
- Malfunctions caused by water scale and by failure to periodically de-scale the unit
- Malfunctions caused by operating the machine at voltages other than that specified on the
nameplate
- Malfunctions caused by improper use or non-adherence to the instructions for use
- Malfunctions caused by alterations made inside the machine
Coffee tastes sour -the machine was not rinsed
properly after descaling
- re-rinse the machine
Problem
Coffee is no longer dispensed
Coffee/tea is cold
A few drops come out of the
dispenser, especially when the
machine is warming up
The pump is too noisy
It is not possible to dispense
coffee or boiling water
Causes Corrective action
- the tank is empty
- the pump is defective
- fill the tank
- contact the dealer
- the water tank is not fully seated
- pompa difettosa
- seat the tank properly
- contact the dealer
- the heating system is defective - contact the dealer
- the tank is empty
- the water tank is not seated
properly
- fill the tank
- seat the tank properly
- this is not a fault - it is normal for a few drops to
come out, this is not a defect
Problem
Pressing the
dispenser buttons
(D-E), no drink is
delivered.
Solution
1) Fill the tank with water
2) Check if the water tank is well located.
3) Lift the lever to permit air outlet take the pod
off and wait for a while to let the pump be cool
, close the lever again. and press the dispenser
buttons (D-E).
The lever (1) will not
slide properly. Press one dispenser button (D-E) and while water is delivered, slowly
open the lever (1)
4) Empty the pods receptacle and reset the coffee
function: turn the machine off and on again
switching the main switch (9) off and on.
If you cannot solve the problem, you are
kindly requested to contact your service
center.

Généralités
Attention. Notre société n’assume aucune responsabilité quant à tout dommage éventuel en cas:
• d’emploi erroné et non conforme aux objectifs prévus;
• de réparations non effectuées auprès des services après-vente agréés;
• demanipulation du cordon d’alimentation;
• de manipulation de n’importe quel composant de l’appareil;
• d’emploi de pièces de rechange et d’accessoires non d’origine.
Dans ces cas, la garantie est invalidée.
Conserver ces instructions d’utilisation dans un endroit sûr et les annexer à l’appareil au cas où
quelqu’un d’autre devrait s’en servir.
Pour toute information ultérieure ou en cas de problèmes non traités ou traités d’une manière
insuffisante dans les présentes instructions, faites appel à des professionnels compétents.
CARACTÉRISTIQUES GÉNÉRALES
Alimentation tension 120 V / 60 Hz
Pompe 48 W / 120 V CL. F NSF
Fusible thermique de sécurité
Puissance chaudière 1000 W
Longueur cordon d’alimentation 1 m
Capacité réservoir 1,5 l
Fabriqué en Italy
Machine conforme à la Directive européenne.
DISPOSITIFS DE SÉCURITÉ
Fusible thermique de sécurité
16
Produits sous licence

17
MISE EN PLACE
Placer l’appareil dans un endroit en sécurité, où personne ne risque de le renverser ou de se blesser.
Ne jamais employer l’appareil en plein air; ne jamais le laisser dans des environnements avec des
températures inférieures ou égales à 5°C, lorsqu’il y a de l’eau à son intérieur.
Ne pas poser l’appareil sur des surfaces chaudes ou à proximité des flammes ouvertes pour éviter
de l’endommager.
NETTOYAGE
Avant de nettoyer l’appareil, il est indispensable de débrancher l’interrupteur général et de retirer
ensuite la fiche de la prise de courant. En outre, attendre que l’appareil se soit refroidi.
Ne jamais plonger l’appareil dans l’eau !
Il est interdit de faire sécher toute partie de l’appareil dans des fours conventionnels et/ou des
fours à micro-ondes.
Il est rigoureusement interdit d’essayer d’intervenir à l’intérieur de l’appareil.
RANGEMENT DE L’APPAREIL
Après toute utilisation, débrancher tous les interrupteurs de l’appareil, retirer la fiche de la prise de
courant.
Ranger l’appareil dans un endroit sec et non accessible aux enfants.
Le protéger contre la poussière et contre la crasse.
• Sous réserve de modifications de construction et d’exécution à la suite des progrès technologiques.
• Machine conforme à la Directive européenne.

18
IMPORTANTES RECOMMANDATIONS DE SÉCURITÉ
1.
2.
3.
4.
Lire les instructions avant l’utilisation.
Ne pas toucher les surfaces chaudes. Utiliser les manches ou les boutons.
Pour éviter les secousses électriques, ne pas plonger le câble d’alimentation,
la fiche ou la machine à café dans de l’eau ou d’autres liquides.
Garder la machine hors de la portée des enfants. Ne laisser la machine aux
enfants que sous étroite surveillance. La machine n'est pas destinée à être
utilisée par des d’enfants.
Débrancher la fiche de la prise quand la machine n'est pas utilisée ou avant
d'en effectuer le nettoyage. Laisser refroidir complètement la machine avant
de monter ou démonter des pièces ou avant de la nettoyer.
Ne pas utiliser la machine si le câble d’alimentation et/ou la fiche sont
endommagés ou en cas de mauvais fonctionnement de la machine ou si celle-
ci est endommagée. S’adresser au centre d’assistance le plus proche afin de
vérifier, réparer ou régler la machine.
L’utilisation d’accessoires non recommandés par le producteur de la machine
peut entrainer des incendies, des secousses électriques ou des accidents.
Ne pas utiliser la machine en plein air.
Ne pas laisser le câble d’alimentation pendre de la table ou du comptoir.
Éviter que le câble d’alimentation ne touche des surfaces chaudes.
Ne pas installer la machine sur ou près de réchauds à gaz ou électriques ou
d'un four allumé.
Pour éteindre la machine, appuyer sur la touche «OFF» et débrancher la
fiche de la prise.
Ne pas utiliser la machine dans des buts différents de ceux qui sont prévus.
Utiliser la fonction vapeur en faisant très attention.
CONSERVER LES INSTRUCTIONS PRÉSENTES
Produit exclusivement destiné à l’utilisation domestique
Lors de l’utilisation d’appareils électriques, il est important de respecter quelques
précautions de sécurité fondamentales telles que:
5.
6.
7.
8.
9.
10.
11.
12.
13.
Table of contents
Languages:
Other MITACA Coffee Maker manuals