Technik
Qualität
Kompetenz
www.mizu-shop.de
Montageanleitung
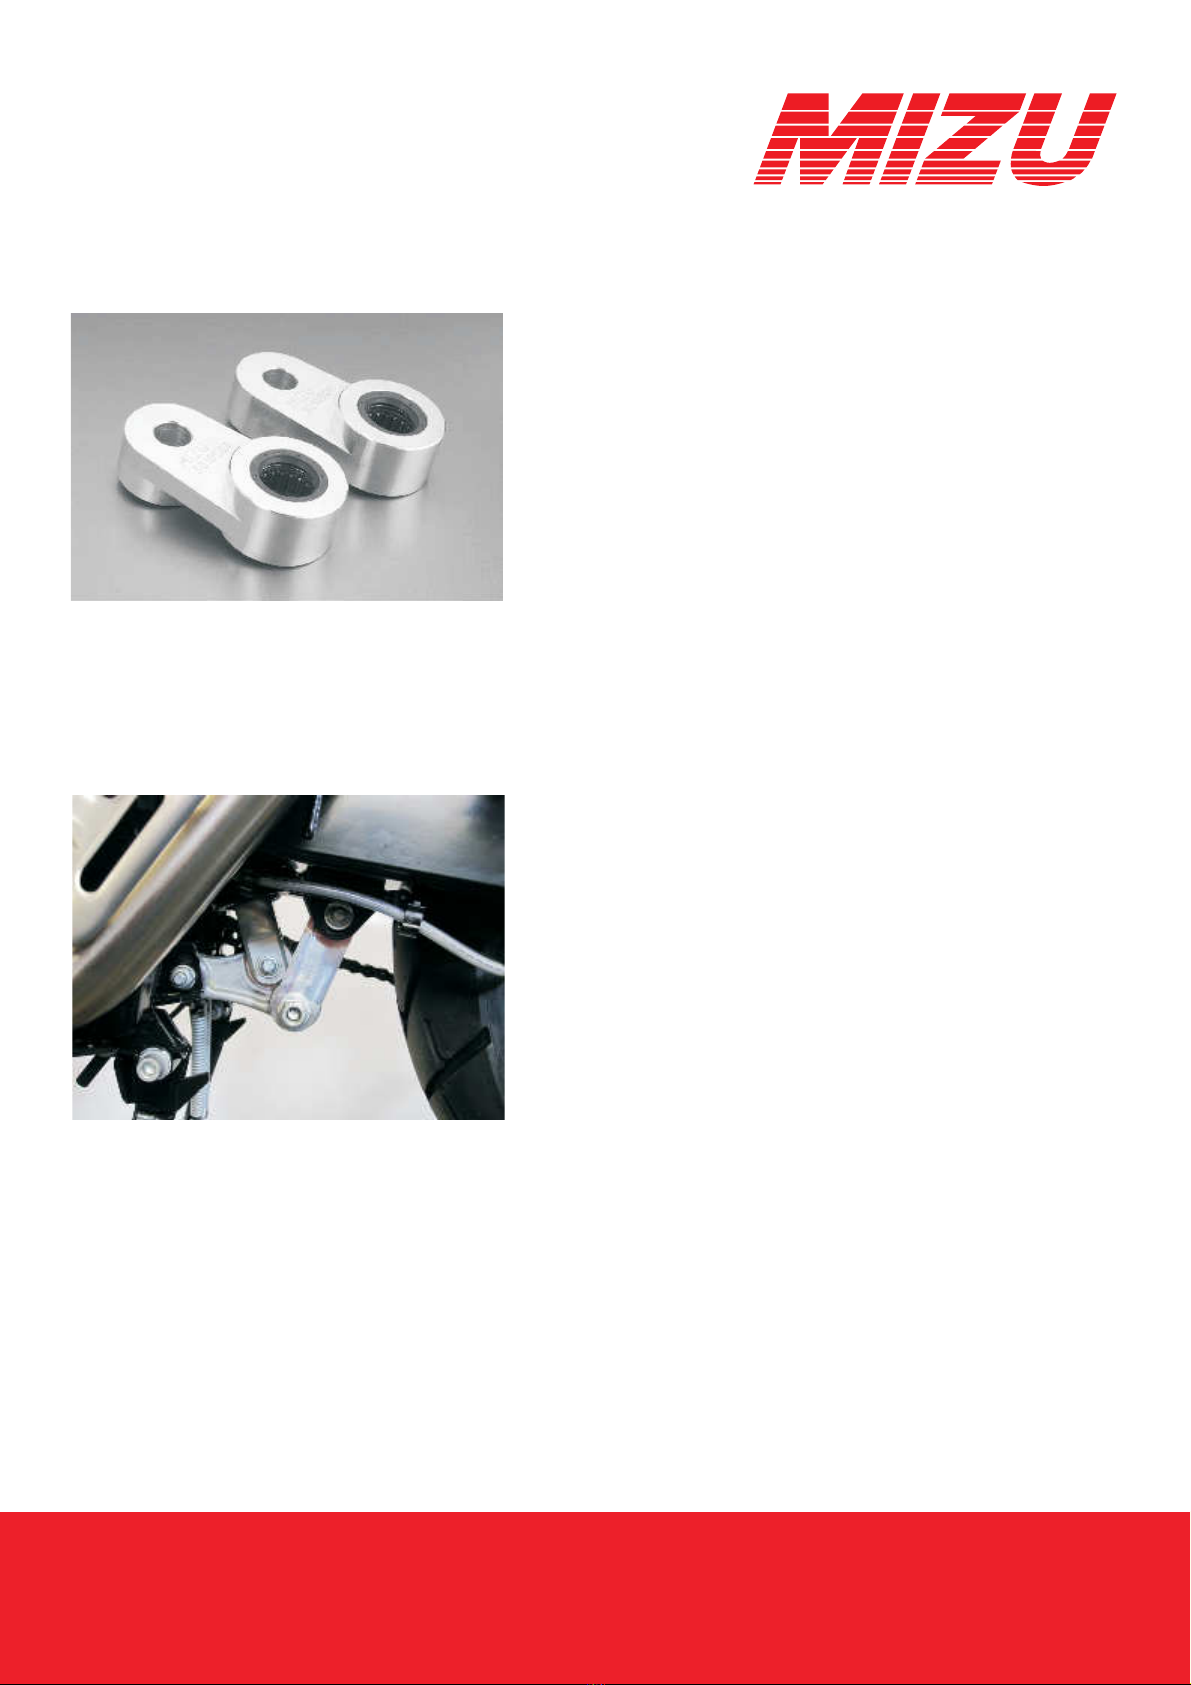
System 11
Demontage:
Bei einigen Fahrzeugen kann es notwendig sein vor der Montage
Verkleidungen oder Auspuffteile zu entfernen.
Sorgen Sie für einen sicheren Stand Ihres Motorrades.
Unterstützen Sie das Motorrad unter dem Motor mit einem verstellbaren
Montageheber bis das Hinterrad gerade frei dreht.
Lösen Sie die Schrauben an den Umlenkhebeln.
Verstellen Sie den Montageheber, durch hoch-oder runter drehen, soweit
dass die Schrauben entlastet sind und entfernen Sie diese.
Entfernen Sie den Montageheber und prüfen alle Bauteile auf festen Sitz und Freigängigkeit. Prüfen Sie die Kettenspannung.
Modellbedingt kann es notwendig sein den Seitenständer an zupassen. Das Maß der Heckhöher-Tieferlegung wird senkrecht über der Hinterachse
gemessen und unterliegt Schwankungen je nach Verschleißzustand und Einstellung des Federbeines.
Montage:
Schmieren Sie die Nadellager der MIZU-Umlenkhebel.
Setzen Sie die MIZU-Umlenkhebel mit der Beschriftung nach außen und der
original Schraube in die Aufnahme der Schwinge ein.
Bei einer Tieferlegung verstellen Sie den Montageheber so weit nach unten bis die
Bohrungen der MIZU-Umlenkhebel mit der Bohrung der original Umlenkung fluchten.
Bei einer Höherlegung verstellen Sie den Montageheber nach oben.
Verbinden Sie die Bauteile mit der original Schraube. Setzen Sie die original Muttern
mit etwas Schraubensicherung an und ziehen diese mit dem vom Fahrzeughersteller
vorgegebenen Drehmoment an.
For some vehicles it may be necessary to install the following before assembly
Remove any trim or exhaust parts.
Ensure that your motorcycle is in a safe position.
Support the motorbike under the engine with an adjustable
Mounting jack until the rear wheel just turns freely.
Loosen the screws on the deflection levers.
Adjust the mounting lever by turning it up or down, as far as
that the screws are unloaded and remove them.
Lubricate the needle bearings of the MIZU deflection levers.
Place the MIZU deflection lever with the inscription facing outwards and the
original screw into the mounting of the swingarm.
When lowering, adjust the mounting jack as far downwards as necessary until the
Align the holes of the MIZU deflection lever with the hole of the original deflection.
If the unit is raised, adjust the mounting jack upwards.
Connect the components with the original screw. Insert the original nuts
with some screw lock and tighten it with the screw lock provided by the vehicle manufacturer.
specified torque.
Remove the mounting jack and check all components for tight fit and freedom of movement. Check the chain tension. Depending on the model, it may be necessary to adjust the side stand.
The dimension of the rear elevation lowering is measured vertically above the rear axle. and is subject to fluctuations depending on the state of wear and adjustment of the strut