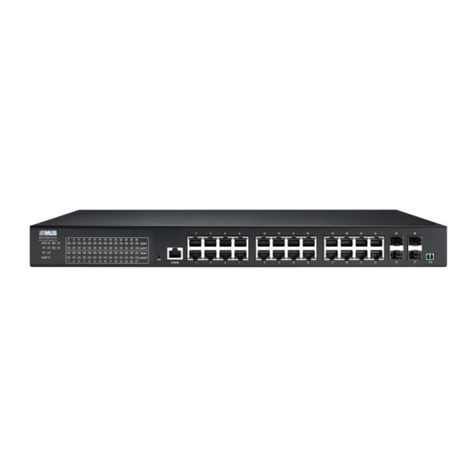
MLis MLB-E4200 Series User manual

1
MLB-E4200 series
8~14-Port Managed Industrial Ethernet Switch
User Guide
Version Number: 1.0
Issue: 1.2r1, July 2019

2
[CONTENTS]
Preface ................................................................................................................................4
Scope................................................................................................................................................. 4
Audience............................................................................................................................................ 4
Safety Instructions.............................................................................................................................. 4
Documentation Conventions.............................................................................................................. 4
Overview..............................................................................................................................6
FacePoEate ....................................................................................................................................... 6
Front Panel Introduction..................................................................................................................... 8
Top Panel Introduction....................................................................................................................... 8
Technical Specifications..................................................................................................................... 9
Quick Installation................................................................................................................14
Mounting the MLB-E4200 (DIN-Rail)............................................................................................... 14
Mounting the MLB-E4200 (Wall mount)........................................................................................... 15
Ground Connections........................................................................................................................ 16
Connecting the Ethernet Interface (RJ45 Ethernet)........................................................................ 17
Connecting the Ethernet Interface (Fiber)....................................................................................... 18
Power Connection............................................................................................................................ 19
Console Connection......................................................................................................................... 20
SYSTEM RESET ............................................................................................................................. 21
Web Interface Initialization (Optional).............................................................................................. 22
CLI Initialization & Configuration (Optional)..................................................................................... 24
Monitoring the Ethernet Interface .................................................................................................... 25
Up/Downgrade Software.................................................................................................................. 25
Reset to Default and Save Configure.............................................................................................. 26
LED STATUS INDICATIONS ........................................................................................................... 29
VLAN ApPoEication Guide.................................................................................................32
ExamPoEe 1: Default VLAN Settings.............................................................................................. 32
ExamPoEe 2: Port-based VLANs.................................................................................................... 33
ExamPoEe 3: IEEE 802.1Q Tagging............................................................................................... 36
Security ApPoEication Guide.............................................................................................39
Case 1: ACL for MAC address......................................................................................................... 39
Case 2: ACL for IP address.............................................................................................................. 55
Case 3:ACL for L4 Port................................................................................................................... 55
Case 4: ACL for ToS......................................................................................................................... 55
Ring Version 2 ApPoEication Guide...................................................................................56
Ring Version 2 Feature.................................................................................................................... 57
How to Configure Ringv2................................................................................................................. 60
QoS ApPoEication Guide...................................................................................................67
SP/SPWRR...................................................................................................................................... 67
ExamPoEe 1: SPQ without Shaping (Default profile)...................................................................... 68
ExamPoEe 2: SPQ with Shaping..................................................................................................... 71
IGMPApPoEication Guide.................................................................................................74
802.1x Authentication ApPoEication Guide........................................................................86
Introduction of 802.1x authentication function................................................................................. 86
802.1x Timer in MLB-E4200 ............................................................................................................ 86
Configuration in RADIUS Server ..................................................................................................... 86
ExamPoEe....................................................................................................................................... 88
Power over Ethernet (PoE) ApPoEication Guide...............................................................92
Reserved Power Determination....................................................................................................... 93
Power Management Mode............................................................................................................... 93

3
Other Setting Parameter.................................................................................................................. 94
PoE Power Scheduling & Reset...................................................................................................... 95
[LIST OF TABLES]
Table 1 LED Status Indicators.................................................................................................................. 29
[LIST OF FIGURES]
Figure 1 MLB-E4200 DIN-Rail Mounting .................................................................................................14
Figure 2 MLB-E4200 Wall Mounting........................................................................................................ 15
Figure 3 LED Indicators............................................................................................................................ 30
Preface
Scope
Audience
Safety Instructions
Documentation Conventions

4
Preface
Scope
This document provides an overview on MLB-E4200. It contains:
Descriptive material about the MLB-E4200 Hardware Installation Guide.
Audience
The guide is intended for system engineers or operating personnel who want to have a basic
understanding of MLB-E4200.
Safety Instructions
When a connector is removed during installation, testing, or servicing, or when an energized fiber is
broken, a risk of ocular exposure to optical energy that may be potentially hazardous occurs, depending
on the laser output power.
The primary hazards of exposure to laser radiation from an optical-fiber communication system are:
Damage to the eye by accidental exposure to a beam emitted by a laser source.
Damage to the eye from viewing a connector attached to a broken fiber or an energized fiber.
Documentation Conventions
The following conventions are used in this manual to emphasize information that will be of interest to the
reader.
Danger —The described activity or situation might or will cause personal injury.
Warning —The described activity or situation might or will cause equipment damage.
Caution —The described activity or situation might or will cause service interruption.
Note —The information supPoEements the text or highlights important points.

5
Overview
Overview
Faceplate
Panel Introduction
Technical Specifications

6
Overview
MLB-E4200 series industrial Ethernet solutions deliver high quality, wide operation temperature range,
extended power input range and advanced VLAN & QoS features. It’s ideal for harsh environments and
mission critical applications.
Faceplate
8-Port series
10-Port series

7
8- 10 Port POE series
12 Port POE series

8
Front Panel Introduction
Front Panel
System Status LED
P1, P2 and Alarm
Gigabit Ethernet Copper Ports
RJ45
Gigabit Ethernet SFP ports
SFP Slots
POE LED
POE port status
RR/RS LED
Device info/status
Models
L2+ Managed Switch
MLB-E4200
(POE)
SFP
MLB-E4200
(POE)
SFP
MLB-E4200
(POE)
SFP
MLB-E4200
(POE)
SFP
MLB-E4200
(POE)
SFP
Total Gigabit Ethernet Ports
8
10
12
12
14
10/100/1000 BaseT(X)
6
8
8
10
10
100/1000 Base SFP
2
2
4
2
4
Top Panel Introduction
Top Panel
Power Input (Dual)
6P Terminal Block
Console (RS232)
RJ45
Reset
Push Button

9
Technical Specifications

10
Ethernet
Operating mode
Store and forward, L2 wire-speed/non-blocking
switching engine
MAC addresses
8K
Jumbo frames
9K Bytes
Copper RJ45 Ports
Speed
10/100/1000 Mbps
MDI/MDIX Auto-crossover
Support straight or cross wired cables
Auto-negotiating
10/100/1000 Mbps speed auto-negotiation; Full and
half duplex
Ethernet isolation
1500 VRMS 1 minute
SFP (PoEuggable) Ports
Port types supported
SFP (Pluggable) Ports 100/1000Base SFP slot
Support 100/1000BaseT SFP transceiver
Fiber port connector
LC typically for fiber (depends on module)
Optimal fiber cable
Typical 50 or 62.5/125 μm for multimode (mm);
Typical 8 or 9/125 μm for single mode (sm)
Network Redundancy
Fast failover protection rings
Link loss recovery < 20ms
Single & Multiple rings supported
Spanning Tree Protocol
IEEE 802.1D STP, IEEE 802.1w RSTP, IEEE 802.1s MSTP
Port Trunk with LACP
Static trunk or Dynamic via LACP (Link Aggregation
Control Protocol)
Bridge, VLANs & Protocols
Flow control
IEEE 802.3x (Full Duplex) and Back-Pressure(Half
Duplex)
VLAN Types
Port-based VLANs
IEEE 802.1Q tag-based VLANs
IEEE 802.1ad Double Tagging (Q in Q)
Multicast protocols
IGMP v1, v2
IGMP snooping and querying
Immediate leave and leave proxy
Throttling and filtering
LLDP
IEEE 802.1ab Link layer Discovery Protocol (LLDP)
Traffic management & QoS
Priority
IEEE 802.1p QoS
Number of queues per port
8
Scheduling schemes
SPQ, WRR
Traffic Shaper
port-based shaping
Security
Port security
IP and MAC-based access control
IEEE 802.1X authentication Network Access Control
Power
Power input
Redundant Input Terminals
Input voltage range
Max. power consumption
12-58 VDC (E4200-POE series: 46~58 VDC)
10.5W (E4200
-POE series: without PoE: 14W,
With PoE: 265 W)
Reverse power protection
Yes
Total PoE output power budget
PoE PSE port output power
management
120W(POE508, POE508-2F) /240W (POE512-4F)
Scheduling; power control; PoE PD power consumption
monitoring
Transient protection
> 15,000 watts peak

11
System statistics
Function Name
System Max Value
VLAN ID
4096
VLAN Limitation
1024
Privilege Level of User
15
RMON Statistic Entry
65535
RMON Alarm Entry
65
RMON Event Entry
65535
Indicators
Power Status indication
Indication of power input status
Ethernet port indication
Link & Speed
Management
User Management interfaces
CLI (command line interface)
WEB-based Management
SNMP v1, v2c
Telnet (5 sessions)
Management Security
HTTPs, SSH
Radius Client for Management
Upgrade & Restore
Configuration Import/Export
Firmware Upgrade
Diagnostic
Syslog
Per VLAN mirroring
SFP with DDM (Digital Diagnostic Monitoring)
MIBs
RMON 1,2,3,9; Q-Bridge MIB,
RFC 1213 MIB-II, RFC 4188 Bridge MIB
DHCP
Client, Server, Relay, Snooping, Option 82
NTP/SNTP
Yes
Environmental & ComPoEiances
Operating temperature range
-40 to +75°C (cold startup at -40°C)
Storage temperature range
-40 to +85 °C
Humidity (non-condensing)
5 to 95% RH
Vibration, shock & freefall
IEC68-2-6, -27, -32
Certification compliance
CE/FCC; EN-50121-4
Electrical safety
CSA C22, EN61010-1, CE
EMC
FCC Part 15, CISPR 22 (EN55022) Class A
IEC61000-4-2, -3, -4, -5, -6
RoHS and WEEE
RoHS (Pb free) and WEEE compliant
MTBF
> 25 years
Mechanical
Ingress protection
IP30
Installation option
Dimension
Weight
DIN-Rail mounting, Wall mounting
154mm x 109mm x 60mm (POE series: 154mm(H) x
128mm(D) x 77mm(W))
1056g (POE series:1410g)

12
IPMC Profile
64
IPMC Rule / Address Entry
128
ACE
256
ICMP Type / Code
255
RADIUS Server
5
TACACS+ Server
5
MAC-based VLAN Entry
256
IP subnet-based VLAN Entry
128
Protocol-based VLAN Group
125
Voice VLAN OUI
16
QCE
256
IP Interface
8
IP Route
32
Security Access Management
16
MVR VLAN
4
MAC Learning table address
8k
IGMP Group
256

13
Quick Installation
Equipment Mounting
Cable Connecting
Equipment Configuration

14
Quick Installation
Mounting the MLB-E4200 (DIN-Rail)
Mounting step:
1. Screw the DIN-Rail bracket on with the bracket and screws in the accessory kit.
2. Hook the unit over the DIN rail.
3. Push the bottom of the unit towards the DIN Rail until it snaps into Place.
Figure 1 MLB-E4200 DIN-Rail Mounting
1
2

15
Mounting the MLB-E4200 (Wall mount)
Mounting step:
1. Screw on the wall-mounting Plate on with the Plate and screws in the accessory kit.
Figure 2 MLB-E4200 Wall Mounting

16
Ground Connections
MLB-E4200 must be properly grounded for optimum system performance.

17
Connecting the Ethernet Interface (RJ45 Ethernet)
MLB-E4200 provides two types of electrical (RJ45) and optical (mini-GBIC) interfaces. For example,
on MLB-E4200-8T(GT)-2SFP, Port 1-8 are electrical only (RJ45).
To connect to a PC, use a straight-through or a cross-over Ethernet cable,
To connect the MLB-E4200 copper Port to an Ethernet device, use UTP (Unshielded Twisted Pair)
or STP (Shielded Twisted Pair) Ethernet cables.
The pin assignment of RJ-45 connector is shown in the following figure and table.
MLB-E4200 series:
Pin
Assignment
1,2
T/Rx+,T/Rx-
3,6
T/Rx+,T/Rx-
4,5
T/Rx+,T/Rx-
7,8
T/Rx+,T/Rx-

18
MLB-E4200 series:
Connecting the Ethernet Interface (Fiber)
Prepare a proper SFP module and install it into the optical port. Then you can connect fiber optics
cabling that uses LC connectors or SC connectors (with the use of an optional SC-to-LC adapter) to
the fiber optics connector.
Refer to Table 1 for the normal operational LED status.
Fiber optics cable with LC duplex
connector
Connect the optical fiber to the SFP
socket
DANGER:
Never attempt to view optical connectors that might be emitting laser energy.
Do not power up the laser product without connecting the laser to the optical fiber and
putting the cover in position, as laser outputs will emit infrared laser light at this point.
Pin
Assignment
PoE
Assignment
1,2
T/Rx+,T/Rx-
Positive VPort
3,6
T/Rx+,T/Rx-
Negative VPort
4,5
T/Rx+,T/Rx-
X
7,8
T/Rx+,T/Rx-
X

19
Power Connection
The DC power interface is a 6-pin terminal block with polarity signs on the top panel.
The MLB-E4200 can be powered from two power supply (input range 12V –58V). The DC power
connector is a 6-pin terminal block; There is alarm contact on the middle terminal block.
Refer to Table 1 for the normal operational LED status.
MLB-E4200 series
MLB-E4200 PoE series

20
Note:
1. The DC power should be connected to a well-fused power supply.
Console Connection
The Console port is for local management by using a terminal emulator or a computer with terminal
emulation software.
DB9 connector connect to computer COM port
Baud rate: 115200bps
8 data bits, 1 stop bit
None Priority
None flow control
Power Connector (6P Terminal Block)
Input
DC 12-58V
PWR1 +/-
Power Input 1 +/-
PWR2 +/-
Power Input 2 +/-
ALM
Alarm relay output
Table of contents
Other MLis Switch manuals
Popular Switch manuals by other brands

GarrettCom
GarrettCom Magnum 10KG Installation and user guide

Pepperl+Fuchs
Pepperl+Fuchs Vibracon LVL-B1 technical information

RCA
RCA VH911 - Video Switch user manual

Leonton
Leonton PT5-0600 Series user manual

abaco systems
abaco systems NETernity RM921N Hardware reference manual

Orro
Orro Simple Multiway installation guide