Mobius m108 User manual

MOBIUSTRIMMER.COM
ALL IN ONE
MANUAL
• OPERATIONS
• ASSEMBLY
• CLEANING

- 1 -
mobiustrimmer.com [email protected]
OPERATIONS
Make sure that the red stop button is in the released position (pulled out), then
plug the M108 in by inserting and twisting the plug.
Now you’ll want to press the green START button.
Check to see that all 3 variable speed knobs are pressed in and turned all the
way to the left (counter clockwise)
Ensure that all 4 casters are in the locked position. Otherwise, install your input hopper and output chute.
The following steps outline the process for operating your M108. You can also view videos of these steps on our website in the Mobius Academy.
Ensure that the Tumbler air pressure is between 130 and 140psi.
If using conveyors, place your conveyor sensor override pucks on the bumpers.*
Check that all the blue safety lights on control panel are off, and ensure the hexagon
guards are in place and secured with the set screw on the bottom of the frame.
STEP 01.STEP 02.
STEP 05B.
STEP 04.
STEP 05A.
STEP 06.
STEP 03.
STEP 07.

- 2 -
mobiustrimmer.com [email protected]
To shut down, press the red stop button in. The LED lights in the lid will turn red.
When restarting from here, the operator can simply release the red stop button
and then press the green button. All previous settings will resume.
When the Trim Tote is full, the Mobius will automatically shut off and the working
lights in the lid will turn to red indicating there is a fault. Empty the Trim Tote (refer
to Step 4 in Assembly section) and resume trimming by pushing the green button.
STEP 10.
STEP 11.
OPERATIONS
Turn the separator fan / tri-ex blades / tumbler on by pulling out each knob and
adjusting to desired setting.
Start feeding plant material into the input hopper while watching the output to
determine how fast to feed the hopper. (Note: to achieve a faster pass through the
tumbler, increase the feed rate, increase the tilt angle, or a combination of both.)
STEP 09.
Lower the tilt lift legs so they just touch the oor.
STEP 08.

- 3 -
mobiustrimmer.com [email protected]
ASSEMBLY
Disassembly and assembly of the Mobius Trimmer M108 is easy, and requires no tools. Follow along in this step by step document as we show you how it’s done.
Keep a good grip until just before your hand is going to get pinched, then slide it
the rest of the way making sure it’s sitting on the guide rails at the top.
Lift up on the separator lever to lock it into place.
Next, you’ll slide the Trim Tote back into place on the separator.
Plug in the Trim Tote sensor wire to the body of the M108. Take note- the plug is
NOT omni-directional.
Notice the holes on the top of the fan housing assembly. These correspond to the
rails on the bottom of the unit. Slide the fan housing back into place on the rails.
A good tip here- brace the Trim Tote with your knee while you pull up on the levers
to lock it into place.
Next, we’ll install the AirThread Tension Tumbler. The smooth end goes in rst. Slide
the tumbler through the lid.
The small n on the end of the tumbler will t just under the schrader valve.
STEP 01.
STEP 03B.
STEP 02A.
STEP 03C.
STEP 02B.
STEP 04A.
STEP 04B.
STEP 03A.

- 4 -
mobiustrimmer.com [email protected]
Replace the rst blue tumbler retaining ring. A tip: pull the tumbler towards you with
your ngers on the inside, while rotating the bracket with your thumbs. Next replace the helical blades. The gear side of the helical blades will t the gear
side of the machine. Make sure they are seated properly.
Rotate the tumbler so that the wires are as straight as possible.
Attach the second tumbler retaining ring.
Attach your pump to the schrader valve. Give it two or three pumps, then rotate
the tumbler back and forth 2-3 times, to ensure that the bearings will run smoothly.
Inate the tumbler to between 130 - 140 psi.
Next, snap the tumbler brush back into place, and close the lid.
STEP 05A.STEP 05B.STEP 05C.STEP 06.
STEP 10.
Then, you’ll replace the spacer bars…
… and the bedknives. Each one has a pin on one side, that will only allow them
to be installed one direction. Remember, there are no bolts required and no
adjustments necessary.
STEP 07.STEP 08.STEP 09.
ASSEMBLY

- 5 -
mobiustrimmer.com [email protected]
That’s it! A complete assembly of the M108. You can always review the Disassembly
page for a video and downloadable step-by-step document.
If you have any questions about this process, don’t hesitate to get in touch with us,
or view some of the other guides and videos we’ve made available in our Mobius
Academy training site.
Pop the screens back into place on the front and back of the M108.
STEP 11.
ASSEMBLY

- 6 -
mobiustrimmer.com [email protected]
CLEANING
With 2 people, rotate the lid assembly slightly back towards the closed position,
then pull up to release the clasp on each side of the assembly.
Remove the hexagon guard screens (remove set screw on bottom of frame) &
tumbler brush from the lid assembly.
Unplug the M108.
Unplug the lid assembly, then push the 2 latches inward to release and rotate to
a fully open position. Make sure the Trim Tote sensor is unplugged, then remove the separator.
Remove the fan housing.
The following steps outline the process for disassembling and cleaning the M108. Remove each of the items in the following order. Refer to Assembly instructions for
tips on removal. You can also view videos of these steps on our website in the Mobius Academy.
Remove the blade bars and spacer bars,
then remove the helical blades.
STEP 02. STEP 01.STEP 03.
STEP 07.STEP 08. STEP 05.
STEP 06.
STEP 04.

- 7 -
mobiustrimmer.com [email protected]
CLEANING
WASHING
POWER SPECS
• Pre-cleaning: set up a cleaning area with wash tubs, racks and, if available, a pressure washer.
• Soak the blades, screens, brush and tumbler in a solution of hot water and degreaser for about 15 minutes.
• Remove the separator, trim tote and fan housing and spray with diluted degreaser. Let sit for about 15 minutes.
• While the removable parts are soaking, wipe down the Mobius body with degreaser, followed by a water wipe.
• Rinse the removable parts with a pressure washer. DO NOT pressure wash the body of the Mobius.
• If required by SOP, perform swab tests on plant-touching surfaces. If any parts do not pass, either re-clean as per previous
steps or wipe down with a sanitizer. Isopropyl wipes can be used for this purpose on all surfaces with one exception: do not
apply isopropyl to the tumbler end caps.
• Allow clean parts to dry and reassemble the machine.
DON’T
•
Use a diluted degreaser and warm/
hot water to perform the initial clean
• Apply isopropyl to tumbler end caps
•
Pressure wash the body of the Mobius
DO
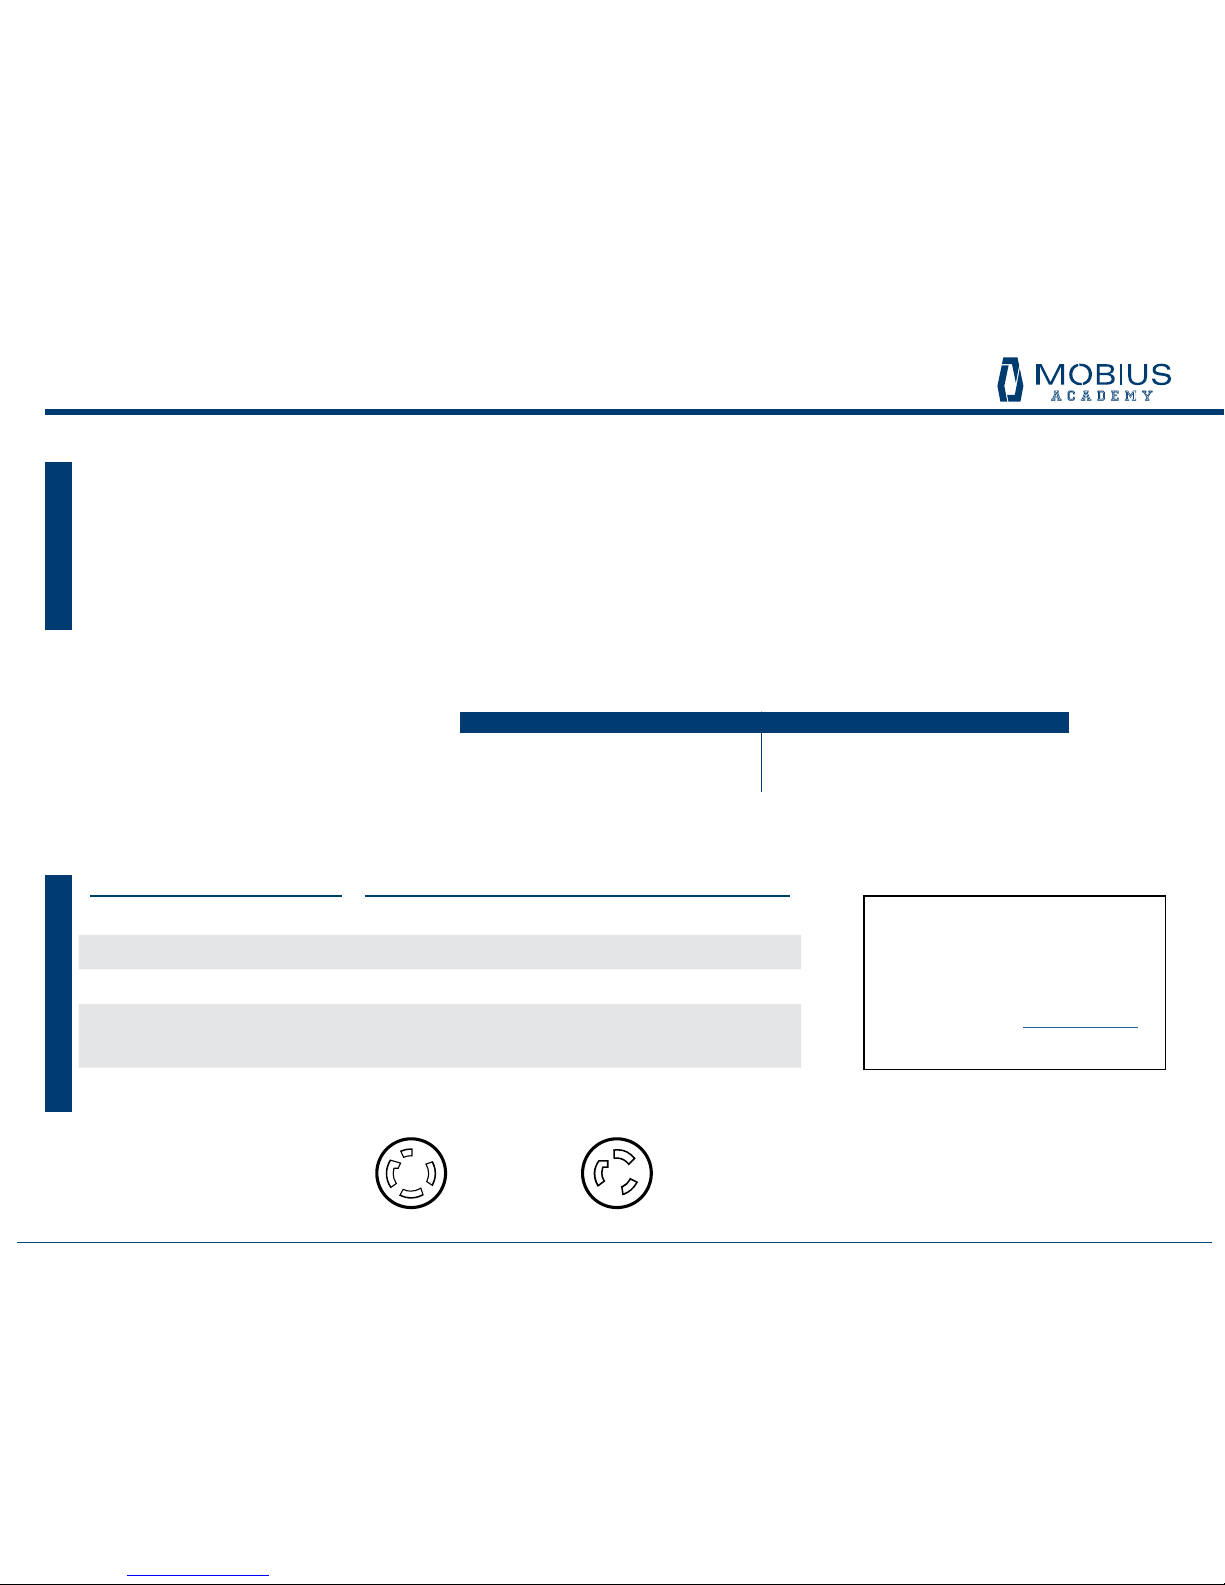
COMPONENT SPECIFICATION / REQUIREMENT
Vacuum Motor 5 HP
Cutter Motor: 0.75 HP
Tumbler Motor: 1/8 HP
Electrical Requirements Single Phase: 240V, 30 amps.
Three Phase: 208V, 22 amps.
Mobius Power Receptacle Three Phase: Single Phase:
L15-30R L6-30R
If you have any questions, don’t hesitate
to give us a call or email us and we’ll help
walk you through the processes described
in this manual.
You can also view videos of these steps
on our website in the Mobius Academy.
Table of contents
Other Mobius Trimmer manuals