Modal craftsynth User manual

1
Modal CRAFTsynth
Digital Monophonic Synthesiser Kit
User Manual
OS Version - 1.00-00

2 3
Important Safety Information
CRAFTsynth is not a toy, it is a musical instrument. Please:
• Read this manual fully before assembly and use
• Do not put any part of the kit in your mouth
• Do not attempt to service the synthesiser
• Do not expose any part of the synthesiser to dusty or moist environments, excess
temperatures or vibration
• Do not apply excessive force to any part of the unit
• Keep the synthesiser away from all liquid
• Always unplug the USB cable and battery pack when not in use
• Do not leave the batteries inside the battery case when not in use for a long period of
time
• Always keep out of reach of children under 10 years of age
• If the synth appears to be damaged, do not attempt to use it
• Use appropriate eye protection when assembling the synth

4 5
Index
00. Introduction
01. Getting Started
Parts List
Assembly
Connecting Hardware
Basic Functions
Touch Pads
Sound Presets
Default Presets
02. Synthesis Engine
Oscillators
LFO
Filter
Effects
03. MIDI
MIDI
MIDI Implementation Chart
04. Update
05. CraftApp
Appendix A
Troubleshooting
Appendix B
Binary LEDs
6
8
9
10
11
12
13
16
17
18
20
22
24
25
26
27
28
30
32
36
40

6 7
00
Introduction
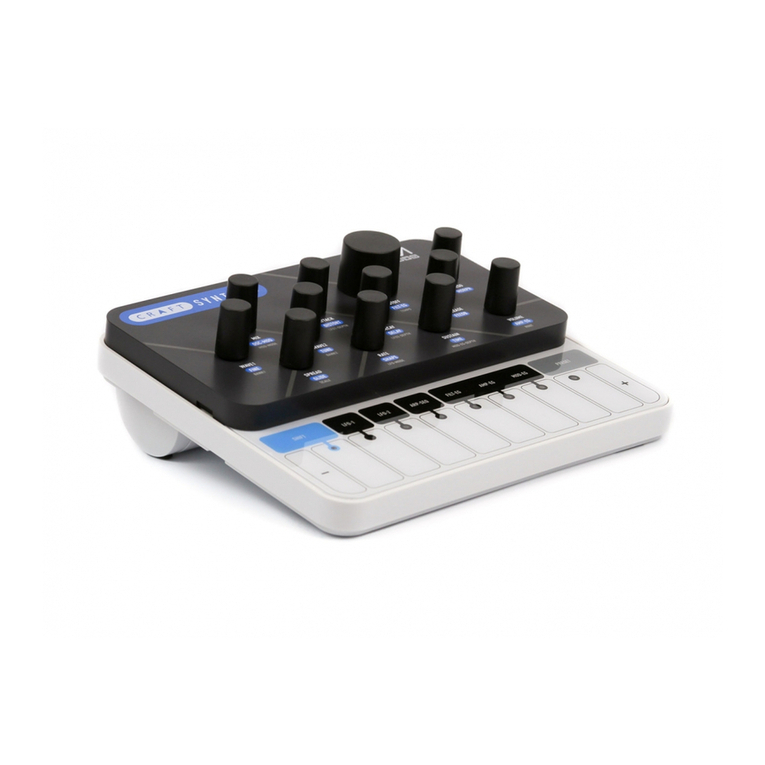
CRAFTsynth is a powerfully versatile monophonic synthesiser, with a unique no-soldering
assembly process. It is intended to bring the pleasure of synthesis to everybody, without
sacrificing sound quality or features.
The kit format and stripped-back design provides the opportunity for you to customise and
augment your CRAFTsynth, from making your own knobs and enclosures to interfacing with
microcontrollers and sensors.
We hope you get as much pleasure from using it as we did making it!
SPECIFICATION:
• Two oscillators with 6 wave shapes
• Oscillator mix and detune
• FM
• Unison & chord modes
• LFO with wide frequency range and 6 destinations
• Variable state resonant filter
• Amplifier and filter envelopes
• Portamento glide
• Overdrive distortion
• Delay
• 16 patch storage
• Full USB MIDI control
• Updatable firmware

8 9
01
Getting Started
Parts List
Customisation ideas:
Paint a pointer:
You can use some paint or tip-ex to mark the pointer position on the pot shafts.
Simply turn the pot shaft all the way to the left, and paint on a line that lines up with the left
leg of the pot. Test it out and see if you got it in the right place before doing the others!
Add some knobs:
You can find or make your own knobs to add over the shafts provided. 6mm knobs that
attach with a worm screw work the best!
Add enclosure:
You can use 3D printing, moldable plastic, cardboard or pretty much anything to encase and
make the craft synth your own!
2x
4x
1x
8x
1x
1x
1x
1x
1x
2x

10 11
Assembly
Troubleshooting
Please see the Troubleshooting section in Appendix A of this manual.
Connecting Hardware
The Craft has three external connections: USB, Line out and Headphones out.
USB
USB Mini B Connection for power, MIDI input and MIDI output.
Simply connect CRAFTsynth to a powered USB socket, such as on your computer, or a
powered hub with a standard USB mini cable.
To use MIDI, connect to your computer or tablet with a USB Mini cable and find ‘Craft Synth’
listed as a MIDI port on your computer.
Line Output
Line level output on 3.5mm Stereo jack.
This output can be connected to any line level input for monitoring and recording.
The line output is higher quality than the headphone output, so always use it when recording
or performing.
Note: In order to preserve maximum dynamic range, and therefore get the best sound quality,
there is no line output volume control on the unit. Control the volume using your interface,
mixer or amplifier.
Headphones Output
Headphone output on 3.5mm jack.
The volume can be adjusted using the VOL function (see the Getting Started section), the
CRAFTsynth app, or through MDI CC (See the MIDI section).
1
2
3
4
5
6
7
8
1x
8x
3x
1x
1x
1x
2x

12 13
Basic Functions
Powering on
CRAFTsynth can be powered either through the USB socket, or by a battery pack.
To use USB power, simply connect a USB cable to a power source as described in the
Connecting Hardware section.
To use the battery pack, simply attach the battery pack lead to the connector and ensure it is
turned on, with charged batteries inside.
The battery pack we recommend is Adafruit Industries’ 727 3xAAA switched JST-PH, available
from many retailers.
You can use double-sided sticky foam to attach the battery pack to the back to underside of
Craftsynth.
Note: The JST-PH battery connector requires 100mA and 4.5v – 5v to power craft.
WARNING!!
DO NOT hold the PAGE/PRESET button whilst powering on CRAFTsynth.
Doing so and holding the button for a further 4 seconds will erase the firmware and stop
the synth from working. You can restore the firmware via the update process, but it’s best to
avoid doing this unintentionally.
Pages
When powered on, a single LED should be lit, indicating that you are on page 1 of the
controls. On page 1, the knobs control the parameters listed directly underneath, for example
WAVE, MIX and DETUNE.
To switch to page 2, simply tap the PAGE/PRESET button, and the knobs will control the
second indicated parameters, for example DISTORT, FM and FINE.
Be sure not to be touching any of the touch pads when trying to change page, as this will
trigger the touch pad secondary functions, as described in the following section.
The top LED also indicates the status of the LFO, fading in and out with the level of the
oscillator.
Touch Pads
Playing notes
The 5 touch pads allow you to play the synthesiser without sending it MIDI from another
device. The octave and scale that these 5 pads trigger can be configured, as detailed in the
secondary functions below.
The pads also send MIDI notes out, which you can use to control other instruments or features
on your DAW.
Secondary functions
The pads all have a secondary function that can be accessed by holding only the relevant pad
and tapping the PAGE/PRESET button.
All of the following parameters can be controlled fully through the Craft App and through
MIDI CCs (See the MIDI section).
OCT
Holding just this pad whist tapping the PAGE/PRESET button will shift the octave of the
current sound. When on page 1, the octave will shift up, when on page 2, the octave will
shift down.
SCALE
Holding just this pad whist tapping the PAGE/PRESET button will change the musical scale that
is assigned to the 5 pads. The LEDs indicate the current selection:
LEDs Selected Scale
0 C Major
1 C Minor
2 C Diminished
3 C Major Augmented
4 C Blues Pentatonic
When on page 1, the scale will shift up, when on page 2, the scale will shift down.
14 15
Touch Pads
GLIDE
Holding the touch segment labeled GLIDE and tapping the PAGE/PRESET button will step
through the portamento glide time presets. The LEDs indicate the length of the glide time
from 0s, to ~2.5s. When on page 1, the glide time will shift up, when on page 2, the glide
time will shift down.
EG
CRAFTsynth has two configurable envelope generators, one modulating the filter cutoff, one
modulating the amplitude. 16 useful presets of these are accessible through this function. To
change the envelope preset, hold the EG pad and tap the PAGE/PRESET button. The number
of active LEDs will indicate which EG preset you are on, between 0 and 15 (Displayed in
binary.)
Preset Number EG Style
0 Snappy
1 Fade In Amp
2 Fade Out Amp
3 Fade In/Out Amp
4 Fade In Filter
5 Fade Out Filter
6 Fade In/Out Filter
7 Filter Closing Quick
8 Percussive 1
9 Percussive 2
10 Percussive 3
11 Percussive 4
12 Pad 1
13 Pad 2
14 Pad 3
15 Pad 4
When on page 1, the EG preset will shift up, when on page 2, the EG preset will shift down.
Full ADSR envelope controls for both amp and filter are configurable via MIDI CCs and the
Craft App!
Touch Pads
VOL (Headphones)
Holding the touch segment labeled VOL and tapping the PAGE/PRESET button will alter the
headphone output volume. On Page 1, the volume will increase each step and wrap around to
being quiet. On Page 2, the volume will decrease, but not wrap around to loud (So you don’t
get a shock!)
Be careful not to damage your ears when adjusting the headphone volume!
MIDI Panic
If the synth won’t stop making sound, it’s likely that you have a ‘hung’ MIDI note. This means
the synth has been sent a ‘note on’ message without ever receiving a ‘note off’.
To manually stop the sound by performing a ‘MIDI Panic’, hold just the OCT and VOL touch
pads and tap the ‘page/preset’ button.

16 17
Sound Presets
CRAFTsynth comes with 16 preset sounds, detailed in the table below. You can save your own
sound over any of these, and restore all factory presets at any time.
To load or save a sound, first enter ‘Preset mode’ by holding the PAGE/PRESET button until
the LEDs start spinning. Now you can scroll through the presets by tapping the PAGE/PRESET
button. The preset number is displayed as a pattern on the LEDs (which is the patch number
in binary for those of you who like that sort of thing!).
Once you reach the preset number you would like to load, simply hold the button until the
LEDs start spinning, and then let go.
To save over a preset, use the same process, but hold the button a bit longer, until the LEDs
Flash.
To exit preset mode without loading or saving, simply press nothing and wait a few seconds
until the LEDs go back to normal, indicating you are on page 1.
To re-load all factory-preset sounds, enter preset mode and hold all 5 touch pads. This will
overwrite any sounds you have made!
You can send CRAFTsynth program change MIDI messages to change preset, which means you
can automate sound changes during a composition from your DAW!
Default Presets
Preset Number EG Style
0 Space Mission
1 Corporation
2 Rave Keys
3 Big Lead
4 Alarm
5 Acid Stab
6 Spooky Organ
7 Metallic
8 Distorted Bass
9 Tinkle
10 LoFi Drum
11 Wobble Bass
12 Pulsar
13 Ambient
14 Aliens
15 Basic Sine

18 19
02
Synthesis engine

20 21
FINE
The FINE parameter allows you to affect the detune of OSC2 more precisely. In the center
position, OSC2 has no fine-tuning applied. When turned right, the frequency of OSC2 is
raised up to a maximum of +50 cents. When turned left, the frequency of OSC2 is lowered to
a maximum of -50 cents.
FM
The FM control on page 2 sets the amount by which OSC1 frequency is modulated by the
level of OSC2, up to a maximum of +/- 2 octaves. Because of the wide range of OSC2 detune
and the flexibility of the LFO, this can be used to create a huge array of effects, from adding
rich harmonics to interesting low-frequency modulations.
SPREAD
The SPREAD control allows CRAFTsynth to introduce additional oscillators to achieve unison
and chord modes.
In the first half of the dial, OSC1 and OSC2 are split into 8 individual oscillators and spread out
over the frequency spectrum to create a fat unison sound. This effect is increased up to the
center position.
Past half way, the oscillators arrange themselves into chord shapes. A huge variation of chords
can be created with this control in conjunction with OSC2 detune.
Note: The average level of the sound will be lower when using the SPREAD control.
This is because the combining oscillators are phasing in and out and not constantly
re-enforcing each other as they would if the spread is set to zero.
Returning the spread to zero and retriggering a note will bring all oscillators back to
their original phase and volume.
Oscillators
The CRAFTsynth synthesis engine has two configurable oscillators referred to as OSC1 and
OSC2, which can be combined in various ways to create a multitude of timbres ready to be
shaped and modulated by the filter, LFO and effects.
This section details the relevant controls for OSC1 and OSC2:
WAVE
This control sets the waveform of the currently selected oscillator (See MIX parameter below
for OSC selection). The available wave shapes are:
OSC1 - Sine, Triangle, Saw tooth, Square and PWM
OSC2 - Sine, Triangle Saw tooth, Square and White Noise
The waveforms are indicated around the dial.
MIX
This parameter cross-fades between OSC1 and OSC2. Set half way, each oscillator can be
heard at equal volume.
If you are predominantly listening to OSC1, the WAVE control will set the shape for OSC1, and
vice versa.
DETUNE
This dial raises or lowers the pitch of OSC2 in relation to the note being played. This can be
used to create different harmonies with OSC1 or to achieve a very low or very high-pitched
sound.
When set to the center position, OSC2 is set to the fundamental frequency of the note being
played. When turning to the left, OSC2 pitch is lowered down to a maximum of -24 cents,
always maintaining a ratio of a 3rd, major 5th, minor 5th or octave.
When turning to the right, OSC2 pitch is raised up to a maximum of 24 cents, always
maintaining a ratio of a 3rd, major 5th, minor 5th or octave.
When OSC2 wave shape is set to white noise, the DETUNE parameter affects the cut off
frequency of a low pass filter affecting the noise, allowing the noise to be sculpted. There are
multiple effects that can be achieved using this feature, such as having low frequency noise as
the FM modulation source, creating an ‘unstable’ frequency.

22 23
SHAPE
This parameter sets the shape and phase of the currently selected LFO, as indicated around
the dial. Available shapes are Sine (up first), Sine (down first), Triangle (up first), Triangle (down
first), Ramp up, Ramp down, Square (high first) and Square (low first).
DEST
This parameter sets the LFO destination. The available destinations are:
• AMP - Overall sound amplitude
• FRQ - Current note frequency
• CUT - Filter cut off frequency
• FM - Amount of FM
• MIX - Mix between OSC1 and OSC2
• PWM - Pulse width of OCS1 (PWM must be selected as OSC1 wave)
Note: In normal operation, the top LED indicates the status of the LFO wave, to help
you keep track of how the sound is being modulated.
LFO
CRAFTsynth features an LFO with 8 waveforms and 6 destinations, which can be synced to
MIDI clock. This feature can be used to create a huge array of sound modulations, including
generating extra harmonics through AM and FM.
DEPTH
The DEPTH control affects the depth of the LFO modulation. The LFO modulation works
differently for each destination to get the most versatility from the synthesis engine.
• AMP - LFO modulates overall amplitude from full volume down to LFO depth, where
maximum depth is silence.
• FRQ - LFO modulates +/- LFO depth around current note frequency.
• CUT - LFO maximum depth is current filter cut off.
• FM - LFO maximum depth is current FM Amount.
• MIX - LFO modulates +/- LFO depth around current OSC Mix.
• PWM - LFO modulates +/- LFO depth around current OSC1 PW.
RATE
This control sets the rate of the LFO, and its behavior depends on the presence of MIDI clock.
If there is no MIDI clock detected:
In the first half of the dial, the frequency is set freely from 0.1 HZ to 20Hz.
If there is MIDI cock detected:
The first half of the dial sets the LFO frequency to divisions of the host BPM.
In the second half of the dial, the LFO rate is set to a division of the main frequency of the
note being played. This allows the LFO frequency to run into the audible range and maintain
harmonious modulations. A massive array of effects can be achieved in this way, including
AM and FM.

24 25
Effects
DISTORT
This control sets the amount of overdrive distortion applied to the sound.
All the way to the left, there is no distortion. All the way to the right, the sound is fully
distorted.
This distortion is a wave-shaping overdrive, which can be used to add harmonics and warmth
to a sound, as well as compressing it and making it very loud and distorted.
DELAY
This parameter affects the Dry/Wet mix of the of the delay audio effect at the end of the audio
signal chain. When set to minimum, only the dry signal will be heard. When set to maximum,
only the delayed signal will be heard.
TIME
TIME controls the delay time of the delay effect, from 0 to 250ms.
If an incoming MIDI Clock signal is detected, the Delay time will snap to divisions of the host
clock. This feature can be disabled or enabled via midi CC (See the MIDI section).
FEEDB
This parameter sets the amount of delayed audio signal fed back into the delay input.
When at the fully position, only the first delayed signal will be heard. All the way to the right,
almost the entire level of the delayed signal is fed back into the delay.
This can be used to create a wide array of effects from an echo or reverb-type effect, to noise
and metallic sounds.
Filter
CUTOFF
This affects the cut-off frequency of the filter, from 0Hz up to 20kHz.
The filter is a low-pass type by default, but is actually a state-variable filter. Through MIDI CC
or the CRAFT App, the filter type can be ‘morphed’ from low-pass, through band-pass and
into high-pass.
The cut-off frequency can be modulated by the LFO and the filter envelope.
RESO
The RESO parameter sets the resonance of the filter around the cutoff frequency.
Note: If the audio output seems unusually quiet, check the resonance is not turned up.
To compensate for feedback occurring when the filter cutoff approaches the
fundamental frequency, turning up the resonance will attenuate the level of the
signal and introduce gentle soft limiting. This is common practice to avoid clipping or
sudden large changes in signal level.

26 27
MIDI
CRAFTsynth is fully USB-MIDI class-compliant, meaning you can plug it into your computer, no
drivers required, and gain access to a huge array of extra features. Simply plug in CRAFTsynth
to a USB port and it will show up as a MIDI input and output device in any software that
supports external MIDI devices.
On Mac OSX, CRAFTsynth will
show up in ‘Midi Studio’, found in
Applications > Utilities > Audio MIDI
Setup. (Once open, select Window >
Show MIDI Studio)
On Windows, CRAFTsynth will show
up as a sound device in the Device
manager.
Remember to enable the device
input and output in your DAW’s
preferences.
03
MIDI

28 29
MIDI
MIDI Output
All controls on the craft output midi messages. This allows CRAFTsynth to be used as a fully
functional plug and play MIDI controller!
When a change is detected on any of the parameters, a CC message is sent out. See the MIDI
implementation chart in the MIDI section to find which parameters send which CC numbers.
The touchpads send MIDI notes for the note that they are set to trigger.
MIDI Input
CRAFTsynth can be played by sending it MIDI notes. This means you can use your DAW or any
device that can send MIDI notes over USB to sequence velocity sensitive notes for your synth.
MIDI Clock
Configure your DAW to send MIDI clock (Sync) to CRAFTsynth and it will automatically
configure itself to work in time with your track tempo. The LFO rate will snap to divisions of
the host clock (up until half way - see LFO section).
Delay time will also snap to divisions of the host clock, depending on the delay sync setting,
controlled via MIDI CC (See MIDI implementation chart above).
When no clock is detected, the synth will continue to use whatever tempo it is configured to
until a change of LFO rate or Delay time is detected by a dial turn.
Program Change
Sending a program change to CRAFTsynth will load the relevant preset.
This enables you to automate changes between sound, for example to move between
different elements of a track, or from one track to the next.
Note: Your DAW might list program changes starting from ‘1’ this will load the first preset on
CRAFTsynth, which is referred to as ‘0’ in this manual.
CC control parameters list
All parameters of the synthesis engine can be controlled by sending CC messages to
CRAFTsynth. There are several features that can only be accessed through this control, or by
using the CRAFT App.
The following table shows which midi CC numbers control which parameters.

30 31
MIDI CC Implemention Chart
Function CC Values
Glide 5 0 - 2.5 seconds, exponential control
Headphone Volume 7 Silence - full volume
Distortion 12 Dry - Wet
Delay Amount 13 Dry - Wet
Delay Time 14 No Sync: 0 - 250 milliseconds / Sync: 8 steps, division of host clock
Delay Feedback 15 0% - 90%
Osc1 Shape 16 0 - 21 Sine / 22-42 Tri / 43-63 Saw / 64-127 PWM duty 50% - 5%
Osc2 Shape 17 0 - 21 Sine / 22-42 Tri / 43-63 Saw / 64-85 Square / 86-127 Noise
Osc Mix 18 OSC1 - OSC2
FM Amount 19 No FM to +/- 2 Octave modulation
Spread 20 0-63 Unison Spread / 64-76 major / 77-89 minor / 90-102 7th /
103 maj 7th / 116-127 maj Octave
FEG Attack 22 0 - 4 Seconds
FEG Decay 23 0 - 2 Seconds
FEG Sustain 24 0 - 1
FEG Release 25 0 - 4 Seconds
AEG Attack 26 0 - 2 Seconds
AEG Decay 27 0 - 4 Seconds
AEG Sustain 28 0 - 1
AEG Release 29 0 - 4 Seconds
Osc2 Detune 30 -/+4 Octaves, Snaps to Root, min3, maj3, 5th
Osc2 Fine 31 -/+ 50 Cents
FEG Invert 32 0-63 Not inverted, 64-127 Inverted
Filter Morph 33 0 = LP / 64 = BP / 127 = HP Continuous morph
Filter Cutoff 34 0Hz - 20kHz
MIDI CC Implemention Chart
Function CC Values
Filter Resonance 35 None - Full
LFO Rate 36
NO SYNC: 0-63 = 0-32Hz Free / 64-71 Root/8 / 72-79 Root/4 /
80-87 Root/2 / 88-95 Root / 96-103 Root*1.5 /104-111 Root*2 /
112-119 Root*2.5 / 120-127 Root*3
SYNC: 0-7 = 1/16 / 8-15 = 1/8 / 16-23 =1/4 / 24-31 =1/2 / 32-39
= 1 / 40-47 = 5/4 / 48-55 =2 / 56-63 = 4 (Cycles per beat), then /
64-71 Root/8 / 72-79 Root/4 / 80-87 Root/2 / 88-95 Root / 96-
103 Root*1.5 /104-111 Root*2 / 112-119 Root*2.5 / 120-127
Root*3
LFO Depth 37 0 - Full
LFO Destination 38 0-21 AMP / 22-42 FRQ / 43-64 CUT / 65-85 FM / 86-106 MIX / 107-
127 PWM
LFO Shape 39 0-14 Sine / 15-31 iSine / 32-47 Tri / 48-63 iTri / 64-79 Ramp up /
80-95 Ramp down / 96-120 Square / 121-127 iSquare
Octave 40 Octave shift -2 to +3 ( 0-21/22-43/44-65/66-87/88-1109/110-127)
Scale 41 C Major (0-24) C Minor (25-49) C Diminished (50-74) C Major Aug-
mented (75-99) C Blues Pentatonic (100-127)
Delay MIDI Sync 42 0-63 Off, 64-127 On
AEG Release 72 0 - 4 Seconds
AEG Attack 73 0 - 4 Seconds
Filter Cutoff 74 0Hz - 20kHz
AEG Decay 75 0 - 2 Seconds
Glide 84 0 - 2.5 seconds, exponential control

32 33
04
Update
Update
CRAFTsynth’s firmware can be updated remotely. This means that you will be able to update
your CRAFTsynth to the latest version each time an update is released, introducing new
features.
CRAFT App will provide the most user-friendly way to update firmware, however it is also
possible to update the firmware using MIDI sysex messages, meaning you won’t need the app.
Instructions for updating will be provided with updates, at www.modalelectronics.com

34 35
05
CraftApp
CraftApp
The CRAFT App is not just for CRAFTsynth, but for all members of the CRAFT range.
Please see the relevant app store or www.modalelectronics.com for App availability and
documentation.

36 37
A
Appendix
Troubleshooting
Having trouble pushing the connectors on?
The pins are designed to be slightly out of line – this helps the connectors stay on nice and
tight! The connector will still slide over the pins.
I can’t seem to fit the knob shafts in?
Look inside the potentiometer - it actually has a shape to it, and you should be able to see
how the shaft fits in. Make sure that the orientation of the knob shaft lines up with the
rectangular slot.
My synth doesn’t turn on?
When you provide power to the CRAFTsynth, you should see LEDs light up. If this isn’t the
case, please check the following:
• Check that all the connectors are attached properly (See Assembly section).
• Check that there is no damage to the synth, such as bent header pins.
If powering by USB:
• Unplug and plug the USB cable back in.
• Try using a different USB cable.
• Check that you are using a USB port on the computer or powered USB hub, rather than a
keyboard or a non-powered hub, which may not be able to provide enough current.
If powering with a battery pack:
• Check that the battery pack’s power switch is turned on.
• Check that the battery pack is properly connected to the battery connector on the synth
and that the leads are not damaged.
• Check that the batteries are fully charged and in the correct orientation.

38 39
Troubleshooting
My synth turns on and looks like it’s working, but there’s no sound?
• Check that all the connectors are attached properly (See Assembly section).
• Check that your headphones or line connections are connected properly and working as
they should (Testing with another device to provide sound is a good way to do this).
• Turn the synth on and wait a few seconds for it to initialise, you should see just the top
LED on, suggesting you are on page one.
• Hold a touch pad and turn the CUTOFF control all the way to the right.
• Try turning DEPTH all the way to the left and putting MIX to the middle.
• Try turning up the headphone volume (See Touch Pads section).
• Try sending MIDI to the synth to identify if it is an issue with the touch pads.
The touch pads don’t seem to work properly or the sound keeps re-triggering?
The touch pads work though ‘capacitive sensing’, detecting the presence of your touch in a
similar way to your smartphone screen. If you are having difficulty using the touch pads, it’s
likely to be to do with either your skin contact, or the power source.
• First ensure that all connectors are attached properly and that the synth is not damaged.
• Because of the ‘open’ circuit, there are several places on the synth other than the touch
pads that will trigger sounds, ensure that you are just touching the pads and not the left
hand side of the synth.
• Ensure your hands are clean and dry and that you are not wearing any gloves.
• Try powering the synth from an alternate power source. Powering from a battery pack
and listening on headphones will isolate the synth from any other equipment that may be
affecting the synth. If this fixes the issue, try unplugging any other equipment that may
be affecting the power, such as your laptop charger.
• Try sending MIDI to the synth to identify if it definitely is an issue with the touch pads,
and not just an unusual sound!
Troubleshooting
My synth turns on, but I just get four solid LEDs lit up and nothing else?
If all four LEDs stay on solidly and you never get to the point where a single LED is on, it may
be that there has been an update error, or you have accidentally entered ‘update mode’.
When starting the update process, the firmware on the synth is erased, ready to put the new
firmware on. If the update is not completed successfully, the result will be that you only ever
see 4 LEDs lit solidly.
Don’t worry, it’s still possible to put the firmware back on the device, just repeat the update
process detailed on www.modalelectronics.com
The synth doesn’t show up as a MIDI device?
CRAFTsynth uses a class-compliant MIDI over USB connection, which means most operating
systems will recognise it as a MIDI device without the need to install additional drivers. If
you’re not seeing ‘Craft Synth’ listed as a MIDI device, check the following:
• Check to see if the device shows up on your computer, as described in the MIDI section
of this manual.
• Some systems may take some time to search for any required drivers, simply wait until
your operating system has finished this process.
• Check that your DAW or other software has enabled MIDI input and output to ‘Craft
Synth’. This is usually found in Preferences > MIDI.
• Check that the USB cable is not faulty, and that the USB socket on your computer works
properly.
• Make sure that the USB sockets are free from dust or dirt.
Table of contents
Other Modal Synthesizer manuals

Modal
Modal Argon8 User manual

Modal
Modal SKULPTsynthesiser User manual

Modal
Modal 008R User manual

Modal
Modal CRAFTsynth 2.0 User manual

Modal
Modal ARGON8X User manual

Modal
Modal ARGON8M User manual

Modal
Modal SKULPTsynth SE User manual

Modal
Modal COBALT8X User manual

Modal
Modal COBALT8 User manual

Modal
Modal 1 User manual