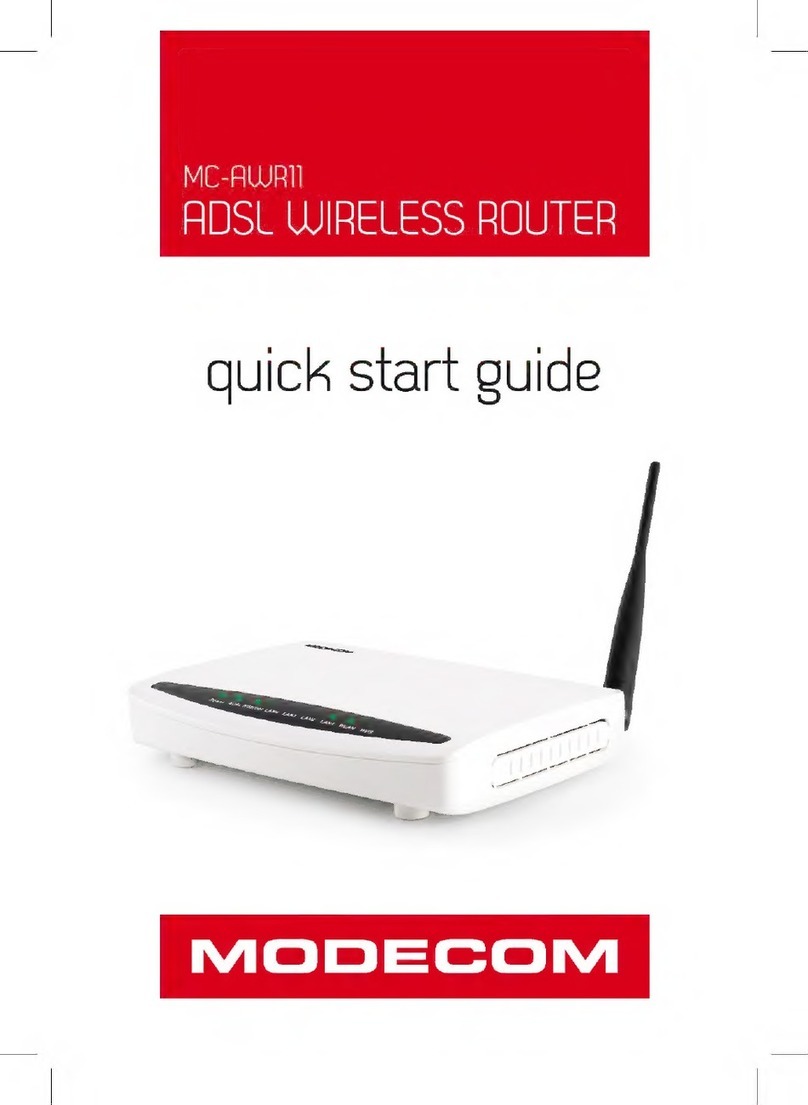
Modecom MC-420 User manual

MODECOM
user’s manual
wireless router ADSL
MC-420

www.modecom.eu
2
WIRELESS ROUTER ADSL
1. Introduction 3
1.1 Introduction 3
1.2 Product Features 4
2. Hardware Installation 6
2.1 System Requirements 6
2.2 Package Contents 6
2.3 Front Panel Indicators and Description 6
2.4 Back Panel 6
2.5 Connect Related Devices 7
3. Connecting Wireless ADSL2+ Router via Ethernet 7
3.1 Setup Wireless ADSL2+ router via Ethernet Cable 7
3.2 Configure TCP/IP 7
4. Configure Wireless ADSL2+ Router via HTML 14
4.1 Login 14
4.2 Navigating the Web Configurator 15
5. Interface Setup 16
5.1 Internet 16
5.1.1 ATM VC & QoS 17
5.1.2 Encapsulation 17
5.2 LAN 20
5.2.1 Router Local IP 20
5.2.2 Explaining RIP Setup 21
5.2.3 DHCP Server 21
5.2.4 DHCP Relay 21
5.2.5 DNS Relay 22
5.3 Wireless 22
5.3.1 Wireless LAN 22
5.3.2 Access Point Settings 23
5.3.3 Multiple SSIDs Settings 23
5.3.4 WDS Settings 23
6 Advanced Setup 24
6.1 Firewall 24
6.2 Routing 24
6.3 NAT 25
6.3.1 What NAT Does 26
6.3.2 How NAT Works 27
Contents
6.3.3 NAT Application 27
6.3.4 NAT Mapping Types 28
6.3.5 DMZ 28
6.3.6 Virtual Server 28
6.3.7 IP Address Mapping 29
6.4 ADSL 29
6.5 QoS 30
6.6 VLAN 30
7. Access Management 31
7.1 ACL 31
7.2 IP Filter 32
7.3 SNMP 34
7.4 UPnP 34
7.5 DDNS 35
8. Maintenance 36
8.1 Administration 36
8.2 Time Zone 37
8.3 Firmware 37
8.4 System Restart 38
8.5 Diagnostic 38
9. Status 38
9.1 Device Info 38
9.2 System Log 40
9.3 Statistics 40
10. Troubleshooting 41
10.1 Using LEDs to Diagnose Problems 41
10.1.1 Power LED 41
10.1.2 LAN LED 41
10.1.3 ADSL LED 42
10.2 Problems with the Web Interface 42
10.3 Problems with the Login Username and Password
42
10.4 Problems with LAN Interface 42
10.5 Problems with WAN Interface 43
10.6 Problems with the Internet Access 43

3
WIRELESS ROUTER ADSL
Copyright©2009 MODECOM S.A. All rights reserved. The MODECOM logo is registered trademark of MODECOM S.A.
Thank you for choosing our wireless ADSL router MC-420.
This broadband wireless ADSL router MC-420 is a all-in-one solution for home and SOHO network.
The built-in modem ADSL allows to reach fast Internet access. In addition, router has 4 port Ethernet switch 10/100
Mbps which allows to connect particular PC computers in local network using wired network.
The device is equipped with an Access Point of wireless network working in 802.11G standard. The built-in access
point of wireless network allows to reach a connection up to 54 Mbps thanks to which using the Internet and working
in the network is exceptionally convenient and efficient.
You can enjoy high-quality multimedia and real time applications such as on-line games, video on demand, VIP and
other broadband services. The device also assures servicing many routing functions thanks to which users can config-
ure their connection according to their demands and expectations.
In order to make using of our product easier, we recommend familiarizing yourself with the manual.
MODECOM takes care about the quality of its products not only by fulfilling, but also by forecasting its clients expec-
tations.
MODECOM products users are used to high quality, advanced technology, reliability and functionality.
We make our exceptional products especially for YOU.
Choose better future - Choose MODECOM!
GB
wireless router ADSL
MC-420

www.modecom.eu
4
WIRELESS ROUTER ADSL
1.2 Product Features
Application Diagram
Internet
MC-420
High Speed Internet Access
This Wireless ADSL2+ router complies with ADSL / ADSL2 / ADSL2+ standards. It can support downstream rates of up
to 24Mbps and upstream rates of up to 1Mbps. This ADSL2+ router is compliant with the following standards.
• ANSI T1.413 issue 2
• ITU-T G.992.1 (G.dmt)
• ITU-T G.992.2 (G.lite)
• G.994.1 (G.hs, Multimode)
• ITU-T G.992.3 (ADSL2 G.dmt.bis)
• ITU-T G.992.4 (ADSL2 G.lite.bis)
• ITU-T G.992.5 (ADSL2+; Annex A, I, J, L & M)
• Reach Extended ADSL (RE ADSL)
Quick Setup Wizard
Support Quick Setup Wizard Web GUI to configure this Wireless ADSL2+ router easily and quickly.
Multi-connection protocol support
• Multi Protocol over AAL5 (RFC1483 / 2684)
• Classical IP over ATM (RFC 1577)
• VC and LLC Multiplexing
• PPP over Ethernet (RFC 2516)
• PPP over ATM (RFC 2364)
Network Address Translation (NAT)
Network Address Translation (NAT) allows the translation of an Internet protocol address used within one network (for
example a private IP address used in a local network) to a different IP address known within another network (for ex-
ample a public IP address used on the Internet).
Universal Plug and Play (UPnP)
Universal Plug and Play is a standard that uses Internet and Web protocols to enable devices such as PCs, peripher-
als, intelligent appliances, and wireless devices to be plugged into a network and automatically know about each other.
This protocol is used to enable simple and robust connectivity among stand-alone devices and PCs.

5
WIRELESS ROUTER ADSL
Dynamic DNS Support
With Dynamic DNS support, you can have a static hostname alias for a dynamic IP address, allowing the host to be
more easily accessible from various locations on the Internet. You must register for this service with a Dynamic DNS
client.
DHCP Support
DHCP (Dynamic Host Configuration Protocol) allows individual clients to obtain TCP/IP configuration at start-up from a
centralized DHCP server. The ADSL router has built-in DHCP server capability enabled by default. It can assign IP ad-
dresses, an IP default gateway and DNS servers to DHCP clients. It can also act as a surrogate DHCP server (DHCP
Relay) where it relays IP address assignment from the actual real DHCP server to the clients.
Device Management
• Web-based GUI Configuration / Management
• Command-line Interpreter (CLI)
• Telnet Remote Management
• Firmware upgrade via FTP / TFTP (Web-based GUI)
• Built-in Diagnostic tool and IP Ping
SNMP (Simple Network Management Protocol) Support
It’s an easy way to remote control the router via SNMP.
10/100M Auto-negotiation Fast Ethernet switch
This auto-negotiation feature allows the router to detect the speed of incoming transmissions and adjust appropriately
without manual intervention. It allows data transfer of either 10 Mbps or 100 Mbps in either half-duplex or full-duplex
mode depending on your Ethernet network.
Multiple PVC (Permanent Virtual Circuits) Support
• Support up to 8PVCs.
• Supports OAM F4/F5 loop-back, AIS and RDI OAM cells.
• ATM Forum UNI 3.1/4.0 PVC
Bridging / Routing support
• Ethernet to ADSL self-learning Transparent Bridging (IEEE 802.1D)
• IP routing-RIPv2 (backward compatible with RIPv1)
• Static IP routing
• Routing (TCP/IP/UDP/ARP/ICMP)
• IP Multicast IGMP v1/v2
Wireless
• IEEE802.11g compliance, backward compatible with 802.11b (at 11Mbps)
• 64/128 bits WEP Encryption
• WPA, WPA-TKIP/PSK
• MAC Address Filtering
Security
• PPP over PAP (Password Authentication Protocol; RFC1334)
• PPP over CHAP (Challenge Authentication Protocol; RFC1994)
• VPN (IPsec, PPTP, L2TP) pass through
• Built-in NAT Firewall
• IP-based Packet filtering
• Password Protected System Management

www.modecom.eu
6
WIRELESS ROUTER ADSL
2. Hardware Installation
2.1 System Requirements
• Pentium III 266 MHz processor or higher
• 128 MB RAM minimum
• 20 MB of free disk space minimum
• RJ45 Ethernet Port
2.2 Package Contents
• Wireless ADSL2+ Router
• RJ-45 Ethernet cable
• RJ-11 Phone cable
• Power Adapter
• Quick Installation Guide
2.3 Front Panel Indicators and Description
Front panel of this Wireless ADSL2+ router has LED indicators to display router’s operating status.
Descriptions of LED status
PWR When an active power adapter is connected with this router, this LED will light up.
WLAN When WLAN card installed properly, this LED will be flashing. When transferring data, the LED will be
steadily.
4 When port 4 connection with PC or Switch / Hub is established, this LED will light up.
3 When port 3 connection with PC or Switch / Hub is established, this LED will light up.
2 When port 2 connection with PC or Switch / Hub is established, this LED will light up.
1 When port 1 connection with PC or Switch / Hub is established, this LED will light up.
ADSL When connection with Internet (ADSL Connected) is established, this LED will light up. When this LED is
flashing: NO ADSL physical connection
2.4 Back Panel
PWR Connect with power adapter
ON/OFF Power switch button
LINE Connect with phone cable
4 Connect with Ethernet Cable to Switch Hub or PC
3 Connect with Ethernet Cable to Switch Hub or PC
2 Connect with Ethernet Cable to Switch Hub or PC
1 Connect with Ethernet Cable to Switch Hub or PC
DEFAULT Reset button

7
WIRELESS ROUTER ADSL
2.5 Connect Related Devices
1) Connect Router to LINE Plug the provided RJ-11 phone cable into LINE port on the back panel of the router and in-
sert the other end into splitter or wall phone jack.
2) Connect Router to LAN Plug RJ-45 Ethernet Cable into LAN port on the back panel of the router and insert the other
end of the Ethernet cable on your PC’s Ethernet port or switch / hub.
3) Connect Router to Power Adapter Plug Power Adapter to PWR port on the back panel of the router and the other
end to a power outlet.
4) Press ON/OFF button to start the router
Warning! Only use the power adapter provided in the package, otherwise it may cause hardware damage.
3. Connecting Wireless ADSL2+ Router via
Ethernet
Your router can be managed from anywhere with the embedded Web configuration using a Web browser, such as
Microsoft Internet Explorer or Netscape Navigator. Internet Explorer 6.0 and later or Netscape Navigator 7.0 and later
versions with JavaScript enabled should be used. A screen resolution of 1024 by 768 pixels is recommended.
3.1 Setup Wireless ADSL2+ router via Ethernet Cable
If there is an available LAN card present on your PC, you just simply connect ADSL router and PC through the Ethernet
cable. Once you establish Internet connection, you could browse the Web through the Ethernet cable.
3.2 Configure TCP/IP
For Windows 98SE and ME
Step 1: Click Start then Settings and choose Control Panel
Step 2: Double click Network icon.
Step 3: Select Configuration tab, then choose TCP/IP from the list of installed network Components and click Properties
button.
Step 4: You can setup the following configurations in two methods:

www.modecom.eu
8
WIRELESS ROUTER ADSL
Option1: Get an IP from Router Automatically
Select the IP Address tab.
In this page, click Obtain an IP address automatically radio button.
1) Select Gateway tab and click OK
2) Then, select DNS Configuration tab and select Disable DNS then click OK to finish the configuration.

9
WIRELESS ROUTER ADSL
Option2: Configure IP Manually
1) At IP Address tab, select Specify an IP address, set default IP address for the Router is 192.168.1.1, so use
192.168.1.X (X is a number between 2 to 254) for IP Address field and 255.255.255.0 for Subnet Mask field.
2) Select Gateway tab and add default Router IP Address “192.168.1.1” in the New gateway field and click Add.
Under DNS Configuration tab, select Enable DNS and add DNS values
(192.168.1.1) in DNS Server Search Order field then click Add.

www.modecom.eu
10
WIRELESS ROUTER ADSL
For Windows 2000
Step 1:
(a) Right-click My Network Places and select Properties in the main window screen
(b) Or, go to Start / Settings / Control Panel. In the Control Panel, double-click on Network and Dial-up Connections.
Step 2: Right click Local Area Connection (your local network hooked up with ADSL router) and select Properties:
Step 3: Select Internet Protocol (TCP/IP) then click Properties:

11
WIRELESS ROUTER ADSL
Configure IP Automatically:
Step 4: Select Obtain an IP address automatically and Obtain DNS server address automatically then click OK to com-
plete IP configuring process.
Configure IP Manually: Step 4: Select Use the following IP address and Use the following DNS server addresses. IP
address: Fill in IP address 192.168.1.x (x is a number between 2 to 254). Subnet mask: Default value is 255.255.255.0.
Default gateway: Default value is 192.168.1.1. Preferred DNS server: Fill in preferred DNS server IP address. Alternate
DNS server: Fill in alternate DNS server IP address.

www.modecom.eu
12
WIRELESS ROUTER ADSL
For Windows XP
Step 1: Click Start then select Control Panel.
Step 2: Double-click Network Connections icon.
Step 3: Right-click Local Area Connection (local network your ADSL hooked up with) and select Properties:

13
WIRELESS ROUTER ADSL
Step 4: Select Internet Protocol (TCP/IP) then click Properties:
Configure IP address Automatically:
Step 5: Select Obtain an IP address automatically and Obtain DNS server address automatically. Click OK to finish
the configuration.

www.modecom.eu
14
WIRELESS ROUTER ADSL
Configure IP Address Manually:
Step 5: Select Use the following IP address and Use the following DNS server addresses.
IP address: Fill in IP address 192.168.1.x (x is a number between 2 to 254).
Subnet mask: Default value is 255.255.255.0.
Default gateway: Default value is 192.168.1.1.
Preferred DNS server: Fill in preferred DNS server IP address.
Alternate DNS server: Fill in alternate DNS server IP address.
You can use ping command under DOS prompt to check if you have setup TCP/IP protocol correctly and if your com-
puter has successfully connected to this router.
1) Type ping 192.168.1.1 under DOS prompt and the following messages will appear:
Pinging 192.168.1.1 with 32 bytes of data: Reply from 192.168.1.1: bytes=32 times<2ms TTL=64 Reply from
192.168.1.1: bytes=32 times<1ms TTL=64 Reply from 192.168.1.1: bytes=32 times<10ms TTL=64
2) If the communication link between your computer and router is not setup correctly,
after you type ping 192.168.1.1 under DOS prompt following messages will appear:
Pinging 192.168.1.1 with 32 bytes of data:
Request timed out.
Request timed out.
Request timed out.
Cable issue or something wrong might cause this failure in configuration procedure.
4. Configure Wireless ADSL2+ Router via
HTML
This device supports a Web-based (HTML) GUI to allow users to configure Router setting via Web browser.
4.1 Login
1) Launch the Web browser.

15
WIRELESS ROUTER ADSL
2) Enter the default IP address http://192.168.1.1
3) Entry of the username and password will be displayed. Enter the default login User Name and Password: • The de-
fault login User Name of the administrator is admin, and the default login password is admin.
4.2 Navigating the Web Configurator
Steps to navigate the Web configuration from the Site Map are summarized as below.

www.modecom.eu
16
WIRELESS ROUTER ADSL
Steps to navigate the Web configuration from the Site Map are summarized below.
• Click on Quick Start to begin a wizard that helps to configure your router.
• Click on Interface Setup to configure Internet and LAN functions.
• Click on Advanced Setup to configure advanced features.
• Click on Access Management to manage Internet access options.
• Click on Maintenance to set a new password, to set the time zone, to upgrade or reload firmware and to run diag-
nostic tests on the router
• Click on Status to see router device information, system logs and performance statistics.
• Click on Help to see available help topics.
5. Interface Setup
The physical connections determine whether the router ports are local area network (LAN) ports or wide area network
(WAN) ports. There are two kinds of IP networks. The local, private kind is the LAN network; the global, public kind is
the WAN network. The following illustration shows the relationship between the router and the two different networks.
A LAN is a shared communication system to which many computers are attached. A LAN is generally limited to the im-
mediate area, usually the same building or floor of a building. A WAN is an outside connection to another network or
to the Internet.
Click an Interface Setup link to set ATM VC values, ISP Encapsulation, configure multi- connection settings, and LAN
configuration.
5.1 Internet
The Internet screen allows you to set up how your router connects to the Internet. If you already ran the Quick Start wiz-
ard, the information you provided to the wizard should be entered into the fields already. After you finish the changes,
click on the SAVE button to save your changes.

17
WIRELESS ROUTER ADSL
5.1.1 ATM VC & QoS
ATM settings are used to connect to your ISP. Your ISP provides VPI, VCI, settings to you. In this Device, you can totally
setup 8 PVCs on different encapsulations if you apply 8 different virtual circuits from your ISP. You need to activate the
VC to take effect. For PVCs management, you can use ATM QOS to setup each PVC traffic line’s priority. Virtual Circuit:
Select the VC number you want to setup. VPI: Virtual Path Identifier. The valid range for the VPI is 0 to 255. VCI: Virtual
Channel Identifier. The valid range for the VCI is 1 to 65635 (0 to 31 is reserved for local management of ATM traffic).
ATM QoS: Select the Quality of Service types for this Virtual Circuit. The ATM QoS types include CBR(Constant Bit Rate),
VBR(Variable Bit Rate) and UBR (Unspecified Bit Rate). These QoS types are all controlled by the parameters specified
below, including PCR, SCR, and MBS. PCR: Peak Cell Rate (PCR) is the maximum rate at which the sender can send
cells. This parameter may be lower (but not higher) than the maximum line speed. 1 ATM cell is 53 bytes (424 bits), so a
maximum speed of 832 Kbps gives a maximum PCR of 1962 cells/sec. This rate is not guaranteed because it is depen-
dent on the line speed. SCR: Sustained Cell Rate (SCR) is the mean cell rate of a bursty, on-off traffic source that can be
sent at the peak rate, and a parameter for burst-type traffic. SCR may not be greater than the PCR; the system default is
0 cells/sec. MBS: Maximum Burst Size (MBS) is the maximum number of cells that can be sent at the PCR.
After MBS is reached, cell rates fall below SCR until cell rate averages to the SCR again. At thistime, more cells (up to
the MBS) can be sent at the PCR again. CBR is for connections that support constant rates of data transfer. The only
parameter you need to worry about in CBR is PCR. UBR is for connections that have variable traffic. The only param-
eter you need to worry about in UBR is PCR.rtVBR is for connections that, while having variable traffic, require precise
timing between trafficsource and destination. PCR, SCR and MBS must all be set for rtVBR. nrtVBR is for connections
that have variable traffic, do not require precise timing, but still require a set bandwidth availability. PCR, SCR and MBS
must all be set for nrtVBR.
5.1.2 Encapsulation
Select the encapsulation protocol your ISP uses. The following section will vary depending on which encapsulation
protocol you select.

www.modecom.eu
18
WIRELESS ROUTER ADSL
(1) Dynamic IP Address
Select this option if your ISP provides you an IP address automatically. Please enter the Dynamic IP information ac-
cordingly.
The following table describes the labels in this screen.
LABEL DESCRIPTION
Encapsulation Select your encapsulation type from the dropdown list.
NAT Select whether NAT is Enabled or Disabled.
Default Route Select whether this PVC will be the default route for Internet data.
TCP MTU Option Enter TCP MTU Value here
Dynamic Route Select the RIP type and direction from the dropdown lists.
Multicast Select the multicast protocol you wish to use from the dropdown list.
(2) Static IP Address
Select this option to set static IP information. You will need to enter in the encapsulation type (1483 Bridged IP LLC,
1483 Bridged IP VC-Mux, 1483 Routed IP LLC (IPoA), 1483 Routed IP VC-Mux), IP address, subnet mask, and gate-
way address provided to you by your ISP. Each IP address entered in the fields must be in the appropriate IP form,
which is 4 IP octets separated by a dot (x.x.x.x). The Router will not accept the IP address if it is not in this format.
The following table describes the labels in this screen.
LABEL DESCRIPTION
Encapsulation Select your encapsulation type from the dropdown list.
Static IP Address Enter the static IP Address here.
IP Subnet Mask Enter the IP Subnet Mask here.
Gateway Enter the Gateway address here.
NAT Select whether NAT is Enabled or Disabled.
Default Route Select whether this PVC will be the default route for Internet data.
Dynamic Route Select the RIP type and direction from the dropdown lists.
Multicast Select the multicast protocol you wish to use from the dropdown list.

19
WIRELESS ROUTER ADSL
(3) PPPoA / PPPoE
Select this option if your ISP requires you to use a PPPoE connection. This option is typically used for DSL service.
Select Dynamic PPPoE to obtain an IP address automatically for your PPPoE connection. Selection Static PPPoE to
use static IP address for your PPPoE connection. Please enter the information accordingly.
LABEL DESCRIPTION
Username Enter your username for your PPPoE/PPPoA connection.
Password Enter your password for your PPPoE/PPPoA connection.
Encapsulation Select your encapsulation type from the dropdown list.
Bridge Interface Select whether the Interface will be Activated or Deactivated.
Connection Select whether your connection is always on or if it connects on demand. If on demand,
specify how many minutes the connection may be idle before it disconnects.
TCP MSS Option Enter the TCP MSS you wish to use here.
Get IP Address Choose whether the ROUTER obtains the IP address statically or dynamically.
Static IP Address Enter the static IP address here. Only if you chose Static above.
IP Subnet Mask Enter the IP subnet mask here. Only if you chose Static above.
Gateway Enter the gateway here. Only if you chose Static above.
NAT Select whether NAT is Enabled or Disabled.
Default Route Select whether this PVC will be the default route for Internet data.
TCP MTU Option Enter TCP MTU Value here.
Dynamic Route Select the RIP type and direction from the dropdown lists.
Multicast Select the multicast protocol you wish to use from the dropdown list.
Connection Setting: For PPPoE/PPPoA connection, you can select Always on or Connect on-demand. Connect on de-
mand is dependent on the traffic. If there is no traffic (or Idle) for a pre-specified period of time, the connection will tear
down automatically. And once there is traffic send or receive, the connection will be automatically on.
IP Address: For PPPoE/PPPoA connection, you need to specify the public IP address for this ADSL Router. The IP ad-
dress can be either dynamically (via DHCP) or given IP address provide by your ISP. For Static IP, you need to specify
the IP address, Subnet Mask and Gateway IP address.
NAT: Select this option to Activate/Deactivated the NAT (Network Address Translation) function for this VC. The NAT
function can be activated or deactivated per PVC basis.

www.modecom.eu
20
WIRELESS ROUTER ADSL
[Dynamic Route]
RIP (Routing Information Protocol): Select this option to specify the RIP version, including RIP1, RIP2-B and RIP2-M.
RIP2-B & RIP2-M are both sent in RIP-2 format, the difference is that RIP2-M using Multicast and RIP2-B using Broadcast
format. RIP Direction: Select this option to specify the RIP direction. None is for disabling the RIP function. Both means
the ADSL Router will periodically send routing information and accept routing information then incorporate into routing
table. IN only means the ADSL router will only accept but will not send RIP packet. OUT only means the ADSL router will
only sent but will not accept RIP packet.
[Multicast]
IGMP (Internet Group Multicast Protocol): It is a session-layer protocol used to establish membership in a multicast
group. The ADSL supports both IGMP version IGMP-v1 & IGMP-v2. Select None to disable it.
Your ISP should provide the above information. Note that you must enter the user name exactly as your ISP assigned it. If
the assigned name is in the form of user@domain where domain identifies a service name, enter it exactly as given.
(4) Bridge Mode
The modem can be configured to act as a bridging device between your LAN and your ISP. Bridges are devices that enable
2 or more networks to communicate as if they are 2 segments of the same physical LAN. Please set the Connection type.
The following table describes the labels in this screen.
LABEL DESCRIPTION
Encapsulation Select your encapsulation type from the dropdown list.
5.2 LAN
There are the IP settings of the LAN Interface for the device. These settings may be referred to as Private settings. You
may change the LAN IP address if needed. The LAN IP address is provided to your internal network and cannot be
seen on the Internet.
5.2.1 Router Local IP
IP Address: Enter the IP address of your ADSL router in dotted decimal notation, for example, 192.168.1.1 (default set-
ting). IP Subnet Mask: Your ADSL router will automatically calculate the subnet mask based on the IP address that you
assign. Unless you are implementing sub netting, use the subnet mask computed by the ADSL router.
Table of contents
Languages:
Other Modecom Network Router manuals