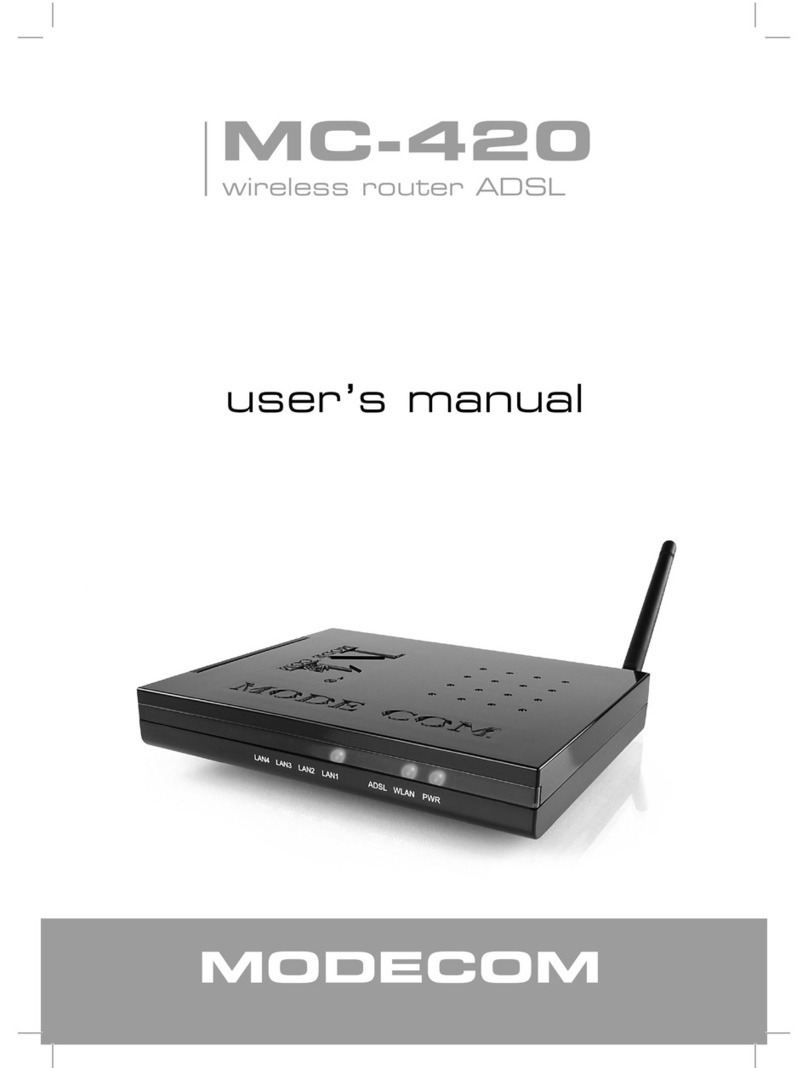
Modecom MC-4220 User manual

1
MODECOM
user’s manual
MC-4220
802.11n WLAN ADSL2+ Router

www.modecom.eu
2
802.11n WLAN ADSL2+ Router
Contest
Introduction 5
Device Requirements 5
Using this Document 6
Special messages 6
Getting to know the device 6
Parts Check 6
Front Panel 7
Rear Panel 9
Connecting your device 10
Conguring Ethernet PCs 11
Connecting the Hardware 11
Easy Setup 12
WAN Conguration: 12
Getting Started with the Web pages 17
Accessing the Web pages 17
Testing your Setup 19
Default device settings 19
Overview 20
Internet access settings 21
About Wireless ADSL2+ Router 22
Wireless Network 22
Basic Settings 22
Advanced Settings 24
Security 26
Access Control 31
Allow Listed 32
WPS 34
Operations of AP - AP being an enrollee 37
Operations of AP - AP being a registrar 44
Internet Access 49
Types of Internet Access 50
Conguring your PPPoE DSL connection 50
Conguring your PPPoA DSL connection 52
Conguring your Bridged DSL connection 53
Conguring your 1483 MER by DHCP 54
Conguring your 1483 MER by Fixed IP 55
ATM Settings 56
ADSL Settings 57
Local Network Conguration 58
Changing the LAN IP address and subnet mask 58
Adding the Secondary LAN IP address and subnet mask 61

3
802.11n WLAN ADSL2+ Router
DHCP Settings 63
DHCP Server Conguration 63
DHCP Relay Conguration 65
DHCP None Conguration 67
DNS Conguration 69
DHCP Server Conguration - Attain DNS Automatically 69
DHCP Server Conguration - Set DNS Manually 71
Overview of Dynamic DNS 73
Dynamic DNS Conguration – DynDNS.org 74
IP/Port Filtering 78
MAC Filtering 79
Conguring MAC ltering to Deny for outgoing access 79
Port Forwarding 81
Conguring Port Forwarding 81
Conguring custom applications 82
URL Blocking 89
Conguring URL Blocking of FQDN 89
Conguring URL Blocking of Keyword 91
Domain Blocking 93
Conguring Domain blocking 93
DMZ 95
Conguring DMZ 95
UPnP 97
Conguring UPnP 97
UPnP Control Point Software on Windows ME 99
UPnP Control Point Software on Windows XP with Firewall 99
RIP 101
ARP Table 103
ARP Table 103
Bridging 103
Bridging 103
Routing 104
Routing 104
SNMP 106
SNMP 106
Port Mapping 107
Port Mapping 107
IP QoS 109
IP QoS 109

www.modecom.eu
4
802.11n WLAN ADSL2+ Router
Remote Access 110
Others 111
Diagnostic 111
Ping 111
ATM Loopback 113
ADSL 114
Diagnostic Test 115
Commit/Reboot 116
Commit/Reboot 116
Backup/Restore 117
Backup settings 117
Restore settings 118
Resetting to Defaults 118
Software Reset: 119
Password 120
Setting your username and password 120
Firmware Update 122
About rmware versions 122
Manually updating rmware 122
ACL Conguration 125
ACL Cong 125
Time Zone 127
SNTP Server and SNTP Client Conguration settings 127
TR-069 Cong 132
TR-069 Conguration 132
Statistics 133
Interfaces 133
ADSL 134
Conguring your Computers 135
Conguring Ethernet PCs 135
Assigning static Internet information to your PCs 138
IP Addresses, Network Masks, and Subnets 139
IP Addresses 139
Subnet masks 141
Troubleshooting 141
Troubleshooting Suggestions 142
Diagnosing Problem using IP Utilities 143
Glossary 145

5
802.11n WLAN ADSL2+ Router
Introduction
Congratulations on becoming the owner of the Wireless ADSL2+ Router. You will
now be able to access the Internet using your high-speed DSL connection.
This User Guide will show you how to connect your Wireless ADSL2+ Router, and
how to customize its conguration to get the most out of your new product.
Features
The list below contains the main features of the device and may be useful to us-
ers with knowledge of networking protocols. If you are not an experienced user, the
chapters throughout this guide will provide you with enough information to get the
most out of your device.
Features include:
Internal DSL modem for high-speed Internet access•
10/100Base-T Ethernet Router to provide Internet connectivity to all comput-•
ers on your LAN
Network address translation (NAT) functions to provide security for your LAN•
Network conguration through DHCP Server and DHCP Client•
Services including IP route and DNS conguration, RIP, and IP and DSL per-•
formance monitoring
User-friendly conguration program accessed via a web browser•
User-friendly conguration program accessed via EasySetup program•
Device Requirements
In order to use the Wireless ADSL2+ Router, you must have the following:
DSL service up and running on your telephone line•
Instructions from your ISP on what type of Internet access you will be using,•
and the addresses needed to set up access
One or more computers each containing an Ethernet card (10Base-T/100Base-•
T network interface card (NIC))
For system conguration using the supplied a. web-based program: a web •
browser such as Internet Explorer v4 or later, or Netscape v4 or later. Note
that version 4 of each browser is the minimum version requirement – for opti-
mum display quality, use Internet Explorer v5, or Netscape v6.1 b. EasySetup
program: Graphical User Interface
Note
You do not need to use a hub or switch in order to connect more than one
Ethernet PC to your device. Instead, you can connect up to four Ethernet PCs
directly to your device using the ports labeled Ethernet on the rear panel.

www.modecom.eu
6
802.11n WLAN ADSL2+ Router
Using this Document
Notational conventions
Acronyms are dened the rst time they appear in the text and also in the •
glossary.
For brevity, the Wireless ADSL2+ Router is referred to as “the device”.•
The term• LAN refers to a group of Ethernet-connected computers at one site.
Typographical conventions
Italic• text is used for items you select from menus and drop-down lists and the
names of displayed web pages.
Bold• text is used for text strings that you type when prompted by the program,
and to emphasize important points.
Special messages
This document uses the following icons to draw your attention to specic instruc-
tions or explanations.
Note
Provides clarifying or non-essential information on the current topic.
Denition
Explains terms or acronyms that may be unfamiliar to many readers. These
terms are also included in the Glossary.
Warning
Provides messages of high importance, including messages relating to per-
sonal safety or system integrity.
Getting to know the device
Parts Check
In addition to this document, your package should arrive containing the following:
1. Wireless ADSL2+ Router
2. CD-ROM containing the online manual and Easy Setup software
3. Power Supply
4. Ethernet Cable
5. Standard Phone Cable
6. Quick Installation Guide

7
802.11n WLAN ADSL2+ Router
Front Panel
The front panel contains lights called Light Emitting Diodes (LEDs) that indicate
the status of the unit.
FrontPanelandLEDs
Label
Color
Function
POWER
green
On: device is powered on
Off: device is powered off
DSL
green
On: DSL link reaches showtime, which means that your
device has successfully connected to your ISP’s DSL
network.
Off: DSL link not in showtime, your device has not suc-
cessfully connected to your ISP’s DSL network.
Blink: Data being transmitted
INTERNET
green
On: PPP link established and active, which means that
your device has successfully connected to your ISP’s
network.
Off: No PPP link, your device has not successfully con-
nected to your ISP’s network.
Blink: PPP link established and active
LAN
4/3/2/1
green
On: LAN link established and active
Off: No LAN link
Blink: Valid Ethernet packet being transferred
WLAN
green
Press this button for 5 seconds to Disable or Enable
Wireless LAN.
WPS
green
Press this button for 3 seconds to Enable WPS function.

www.modecom.eu
8
802.11n WLAN ADSL2+ Router
Rear Panel
The rear panel contains a RestoreDefaults button, the ports for the unit’s data and
power connections.
RearPanelConnections
RightPanelConnections

9
802.11n WLAN ADSL2+ Router
BottomSideforResetbuttonFigure1:
Label Function
LINE Connects the device to a telephone port in the wall of your home/
ofce for DSL communication
RESET Pressing this button restores the factory default conguration on
your device
LAN 4/3/2/1 Connects the device via Ethernet to up to four PCs on your LAN
ANETENNA ANETENNA
POWER Connects to the supplied power cable
ON/OFF
SWITCH
Power on/off the device
WLAN Press this button for 5 seconds to Disable or Enable Wireless
LAN.
WPS Press this button for 3 seconds to Enable WPS function.
Connecting your device
This chapter provides basic instructions for connecting the Wireless ADSL2+
Router to a computer or LAN and to the Internet.
In addition to conguring the device, you need to congure the Internet properties
of your computer(s). For more details, see the following sections:

www.modecom.eu
10
802.11n WLAN ADSL2+ Router
Conguring Ethernet PCs
This chapter assumes that you have already established a DSL service with your
Internet service provider (ISP). These instructions provide a basic conguration that
should be compatible with your home or small ofce network setup. Refer to the sub-
sequent chapters for additional conguration instructions.
Connecting the Hardware
This section describes how to connect the device to the wall phone port, the power
outlet and your computer(s) or network.
WARNING
Before you begin, turn the power off for all devices. These include
your computer(s), your LAN hub/switch (if applicable), and the Wireless
ADSL2+ Router.
The diagram below illustrates the hardware connections. The layout of the ports
on your device may vary from the layout shown. Refer to the steps that follow for
specic instructions.
OverviewofHardwareConnections

11
802.11n WLAN ADSL2+ Router
Step 1. Connect the Telephone cable to ADSL line
Connect one end of the provided phone cable to the port labeled LINE on the rear
panel of the device. Connect the other end to your wall phone port.
Step 2. Connect the Ethernet cable
Connect either a LAN hub or Ethernet computers directly to the device via Ether-
net cable(s).
Note that the cables do not need to be crossover cables.
Step 3. Attach the power connector
Connect the power adapter to the POWER connector on the back of the device
and plug the adapter into a wall outlet or power strip. Turn on and boot up your
computer(s) and any LAN devices such as hubs or switches.
Step 4. Power on the device
Press ON/OFF SWITCH to power on the device.
Step 5. Congure your Ethernet PCs
You must also congure the Internet properties on your Ethernet PCs. SeeCon-
guringEthernetPCs.
Next step
After setting up and conguring the device and PCs, you can log on to the device
by following the instructions in Getting Started with the Web pages. The chapter
includes a section calledTesting yourSetup, which enables you to verify that the
device is working properly.
Easy Setup
For easy conguration, insert the CD into your CD-ROM drive.
The CD should auto-start and then click “Easy Setup”. If it does not start, click on
Start -> Run and type in CD:\fscommand \vbpES.exe (where CD is the drive letter of
your CD-ROM drive.)
WAN Conguration:
There are Four options of Protocol Modes on WAN Conguration: PPPoA VC-
Mux, PPPoE LLC, 1483 Bridged IP LLC and 1483 MER LLC Mode.
PPPoE LLC / PPPoA VC-Mux
After selecting the Protocol : • PPPoELLC/PPPoAVC-Mux:
Enter • VPI/VCI which was given by Telecom or by your Internet Service Pro-
vider (ISP).
Enter • Username/Password which was given by Telecom or by your Internet
Service Provider (ISP).
Click• Setup.

www.modecom.eu
12
802.11n WLAN ADSL2+ Router
Easy setup conguration completed. Now you are ready to Surf the Internet!!!

13
802.11n WLAN ADSL2+ Router
1483 Bridged IP LLC
After selecting the Protocol : 1483 Bridged IP LLC:•
Enter • VPI/VCI which was given by Telecom or by your Internet Service Pro-
vider (ISP).
Click• Setup.
Easy setup conguration completed. Now you are ready to Surf the Internet!!!

www.modecom.eu
14
802.11n WLAN ADSL2+ Router
1483 MER LLC Fixed IP
After selecting the Protocol : 1483 MER LLC:•
Enter • VPI/VCI which was given by Telecom or by your Internet Service Pro-
vider (ISP).
From the• Type ratio, click FixedIP.
Enter • LocalIPAddress/SubnetMask/RemoteIPAddress which was given
by Telecom or by your Internet Service Provider (ISP).
Click• Setup.
Easy setup conguration completed. Now you are ready to Surf the Internet!!!

15
802.11n WLAN ADSL2+ Router
1483 MER LLC DHCP
After selecting the Protocol : 1483 MER LLC:•
Enter • VPI/VCI which was given by Telecom or by your Internet Service Pro-
vider (ISP).
From the• Type ratio, click DHCP.
Click• Setup.
Easy setup conguration completed. Now you are ready to Surf the Internet!!!

www.modecom.eu
16
802.11n WLAN ADSL2+ Router
Getting Started with the Web pages
The Wireless ADSL2+ Router includes a series of Web pages that provide an
interface to the software installed on the device. It enables you to congure the de-
vice settings to meet the needs of your network. You can access it through your web
browser from any PC connected to the device via the LAN ports.
Accessing the Web pages
To access the Web pages, you need the following:•
A PC or laptop connected to the LAN port on the device.•
A web browser installed on the PC. The minimum browser version require-•
ment is Internet Explorer v4 or Netscape v4. For the best display quality, use
latest version of Internet Explorer, Netscape or Mozilla Firefox.From any of the
LAN computers, launch your web browser, type the following URL in the web
address (or location) box, and press [Enter] on your keyboard: http://10.0.0.2
The Status homepage for the web pages is displayed:
10.0.0.2
Homepage

17
802.11n WLAN ADSL2+ Router
The rst time that you click on an entry from the left-hand menu, a login box is
displayed. You must enter your username and password to access the pages.
A login screen is displayed:
•••••••••••••
Loginscreen
Enter your user name and password. The rst time you log into the program, use
these defaults:
UserName: admin
Password: administrator
Note
You can change the password at any time or you can congure your device so
that you do not need to enter a password. See Password.
Click on OK. You are now ready to congure your device.
This is the rst page displayed each time you log in to the Web pages. This page
contains links to the following pages:
Addressing; links to the• Addressing page that controls your device’s network
address. SeeAddressing.
Internet Access; links to the• InternetAccess page that controls how your de-
vice connects to the Internet. See InternetAccess.
Note
If you receive an error message or the Welcome page is not displayed, see
Troubleshooting Suggestions.

www.modecom.eu
18
802.11n WLAN ADSL2+ Router
Testing your Setup
Once you have connected your hardware and congured your PCs, any computer
on your LAN should be able to use the device’s DSL connection to access the Inter-
net.
To test the connection, turn on the device, wait for 30 seconds and then verify that
the LEDs are illuminated as follows:
Table 1. LED Indicators
LED
Behavior
POWER
Solid green to indicate that the device is turned on. If this light is
not on, check the power cable attachment.
ETH
Flashing on/off while the device is booting. After about 10-15
seconds, solid green to indicate that the device can communicate
with your LAN.
Link
Flashing on/off while data is being transmitted. Solid green to
indicate that the device has successfully established a connec-
tion with your ISP.
INTERNET
Flashing on/off while data is being transferred. Solid green when
a valid IP address has been assigned to the device by the ISP.
If the LEDs illuminate as expected, test your Internet connection from a LAN com-
puter. To do this, open your web browser, and type the URL of any external website.
The LED labeled INTERNET should blink rapidly and then appear solid as the device
connects to the site.
If the LEDs do not illuminate as expected, you may need to congure your Internet
access settings using the information provided by your ISP. For details, see Internet
Access. If the LEDs still do not illuminate as expected or the web page is not dis-
played, seeTroubleshootingSuggestions or contact your ISP for assistance.
Default device settings
In addition to handling the DSL connection to your ISP, the DSL Modem can pro-
vide a variety of services to your network. The device is precongured with default
settings for use with a typical home or small ofce network.
The table below lists some of the most important default settings; these and other
features are described fully in the subsequent chapters. If you are familiar with net-
work conguration, review these settings to verify that they meet the needs of your
network. Follow the instructions to change them if necessary. If you are unfamiliar
with these settings, try using the device without modication, or contact your ISP for
assistance.

19
802.11n WLAN ADSL2+ Router
WARNING
We strongly recommend that you contact your ISP prior to changing the
default conguration.
Option Default Setting Explanation/Instructions
LINEPortIPAd-
dress
Unnumbered inter-
face:
10.0.0.2
Subnet mask:
255.255.255.255
This is the temporary public IP ad-
dress of the WAN port on the device.
It is an unnumbered interface that is
replaced as soon as your ISP assigns
a ‘real’ IP address. SeeInternetAc-
cess.
LANPort
IPAddress
Assigned static IP
address:
10.0.0.2
Subnet mask:
255.255.255.0
This is the IP address of the LAN port
on the device. The LAN port connects
the device to your Ethernet network.
Typically, you will not need to change
this address. See LAN.
DHCP(Dynamic
HostConguration
Protocol)
DHCP server
enabled with the
following pool of ad-
dresses:
10.0.0.33
through
10.0.0.254
The Wireless ADSL2+ Router main-
tains a pool of private IP addresses
for dynamic assignment to your LAN
computers. To use this service, you
must have set up your computers to
accept IP information dynamically, as
described inServices->DHCPSet-
tings.
NAT(NetworkAd-
dressTranslation)
NAT enabled Your computers’ private IP addresses
(see DHCP above) will be translated
to your public IP address whenever
the PCs access the Internet. See Ser-
vices->Firewall.
Overview
The Overviewpage displays useful information about the setup of your device,
including:
details of the device’s Internet access settings•
version information about your device•
To display this page:
From the left-hand menu, click on Status. The following page is displayed:

www.modecom.eu
20
802.11n WLAN ADSL2+ Router
10.0.0.2
Overviewpage
The information displayed on this page is explained in detail in the following sec-
tions.
Internet access settings
This section displays details of the settings that allow your device to access the
Internet. These details include:
Table of contents
Other Modecom Network Router manuals
Popular Network Router manuals by other brands

Harbor Freight Tools
Harbor Freight Tools 95160 operating instructions

ADTRAN
ADTRAN 1200263L1-1.2A user manual

Edimax
Edimax BR-6214K Firmware upgrade guide

ZyXEL Communications
ZyXEL Communications AMG1202-T10A user guide

MikroTik
MikroTik RBSXTG-5HPnD Series Repair instruction

NetComm
NetComm LIBERTY 3G22WV user guide

Billion
Billion BiPAC 7300WX Features & specifications

RouterBOARD
RouterBOARD Cloud Core Series Setup guide

Matrix Switch Corporation
Matrix Switch Corporation MSC-2HD2408S product manual

Patton electronics
Patton electronics 3210 Specification sheet

Juniper
Juniper JCS 1200 Removing guide

Vox
Vox Mikrotik installation guide