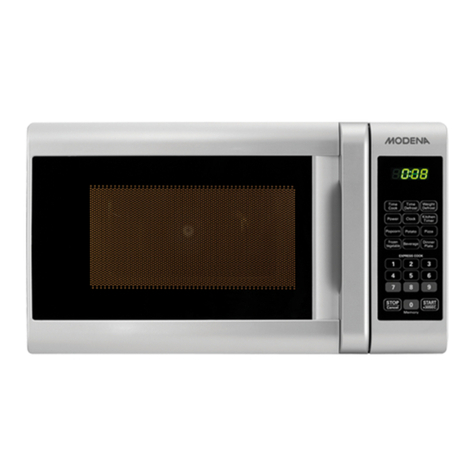
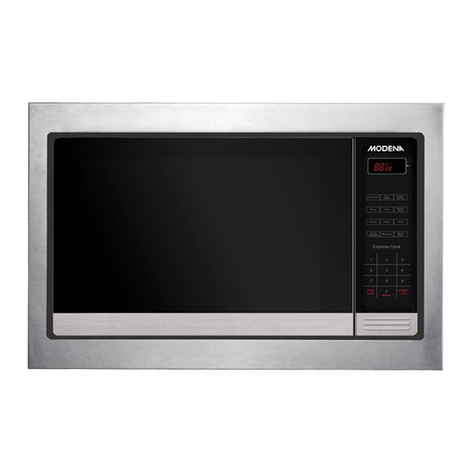
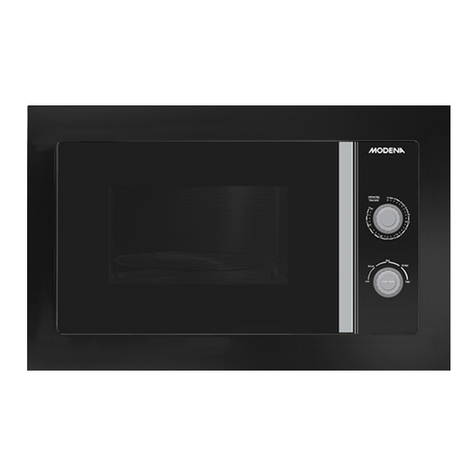
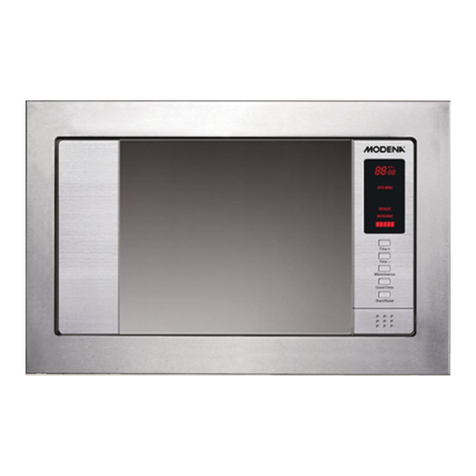
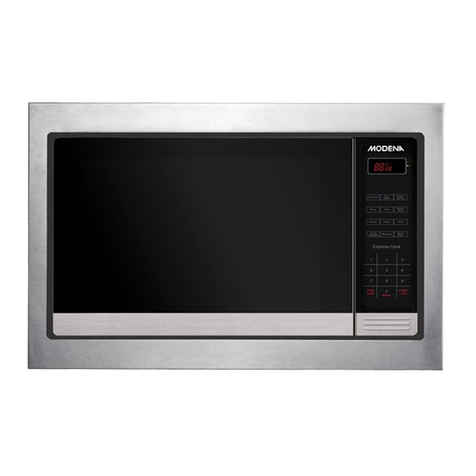
Modena Agiato Series Owner's manual

User Manual Book
Microwave Oven
Agiato Series
MO 2004
MO2305

2
TABLE OFCONTENTS
Part 1:Safety Warnings 28
Part 2: Nameof Parts 30
Turntable Installation 31
Part 3: Installation 31
Installation onthe Table 32
Part 4: Howto Use 33
How to UseMO 2004 33
How to UseMO 2305 39
Part 5: Maintenance 44
Part 6: Troubleshooting 44
Part 7: Precaution 45
Part 8: Specification 46
This guide book explains everything you need to know about your new
product. Please contact our Customer Care should you need further
assistance throughwww.modena.com

3
To reduce the risk of fire, electric shock, injury to persons or exposure
to excessive microwave oven energy when using your appliance,
follow basic precautions, including the following:
•
This appliance can be used by children aged from 8 years and above
and persons with reduced physical, sensory or mental capabilities
or lack of experience and knowledge if they have been given
supervision or instruction concerning use of the appliance in a safe
way and understand the hazards involved. Children shall not play
with the appliance. Cleaning and user maintenance shall not be
made by children unless they are older than 8 and supervised.
•
Keep the appliance and its cord out of reach of children less than 8
years.
•
Only use utensils that are suitable for use in microwave
•
The oven should be cleaned regularly and any food deposits should
be removed.
•
Read and follow the specific: "Precautions to Avoid Possible
Exposure to Excessive Microwave Energy".
•
When heating food in plastic or paper containers, keep an eye on
the oven due to the possibility of ignition.
•
If smoke is emitted, switch off or unplug the appliance and keep the
door closed in order to stifle any flames.
•
Do not overcook food.
•
Do not use the oven cavity for storage purposes. Do not store
items, such as bread, cookies, etc. inside the oven.
•
Remove wire twist-ties and metal handles from paper or plastic
containers/bags before placing them in the oven.
•
Install or locate this oven only in accordance with the installation
instructions provided.
•
Eggs in the shell and whole hard-boiled eggs should not be heated
in microwave ovens since they may explode, even after microwave
heating has ended.
•
This appliance is intended to be used in household and similar
applications such as: - staff kitchen areas in shops, offices and
other working environments; - by clients in hotels, motels and other
residential type environments; - farm houses;
- bed and breakfast type environments.
PART 1: SAFETY WARNINGS

4
•
If the supply cord is damaged, it must be replaced by the
manufacturer, its service agent or similarly qualified persons in
order to avoid a hazard.
•
Do not store or use this appliance outdoors.
•
Do not use this oven near water, in a wet basement or near a
swimming pool.
•
The temperature of accessible surfaces may be high when the
appliance is operating. The surfaces are liable to get hot during
use. Keep cord away from heated surface, and do not cover any
vents on the oven.
•
Do not let cord hang over edge of table or counter.
•
Failure to maintain the oven in a dean condition could lead to
deterioration of the surface that could adversely affect the life of
the appliance and possibly result in a hazardous situation.
•
The contents of feeding bottles and baby food jars shall be stirred
or shaken and the temperature checked before consumption, in
order to avoid bums.
•
Microwave heating of beverages can result in delayed eruptive
boiling, therefore care must be taken when handling the container.
•
The appliance is not intended for use by persons (including
children) with reduced physical, sensory or mental capabilities, or
lack of experience and knowledge, unless they have been given
supervision or instruction concerning use of the appliance by a
person responsible for their safety.
•
Children should be supervised to ensure that they do not play with
the appliance.
•
The appliances are not intended to be operated by means of an
external timer or separate remote-control system.
•
Accessible parts may become hot during use. Young children
should be kept away.
•
Steam cleaner is not to be used.
•
During use the appliance becomes hot. Care should be taken to
avoid touching heating elements inside the oven.
•
Only use the temperature probe recommended for this oven(for
ovens provided with a facility to use a surface, and do not cover any
vents on the oven.

5
•
WARNING: The appliance and its accessible parts become hot
during use. Care should be taken to avoid touching heating
elements. Children less than 8 years of age shall be kept away
unless continuously supervised.
•
The microwave oven must be operated with the decorative door
open (for ovens with a decorative door.)
•
The rear surface of appliance shall be placed against a wall.
•
The microwave oven must not be placed in a cabinet.
•
The microwave oven is intended for heating food and beverages.
Drying of food or clothing and heating of warming pads, slippers,
sponges, damp cloth and similar may lead to risk of injury, ignition
or fire.
A.
Control Panel
B.
Turntable shaft
C.
Turntable ring assembly
D.
Glass Tray
E.
Observation Window
F.
Door Assembly
G.
Safety Interlock System
PART 2: NAME OF PARTS

6
Turntable Installation
•
Never place the glass tray upside down. The glass tray should
never be restricted.
•
Both glass tray and turntable ring assembly must always be used
during cooking
•
All food and its containers are always placed on the glass tray on
cooking process
•
If glass tray or turntable ring assembly breaks or cracks, contact
MODENA call cente

7
PART 3: INSTALLATION
•
Make sure all the packing materials are removed from the inside of
the door.
•
Inspect the oven after unpacking for any visual damage such as:
•
Misaligned Door
•
Damaged Door
•
Dents of Holes in Door Window and Screen
•
Dents in Cavity
If any of the above is visible, DO NOT uses the oven.
•
This microwave oven must be placed on a horizontal surface strong
enough to support this weight.
•
The oven must be placed away from high temperature and steam.
•
DO NOT place anything on top of the oven.
•
On the use of freestanding, leave a space of at least 10 cm from
the rear, 8 cm from both sides of the wall and 15 cm from the top to
ensure proper ventilation.
•
On the use of a built-in (planted), adjust the distance by following
the installation of an appropriate frame.
•
oven.
•
Do not remove the light brown Mica cover that is attached to the
oven cavity to protect the magnetron.
•
As with any appliance, close supervision is necessary when used by
children.
WARNING!
•
The plug socket should be within easy reach of the power cord.
•
This oven requires 1.5 KVA for its input. Consultation with service engineer
is suggested when installing the oven.

8
Installation on the Table
1.
Select a level surface that provide enough open space for the
intake and/or outlet vents.
•
The minimum installation height is 85cm.
•
The rear surface of appliance shall be placed against a wall.
Leave a minimum clearance of 30cm above the oven, a
minimum clearance of 20cm is required between the oven and
any adjacent walls.
•
Do not remove the legs from the bottom of the oven.
•
Blocking the intake and/or outlet openings can damage the
oven.
•
Place the oven as far away from radios and TV as possible.
Operation of microwave oven may cause interference to your
radio or TV reception.
2.
Plug your oven into a standard household outlet. Be sure the
voltage and the frequency is the same as the voltage and the
frequency on the rating label. WARNING: Do not install oven over a
range cooktop or other heat-producing appliance. If installed near
or over a heat source, the oven could be damaged and the
warranty would be void. The accessible surface may be hot during
operation.

9
NOTE
•
In the process of clock setting, if the " STOP/CANCEL " button is pressed
or if there is no operation within 1 minute, the oven will go back to the
former setting automatically.
•
If the clock need to be reset, please repeat step 1 to step 3.
How to Use MO 2004
Power Level
10 power levels are available
Power
option
10
9
8
7
6
5
4
3
2
1
0
Oven Power
100
%
90
%
80%
70%
60%
50%
40
%
30%
20
%
10%
0%
Screen
Display
PL10
PL9
PL8
PL7
PL6
PL5
PL4
PL3
PL2
PL1
PL0
2.
Clock Setting
a.
Press " CLOCK ". "00:00" will display.
b.
Press the number keys and enter the current time. For example,
time is 12:10 now, please press "1,2,1,0" in turn.
c.
Press " CLOCK " to finish dock setting. ":" will flash and the clock will
be lighted.
d.
If the numbers input are not within the range of 1:00--12:59, the
setting will be invalid until valid numbers are input.
Kitchen Timer
a.
Press "KITCHEN TIMER ", LED will display 00:00, the first hour figure
flash.
b.
Press the number keys and enter the timer time. (the maximum
cooking time is 99 minutes and 99 seconds)
c.
Press " START/+30SEC. " to confirm setting.
d.
When the timer time arrives, the buzzer will ring 5 times. If the clock
be set (12- hour system), LED will display the current time.
PART 4: HOW TO USE

10
Microwave Cook
a.
Press "TIME COOK" once, LED will display "00:00".
b.
Press number keys to input the cooking time; the maximum cooking
time is 99 minutes and 99 seconds.
c.
Press " POWER " once, LED will display "PL10". The default power is
100% power. Now you can press number keys to adjust the power
level.
d.
Press " START/+30SEC." to start cooking.
Example: to cook the food with 50% microwave power for 15 minutes.
a. Press "TIME COOK" once."00:00" displays.
b. Press "1","5","0","0" in order.
c.
Press "POWER" once, then press "5" to select 50% microwave
power.
d.
Press "START/+30SEC." to start cooking.
NOTE
•
In the process of setting, if the " STOP/CANCEL" button is pressed or if
there is no operation within 1 minute, the oven will go back to the former
setting automatically.
•
If "PL0" selected, the oven will work with fan for no power.
•
During microwave cooking, "POWER" can be pressed to change the power
you need. After pressing POWER", the current power flash for 3 seconds,
now you can press number button to change the power. The oven will work
with the selected power for the rest time.
NOTE
•
The kitchen time is differ from 12-hour system, Kitchen Timer is a timer.
•
During kitchen timer, any program cannot be set.

11
Speedy Cooking
a.
In waiting state, instant cooking at 100% power level can be started
by select a cooking time from 1 to 6 minutes by pressing number
pads1 to 6. Press " START/+30SEC." to increase the cooking time;
the maximum cooking time is 99 minutes and 99 seconds.
b.
In waiting state, instant cooking at 100% power level with 30
seconds' cooking time can be started by pressing " START/+30SEC
". Each press on the same button will increase cooking time by 30
seconds. the maximum cooking time is 99 minutes and 99 seconds.
Weight Defrost Function
a.
Press WEIGHT DEFROST, LED will display dEF1.
b.
Press numerical buttons to input weight to be defrosted. Input the
weight ranged between 100-2000 g.
c.
If the weight input is not within 100-2000 g, the input will be invalid.
d.
Press "START/+30SEC." to start defrosting and the cooking time
remained will be displayed.
Time Defrost Function
a.
Press "TIME DEFROST", LED will display "dEF2".
b.
Press number pads to input defrosting time. The effective time
range is 00:01- 99:99
c.
The default microwave power is power level 3. If you want to
change the power level, press " POWER " once, and the LED will
display "PL 3", then press the number pad of the power level you
wanted.
d.
Press " START/+30SEC. " to start defrosting. The remained cooking
time will be displayed.
Popcorn
a.
Press " POPCORN " repeatedly until the number you wish appears in
the display, "50","100"g will display in order. For example, press
"POPCORN" once , "50" appears.
b.
Press " START/+30 SEC. " to cook, buzzer sounds once. When
cooking finish, buzzer sounds five times and then turn back to
waiting state.
Important Information About Microwave Popcorn Feature:
•
When selecting 100 g of popcorn, it is suggested that you fold
down a triangle on each corner of the bag before cooking. Refer to
NOTE
During microwave cooking and time defrost, time can be added by pressing "
START/+30SEC" button.

12
the picture at right.
•
If/When the popcorn bag expands and no longer rotates properly,
please press STOP/CANCEL button once and open the oven door
and adjust the bag position to ensure even cooking.
Potato
a.
Press " POTATO " repeatedly until the number you wish appears in
the display, "1","2","3" will display in order. "1"SET : 1 potato
(approximate 230 gram) "2"SETS: 2 potatoes (approximate 460
gram) "3"SETS: 3 potatoes (approximate 690 gram) For example,
press "POTATO" once , "1" appears.
b.
Press " START/+30 SEC. " to cook, buzzer sounds once. When
cooking finish, buzzer sounds five times and then turn back to
waiting state
Frozen Vegetable
a.
Press " FROZEN VEGETABLE " repeatedly until the number you wish
appears in the display, "150","350","500" g will display in order. For
example, press "FROZEN VEGETABLE" once , "150" appears.
b.
Press " START/+30 SEC. " to cook, buzzer sounds once. When
cooking finish, buzzer sounds five times and then turn back to
waiting state.
Beverage
a.
Press " BEVERAGE " repeatedly until the number you wish appears
in the display, "1","2","3" cup will display in order. One cup is about
120m1. For example, press "BEVERAGE" once , "1" appears.
b.
Press " START/+30 SEC. " to cook, buzzer sounds once. When
cooking finish, buzzer sounds five times and then turn back to
waiting state.
Dinner Plate
a.
Press " DINNER PLATE " repeatedly until the number you wish
appears in the display, "250","350","500" g will display in order. For
example, press "DINNER PLATE" once , "250" appears.
b.
Press " START/+30 SEC. " to cook, buzzer sounds once. When
cooking finish, buzzer sounds five times and then turn back to
waiting stat
Pizza
a.
Press " PIZZA " repeatedly until the number you wish appears in the
display, "100","200","400" g will display in order. For example,
press "PIZZA" once , "100" appears.
b.
Press " START/+30 SEC. " to cook, buzzer sounds once. When

13
cooking finish, buzzer sounds five times and then turn back to
waiting state
Memory Function
a.
Press "0/MEMORY" to choose memory 1-3 procedure. The LED will
display 1,2,3.
b.
If the procedure has been set, press " START/ +30 SEC." to use it. If
not, continue to set the procedure. Only one or two stages can be
set.
c.
After finishing the setting, press "START/ +30 SEC." once to save
the procedure and turn back to the waiting states. If press " START/
+30 SEC." again, it will start cooking
Example: to set the following procedure as the second memory, that is
memory 2. to cook the food with 80% microwave power for 3minutes
and 20 seconds. The steps are as follow:
a)
In waiting states, press "0/MEMORY" twice stop pressing until the
screen displays "2".
b)
Press "TIME COOK" once, then press "3","2","0" in order.
c)
Press "POWER" once,"PL10" display, then press "8" and "PL8"
displays.
d)
Press "START/ +30 SEC." to save the setting. Buzzer sounds once
then turn back to waiting states. If you press "START/+30SEC."
again, the procedure will be saved as the memory 2 and operated.
e)
If the electricity is not cut off, the procedure will be saved all the
time. If it is, the procedure need to reset.
f)
If you want to run the saved procedure, in waiting states, press
"0/MEMORY" twice, screen displays "2", then press
"START/+30SEC." to run.
Multi-Stage Cooking
At most 2 stages can be set for cooking. In multi-stage cooking, if one
stage is defrosting, then defrosting shall be placed at the first stage
automatically. Note: Auto cooking cannot work in the multi-stage
cooking.
Example: if you want to cook with 80% microwave power for 5 minutes
+ 60% microwave power for 10 minutes. The cooking steps are as
following:
1)
Press "TIME COOK" once, then press "5","0","0" to set the cooking
time;
2)
Press "POWER" once, then press "8" to select 80% microwave
power.

14
3)
Press "TIME COOK" once, then press "1","0","0","0" to set the
cooking time;
4)
Press "POWER" once, then press "6" to select 60% microwave
power.
5)
Press "START/ +30 SEC." to start cooking.
Inquiring Function
a.
In cooking state, press " CLOCK ", the LED will display clock for three
seconds.
b.
In the microwave cooking state, press " POWER " to inquire
microwave power level, and the current microwave power will be
displayed. After three seconds, the oven will turn back to the
previous state. In multi-stage state, the inquiring way can be done
by the same way as above.
Lock Function forChildren
Lock: In waiting state, press " STOP/CANCEL " for 3 seconds, there
will be a long "beep" denoting the entering into the children-lock state;
meanwhile, LED will display " E 3 "
Lock quitting: In locked state, press" STOP/CANCEL "for 3 seconds,
there will be a long "beep" denoting that lock is released.
Cooking End RemindingFunction
When the cooking is over, the buzzer will sound 5 "beep" to alert user
the cooking is finished.
Other Specifications
a.
In standby state, if the set clock digital tube displays current time,
the icon " : " would flash; otherwise, it shows "0:00".
b.
In setting function state, LED displays corresponding setting.

15
Microwave
Weight Defrost
Time Defrost
Clock
Kitchen Timer
Stop/Clear
Start/+30 Sec/Confirm
How to Use MO 2305
Control Panel
Operation Instructions
Clock Setting
When the microwave oven is connected to the power, the oven will
display “0:00”
and the buzzer will ring once.
a.
Press
. The hour numbers will blink.
b.
Rotate the to adjust the hour. The input time should be within 0-
23.
c.
Press
, the minute numbers will blink.
d.
Rotate the to adjust the minute. The input time should be within
0-59.
e.
Press
again to finish the clock setting and the “:” will blink.

16
NOTE
Under the auto menu and weight defrost program, cooking time cannot be
increased by pressing “Start/+30 Sec/Confirm”.
Microwave Cooking
a.
Press the button once, display will show “P100”
b.
Press the button repeatedly or turn to select the microwave
power
“P100”, “P80”, “P50”, “P30”, and “P10” will be displayed in order.
c.
Press “Start/+30 Sec/Confirm” to confirm.
d.
Turn to adjust the cooking time. (The time setting should be 0:05-
95:00).
e.
Press “Start/30 Sec/Confirm” to start cooking.
Microwave Power Chart
Microwave
Power
100
%
80
%
50
%
30%
10%
Display
P100
P80
P50
P30
P10
Speedy Cooking
a.
In standby position, press “Start/+30 Sec/Confirm” button to cook
with 100% power level for 30 seconds. Each press of the button on
the same key adds 30 seconds. The maximum cooking time is 95
minutes.
b.
During the microwave cooking and time defrost process, press
“Start/+30 Sec/Confirm” to increase cooking time.
c.
In standby position, turn the left to directly choose the cooking
time. After choosing the time, press “Start/+30 Sec/Confirm” to
start cooking. The microwave power is 100%.
NOTE
•
If the clock is not initially set, the clock function will not work.
•
During the process of setting the clock, if the appliance is idle for 1 minute,
the oven will automatically go back to previous status.

17
NOTE
The kitchen timer is different from the Clock.
Defrost by Weight
a.
Press once, the screen will display “dEF1”.
b.
Turn to select the food weight. The range of weight is 100-2000g.
c.
Press “Start/+30 Sec/Confirm” key to start defrosting.
Multi-stage Cooking
A maximum of two stages can be set. If one of the stages is defrosting,
it should be put as the first stage. The buzzer will ring once after each
stage and the next stage will begin.
Example: If you want to defrost the food for 5 minutes, then to cook
with 80% microwave power for 7 minutes. The steps are as follows:
a.
Press
once, the screen will display “dEF2”.
b.
Rotate to adjust the defrost time of 5 minutes.
c.
Press once.
d.
Rotate to choose 80% microwave power until “P80” showed up in
the
screen.
e.
Press “Start/+30 Sec/Confirm” to confirm.
f.
Rotate
to adjust the cooking time of 7 minutes.
g.
Press “Start/+30 Sec/Confirm” to start cooking.
Kitchen Timer
a.
Press once, the screen will display 00:00.
b.
Rotate to enter the correct time. (Maximum cooking time is 95
minutes.)
c.
Press “Start/+30 Sec/Confirm” to confirm setting.
d.
When the timer has ended, the clock indicator will turn off and
buzzer will ring 5 times. If the clock has been set (24-hour system),
the screen will display the current time.

18
Auto Menu
a.
In standby mode, rotate the to the right to choose the menu
from “A-1” to “A-8”.
b.
Press “Start/+30 Sec/Confirm” to confirm the menu.
c.
Rotate
to choose the food weight.
d.
Press “Start/+30 Sec/Confirm” to start cooking.
e.
After cooking is finished, the buzzer will ring for 5 times.
Child Lock
•To activate child lock: In waiting state, press for 3 seconds,
there will be a long “beep” to indicate that Child Lock is activated
and the screen will display current time or [--].
•To deactivate child lock: Press for 3 seconds, there will be a long
“beep” to
indicate that Child Lock is deactivated.
Inquiry Function
a.
In cooking state of microwave cooking, press then the current
power level will be displayed for 3 seconds.
b.
During cooking, press to check the current time. It will be
displayed for 3 seconds.
Specification
a.
The buzzer will ring once when rotating the knob at the beginning
b.
If the door is opened during cooking, press “Start/+30 Sec/Confirm”
to continue
cooking.
c.
Once the cooking programme has been set, if the “Start/+30
Sec/Confirm” is not pressed in 1 minute, the current time will be
displayed and setting will be cancelled.
d.
The buzzer will sound only if the button is pressed correctly.
e.
The buzzer will sound five times when the cooking time is finished.

19
Menu
Weight
Display
A-1
Pizza
200 g
200
400 g
400
A-2
Meat
250 g
250
350 g
350
450 g
450
A-3
Vegetabl
e
200 g
200
300 g
300
400 g
400
A-4
Pasta
50g(with 450 ml cold
water)
50
100g(with 800 ml cold
water)
100
A-5
Potato
200 g
200
400 g
400
600 g
600
A-6
Fish
250 g
250
350 g
350
450 g
450
A-7
Beverag
e
1 cup(120 ml)
1
2 cups(240 ml)
2
3 cups(360ml)
3
A-8
Popcorn
50 g
50
85 g
85
100 g
100

20
PART 6: TROUBLESHOOTING
•
Be sure to unplug the appliance from the power supply.
•
Clean the cavity of the oven after using with a slightly damp cloth.
•
Clean the accessories in the usual way in soapy water
•
The door frame and seal and neigh boring parts must be cleaned
carefully with a damp cloth when they are dirty.
•
Do not use harsh abrasive cleaners or sharp metal scrapers to
clean the oven door glass since they can scratch the surface,
which may result in shattering of the glass.
•
Cleaning Tip : For easier cleaning of the cavity walls that the food
cooked can touch: Place half a lemon in a bowl, add 300m1 (1/2
pint) water and heat on 100% microwave power for 10 minutes.
Wipe the oven clean using a soft, dry cloth.
Consult the following troubleshooting before contacting our Service
Center regarding your microwave oven:
Problem
Possible Cause
Microwave oven interfering TV
reception
Radio and TV reception may be
interfered when microwave oven
operating. It is similar to the interference
of small electrical appliances like mixer,
vacuum cleaner, and electric fan. It is
normal.
Dim oven light
In low power microwave cooking, oven
light may become dim. It is normal.
Steam accumulating on door, hot air
out of vents
In cooking, steam may come out of food.
Most will get out from vents. But some
may cumulate and cool place like oven
door. It is normal.
Oven started accidentally with no
food in.
It is forbidden to run the unit without any
food inside. It is very dangerous.
PART 5: MAINTENANCE
Other manuals for Agiato Series
2
This manual suits for next models
2
Table of contents
Other Modena Microwave Oven manuals

Modena
Modena Agiato Series Owner's manual

Modena
Modena MV Series User manual

Modena
Modena MG 2517 WAM Owner's manual

Modena
Modena MG Series User manual

Modena
Modena Vicino Series Owner's manual

Modena
Modena Agiato Series Owner's manual

Modena
Modena MG Series User manual

Modena
Modena MK Series User manual

Modena
Modena MO Series User manual

Modena
Modena MG Series User manual