Moleskine Smart Writing Set User manual

Smart Writing Set User Guide
FAQ and User Guide references
User's Manual
1
User’s manual
Where can I find the user Manual?
1
The Smart Writing
System
2
SWS
How does the Smart Writing System work?
2.1
3
Elements
What does the Smart Writing Set include?
2.2
4
Warranty
How does the warranty work?
2.3
5
Serial number
Where can I find the serial number of my
Smart Pen?
2.4
The App
6
App and compatibility
Is the Moleskine Notes App compatible with
my device?
3.2
7
Windows version
Is the Notes App available for Windows?
3.2.1
8
New vs previous App
I have been using the previous version of
Moleskine Notes. Should I migrate to the new
version?
3.3
9
Main features
What can I do with the Notes App and the
Smart Writing Set?
3.4
10
Exporting vector files
How can I export my drawings in order to
transform them into vectors?
3.4.1
11
Notes creation
How should I start writing in my Smart
Notebook?
3.5
12
Bluetooth
How is the Smart Pen connected to the Notes
App?
3.6
13
Offline export and sync
Can I write and export notes while I'm offline?
3.7
14
Firmware update
How can I update the Firmware?
3.7.1
15
Migration
How can I switch from the previous to the new
Notes App?
3.8
16
Account
Do I need to create an account and register
my email?
3.10
17
Transcribe
How do I transcribe my notes?
3.11
18
Notes Editing
Can I modify my notes digitally?
3.11.1
19
Customise your Notes
How can I change the color and the thickness
of pen strokes?
3.11.1
20
Sketching
Is the SWS useful for sketching/drawing?
3.11.2
21
Timelapse
Can I save my sketching/writing activity as a
time-lapse?
3.12
22
Sharing notes
How do I share my notes via email?
3.13
23
Voice-memo recordings
Can I record a voice memo?
3.14
24
Tags
How can I create tags in order to retrieve my
notes quickly?
3.15
25
Languages
Which languages are available and recognised
by the app?
3.16
The pen
26
Tech Specs
What are the technical specs of the Smart
Writing System?
4.1.2
27
Battery Charge
How long does the Smart Pen battery last?
4.2
28
Power on/off
Do I have to turn my Smart Pen on/off, or is it
automatic?
4.3
29
Formatting
How can I format my Smart Pen?
4.3.1
30
Led colors
What do the LED colors on the Smart Pen
mean?
4.4

31
Calibration
Can I fix the thickness and sharpness of my
Smart Pen strokes?
4.6
32
Lead change
Can I change the lead of my pen?
4.7
33
Ink refill
Can I refill my pen when the ink has run out?
4.8
Notebooks
34
Compatibility
Do I have to buy a special notebook in order to
use the Smart Pen and the Notes App?
5.1
35
More notebooks
I have several notebooks. How can I define
the one I'm writing on?
5.2
36
Virtual notebooks
Can I create virtual Notebooks by matching
pages from my different notebooks?
5.2.1
Planners
37
Planners
What type of Smart Planners are available?
6.1
38
Getting started
How do I use my Smart Planner?
6.2
39
Modify events and duration
How can I create and modify events and set
their duration?
6.4
40
Offline appointment sync
Do my appointments automatically sync while
the Notes App is offline?
6.5
41
Cal Sync
How do I sync my digital calendars with my
Smart Planner?
6.6
42
Writing events slots
What's the right way to write down my
appointments/events slots?
6.7
43
Create an all-day event
How do I create an all-day event?
6.8
44
Overnight events
How do I write down an event that starts today
and ends tomorrow?
6.9
45
Slots longer than 1 hour
In my Smart Weekly Planner, Can I create
events that last more or less than one hour?
6.10
46
Day-long events
In my Monthly Planner, can I insert more than
one event per day and set timings?
6.11
Troubleshooting
47
Pen On
What should I do if my Smart Pen doesn't turn
on?
7.1
48
Bluetooth
What if I have any issues while pairing my
Smart Pen via Bluetooth?
7.2
49
Hand writing not recognised
My handwriting is not recognised. What should
I do?
7.3
50
Notes missing
Some of the notes I've taken are missing in
the transcription. What should I do?
7.4
51
Support
How can I reach the assistance?
7.5
1. Introduction: about the Smart Writing Set
At Moleskine we believe in the timeless power of handwriting as an essential expression of human
civilization, a powerful act to unleash human genius and foster the development and sharing of
literacy and knowledge. Handwriting is both universal and deeply personal. It’s a thoughtful way to
express your true self and connect to others in a very intimate yet universally accessible way.
Put pen to paper and unleash your unique voice.
We also believe in the infinite potential for continuity and connection between analogue and digital
tools. This bridging of page and screen is essential to fulfil our users’ needs.
Moleskine Smart is an ecosystem of smart tools and services designed to simplify the creative and
productive process, allowing an idea to evolve naturally on paper before being edited and shared
digitally.

You can visit our website using the following link: https://www.moleskine.com/home
This guide is the first step in familiarizing yourself with your Smart Writing Set. It will help you to
answer some of the questions you may have and facilitate your experience.
If you have a specific question, please check our FAQs.
2. Getting to know your Smart Writing Set
2.1 How does the Smart Writing Set work?
The Smart Writing Set is designed to amplify the note-taking process by combining the power of
technology with the instinctive feel of exploring ideas on paper. It features a Smart Pen, connected
via Bluetooth to the Moleskine Notes App, and a special Smart Notebook featuring Ncoded
technology: a hidden grid embedded within the pages which enables words and drawings to be
transformed into digital documents.
Discover the Smart Writing System:
https://www.moleskine.com/en-us/shop/moleskine-smart/smart-writing-system/
2.2 What is included in the Smart Writing set?
The Smart Writing Set comes with a Smart Pen, an Ncoded Smart Notebook, a magnetic charger, and
a spare black ink refill.
The Smart Writing Set is available on moleskine.com, Moleskine stores and retailers

You can purchase Smart Planners and Smart Notebooks individually from Moleskine stores, retailers
or via our website. More Moleskine Smart Notebooks featuring Ncoded paper will be introduced in
the future.
You can download the Moleskine Notes App on Apple store OR Google play. Please find more
information about the app below.
2.3 Warranty and support system
Please find the warranty here:
https://www.moleskine.com/on/demandware.static/-/Library-Sites-MoleskineSharedLibrary/default/
dwbe893d20/pdf/2WARRSMPEN04_Warranty_8no_10%20lang.pdf
At Moleskine, we want to make sure you get the most from your Smart Writing Set. You can reach us
using the Support section on our website. The FAQ section can be accessed here:
https://www.moleskine.com/it-it/faq
If you have any inquiries regarding your purchase, the return process or defects, please contact us
via: https://www.moleskine.com/contact-us
For technical questions not solved by reading our FAQs, please do not hesitate to contact us:
2.4 Smart Pen serial number
The serial number is on the sticker on your Smart Pen. The serial number is useful to identify your
product in case a problem occurs.
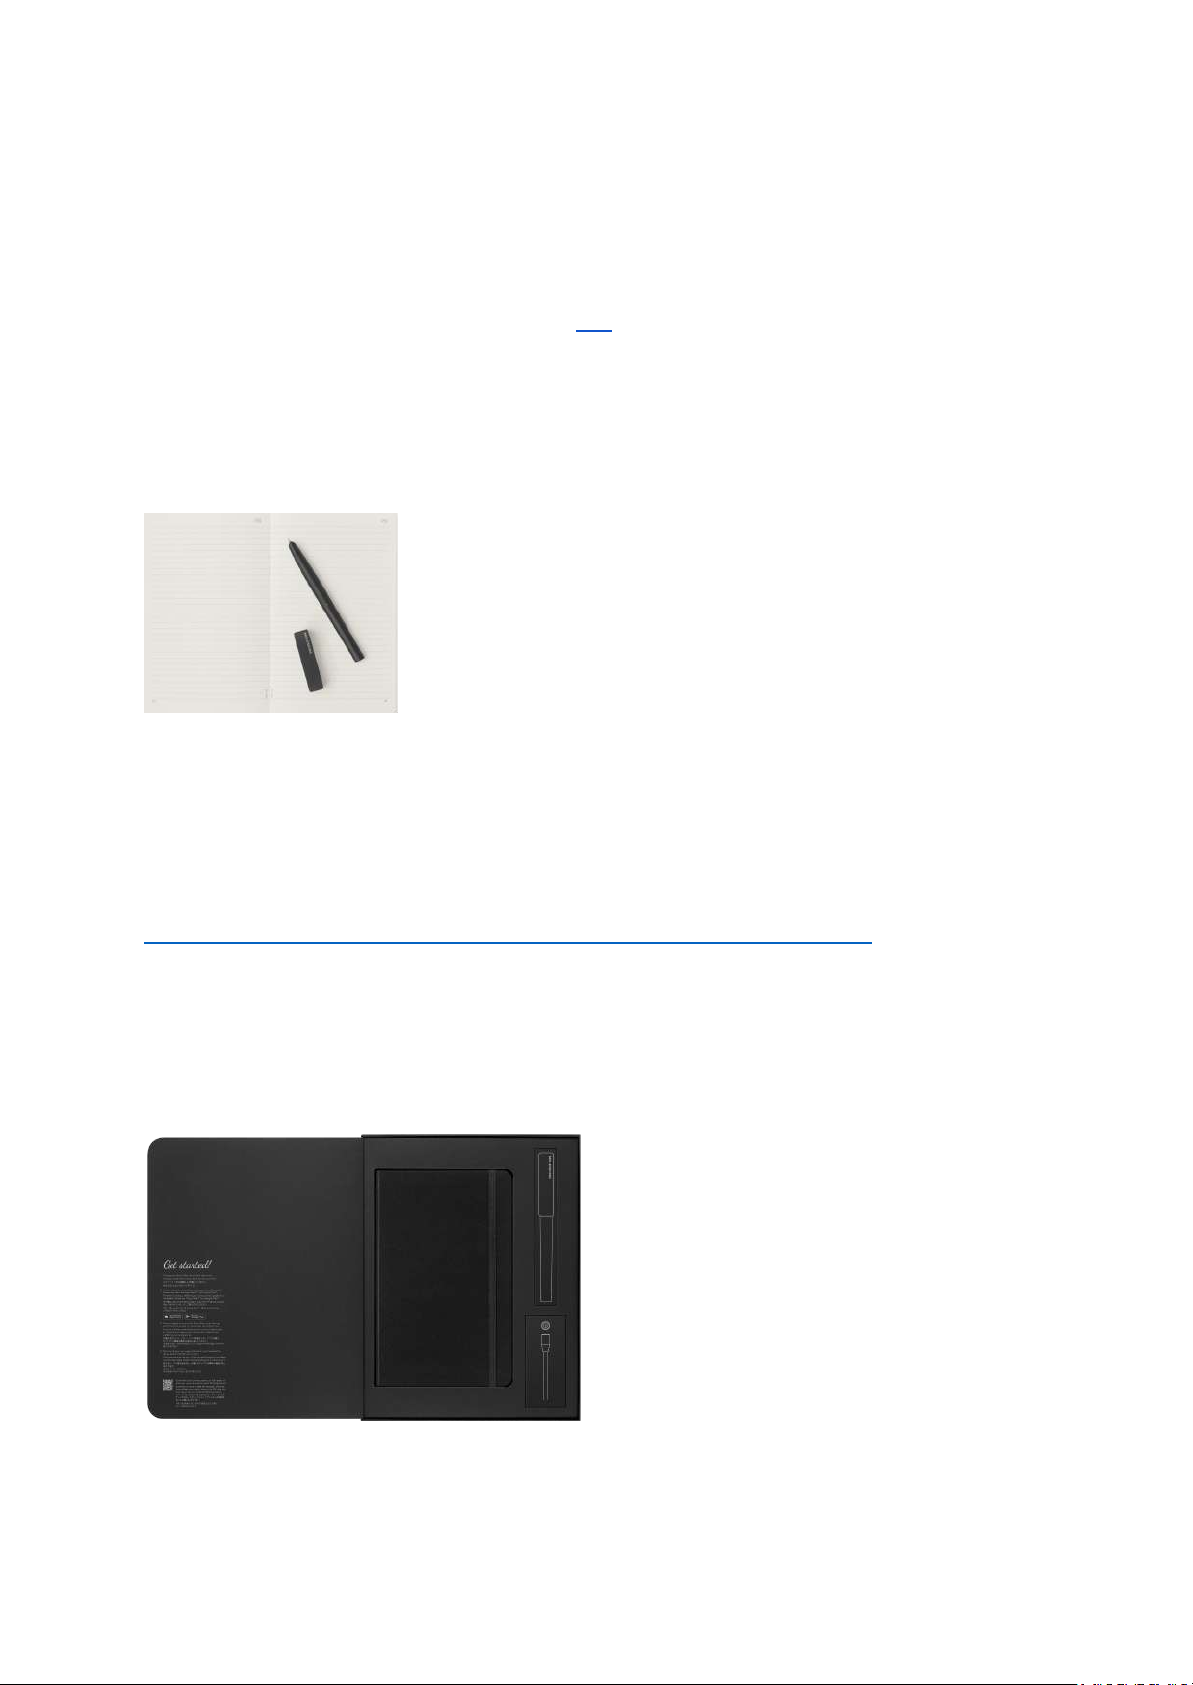
2.5 Smart Notebooks
All Moleskine Smart Notebooks are compatible with the Smart Pen and with the new versions of the
Notes App. Check our website to browse our available portfolio of Ncoded Smart Notebooks and
Smart Planners. You can also check your nearest Moleskine store or retailer.
For more details, see below.
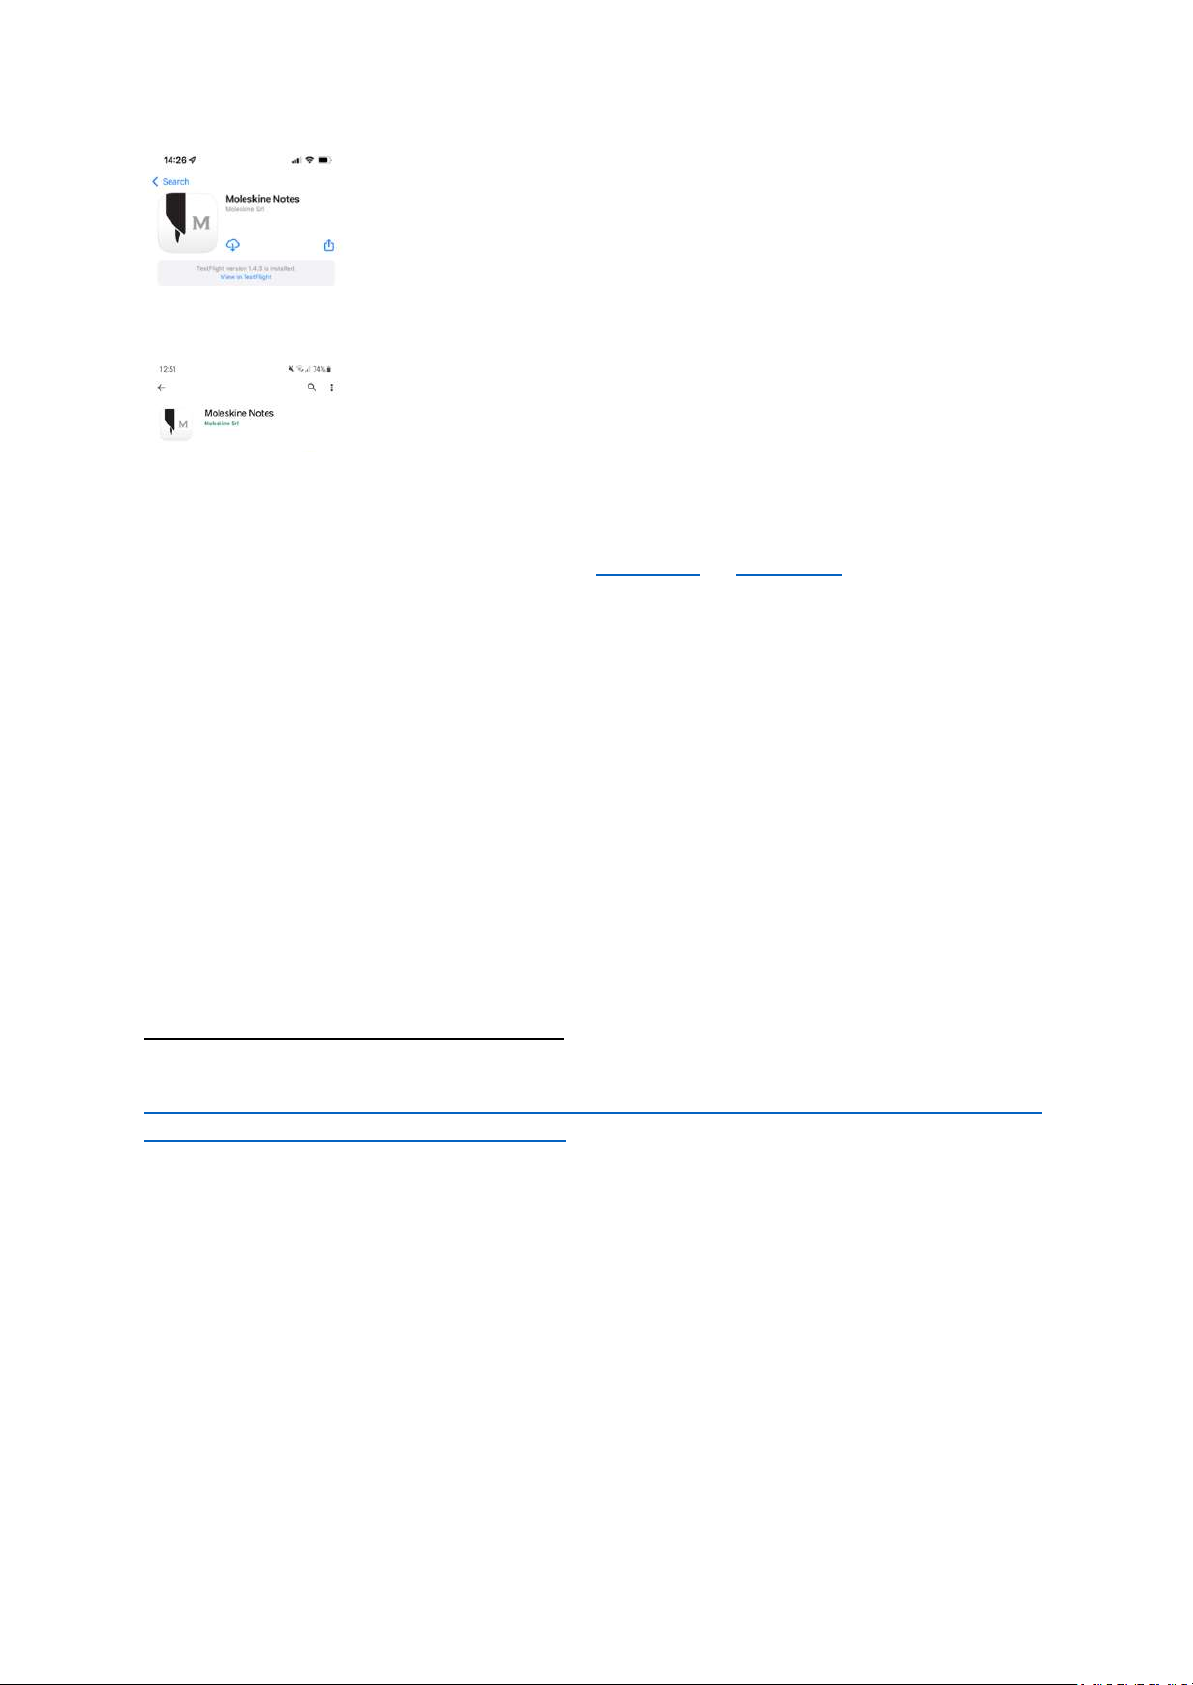
3. Moleskine Notes App
3.1 The Moleskine Notes App
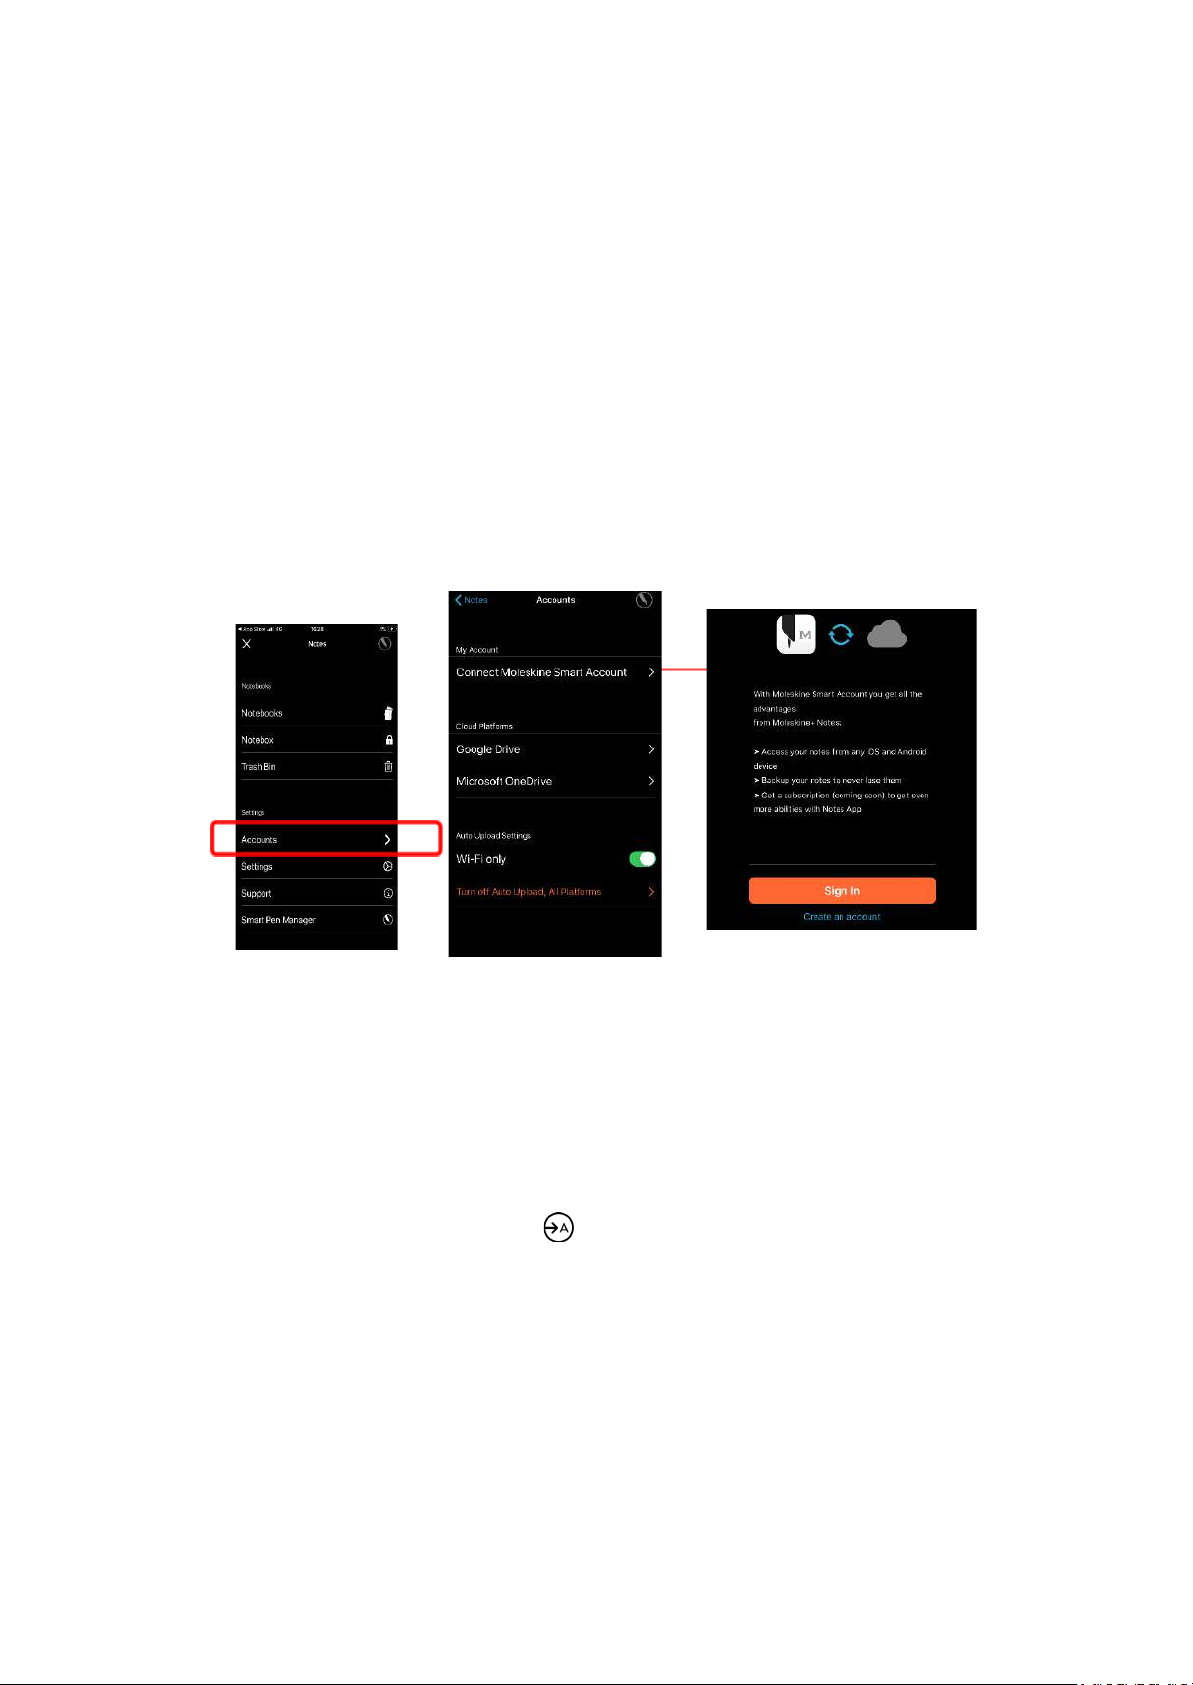
The Smart Writing Set app is called MOLESKINE NOTES. You need the app to connect the
Smart Pen and sync your notes to your device.
Compatibility: IOS (App Store) and Android (only Google Play).
The Notes App is the third element of the Smart Writing Set. By buying the set and downloading the
Notes App, you will be able to digitize every pen stroke made on the pages of your Smart Notebook.
Please download the Notes App to begin the experience - making sure you have enough storage
space on your device.

Apple Store
Google Play
3.2 Compatibility
The Notes App is compatible with several mobile phones, Android tablets and iPads. You can
download the Notes App using the following links: Apple Store OR Google Play
Make sure that you have Bluetooth support and the latest operating system on your device. If not,
please update your device software.
3.2.1 Moleskine Notes app is not available on Windows
The new Notes App is currently not available on Windows OS.
3.3 How to move from the previous Notes App
The previous version of Moleskine Notes is still working but can't be downloaded nor is it updated
anymore. If you have stored any data in the previous version of the app, you should keep it and
proceed with the migration process before deleting it from your device.
Before starting with the new Notes App, if you have digital notebooks synced on the previous app
version, please back-up your notes on Google Drive. Local migration is available to all users and it is
the default setting.
See below for more information about syncing.
Guide to the previous version of the Moleskine Notes app:
https://www.moleskine.com/on/demandware.static/-/Sites-masterCatalog_Moleskine/default/dwb0
33a449/pdf/SmartPen3_UserGuideA4_web.pdf
3.4 Main Notes App features:
Moleskine Notes helps you turn inspiration on paper into ideas on screen. You can:
· Digitize handwriting and sketches from your Smart Notebook
· Modify notes and drawings with powerful editing tools
· Transcribe your handwritten notes into digital font
· Export your drawings in vector formats
· Plan your work or personal events using a Smart Diary/Planner
· Search within all your notes and events

· Share notes and sketches with others or upload to cloud storage
Simply start writing in your Smart Notebook with your Smart Pen to create an instant digital copy of
each notebook page in the Notes App.
3.4.1 Exporting your drawings
The Notes App allows you to export digital pages as Images (JPEG/PNG), PDF, Vector file (SVG), Text,
Word and PowerPoint.
3.5 How to start
After unboxing, charge your Smart Pen using the magnetic charger provided, keep your Smart
Notebook at your fingertips and download the Notes App. Then, simply follow the instructions on
screen.
3.6 Bluetooth and pairing
Open the app and step into the world of Moleskine Notes!
Once you have downloaded the Notes App, follow the steps on screen in order to pair your Smart
Pen to the app via Bluetooth.
After making sure that your Smart Pen is charged (it takes 2 hours to fully charge), open the Notes
App and click on “Add you Moleskine Smart Pen”. If you don’t have your Smart Pen with you or if it’s
not charged, you can still explore the app by clicking on “Proceed without Smart Pen”. See
screenshot below.
Please make sure your Bluetooth is on and that you “allow” your device to pair with new devices.
Make sure you have the space to pair a new device.
Press the on/off button on the pen once: the LED will turn on (blue LED light) and the Smart Pen will
automatically connect to the Notes App.
If you have a Pen+ or Pen+ Ellipse smart pen, please press the button for 3 seconds to connect to
your device.

Screenshots of the Moleskine Notes App to help you set up your new Smart Pen.
Once the Smart Pen is recognized by the Notes App, you can tap on the pen icon to proceed. The
next steps allow for personalization: you can give your Smart Pen a name and add a passcode.
If your Smart Pen is already connected, tapping on the icon will open the Smart Pen settings menu
with options such as calibration and stats regarding the battery and memory.
3.7 Sync
The Smart Writing Set allows you to sync your notes at any time, even if the Notes App is not opened
on your device.
If the Notes App is not running, make sure your Moleskine Smart Pen is turned on when taking notes.
The light on your Smart Pen should be blue while connecting to your device and then green when it
is ready to be used.
Your work is automatically saved when the Smart Pen is paired to the Notes App. If you are writing
with the Smart Pen switched on but when the Notes App is not running, your notes will be saved to
your device as soon as you activate the Notes App.
Make sure that your smart device and operating system are compatible.
Ensure that the Moleskine Smart Pen firmware and Notes App software are updated to the latest
versions. To check which version you’re currently using, please go to the Support section in the Notes
App.
3.7.1 Firmware
You can update your firmware in the Notes App by tapping the Smart Pen Settings icon (top right
corner) > Firmware > Update
Make sure you have activated the Smart Pen connection icon in the top right corner (the icon glows
when activated) when syncing your notes.

3.8 Migration from the previous version of the Notes App to the current version
If you are using the previous version of the Notes App, we kindly advise you to switch to the latest
version, available on Google Play and on AppStore. The new Notes App will be updated with further
releases and will keep on being your best option to view, store and edit your notes.
The previous version of the Notes App is no longer available. Please, do not delete the previous
version from your device before downloading and switching to the new one. Follow these
instructions to back up and move your digital contents from the previous version of the app to the
new one:
- Open Moleskine Notes Legacy
- Open left side menu
- Tap “Settings” option
- Tap “Authentication center” menu item
- Turn on “Google Drive” toggle
- Sign into Google Account
- Go back to the “Settings” menu
- Tap “Backup & Restore”
- Turn on “Google Drive” toggle here as well
- Go back to side menu
- You should see an additional “Backup & Restore” item
- Follow the instructions to complete backup
Then, reopen the new Moleskine Notes
- Select “With Google Drive” as method
- Continue Migration (if you can’t find it open side menu > Settings > Migration)
- Connect to Google
- Transfer Notebooks
3.9 Local Migration
Follow these steps:
- Open Moleskine Notes Legacy
- Open left side menu

- Tap the orange “Export Notebook” button
Then reopen the new Moleskine Notes
- Select “Locally on this Device” as method
- Transfer Notebooks
3.10 Create a free account
In the Accounts area, you can create a Notes App account for free.
By creating an account, you can access your notes from any mobile device and back-up your
notebooks.
To view your digitized notes on multiple devices, the Notes App needs to be downloaded on each
device and the user login must match your account.
We advise creating an account to be able to view your digital notebooks from multiple compatible
devices. Your data will be stored in your personal account.
3. 11 Transcribe and modify text
The Notes App allows you to transcribe your notes from the pages of your Smart Notebook - turning
your handwriting into digital font on screen. The third round icon in the central part of the
screen is for transcription. You will be able to see the transcribed format (font) of your notes on
screen. You can add and edit sentences using your device keyboard.
3.11.1 Writing and drawing tools on the Moleskine Notes App
Within the Notes App you can draw on and edit your notes by following these easy steps:

Click on the central round icon to draw and edit your notes. You can highlight or insert simple
drawings interacting with the screen of your device.
Edit allows you to select text and change the thickness and colour of your strokes. In order to
change the thickness, select the pen icon at the bottom of the screen (the first).
The second pen icon is the highlighter. You can change the color of your pen and highlighter with the
options provided in the color palette. Select the pen or the highlighter, then change the color.
3.11.2 Sketching on paper
The Smart Writing Set not only transcribes text, but also digitizes your drawing and sketches. An
exact digital version of your creation appears in the Notes App in real time. You can also store and
share the time-lapse of your drawing process. Please check below for more information.
3.12 Writing replay and time-lapse
Handwriting is automatically recorded from start to finish. If you want to watch back the process
from the first pen stroke to the last, press “play” in the top left corner of the screen (see image
below)
You can choose the speed of the video in the options provided on the banner, as well as the
time-lapse and real-time options. You can export the final product and share it with options
provided, or directly save the file on your device.
3.13 Email set up and sharing
Tapping the envelope on the page of your Smart Notebook allows you to share the page, with various
sharing options available. With just a few clicks, you can share each page to an email address already
setup on your device.
Check your device settings in order to set up a default email account for email sending.
You can share work by tapping the envelope icon in your Smart Notebook or Planner with your Smart
Pen and following the steps on your device.

3.14 Voice and video recording
The Moleskine Notes App and Smart Pen allow you to make voice recordings. Below each page you
can find the “voice record” icon. Press to start recording.
3.15 Search and tags
The new Notes App allows you to search for Smart Notebooks and specific words: tap on the
“Search” field and start typing the word you want to find. You can search your notebooks,
transcribed pages, tags, dates, comments and attachments (this feature is coming soon) as well as
other properties.
Tags can be added to each page and to individual Smart Notebooks. Each tag can have a color (type
or select to choose) and/or a name. Names and colors facilitate the searching and grouping process
on your work online.

3.16 Languages
The default language of the Notes App is English, but there are 30 languages available. You can
choose just one additional language alongside English.
4. Pen
There are 3 models of Smart Pen available :
The Moleskine Pen+ (no longer for sale), the Pen+ Ellipse, and the newest Smart Pen.
Moleskine Smart Pen
Moleskine Pen+ Ellipse
4.1 Smart Pen features compared
Pen+ Ellipse
Smart Pen
Metallic finish
Soft finish
Elliptical shape
Rounded shape
Weight: 22g without pen cap
Weight: 15.8g without pen cap
Length: 16 cm (with pen cap)
Length: 14.6 cm (with pen cap)
Pressure sensitivity: 1024 levels
Pressure sensitivity: 4096 levels
Battery 5H (of continuous usage)
Eco mode available. Battery - Eco mode ON 11H - Eco
mode OFF 8H
Charging cable (plastic covered)
Charging cable (textile covered)
USB charging cable
Magnetic charging cable

4.1.2 Smart Pen tech specs
4.2 Battery charge and battery life
The Smart Pen (new version) can only be charged using the specific cable provided with it in
the Smart Writing Set (POGO magnetic connector → USB). The USB port can be connected to
any smartphone charger/pc USB power port)
The Moleskine Smart Pen takes about 2 hours to fully charge. The fully charged Moleskine
Smart Pen will provide from 8 to 11 hours of non-stop writing (depending if eco-mode is
switched on).
The Pen+ Ellipse provides a continuous usage of 5 hours.
4.3 Power on/off
Auto on: Auto-on is a setting that means that the Smart Pen switches on automatically when it
touches the page and you start writing. Auto-on is activated by default after the Smart Pen is first
paired with the Notes App, but can be disabled on the Smart Pen info and Settings page (icon in
the top right corner or in the left menu > Pen Manager > Smart Pen)
Automatic power-off is set by default with the Smart Pen’s 20-minute battery-save mode.
The battery may be low when first purchased and we strongly recommend charging before use. It
takes 2 hours to fully charge the Smart Pen. Check the “Battery charge and battery life” section for
more information about the battery.

To use the reset feature, press the Smart Pen power button for about 10 seconds.
4.3.1 Formatting your Smart Pen
When you wish to cancel all the data stored in the Smart Pen, you can format it by keeping the
power button pressed for 10-15 seconds.
To delete the data currently stored in the Smart Pen memory, pair the Smart Pen and insert the
wrong passcode 10 times.
4.3.2 Setting a passcode
The passcode will allow you to keep your data protected. Should anyone else use your pen, they
could format it and use it but they won’t be able to access your notes. You can set it during the initial
set up, as suggested, or decide to skip it. If you wish to add it later on, pressing on the pen icon on
the upper corner right, you can insert the Password (4 digits). If you enter the wrong password 10
times, the data stored in the internal memory of the pen will be erased.
4.4 LED colors of the new Smart Pen
Blue: Smart Pen is pairing but not yet synced with your device.
Green: Smart Pen is connected to the app and ready to use with any Moleskine Smart Notebook or
Smart Planner.
Yellow: Smart Pen is running out of memory. Please connect it to the Moleskine Notes App to
transfer your Smart Pen data.
For more information, please check the section below

4.5 LED colors Moleskine Pen+ Ellipse for status
4.5.1 LED colors Moleskine Smart Pen for status
If you are asked to check your Smart Pen’s optical sensor, please refer to chapter 7.3 to solve the
problem.
4.6 Calibration
The Smart Pen Calibration function allows you to regulate the width and sharpness of your
handwriting on screen depending on the amount of pressure you typically apply when writing on the
page. Move the slider in the Pen Calibration graph so that your handwriting appears thicker or
thinner based on your unique writing style.
If you have already registered your Smart Pen, you can explore this function by clicking on the pen
icon on the top right of the app page, then going to the calibration section

Calibration setting view within the Notes App
4.7 Lead change
You can order a new lead (ink and cable) at your nearest Moleskine retail store, on moleskine.com or
at a Moleskine retailer.
4.8 Ink refill
The Moleskine Smart Pen uses a standard D1 mini refill that is widely available in various formats and
colors.
The Smart Writing Set comes with 2 Ink refills, one already in the Smart Pen and a spare. We can
provide a recommended refill list to guarantee the best performance of the Moleskine Smart Pen:
Ncoded technology uses carbon ink, so all pen strokes need to be carbon-free in order not to affect
recognition precision.
Recommended Smart Pen refills:
ZEBRA - 4C TYPE MITSUBISHI - SE TYPE
KAWECO
PARKER
PILOT
STAEDTLER
SAILORPEN
ROTRING
CARAN D’ACHE
KYOCERA
SHACHIHATA
VISCONTI
YARD-O-LED
5. Our portfolio: Moleskine Smart Notebooks
This new way of writing puts together the Smart Pen and Ncoded Smart Notebooks to
digitize your handwritten ideas. Ncode is a technology that uses invisible patterns of dots

or lines within the pages of our beloved notebooks. With the help of the Smart Pen, your notes and
sketches are instantly recreated on your device. Ncode paper helps the Smart Pen digitize every line
and word you add to the page. Ncode is also designed to allow you to identify an exact location in a
specific Smart Notebook.
Our current Smart portfolio features Smart Notebooks (hard cover black, ruled, large and XL) and
Smart Cahiers (pocket, large ruled and XL Plain). More Moleskine Smart Notebooks will be available
soon.
Discover all available Smart Notebooks here:
https://www.moleskine.com/en-us/shop/moleskine-smart/smart-writing-system/smart-notebooks/
Discover the Smart Writing System here:
https://www.moleskine.com/en-us/shop/moleskine-smart/smart-writing-system/
5.1 Compatibility Smart Pen versions/Smart Notebooks
All you need is a Moleskine Smart Notebook featuring the Ncoded technology: a hidden grid
embedded within the paper enables the Moleskine Smart Pen to recognize both individual pages and
where you are on each page. Both our previous Smart Pens are compatible with our current Smart
Notebooks. See the following link to buy the Smart Writing system.
More Moleskine Smart Notebooks featuring Ncoded paper will be introduced in the future.
5.2 Using more than one notebook
The Moleskine Smart Pen can recognize where you are in each Smart Notebook thanks to a hidden
grid embedded within each page. Notebooks that use this technology are coded according to type.
You will find all your notebooks listed in the Notes App, however, if you wish to use two notebooks of
the same type, the app will recognise them as one. Please block the one you will not be using. Please
refer to the Notebook Lock and Unlock feature in the Main Menu to be able to keep both within the
Notes App, but always keep just one active.
By pressing the lock icon (second one on the lower bar), you will be able to block the Smart
Notebook

5.2.1 Virtual notebooks
Please remember that with the new Notes App, it is no longer possible to create a “virtual notebook”
by matching pages from different physical Smart Notebooks.
6. Our portfolio: Smart Planners
6.1 Getting started with Smart Planners
Our current Smart portfolio features the Smart Planner (hard cover, black, weekly 12-month) and the
Smart Planner Pro (hard cover, black, weekly, 12-month).
Smart Planner Pro
Discover our Smart Planners here:
https://www.moleskine.com/en-us/shop/moleskine-smart/smart-writing-system/smart-planner/
Discover the Smart Writing System here:
https://www.moleskine.com/en-us/shop/moleskine-smart/smart-writing-system/
The Smart Planner gives you a new way of planning.
The first time you write in your Smart Planner, you'll be invited to connect it to a digital calendar
on your device. Setting up this connection will allow the Notes App to create events on the device
calendar that mirror the ones you write on paper.
In order to connect your planner to your device, please follow these steps:
Connect your Smart Pen to your device (see the steps above)
Once you start writing in your Smart Planner, the Smart Pen will recognise the page and type of
notebook.
Within the Notes App you can see all your Smart Notebooks and Smart Planners on the main
page (Notebooks page) and block the ones you are not using.
The Smart Planner has different page layouts: Monthly, Weekly Vertical and Weekly Horizontal
(PRO). Depending on the page layout, some information about your events is automatically
recognized, then you can add additional information like start time and duration as specified in
this guide.
6.1.2 Migrating from a previous version of the Moleskine Notes App
In the former Notes App, digital calendars were updated via the “Authentication Center”, while in the
current Notes App they synchronize directly with the digital calendars connected to your device.

6.2 Type of Smart Planner
The Weekly Planner features the days of the week listed vertically on the left page opposite an extra
page for notes.
The Weekly Pro Planner features the days of the week in columns, with lines for time slots.
The Monthly Planner, integrated as a special view in the Smart Planner and in the Smart Planner Pro.
Discover our Smart Planners here:
https://www.moleskine.com/en-us/shop/moleskine-smart/smart-writing-system/smart-planner/
6.3 Smart Planner compatibility
A digitized version of your Smart Planner will be available on whichever device has your Moleskine
Notes App and which is linked to your Smart Pen. Please check above for app and device
compatibility information.
Once your events are synced with your digital calendar, they will be available on all the devices you
have synced to your calendar account.
6.4 Modify events and duration
You can edit or cancel events within your preferred digital calendar.
(If you strike through an event in your Smart Planner, it will appear struck through in the digital
version of your Smart Planner within the Moleskine Notes App. However, the event will not then be
deleted from your preferred digital calendar). You can also edit the duration of single events you
have already created.
6.5 Appointment sync with the application off
Appointments are synced only when the Smart Pen is connected to the Moleskine Notes App via
Bluetooth.
If you write an event off-line (you write in Smart Diary/Planner PRO with your Smart Pen turned on,
but without connecting to the Notes App) the event/s in question will be synced to your calendar the
moment you connect your Smart Pen to the Moleskine Notes App.
6.6 Sync Smart Planner with online calendars if you missed the initial set up
Open the notebook within the Notes App and a list of the pages is shown
- Tap on the "tag" button, the first at the bottom of the screen
Tap on "Calendar to sync with" and select the calendar (Grant permissions to Calendar)
- Switch on the "Auto-sync calendar" toggle
Once this is done you should be able to see the transcription in the transcription view and see the
detail of the event.

6.7 Writing event slots
The Smart Planner currently supports the following time format: 12 hour AM/PM notation.
The 24-hour clock is not currently recognized.
The Smart Planner supports the following formats for indicating time span:
Format
Example
hh:mm AM or PM - hh:mm AM or PM
1PM- 3PM Lunch with John
hh:mm AM or PM - hh:mm
1PM-3 Lunch with John
hh:mm - hh:mm AM or PM
1-3PM Lunch with John
All of these examples will create a 2-hour event from 1PM to 3PM
If you only specify an event start time in the Smart Planner, a 1-hour event is automatically created in
your digital calendar.
6.8 Create an all-day event slot
To create an all-day event, simply write the event name without specifying a time.
Time formats such as AM and PM are NOT recognized while creating an all-day event.
6.9 Overnight events
You can write events that last up to 23 hours and 59 minutes from any time on one day to the next.
Simply record the event and timing on the start date.
For example: 09PM – 01AM Gala dinner
Other manuals for Smart Writing Set
1
Table of contents
Other Moleskine Graphic Tablet manuals