Kanvus Artist 127 User manual

V1.01
User Manual
Windows & Macintosh

1
Table of the Contents
About This User’s Manual .........................2
Notes for This Manual ...............................2
Safety Information .....................................3
Care and Cleaning .....................................3
1. Product Introduction..............................4
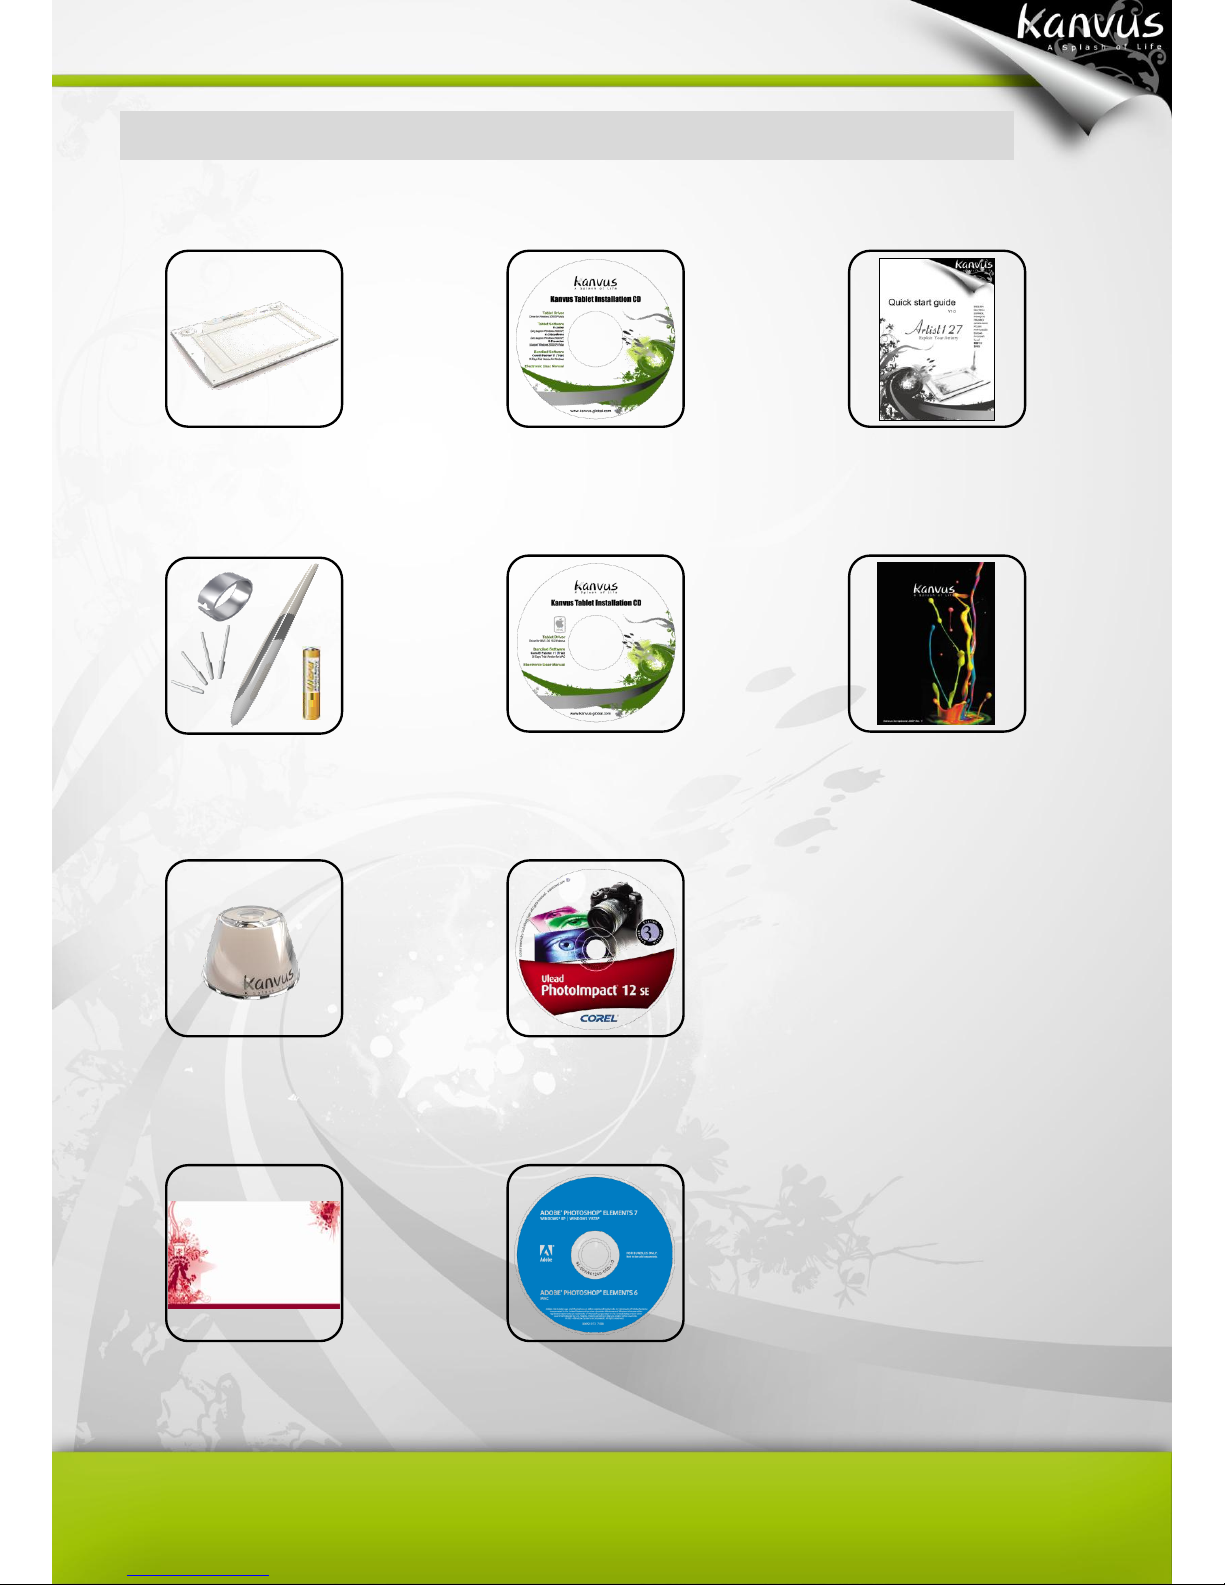
Package Contents ................................5
Tablet....................................................6
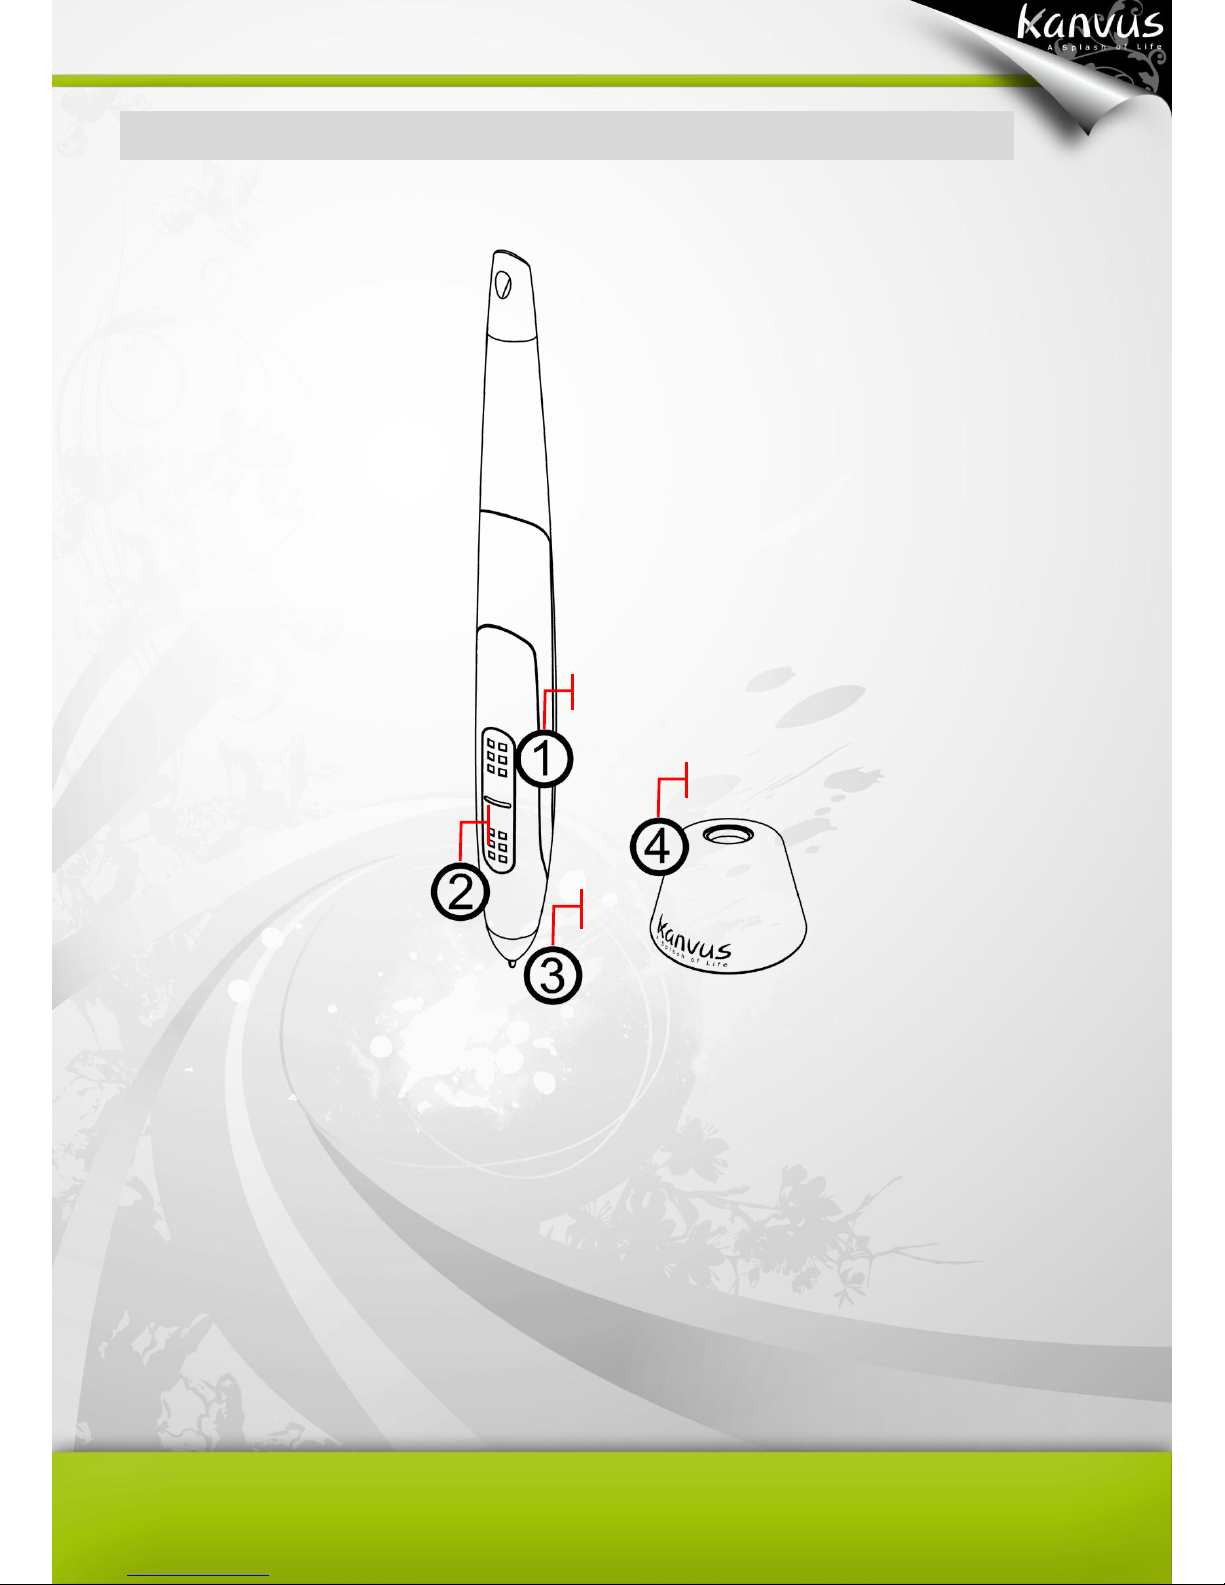
Digital Pen ............................................9
2. Getting Started.....................................11
Installation...........................................12
Windows......................................12
Mac OS........................................14
Configuration ......................................17
Windows......................................17
Mac OS........................................26
Uninstall..............................................33
Windows......................................33
Mac OS........................................34
3. Using the Tablet ...................................37
Holding the Pen ..................................38
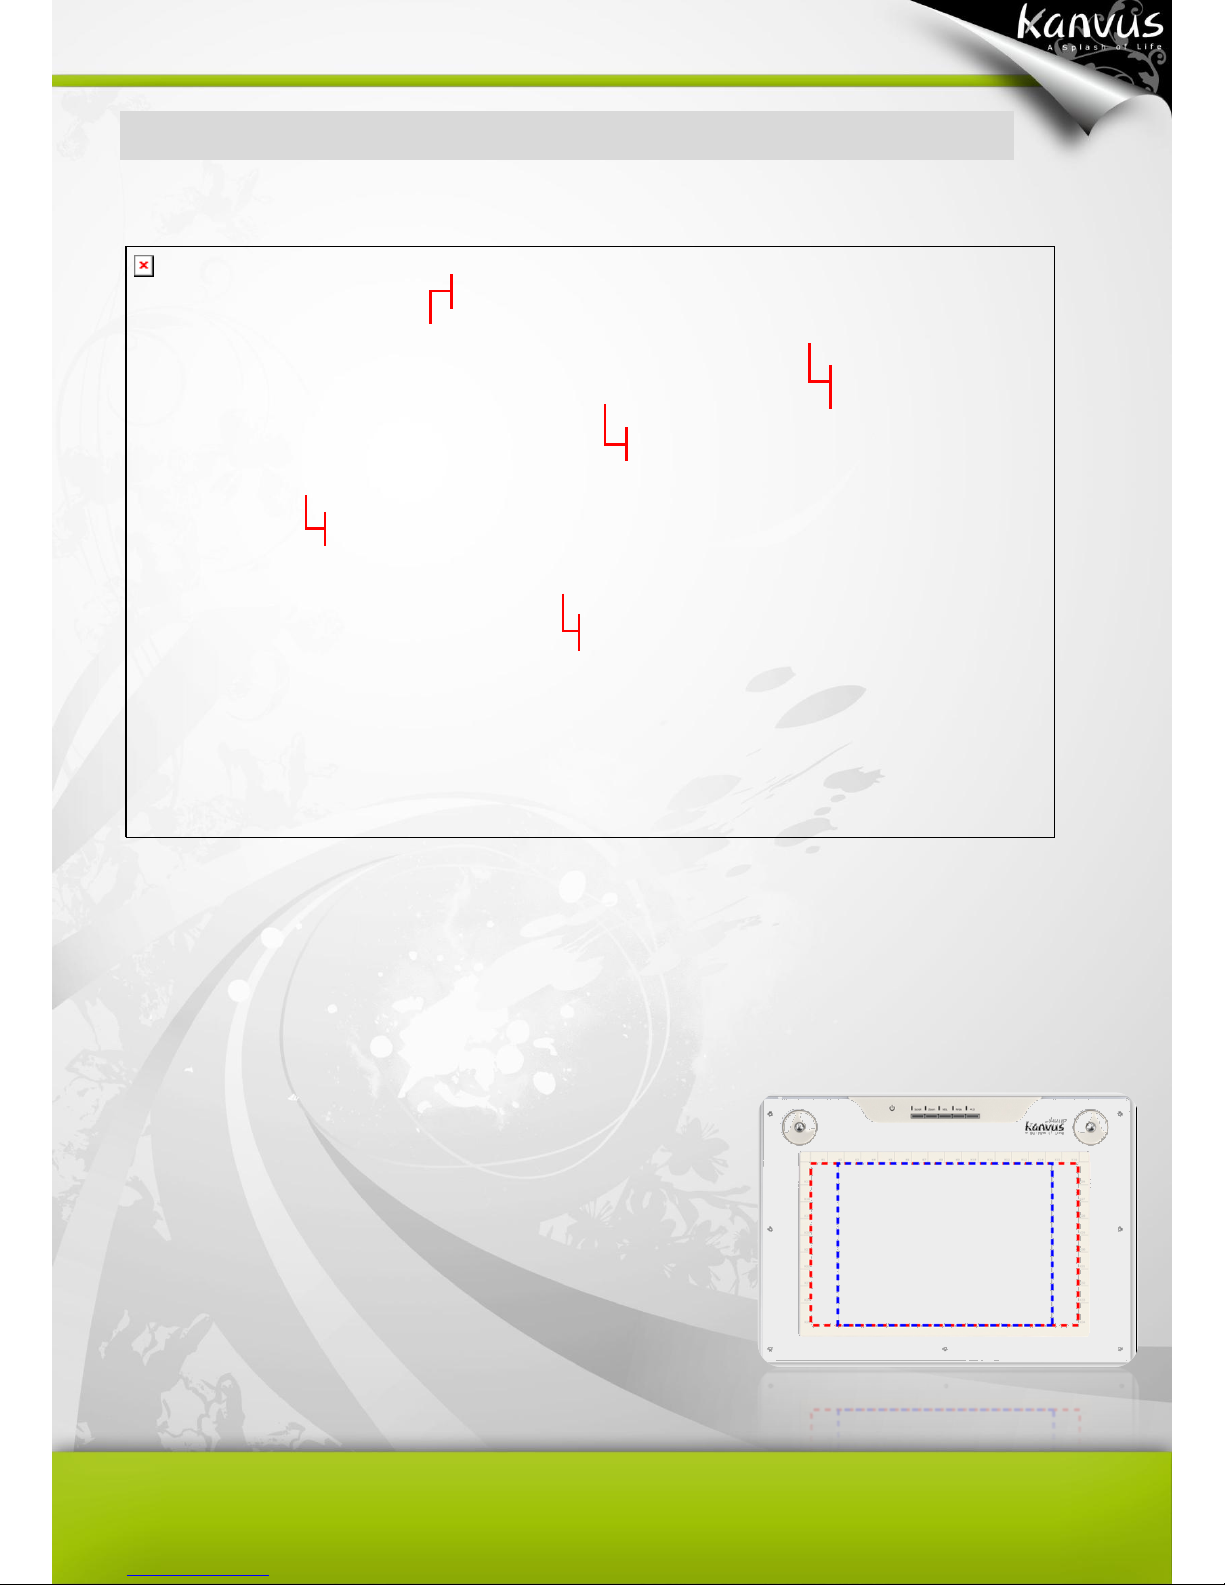
Working Area ......................................39
Positioning..........................................40
Clicking...............................................41
Dragging.............................................42
Pressure Control.................................43
4. Using the Bundled Software...............44
K-Jotter Overview...............................45
Letter Mode .................................45
Desktop Mode .............................52
K-OfficeMemo Overview.....................56
K-Presenter Overview.........................61
Before Installation........................61
Hardware Installation...................61
How to Open K-Presenter............62
5. Specification Summary .......................67
Tablet..................................................68
Digital Pen ..........................................69
6. Troubleshooting...................................70
Testing your device.............................71
FAQ ....................................................74
Service and Technical Support ...........75
Driver Download.................................76
Appendix ..................................................77
Declarations and Safety Statements...78
FCC.............................................78
CE................................................78
Ordering Components and
Accessories ........................................79
Copyright Information .........................80
Limitation of Liability ...........................81

2
About This User
’
s Manual
You are reading the Kanvus Artist 127 Graphic Tablet User Manual. This Manual provides
information regarding the components in the Kanvus Graphic Tablet and how to use them. The
following are major sections of this User’s Manual :
1. Product Introduction
Provides information on the Kanvus Graphic Tablet’s components.
2. Getting Started
Provides information on getting started with the Kanvus Tablet.
3. Using the Tablet
Provides information on using the Kanvus Graphic Tablet.
4. Using the Bundled Software
Provides information on using the Kanvus Graphic Tablet’s utility.
5. Specification Summary
Gives you specifications summary of Kanvus Graphic Tablet.
6. Troubleshooting
Provides information on Kanvus Graphic Tablet, where you can find the answers to most
common questions.
Notes for This Manual
A few notes and manuals are used throughout this guide, allowing you to complete certain tasks
safely and effectively.
1.
WARNING
Important Information that must be followed for safe operation.
2.
IMPORTANT
Vital information that must be followed to prevent damage to data,
components, or persons.
3.
TIP
Tips for completing tasks.
4.
NOTE
Information for special situations.

3
Safety Information
Adhering to the following safety information will prolong the life of the Tablet.
1. DO NOT try to open the housing of the tablet and the digital pen. It will void
your warranty.
2. DO NOT expose to or use near liquids, rain, or moisture.
3. DO NOT place or drop objects on top of the Tablet.
4. DO NOT expose to strong magnetic or electrical fields.
5. DO NOT throw the Tablet in municipal waste. The product has been
designed for proper reuse and recycling of parts. The symbol of the
crossed-out wheeled bin indicates that the product should not be placed in
municipal waste. Check your local regulations for disposal of electronic
products.
Care and Cleanin g
1. DO NOT expose to dirty or dusty environments to avoid wearing-down the
surface of the tablet.
2. Regular cleaning of the tablet surface with a soft cloth will help expand the
life span of your tablet. DO NOT use any kind of volatile liquid on the tablet
surface, as it will damage the plastic case.
3. Store your tablet and the pen in a clean, dry place and avoid extreme
temperatures.

4
1. Product Introduction
-Package Contents
-Tablet
-Digital Pen

5
Package Contents
Check your package for the following items.
Kanvus Artist 127 Digital
Tablet
Digital Pen & 1.5V AAA
Battery & Refills & Pen
Clip
Pen Stand
Pad-Cover
Installation CD(Windows)
Installation CD(Mac OS)
Corel PhotoImpact 12 SE
Adobe Photoshop
Elements 7.0
Quick Guide
Kanvus DM

6
Tablet
Refer to the picture below.
Descriptions :
○
1 —USB Connector : Connect to a USB port on your PC.
○
2 —Working Area : There are two working areas for
you to choose, wide (12” X 7.25”) and 4:3 (9.5” X 7.25”).
Please press the “Wide”or “4:3”buttons on the top side of
your tablet then the respective LED will be on. Please refer
to Working area section for detail descriptions.
Working Area
Hotspot Area
USB Connector
LED Indicator
Rolling Pad

7
○
3 —LED Indicator : The blue LED light on the tablet is the main indicator for hardware
operation. This LED normally blinks, and will only be turned on/off in response to certain conditions.
Pay attention to the states of the LED when you are encountering the following situations :
(a) A built-in power saving function would execute the power saving mode for the pen if it
is left unused for a period of time. Tap anywhere on the surface with the tip of the pen
to “wake it up” if it has gone into power saving mode.
(b) When the tablet detects the digital pen, the LED light will be on and solid. This
happens when the pen tip is idling suspended within the working area on the tablet.
(c) When you tap the tip or press a button of the pen within the working area on the tablet,
the LED light will be turned off temporarily.
(d) Moving the pen around the working area will cause the cursor on the screen to move
accordingly.
○
4 —Hotspot Area : The hotspot area is located at the edge of the working area. A hotspot is
used as a hot key. Press the hotspot to start a default or user-defined application or function.
○
5 —Rolling Pad : It allows you to navigate easily in “Scroll”, “Zoom”or “VOL”functions. Please
be noted that you have to install Hotspot Manager to enable the function. The usages of a rolling
pad are as followed :
(a) Scroll : The Rolling Pad enables you to scroll vertically and horizontally. Click the
After the tablet’s device driver has been properly installed, a small
tablet icon will appear in the System Tray, which is normally at
the lower right corner of the desktop.

8
central button of rolling pad to switch the direction.
(b) Zoom : You can use the Rolling Pad to zoom in or zoom out. Keep pressing the
central button of rolling pad will change to Hand Tool.
(c) VOL : Adjusts the volume with the Rolling Pad. Click the central button of rolling pad
to enable / disable mute.
We design these key functions for Adobe PhotoShop Serial
applications. However, different applications might have different
definitions in terms of horizontal scrolling, Zoom and Hand Tool.
Thus, the rolling pad may not work in all kinds of applications.

9
Digital Pen
Refer to the pictures below.
Descriptions
○
1 —Button 2 : Functions like the Double Click of the mouse (by default).
○
2 —Button 1 : This button functions as the Right Click of the mouse (by default).
○
3 —Pen Tip : It is a pressure-sensitive freehand tool for image editing and creating pen strokes
similar to real handwriting. Tap the Pen tip on tablet acts as the Left Click of the mouse (by default).
Button 2
Button 1
Pen Tip
Pen Stand

10
○
4 —Pen Stand : Use the Pen stand to store the pen between tasks.
Changing the battery
Changing the pen tip
The power saving mode will be activated if the pen is left unused
for about 3 minutes. To wake the pen up, please press the pen tip
once anywhere on the surface before you start writing again.
Please refer to Configuration section for more detail settings.

11
2. Getting Started
-Installation
-Configuration
-Uninstall

12
Installation
Windows
Installing the Driver Software on Windows
Please follow the installation instructions below for Microsoft Windows 2000, XP, Vista and 7
operating systems :
1. Place the CD into the CD-ROM drive.
2. The main installation window will appear automatically. If not, please start the installation
manually by opening 【My Computer】►【CD/DVD Rom】►then click on the 【Autorun】
program.
3. Press “Driver Setup”to install the Kanvus Tablet driver with the Hotspot manager.

13
4. When installing the driver, please follow the installation instructions on screen, pressing the
“Enter” key through each step. After the installation is complete, please reboot the computer
(recommended)
Hardware Installation
After you have finished the driver installation and restarted Windows, connect the tablet through a
USB interface to the PC.
Driver must be installed before you connect the device.

14
Mac OS
Installing the Driver Software on Mac OS
1. Place CD labeled “Tablet Driver Mac” in CD-ROM drive.
2. Double click the icon “USB Tablet”, and you will see the folder containing “Kanvus Tablet Driver”.
3. Double click the driver “Kanvus Tablet Driver”.
4. Type your name and password
and press “OK”. (Please note
that Mac computers require a
username and password)
5. Press “Continue”on the
Introduction page.

15
6. In the top bar, choose “Easy
Install”and press “Install”.
7. Installation may take a moment,
please be patient.
8. The window will show a message
telling you that the “Installation
was successful”. Please press
“Restart”to restart your PC.

16
Hardware Installation
After you have finished the driver installation and restarted PC, connect the tablet through a USB
interface to the PC.
Driver must be installed before you connect the device.

17
Configuration
Windows
Once you install “Hotspot Manager” and plug the tablet into your PC, the icon ( ) will be showed
in the System Tray.
However, you can choose to disable the Hotspot Manager by clicking the right button and selecting
“Disable”. Once you disable Hotspot Manager or un-plug your tablet from your PC, the original icon
will be changed into icon ( ).
Setting
Move the cursor to the Hotspot manager icon in the system tray, and then click the right button.

18
About
Shows information of Software Version, Driver Version and Firmware Version.

19
Show
Shows the Hotspot Manager User Interface.
1. Hotspot Manager Panel
Double click the Hotspot Manager in the system tray to access the functions.
(1) Profile : You can select, create or modify Hotspot profiles on this page. There is a wide testing
space for you to configure the profiles of Hotspots.
Table of contents
Other Kanvus Graphic Tablet manuals