TO START
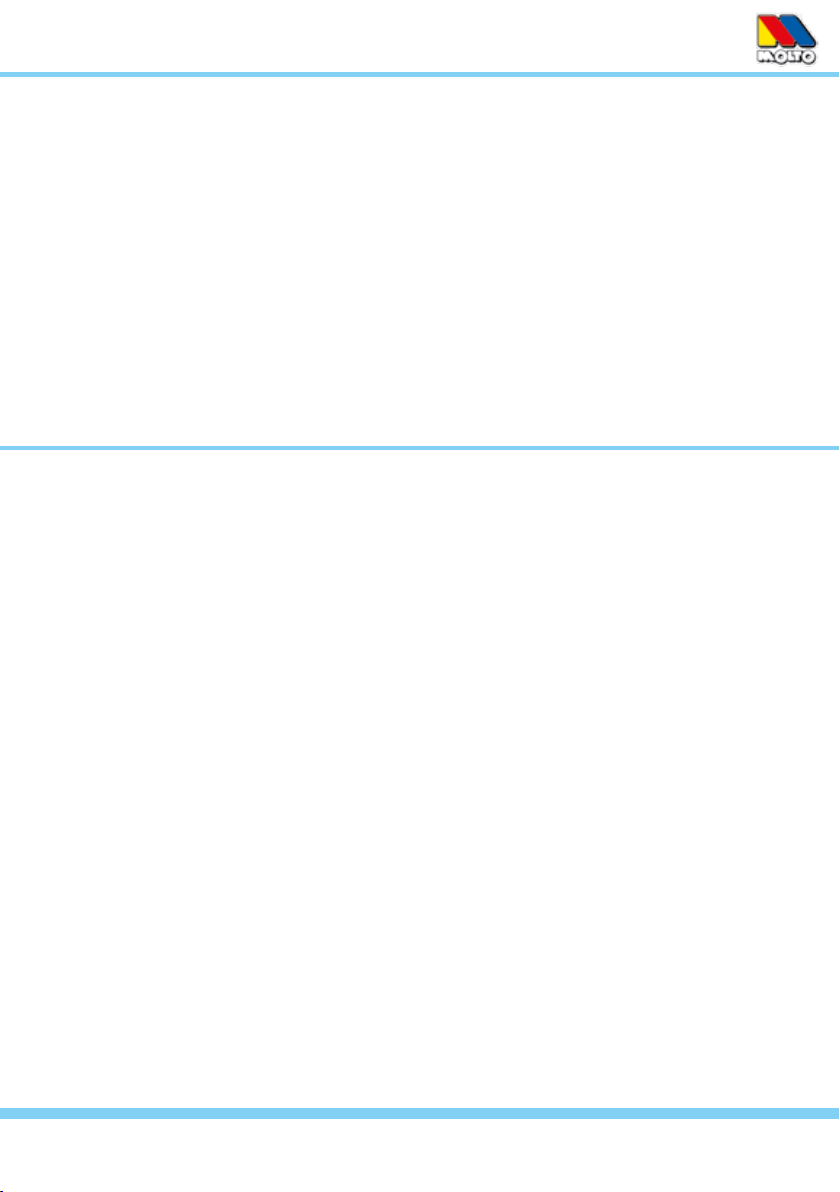
Main Menu
Camera View
A. Plug one of the AC/DC adapters (they are interchangeable) into the monitor and allow it to
charge the Monitor Battery for at least 6 hours.
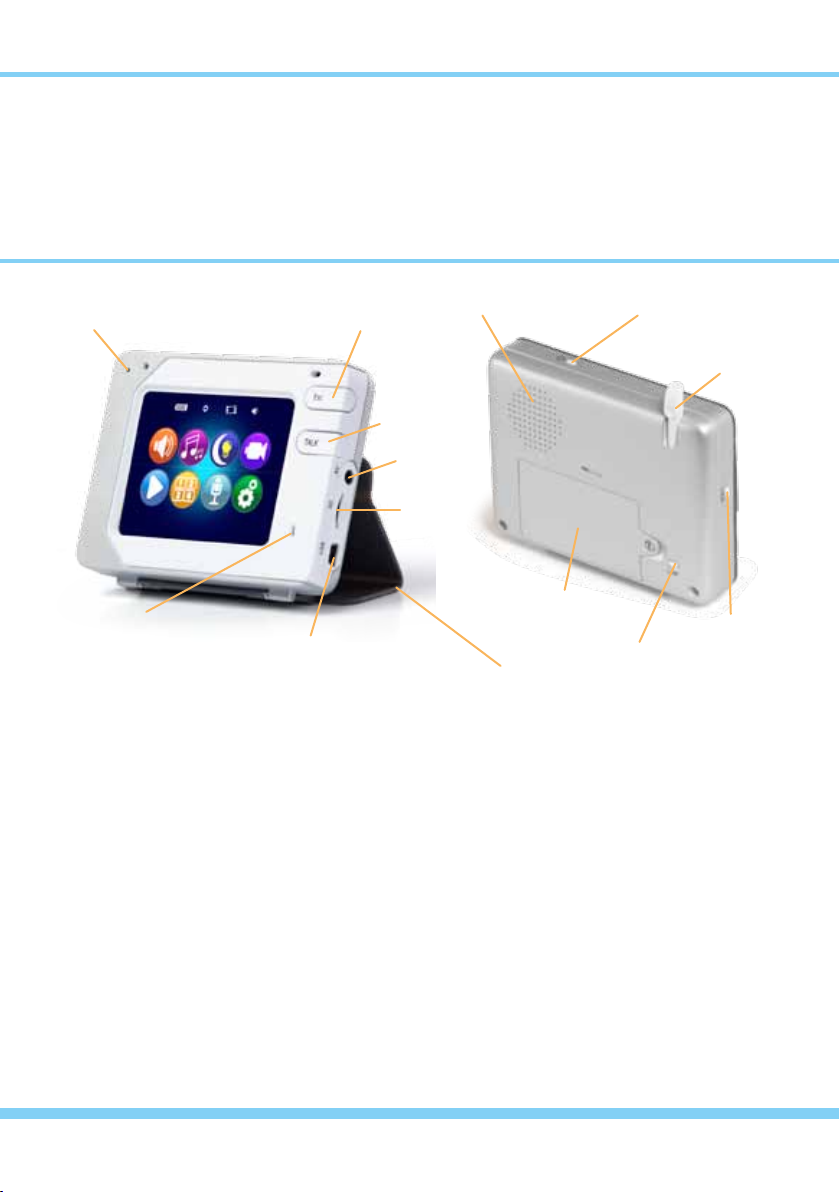
B. Plug the other AC/DC adapter into the camera. Turn the Camera On by holding the ON/OFF
Button down for several seconds. The green “Power On” Indicator lights when powered up.
C. Turn the Monitor On by holding its ON/OFF Button down for several seconds. Its “Power
On” Indicator will light up (green on battery power, red when charging) and the MOLTO logo
will appear on the screen.
D. Press ESC Button to go to the Main Menu.
E. Press ESC Button once again to go to the
Camera View. Along the top and bottom of the
screen, small “Per Camera” Icons (ex-plained
on page 18) will appear over the view from the
camera, which should be on and paired with
the monitor.
IMPORTANT: Use ONLY a nger-
tip or other NON-SHARP object to
select touch screen options.
Using sharp objects can damage
the screen and void the warranty.
LOCKING THE SCREEN: If you press the Lock Screen Button a LOCK icon will appear and the
touch-screen function will be disabled. Pressing the Lock Screen Button again will revert it back to
normal touch-screen function.
TO SET TO ANOTHER LANGUAGE: The monitor is set to English by default. The text can also
be displayed in French, German, Portuguese, Spanish, or Italian. To change the language follow
this sequence:
press the ESC Button
touch Setting icon
touch System Setting
touch slider to See More List
select Language from the list
select a new Language
press the ESC Button
NOTE: While viewing the Main Menu, if no
buttons are pressed, or the screen is not
touched after 30 seconds, the monitor will
automatically exit the Main Menu mode.
6