13 14
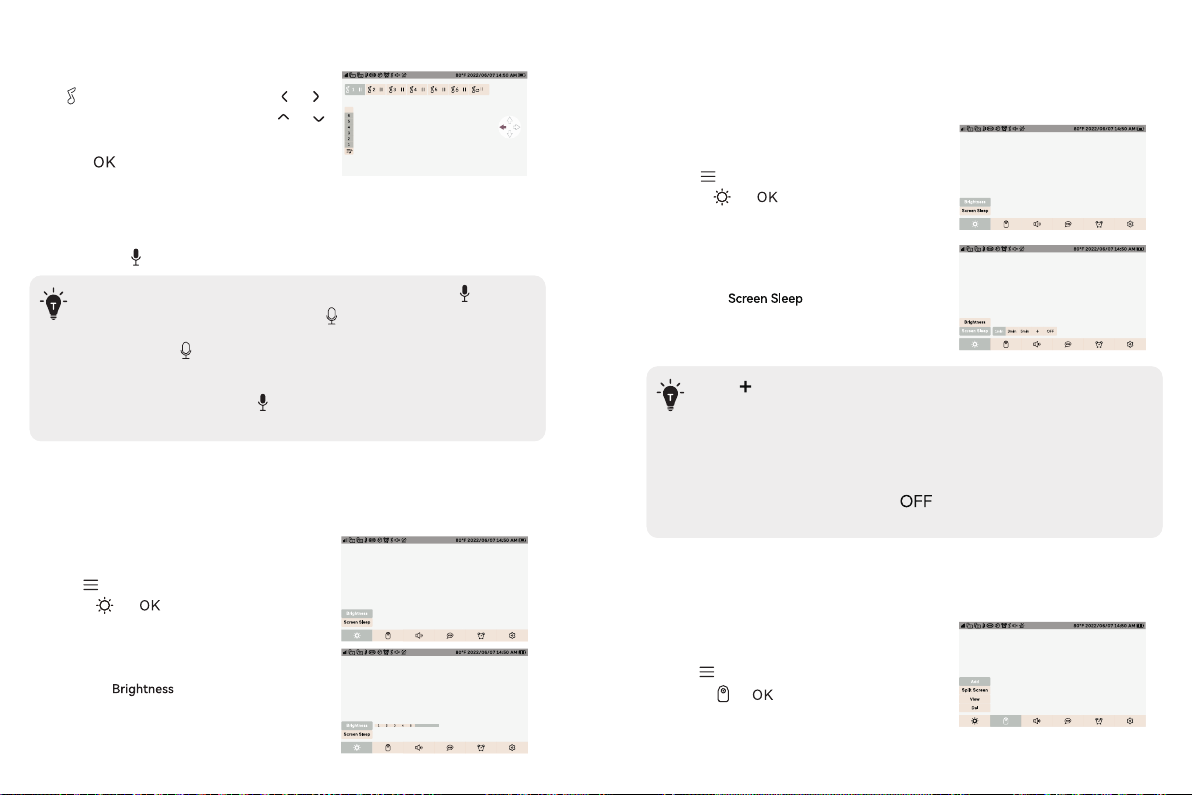
Step 1:
1. Press to enter menu page.
2. Choose -> button.
Step 2: Step 1:
1. Press to enter menu page.
2. Choose -> button.
1. Select the Setting to
change the monitor screen Brightness.
6. Brightness
Explanation:
This function is used to adjust the screen brightness of the monitor.
7. Screen Sleep
Explanation:
This function is to set the monitor screen to sleep without powering off
the monitor.
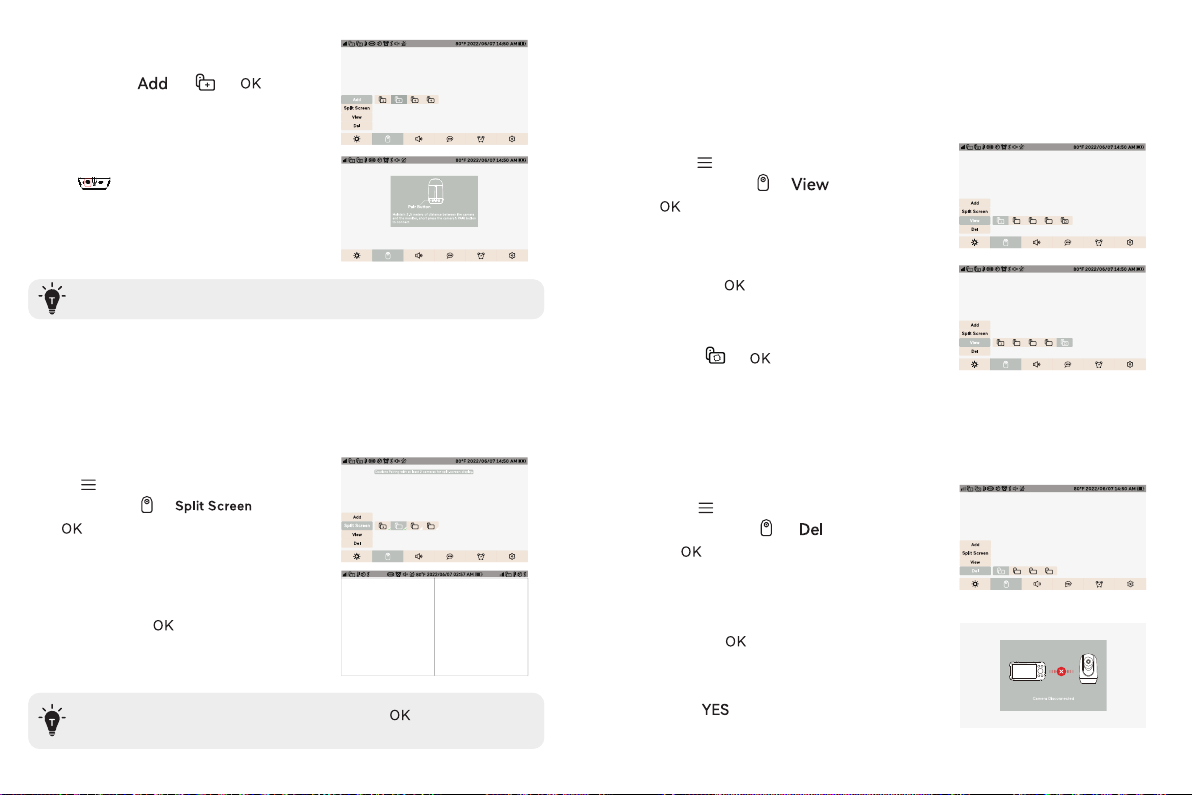
8. Add A New Camera
5. Talk Back
Press and hold Button to talk to your baby, release it to exit the talking mode.
4. Lullaby
Use Shortcut Button:
Press to enter the lullaby page. Press &
buttons to select the lullaby song,press &
buttons to adjust the volume of the lullaby,
and press to turn on or off the lullaby.
·When you are in the monitoring mode, press and hold the button
to enter the intercom mode, and the icon will be displayed on the
monitor. When you enter the menu, the intercom function can still be
used, but the icon will not appear on the screen.
·When it’s mute or the speaker volume is too low, you may not be able
to hear the baby.
·When you’re pressing the Button, the camera will not transfer the
sound to the monitor. Please release the button to listen to your baby.
Step 1:
1. Press to enter menu page.
2. Choose -> button.
Step 2:
1. Select the and select the
time you want.
·Click to enter the page for customizing the resting time. The resting
time ranges from 1 to 60 minutes.
· The screen will automatically light up if there is a VOX or a temperature
alert.
· When VOX is turned off, the screen will not automatically wake up and
light up.
· When the sleep time is set to " ", the monitor will not be off the
screen.