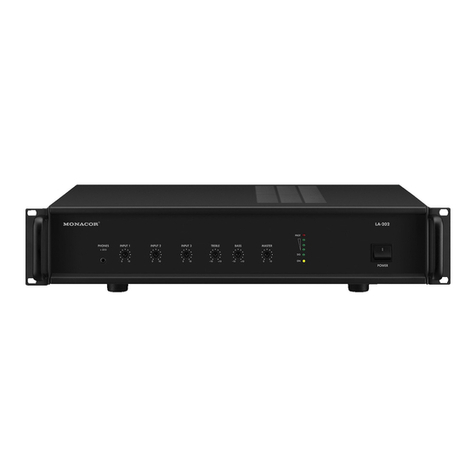
Monacor PA-930CD User manual

BEDIENUNGSANLEITUNG
INSTRUCTION MANUAL
MODE D’EMPLOI
ISTRUZIONI PER L’USO
MANUAL DE INSTRUCCIONES
INSTRUKCJA OBSŁUGI
VEILIGHEIDSVOORSCHRIFTEN
SIKKERHEDSOPLYSNINGER
SÄKERHETSFÖRESKRIFTER
TURVALLISUUDESTA
ELA-MISCHVERSTÄRKER
MIT CD-SPIELER
PA MIXING AMPLIFIER WITH CD PLAYER
PA-930CD
Best.-Nr. 17.2920

2
Bevor Sie einschalten …
Wir wünschen Ihnen viel Spaß mit Ihrem neuen Gerät
von MONACOR. Bitte lesen Sie diese Bedienungsan-
leitung vor dem Betrieb gründlich durch. Nur so lernen
Sie alle Funktionsmöglichkeiten kennen, vermeiden
Fehlbedienungen und schützen sich und Ihr Gerät vor
eventuellen Schäden durch unsachgemäßen Gebrauch.
Heben Sie die Anleitung für ein späteres Nachlesen auf.
Der deutsche Text beginnt auf der Seite 4.
D
A
CH
GB
Avant toute installation …
Nous vous souhaitons beaucoup de plaisir à utiliser cet
appareil MONACOR. Lisez ce mode dʼemploi entière-
ment avant toute utilisation. Uniquement ainsi, vous pour-
rez apprendre lʼensemble des possibilités de fonction-
nement de lʼappareil, éviter toute manipulation erronée et
vous protéger, ainsi que lʼappareil, de dommages éven-
tuels engendrés par une utilisation inadaptée. Conservez
la notice pour pouvoir vous y reporter ultérieurement.
La version française se trouve page 12.
Prima di accendere …
Vi auguriamo buon divertimento con il vostro nuovo
apparecchio di MONACOR. Leggete attentamente le
istruzioni prima di mettere in funzione lʼapparecchio.
Solo così potete conoscere tutte le funzionalità, evitare
comandi sbagliati e proteggere voi stessi e lʼapparecchio
da eventuali danni in seguito ad un uso improprio. Con-
servate le istruzioni per poterle consultare anche in
futuro.
Il testo italiano inizia a pagina 12.
F
B
CH
I
Voor u inschakelt …
Wij wensen u veel plezier met uw nieuwe apparaat van
MONACOR. Lees de veiligheidsvoorschriften grondig
door, alvorens het apparaat in gebruik te nemen. Zo
behoedt u zichzelf en het apparaat voor eventuele
schade door ondeskundig gebruik. Bewaar de handlei-
ding voor latere raadpleging.
De veiligheidsvoorschriften vindt u op pagina 28.
Antes de la utilización …
Le deseamos una buena utilización para su nuevo apa-
rato MONACOR. Por favor, lea estas instrucciones de
uso atentamente antes de hacer funcionar el aparato.
De esta manera conocerá todas las funciones de la uni-
dad, se prevendrán errores de operación, usted y el apa-
rato estarán protegidos en contra de todo daño causado
por un uso inadecuado. Por favor, guarde las instruccio-
nes para una futura utilización.
La versión española comienza en la página 20.
NL
B
E
Før du tænder …
Vi håber, du bliver glad for dit nye MONACOR produkt.
Læs venligst betjeningsmanualen grundigt igennem,
inden du tager produktet i brug. På denne måde lærer du
alle funktioner at kende, og undgår betjeningsfejl, der
kan skade produktet. Gem venligst betjeningsmanualen
til senere brug.
Den danske vejledning finder du på side 28.
Innan du slår på enheten …
Vi önskar dig mycket glädje med din nya MONACOR
produkt. Läs igenom säkerhetsföreskrifterna noga innan
enheten tas i bruk. Detta kan förhindra att problem eller
fara för dig eller enheten uppstår vid användning. Spara
instruktionerna för framtida användning.
Säkerhetsföreskrifterna återfinns på sidan 29.
DK
SEnnen kytkemistä …
Toivomme Sinulle paljon miellyttäviä hetkiä uuden
MONACOR laitteen kanssa. Ennen laitteen käyttöä pyy-
dämme Sinua huolellisesti tutustumaan turvallisuusoh-
jeisiin. Näin vältyt vahingoilta, joita virheellinen laitteen
käyttö saattaa aiheuttaa. Ole hyvä ja säilytä käyttöohjeet
myöhempää tarvetta varten.
Turvallisuusohjeet löytyvät sivulta 29.
FIN
Przed uruchomieniem …
Życzymy zadowolenia z nowego produktu MONACOR.
Dzięki tej instrukcji obsługi będą państwo w stanie
poznać wszystkie funkcje tego urządzenia. Stosując się
do instrukcji unikną państwo błędów i ewentualnego
uszkodzenia urządzenia na skutek nieprawidłowego
użytkowania. Prosimy zachować instrukcję.
Tekst polski zaczyna się na stronie 20.
PL
Before you switch on …
We wish you much pleasure with your new MONACOR
unit. Please read these operating instructions carefully
prior to operating the unit. Thus, you will get to know all
functions of the unit, operating errors will be prevented,
and yourself and the unit will be protected against any
damage caused by improper use. Please keep the oper-
ating instructions for later use.
The English text starts on page 4.

3
INPUT 1
010 010
INPUT 2
010
INPUT 3 INPUT 4
010
AUX
010
BASS
-10 +10
dB
TREBLE
-10 +10
dB 010
MASTER +3
0dB
-3
-8
-13
ON
POWER
MP3
AUX
®
FOLDER SKIP
DOWN/ REV UP/CUESTOP
REMOTE USB CD
PLAY/PAUSE EJECT
PA-930CD AMPLIFIER 120 WATT
6 7 8 9 10 11 12 13 14 15 16 17 18 19
COM
OUTPUT
4Ω70V 100V
24V DC
+–
230V~/50Hz
GND
T1.6 AL
PRE OUT
AMP IN
L
R
LINE OUT AUX IN
L
R
MIC
LINE
INPUT 4
MIC
LINE
INPUT 3
MIC
LINE
INPUT 2
MIC
LINE
INPUT 1 AUTO
TALK
+21V
PHANTOM
POWER
OFF
ON OFF
ON
+ – GND
21
3
21
3
21
3
21
3
20 21 22 23 24 25 26 27 28 29 30 31 32
4Ω
COM
OUTPUT
4Ω70V 100V
100V
4Ω
120WRMS
+
-
100V
+
-
100V
+
-
100V
+
-
max. Belastung
max. load
120W RMS
+
-
+
-
COM
OUTPUT
4Ω70V 100V
. . .
70V
+
-
70V
+
-
70V
+
-
COM
OUTPUT
4Ω70V 100V
. . .
70V
4Ω
30WRMS
4Ω
COM
OUTPUT
4Ω70V 100V
4Ω
30WRMS
+
-
+
-
4Ω
30WRMS
4Ω
30WRMS
8Ω
60WRMS
4Ω
COM
OUTPUT
4Ω70V 100V
8Ω
60WRMS
+
-
+
-
max. Belastung
max. load
120W RMS
1 2345
0
8
5
2
7
4
1
9
6
3
FIND
PROG
STOP
ESP
P
L
A
Y
/
P
A
U
S
E
MUTEEJECT
FOLDER SKIP DOWN/REV UP/CUE
DISPLAYPLAY MODE CD USB
11
10
3
39
38
37
2
4
36
5
33
9
34
35

Please unfold page 3. Then you can always see the
operating elements and connections described.
Contents
1 Operating Elements . . . . . . . . . . . . . . . . . . 4
1.1 Front panel . . . . . . . . . . . . . . . . . . . . . . . . . . 4
1.2 Rear panel . . . . . . . . . . . . . . . . . . . . . . . . . . . 4
1.3 Remote control . . . . . . . . . . . . . . . . . . . . . . . 5
2 Safety Notes . . . . . . . . . . . . . . . . . . . . . . . . . 5
3 Applications . . . . . . . . . . . . . . . . . . . . . . . . . 6
4 Setting up the Amplifier . . . . . . . . . . . . . . . 6
4.1 Rack installation . . . . . . . . . . . . . . . . . . . . . . 6
5 Connecting the PA Amplifier . . . . . . . . . . . 6
5.1 Speakers . . . . . . . . . . . . . . . . . . . . . . . . . . . . 6
5.2 Microphones . . . . . . . . . . . . . . . . . . . . . . . . . 6
5.3 Units with line output . . . . . . . . . . . . . . . . . . . 7
5.4 Inserting an equalizer or another unit . . . . . . 7
5.5 Additional amplifier . . . . . . . . . . . . . . . . . . . . 7
5.6 Power supply and emergency power supply . 7
6 Operation . . . . . . . . . . . . . . . . . . . . . . . . . . . 7
6.1 Talkover function of channel 1 . . . . . . . . . . . . 7
6.2 CD player . . . . . . . . . . . . . . . . . . . . . . . . . . . 7
6.2.1 Remote control . . . . . . . . . . . . . . . . . . . . . . 7
6.2.2 Replaying a CD, hard disk,
or USB memory stick . . . . . . . . . . . . . . . . . 8
6.2.3 Automatic CD start feature . . . . . . . . . . . . . 8
6.2.4 Title selection . . . . . . . . . . . . . . . . . . . . . . . 8
6.2.5 Fast forward / reverse . . . . . . . . . . . . . . . . . 9
6.2.6 Repeat functions and random replay . . . . . 9
6.2.7 Muting the sound . . . . . . . . . . . . . . . . . . . . 9
6.2.8 Compiling an individual title sequence . . . . 9
6.2.9 Note on sound interruptions
and reading errors . . . . . . . . . . . . . . . . . . 10
7 Specifications . . . . . . . . . . . . . . . . . . . . . . 10
1 Operating Elements
1.1 Front panel
1CD slot; slide the CD so far into the slot until it is
retracted automatically
2Button STOP to stop the replay
3Buttons DOWN/REV and UP/CUE for the title
selection and for fast forward/reverse
Title selection
Each time the button UP/CUE is pressed, the
unit will advance one title; when the button
DOWN/REV is pressed, the unit will go to the
beginning of the title, and with each further
actuation, the unit will go back one title at a
time.
Fast forward/reverse
For fast forward, keep the button UP/CUE
pressed, for fast reverse, the button DOWN/
REV.
4Button PLAY/PAUSE for switching between re-
play and pause
5Button EJECT for ejecting the CD
6USB interface for inserting a USB memory stick
or for connection of a hard disk
7Display
8Infrared sensor for the remote control signals
9Buttons FOLDER SKIP with MP3 files for select-
ing the first title in another folder and for further
title selection:
Use the left button to go to the first title of the pre-
vious folder and the right button to go to the first
title of the next folder. To go to the following titles
or previous titles while replaying, keep a button
pressed.
10 Button USB for selecting the USB interface (6)
11 Button CD for selecting the inserted CD
12 Tone controls
BASS control, ±10 dB/100 Hz
TREBLE control, ±10 dB/10 kHz
13 Control for adjusting the volume for the mono
channels INPUT 1 to INPUT 4
14 Control MASTER for the total volume
15 Level display
16 POWER LED
17 POWER switch
18 Control for adjusting the volume for the signal
source connected to the input AUX IN (28)
[button AUX/MP3 (19) not pressed] or for the vol-
ume of the internal CD player [button AUX/MP3
pressed]
19 Button AUX/MP3
button pressed internal CD player is selected
(the LED above the button lights
up)
not pressed the input AUX IN (28) is selected
1.2 Rear panel
20 Mains jack for connection to a mains socket
(230 V~/50 Hz) via the supplied mains cable
21 Support for the mains fuse;
replace a blown fuse only by one of the same
type
22 Clamping screw for a possible ground connec-
tion (e. g. in case of hum problems)
23 Screw terminals* for an emergency supply volt-
age (24 V )
24 Screw terminals* for the connection of the speak-
ers
4
GB
D
A
CH
* Die Schraubklemmen lassen sich zur besseren Hand-
habung aus ihrer Steckverbindung herausziehen.
* To facilitate handling, the screw terminals can be pulled
out of their plug-in connections.
Bitte klappen Sie die Seite 3 heraus. Sie sehen
dann immer die beschriebenen Bedienelemente
und Anschlüsse.
Inhalt
1 Übersicht der Bedienelemente
und Anschlüsse . . . . . . . . . . . . . . . . . . . . . . 4
1.1 Frontseite . . . . . . . . . . . . . . . . . . . . . . . . . . . 4
1.2 Rückseite . . . . . . . . . . . . . . . . . . . . . . . . . . . . 4
1.3 Fernbedienung . . . . . . . . . . . . . . . . . . . . . . . 5
2 Hinweise für den sicheren Gebrauch . . . . 5
3 Einsatzmöglichkeiten . . . . . . . . . . . . . . . . . 6
4 Aufstellen des Verstärkers . . . . . . . . . . . . . 6
4.1 Rackeinbau . . . . . . . . . . . . . . . . . . . . . . . . . . 6
5 ELA-Verstärker anschließen . . . . . . . . . . . . 6
5.1 Lautsprecher . . . . . . . . . . . . . . . . . . . . . . . . . 6
5.2 Mikrofone . . . . . . . . . . . . . . . . . . . . . . . . . . . . 6
5.3 Geräte mit Line-Ausgang . . . . . . . . . . . . . . . 7
5.4 Equalizer oder anderes Gerät einschleifen . . 7
5.5 Zusätzlicher Verstärker . . . . . . . . . . . . . . . . . 7
5.6 Strom- und Notstromversorgung . . . . . . . . . . 7
6 Bedienung . . . . . . . . . . . . . . . . . . . . . . . . . . 7
6.1 Talkover-Funktion des Kanals 1 . . . . . . . . . . 7
6.2 CD-Spieler . . . . . . . . . . . . . . . . . . . . . . . . . . . 7
6.2.1 Fernbedienung . . . . . . . . . . . . . . . . . . . . . . 7
6.2.2 CD, Festplatte oder USB-Stick abspielen . 7
6.2.3 Automatische CD-Start-Funktion . . . . . . . . 8
6.2.4 Titelanwahl . . . . . . . . . . . . . . . . . . . . . . . . . 8
6.2.5 Schneller Vor- / Rücklauf . . . . . . . . . . . . . . 9
6.2.6 Wiederholfunktionen und
Zufallswiedergabe . . . . . . . . . . . . . . . . . . . 9
6.2.7 Ton stumm schalten . . . . . . . . . . . . . . . . . . 9
6.2.8 Eigene Titelfolge zusammenstellen . . . . . . 9
6.2.9
Hinweis zu Tonaussetzern und Lesefehlern
10
7 Technische Daten . . . . . . . . . . . . . . . . . . . 10
1 Übersicht der Bedienelemente
und Anschlüsse
1.1 Frontseite
1CD-Einzugsschlitz; die CD so weit in den Schlitz
schieben, bis sie automatisch eingezogen wird
2Taste STOP zum Beenden des Abspielens
3Tasten DOWN/REV und UP/CUE für die Titelan-
wahl sowie den schnellen Vor- und Rücklauf
Titelanwahl
Mit jedem Drücken der Taste UP/CUE wird ein
Titel vorgesprungen; durch Drücken der Taste
DOWN/REV wird an den Titelanfang gesprun-
gen und mit jedem weiteren Drücken ein Titel
zurück.
schneller Vor-/Rücklauf
Für den Vorlauf die Taste UP/CUE gedrückt
halten, für den Rücklauf die Taste DOWN/REV.
4Taste PLAY/PAUSE zum Umschalten zwischen
Wiedergabe und Pause
5Taste EJECT zum Auswerfen der CD
6USB-Schnittstelle zum Einstecken eines USB-
Sticks oder zum Anschluss einer Festplatte
7Display
8Infrarotsensor für die Fernbedienungssignale
9Tasten FOLDER SKIP bei MP3-Dateien zur
Anwahl des ersten Titels in einem anderen Ord-
ner und zur weiteren Titelauswahl:
Mit der linken Taste wird auf den ersten Titel des
vorherigen Ordners gesprungen und mit der
rechten Taste auf den ersten Titel des nächsten
Ordners. Während der Wiedergabe kann durch
Gedrückthalten einer Taste auf die folgenden
oder auf die davor liegenden Titel gesprungen
werden.
10 Taste USB zum Anwählen der USB-Schnitt-
stelle (6)
11 Taste CD zum Anwählen der eingelegten CD
12 Klangregler
BASS = Bassregler, ±10 dB/100 Hz
TREBLE = Höhenregler, ±10 dB/10 kHz
13 Regler zum Einstellen der Lautstärke für die
Mono-Kanäle INPUT 1 bis INPUT 4
14 Regler MASTER für die Gesamtlautstärke
15 Pegelanzeige
16 Betriebsanzeige
17 Ein-/Ausschalter POWER
18 Regler zum Einstellen der Lautstärke für die am
Eingang AUX IN (28) angeschlossene Signal-
quelle [Taste AUX/MP3 (19) nicht gedrückt] bzw.
für die Lautstärke des internen CD-Spielers
[Taste AUX/MP3 gedrückt]
19 Taste AUX/MP3
Taste gedrückt interner CD-Spieler ist ange-
wählt (die LED über der Taste
leuchtet)
nicht gedrückt der Eingang AUX IN (28) ist an-
gewählt
1.2 Rückseite
20 Netzbuchse zum Anschluss an eine Steckdose
(230 V~/50 Hz) über das beiliegende Netzkabel
21 Halterung für die Netzsicherung;
eine durchgebrannte Sicherung nur durch eine
gleichen Typs ersetzen
22 Klemmschraube für einen eventuellen Masse-
anschluss (z. B. bei Brummproblemen)
23 Schraubklemmen* für eine Notversorgungs-
spannung (24 V )
24 Schraubklemmen* für den Anschluss der Laut-
sprecher

25 XLR-Eingangsbuchsen der Mono-Kanäle IN-
PUT 1 bis INPUT 4 für den Anschluss von Mikro-
fonen oder Mono-Geräten mit Line-Ausgang
26 Durchschleifanschlüsse PRE OUT und AMP IN
zum Zwischenschalten eines Gerätes (z. B.
Equalizer);
der Ausgangspegel der Buchse PRE OUT ist
unabhängig vom Regler MASTER (14)
27 Ausgang LINE OUT zum Anschluss weiterer
Verstärker; der Ausgangspegel ist unabhängig
vom Regler MASTER (14)
28 Eingang AUX IN zum Anschluss von Audioge-
räten, z. B. CD-Spieler, Tuner etc.
29 Umschalter für die Mono-Kanäle INPUT 1 – 4
zwischen Mikrofonpegel (Taste nicht gedrückt)
und Line-Pegel (Taste gedrückt)
30 Schraubklemmen zum Anschluss eines Mikro-
fons oder eines Audiogerätes mit Line-Ausgang;
parallel zur XLR-Buchse INPUT 1 geschaltet
31 Taste AUTOTALK zum Ein-/Ausschalten der Talk-
over-Funktion des Kanals 1
32 Taste +21 V PHANTOM POWER zum Einschal-
ten der 21-V-Phantomspeisung für die XLR-
Buchsen INPUT 1 bis INPUT 4 (25); erforderlich
beim Anschluss von Kondensator- bzw. Elektret-
mikrofonen, die mit Phantomspeisung arbeiten
1.3 Fernbedienung
2–5und 9–11
Diese Tasten haben die gleichen Funktionen wie
die Tasten am Gerät
33 Zifferntasten zur Direktanwahl eines Titels, z. B.:
Titelnr. Tasten
4 4, PLAY/PAUSE
27 2, 7, PLAY/PAUSE
135 1, 3, 5, PLAY/PAUSE
34 Taste PLAY MODE zum Anwählen der Wieder-
holfunktionen und der Zufallswiedergabe
Grundeinstellung (PLAY ALL)
alle Titel des Datenträgers oder einer program-
mierten Titelfolge werden einmal abgespielt
erster Tastendruck (PLAY ALL RANDOM)
einmalige Wiedergabe der Titel in zufälliger
Reihenfolge
nächster Tastendruck (REPEAT TRACK)
ständige Wiederholung des angewählten Titels
nächster Tastendruck (REPEAT FOLDER)
ständige Wiederholung aller Titel im ange-
wählten Ordner (Funktion nur bei MP3-
Dateien vorhanden)
nächster Tastendruck (REPEAT ALL)
ständige Wiederholung aller Titel
nächster Tastendruck (RANDOM REPEAT)
ständiges Abspielen der Titel in zufälliger Rei-
henfolge
nächster Tastendruck (PLAY ALL)
Zurückschalten auf die Grundeinstellung
35 Taste DISPLAY zum Umschalten der Informatio-
nen in der unteren Displayzeile bei MP3-Dateien;
die obere Displayzeile zeigt bei MP3-Dateien
immer durchlaufend den Namen des Albums,
des Titels und des Interpreten oder der Gruppe
(Artist) an
Grundeinstellung
In der unteren Zeile wird die Titelnummer (TR)
und die gespielte Zeit des Titels angezeigt
1. Tastendruck
Der Ordnername wird angezeigt
2. Tastendruck
Der Titelname wird angezeigt
3. Tastendruck
Die Anzahl der Ordner und der Titel werden
angezeigt
4. Tastendruck
Zurückschalten auf die Grundeinstellung
36 Taste MUTE zum Stummschalten des CD-Play-
ers
37 Taste PROG, um zum Zusammenstellen einer
eigenen Titelfolge in den Programmiermodus zu
schalten (siehe Kap. 6.2.8)
38 Taste FIND zur alphabetischen Suche eines
Titels auf MP3-CDs (siehe Kap. 6.2.4, D)
39 Taste ESP zum Aus- und Wiedereinschalten des
Anti-Schock-Speichers
(nicht bei MP3-Betrieb möglich)
2 Hinweise für den sicheren Gebrauch
Das Gerät entspricht allen erforderlichen Richtlinien
der EU und ist deshalb mit gekennzeichnet.
Beachten Sie unbedingt die folgenden Punkte:
GDas Gerät ist nur zur Verwendung im Innenbe-
reich geeignet. Schützen Sie es vor Tropf- und
Spritzwasser, hoher Luftfeuchtigkeit und Hitze
(zulässiger Einsatztemperaturbereich 0 – 40 °C).
WARNUNG Das Gerät wird mit lebensgefähr-
licher Netzspannung (230 V~) ver-
sorgt. Nehmen Sie deshalb nie selbst
Eingriffe am Gerät vor. Durch un-
sachgemäßes Vorgehen besteht die
Gefahr eines elektrischen Schlages.
Im Betrieb liegt an den Lautsprecheranschlüssen
(24) berührungsgefährliche Spannung bis 100 V
an. Alle Anschlüsse nur bei ausgeschalteter ELA-
Anlage vornehmen bzw. verändern.
Vorsicht! Den Schalter nur bei ausgeschalte-
tem Verstärker betätigen, um Schaltgeräusche
zu vermeiden. Bitte beachten Sie auch den Vor-
sichtshinweis der Position 25.
Vorsicht! Bei eingeschalteter Phantomspei-
sung [Taste +21 V PHANTOM POWER (32) ein-
gerastet] werden die XLR-Buchsen mit 21-V-
Phantomspeisung versorgt. Es dürfen in diesem
Fall keine Mikrofone mit asymmetrischem Aus-
gang angeschlossen sein, da diese beschädigt
werden können.
25 XLR input jacks of the mono channels INPUT 1
to INPUT 4 for connecting microphones or mono
units with line output
26 Feed-through connections PRE OUT and AMP
IN for inserting a unit (e. g. equalizer);
the output level of jack PRE OUT is independent
of control MASTER (14)
27 Output LINE OUT for connection of further ampli-
fiers;
the output level is independent of control MAS-
TER (14)
28 Input AUX IN for the connection of audio units,
e. g. CD player, tuner, etc.
29 Selector switches for the mono channels INPUT
1 – 4 between microphone level (button not
pressed) and line level (button pressed)
30 Screw terminals for connecting a microphone or
an audio unit with line output; connected in par-
allel to the XLR jack INPUT 1
31 Button AUTOTALK for switching on/off the talk-
over function of channel 1
32 Button +21 V PHANTOM POWER for switching
on the 21 V phantom power for the XLR jacks
INPUT 1 to INPUT 4 (25); required for connect-
ing capacitor or electret microphones operating
with phantom power
1.3 Remote control
2–5and 9–11
These buttons have the same functions as the
buttons on the unit.
33 Numerical keys for direct selection of a title, e. g.:
Title No. Keys
4 4, PLAY/PAUSE
27 2, 7, PLAY/PAUSE
135 1, 3, 5, PLAY/PAUSE
34 Button PLAY MODE for selecting the repeat
functions and the random replay
Basic setting (PLAY ALL)
All titles of the data carrier or a programmed
title sequence are replayed once
First actuation of button (PLAY ALL RANDOM)
The titles are once replayed in random order
Next actuation of button (REPEAT TRACK)
Continuous repeat of the title selected
Next actuation of button (REPEAT FOLDER)
Continuous repeat of all titles in the selected
folder (function available for MP3 files only)
Next actuation of button (REPEAT ALL)
Continuous repeat of all titles
Next actuation of button (RANDOM REPEAT)
Continuous replay of the titles in random order
Next actuation of button (PLAY ALL)
Return to the basic setting
35 Button DISPLAY for switching the information in
the lower display line in case of MP3 files; the
names of the album, the title, and the artist
always scroll continuously in the upper display
line in case of MP3 files
Basic setting
The lower line shows the title number (TR)
and the time already played of the title
1st pressing of button
The folder name is displayed
2nd pressing of button
The title name is displayed
3rd pressing of button
The number of folders and titles are dis-
played
4th pressing of button
Switching back to the basic setting
36 Button MUTE for muting the CD player
37 Button PROG for switching to the programming
mode for compiling an individual title sequence
(see chapter 6.2.8)
38 Button FIND for alphabetic search for a title on
MP3 CDs (see chapter 6.2.4, D)
39 Button ESP for switching off and on again the
anti-shock memory
(not possible during MP3 operation)
2 Safety Notes
The unit corresponds to all required directives of the
EU and is therefore marked with .
It is essential to observe the following items:
GThe unit is suitable for indoor use only. Protect it
against dripping water and splash water, high air
humidity, and heat (admissible ambient tempera-
ture range 0 – 40 °C).
GDo not place any vessels filled with liquid, e. g.
drinking glasses, on the unit.
GThe heat being generated in the unit has to be
removed via air circulation. Therefore, the air
vents at the housing must not be covered.
WARNING The unit is supplied with hazardous
mains voltage (230 V~). Leave ser-
vicing to skilled personnel only. Inex-
pert handling or modification of the
unit may cause an electric shock
hazard.
During operation there is a hazard of contact at the
speaker connections (24) with a dangerous voltage
up to 100 V. All connections must only be carried
out or changed with the PA system switched off.
Caution! Only actuate the switch with the
amplifier switched off to prevent switching
noise. Please pay attention to the cautionary
note under item 25.
Caution! With phantom power connected [but-
ton +21 V PHANTOM POWER (32) locked] the
XLR jacks are supplied with 21 V phantom
power. In this case no microphones with unbal-
anced output must be connected as they may
be damaged.
5
GB
D
A
CH

GStellen Sie keine mit Flüssigkeit gefüllten Gefäße,
z. B. Trinkgläser, auf das Gerät.
GDie im Gerät entstehende Wärme muss durch
Luftzirkulation abgegeben werden. Decken Sie
die Lüftungsöffnungen nicht ab.
GStecken Sie nichts durch die Lüftungsöffnungen.
Dies kann zu einem elektrischen Schlag führen!
GNehmen Sie das Gerät nicht in Betrieb und ziehen
Sie sofort den Netzstecker aus der Steckdose:
1. wenn sichtbare Schäden am Gerät oder an der
Netzanschlussleitung vorhanden sind,
2. wenn nach einem Sturz oder Ähnlichem der
Verdacht auf einen Defekt besteht,
3. wenn Funktionsstörungen auftreten.
Lassen Sie das Gerät in jedem Fall in einer Fach-
werkstatt reparieren.
GZiehen Sie den Netzstecker nie am Kabel aus der
Steckdose, fassen Sie immer am Stecker an.
GVerwenden Sie zum Reinigen nur ein trockenes,
weiches Tuch, niemals Wasser oder Chemikalien.
GWird das Gerät zweckentfremdet, nicht richtig
angeschlossen, falsch bedient oder nicht fachge-
recht repariert, kann keine Garantie für das Gerät
und keine Haftung für daraus resultierende Sach-
oder Personenschäden übernommen werden.
3 Einsatzmöglichkeiten
Dieser Verstärker mit integriertem CD-Spieler ist
speziell für den Einsatz in ELA-Beschallungsan-
lagen konzipiert. Er kann 120 W Sinus an 100-V-
und 70-V-Lautsprecher abgeben oder an eine Laut-
sprechergruppe mit einer Gesamtimpedanz von
4 Ω. An die fünf miteinander mischbaren Eingangs-
kanäle lassen sich Mikrofone (Kanäle 1 – 4) oder
Geräte mit Line-Pegel (Kanäle 1 – 4 und AUX) an-
schließen. Der Kanal 1 ist mit einer Talkover-Funk-
tion ausgestattet, die bei einer Durchsage die ande-
ren Kanäle in der Lautstärke um 40 dB reduziert.
Der CD-Player ist mit einem Anti-Schock-Spei-
cher ausgestattet, der Störungen beim Abtasten
einer CD durch Stöße und Vibrationen bis 40 Sekun-
den ausgleichen kann. Jedoch können damit keine
lang anhaltenden Störungen ausgeglichen werden.
Zum Testen lässt sich der Anti-Schock-Speicher mit
der Taste ESP (39) ausschalten (nicht bei MP3-
Betrieb). Das Display (7) signalisiert kurz „ESP
OFF“. Zum Wiedereinschalten die Taste ESP erneut
drücken. Das Display zeigt kurz „40 SEC CD“.
4 Aufstellen des Verstärkers
Der Verstärker ist für den Einschub in ein Rack
(482 mm/19") vorgesehen, kann aber auch als
Tischgerät verwendet werden. In jedem Fall muss
Luft ungehindert durch alle Lüftungsöffnungen strö-
men können, damit eine ausreichende Kühlung der
Endstufe gewährleistet ist.
4.1 Rackeinbau
Für den Einbau in ein Rack die beiden mitgelieferten
Montagewinkel an die Geräteseiten anschrauben.
Im Rack werden für den Verstärker 2 Höheneinhei-
ten benötigt (1 Höheneinheit HE = 44,5 mm).
Damit das Rack nicht kopflastig wird, muss der
Verstärker im unteren Bereich des Racks einge-
schoben werden. Für eine sichere Befestigung rei-
chen die Montagewinkel allein nicht aus. Zusätzlich
müssen Seitenschienen oder eine Bodenplatte das
Gerät halten.
5 ELA-Verstärker anschließen
Alle Anschlüsse sollten nur durch eine qualifizierte
Fachkraft und unbedingt bei ausgeschaltetem Ver-
stärker vorgenommen werden!
5.1 Lautsprecher
Es können ELA-Lautsprecher oder Lautsprecher
bzw. Lautsprechergruppen mit einer Gesamtimpe-
danz von mindestens 4 Ω angeschlossen werden.
Die Anschlussmöglichkeiten für die Lautsprecher
sind in den Abb. 4 – 8 dargestellt. Je nach Lautspre-
chertyp die entsprechenden Kontakte der Klemm-
leiste OUTPUT (24) verwenden. Die Klemmleiste
lässt sich zur besseren Handhabung aus ihrer
Steckverbindung herausziehen.
Beim Anschluss auf die richtige Einzel- bzw.
Gesamtimpedanz der Lautsprecher und auf ihre
richtige Polung achten (Plus- und Minusanschlüsse
wie in Abb. 4 – 8 gezeigt). Der Plusanschluss der
Lautsprecher ist immer besonders gekennzeichnet.
5.2 Mikrofone
Bis zu vier Mikrofone lassen sich an die Eingänge
INPUT 1 bis INPUT 4 (25) anschließen. Anstelle der
XLR-Buchse INPUT 1 können auch die Schrauban-
schlüsse (30) verwendet werden.
1) Bei Anschluss eines Mikrofons den dazugehöri-
gen Schalter MIC/LINE (29) ausrasten.
2) Bei Verwendung phantomgespeister Mikrofone
die 21-V-Phantomspannung mit der Taste +21 V
PHANTOM POWER (32) einschalten.
Vorsicht!
Bei zugeschalteter Phantomspannung dürfen an
den Eingängen keine Mikrofone mit asymmetri-
schem Ausgang angeschlossen sein, da diese
beschädigt werden können.
Vorsicht!
Bei ELA-Lautsprechern mit 70-V- oder 100-V-
Audiotransformator (Abb. 4 und 5) darf die Ge-
samtbelastung durch die Lautsprecher nicht mehr
als 120 W Sinus betragen, sonst wird der Verstär-
ker überlastet und eventuell beschädigt.
Soll das Gerät endgültig aus dem Betrieb
genommen werden, übergeben Sie es zur
umweltgerechten Entsorgung einem ört-
lichen Recyclingbetrieb.
GDo not insert anything into the air vents! This
could result in an electric shock!
GDo not set the unit into operation, and immediately
disconnect the mains plug from the mains socket if
1. there is visible damage to the unit or to the
mains cable,
2. a defect might have occurred after a drop or
similar accident,
3. there are malfunctions.
The unit must in any case be repaired by skilled
personnel.
GNever pull the mains cable to disconnect the
mains plug from the mains socket, always seize
the plug.
GFor cleaning only use a dry, soft cloth, by no
means chemicals or water.
GNo guarantee claims for the unit and no liability
for any resulting personal damage or material
damage will be accepted if the unit is used for
other purposes than originally intended, if it is not
correctly connected or operated, or not repaired in
an expert way.
GImportant for U. K. Customers!
The wires in the mains lead of the power supply
unit are coloured in accordance with the following
code:
green/yellow = earth
blue = neutral
brown = live
As the colours of the wires in the mains lead of this
appliance may not correspond with the coloured
markings identifying the terminals in your plug,
proceed as follows:
1.
The wire which is coloured green and yellow must
be connected to the terminal in the plug which is
marked with the letter E or by the earth symbol ,
or coloured green or green and yellow.
2. The wire which is coloured blue must be con-
nected to the terminal which is marked with the
letter N or coloured black.
3. The wire which is coloured brown must be con-
nected to the terminal which is marked with the
letter L or coloured red.
Warning – This appliance must be earthed.
3 Applications
This amplifier with integrated CD player has espe-
cially been designed for use in PA systems. It is able
to supply 120 WRMS to 100 V or 70 V speakers or to
a speaker group with a total impedance of 4 Ω. To
the five input channels which can be mixed with one
another, microphones (channels 1 – 4) or units with
line level (channels 1 – 4 and AUX) can be connect-
ed. Channel 1 is equipped with a talkover function
which attenuates the volume of the other channels
by 40 dB in case of an announcement.
The CD player is equipped with an anti-shock
memory which is able to compensate interruptions
up to 40 seconds caused by shocks and vibrations
when sampling a CD. However, the anti-shock mem-
ory will not be able to compensate continuous inter-
ruptions. For testing, switch off the anti-shock mem-
ory with the button ESP (39) [not during MP3
operation]. The display (7) will shortly indicate “ESP
OFF”. To switch it on again, press the button ESP
again. The display will shortly indicate “40 SEC CD”.
4 Setting up the Amplifier
The amplifier has been designed for installation into
a rack (482 mm/19"), however, it can also be used
as a table top unit. In any case, air must be allowed
to pass through all air vents without obstruction to
ensure sufficient cooling of the power amplifier.
4.1 Rack installation
For rack installation screw the two supplied mounting
brackets to the sides of the unit. For the amplifier
2 rack spaces are required (1 rack space = 44.5 mm).
To prevent top-heaviness of the rack, the ampli-
fier must be inserted into the lower part of the rack.
The mounting brackets alone will not be able to
secure the unit. Side rails or a base plate must addi-
tionally be provided.
5 Connecting the PA Amplifier
All connections should only be made by qualified,
specialized personnel and with the amplifier
switched off in any case!
5.1 Speakers
It is possible to connect PA speakers or speakers/
speaker groups with a total impedance of at least
4 Ω. The possibilities of connection for the speakers
are shown in figures 4 – 8. Depending on the
speaker type, use the corresponding contacts of the
terminal strip OUTPUT (24). To facilitate handling,
the terminal strip can be pulled out of its plug-in con-
nection.
When connecting, observe the correct individual
or total impedance of the speakers and their correct
polarity (positive and negative connections as
shown in figs. 4 – 8). The positive connection of the
speakers is always especially coded.
5.2 Microphones
Up to four microphones may be connected to INPUT 1
to INPUT 4 (25). Instead of the XLR jack INPUT 1 also
the screw terminals (30) may be used.
Caution!
In case of PA speakers with a 70 V or 100 V audio
transformer (figs. 4 and 5), the total load by the
speakers must not exceed 120 WRMS, otherwise the
amplifier will be overloaded and possibly damaged.
If the unit is to be put out of operation defin-
itively, take it to a local recycling plant for a
disposal which is not harmful to the envi-
ronment.
6
GB
D
A
CH
5.3 Geräte mit Line-Ausgang
Bis zu fünf Geräte mit einem Line-Ausgang (z. B.
CD-Spieler, Kassettenrecorder) lassen sich an die
Eingänge INPUT 1 bis INPUT 4 (25) und an den Ein-
gang AUX IN (28) anschließen. Beim Anschluss an
die Eingänge INPUT 1 bis INPUT 4 den dazugehöri-
gen Schalter MIC/LINE (29) einrasten.
5.4 Equalizer oder
anderes Gerät einschleifen
Zur externen Klangbeeinflussung lässt sich z. B. ein
Equalizer über die Buchsen PRE OUT und AMP IN
(26) einschleifen.
1) Die Brücke zwischen den Anschlüssen PRE OUT
und AMP IN herausziehen. Der Vor- und der End-
verstärker werden dadurch getrennt.
2) Den Eingang des Gerätes an die Buchse PRE
OUT anschließen.
3) Den Ausgang des Gerätes mit der Buchse AMP
IN verbinden.
Hinweis: Der Verstärker gibt kein Signal ab, wenn das
eingeschleifte Gerät nicht eingeschaltet, defekt oder
nicht richtig angeschlossen ist.
5.5 Zusätzlicher Verstärker
Werden mehr Lautsprecher benötigt als für den Ver-
stärker zulässig sind, ist ein weiterer Verstärker
erforderlich. Den Eingang des zusätzlichen Verstär-
kers mit der Buchse LINE OUT (27) verbinden. Der
Ausgangspegel der Buchse ist unabhängig vom
Regler MASTER (14).
5.6 Strom- und Notstromversorgung
1) Soll der Verstärker bei einem eventuellen
Netzausfall weiterarbeiten, an die Klemmleiste
24 V DC (23) eine 24-V-Notstromeinheit (z. B.
PA-24ESP von MONACOR) anschließen. Die
Klemmleiste lässt sich zur besseren Handha-
bung aus ihrer Steckverbindung herausziehen.
Hinweis: Liegt die 24-V-Spannung von der Notstromein-
heit an den Anschlüssen 24V DC an, lässt sich der Ver-
stärker mit dem Schalter POWER (17) nicht ausschalten.
Er schaltet bei einem Netzausfall oder im ausgeschalte-
ten Zustand automatisch auf die Notstromversorgung um.
2) Zum Schluss das beiliegende Netzkabel zuerst in
die Netzbuchse (20) und dann in eine Steckdose
(230 V~/50 Hz) stecken.
6 Bedienung
1) Vor dem ersten Einschalten zunächst die Regler
INPUT 1 bis 4 (13) sowie die Regler AUX (18)
und MASTER (14) in die Position „0“ stellen.
2) Mit dem Schalter POWER (17) den Verstärker
einschalten. Nach dem Einschalten leuchtet die
LED ON (16).
3) Mit der Taste AUX/MP3 (19) für den AUX-Kanal
die gewünschte Signalquelle wählen:
Für die interne CD-Wiedergabe die Taste drü-
cken; die LED über der Taste leuchtet.
Zum Anwählen des Eingangs AUX IN (28) die
Taste ausrasten; die LED über der Taste darf
nicht leuchten.
4) Den Regler MASTER (14) so weit aufdrehen,
dass die nächsten Einstellungen zu hören sind.
5) Die Eingangsregler INPUT 1 bis 4 (13) und den
Regler AUX (18) auf den gewünschten Wert ein-
stellen. Die Regler der nicht benutzten Kanäle
auf Null drehen.
6) Die Klangregler BASS und TREBLE (12) auf opti-
malen Klang einstellen.
7) Die Gesamtlautstärke mit dem Hauptregler MAS-
TER (14) einstellen. Die 5-stufige LED-Kette (15)
zeigt den Ausgangspegel an. Für eine optimale
Aussteuerung den Regler so einstellen, dass die
rote LED „+3“ gerade noch nicht leuchtet.
6.1 Talkover-Funktion des Kanals 1
Über den Kanal INPUT 1 können Durchsagen über
ein laufendes Musikprogramm gesprochen werden.
Dabei wird die Lautstärke der anderen Kanäle auto-
matisch um 40 dB abgesenkt. Zum Einschalten die-
ser Funktion die Taste AUTOTALK (31) einrasten.
6.2 CD-Spieler
Befindet sich nach dem Einschalten des Verstärkers
keine CD im Laufwerk, zeigt das Display (7) „NO
DISC“. Weitere Displayanzeigen sind im Kapitel
6.2.2 beschrieben.
6.2.1 Fernbedienung
1) Zum Einsetzen der Batterien (2 × 1,5 V, Größe
AAA = Mikro) auf der Rückseite der Fernbedie-
nung auf den Pfeil des Deckels drücken und den
Deckel nach unten schieben. Die Batterien, wie
im Batteriefach angegeben, einsetzen. Das Fach
mit dem Deckel wieder schließen.
Bei längerem Nichtgebrauch die Batterien
herausnehmen, damit die Fernbedienung bei
einem eventuellen Auslaufen der Batterien nicht
beschädigt wird.
2) Die Fernbedienung beim Betätigen einer Taste
immer in Richtung des Sensors REMOTE (8) hal-
ten. Dabei muss Sichtverbindung zwischen der
Fernbedienung und dem Sensor bestehen.
3) Lässt die Reichweite der Fernbedienung nach,
sind die Batterien verbraucht und müssen ausge-
wechselt werden.
6.2.2 CD, Festplatte oder USB-Stick abspielen
1) Eine CD mit der Beschriftung nach oben so weit
in den Einzugsschlitz (1) schieben, bis sie auto-
matisch eingezogen wird.
Werfen Sie verbrauchte Batterien nicht in
den Hausmüll, sondern geben Sie sie nur
in den Sondermüll (z. B. Sammelbehälter
bei Ihrem Elektrofachhändler).
1) When connecting a microphone, unlock the cor-
responding switch MIC/LINE (29).
2) When using phantom-powered microphones,
switch on the 21 V phantom power with the but-
ton +21 V PHANTOM POWER (32).
5.3 Units with line output
Up to five units with a line output (e. g. CD player, cas-
sette recorder) can be connected to INPUT 1 to
INPUT 4 (25) and to the input AUX IN (28). When
connecting to INPUT 1 to INPUT 4, lock the corre-
sponding switch MIC / LINE (29).
5.4 Inserting an equalizer or another unit
For external effects on the sound, e. g. an equalizer
can be inserted via the jacks PRE OUT and AMP
IN (26).
1) Remove the jumper between the connections
PRE OUT and AMP IN. Thus, the preamplifier
and the power amplifier are separated.
2) Connect the input of the unit to the jack PRE OUT.
3) Connect the output of the unit to the jack AMP IN.
Note: The amplifier does not emit a signal if the unit
inserted is not switched on, if it is defective, or not cor-
rectly connected.
5.5 Additional amplifier
If the number of the required speakers is higher than
the number admissible for the amplifier, an addition-
al amplifier will be required. Connect the input of the
additional amplifier to the jack LINE OUT (27). The
output level of the jack is independent of the control
MASTER (14).
5.6 Power supply and
emergency power supply
1) For continued operation of the amplifier after a
possible mains failure, connect a 24 V emergen-
cy power supply unit (e. g. MONACOR PA-
24ESP) to the terminal strip 24 V DC (23). To
facilitate handling, the terminal strip can be
removed from its plug-in connection.
Note: If the 24 V voltage from the emergency power
unit is present at the terminals 24 V DC, the amplifier
cannot be switched off with the switch POWER (17).
In case of a mains failure or if it is switched off, it
switches automatically to the emergency power
supply.
2) Finally connect the supplied mains cable to the
mains jack (20) first and then to a mains socket
(230 V~/50 Hz).
6 Operation
1) Prior to switching on the amplifier for the first
time, set the controls INPUT 1 to 4 (13) and the
controls AUX (18) and MASTER (14) to position
“0” for the time being.
2) Switch on the amplifier with the POWER switch
(17). After switching-on, the LED ON (16) lights
up.
3) With the button AUX/MP3 (19) select the desired
signal source for the AUX channel:
For the internal CD replay press the button; the
LED above the button lights up.
To select the input AUX IN (28), unlock the but-
ton; the LED above the button must not light up.
4) Turn up the control MASTER (14) so that the next
adjustments are audible.
5) Adjust the input controls INPUT 1 to 4 (13) and
the control AUX (18) to the desired value. Turn
the controls of the channels not used to zero.
6) Adjust the tone controls BASS and TREBLE (12)
to optimum sound.
7) Adjust the total volume with the main control MAS-
TER (14). The 5-step LED row (15) shows the out-
put level. For an optimum level adjust the control
so that the red LED “+3” does not yet light up.
6.1 Talkover function of channel 1
Via the channel INPUT 1 announcements can be
made during a current musical programme. Then
the volume of the other channels is automatically
attenuated by 40 dB. To switch on this function, lock
the button AUTOTALK (31).
6.2 CD player
If there is no CD in the player mechanism after
switching on the amplifier, the display (7) shows “NO
DISC”. Additional display indications are described
in chapter 6.2.2.
6.2.1 Remote control
1) To insert the batteries (2 × 1.5 V, type AAA), press
the arrow of the cover on the rear side of the
remote control and slide the cover downwards.
Insert the batteries as indicated in the battery
compartment. Close the compartment again with
the cover.
If the remote control is not used for a longer
period, remove the batteries so that it will not be
damaged in case the batteries should leak.
2) When actuating a button, always direct the re-
mote control towards the sensor REMOTE (8).
There must be no obstacles between the remote
control and the sensor.
3) If the range of the remote control decreases, the
batteries are probably exhausted and must be
replaced.
Dead batteries do not belong in the house-
hold rubbish; always take them to a special
waste disposal (e. g. collecting container at
your retailer).
Caution!
With phantom power switched on, no micro-
phones with unbalanced output must be con-
nected to the inputs as these units may be dam-
aged.
7
GB
D
A
CH

2) Zusätzlich oder alternativ kann ein USB-Stick
oder eine Festplatte in den USB-Anschluss (6)
gesteckt bzw. mit dem USB-Anschluss verbun-
den werden. Zum Umschalten auf den USB-An-
schluss die Taste USB (10) drücken, zum Wech-
seln zur CD die Taste CD (11).
3) Nach dem Einlesen des Datenträgers (CD, USB-
Stick oder Festplatte) zeigt das Display folgende
Informationen an:
–bei einer CD ohne MP3-Dateien z. B.:
TR21 60:22 CD
Datenträger
Gesamtlaufzeit (Min. : Sek.)
Anzahl der Titel
–bei einer CD mit MP3-Dateien z. B.:
5 149
Anzahl der Titel
Anzahl der Ordner
– bei einer Festplatte oder einem USB-Stick z. B.:
12 218 Flash
USB-Anschluss
Anzahl der Titel
Anzahl der Ordner
4) Mit der Taste PLAY/PAUSE (4) die Wiedergabe
des ersten Titels starten. Zum Anwählen eines
anderen Titels siehe Kapitel 6.2.4.
5) Während des Abspielens ist in der oberen Dis-
playzeile das Wiedergabesymbol eingeblendet.
Die untere Zeile zeigt die Nummer (TR …) des
laufenden Titels und die bereits verstrichene Ab-
spielzeit (Min. : Sek.) des Titels an.
Bei MP3-Dateien erscheint zusätzlich durch-
laufend in der oberen Zeile der Name des Titels
(Title: …), des Interpreten oder der Gruppe
(Artist: …) und des Albums (Album: …). Der
Dateiname (File-…) wird nur einmal nach dem
Starten der Wiedergabe angezeigt. Fehlt eine
Angabe, zeigt das Display z. B. „Title : Unknown“
oder „Artist : None“. Durch Drücken der Taste
DISPLAY (35) auf der Fernbedienung können bei
MP3-Dateien in der unteren Displayzeile ver-
schiedene Informationen angezeigt werden:
Grundeinstellung
In der unteren Zeile wird die Titelnummer und
die gespielte Zeit des Titels angezeigt
1. Tastendruck
Der Ordnername wird angezeigt
2. Tastendruck
Der Titelname wird angezeigt
3. Tastendruck
Die Anzahl der Ordner und der Titel werden
angezeigt
4. Tastendruck
Zurückschalten auf die Grundeinstellung
6) Mit der Taste PLAY/PAUSE kann zwischen Wie-
dergabe und Pause gewechselt werden. Im Pau-
senmodus ist das Pausensymbol eingeblendet
und die Zeitangabe blinkt.
7) Zum Auswerfen der CD die Taste EJECT (5)
drücken. Das Display zeigt „EJECT“, die CD wird
herausgefahren und kann entnommen werden.
Wird die CD nicht aus dem Einzugsschlitz ge-
nommen, zieht das Gerät sie nach ca. 10 s wie-
der automatisch ein.
6.2.3 Automatische CD-Start-Funktion
Wird während des Abspielens eines Titels der Ver-
stärker mit dem Netzschalter POWER (17) aus-
geschaltet und danach erneut eingeschaltet, startet
das Abspielen automatisch nach ca. 30 Sekunden.
Automatik ausschalten
Soll nach dem Einschalten das Abspielen nicht auto-
matisch gestartet werden, muss im Verstärker die
Brücke JMP2 umgesteckt werden.
Falls eine Notstromeinheit angeschlossen ist, diese
von den Anschlüssen 24 V DC (23) trennen, damit
der Verstärker außer Betrieb ist.
1) Den Gehäusedeckel abschrauben.
2) Auf der kleinen Leiterplatte (Abb. 9) zwischen
dem CD-Spieler-Modul und der Leiterplatte mit
den Eingängen die Brücke JMP2 in die Position
OFF stecken.
Abb. 9 Start-Automatik Ein (ON) oder Aus (OFF)
3) Den Verstärker mit dem Gehäusedeckel wieder
schließen.
6.2.4 Titelanwahl
A Direktwahl der Titelnummer
Mit den Zifferntasten (33) lässt sich ein Titel durch
Eingabe seiner Nummer direkt anwählen. Zum Star-
ten des Titels anschließend die Taste PLAY/PAUSE
(4) drücken. Beispiele:
Titelnr. Tasten
4 4, PLAY/PAUSE
27 2, 7, PLAY/PAUSE
135 1, 3, 5, PLAY/PAUSE
CON2
IC1
JMP2
CON1
OFF
Q1
ON
Automatic
start
WARNUNG Das Umstecken darf nur durch Fach-
personal erfolgen. Vor dem Öffnen
des Verstärkers den Netzstecker aus
der Steckdose ziehen, anderenfalls
besteht die Gefahr eines elektrischen
Schlages!
6.2.2 Replaying a CD, hard disk,
or USB memory stick
1) Slide a CD with the lettering facing upwards so
far into the slot (1) until it is retracted automati-
cally.
2) Additionally or alternatively, the USB port (6)
allows to insert a USB memory stick or to connect
a hard disk. To switch to the USB port, press the
button USB (10), to change to the CD, press the
button CD (11).
3) After reading in the data carrier (CD, USB mem-
ory stick, or hard disk), the display will show the
following information:
–for a CD without MP3 files, e. g.:
TR21 60:22 CD
data carrier
total replay time (min. : sec.)
number of titles
–for a CD with MP3 files, e. g.:
5 149
number of titles
number of folders
–for a hard disk or a USB memory stick, e. g.:
12 218 Flash
USB port
number of titles
number of folders
4) Start the replay of the first title with the button
PLAY/PAUSE (4). To select another title, see
chapter 6.2.4.
5) While replaying, the replay symbol is shown in
the upper display line. The lower line shows the
number (TR …) of the title currently playing and
the time already played of the title (min. : sec.).
For MP3 files, the names of the title (Title: …),
the artist (Artist: …), and the album (Album: …) will
additionally scroll continuously in the upper line.
The file name (File-…) will only be shown once
after starting the replay. If an indication is missing,
the display will show e. g. “Title: Unknown” or
“Artist: None”. By pressing the button DISPLAY
(35) on the remote control, various information for
MP3 files can be given in the lower display line:
Basic setting
Indication of the title number and the time
already played of the title in the lower line.
1st actuation of the button
Indication of the folder name.
2nd actuation of the button
Indication of the title name.
3rd actuation of the button
Indication of the number of folders and titles.
4th actuation of the button
Return to the basic setting
6) Use the button PLAY/PAUSE to change between
replay and pause. In the pause mode, the pause
symbol will be shown and the time display will
flash.
7) To eject the CD, press the button EJECT (5). The
display will show “EJECT”, the CD will be ejected
and can be removed. If the CD is not removed
from the slot, the CD player will retract it auto-
matically after approx. 10 s.
6.2.3 Automatic CD start feature
If the amplifier is switched off with the POWER
switch (17) while replaying a title, and after that it is
switched on again, the replay will automatically start
after approx. 30 seconds.
Switching off the automatic feature
If the replay should not be started automatically after
switching on, the jumper JMP2 must be rearranged
in the amplifier.
If an emergency power supply unit is connected, dis-
connect it from the terminal 24 V DC (23) so that the
amplifier is out of operation.
1) Unscrew the housing cover.
2) Connect the jumper JMP2 to position OFF on the
small PCB (fig. 9) between the CD player module
and the PCB with the inputs.
Fig. 9 Automatic start ON or OFF
3) Close the amplifier with the housing cover.
6.2.4 Title selection
A Direct selection of the title number
For direct selection of a title with the numerical keys
(33), enter its number. To start the title, press the
button PLAY/PAUSE (4). Examples:
Title No. Keys
4 4, PLAY/PAUSE
27 2, 7, PLAY/PAUSE
135 1, 3, 5, PLAY/PAUSE
B Skipping titles in forward / backward direction
To skip one title/several titles in forward or backward
direction, shortly press the button UP/CUE or
DOWN/REV (3).
Button UP/CUE: Advance to the next title
Button DOWN/REV: Return to the beginning of the
title currently playing. With each further actuation of
the button DOWN/REV, the unit will go back one title
at a time.
Note: Only press the buttons DOWN/REV and UP/CUE
shortly, otherwise this will result in fast forward or reverse.
CON2
IC1
JMP2
CON1
OFF
Q1
ON
Automatic
start
WARNING Only specialized personnel is allowed
to make this rearrangement. Prior to
opening the amplifier, disconnect the
mains plug from the socket, other-
wise there will be an electric shock
hazard!
8
GB
D
A
CH

B
Titel vor- oder zurückspringen
Um einen oder mehrere Titel vor- oder zurückzu-
springen, die Taste UP/CUE bzw. DOWN/REV (3)
kurz drücken.
Taste UP/CUE: zum nächsten Titel springen
Taste DOWN/REV: an den Anfang des gerade lau-
fenden Titels springen. Durch weiteres Drücken der
Taste DOWN/REV wird immer ein Titel weiter
zurückgesprungen.
Hinweis: Die Tasten DOWN/REV und UP/CUE nur kurz
drücken, sonst erfolgt ein schneller Rück- bzw. Vorlauf.
C Alphabetische Suche auf MP3-CDs
1) Die Taste FIND (38) drücken. Die untere Display-
zeile zeigt „A–……“ und den ersten Titel, der mit
dem Buchstaben A beginnt.
2) Mit der Taste UP/CUE [vorwärts laufend] oder
DOWN/REV (3) [rückwärts laufend] den Buch-
staben wählen, mit dem der gesuchte Titel
beginnt. Hierbei können auch die Ziffern 0 – 9
gewählt werden. Buchstaben und Ziffern, mit
denen kein Titel auf der CD beginnt, sind durch
„None“ gekennzeichnet.
3) Die Taste PLAY/PAUSE (4) drücken. Wenn meh-
rere Titel mit dem gleichen Anfangsbuchstaben
vorkommen, nach dem Drücken der Taste PLAY/
PAUSE mit der Taste UP/CUE auf den ge-
wünschten Titel springen.
Hinweis: Beim Abspielen von MP3-Dateien über die
USB-Schnittstelle (6) kann die alphabetische Suche nicht
genutzt werden.
D Ordneranwahl bei MP3-Dateien
Bei Datenträgern mit MP3-Dateien und mehreren
Ordnern (Dateiverzeichnisse) werden die Titel in fol-
gender Reihenfolge abgespielt:
1. alle Titel auf der Hauptebene (ohne Ordner),
angezeigt als Ordner „ROOT“
2. alle Titel in Ordnern auf der Hauptebene
3. alle Titel in Unterordnern usw.
Mit den Tasten FOLDER SKIP (9) können in dieser
oder in umgekehrter Reihenfolge die Ordner ange-
wählt werden. Dabei wird immer auf den ersten Titel
in einem Ordner gesprungen. Mit der Taste UP/
CUE oder DOWN/REV (3) lassen sich andere Titel
im Ordner anwählen.
Im Stoppmodus zeigt die obere Displayzeile
nach dem Drücken einer der Tasten FOLDER SKIP
den Ordnernamen an. Um während der Wiedergabe
oder im Pausenmodus den Ordnernamen anzuzei-
gen, mit der Taste DISPLAY (35) auf der Fernbedie-
nung die untere Displayzeile entsprechend um-
schalten ( ……).
6.2.5 Schneller Vor- / Rücklauf
Während des Abspielens kann mit den Tasten UP/
CUE und DOWN / REV (3) schnell vor- oder zurück-
gefahren werden: Für den schnellen Vorlauf die
Taste UP/CUE gedrückt halten, für den schnellen
Rücklauf die Taste DOWN/REV. Bei MP3-Dateien
kann ein Vor- oder Rücklauf nur innerhalb eines
Titels erfolgen und nicht akustisch verfolgt werden.
6.2.6 Wiederholfunktionen und
Zufallswiedergabe
Mit der Taste PLAY MODE (35) lässt sich eine der
Wiederholfunktionen und die Wiedergabe der Titel
in zufälliger Reihenfolge einschalten:
Grundeinstellung (PLAY ALL)
Alle Titel des Datenträgers oder einer program-
mierten Titelfolge werden einmal abgespielt,
dann schaltet das Gerät in den Stoppmodus.
erster Tastendruck (PLAY ALL RANDOM)
einmalige Wiedergabe der Titel in zufälliger Rei-
henfolge
nächster Tastendruck (REPEAT TRACK)
ständige Wiederholung des angewählten Titels
nächster Tastendruck (REPEAT FOLDER)
ständige Wiederholung aller Titel im angewählten
Ordner (Funktion nur bei MP3-Dateien vorhan-
den)
nächster Tastendruck (REPEAT ALL)
ständige Wiederholung aller Titel
nächster Tastendruck (RANDOM REPEAT)
ständiges Abspielen der Titel in zufälliger Reihen-
folge
nächster Tastendruck (PLAY ALL)
Zurückschalten auf die Grundeinstellung
6.2.7 Ton stumm schalten
Um den Ton des CD-Players stumm zu schalten, die
Taste MUTE (36) drücken. Zum Wiedereinschalten
des Tons die Taste MUTE erneut drücken.
6.2.8 Eigene Titelfolge zusammenstellen
Sollen von einem Datenträger nur einige Titel in
einer bestimmten Reihenfolge abgespielt werden,
kann eine Folge von max. 10 Titeln programmiert
werden.
1) Der CD-Player muss sich im Stoppmodus befin-
den, ggf. die Taste STOP (2) drücken.
2) Mit der Taste PROG (37) den Programmier-
modus einschalten. Alle weiteren Tasten müssen
jeweils innerhalb von 10 Sekunden gedrückt
werden, sonst wird der Programmiermodus ver-
lassen. In diesem Fall die Taste PROG erneut
drücken. Das Display zeigt:
–bei einer CD ohne MP3-Dateien
MEM
TR00 P-01 CD
–bei einer CD mit MP3-Dateien
MEM P-01
000 0000
3) Bei CDs ohne MP3-Dateien diesen Bedienschritt
überspringen und direkt mit dem Schritt 4 fort-
fahren.
Bei MP3-Dateien muss zuerst die Nummer
des Ordners gewählt werden, in dem sich der
erste gewünschte Titel für die Titelfolge befindet.
Dieses ist auch erforderlich, wenn alle Dateien
auf der Hauptebene ROOT ohne Ordner auf dem
C Alphabetic search on MP3 CDs
1) Press the button FIND (38). The lower display
line will show “A–……” and the first title starting
with the letter A.
2) With the button UP/CUE [forward] or DOWN /
REV (3) [backward] select the first letter of the
title searched. The numbers 0 – 9 are also avail-
able. If there are no titles beginning with certain
letters or numbers, these letters or numbers are
marked by “None”.
3) Press the button PLAY/PAUSE (4). If there are
several titles beginning with the same letter, after
the button PLAY/PAUSE has been pressed, go to
the desired title with the button UP/CUE.
Note: When replaying MP3 files via the USB interface (6),
the alphabetic search is not available.
D Folder selection with MP3 files
In case of data carriers with MP3 files and several
folders (file directories), the titles will be replayed in
the following order:
1. all titles in the root directory (without folders),
indicated as folder “ROOT”
2. all titles in folders in the root directory
3. all titles in subfolders, etc.
With the buttons FOLDER SKIP (9), the folders can
be selected in this order or in reverse order. The unit
will always go to the first title in a folder. With the but-
ton UP/CUE or DOWN/REV (3), other titles in the
folder can be selected.
In the stop mode, the upper display line will show
the folder name after one of the buttons FOLDER
SKIP has been pressed. To show the folder name
during the replay or in the pause mode, switch over
the lower display line ( ……) with the button DIS-
PLAY (35) on the remote control accordingly.
6.2.5 Fast forward / reverse
While replaying, fast forward or reverse is possible
with the buttons UP/CUE and DOWN/REV (3): For
fast forward, keep the button UP/CUE pressed, for
fast reverse, keep the button DOWN/REV pressed.
With MP3 files, the fast forward and reverse function
is only possible within a title and cannot be traced
acoustically.
6.2.6 Repeat functions and random replay
With the button PLAY MODE (35) one of the repeat
functions and the replay of the titles in random order
can be activated:
Basic setting (PLAY ALL)
All titles of the data carrier or a programmed title
sequence are replayed once, then the unit will go
to the stop mode.
First actuation of the button (PLAY ALL RANDOM)
The titles are once replayed in random order
Next actuation of button (REPEAT TRACK)
Continuous repeat of the title selected
Next actuation of button (REPEAT FOLDER)
Continuous repeat of all titles in the folder se-
lected (function available for MP3 files only)
Next actuation of button (REPEAT ALL)
Continuous repeat of all titles
Next actuation of button (RANDOM REPEAT)
Continuous repeat of the titles in random order
Next actuation of button (PLAY ALL)
Return to the basic setting
6.2.7 Muting the sound
For muting the sound of the CD player press the but-
ton MUTE (36). To switch on the sound again, press
the button MUTE once again.
6.2.8 Compiling an individual title sequence
For replaying only a few titles from a data carrier in a
certain order, a sequence of 10 titles as a maximum
can be programmed.
1) The CD player must be in the stop mode, press
the button STOP (2), if required.
2) Switch on the programming mode with the button
PROG (37). All other buttons must be pressed
within 10 seconds respectively, otherwise the
programming mode will be exited. In this case,
press the button PROG once again. The display
will show:
–for a CD without MP3 files
MEM
TR00 P-01 CD
–for a CD with MP3 files
MEM P-01
000 0000
3) In case of CDs without MP3 files, skip this oper-
ating step and directly proceed with step 4.
In case of MP3 files, first select the number of
the folder containing the first title desired for the
title sequence. This is also required if all files
have been stored on the data carrier in the direc-
tory ROOT without folder. The root directory will
then be named Folder 1.
If there are files without folder in the root direc-
tory, the folders in the root directory starting from
Folder No. 2 will be numbered in ascending
alphabetic order. If not, the numbering for the
folders will start with the number 1, followed by all
subfolders and then by any subsubfolders etc.
Select the folder number with the buttons
DOWN/REV and UP/CUE (3) or with the numeri-
cal keys (33). For storing, press the button PROG.
The three zeroes below the indication “MEM” will
flash as a request to enter the title number.
9
GB
D
A
CH

Datenträger gespeichert sind. Die Hauptebene
wird dann als Ordner 1 bezeichnet.
Sind Dateien ohne Ordner auf der Haupt-
ebene vorhanden, werden die Ordner auf der
Hauptebene beginnend mit der Ordnernummer 2
in alphabetischer Reihenfolge aufsteigend num-
meriert. Wenn nicht, beginnt die Nummerierung
für die Ordner mit der Nummer 1. Anschließend
folgen alle Unterordner und dann eventuelle
Unterunterordner usw.
Die Ordnernummer mit den Tasten DOWN/
REV und UP/CUE (3) wählen oder mit den Zif-
ferntasten (33) eingeben. Zum Speichern dann
die Taste PROG drücken. Die drei Nullen unter
der Anzeige „MEM“ blinken als Aufforderung, die
Titelnummer einzugeben.
4) Die Nummer des ersten Titels für die Titelfolge
mit den Tasten DOWN/REV und UP/CUE (3)
wählen oder mit den Zifferntasten (33) eingeben.
Bei MP3-Dateien in Ordnern beachten, dass jetzt
nicht alle Dateien durchnummeriert sind, sondern
dass jeweils die erste Datei in einem Ordner mit
Nummer 1 bezeichnet wird.
5) Zum Speichern die Taste PROG drücken. Das
Display zeigt die nächste Speicherplatznummer,
z. B. „P-02“.
6) Die Bedienschritte (3), 4 und 5 für alle weiteren
gewünschten Titel wiederholen, bis die gesamte
Titelfolge programmiert ist.
7) Zum Starten der Titelfolge die Taste PLAY/
PAUSE (4) drücken. Die oberen Displayzeile
zeigt „MEM“ für Memory an und die Titelfolge
wird abgespielt.
8) Mit den Tasten DOWN/REV und UP/CUE kann
jeder Titel der Titelfolge angewählt oder durch
Gedrückthalten der jeweiligen Taste der schnelle
Vor-/Rücklauf innerhalb eines Titels aktiviert wer-
den.
9) Nach dem Abspielen der Titelfolge oder beim
Drücken der Taste STOP schaltet der CD-Spieler
in den Stoppmodus. Soll die Titelfolge erneut ge-
startet werden, zuerst die Taste PROG und dann
die Taste PLAY/PAUSE drücken.
Hinweis: Eine programmierte Titelfolge wird beim Wech-
seln des Datenträgers, beim Drücken der Taste STOP im
Programmiermodus und beim Ausschalten des Gerätes
gelöscht.
6.2.9 Hinweis zu Tonaussetzern und Lesefehlern
Zigarettenrauch und Staub dringen leicht durch alle
Öffnungen des Gerätes und setzen sich auch auf
der Optik des Laser-Abtastsystems ab. Sollte dieser
Belag zu Lesefehlern und Tonaussetzern führen,
muss das Gerät in einer Fachwerkstatt gereinigt
werden. Diese Reinigung ist kostenpflichtig, auch
während der Garantiezeit!
7 Technische Daten
Ausgangsleistung: . . . . . . 120 WRMS, 160 WMAX
Ausgänge
Lautsprecher*: . . . . . . . min. 4 Ω, 70 V, 100 V
Line Out: . . . . . . . . . . . . 1 V/600 Ω
Pre Out: . . . . . . . . . . . . 1 V/600 Ω
Eingänge
Input 1 – 4: . . . . . . . . . . Mic 1,5 mV/1,1 kΩ
umschaltbar auf
Line 300 mV/14 kΩ;
XLR, symmetrisch
Aux: . . . . . . . . . . . . . . . 300 mV/50 kΩ;
Cinch, asym.
Amp In: . . . . . . . . . . . . . 1 V/14 kΩ; Cinch, asym.
Frequenzbereich: . . . . . . . 50 – 15 000 Hz, ±3 dB
Klirrfaktor: . . . . . . . . . . . . 1 % bei 120 WRMS
Störabstand: . . . . . . . . . . > 92 dB
Klangregelung
Tiefen: . . . . . . . . . . . . . ±10 dB/100 Hz
Höhen: . . . . . . . . . . . . . ±10 dB/10 kHz
Einsatztemperatur: . . . . . 0 – 40 °C
Stromversorgung
Netzspannung: . . . . . . . 230 V~/50 Hz
Leistungsaufnahme: . . . 300 VA
Notstromversorgung: . . 24 V /9 A
Abmessungen (B × H × T): 430 × 89 × 380 mm,
2 HE (Höheneinheiten)
Gewicht: . . . . . . . . . . . . . . 11,7 kg
*Entweder die 70-V- und 100-V-Ausgänge oder den
4-Ω-Ausgang verwenden!
Änderungen vorbehalten.
4) Select the number of the first title for the title
sequence with the buttons DOWN/REV and UP/
CUE (3) or enter it with the numerical keys (33). If
there are MP3 files in folders, please note that
these files are not numbered consecutively but
that the first file in each folder is always named
No. 1.
5) For storing, press the button PROG. The display
will show the next storage location number, e. g.
“P-02”.
6) Repeat the operating steps (3), 4 and 5 for all fur-
ther titles desired until the entire title sequence
has been programmed.
7) To start the title sequence, press the button
PLAY/PAUSE (4). The upper display line will
show “MEM” for memory and the title sequence
will be replayed.
8) With the buttons DOWN/REV and UP/CUE, se-
lect any title of the title sequence or activate the
fast forward/reverse function within a title by
keeping the corresponding button pressed.
9) After replaying the title sequence or when press-
ing the button STOP, the CD player will go to the
stop mode. To restart the title sequence once
again, first press the button PROG, then the but-
ton PLAY/ PAUSE.
Note: A programmed title sequence will be deleted if the
data carrier is changed, if the button STOP is pressed in
the programming mode, and if the unit is switched off.
6.2.9 Note on sound interruptions
and reading errors
Cigarette smoke and dust will easily penetrate
through all openings of the unit and will also settle
on the optics of the laser sampling system. If this
deposit should cause reading errors and sound
interruptions, the unit must be cleaned by skilled
personnel. Please note that there will be a charge on
cleaning, even during the warranty period!
7 Specifications
Output power: . . . . . . . . . 120 WRMS, 160 WMAX
Outputs
Speakers*: . . . . . . . . . . min 4 Ω‚ 70 V, 100 V
Line Out: . . . . . . . . . . . . 1 V/600 Ω
Pre Out: . . . . . . . . . . . . 1 V/600 Ω
Inputs
Input 1 – 4: . . . . . . . . . . Mic 1.5 mV/1.1 kΩ
switchable to Line
300 mV/14 kΩ;
XLR, balanced
Aux: . . . . . . . . . . . . . . . 300 mV/50 kΩ;
phono, unbalanced
Amp In: . . . . . . . . . . . . . 1 V/14 kΩ;
phono, unbalanced
Frequency range: . . . . . . 50 – 15 000 Hz, ±3 dB
THD: . . . . . . . . . . . . . . . . 1% at 120 WRMS
S/N ratio: . . . . . . . . . . . . . > 92 dB
Tone control
Bass: . . . . . . . . . . . . . . ±10 dB/100 Hz
Treble: . . . . . . . . . . . . . ±10 dB/10 kHz
Ambient temperature: . . . 0 – 40 °C
Power supply
Mains voltage: . . . . . . . 230 V~/50 Hz
Power consumption: . . . 300 VA
Emergency
power supply: . . . . . . . . 24 V /9 A
Dimensions (W × H × D): . 430 × 89 × 380 mm,
2 rs (rack spaces)
Weight: . . . . . . . . . . . . . . . 11.7 kg
*Either use the 70 V and 100 V outputs or the 4 Ω output!
Subject to technical modification.
10
GB
D
A
CH
Diese Bedienungsanleitung ist urheberrechtlich für MONACOR
®
INTERNATIONAL GmbH & Co. KG
geschützt. Eine Reproduktion für eigene kommerzielle Zwecke – auch auszugsweise – ist untersagt.
All rights reserved by MONACOR
®
INTERNATIONAL GmbH & Co. KG. No part of this instruction manual
may be reproduced in any form or by any means for any commercial use.

11

Ouvrez le présent livret page 3 de manière à
visualiser les éléments et branchements
Table des matières
1 Eléments et branchements . . . . . . . . . . . . 12
1.1 Face avant . . . . . . . . . . . . . . . . . . . . . . . . . . 12
1.2 Face arrière . . . . . . . . . . . . . . . . . . . . . . . . . 12
1.3 Télécommande . . . . . . . . . . . . . . . . . . . . . . 13
2 Conseils dʼutilisation et de sécurité . . . . 13
3 Possibilités dʼutilisation . . . . . . . . . . . . . . 14
4 Positionnement de lʼappareil . . . . . . . . . . 14
4.1 Installation en rack . . . . . . . . . . . . . . . . . . . 14
5 Branchement de lʼamplificateur
Public Adress . . . . . . . . . . . . . . . . . . . . . . 14
5.1 Haut-parleurs . . . . . . . . . . . . . . . . . . . . . . . . 14
5.2 Microphones . . . . . . . . . . . . . . . . . . . . . . . . 14
5.3 Appareils à sortie Ligne . . . . . . . . . . . . . . . . 15
5.4 Insérer un égaliseur ou un autre appareil . . 15
5.5 Amplificateur supplémentaire . . . . . . . . . . . 15
5.6 Alimentation secteur et alimentation
de secours . . . . . . . . . . . . . . . . . . . . . . . . . . 15
6 Fonctionnement . . . . . . . . . . . . . . . . . . . . 15
6.1 Fonction talkover du canal 1 . . . . . . . . . . . . 15
6.2 Lecteur CD . . . . . . . . . . . . . . . . . . . . . . . . . 15
6.2.1 Télécommande . . . . . . . . . . . . . . . . . . . . 15
6.2.2 Lecture de CD, disque dur ou clé USB . . 16
6.2.3 Fonction démarrage automatique du CD . 16
6.2.4 Sélection de titres . . . . . . . . . . . . . . . . . . 16
6.2.5 Avance et retour rapides . . . . . . . . . . . . . 17
6.2.6 Fonctions répétition et lecture aléatoire . . 17
6.2.7 Coupure du son . . . . . . . . . . . . . . . . . . . . 17
6.2.8 Composition personnelle
dʼune suite de titres . . . . . . . . . . . . . . . . . 17
6.2.9 Remarques sur les coupures du son
et les erreurs de lecture . . . . . . . . . . . . . . 18
7 Caractéristiques techniques . . . . . . . . . . 18
1 Eléments et branchements
1.1 Face avant
1Fente dʼinsertion du CD : poussez le CD dans la
fente jusquʼà ce quʼil entre automatiquement.
2Touche STOP pour terminer la lecture
3Touches DOWN/REV et UP/CUE pour la sélec-
tion de titres et lʼavance et retour rapides
sélection de titres :
à chaque pression sur la touche UP/CUE, on
avance dʼun titre ; en appuyant sur la touche
DOWN/REV, on saute au début du titre et à
chaque autre pression, on recule dʼun titre.
avance et retour rapides :
pour lʼavance rapide, maintenez la touche
UP/CUE enfoncée, pour le retour rapide,
maintenez la touche DOWN/REV enfoncée.
4Touche PLAY/PAUSE pour commuter entre lec-
ture et pause
5Touche EJECT pour éjecter le CD
6Interface USB pour insérer une clé USB ou pour
brancher un disque dur
7Affichage
8Capteur infrarouge pour les signaux de la télé-
commande
9Touches FOLDER SKIP pour des fichiers MP3
pour sélectionner le premier titre dans un autre
dossier et pour une autre sélection de titres :
avec la touche gauche, on saute au premier titre
du dossier précédent et avec la touche droite, au
premier titre du dossier suivant. Pendant la lec-
ture, on peut sauter aux titres suivants ou aux
titres précédents en maintenant une des touches
enfoncées.
10 Touche USB pour sélectionner lʼinterface USB (6)
11 Touche CD pour sélectionner le CD inséré
12 Egaliseur
BASS = réglage des graves, ±10 dB/100 Hz
TREBLE = réglage des aigus, ±10 dB/10 kHz
13 Potentiomètres de réglage du volume pour les
canaux mono INPUT 1 à INPUT 4
14 Potentiomètre de réglage MASTER pour le
volume total
15 Témoin de fonctionnement
16 Affichage du niveau
17 Interrupteur MARCHE/ARRET
18 Potentiomètre de réglage du volume pour la
source de signal reliée à lʼentrée AUX IN (28)
[touche AUX/MP3 (19) non enfoncée] ou pour le
volume du lecteur interne de CD (touche AUX/
MP3 enfoncée)
19 Touche AUX/MP3
touche enfoncée : le lecteur CD interne est
sélectionné (la LED au-
dessus de la touche
brille)
touche non enfoncée : lʼentrée AUX IN (28) est
sélectionnée
1.2 Face arrière
20 Prise pour brancher à une prise secteur (230 V~/
50 Hz) via le cordon secteur livré
21 Porte-fusible ;
tout fusible fondu ne doit être remplacé que par
un fusible de même type
22 Vis dʼarrêt pour une connexion masse possible
(p. ex. en cas de problèmes de ronflement)
23 Bornes* pour une tension dʼalimentation de se-
cours (24 V )
24 Bornes* pour brancher des haut-parleurs
Vi preghiamo di aprire completamente la pagina 3.
Così vedrete sempre gli elementi di comando e i
collegamenti descritti.
Indice
1 Elementi di comando e collegamenti . . . 12
1.1 Pannello frontale . . . . . . . . . . . . . . . . . . . . . 12
1.2 Pannello posteriore . . . . . . . . . . . . . . . . . . . 12
1.3 Telecomando . . . . . . . . . . . . . . . . . . . . . . . . 13
2 Avvertenze di sicurezza . . . . . . . . . . . . . . 13
3 Possibilità dʼimpiego . . . . . . . . . . . . . . . . 14
4 Collocamento dellʼamplificatore . . . . . . . 14
4.1 Montaggio in un rack . . . . . . . . . . . . . . . . . . 14
5 Collegare lʼamplificatore PA . . . . . . . . . . . 14
5.1 Altoparlanti . . . . . . . . . . . . . . . . . . . . . . . . . 14
5.2 Microfoni . . . . . . . . . . . . . . . . . . . . . . . . . . . 14
5.3 Apparecchi con uscita Line . . . . . . . . . . . . . 14
5.4 Inserire un equalizzatore
o un altro apparecchio . . . . . . . . . . . . . . . . . 15
5.5 Amplificatore supplementare . . . . . . . . . . . . 15
5.6 Alimentazione e alimentazione
di emergenza . . . . . . . . . . . . . . . . . . . . . . . . 15
6 Funzionamento . . . . . . . . . . . . . . . . . . . . . 15
6.1 Funzione Talkover del canale 1 . . . . . . . . . . 15
6.2 Lettore CD . . . . . . . . . . . . . . . . . . . . . . . . . . 15
6.2.1 Telecomando . . . . . . . . . . . . . . . . . . . . . . 15
6.2.2 Riprodurre da CD, disco rigido o
chiavetta USB . . . . . . . . . . . . . . . . . . . . . 15
6.2.3 Funzione dʼavvio automatico del CD . . . . 16
6.2.4 Scelta del titolo . . . . . . . . . . . . . . . . . . . . . 16
6.2.5 Avanzamento / ritorno veloce . . . . . . . . . . 17
6.2.6 Funzioni di ripetizione
e riproduzione casuale . . . . . . . . . . . . . . . 17
6.2.7 Audio muto . . . . . . . . . . . . . . . . . . . . . . . . 17
6.2.8 Creare una compilation personale . . . . . . 17
6.2.9 Note su possibili errori di lettura . . . . . . . . 18
7 Dati tecnici . . . . . . . . . . . . . . . . . . . . . . . . . 18
1 Elementi di comando e collegamenti
1.1 Pannello frontale
1Fessura dʼintroduzione per il CD; spingere il CD
nella fessura finché non viene ritirato automati-
camente
2Tasto STOP per terminare la riproduzione
3Tasti DOWN/REV e UP/CUE per la scelta dei
titoli e per lʼavanzamento/ritorno veloce
Scelta del titolo
Con ogni pressione del tasto UP/CUE si salta
avanti di un titolo; con ogni pressione del tasto
DOWN/REV si ritorna allʼinizio del titolo e con
ogni ulteriore pressione si salta indietro di un
titolo.
Avanzamento/ritorno veloce
Per lʼavanzamento tener premuto il tasto UP/
CUE, per il ritorno il tasto DOWN/REV.
4Tasto PLAY/PAUSE per passare fra riproduzione
e pausa
5Tasto EJECT per espellere il CD
6Porta USB per una chiavetta USB o per colle-
gare un disco rigido
7Display
8Sensore infrarosso per i segnali del telecomando
9Tasti FOLDER SKIP con file MP3 per scegliere il
primo titolo in unʼaltra cartella e per lʼulteriore
scelta dei titoli:
Con il tasto di sinistra si salta sul primo titolo
della cartella precedente e con il tasto di destra
sul primo titolo della cartella successiva. Durante
la riproduzione, tenendo premuto il tasto, si può
saltare sui titoli successivi o precedenti.
10 Tasto USB per scegliere la porta USB (6)
11 Tasto CD per scegliere il CD inserito
12 Regolatori toni
BASS = regolatore bassi, ±10 dB/100 Hz
TREBLE = regolatore alti, ±10 dB/10 kHz
13 Regolatori per impostare il volume dei canali
mono INPUT 1 a INPUT 4
14 Regolatore MASTER per il volume globale
15 Indicazione livello
16 Spia di funzionamento
17 Interruttore on/off POWER
18 Regolatore per impostare il volume della sor-
gente collegata allʼingresso AUX IN (28) [tasto
AUX/MP3 (19) non premuto] oppure per il
volume del lettore CD interno [tasto AUX/MP3
premuto]
19 Tasto AUX/MP3
tasto premuto è selezionato il lettore CD interno
(il LED sopra il tasto è acceso)
non premuto è selezionato lʼingresso AUX IN
(28)
1.2 Pannello posteriore
20 Presa rete per il collegamento con una presa
(230 V~/50 Hz) servendosi del cavo rete in dota-
zione
21 Supporto per il fusibile di rete;
sostituire un fusibile difettoso solo con uno dello
stesso tipo
22 Morsetto per un eventuale collegamento con la
massa (p. es. nel caso di problemi di ronzio)
23 Morsetti a vite* per unʼalimentazione di emer-
genza (24 V )
24 Morsetti a vite* per il collegamento degli altopar-
lanti
12
I
F
B
CH
* Il est possible de retirer les bornes de leur emplacement
pour faciliter lʼaccès.
* Per maggiore comodità, i morsetti a vite possono
essere sfilati dai connettori.

25 Prises dʼentrée XLR des canaux mono INPUT 1
à INPUT 4 pour brancher des microphones ou
des appareils mono à sortie Ligne
26 Prises de repiquage PRE OUT et AMP IN pour
insérer un appareil (par exemple égaliseur) ;
le niveau de sortie de la prise PRE OUT est indé-
pendant du réglage MASTER (14)
27 Sortie LINE OUT pour brancher dʼautres amplifi-
cateurs ;
le niveau de sortie est indépendant du réglage
MASTER (14)
28 Entrée AUX IN pour brancher des appareils audio,
p. ex. lecteur CD, tuner, etc.
29 Sélecteurs pour les canaux mono INPUT 1 – 4
entre niveau du microphone (touche non enfon-
cée) et niveau Ligne (touche enfoncée)
30 Bornes pour brancher un microphone ou un
appareil audio à sortie Ligne ; branchées en
parallèle à la prise XLR INPUT 1
31 Touche AUTOTALK pour allumer/éteindre la
fonction talkover du canal 1
32 Touche +21 V PHANTOM POWER pour connec-
ter lʼalimentation fantôme 21 V pour les prises
XLR INPUT 1 à INPUT 4 (25) ; nécessaire pour
brancher des microphones condensateur ou
électret fonctionnant avec une alimentation fan-
tôme.
1.3 Télécommande
2–5et 9–11
ces touches ont les mêmes fonctions que les
touches sur lʼappareil.
33 Touches numériques pour la sélection directe
dʼun titre, par exemple :
numéro titre touche
4 4, PLAY/PAUSE
27 2, 7, PLAY/PAUSE
135 1, 3, 5, PLAY/PAUSE
34 Touche PLAY MODE pour sélectionner les fonc-
tions répétition et lecture aléatoire
Réglage de base (PLAY ALL)
Tous les titres du support de données ou
dʼune suite programmée sont lus une fois.
Première pression (PLAY ALL RANDOM)
une seule lecture de tous les titres dans un
ordre aléatoire
Pression suivante (REPEAT TRACK)
répétition continue du titre sélectionné
Pression suivante (REPEAT FOLDER)
répétition continue de tous les titres dans le
dossier sélectionné (fonction uniquement
pour des fichiers MP3)
Pression suivante (REPEAT ALL)
répétition continue de tous les titres
Pression suivante (RANDOM REPEAT)
lecture continue des titres dans un ordre aléa-
toire
Pression suivante (PLAY ALL)
retour au réglage de base
35 Touche DISPLAY pour commuter les informa-
tions dans la ligne inférieure de lʼaffichage pour
des fichiers MP3 ; pour des fichiers MP3, le nom
de lʼalbum, le titre et lʼinterprète ou le groupe
(Artist) défilent en continu dans la ligne supé-
rieure de lʼaffichage
réglage de base :
dans la ligne inférieure, le numéro du titre
(TR) et la durée lue du titre sont affichés
1ère pression
le nom du dossier est affiché
2ème pression
le nom du titre est affiché
3ème pression
le nombre de dossiers et de titres est affiché
4ème pression
retour au réglage de base
36 Touche MUTE pour couper le lecteur CD
37 Touche PROG pour commuter en mode pro-
grammation sur la création dʼune suite de titres
individuelle (voir chapitre 6.2.8)
38
Touche FIND pour une recherche alphabétique
dʼun titre sur des CDs MP3 (voir chapitre 6.2.4, D)
39 Touche ESP pour éteindre et rallumer la mémoire
anti-chocs (impossible en mode MP3)
2 Conseils dʼutilisation et de sécurité
Cet appareil répond à toutes les directives nécessaires
de lʼUnion Européenne et porte donc le symbole .
Respectez scrupuleusement les points suivants:
GLʼappareil nʼest conçu que pour une utilisation en
intérieur. Protégez-le de tout type de projections
dʼeau, des éclaboussures, dʼune humidité élevée
et de la chaleur (plage de température de fonc-
tionnement autorisée 0 – 40 °C).
AVERTISSEMENT Cet appareil est alimenté
par une tension dangereuse
230 V~. Ne touchez jamais
lʼintérieur de lʼappareil car, en
cas de mauvaise manipula-
tion, vous pourriez subir une
décharge électrique.
Pendant le fonctionnement, une tension dange-
reuse de contact de 100 V au plus est présente aux
bornes haut-parleurs (24). Lʼensemble des bran-
chements ne peut être effectué ou modifié que si
lʼinstallation PA est déconnectée.
Attention ! Actionnez la touche uniquement si
lʼamplificateur est éteint pour éviter des bruits
de commutation. Respectez les conseils men-
tionnés dans le point 25.
Attention ! Si lʼalimentation fantôme est con-
nectée [touche +21 V PHANTOM POWER (32)
enclenchée], les prises XLR sont alimentées
par une alimentation fantôme de 21 V. Dans ce
cas, il ne faut pas brancher de microphones
avec sortie asymétrique car ils peuvent être
endommagés.
25 Prese dʼingresso XLR dei canali mono INPUT 1
a INPUT 4 per il collegamento di microfoni o di
apparecchi mono con uscita Line
26 Contatti di attraversamento PRE OUT e AMP IN
per inserire un apparecchio (p. es. equalizer);
il livello dʼuscita della presa PRE OUT è indipen-
dente dal regolatore MASTER (14)
27 Uscita LINE OUT per il collegamento di ulteriori
amplificatori;
il livello dʼuscita è indipendente dal regolatore
MASTER (14)
28 Ingresso AUX IN per il collegamento di apparec-
chi audio, p. es. lettore CD, tuner, ecc.
29 Commutatore per i canali mono INPUT 1 – 4 fra
livello microfono (tasto non premuto) e livello
Line (tasto premuto)
30 Morsetti per il collegamento di un microfono o di
un apparecchio audio con uscita Line; collegato
in parallelo con la presa XLR INPUT 1
31 Tasto AUTOTALK per attivare/disattivare la fun-
zione talkover del canale 1
32 Tasto +21 V PHANTOM POWER per attivare lʼa-
limentazione phantom per le prese XLR INPUT 1
a INPUT 4 (25); è necessario quando si colle-
gano microfoni a condensatore o a elettrete che
funzionano con alimentazione phantom
1.3 Telecomando
2–5e9–11
Questi tasti hanno funzioni identiche ai tasti sul-
lʼapparecchio
33 Tasti numerici per la scelta diretta di un titolo,
p. es.:
N. titolo Tasti
4 4, PLAY/PAUSE
27 2, 7, PLAY/PAUSE
135 1, 3, 5, PLAY/PAUSE
34 Tasto PLAY MODE per scegliere la funzione di
ripetizione e della riproduzione casuale
Impostazione base (PLAY ALL)
tutti i titoli del supporto dati o di una sequenza
programmata vengono riprodotti una volta
prima pressione del tasto (PLAY ALL RANDOM)
riproduzione dei titoli in ordine casuale
altra pressione del tasto (REPEAT TRACK)
ripetizione continua del titolo scelto
altra pressione del tasto (REPEAT FOLDER)
ripetizione continua di tutti i titoli nella cartella
scelta (solo con file MP3)
altra pressione del tasto (REPEAT ALL)
ripetizione continua di tutti i titoli
altra pressione del tasto (RANDOM REPEAT)
riproduzione continua dei titoli in ordine
casuale
altra pressione del tasto (PLAY ALL)
ritorno allʼimpostazione base
35 Tasto DISPLAY per cambiare le informazioni
nella riga inferiore del display con i file MP3; la
riga superiore del display indica sempre il nome
dellʼalbo, del titolo e dellʼinterprete o del gruppo
(artista)
Impostazione base
Nella riga inferiore è indicato il numero del
titolo (TR) con il tempo trascorso del titolo
1. pressione del tasto
È indicato il nome della cartella
2. pressione del tasto
È indicato il nome del titolo
3. pressione del tasto
È indicato il numero delle cartelle e dei titoli
4. pressione del tasto
Ritorno allʼimpostazione base
36 Tasto MUTE per rendere muto il lettore CD
37 Tasto PROG, per passare nella modalità di pro-
grammazione per compilare una sequenza indi-
viduale di titoli (vedi cap. 6.2.8)
38 Tasto FIND per la ricerca alfabetica di un titolo
sui CD MP3 (vedi cap. 6.2.4, D)
39 Tasto ESP per spegnere ed riaccendere la
memoria anti-shock
(non con funzionamento MP3)
2 Avvertenze di sicurezza
Questʼapparecchio è conforme a tutte le direttive
richieste dellʼUE e pertanto porta la sigla .
Si devono osservare assolutamente i seguenti punti:
G
Lo strumento è previsto solo per lʼuso allʼinterno di
locali. Proteggerlo dallʼacqua gocciolante e dagli
spruzzi dʼacqua, da alta umidità dellʼaria e dal calore
(temperatura dʼimpiego ammessa fra 0 e 40 °C).
GNon depositare sullʼapparecchio dei contenitori
riempiti di liquidi, p. es. bicchieri.
Attenzione! Se è attivata lʼalimentazione phan-
tom [tasto +21 V PHANTOM POWER (32) pre-
muto fino allo scatto] tutte le prese XLR vengono
alimentate con lʼalimentazione phantom 21 V. In
questo caso non devono essere collegati
microfoni con uscita asimmetrica in quanto
potrebbero subire dei danni.
AVVERTIMENTO Lʼapparecchio funziona con peri-
colosa tensione di rete (230 V~).
Non intervenire mai personal-
mente al suo interno! La mani-
polazione scorretta può pro-
vocare una scarica elettrica
pericolosa.
Durante il funzionamento, ai contatti per gli altopar-
lanti (24) è presente una tensione fino a 100 V,
pericolosa al contatto. Eseguire o modificare tutti i
collegamenti solo con lʼimpianto PA spento.
Attenzione! Attivare il tasto solo con lʼamplifi-
catore spento, per evitare rumori di commuta-
zione. Da notare anche la nota al punto 25.
13
I
F
B
CH

GEn aucun cas, vous ne devez poser dʼobjet conte-
nant du liquide ou un verre sur lʼappareil.
GLa chaleur dégagée par lʼappareil doit être évacuée
par une circulation dʼair correcte. En aucun cas les
ouïes de ventilation ne doivent être obturées.
GNe faites rien tomber dans les ouïes de ventila-
tion, vous pourriez subir une décharge électrique !
GNe faites jamais fonctionner lʼappareil et débran-
chez-le immédiatement lorsque :
1. des dommages sur lʼappareil ou sur le cordon
secteur apparaissent.
2. après une chute ou accident similaire, vous
avez un doute sur lʼétat de lʼappareil.
3. des défaillances apparaissent.
Dans tous les cas, les dommages doivent être
réparés par un technicien spécialisé.
GNe débranchez jamais lʼappareil en tirant sur le
cordon secteur ; retirez toujours le cordon secteur
en tirant la fiche.
GPour nettoyer lʼappareil, utilisez uniquement un
chiffon sec et doux, en aucun cas de produits chi-
miques ou dʼeau.
GNous déclinons toute responsabilité en cas de
dommages matériels ou corporels résultants si
lʼappareil est utilisé dans un but autre que celui
pour lequel il a été conçu, sʼil nʼest pas correcte-
ment branché, utilisé ou nʼest pas réparé par une
personne habilitée, en outre, la garantie devien-
drait caduque.
3 Possibilités dʼutilisation
Cet amplificateur avec lecteur CD intégré est spé-
cialement conçu pour une utilisation dans des instal-
lations de sonorisation Public Adress. Il peut délivrer
120 WRMS à des haut-parleurs 100 V et 70 V ou à un
groupe de haut-parleurs avec une impédance totale
de 4 Ω. Il est possible de brancher des microphones
(canaux 1 – 4) ou des appareils à niveau Ligne (ca-
naux 1 – 4 et canal AUX) aux cinq canaux dʼentrée
mixables entre eux. Le canal 1 est doté dʼune fonc-
tion talkover qui diminue le volume des autres ca-
naux de 40 dB pendant une annonce.
Le lecteur CD est doté dʼune mémoire anti chocs
qui peut compenser les dysfonctionnements causés
par des chocs ou vibrations lors de la lecture du CD
jusquʼà 40 secondes. Cependant, la mémoire anti-
chocs ne permet pas de compenser des interrup-
tions continues. Pour tester, la mémoire anti-chocs
peut être désactivée avec la touche ESP (39) [pas
en mode MP3]. Lʼaffichage (7) indique brièvement
“ESP OFF”. Pour rallumer, appuyez une nouvelle
fois sur la touche ESP, lʼaffichage indique briève-
ment “40 SEC CD”.
4 Positionnement de lʼappareil
Lʼamplificateur est prévu pour être placé dans un
rack (482 mm/19"), il peut également être placé
directement sur une table. Dans tous les cas, lʼair
doit pouvoir circuler librement via toutes les ouïes de
ventilation afin de garantir un refroidissement suffi-
sant de lʼamplificateur.
4.1 Installation en rack
Pour un montage en rack, vissez les deux étriers de
montage livrés sur les côtés de lʼappareil. Dans le
rack, pour lʼamplificateur, 2 unités sont nécessaires
(1 unité = 44,5 mm).
Afin que le rack ne se renverse pas, vous devez
placer lʼamplificateur dans la partie inférieure du
rack. Pour une fixation solide, les étriers de montage
seuls ne suffisent pas. Utilisez également des rails
latéraux ou une plaque inférieure pour le maintenir
correctement en place.
5 Branchement de lʼamplificateur
Public Adress
Tous les branchements ne doivent être effectués
que par un technicien qualifié et uniquement lorsque
lʼamplificateur est éteint !
5.1 Haut-parleurs
Il est possible de brancher des haut-parleurs Public
Adress ou des haut-parleurs ou des groupes de
haut-parleurs avec une impédance totale de 4 Ω au
moins. Les possibilités de branchement pour les
haut-parleurs sont indiquées sur les schémas 4 – 8.
Selon le type de haut-parleur, utilisez les contacts
correspondants des bornes OUTPUT (24). Il est
possible de retirer les bornes de leur emplacement
pour faciliter lʼaccès.
Lors du branchement, veillez à respecter lʼimpé-
dance individuelle ou lʼimpédance totale des haut-
parleurs et leur polarité (branchements plus et
moins comme indiqués sur les schémas 4 – 8). Le
branchement plus des haut-parleurs est toujours
spécialement repéré.
5.2 Microphones
Il est possible de relier jusquʼà quatre microphones
aux entrées INPUT 1 à INPUT 4 (25). Il est égale-
ment possible dʼutiliser les bornes (30) à la place de
la prise XLR INPUT 1.
1) Lors du branchement dʼun microphone, désen-
clenchez le sélecteur correspondant MIC/LINE
(29).
Attention !
Dans le cas de haut-parleurs Public Adress avec
transformateur audio 70 V ou 100 V (schémas 4 et
5), la puissance totale par les haut-parleurs ne doit
pas être supérieure à 120 WRMS, sinon lʼamplifica-
teur serait en surcharge et pourrait être endommagé.
Lorsque lʼappareil est définitivement retiré
du service, vous devez le déposer dans
une usine de recyclage adaptée pour
contribuer à son élimination non polluante.
GDevʼessere garantita la libera circolazione dellʼa-
ria per dissipare il calore che viene prodotto allʼin-
terno dellʼapparecchio. Non coprire le fessure
dʼaerazione.
GNon inserire oggetti nelle fessure dʼaerazione. Altri-
menti si potrebbe provocare una scarica elettrica!
GNon mettere in funzione lʼapparecchio e staccare
subito la spina rete se:
1. lʼapparecchio o il cavo rete presentano dei
danni visibili;
2. dopo una caduta o dopo eventi simili sussiste il
sospetto di un difetto;
3. lʼapparecchio non funziona correttamente.
Per la riparazione rivolgersi sempre ad unʼofficina
competente.
GStaccare il cavo rete afferrando la spina, senza ti-
rare il cavo.
GPer la pulizia usare solo un panno morbido,
asciutto; non impiegare in nessun caso prodotti
chimici o acqua.
GNel caso dʼuso improprio, di collegamenti sba-
gliati, dʼimpiego scorretto o di riparazione non a
regola dʼarte dellʼapparecchio, non si assume
nessuna responsabilità per eventuali danni con-
sequenziali a persone o a cose e non si assume
nessuna garanzia per lʼapparecchio.
3 Possibilità dʼimpiego
Questo amplificatore con lettore CD integrato è
stato realizzato specialmente per lʼimpiego in im-
pianti di sonorizzazione PA. Fornisce 120 W eff. ad
altoparlanti con ingresso audio 100 V e 70 V oppure
ad un gruppo di altoparlanti con impedenza globale
di 4 Ω. Ai cinque canali dʼingresso miscelabili fra di
loro si possono collegare dei microfoni (canali 1 – 4)
oppure apparecchi con livello Line (canali 1 – 4 e
AUX). Il canale 1 possiede una funzione Talkover,
che durante un avviso riduce il volume degli altri
canali di 40 dB.
Il lettore CD è equipaggiato con una memoria
anti-shock che è in grado i compensare disturbi
durante la scansione del CD in seguito a urti e vibra-
zioni per una durata massima di 40 secondi. Tutta-
via non è possibile compensare disturbi prolungati.
Per scopi di test si può disattivare la memoria anti-
shock per mezzo del tasto ESP (39) [non in caso di
funzionamento MP3]. Il display (7) segnala breve-
mente “ESP OFF”. Per attivare nuovamente la fun-
zione, premere unʼaltra volta il tasto ESP. Il display
indica brevemente “40 SEC CD”.
4 Collocamento dellʼamplificatore
Lʼamplificatore è previsto per il montaggio in un rack
(482 mm/19"), ma può essere collocato anche su un
tavolo. In ogni caso deve essere garantita la libera
circolazione dellʼaria attraverso le fessure di aera-
zione per ottenere una raffreddamento sufficiente
dello stadio finale.
4.1 Montaggio in un rack
Per il montaggio in un rack avvitare ai lati dellʼappa-
recchio i due angoli di montaggio in dotazione. Lʼam-
plificatore richiede due unità di altezza (1 unità di
altezza RS = 44,5 mm).
Per evitare che il rack risulti con troppi pesi in alto
occorre che lʼamplificatore venga sistemato in basso.
Per un fissaggio sicuro non bastano i soli angoli di
montaggio. Lʼapparecchio deve essere sostenuto da
guide laterali o da un piano sul quale poggia.
5 Collegare lʼamplificatore PA
Fare eseguire tutti i collegamenti solo da un esperto
qualificato e con lʼamplificatore assolutamente
spento!
5.1 Altoparlanti
Si possono collegare altoparlanti PA oppure altopar-
lanti/gruppi di altoparlanti con unʼimpedenza globale
non inferiore a 4 Ω. Le possibilità di collegamento
degli altoparlanti sono illustrate nelle figg. 4 – 8. A
seconda del tipo di altoparlante usare i contatti della
morsettiera OUTPUT (24). Per maggiore comodità,
la morsettiera può essere sfilata dal connettore.
Durante il collegamento fare attenzione alla cor-
retta impedenza singola o globale degli altoparlanti
(positivo e negativo come illustrato nelle figg. 4 – 8).
Il positivo degli altoparlanti è sempre quello contras-
segnato.
5.2 Microfoni
Agli ingressi INPUT 1 a INPUT 4 (25) si possono col-
legare fino a 4 microfoni. Al posto della presa XLR
INPUT 1 si possono usare anche i contatti a vite (30).
1) Se è collegato un microfono sbloccare il relativo
commutatore MIC/LINE (29).
2) Nel caso di microfoni con alimentazione phan-
tom, attivare lʼalimentazione phantom 21 V con il
tasto + 21 V PHANTOM POWER (32).
5.3 Apparecchi con uscita Line
Agli ingressi INPUT 1 a INPUT 4 (25) e allʼingresso
AUX IN (28) si possono collegare fino a cinque
apparecchi con uscita Line (p. es. lettore CD, regi-
Attenzione!
Se è attivata lʼalimentazione phantom, agli in-
gressi non devono essere collegati dei microfoni
con uscita asimmetrica perché potrebbero sub-
ire dei danni.
Attenzione!
Nel caso di altoparlanti PA con trasformatore audio
70 V o 100 V (figg. 4 e 5), il carico globale degli al-
toparlanti non deve superare 120 W eff. per non so-
vraccaricare ed eventualmente danneggiare lʼamp-
lificatore.
Se si desidera eliminare lʼapparecchio defi-
nitivamente, consegnarlo per lo smalti-
mento ad unʼistituzione locale per il rici-
claggio.
14
I
F
B
CH

2) Si des microphones à alimentation fantôme sont
utilisés, activez lʼalimentation fantôme 21 V avec
la touche +21 V PHANTOM POWER (32).
5.3 Appareils à sortie Ligne
Il est possible de relier jusquʼà cinq appareils à sortie
Ligne (p. ex. lecteur CD, magnétophone) aux entrées
INPUT 1 à INPUT 4 (25) et à lʼentrée AUX IN (28). Si
les entrées INPUT 1 à INPUT 4 sont reliées, enclen-
chez le sélecteur correspondant MIC/LINE (29).
5.4 Insérer un égaliseur ou un autre appareil
Pour une modification externe de la tonalité, il est
possible dʼinsérer par exemple un égaliseur via les
prises PRE OUT et AMP IN (26).
1) Retirez le cavalier entre les connexions PRE
OUT et AMP IN. Ainsi, le préamplificateur et lʼam-
plificateur de puissance sont séparés.
2) Branchez lʼentrée de lʼappareil à la prise PRE
OUT.
3) Reliez la sortie de lʼappareil à la prise AMP IN.
Conseil : Lʼamplificateur ne fournit pas de signal si lʼap-
pareil inséré nʼest pas allumé, sʼil est défectueux ou nʼest
pas correctement branché.
5.5 Amplificateur supplémentaire
Si le nombre de haut-parleurs nécessaires est supé-
rieur au nombre autorisé pour lʼamplificateur, il est
nécessaire de connecter un autre amplificateur.
Reliez lʼentrée de lʼamplificateur supplémentaire à la
prise LINE OUT (27). Le niveau de sortie de la prise
est indépendant du réglage MASTER (14).
5.6 Alimentation secteur et
alimentation de secours
1) Si lʼamplificateur doit continuer à fonctionner en
cas de coupure dʼalimentation secteur, reliez une
unité dʼalimentation de secours 24 V (p. ex. PA-
24ESP de MONACOR) aux bornes 24 V DC (23).
Il est possible de retirer les bornes de leur empla-
cement pour faciliter lʼaccès.
Conseil : si une tension 24 V de lʼunité dʼalimentation
de secours est présente aux bornes 24 V DC, lʼampli-
ficateur ne peut pas être éteint avec lʼinterrupteur
POWER (17). Il commute en cas de coupure de cou-
rant ou sʼil est éteint, automatiquement sur lʼalimenta-
tion de secours.
2) Pour finir, reliez le cordon secteur livré tout
dʼabord à la prise (20) et puis à une prise secteur
(230 V~/50 Hz).
6 Fonctionnement
1) Avant la première mise sous tension, mettez tout
dʼabord les réglages INPUT 1 à 4 (13) ainsi que
les réglages AUX (18) et MASTER (14) sur la
position “0”.
2) Allumez lʼamplificateur avec lʼinterrupteur POW-
ER (17). Après la mise sous tension, la LED ON
(16) brille.
3) Avec la touche AUX/MP3 (19), sélectionnez la
source de signal voulue pour le canal AUX :
pour la lecture interne de CD, enfoncez la
touche; la LED au-dessus de la touche brille.
pour sélectionner lʼentrée AUX IN (28), désen-
clenchez la touche ; la LED au-dessus de la
touche ne doit pas briller.
4) Tournez le réglage MASTER (14) jusquʼà ce que
les réglages suivants puissent être écoutés.
5) Mettez les réglages dʼentrée INPUT 1 à 4 (13) et
le réglage AUX (18) sur la valeur souhaitée. Tour-
nez sur zéro les réglages des canaux inutilisés.
6) Réglez les réglages de lʼégaliseur BASS et
TREBLE (12) pour obtenir une tonalité optimale.
7) Réglez le volume total avec le réglage principal
MASTER (14). La chaîne des LEDs à 5 niveaux
(15) indique le niveau de sortie. Pour un réglage
optimal, tournez le réglage de telle sorte que la
LED “+3” rouge ne brille pas.
6.1 Fonction talkover du canal 1
Via le canal INPUT 1, il est possible dʼeffectuer des
annonces pendant la diffusion dʼun programme de
musique. Le volume des autres canaux est automa-
tiquement diminué de 40 dB. Pour allumer cette
fonction, enclenchez la touche AUTOTALK (31).
6.2 Lecteur CD
Si une fois lʼamplificateur allumé, aucun CD nʼest
placé dans le lecteur, “NO DISC” est visible sur lʼaf-
fichage (7). Vous trouverez chapitre 6.2.2 dʼautres
indications dʼaffichage.
6.2.1 Télécommande
1) Pour insérer les batteries (2 ×1,5 V, type R03),
appuyez sur la face arrière de la télécommande
sur la flèche du couvercle et poussez le cou-
vercle vers le bas. Insérez les batteries comme
indiqué dans le compartiment, refermez le com-
partiment avec le couvercle.
En cas de non utilisation prolongée de la télé-
commande, retirez les batteries, elles pourraient
couler et endommager la télécommande.
2) Maintenez toujours la télécommande dans la
direction du capteur REMOTE (8) lorsque vous
activez une touche. Il ne faut aucun obstacle
entre la télécommande et le capteur.
3) Si la portée de la télécommande diminue, les bat-
teries sont vraisemblablement épuisées et doi-
vent être remplacés.
Ne jetez pas les batteries usagées ou les
accumulateurs défectueux dans la pou-
belle domestique, déposez-les dans un
container spécifique ou ramenez-les chez
votre revendeur.
Attention !
Si lʼalimentation fantôme est connectée, il ne
faut pas brancher des microphones avec sortie
asymétrique aux entrées, car ils peuvent être
endommagés.
stratore a cassette). Nel caso di collegamento agli
ingressi INPUT 1 a INPUT 4 premere fino allo scatto
il relativo commutatore MIC/LINE (29).
5.4 Inserire un equalizzatore o
un altro apparecchio
Per una regolazione esterna dei toni è possibile
inserire, attraverso le prese PRE OUT e AMP IN
(26), p. es. un equalizzatore.
1) Sfilare il ponticello fra i contatti PRE OUT e AMP
IN. In questo modo si separano il preamplifica-
tore e lʼamplificatore finale.
2) Collegare lʼingresso dellʼapparecchio con la
presa PRE OUT.
3) Collegare lʼuscita dellʼapparecchio con la presa
AMP IN.
N.B.: Lʼamplificatore rimane muto se lʼapparecchio inse-
rito non è acceso, se è difettoso o non collegato corretta-
mente.
5.5 Amplificatore supplementare
Se sono richiesti più altoparlanti di quanto ammessi
per lʼamplificatore, è necessario un amplificatore
supplementare. Collegare lʼingresso dellʼamplifica-
tore supplementare con la presa LINE OUT (27). Il
livello dʼuscita della presa è indipendente dal regola-
tore MASTER (14).
5.6
Alimentazione e alimentazione di emergenza
1) Se lʼamplificatore deve continuare a funzionare
anche in caso di unʼeventuale caduta di rete, alla
morsettiera 24 V DC (23) si deve collegare unʼu-
nità di alimentazione dʼemergenza 24 V (p. es. PA-
24ESP della MONACOR). Per maggiore comodi-
tà, la morsettiera può essere sfilata dal connettore.
N.B.: Se ai contatti DC POWER 24 V DC è presente
la tensione di 24 V proveniente dal gruppo di conti-
nuità, lʼamplificatore non può essere spento con lʼin-
terruttore POWER (17). In caso di caduta di rete e se
è spento, lʼamplificatore passa automaticamente
allʼalimentazione dʼemergenza.
2) Alla fine inserire il cavo rete in dotazione dap-
prima nella presa (20) e quindi in una presa di
rete (230 V~/50 Hz).
6 Funzionamento
1) Prima della prima accensione portare i regolatori
INPUT 1 a 4 (13) nonché i regolatori AUX (18) e
MASTER (14) in posizione “0”.
2) Accendere lʼamplificatore con lʼinterruttore
POWER (17). Dopo lʼaccensione si accende il
LED ON (16).
3) Con il tasto AUX/MP3 (19) si seleziona la sor-
gente per il canale AUX:
Per la riproduzione interna di un CD premere il
tasto; il LED sopra il tasto si accende.
Per selezionare lʼingresso AUX IN (28) sbloccare
il tasto; il LED sopra il tasto non deve essere
acceso.
4) Aprire il regolatore MASTER (14) al punto da
poter sentire le impostazioni più vicine.
5) Portare i regolatori degli ingressi INPUT 1 a 4
(13) nonché il regolatore AUX (18) sul valore
desiderato. Portare i regolatori dei canali liberi
sullo zero.
6) Impostare il tono ottimale con i regolatori BASS e
TREBLE (12).
7) Impostare il volume globale con il regolatore prin-
cipale MASTER (14). La catena dei 5 LED (15)
indica il livello dʼuscita. Per una regolazione otti-
male impostare il regolatore in modo tale che il
LED rosso “+3” per poco non si accende.
6.1 Funzione Talkover del canale 1
Attraverso il canale INPUT 1 si possono fare degli
avvisi durante un programma di musica. In questo
caso, il volume degli altri canali viene abbassato au-
tomaticamente di 40 dB. Per attivare tale funzione,
premere fino allo scatto il tasto AUTOTALK (31).
6.2 Lettore CD
Se dopo lʼaccensione dellʼamplificatore, nel lettore
non si trova nessun CD, il display (7) segnala “NO
DISC“. Altre indicazioni del display sono descritte
nel capitolo 6.2.2.
6.2.1 Telecomando
1) Per inserire le batterie (2 × 1,5 V, AAA ministilo)
esercitare una pressione sulla freccia del coper-
chio sul retro del telecomando e spingere il
coperchio verso il basso. Inserire le batterie
come segnato nel vano batterie. Richiudere il
vano batterie con il suo coperchio.
In caso di non utilizzo prolungato togliere le
batterie per escludere che il telecomando venga
danneggiato dalle batterie che eventualmente
possono perdere.
2)
Se si aziona un tasto, tenere il telecomando sem-
pre in direzione del sensore REMOTE (8). Non ci
devono essere degli ostacoli fra il telecomando e il
sensore.
3) Se la portata del telecomando diminuisce vuol
dire che le batterie sono probabilmente scariche
e che devono essere sostituite.
6.2.2 Riprodurre da CD, disco rigido o
chiavetta USB
1) Inserire un CD con la scritta rivolta in alto nella
fessura dʼinserimento (1) finché non viene intro-
dotta automaticamente.
2) In più o in alternativa è possibile inserire una
chiavetta USB nella porta USB (6) o collegare un
disco rigido con quella porta. Per attivare il colle-
Non gettare le batterie scariche nelle im-
mondizie di casa, bensì negli appositi con-
tenitori (p. es. presso il vostro rivenditore).
15
I
F
B
CH

6.2.2 Lecture de CD, disque dur ou clé USB
1)
Insérez un CD, inscription vers le haut dans la fente
(1) jusquʼà ce quʼil soit automatiquement inséré.
2)
Il est possible en plus ou à la place, de placer une
clé USB dans le port USB (6) ou de brancher un
disque dur à la connexion USB. Pour commuter sur
la connexion USB, enfoncez la touche USB (10),
pour passer sur le CD, enfoncez la touche CD (11).
3) Une fois le support de données reconnu (CD, clé
USB ou disque dur), lʼaffichage indique les infor-
mations suivantes :
–pour un CD sans fichiers MP3, p. ex. :
TR21 60:22 CD
support données
durée totale (min, sec)
nombre de titres
–pour un CD avec fichiers MP3, p. ex. :
5 149
nombre de titres
nombre de dossiers
–pour un disque dur ou une clé USB, p. ex. :
12 218 Flash
connexion USB
nombre de titres
nombre de dossiers
4) Avec la touche PLAY/PAUSE (4), démarrez la
lecture du premier titre. Pour sélectionner un
autre titre, voir chapitre 6.2.4.
5) Pendant la lecture, sur la ligne supérieure de lʼaf-
fichage, le symbole de lecture sʼaffiche. La ligne
inférieure indique le numéro (TR...) du titre en
cours et la durée déjà écoulée (min, sec) du titre.
Pour des fichiers MP3, défile en plus sur la
ligne supérieure le nom du titre (Title : ...), de lʼin-
terprète ou du groupe (Artist : ...) et de lʼalbum
(Album : ...). Le nom du fichier (File-...) nʼest indi-
qué quʼune fois la lecture démarrée. Si une don-
née est manquante, lʼaffichage indique par
exemple “Title : Unknown” ou “Artist : None”. Par
une pression sur la touche DISPLAY (35) sur la
télécommande, on peut, pour des fichiers MP3,
afficher dʼautres informations dans la ligne infé-
rieure de lʼaffichage :
réglage de base
dans la ligne inférieure, le numéro du titre et la
durée lue du titre sont affichés
1ère pression le nom du dossier est affiché
2ème pression le nom du titre est affiché
3ème pression le nombre de dossiers et de ti-
tres est affiché
4ème pression retour au réglage de base
6) Avec la touche PLAY/PAUSE, on peut commuter
entre lecture et pause. En mode pause, le sym-
bole sʼaffiche, la donnée de durée clignote.
7) Pour éjecter le CD, appuyez sur la touche EJECT
(5). Lʼaffichage indique “EJECT”, le CD est éjecté
et peut être retiré. Si le CD nʼest pas retiré de la
fente, lʼappareil lʼavale automatiquement après
10 secondes environ.
6.2.3 Fonction démarrage automatique du CD
Si pendant la lecture dʼun titre, lʼamplificateur est
éteint avec lʼinterrupteur POWER (17), puis ensuite
rallumé, la lecture démarre automatiquement après
30 secondes environ.
Déconnexion de la fonction automatique
Si après lʼallumage de lʼamplificateur, la lecture ne
doit pas démarrer automatiquement, il faut déplacer
le cavalier JMP2 dans lʼamplificateur.
Si une alimentation de secours est reliée, séparez-la
des bornes 24 VDC (23) pour mettre lʼamplificateur
hors circuit.
1) Dévissez le couvercle du boîtier.
2) Mettez le cavalier JMP2 sur le petit circuit imprimé
(schéma 9) entre le module lecteur CD et le circuit
imprimé avec les entrées, sur la position OFF.
schéma 9 démarrage automatique (ON)
ou désactivé (OFF)
3) Refermez lʼamplificateur avec le couvercle du
boîtier.
6.2.4 Sélection de titres
A Sélection directe du numéro de titre
Sélectionnez directement le titre voulu avec les
touches numériques (33) en tapant son numéro.
Pour démarrer le titre, appuyez ensuite sur la touche
PLAY/PAUSE (4). Exemples :
numéro titre touches
4 4, PLAY/PAUSE
27 2, 7, PLAY/PAUSE
135 1, 3, 5, PLAY/PAUSE
B Avance et retour de titres
Pour avancer ou reculer dʼun ou plusieurs titres,
appuyez brièvement sur la touche UP/CUE ou
DOWN/REV (3).
touche UP/CUE : saut au titre suivant
touche DOWN/REV : saut au début du titre en cours.
Par une autre pression sur la touche DOWN/REV,
on recule toujours dʼun titre.
Conseil : nʼappuyez que brièvement sur les touches
DOWN/REV et UP/CUE sinon on a une avance/un retour
rapide.
CON2
IC1
JMP2
CON1
OFF
Q1
ON
Automatic
start
AVERTISSEMENT Seul un personnel qualifié
peut effectuer la modification.
Avant dʼouvrir lʼamplificateur,
débranchez le cordon secteur
de la prise sinon, il y a risque
de décharge électrique !
gamento USB premere il tasto USB (10), per
passare al CD premere il tasto CD (11).
3) Dopo aver riconosciuto il supporto dati (CD, chia-
vetta USB o disco rigido), il display indica le
seguenti informazioni:
–con un CD senza file MP3 p. es.:
TR21 60:22 CD
Supporto dati
Durata complessiva (min. : sec.)
Numero titoli
–con un CD con file MP3 p. es.:
5 149
Numero titoli
Numero cartelle
–con un disco rigido o con una chiavetta USB
p. es.:
12 218 Flash
Porta USB
Numero titoli
Numero cartelle
4) Con il tasto PLAY/PAUSE (4) avviare la riprodu-
zione del primo titolo. Per scegliere un altro titolo
vedi capitolo 6.2.4.
5) Durante la riproduzione, nella riga superiore del
display si vede il simbolo di riproduzione . La
riga inferiore indica il numero (TR …) del titolo
attuale e il tempo già trascorso (min. : sec.) del
titolo.
Nel caso di file MP3, nella riga superiore si
vede scorrendo anche il nome del titolo (Title: …),
dellʼinterprete o del gruppo (Artist: …) e dellʼalbo
(Album: …). Il nome del file (File-…) viene indi-
cato solo una volta dopo lʼavvio della riprodu-
zione. Se manca unʼinformazione, il display
segnala p. es. “Title : Unknown” o “Artist : None”.
Premendo il tasto DISPLAY (35) sul teleco-
mando, per i file MP3 si possono visualizzare
varie informazioni nella riga inferiore del display:
Impostazione base
Nella riga inferiore è indicato il numero del
titolo con il tempo trascorso del titolo
1. pressione del tasto
È indicato il nome della cartella
2. pressione del tasto
È indicato il nome del titolo
3. pressione del tasto
È indicato il numero delle cartelle e dei titoli
4. pressione del tasto
Ritorno allʼimpostazione base
6) Con il tasto PLAY/PAUSE si può cambiare fra
riproduzione e pausa. Nella modalità di pausa si
vede il simbolo di pausa , e lʼindicazione del
tempo sta lampeggiando.
7) Per espellere il CD premere il tasto EJECT (5). Il
display indica “EJECT”, il CD esce e può essere
prelevato. Se il CD non viene tolto dalla fessura
di inserimento, dopo 10 s circa il lettore lo ritira di
nuovo automaticamente.
6.2.3 Funzione dʼavvio automatico del CD
Se durante la riproduzione di un titolo si spegne
lʼamplificatore con lʼinterruttore di rete POWER (17)
e se lo si riaccende successivamente, la riprodu-
zione si avvia automaticamente dopo 30 secondi ca.
Disattivare lʻautomatismo
Se dopo lʼaccensione non si desidera che la ripro-
duzione si avvii automaticamente, nellʼamplificatore
occorre spostare il jumper JMP2.
Se è collegato un gruppo di continuità, staccarlo dai
contatti 24 V DC (23), per mettere fuori uso lʼamplifi-
catore.
1) Svitare il coperchio del contenitore.
2) Sulla scheda piccola (fig. 9), fra il modulo del let-
tore CD e la scheda con gli ingressi, portare il
jumper JMP2 in posizione OFF.
Fig. 9 Avvio automatico attivato (ON) o disattivato (OFF)
3) Rimettere il coperchio.
6.2.4 Scelta del titolo
A Scelta diretta del numero del titolo
Con i tasti numerici (33) si può scegliere un titolo
direttamente digitando il suo numero. Per avviare
poi il titolo, premere il tasto PLAY/PAUSE (4).
Esempi:
N. titolo Tasti
4 4, PLAY/PAUSE
27 2, 7, PLAY/PAUSE
135 1, 3, 5, PLAY/PAUSE
B Saltare dei titoli in avanti o indietro
Per saltare in avanti o indietro uno o più titoli, pre-
mere brevemente rispettivamente il tasto UP/CUE o
DOWN/REV (3).
Tasto UP/CUE: per saltare al titolo successivo
Tasto DOWN/REV: per saltare allʼinizio del titolo
attuale. Premendo ancora il tasto DOWN/REV si
salta indietro ogni volta di un altro titolo.
N. B.: I tasti DOWN/REV e UP/CUE devono essere pre-
muti solo brevemente, altrimenti si attiva lʼavanzamento o
il ritorno veloce.
CON2
IC1
JMP2
CON1
OFF
Q1
ON
Automatic
start
AVVERTIMENTO Lo spostamento del jumper
deve essere fatto solo da perso-
nale qualificato. Prima di aprire
lʼamplificatore, staccare al spina
dalla rete, altrimenti esiste il
pericolo di una scarica elettrica!
16
I
F
B
CH

C Recherche alphabétique sur des CDs MP3
1) Appuyez sur la touche FIND (38). La ligne infé-
rieure de lʼaffichage indique “A–......” et le premier
titre commençant par la lettre A démarre.
2) Avec la touche UP/CUE [avance], ou DOWN/
REV (3) [retour], sélectionnez la lettre débutant le
titre recherché. Les chiffres 0 à 9 peuvent être
sélectionnés. Les lettres et chiffres qui ne débu-
tent aucun titre sur le CD sont toujours repérés
par “None”.
3) Appuyez sur la touche PLAY/PAUSE (4). Si plu-
sieurs titres ont la même lettre initiale, allez au
titre voulu en appuyant sur la touche UP/CUE,
une fois la touche PLAY/PAUSE enfoncée.
Remarque : lors de la lecture de fichiers MP3 via lʼinter-
face USB (6), la recherche alphabétique ne peut pas être
utilisée.
D Sélection de dossiers pour des fichiers MP3
Pour des supports de données avec fichiers MP3 et
plusieurs dossiers (répertoires de fichiers), les titres
peuvent être lus dans lʼordre suivant :
1. tous les titres sur la plage principale (sans dos-
siers), indiqué comme dossier “ROOT”
2. tous les titres dans les dossiers sur la plage prin-
cipale
3. tous les titres dans les sous-dossiers etc.
Avec les touches FOLDER SKIP (9), on peut sélec-
tionner les dossiers dans cet ordre ou dans lʼordre
inverse. On saute toujours au premier titre dans un
dossier. Avec la touche UP/CUE ou DOWN/REV
(3), on peut sélectionner dʼautres titres dans le dos-
sier.
En mode Stop, la ligne supérieure de lʼaffichage
indique, après une pression sur une des touches
FOLDER SKIP, le nom du dossier. Pour, pendant la
lecture, ou en mode pause, afficher le nom du dos-
sier, commuter la ligne inférieure de lʼaffichage en
conséquence, avec la touche DISPLAY (35) de la
télécommande ( ……).
6.2.5 Avance et retour rapides
Pendant la lecture, on peut faire une avance et
retour rapides avec les touches UP/CUE et DOWN/
REV (3) : pour lʼavance rapide, maintenez la touche
UP/CUE enfoncée, pour un retour rapide, la touche
DOWN/REV. Pour des fichiers MP3, une avance ou
retour rapide ne peut se faire quʼau sein dʼun titre et
ne peut être suivie acoustiquement.
6.2.6 Fonctions répétition et lecture aléatoire
Avec la touche PLAY MODE (35), on peut activer
une des fonctions répétition et la lecture de tous les
titres en ordre aléatoire :
Réglage de base (PLAY ALL)
Tous les titres du support de données ou dʼune
suite programmée sont lus une fois puis lʼappa-
reil commute sur le mode Stop.
Première pression (PLAY ALL RANDOM)
une seule lecture de tous les titres dans un ordre
aléatoire
Pression suivante (REPEAT TRACK)
répétition continue du titre sélectionné
Pression suivante (REPEAT FOLDER)
répétition continue de tous les titres dans le dos-
sier sélectionné (fonction uniquement pour des
fichiers MP3)
Pression suivante (REPEAT ALL)
répétition continue de tous les titres
Pression suivante (RANDOM REPEAT)
lecture continue des titres dans un ordre aléa-
toire
Pression suivante (PLAY ALL)
retour au réglage de base
6.2.7 Coupure du son
Pour couper le son du lecteur CD, appuyez sur la
touche MUTE (36). Pour rallumer le son, appuyez
une nouvelle fois sur la touche MUTE.
6.2.8 Composition personnelle
dʼune suite de titres
Si, à partir dʼun support de données, seuls quelques
titres doivent être lus dans un ordre donné, on peut
programmer une suite de 10 titres au plus.
1) Le lecteur CD doit être en mode Stop ; si besoin,
appuyez sur la touche STOP (2).
2) Avec la touche PROG (37), activez le mode de
programmation ; toutes les autres touches doi-
vent être enfoncées en lʼespace de 10 secondes
sinon on quitte le mode de programmation. Dans
ce cas, appuyez une nouvelle fois sur la touche
PROG. Lʼaffichage indique :
–pour un CD sans fichiers MP3
MEM
TR00 P-01 CD
–pour un CD avec fichiers MP3
MEM P-01
000 0000
3) Pour des CDs sans fichiers MP3, sautez cet
étape et allez directement au point 4).
Pour des fichiers MP3, il faut tout dʼabord
sélectionner le numéro du dossier dans lequel se
trouve le premier titre souhaité pour la suite. Il est
également nécessaire que tous les fichiers soient
mémorisés sur le support de données, sur la
plage principale ROOT sans dossier. La plage
principale est alors considérée comme dossier 1.
Sʼil existe des fichiers sans dossier sur la
plage principale, tous les dossiers sur la plage
principale à partir du numéro 2, sont numérotés
en ordre alphabétique croissant. Si ce nʼest pas le
cas, la numérotation commence pour les dossiers
avec le numéro 1. Ensuite, suivent tous les sous-
dossiers et si besoin les sous sous-dossiers.
Sélectionnez le numéro de dossier avec les
touches DOWN/REV et UP/CUE (3) ou, tapez-le
avec les touches numériques (33). Pour mémori-
ser, appuyez ensuite sur la touche PROG. Les
trois zéro sous la ligne “MEM” clignotent incitant
à taper le numéro du titre.
C Ricerca alfabetica su CD con MP3
1) Premere il tasto FIND (38). La riga inferiore del
display indica “A–……” e il primo titolo che inizia
con la lettera A.
2) Con il tasto UP/CUE [in avanti] o DOWN/REV (3)
[indietro] scegliere la lettera con la quale inizia il
titolo cercato. Si possono scegliere anche le cifre
0 – 9. Lettere e cifre con le quali non inizia nessun
titolo sul CD sono contrassegnate con “None”.
3) Premere il tasto PLAY/PAUSE (4). Se sono pre-
senti più titoli che iniziano con la medesima lettera,
dopo la pressione del tasto PLAY/PAUSE, con il
tasto UP/CUE si può saltare sul titolo desiderato.
N.B.: Riproducendo dei file MP3 attraverso la porta USB
(6), la ricerca alfabetica non è possibile.
D Scelta della cartella con file MP3
Nei supporti dati con file MP3 e con più cartelle, i
titoli sono riprodotti nel seguente ordine:
1. tutti i titoli sul livello principale (senza cartelle),
indicato come ”ROOT”
2. tutti i titoli in cartelle sul livello principale
3. tutti i titoli in sottocartelle ecc.
Con i tasti FOLDER SKIP (9) è possibile scegliere le
cartelle in questo ordine o in ordine inverso. Si sal-
terà sempre sul primo titolo della cartella. Con il
tasto UP/CUE o DOWN/REV (3) si possono sce-
gliere altri titoli nella cartella.
Nella modalità di Stop, la riga superiore del display,
dopo la pressione di uno dei tasti FOLDER SKIP,
indica il nome della cartella. Per visualizzare il nome
della cartella durante la riproduzione o in pausa, cam-
biare lʼindicazione della riga inferiore del display con il
tasto DISPLAY (35) sul telecomando [ ……].
6.2.5 Avanzamento / ritorno veloce
Durante la riproduzione, con i tasti UP/CUE e
DOWN/REV (3) si attiva lʼavanzamento e il ritorno
veloce: per lʼavanzamento veloce tener premuto il
tasto UP/CUE, per il ritorno veloce il tasto
DOWN/REV. Con i file MP3, lʼavanzamento o il
ritorno è possibile solo allʼinterno dello stesso titolo e
non può essere seguito acusticamente.
6.2.6 Funzioni di ripetizione e
riproduzione casuale
Con il tasto PLAY MODE (35) si può attivare una
delle funzioni di ripetizione e la riproduzione dei titoli
in ordine casuale:
impostazione base (PLAY ALL)
si riproducono una volta tutti i titoli del supporto
dati o di una sequenza programmata di titoli;
quindi lʼapparecchio va nella modalità di Stop.
prima pressione del tasto (PLAY ALL RANDOM)
riproduzione per una volta dei titoli in ordine
casuale
altra pressione del tasto (REPEAT TRACK)
ripetizione continua del titolo scelto
altra pressione del tasto (REPEAT FOLDER)
ripetizione continua di tutti i titoli nella cartella
scelta (solo con file MP3)
altra pressione del tasto (REPEAT ALL)
ripetizione continua di tutti i titoli
altra pressione del tasto (RANDOM REPEAT)
riproduzione continua dei titoli in ordine casuale
altra pressione del tasto (PLAY ALL)
ritorno allʼimpostazione base
6.2.7 Audio muto
Per rendere muto lʼaudio del lettore CD, premere il
tasto MUTE (36). Per riattivare lʼaudio, premere di
nuovo il tasto MUTE.
6.2.8 Creare una compilation personale
Se di un supporto dati si vogliono riprodurre solo
alcuni titoli in un determinato ordine, è possibile pro-
grammare una sequenza di un massimo di 10 titoli.
1) Il lettore CD/MP3 deve trovarsi nella modalità di
Stop; eventualmente premere il tasto STOP (2).
2) Con il tasto PROG (37) attivare la modalità di
programmazione. Tutti gli altri tasti devono
essere premuti sempre entro 10 secondi, altri-
menti si esce dalla modalità di programmazione.
In questo caso premere di nuovo il tasto PROG.
Il display indica:
–con un CD senza file MP3
MEM
TR00 P-01 CD
–con un CD con file MP3
MEM P-01
000 0000
3) Nei CD senza file MP3 saltare questo passo e
continuare direttamente con il passo n. 4.
Nei file MP3 si deve dapprima scegliere il
numero della cartella nella quale si trova il primo
titolo desiderato per la sequenza. Ciò è impor-
tante anche se tutti i file sono memorizzati senza
cartella nella root del supporto dati. Il livello prin-
cipale sarà contrassegnato con cartella 1.
Se sul livello principale si trovano dei file
senza cartelle, le cartelle sul livello principale, a
partire dalla cartella numero 2, vengono nume-
rate in ordine alfabetico crescente. Altrimenti, la
numerazione per le cartelle inizia con il numero 1.
Seguono tutte le sottocartelle e eventuali cartelle
subordinate ecc.
Scegliere il numero cartella con i tasti DOWN/
REV e UP/CUE (3) oppure digitarlo con i tasti
numerici (33). Per memorizzare premere quindi il
tasto PROG. I tre zeri sotto lʼindicazione “MEM”
lampeggiano come invito a impostare il numero
del titolo.
4) Scegliere il numero del primo titolo per la
sequenza con i tasti DOWN/REV e UP/CUE (3)
oppure digitarlo con i tasti numerici (33). Nel caso
di file MP3 nelle cartelle, tener presente che ora
non sono numerati tutti i file, ma che il primo file
in una cartella è sempre segnato con il numero 1.
5) Per memorizzare premere il tasto PROG. Il
display indica il numero successivo per la memo-
rizzazione, p. es. “P-02”.
17
I
F
B
CH

4) Sélectionnez le numéro du premier titre pour la
suite avec les touches DOWN/REV et UP/CUE
(3) ou avec les touches numériques (33), tapez-
le. Pour des fichiers MP3 dans des dossiers,
nʼoubliez pas que les fichiers ne sont pas numé-
rotés les uns à la suite des autres mais que le
premier fichier dans un dossier est repéré par
numéro 1.
5) Appuyez sur la touche PROG pour mémoriser.
Lʼaffichage indique le prochain numéro de lʼem-
placement de mémoire, par exemple “P-02”.
6) Répétez les étapes (3), 4 et 5 pour les autres ti-
tres souhaités jusquʼà complète programmation.
7) Pour démarrer la lecture de la suite, appuyez sur
la touche PLAY/PAUSE (4). La ligne supérieure
de lʼaffichage indique “MEM” pour Memory
(mémoire) et la suite de titres est lue.
8) Avec les touches DOWN/REV et UP/CUE, on
peut sélectionner chaque titre de la suite ou, acti-
ver la fonction avance/retour rapides au sein dʼun
titre en maintenant la touche correspondante
enfoncée.
9) Une fois la suite lue ou si vous appuyez sur la
touche STOP, le lecteur CD passe en mode Stop.
Pour redémarrer une suite, enfoncez tout dʼabord
la touche PROG puis la touche PLAY/PAUSE.
Conseil : une suite programmée de titres est effacée lors-
quʼon change de supports de données, lorsquʼon appuie
sur la touche STOP en mode programmation et si on
arrête lʼappareil.
6.2.9 Remarques sur les coupures du son et les
erreurs de lecture
La fumée de cigarettes et la poussière sʼintroduisent
facilement dans les ouvertures du lecteur et se
déposent sur lʼoptique du système laser. Cela peut
générer des erreurs de lecture et des coupures de
son, donc, le nettoyage du lecteur doit être confié à
un technicien spécialisé. Cette opération est à la
charge de lʼutilisateur, même lorsque lʼappareil est
sous garantie !
7 Caractéristiques techniques
Puissance de sortie : . . . . 120 WRMS, 160 WMAX
Sorties
Haut-parleurs* : . . . . . . min. 4 Ω, 70 V, 100 V
Line Out : . . . . . . . . . . . 1 V/600 Ω
Pre Out : . . . . . . . . . . . . 1 V/600 Ω
Entrées
Input 1 – 4 : . . . . . . . . . . Mic 1,5 mV/1,1 kΩ
commutable sur
Ligne 300 mV/14 kΩ ;
XLR, symétrique
Aux : . . . . . . . . . . . . . . . 300 mV/50 kΩ ;
RCA, asymétrique
Amp In : . . . . . . . . . . . . 1 V/14kΩ ; RCA, asymé-
trique
Bande passante : . . . . . . . 50 – 15 000 Hz, ±3 dB
Taux de distorsion : . . . . . 1 % à 120 WRMS
Rapport signal/bruit : . . . . > 92 dB
Réglage de tonalité
Graves : . . . . . . . . . . . . ±10 dB/100 Hz
Aigus : . . . . . . . . . . . . . ±10 dB/10 kHz
Température de fonc. : . . . 0 – 40 °C
Alimentation
Tension secteur : . . . . . 230 V~/50 Hz
Consommation : . . . . . . 300 VA
Alimentation de secours : 24 V /9 A
Dimensions (L ×H ×P) : . 430 ×89 ×380 mm,
2 unités
Poids : . . . . . . . . . . . . . . . 11,7 kg
* Utilisez soit les sorties 70 V ou 100 V soit la sortie 4 Ω !
Tout droit de modification réservé.
6) Ripetere i passi (3), 4 e 5 per tutti gli altri titoli desi-
derati finché lʼintera sequenza è programmata.
7) Per avviare la sequenza, premere il tasto PLAY/
PAUSE (4). La riga superiore del display segnala
“MEM” per Memory, e la sequenza viene ripro-
dotta.
8) Con i tasti DOWN/REV e UP/CUE si possono sce-
gliere tutti i titoli della sequenza, oppure, tenendo
premuto il relativo tasto, si può attivare lʼavanza-
mento/ritorno veloce allʼinterno di un titolo.
9) Dopo la riproduzione della sequenza, oppure
premendo il tasto STOP, il lettore CD si mette
nella modalità di Stop. Per avviare nuovamente
la sequenza di titoli, premere dapprima il tasto
PROG e quindi il tasto PLAY/PAUSE.
N.B.: Una sequenza programmata di titoli viene cancel-
lata con il cambio del supporto dati, con la pressione del
tasto STOP nella modalità di programmazione e con lo
spegnimento dellʼapparecchio.
6.2.9 Note su possibili errori di lettura
Il fumo di sigarette e la polvere penetrano facilmente
fra tutte le aperture dellʼapparecchio e si depositano
sul sistema ottico della scansione ai raggi laser. Se
questo deposito dovesse provocare errori di lettura
e buchi nella riproduzione, lʼapparecchio deve
essere pulito in un laboratorio specializzato. Una
tale pulizia è a pagamento, anche durante il periodo
di garanzia!
7 Dati tecnici
Potenza dʼuscita: . . . . . . . 120 WRMS, 160 WMAX
Uscite
Altoparlanti*: . . . . . . . . . min. 4 Ω, 70 V, 100 V
Line Out: . . . . . . . . . . . . 1 V/600 Ω
Pre Out: . . . . . . . . . . . . 1 V/600 Ω
Ingressi
Input 1 – 4: . . . . . . . . . . Mic 1,5 mV/1,1 kΩ
commutabile a Line
300 mV/14 kΩ;
XLR, simmetrico
Aux: . . . . . . . . . . . . . . . 300 mV/50 kΩ;
RCA, asimmetrico
Amp In: . . . . . . . . . . . . . 1 V/14 kΩ;
RCA, asimmetrico
Gamma passante: . . . . . . 50 – 15 000 Hz, ±3 dB
Fattore di distorsione: . . . 1 % a 120 WRMS
Rapporto S/R: . . . . . . . . . > 92 dB
Regolazione toni
bassi: . . . . . . . . . . . . . . ±10 dB/100 Hz
alti: . . . . . . . . . . . . . . . . ±10 dB/10 kHz
Temperatura dʼesercizio: . 0 – 40 °C
Alimentazione
Tensione di rete . . . . . . 230 V~/50 Hz
Assorbimento: . . . . . . . 300 VA
Alimentazione
dʼemergenza: . . . . . . . . 24 V /9 A
Dimensioni (l × h × p): . . . 430 × 89 × 380 mm,
2RS
Peso: . . . . . . . . . . . . . . . . 11,7 kg
* Usare ole uscite 70 V e 100 V oppure lʼuscita 4 Ω!
Con riserva di modifiche tecniche.
18
I
F
B
CH
Notice dʼutilisation protégée par le copyright de MONACOR
®
INTERNATIONAL GmbH & Co. KG. Toute
reproduction même partielle à des fins commerciales est interdite.
La MONACOR
®
INTERNATIONAL GmbH & Co. KG si riserva ogni diritto di elaborazione in qualsiasi forma
delle presenti istruzioni per lʼuso. La riproduzione – anche parziale – per propri scopi commerciali è vietata.

19

Abrir el presente libro página 3 de manera a
visualizar los elementos y las conexiones
Contenidos
1 Elementos y conexiones . . . . . . . . . . . . . 20
1.1 Parte delantera . . . . . . . . . . . . . . . . . . . . . . 20
1.2 Parte trasera . . . . . . . . . . . . . . . . . . . . . . . . 20
1.3 Control remoto . . . . . . . . . . . . . . . . . . . . . . . 21
2 Consejos de utilización y seguridad . . . . 21
3 Posibilidades de utilización . . . . . . . . . . . 22
4 Instalación del aparato . . . . . . . . . . . . . . . 22
4.1 Instalación en rack . . . . . . . . . . . . . . . . . . . 22
5 Conexión del amplificador Public Adress
22
5.1 Altavoces . . . . . . . . . . . . . . . . . . . . . . . . . . . 22
5.2 Micros . . . . . . . . . . . . . . . . . . . . . . . . . . . . . 22
5.3 Aparatos con salida linea . . . . . . . . . . . . . . 23
5.4 Insertar un ecualizador u otro aparato . . . . 23
5.5 Amplificador suplementario . . . . . . . . . . . . . 23
5.6 Alimentación de red
y alimentación de socorro . . . . . . . . . . . . . . 23
6 Funcionamiento . . . . . . . . . . . . . . . . . . . . . 23
6.1 Función talkover del canal 1 . . . . . . . . . . . . 23
6.2 Lector CD . . . . . . . . . . . . . . . . . . . . . . . . . . 23
6.2.1 Control remoto . . . . . . . . . . . . . . . . . . . . . 23
6.2.2 Reproducción de un CD, disco duro
o lápiz USB . . . . . . . . . . . . . . . . . . . . . . . 23
6.2.3 Opción de inicio de CD automático . . . . . 24
6.2.4 Selección de Tema . . . . . . . . . . . . . . . . . . 24
6.2.5 Avanzar/retroceder . . . . . . . . . . . . . . . . . 25
6.2.6 Funciones de repetición
y reproducción aleatoria . . . . . . . . . . . . . . 25
6.2.7 Silenciar la reproducción . . . . . . . . . . . . . 25
6.2.8 Creación de una lista de temas . . . . . . . . 25
6.2.9 Consejos para los cortes de sonido
y los errores de lectura . . . . . . . . . . . . . . 26
7 Características técnicas . . . . . . . . . . . . . . 26
1 Elementos y conexiones
1.1 Parte delantera
1Ranura de CD; inserte el CD hasta que se intro-
duzca automáticamente.
2Tecla STOP para acabar la lectura
3Botones DOWN/REV y UP/CUE para la selec-
ción de temas y para avanzar/retroceder
Selección de tema
Cada vez que se pulsa el botón UP/CUE, el
aparato avanza un tema; cuando se pulsa el
botón DOWN/REV, el aparato va al inicio del
tema, y cada vez que se pulse, el aparato
retrocede un tema.
Avanzar/retroceder
Para el avance rápido, mantenga pulsado el
botón UP/CUE, y para el retroceso rápido el
botón DOWN/REV.
4Tecla PLAY/PAUSA para conmutar entre lectura
y pausa
5Botón EJECT para expulsar el CD.
6Puerto USB para insertar un lápiz de memoria
USB o para conectar un disco duro.
7Visualización
8Sensor infrarrojo para las señales del control
remoto.
9Botones FOLDER SKIP; con archivos MP3 se
selecciona el primer tema en otro directorio, para
seleccionar más temas:
Utilice el botón izquierdo para ir al primer tema
del directorio previo y el botón derecho para ir al
primer tema del siguiente directorio. Para ir a los
siguientes temas o a los anteriores durante la
reproducción, mantenga un botón pulsado.
10 Botón USB para seleccionar la interfaz USB (6).
11 Botón CD para seleccionar el CD insertado.
12 Ecualizador
BASS = reglaje de graves, ±10 dB/100 Hz
TREBLE = reglaje de los agudos, ±10 dB/10 kHz
13 Potenciómetros de reglaje del volumen para los
canales mono INPUT 1 a INPUT 4
14 Potenciómetro de reglaje MASTER para el volu-
men total
15 Pantalla de nivel
16 Testigo de funcionamiento
17 Interruptor POWER (marcha/paro)
18 Potenciómetro de reglaje del volumen para la
fuente de señal conectada a la entrada AUX IN
(28) [tecla AUX/MP3 (19) no pulsada] o para el
volumen del lector interno de CD [tecla AUX/MP3
pulsada]
19 Tecla AUX/MP3
tecla pulsada: el lector CD interno está selec-
cionado (el LED encima de la
tecla brilla)
tecla no pulsada: la entrada AUX IN (28) está se-
leccionada
1.2 Parte trasera
20 Toma para conectar a un enchufe (230 V~/
50 Hz) vía el cable de conexión entregado
21 Porta-fusible; todo fusible dañado debe cam-
biarse sólo por un fusible de mismo tipo
22 Tuerca para una conexión masa posible (por
ejemplo en caso de problemas de zumbidos)
23 Bornes* para una tensión de alimentación de
socorro (24 V )
24 Bornes* para conectar altavoces
Proszę otworzyć instrukcję obsługi na stronie 3,
gdzie znajdą Państwo opisywane elementy użyt-
kowe i gniazda połączeniowe.
Spis treści
1 Elementy sterujące
i gniazda połączeniowe . . . . . . . . . . . . . . . . 20
1.1 Panel przedni . . . . . . . . . . . . . . . . . . . . . . . 20
1.2 Panel tylni . . . . . . . . . . . . . . . . . . . . . . . . . . 20
1.3 Pilot zdalnego sterowania . . . . . . . . . . . . . . 21
2 Środki ostrożności . . . . . . . . . . . . . . . . . . 21
3 Zastosowanie . . . . . . . . . . . . . . . . . . . . . . . 22
4 Instalacja wzmacniacza . . . . . . . . . . . . . . 22
4.1 Instalacja rackowa . . . . . . . . . . . . . . . . . . . . 22
5 Podłączanie wzmacniacza . . . . . . . . . . . . 22
5.1 Głośniki . . . . . . . . . . . . . . . . . . . . . . . . . . . . 22
5.2 Mikrofony . . . . . . . . . . . . . . . . . . . . . . . . . . . 22
5.3
Urządzenia z wyjściem o poziomie liniowym
22
5.4
Podłączanie korektora lub innych urządzeń
.23
5.5 Dodatkowy wzmacniacz . . . . . . . . . . . . . . . 23
5.6 Zasilanie i zasilanie awaryjne . . . . . . . . . . . 23
6 Obsługa . . . . . . . . . . . . . . . . . . . . . . . . . . . 23
6.1 Funkcja talkover . . . . . . . . . . . . . . . . . . . . . 23
6.2 Odtwarzacz CD . . . . . . . . . . . . . . . . . . . . . . 23
6.2.1 Zdalne sterowanie . . . . . . . . . . . . . . . . . . 23
6.2.2 Odtwarzanie plików z CD, twardego
dysku lub pamięci przenośnej USB . . . . . 23
6.2.3 Funkcja automatycznego startu CD . . . . . 24
6.2.4 Wybór utworu . . . . . . . . . . . . . . . . . . . . . . 24
6.2.5 Szybkie przewijanie . . . . . . . . . . . . . . . . . 25
6.2.6 Funkcja powtarzania
i odtwarzanie losowe . . . . . . . . . . . . . . . . 25
6.2.7 Wyciszanie . . . . . . . . . . . . . . . . . . . . . . . . 25
6.2.8 Programowanie indywidualnej
kolejności odtwarzania . . . . . . . . . . . . . . . 25
6.2.9 Uwagi dotyczące niepoprawnego odtwar-
zania dźwięku oraz błędów odczytu . . . . . 26
7 Dane techniczne . . . . . . . . . . . . . . . . . . . . 26
1 Elementy sterujące
i gniazda połączeniowe
1.1 Panel przedni
1Wpust do płyty CD, wsunąć lekko płytę w szcze-
linę aż zostanie automatycznie wciągnięta
2Przycisk STOP – zatrzymanie odtwarzania
3Przyciski DOWN/REV oraz UP/CUE do przełą-
czania na następny/poprzedni utwór oraz do
szybkiego przewijania odtwarzanego utworu
Wybór utworów
Wciśnięcie przycisku UP/CUE powoduje
przejście do kolejnego utworu, wciśnięcie
przycisku DOWN/REV powoduje powrót do
początku odtwarzanego utworu (kolejne wci-
śnięcie tego przycisku powoduje przejście do
wcześniejszego utworu)
Szybkie przewijanie
W celu szybkiego przewinięcia odtwarzanego
utworu w przód lub w tył, należy przytrzymać
wciśnięty przycisk UP/CUE lub DOWN/REV.
4Przycisk PLAY/PAUSE – przełączanie pomiędzy
odtwarzaniem a pauzą
5Przycisk EJECT do wysuwania płyty CD
6Gniazdo USB do podłączania pamięci przeno-
śnej lub dysku USB
7Wyświetlacz
8Czujnik podczerwieni do odbioru sygnału z pilota
zdalnego sterowania
9Przyciski FOLDER SKIP do przełączania między
folderami w przypadku płyty z plikami MP3:
Wciśnięcie przycisku powoduje odtworzenie
pierwszego pliku z kolejnego/poprzedniego fol-
deru na płycie. Aby odtworzyć kolejne/wcześniej-
sze pliki z danego folderu należy przytrzymać
wciśnięty przycisk.
10 Przycisk USB do przełączenia na odtwarzanie pli-
ków z nośnika podłączonego do gniazda USB (6)
11 Przycisk CD do przełączenia na odtwarzanie pli-
ków z płyty CD
12 Regulatory barwy:
Regulator tonów niskich BASS = ±10 dB /100 Hz
Regulator tonów wysokich TREBLE = ±10 dB/
10 kHz
13 Regulatory głośności dla kanałów monofoni-
cznych INPUT 1 do INPUT 4
14 Regulator całkowitej głośności MASTER
15 Wskaźnik wysterowania
16 Wskaźnik zasilania POWER
17 Włącznik zasilania POWER
18 Regulator głośności dla źródła podłączonego do
gniazda AUX IN (28) [przycisk AUX/MP3 (19) nie
wciśnięty] lub też regulacja głośności dla zinte-
growanego odtwarzacza CD [przycisk AUX/MP3
wciśnięty]
19 Przycisk AUX/MP3
Przycisk wciśnięty: wybrany jest zintegrowany
odtwarzacz CD (zapalony
wskaźnik nad przyciskiem)
Przycisk nie
wciśnięty: wybrane jest wejście AUX IN
(28)
1.2 Panel tylni
20 Gniazdo do podłączenia kabla zasilającego do
sieci energetycznej (230 V~/50 Hz)
21 Gniazdo bezpiecznika
Uszkodzony bezpiecznik należy zastępować
jedynie bezpiecznikiem tego samego typu.
22 Zacisk zakręcany do podłączenia masy (np.: w
przypadku występowania przydźwięków)
23 Zaciski* do podłączenia zasilania awaryjnego
(24 V )
24 Gniazda* do podłączenia głośników
20
PL
E
* Es posible sacar los bornes para facilitar el acceso.
*Dla ułatwienia podłączania przewodów można odłą-
czyć terminale od urządzenia.
Table of contents
Other Monacor Amplifier manuals

Monacor
Monacor UVCA-22 User manual

Monacor
Monacor IPA-10 User manual

Monacor
Monacor TXA-820 User manual

Monacor
Monacor PA-2240 User manual

Monacor
Monacor PA-806DAP User manual

Monacor
Monacor TXA-110 User manual

Monacor
Monacor CARPOWER Power-4/600 User manual

Monacor
Monacor PA-2240 User manual

Monacor
Monacor SA-225 User manual

Monacor
Monacor PA-102 User manual

Monacor
Monacor PA-1960 User manual

Monacor
Monacor PA-1120 User manual

Monacor
Monacor VCA-202 User manual

Monacor
Monacor TXA-200ACCU User manual

Monacor
Monacor SLA-35 User manual

Monacor
Monacor AKB-90WIFI Quick guide

Monacor
Monacor PA-1960 User manual

Monacor
Monacor PA-4150 User manual

Monacor
Monacor WAP-7D User manual

Monacor
Monacor WAP-8 User manual