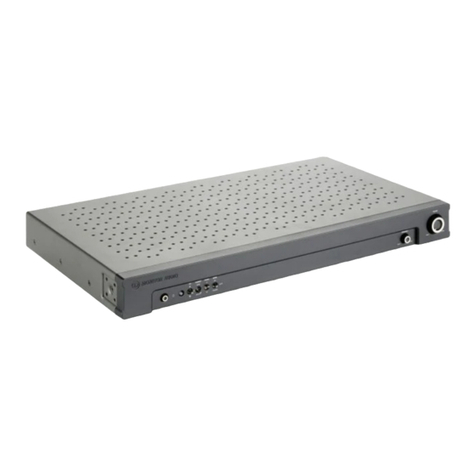
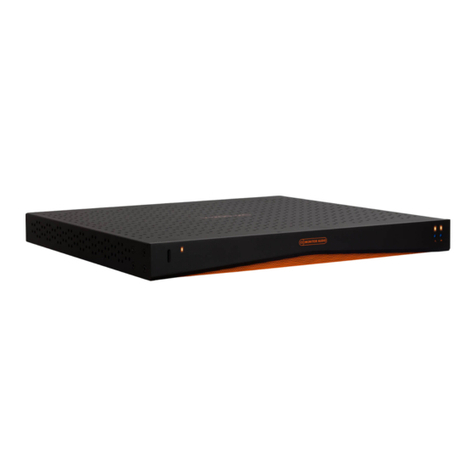
Monitor Audio IA40-3 User manual

Amplifier
Owners Manual


Contents
monitoraudio.com 1
ENGLISH
Setting Up the IA40-3 1
Standby and Sleep Settings 1
Remote Control Code Learning 1
Pairing with a Bluetooth Device 1
Front and Rear Panel Layout 2
Status LED Guide 3
Fitting the Mounting Bracket 3
Warranty 3
Owner Information 3
FCC & IC Radiation Exposure Statement 3
Specifications 4
Setting Up the IA40-3
Standby and Sleep Settings
There are two modes the IA40-3 can operate when
the Status LED is illuminated red, Standby or Sleep
mode. In Standby mode the IA40-3 can only be
turned on by pressing the Multi-Function Encoder
or through RS232 control. Setting the IA40-3 in the
sleep mode enables auto-on input signal sensing
and will turn the IA40-3 'On' when there is a signal
present and will automatically turn 'Off' when there
is no signal present for 5-7 minutes.
With the amplifier 'Off' (red Status LED) press and
hold the Multi-Function Encoder for approximately
10 seconds, or until LED starts blinking blue or green
for 3 seconds. If the Status LED blinks blue it is in
Sleep mode. If it blinks green it is in Standby mode.
To change the mode simply repeat the above.
The input switch is used for selecting between the
wired inputs. The analogue input (up position) uses
the 3.5mm wired jack input and the optical input
(downwards position) uses the wired SPDIF input.
Remote Control Code Learning
Note: This section must be completed
before any Bluetooth devices can be
paired.
1. Connect the supplied IR receiver to the
External IR port on the amplifier.
2. Connect the 33V AC power adaptor and turn
'On' the unit by pressing the Multi-Function
Encoder.
3. Press and hold the Multi-Function Endocder
on the unit it starts blinking purple (5 seconds).
4. Point any IR remote control (not supplied)
at the IR receiver and press the volume up
button 3 times, the Status LED will blink purple
3 times rapidly.
5. Repeat step 4 with the volume down button.
The Status LED will blink purple 3 times rapidly.
6. Repeat step 4 with the mute button. The
Status LED will blink purple 3 times rapidly
and then turn solid white. The amplifier is now
programmed and will respond to the remote
control volume commands.
Pairing with a Bluetooth Device
Note: Bluetooth devices cannot be
paired until a remote has been set up
with the amplifier, refer to the 'Remote Control
Codes Learning' section.
1. Turn the IA40-3 amplifier 'On' by pressing the
Multi-Function Encoder. The Status LED will
turn white.
2. Press and hold the mute button on remote
control (not supplied) for 3 seconds. The
Status LED will blink white for 1 minute or until
paired.
3. Select "IA40-3” in your Bluetooth device
settings to pair with the amplifier.
4. Bluetooth will take priority over any wired audio
signal when streaming audio. When you stop
or pause Bluetooth audio wired audio will
resume playback.
monitoraudio.com 1

1. Power Input
Connect the supplied power supply output
lead here. Use ONLY the appropriate IEC
mains lead and power supply provided with
the product.
2. External IR
Connect the supplied IR Receiver. This is used
for learning remote codes and to control the
amplifier. A remote must be paired in order to
enable Bluetooth searching.
3. Sub/ Line Out
Line level output for connecting to an active or
another mono device.
4. RS232
For use with home automation systems
and uses a block connector for the wiring
configuration and set up protocol.
5. Speaker Output
Accepts up to 12 gauge cable for connecting
speakers.
6. Antenna
Comes unattached from the unit and should
be connected to the IA40-3 for Bluetooth.
To fit the antennae simply tighten it onto the
threaded input on the amplifier.
7. EQ and Input Dip Switches
Two position switches for selecting between
options listed above and below the switches.
8. Optical Input
Used to connect digital optical audio source to
the IA40-3 using a SPDIF connector.
9. Analogue Input
Used to connect an analogue stereo audio
source to the IA40-3 using a 3.5mm stereo
mini jack connector.
10. Status LED
Will light up different colours static or flashing
to indicate different operations, refer to the
next page for more information.
11. Multi-Function Encoder
Controls volume up and down via rotation,
power control and configuration as well as
Bluetooth and Remote pairing.
IA40-3 Manual2
1
7
8 9 10
11
2 3 4 5
Front and Rear Panel Layout
6
IA40-3 Manual2

Status LED Guide
Standby/ Sleep: Red
Power On/ No Signal: White
Analogue/ PCM: Green
Dolby: Purple
Bluetooth Connected: Blue
Bluetooth Pairing: White Blinking
IR Learning Mode: Purple Blinking
Time-out to Sleep Selected: Blue Blinking
Time-out to Standby Selected: Green Blinking
Fitting the Mounting Bracket
The IA40-3 is supplied with 3 mounting brackets, 2
for fitting to the product and a spare. The brackets
are attached using 4 supplied screws. Fit these
through the bracket holes shown into the inserts on
the base of the IA40-3, locations are circled in this
illustration.
Warranty
Both the craftsmanship and the performance of this
product is covered by the manufacturer’s warranty
against manufacturing defects provided that the
product was supplied by an authorised Monitor
Audio retailer under the consumer sale agreement.
For the period of cover please refer to the product
page on our website: monitoraudio.com for the
product you have purchased.
When purchasing Monitor Audio products, please
keep your receipt of purchase safe, as this validates
your warranty.
The Bluetooth word mark
and logos are registered
trademarks owned by Bluetooth SIG, Inc.and any
use of such marks by MONITOR AUDIO Ltd. is
under license. Other trademarks and trade names
are those of their respective owners.
Manufactured under
license from Dolby
Laboratories. Dolby, Dolby Audio, and the double-D
symbol are trademarks of Dolby Laboratories.
Owner Information
Product Details
Product Serial No:
Date of Purchase:
Dealer Details
Dealer Name:
Address:
Post code:
E-mail address:
FCC & IC Radiation Exposure Statement
This device complies with part 15 of the FCC Rules.
Operation is subject to the following two conditions:
(1) This device may not cause harmful interference,
and (2) this device must accept any interference
received, including interference that may cause
undesired operation.
This device contains licence-exempt transmitter(s)/
receiver(s) that comply with Innovation, Science and
Economic Development Canada’s licence-exempt
RSS(s). Operation is subject to the following two
conditions:
1. This device may not cause interference.
2. This device must accept any interference,
including interference that may cause
undesired operation of the device.
Changes or modifications not expressly approved
by the party responsible for compliance could void
the user's authority to operate the equipment.
NOTE: This equipment has been tested and found
to comply with the limits for a Class B digital
device, pursuant to part 15 of the FCC Rules.
These limits are designed to provide reasonable
protection against harmful interference in a
residential installation. This equipment generates,
uses and can radiate radio frequency energy
and, if not installed and used in accordance with
the instructions, may cause harmful interference
to radio communications. However, there is no
guarantee that interference will not occur in a
particular installation.
ENGLISH
monitoraudio.com 3monitoraudio.com 3

If this equipment does cause harmful interference
to radio or television reception, which can be
determined by turning the equipment off and
on, the user is encouraged to try to correct the
interference by one or more of the following
measures:
• Reorient or relocate the receiving antenna.
• Increase the separation between the
equipment and receiver.
• Connect the equipment into an outlet on a
circuit different from that to which the receiver
is connected.
• Consult the dealer or an experienced radio/TV
technician for help.
To satisfy FCC / IC RF exposure requirements, a
separation distance of 20 cm or more should be
maintained between the antenna of this device
and persons during device operation. To ensure
compliance, operations at closer than this distance
is not recommended.
Limited by local law regulations, version for North
America does not have region selection option.
This radio transmitter (5928A-MA439113) has been
approved by Innovation, Science and Economic
Development Canada to operate with the antenna
types listed below with the maximum permissible
gain and required antenna impedance for each
antenna type indicated. Antenna types not included
in this list, having a gain greater than the maximum
gain indicated for that type, are strictly prohibited
for use with this device.
Gain of antenna: 2dBi max.
Type of antenna: 50ohm, Omni-directionnel
IA40-3 Manual4
Specifications
Number of Output Channels 3
Power (W / Channel) 4 Ohms @ 1 kHz 60 W @ 1% THD+N for 2 Channel
40 W @ 1% THD+N for 3 Channel
Power (W / Channel) 8 Ohms @ 1 kHz 50 W @ 1% THD+N for 2 Channel
30 W @ 1% THD+N for 3 Channel
Input Impedance 10 k Unbalanced
Output Impedance (Sub/ Line Out) 1.47 kΩ
Input Sensitivity ~300 mV - Full Power
Maximum Input Voltage 2.3 V
Signal to Noise (SNR) > 84 dB Unweighted
Frequency Response (+- 0.5 dB) @ 1 W 10 Hz - 20 kHz
Total Harmonic Distortion
(THD+N @ 1 W, 2ch 8 Ohms, Full Bandwidth) < 0.05 %
Dimensions Excluding Mounting Brackets and
Antenna (H x W x D)
180 x 110.5 x 31.4 mm
71/16 x 43/8 x 11/4 ”
Dimensions Including Mounting Brackets
(H x W x D)
196 x 182.5 x 32.6 mm
711/16 x 73/16 x 15/16 ”
Mains Operating Voltage 100-240 VAC, 50/60 Hz
Fuse Rating (Power Supply) 3 A
Standby Power Consumption < 0.5 W
Weight (Amp + RS232 Terminal Block + Speaker
Terminal Block + Antenna) - No Brackets
0.484 kg
1 lb 2 oz
Bluetooth Yes
Bluetooth Range with Antenna (Line of Sight) > 20 m
Bluetooth Version 4.1
Bluetooth Profiles A2DP, AVRCP
Audio Codec SBC, Apt-X
Monitor Audio reserves the right to alter specifications without notice.
IA40-3 Manual4

FRANÇAIS
Installation de l'amplificateur IA40-3
Réglages Veille et Sommeil
Lorsque la DEL d'état est rouge, l'IA40-3 peut
fonctionner sous deux modes : Veille ou Sommeil.
En mode Veille, l'IA40-3 ne peut être allumé qu'en
appuyant sur l'encodeur multifonction ou en
utilisant la commande RS232. En réglant l'IA40-
3 sur le mode sommeil, cela permet d'activer
la détection de signal d'entrée automatique et
d'allumer l'IA40-3 en cas de présence de signal, et
de l'éteindre automatiquement en cas d'absence
de signal pendant 5 à 7 minutes.
Une fois l'amplificateur éteint (DEL d'état rouge),
maintenez l'encodeur multifonction enfoncé
pendant environ 10 secondes, ou jusqu'à ce que
la DEL commence à clignoter en bleu ou en vert
pendant 3 secondes. Si la DEL d'état clignote
en bleu, cela indique que le mode Sommeil est
activé. Si elle clignote en vert, cela indique que le
mode Veille est activé. Répétez simplement les
procédures ci-dessus pour changer de mode.
Apprentissage du code de
télécommande
Remarque : La procédure de cette
section doit être effectuée avant tout
couplage de périphériques Bluetooth.
1. Branchez le récepteur IR fourni au port IR
externe de l'amplificateur.
2. Branchez l'adaptateur CA 33 V et allumez
l'unité en appuyant sur l'encodeur
multifonction.
3. Maintenez enfoncé l'encodeur multifonction
sur l'unité enfoncé. Il commence à clignoter en
violet (5 secondes).
4. Dirigez une télécommande IR (non fournie)
vers le récepteur IR, et appuyez 3 fois sur le
bouton pour augmenter le volume, la DEL
d'état clignotera en violet 3 fois rapidement.
5. Répétez l'étape 4 avec le bouton pour baisser
le volume. La DEL d'état clignotera en violet
3 fois rapidement.
6. Répétez l'étape 4 avec le bouton muet.
La DEL d'état clignotera en violet 3 fois
rapidement, puis restera blanche.
L'amplificateur est maintenant programmé et
répondra aux commandes de volume de la
télécommande.
Couplage avec un périphérique
Bluetooth
Remarque : Un périphérique Bluetooth
ne peut pas être couplé tant qu'une
télécommande n'a pas été connectée à
l'amplificateur, reportez-vous à la section
« Apprentissage du code de télécommande ».
1. Allumez l'amplificateur IA40-3 en appuyant sur
l'encodeur multifonction. La DEL d'état sera
blanche.
2. Maintenez le bouton muet sur la
télécommande (non fournie) enfoncé pendant
3 secondes. La DEL d'état clignotera en blanc
pendant 1 minute ou jusqu'au couplage.
3. Sélectionnez « IA40-3 » dans les réglages de
votre périphérique Bluetooth pour effectuer le
couplage avec l'amplificateur.
4. Le Bluetooth aura la priorité sur tous les
signaux audio filaires en cas de diffusion
audio. En arrêtant le son en Bluetooth ou en
le mettant en pause, le son filaire reprendra la
lecture.
Table des matières
monitoraudio.com 5
Installation de l'amplificateur IA40-3 5
Réglages Veille et Sommeil 5
Apprentissage du code de télécommande 5
Couplage avec un périphérique Bluetooth 5
Aperçu des panneaux avant et arrière 6
Guide sur la DEL d'état 7
Fixation du support de montage 7
Garantie 7
Informations destinées à l'utilisateur 7
Spécifications 8
Déclaration de FCC et IC sur l'exposition aux radiations 8
1. Prise d'alimentation
Branchez ici la fiche d'alimentation fournie.
N'utilisez QUE le câble CEI et l'alimentation
appropriés et fournis avec le produit.
2. IR externe
Branchez le récepteur IR fourni. Il permet
d'apprendre les codes de la télécommande
et de contrôler l'amplificateur. Une
télécommande doit être couplée pour activer
la recherche Bluetooth.
3. Sortie Sub/Line
Sortie de niveau de ligne pour permettre le
branchement à un appareil mono activé ou à
un autre appareil mono.
4. RS232
Pour une utilisation avec des systèmes
automatisés et un connecteur de bloc, pour la
configuration de câblage et la configuration du
protocole.
5. Sortie d'enceinte
Prend en charge jusqu'à 12 câbles pour le
branchement d'enceintes.
6. Antenne
Celle-ci n'est pas fixée à l'unité et doit être
branchée à l'IA40-3 pour la connexion
Bluetooth. Vissez simplement l'antenne sur
l'orifice d'entrée fileté de l'amplificateur pour
la fixer.
7. Commutateurs Dip EQ et Entrée
Deux commutateurs de position pour
sélectionner les options indiquées au-dessus
et au-dessous des commutateurs.
8. Entrée optique
Utilisée pour brancher la source audio optique
numérique à l'IA40-3 grâce à un connecteur
SPDIF.
9. Entrée analogique
Utilisée pour brancher une source audio stéréo
analogique à l'IA40-3 grâce à un connecteur
mini jack stéréo de 3,5 mm.
10. DEL d'état
Reste allumée ou clignote de différentes
couleurs pour indiquer différentes opérations,
reportez-vous à la page suivante pour plus
d'informations.
11. Encodeur multifonction
Diminue ou augmente le volume par rotation,
et contrôle la puissance et la configuration
ainsi que le couplage de télécommande et
Bluetooth.
Aperçu des panneaux avant et arrière
IA40-3 Manual6
1
7
8 9 10
11
2 3 4 5
6

FRANÇAIS
Guide sur la DEL d'état
Veille/Sommeil : Rouge
Mise en route/Aucun signal : Blanc
Analogique/PCM : Vert
Dolby : Violet
Connexion Bluetooth établie : Bleu
Couplage via Bluetooth :
Lumière blanche clignotante
Mode d'apprentissage IR :
Lumière violette clignotante
Délai jusqu'au mode Sommeil sélectionné :
Lumière bleue clignotante
Délai jusqu'au mode Veille sélectionné :
Lumière verte clignotante
Fixation du support de montage
L'IA40-3 est fourni avec 3 supports de montage,
2 pour fixer le produit et un de rechange. Les
supports sont fixés par les 4 vis fournies.
Insérez-les dans les trous de support indiqués
sur les inserts situés à la base de l'IA40-3, les
emplacements sont entourés sur cette illustration.
Garantie
La qualité de fabrication et les performances de ce
produit sont couvertes par la garantie du fabricant
contre les défauts de fabrication, dans la mesure
où le produit a été fourni par un revendeur Monitor
Audio agréé selon un accord de vente. Pendant
la période de garantie, reportez-vous à la page
relative au produit que vous avez acheté sur notre
site web : monitoraudio.com.
Lors de l'achat de produits Monitor Audio,
conservez précieusement votre preuve d'achat,
celle-ci faisant office de bon de garantie.
La marque et les logos
Bluetooth sont des marques
déposées de Bluetooth SIG, Inc., et toute utilisation
de ces marques par MONITOR AUDIO Ltd. se fait
sous licence. Les autres marques déposées et
marques commerciales appartiennent à leurs
propriétaires respectifs.
Fabriqué sous licence de
Dolby Laboratories.
Dolby, Dolby Audio et le sigle double D sont des
marques commerciales de Dolby Laboratories.
Informations destinées à l'utilisateur
Informations sur le produit
Numéro de série du produit :
Date d'achat :
Informations sur le revendeur
Nom du revendeur :
Adresse :
Code postal :
Adresse e-mail :
monitoraudio.com 7

Déclaration de FCC et IC sur l'exposition
aux radiations
L’émetteur/récepteur exempt de licence contenu
dans le présent appareil est conforme aux
CNR d’Innovation, Sciences et Développement
économique Canada applicables aux appareils
radio exempts de licence. L’exploitation est
autorisée aux deux conditions suivantes :
1. 1. L’appareil ne doit pas produire de
brouillage;
2. 2. L’appareil doit accepter tout brouillage
radioélectrique subi, même si le brouillage
est susceptible d’en compromettre le
fonctionnement.
Les antennes installées doivent être situées de
facon à ce que la population ne puisse y être
exposée à une distance de moin de 20 cm. Installer
les antennes de facon à ce que le personnel ne
puisse approcher à 20 cm ou moins de la position
centrale de l’ antenne.
La FCC des éltats-unis stipule que cet appareil doit
être en tout temps éloigné d’au moins 20 cm des
personnes pendant son functionnement.
Le présent émetteur radio (5928A-MA439113)
a été approuvé par d’Innovation, Sciences et
Développement économique Canada pour
fonctionner avec les types d'antenne énumérés
ci-dessous et ayant un gain admissible maximal et
l'impédance requise pour chaque type d'antenne.
Les types d'antenne non inclus dans cette liste, ou
dont le gain est supérieur au gain maximal indiqué,
sont strictement interdits pour l'exploitation de
l'émetteur.
Gain d'antenne: 2dBi maximal
Type d'antenne: 50ohm, Omni-directionnel
Spécifications
IA40-3
Nombre de canaux de sortie 3
Puissance (W/canal) 4 Ohms à 1 kHz 60 W à 1 % THD+N pour 2 canaux
40 W à 1 % THD+N pour 3 canaux
Puissance (W/canal) 8 Ohms à 1 kHz 50 W à 1 % THD+N pour 2 canaux
30 W à 1 % THD+N pour 3 canaux
Impédance en entrée 10 k, non équilibrée
Impédance de sortie (sortie Sub/Line) 1,47 kΩ
Sensibilité d'entrée ~300 mV - Alimentation max.
Tension d'entrée maximum 2,3 V
Rapport signal sur bruit (SNR) > 84 dB, sans pondération
Réponse en fréquence (+- 0,5 dB) à 1 W 10 Hz à 20 kHz
Distorsion harmonique totale
(THD+N à 1 W, 2 canaux 8 Ohms, bande passante intégrale) < 0,05 %
Dimensions n'incluant pas les supports de montage et
l'antenne (H x L x P)
180 x 110,5 x 31,4 mm
71/16 x 43/8 x 11/4 ”
Dimensions avec supports de montage
(H x L x P)
196 x 182,5 x 32,6 mm
711/16 x 73/16 x 15/16 ”
Tension de fonctionnement principale 100-240 VCA, 50/60 Hz
Valeur des fusibles (alimentation) 3 A
Consommation électrique en mode veille < 0,5 W
Poids (ampli + bornier de connexion RS232 + bornier de
connexion de l'enceinte + antenne) - Aucun support
0,484 kg
1 lb 2 oz
Bluetooth Oui
Portée Bluetooth avec antenne (visibilité directe) > 20 m
Version Bluetooth 4.1
Profils Bluetooth A2DP, AVRCP
Codec audio SBC, Apt-X
Monitor Audio se réserve le droit de modifier les spécifications sans préavis.
IA40-3 Manual8

ITALIA
Sommario
Installazione dell’unità IA40-3
Impostazioni Standby e Sleep
Quando il LED di stato è illuminato in rosso, l'unità
IA40-3 può funzionare in due modalità: Standby o
Sleep. In modalità Standby, è possibile accendere
l'unità IA40-3 solo premendo l'encoder multi-
funzione o il comando RS232. L'impostazione
dell’unità IA40-3 in modalità Sleep abilita il
rilevamento automatico del segnale di ingresso.
L'unità IA40-3 viene accesa quando viene rilevato
un segnale e automaticamente disattivata quando
non viene rilevato alcun segnale per 5-7 minuti.
Con l’amplificatore in posizione "Off" (LED di stato
rosso), tenere premuto l'encoder multi-funzione per
circa 10 secondi o finché il LED inizia a lampeggiare
in blu o in verde per 3 secondi. Se il LED di stato
lampeggia in blu, significa che è attiva la modalità
Sleep. Se lampeggia in verde, significa che è attiva
la modalità Standby. Per modificare la modalità,
ripetere semplicemente la procedura descritta in
precedenza.
Apprendimento dei codici del telecomando
Nota: completare le operazioni descritte
in questa sezione prima di accoppiare un
qualsiasi dispositivo Bluetooth.
1. Collegare il ricevitore IR in dotazione alla porta
External IR sull’amplificatore.
2. Collegare l'adattatore di alimentazione da 33
V CA e accendere l'unità premendo l'encoder
multi-funzione.
3. Premere e tenere premuto l'encoder multi-
funzione sull’unità. Il LED corrispondente inizia
a lampeggiare in viola (per 5 secondi).
4. Puntare un qualsiasi telecomando a infrarossi
(non in dotazione) verso il ricevitore IR e
premere il pulsante di innalzamento del volume
per 3 volte: il LED di stato lampeggerà in viola
a brevi intervalli per 3 volte.
5. Ripetere l'operazione descritta nel punto 4 con
il pulsante di abbassamento del volume. Il LED
di stato lampeggerà in viola a brevi intervalli
per 3 volte.
6. Ripetere l'operazione descritta nel punto 4 con
il pulsante Mute. Il LED di stato lampeggerà
in viola a brevi intervalli per 3 volte, quindi
si illuminerà in bianco fisso. A questo punto
l’amplificatore è programmato e risponderà ai
comandi del volume del telecomando.
Accoppiamento con un dispositivo
Bluetooth
Nota: i dispositivi Bluetooth possono
essere accoppiati solo dopo che è stato
configurato un telecomando per
l'amplificatore. Fare riferimento alla sezione
"Apprendimento dei codici del telecomando".
1. Accendere l'unità IA40-3 premendo l'encoder
multi-funzione. Il LED di stato si accende in
bianco.
2. Premere e tenere premuto il pulsante Mute
sul telecomando (non in dotazione) per 3
secondi. Il LED di stato lampeggerà in bianco
per 1 minuto o finché non è stato eseguito
l'accoppiamento.
3. Selezionare "IA40-3" nelle impostazioni
del dispositivo Bluetooth per eseguire
l’accoppiamento con l’amplificatore.
4. Bluetooth avrà la priorità su qualsiasi segnale
audio cablato durante lo streaming audio.
Quando si interrompe o si mette in pausa
l’audio Bluetooth, la riproduzione verrà ripresa
con l’audio del dispositivo cablato.
monitoraudio.com 9
Installazione dell’unità IA40-3 9
Impostazioni Standby e Sleep 9
Apprendimento dei codici del telecomando 9
Accoppiamento con un dispositivo Bluetooth 9
Layout dei pannelli anteriore e posteriore 10
GUIDA ai LED di stato 11
Installazione della staffa di montaggio 11
Garanzia 11
Informazioni per l'utente 11
Specifiche 12

1. Power Input
Collegare qui il cavo di uscita dell'alimentatore
in dotazione. Usare SOLO cavi elettrici IEC
appropriati e l’alimentatore fornito con il
prodotto.
2. External IR
Collegare il ricevitore IR in dotazione. Questo
dispositivo serve per apprendere i codici del
telecomando e controllare l'amplificatore. È
necessario accoppiare un telecomando per
abilitare la ricerca Bluetooth.
3. Sub / Line Out
Uscita a livello di linea per il collegamento a un
dispositivo attivo o a un altro dispositivo mono.
4. RS232
Utilizzabile con impianti domotici e con
connettori di blocco per la configurazione dei
cavi e il protocollo d'installazione.
5. Speaker Output
Utilizzare cavi con sezione inferiore a 12 gauge
per il collegamento dei diffusori.
6. Antenna
L'antenna viene fornita scollegata dall'unità e
deve essere collegata all'unità IA40-3 tramite
Bluetooth. Per installare l'antenna, è sufficiente
inserirla saldamente nell'ingresso filettato
sull'amplificatore.
7. Dip switch EQ e di ingresso
Due interruttori di posizione per la selezione
delle opzioni elencate sopra e sotto gli
interruttori.
8. Ingresso Optical
Utilizzato per collegare la sorgente audio ottica
digitale all'unità IA40-3 tramite un connettore
SPDIF.
9. Ingresso Analogue
Utilizzato per collegare una sorgente audio
stereo analogica all'unità IA40-3 tramite un
connettore mini jack stereo da 3,5 mm.
10. LED di stato
Si accendono fissi o lampeggiano in più
colori per indicare operazioni diverse; fare
riferimento alla pagina successiva per ulteriori
informazioni.
11. Encoder multi-funzione
Consente di controllare il volume mediante
rotazione, l'alimentazione e la configurazione,
nonché l'accoppiamento con il dispositivo
Bluetooth e il telecomando.
Layout dei pannelli anteriore e posteriore
IA40-3 Manual10
1
7
8 9 10
11
2 3 4 5
6

ITALIA
GUIDA ai LED di stato
Standby/Sleep: rosso
Accensione (Power ON)/Nessun segnale: bianco
Analogico/PCM: verde
Dolby: viola
Connessione Bluetooth attiva: blu
Accoppiamento tramite Bluetooth: bianco
lampeggiante
Modalità di apprendimento IR: viola lampeggiante
Selezione del timeout per l'attivazione della
modalità Sleep: blu lampeggiante
Selezione del timeout per l'attivazione della
modalità Standby: verde lampeggiante
Installazione della staffa di montaggio
L’unità IA40-3 viene fornita con 3 staffe di
montaggio, 2 per il montaggio sul prodotto e una
di ricambio. Le staffe vengono fissate in posizione
mediante le 4 viti fornite in dotazione. Inserire le viti
nei fori delle staffe mostrati, quindi negli inserti sulla
base dell'unità IA40-3. Le posizioni dei fori sono
evidenziate con un cerchio in questa illustrazione.
Garanzia
La garanzia del produttore copre i difetti sia di
fabbricazione che delle prestazioni di questo
prodotto, a condizione che il prodotto sia stato
fornito da un rivenditore autorizzato Monitor Audio
con contratto di vendita. Durante il periodo di
garanzia, fare riferimento alla pagina del prodotto
acquistato sul sito Web monitoraudio.com.
Quando si acquistano prodotti Monitor Audio,
conservare sempre in un luogo sicuro la ricevuta
d'acquisto, necessaria per convalidare la garanzia.
Il marchio e i loghi Bluetooth
sono marchi registrati di
proprietà di Bluetooth SIG, Inc. e qualsiasi utilizzo di
tali marchi da parte di MONITOR AUDIO Ltd. è
concesso su licenza. Altri marchi e nomi
commerciali sono quelli dei rispettivi titolari.
Prodotto su licenza di
Dolby Laboratories.
Dolby, Dolby Audio e il simbolo doppia-D sono
marchi di Dolby Laboratories.
Informazioni per l'utente
Informazioni sul prodotto
N. di serie del prodotto:
Data di acquisto:
Informazioni sul rivenditore
Nome del rivenditore:
Indirizzo:
Codice postale:
Indirizzo e-mail:
monitoraudio.com 11

Specifiche
IA40-3
Numero di canali di uscita 3
Alimentazione (W / Canale) 4 Ohm a 1 kHz 60 W all'1% THD+N per 2 canali
40 W all'1% THD+N per 3 canali
Alimentazione (W / Canale) 8 Ohm a 1 kHz 50 W all'1% THD+N per 2 canali
30 W all'1% THD+N per 3 canali
Impedenza in ingresso 10 K sbilanciata
Impedenza in uscita (Uscita Sub / Line) 1,47 kΩ
Sensibilità in ingresso ~300 mV - Potenza massima
Tensione massima in ingresso 2,3 V
Rapporto segnale/rumore (SNR) > 84 dB non ponderato
Risposta in frequenza (+- 0,5 dB) a 1 W 10 Hz - 20 kHz
Distorsione armonica totale
(THD+N a 1 W, 2 canali, 8 Ohm, larghezza di banda completa) < 0,05 %
Dimensioni escluse le staffe di montaggio e l’antenna
(A x L x P)
180 x 110,5 x 31,4 mm
71/16 x 43/8 x 11/4 ”
Dimensioni incluse le staffe di montaggio
(A x L x P)
196 x 182,5 x 32,6 mm
711/16 x 73/16 x 15/16 ”
Tensione di funzionamento della rete elettrica 100-240 V CA, 50/60 Hz
Amperaggio del fusibile (Alimentazione) 3 A
Consumo energetico in standby < 0,5 W
Peso (Amp + morsettiera RS232 + morsettiera diffusore +
antenna) - Nessuna staffa
0,484 kg
1 lb 2 once
Bluetooth Sì
Portata Bluetooth con antenna (visibilità ottica) > 20 m
Versione Bluetooth 4.1
Profili Bluetooth A2DP, AVRCP
Audio Codec SBC, Apt-X
Monitor Audio si riserva il diritto di modificare le specifiche senza preavviso.
IA40-3 Manual12

DEUTSCH
Inhalt
Einrichten des IA40-3
Standby- und Ruhemodus-Einstellungen
Wenn die Status-LED rot leuchtet, kann der IA40-3
kann in zwei Modi operieren, im Standby- oder
Ruhezustand-Modus. Im Standby-Modus kann
der IA40-3 nur durch Drücken des Multifunktions-
Encoders oder per RS232-Steuerung angeschaltet
werden. Durch die Einstellung des IA40-3 auf
den Ruhezustand-Modus wird die automatische
Eingangssignal-Erkennung aktiviert, der IA40-3
schaltet sich ‚An‘, wenn ein Signal vorhanden ist,
und schaltet sich automatisch ‚Aus‘, wenn 5-7
Minuten lang kein Signal vorhanden ist.
Während der Verstärker ‚Aus‘ ist (Status-LED
rot), drücken und drücken Sie den Multifunktions-
Encoder ca. 10 Sekunden lang oder bis die
LED drei Sekunden lang blau oder grün blinkt.
Falls die Status-LED blau blinkt, ist das Gerät im
Ruhezustand-Modus. Falls sie grün blinkt, befindet
es sich im Standby-Modus. Wiederholen Sie diesen
Vorgang einfach, um den Modus zu wechseln.
Einlernen des Fernbedienungscodes
Hinweis: Dieser Abschnitt muss
abgeschlossen werden, bevor Bluetooth-
Geräte gekoppelt werden können.
1. Verbinden Sie den mitgelieferten IR-Empfänger
mit dem externen IR-Port des Verstärkers.
2. Verbinden Sie den 33-V-AC-Stromadapter und
schalten Sie das Gerät auf ‚Ein‘, indem Sie
den Multifunktions-Encoder drücken.
3. Drücken und halten Sie den Multifunktions-
Encoder, bis das Gerät zu blinken beginnt (5
Sekunden).
4. Richten Sie eine beliebige IR-Fernbedienung
(nicht mitgeliefert) auf den IR-Empfänger und
drücken Sie 3-mal die „Lautstärke hoch“-
Taste. Die Status-LED-Anzeige blinkt daraufhin
3-mal schnell violett.
5. Wiederholen Sie Schritt 4 mit der „Lautstärke
ab“-Taste. Die Status-LED-Anzeige blinkt
daraufhin 3-mal schnell violett.
6. Wiederholen Sie Schritt 4 mit der „Stumm
schalten“-Taste. Die Status-LED-Anzeige blinkt
daraufhin 3-mal schnell violett und leuchtet
dann konstant weiß. Der Verstärker ist nun
programmiert und reagiert auf die Lautstärke-
Regelung über die Fernbedienung.
Kopplung mit einem Bluetooth-Gerät
Hinweis: Bluetooth-Geräte können erst
gekoppelt werden, nachdem eine
Fernbedienung für den Verstärker eingerichtet
wurde, vgl. Abschnitt „Einlernen des
Fernbedienungscodes“.
1. Schalten Sie den IA40-3 durch Drücken des
Multifunktions-Encoders ein. Die Status-LED
leuchtet weiß auf.
2. Drücken und halten Sie die „Stumm schalten“-
Taste der Fernbedienung (nicht mitgeliefert)
3 Sekunden lang. Die Status-LED blinkt
daraufhin eine Minute lang oder bis zur
Kopplung weiß.
3. Wählen Sie in den Einstellungen Ihres
Bluetooth-Geräts „IA40-3“, um es mit dem
Verstärker zu koppeln.
4. Beim Abspielen von Ton hat Bluetooth Priorität
vor allen kabelbasierten Audiosignalen. Wenn
Sie Bluetooth anhalten oder pausieren, wird
das Abspielen des kabelgebundenen Tons
fortgesetzt.
monitoraudio.com 13
Einrichten des IA40-3 13
Standby- und Ruhemodus-Einstellungen 13
Einlernen des Fernbedienungscodes 13
Kopplung mit einem Bluetooth-Gerät 13
Layout von Front- und Rückblende 14
Status-LED-Leitfaden 15
Anbringen der Montagehalterung 15
Garantie 15
Eigentümerinformationen 15
Technische Daten 16

1. Stromeingang (Power Input)
Schließen Sie hier das mitgelieferte
Stromversorgungskabel an. Verwenden Sie
AUSSCHLIESSLICH das passende IEC-
Stromkabel und Netzteil, die mit dem Produkt
geliefert wurden.
2. Externes IR (External IR)
Verbinden Sie den mitgelieferten
IR-Empfänger. Dieser dient dazu,
Fernbedienungscodes einzulernen und den
Verstärker zu steuern. Eine Fernbedienung
muss gekoppelt werden, um die Bluetooth-
Suche zu aktivieren.
3. Sub/Line-Out-Schnittstelle (Sub/ Line
Out)
Line-Pegelausgang zum Verbinden mit einem
aktiven oder anderen Mono-Gerät.
4. RS232
Für den Einsatz mit
Hausautomatisierungssystemen
und mit einer Anschlussleiste für die
Verdrahtungskonfiguration und das
Einstellungsprotokoll.
5. Lautsprecher-Ausgang (Speaker Output)
Für den Anschluss von Lautsprechern mit
einer Kabelstärke von bis zu 12 AWG.
6. Antenne
Wird unmontiert mit dem Gerät geliefert und
sollte für Bluetooth mit dem IA40-3 verbunden
werden. Um die Antenne anzubringen, ziehen
Sie diese einfach auf der Gewindeverbindung
des Verstärkers fest.
7. EQ- und Eingangs-DIP-Schalter
Schalter mit zwei Positionen zur Auswahl
zwischen den jeweils über und unter den
Schaltern angegebenen Optionen.
8. Optischer Eingang (Inputs - Optical)
Zur Verbindung digitaler optischer
Audioquellen mit dem IA40-3 unter
Verwendung eines SPDIF-Anschlusses.
9. Analoger Eingang (Inputs - Analogue)
Zur Verbindung einer analogen Stereo-
Audioquelle mit dem IA40-3 unter
Verwendung eines 3,5-mm-Stereo-Mini-
Klinkenanschlusses.
10. Status-LED-Anzeige (Status)
Leuchtet oder blinkt verschiedenfarbig, um
verschiedene Vorgänge anzuzeigen, vgl.
nächste Seite für weitere Informationen.
11. Multifunktions-Encoder
Steuert die Lautstärke per Drehung nach
oben oder unten, die Leistungssteuerung
und -konfiguration sowie Bluetooth- und
Fernbedienungs-Kopplung.
Layout von Front- und Rückblende
IA40-3 Manual14
1
7
8 9 10
11
2 3 4 5
6

DEUTSCH
Status-LED-Leitfaden
Standby/Ruhezustand: Rot
Eingeschalten/Kein Signal: Weiß
Analog/PCM: Grün
Dolby: Violett
Bluetooth verbunden: Blau
Bluetooth-Kopplung läuft: Weiß blinkend
IR-Lernmodus: Violett blinkend
Bei Timeout Ruhezustand ausgewählt: Blau
blinkend
Bei Timeout Standby ausgewählt: Grün blinkend
Anbringen der Montagehalterung
Der IA40-3 ist mit 3 Montagehalterungen
ausgestattet, 2 zum Anbringen am Produkt und
einem Ersatzteil. Die Halterungen werden mit den
4 mitgelieferten Schrauben befestigt. Führen Sie
diese durch die gezeigten Halterungslöcher in
die Einsätze am Sockel des IA40-3, wie auf der
Abbildung mit Kreisen markiert.
Garantie
Sowohl die handwerkliche Arbeit als auch die
Leistung dieses Produkts werden von der Garantie
gegen Produktionsfehler abgedeckt, vorausgesetzt,
das Produkt wurde von einem autorisierten Monitor
Audio-Einzelhändler im Rahmen des Konsumenten-
Verkaufsvertrags ausgeliefert. Den Garantiezeitraum
für das gekaufte Produkt finden Sie auf der
Produktseite unserer Webseite: monitoraudio.com.
Bewahren Sie beim Kauf von Monitor Audio-
Produkten den Kaufbeleg sicher auf, da dieser als
Nachweis Ihrer Garantie dient.
Die Bluetooth-Wortmarke
und das Bluetooth-Logo sind
eingetragene Markenzeichen im Eigentum von
Bluetooth SIG, Inc. und werden von MONITOR
AUDIO Ltd. stets unter Lizenz verwendet. Andere
Markenzeichen und Markennamen sind Eigentum
der jeweiligen Inhaber.
Hergestellt unter Lizenz
von Dolby Laboratories.
Dolby, Dolby Audio und das DD-Symbol sind
Markenzeichen von Dolby Laboratories.
Eigentümerinformationen
Produktangaben
Produkt-Seriennummer:
Kaufdatum:
Händlerinformationen
Händlername:
Adresse:
Postleitzahl:
E-Mail-Adresse:
monitoraudio.com 15

Technische Daten
IA40-3
Zahl der Ausgangskanäle 3
Leistung (W/Kanal) 4 Ohm bei 1 Hz 60 W bei 1 % THD+N für 2-Kanal
40 W bei 1 % THD+N für 3-Kanal
Leistung (W/Kanal) 8 Ohm bei 1 Hz 50 W bei 1 % THD+N für 2-Kanal
30 W bei 1 % THD+N für 3-Kanal
Eingangswiderstand 10 k Asymmetrisch
Ausgangswiderstand (Sub/Line Out) 1,47 kΩ
Empfindlichkeit des Eingangs D300 mV – volle Leistung
Maximale Eingangsspannung 2,3 V
Rauschabstand (SNR) > 84 dB ungewichtet
Frequenzbereich (+/- 0,5 dB) bei 1 W 10 Hz – 20 kHz
Gesamtklirrfaktor
(THD+N bei 1 W, 2-Kanal 8 Ohm, volle Bandbreite) <0,05 %
Abmessungen ohne Montagehalterungen und Antenne
(H x B x T)
180 x 110,5 x 31,4 mm
71/16 x 43/8 x 11/4 ”
Abmessungen einschließlich Montagehalterungen
(H x B x T)
196 x 182,5 x 32,6 mm
711/16 x 73/16 x 15/16 ”
Netzanschlussspannung 100-240 VAC, 50/60 Hz
Sicherungswert (Stromversorgung) 3 A
Stromverbrauch im Standby-Modus <0,5 W
Gewicht (Verstärker + RS232-Klemmelsite + Lautsprecher-
Klemmleiste + Antenne) - Keine Halterungen
0,484 kg
1 lb 2 oz
Bluetooth Ja
Bluetooth-Reichweite mit Antenne (Sichtverbindung) > 20 m
Bluetooth-Version 4.1
Bluetooth-Profile A2DP, AVRCP
Audio-Codec SBC, aptX
Monitor Audio behält sich das Recht vor, die technischen Daten ohne vorherige Ankündigung zu ändern.
IA40-3 Manual16

ESPAÑOL
Índice
Configuración del IA40-3
Configuración de modos de reposo y
suspensión
Hay dos modos en los que el IA40-3 puede
funcionar mientras el LED de estado está iluminado
en rojo: el modo Reposo y el modo Suspensión.
En el modo de reposo, el IA40-3 solo se puede
encender al pulsar el codificador multifunción o
mediante control RS232. La configuración del IA40-
3 en el modo de suspensión habilita el encendido
automático mediante detección de señal de
entrada. El IA40-3 se pondrá en marcha cuando se
reciba una señal y se apagará automáticamente si
no se recibe ninguna señal durante un tiempo de 5
a 7 minutos.
Con el amplificador apagado (LED de estado en
rojo), mantenga pulsado el codificador multifunción
durante unos 10 segundos o hasta que el LED
parpadee en azul o verde durante 3 segundos. Si el
LED de estado parpadea en azul, está en el modo
de suspensión. Si parpadea en verde, está en el
modo de reposo. Para cambiar el modo solo tiene
que repetir los pasos indicados anteriormente.
Aprendizaje de códigos del mando a
distancia
Nota: Para poder emparejar dispositivos
Bluetooth, antes deben completarse las
instrucciones de este apartado.
1. Conecte el receptor de infrarrojos incluido al
puerto External IR del amplificador.
2. Conecte el adaptador de corriente de 33 V
CA y pulse el codificador multifunción para
encender la unidad.
3. Mantenga pulsado el codificador multifunción
en la unidad hasta que empiece a parpadear
en color violeta (5 segundos).
4. Apunte con un mando a distancia por
infrarrojos (no incluido) al receptor de
infrarrojos y pulse tres veces el botón de subir
volumen; el LED de estado parpadeará tres
veces de forma rápida en color violeta.
5. Repita el paso 4 con el botón de bajar
volumen. El LED de estado parpadeará tres
veces de forma rápida en color violeta.
6. Repita el paso 4 con el botón de silencio
(Mute). El LED de estado parpadeará tres
veces de forma rápida en color violeta y,
a continuación, permanecerá encendido
en color blanco fijo. El amplificador ya está
programado y responderá a los comandos de
volumen del mando a distancia.
Emparejamiento con un dispositivo
Bluetooth
Nota: No podrán emparejarse
dispositivos Bluetooth hasta que se haya
configurado un mando a distancia con el
amplificador; consulte el apartado
"Aprendizaje de códigos del mando a
distancia".
1. Pulse el codificador multifunción para
encender el amplificador IA40-3. El LED de
estado cambiará a color blanco.
2. Mantenga pulsado el botón de silencio en el
mando a distancia (no incluido) durante tres
segundos. El LED de estado parpadeará en
color blanco durante un minuto o hasta que
concluya el proceso de emparejamiento.
3. Seleccione "IA40-3" en los ajustes del
dispositivo Bluetooth que desea emparejar
con el amplificador.
4. Al transmitir audio por streaming, el Bluetooth tendrá
prioridad sobre cualquier otras señal de audio con
cable. Si para o pone en pausa el audio Bluetooth,
se reanudará la reproducción del audio con cable.
monitoraudio.com 17
Configuración del IA40-3 17
Configuración de modos de reposo y suspensión 17
Aprendizaje de códigos del mando a distancia 17
Emparejamiento con un dispositivo Bluetooth 17
Distribución del panel delantero y trasero 18
Guía de los indicadores LED de estado 19
Colocación del soporte de montaje 19
Garantía 19
Información del usuario 19
Especificaciones 20

1. Power Input (Entrada de alimentación)
Conecte aquí el cable de salida de la fuente de
alimentación incluida. Utilice SOLO el cable de
alimentación IEC y la fuente de alimentación
que se incluyen con el producto.
2. External IR (IR externa)
Conecte el receptor de infrarrojos incluido. Se
usa para capturar y aprender los códigos de
mandos a distancia y controlar el amplificador.
Para habilitar la búsqueda Bluetooth, es
necesario emparejar un mando a distancia.
3. Sub/ Line Out (Salida de línea/Sub)
Salida de línea para conexión a un dispositivo
activo o a otro dispositivo monoaural.
4. RS232
Se utiliza para domótica doméstica y utiliza un
bloque de terminales para la disposición del
cableado y el protocolo de configuración.
5. Speaker Output (salida de altavoz)
Acepta cables hasta de calibre 12 para
conectar altavoces.
6. Antena
La antena no viene montada en la unidad y
debe conectarse al IA40-3 para poder usar la
conectividad Bluetooth. Para montar la antena
solo hay que conectarla a la entrada roscada
del amplificador.
7. Interruptores DIP EQ e Input
(Ecualización y entrada)
Dos interruptores de posición con los que se
seleccionan las opciones indicadas encima y
debajo de los interruptores.
8. Entrada óptica
Se usa para conectar una fuente óptica digital
de audio al IA40-3 mediante un conector
SPDIF.
9. Entrada analógica
Se utiliza para conectar una fuente de audio
analógica estéreo al IA40-3 mediante una
miniclavija estéreo de 3,5 mm.
10. LED de estado
Se iluminará de distintos colores de forma
estática o parpadeante para indicar distintos
estados de funcionamiento; consulte la
siguiente página para más información.
11. Codificador multifunción
Al girarlo, puede subir y bajar el volumen,
controlar la potencia y la configuración,
además del emparejamiento Bluetooth y del
mando a distancia.
Distribución del panel delantero y trasero
IA40-3 Manual18
1
7
8 9 10
11
2 3 4 5
6
Other manuals for IA40-3
1
Table of contents
Languages:
Other Monitor Audio Amplifier manuals

Monitor Audio
Monitor Audio AirStream A100 User manual

Monitor Audio
Monitor Audio IA150-2 User manual

Monitor Audio
Monitor Audio IA125-4 User manual

Monitor Audio
Monitor Audio IA60-4 User manual

Monitor Audio
Monitor Audio AirStream A100 User manual

Monitor Audio
Monitor Audio IA150-2 User manual

Monitor Audio
Monitor Audio IA40-3 User manual

Monitor Audio
Monitor Audio air stream A100 User manual

Monitor Audio
Monitor Audio IWA-250 User manual

Monitor Audio
Monitor Audio IWA-250 User manual