7
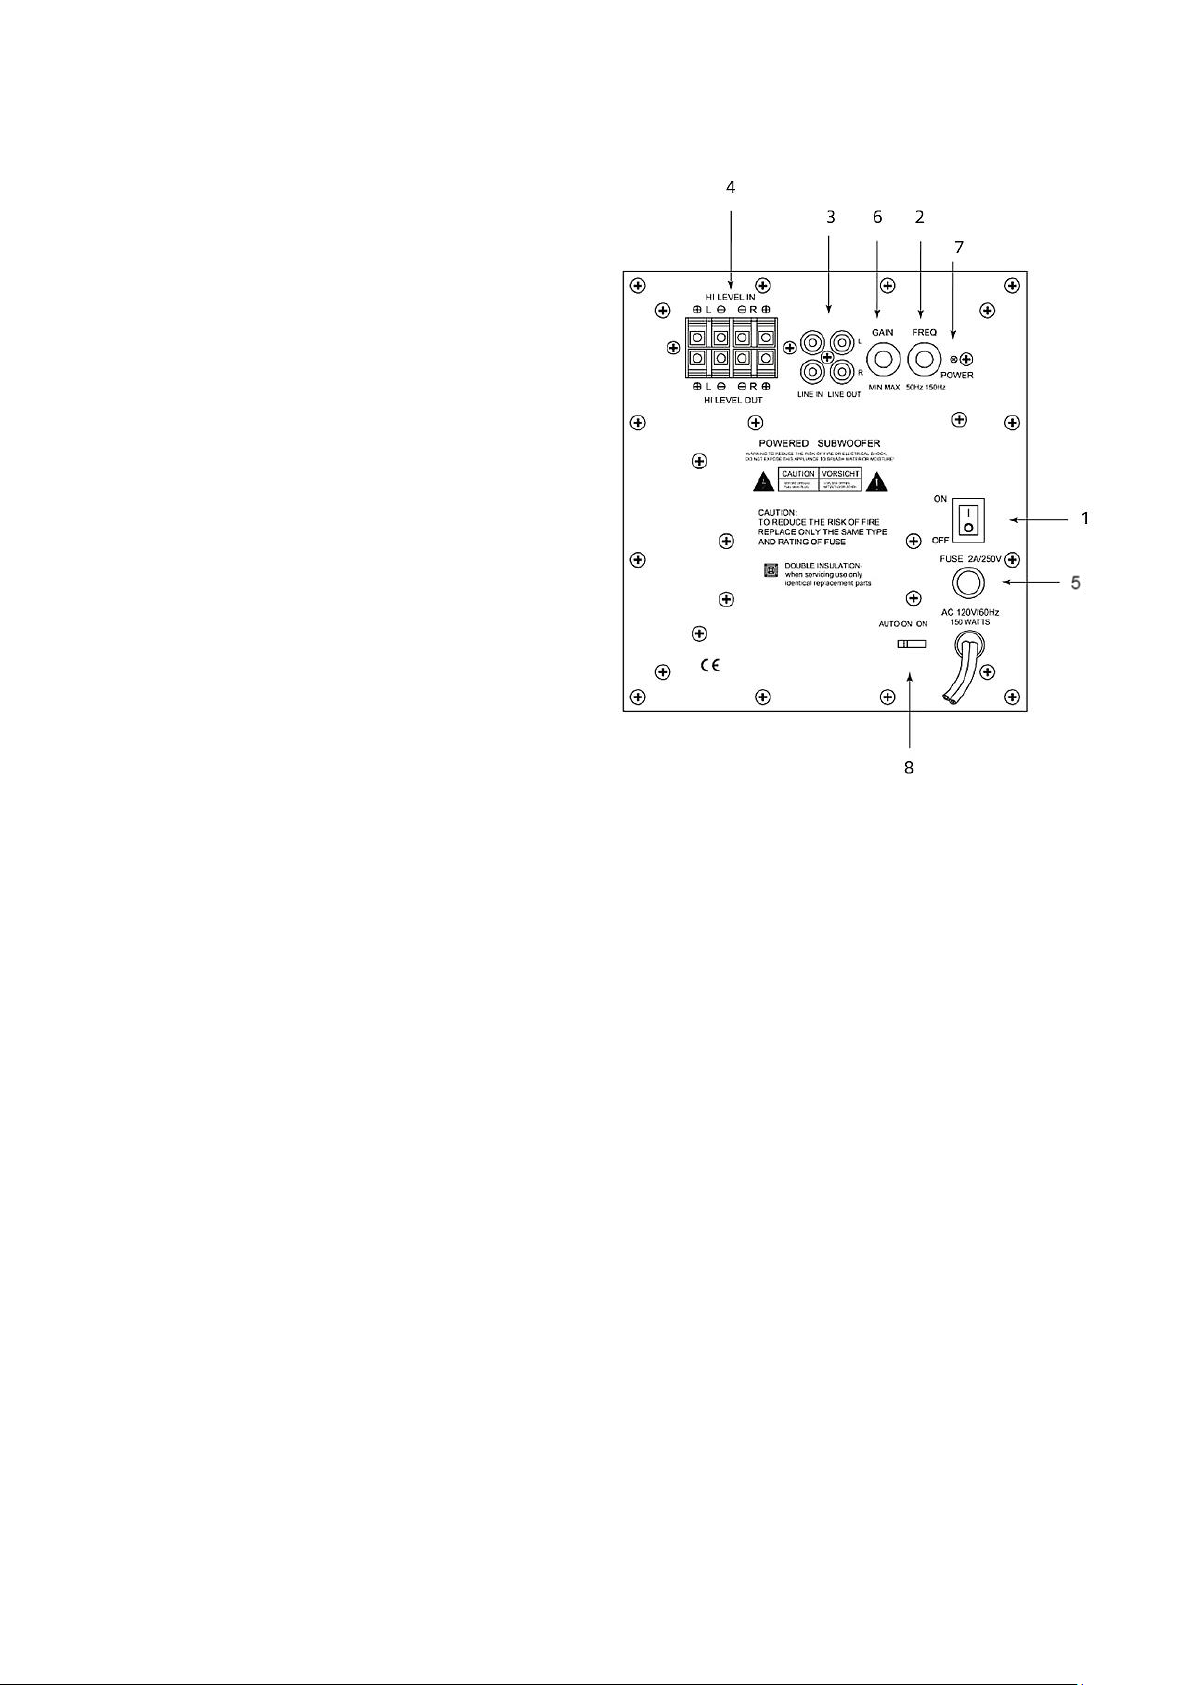
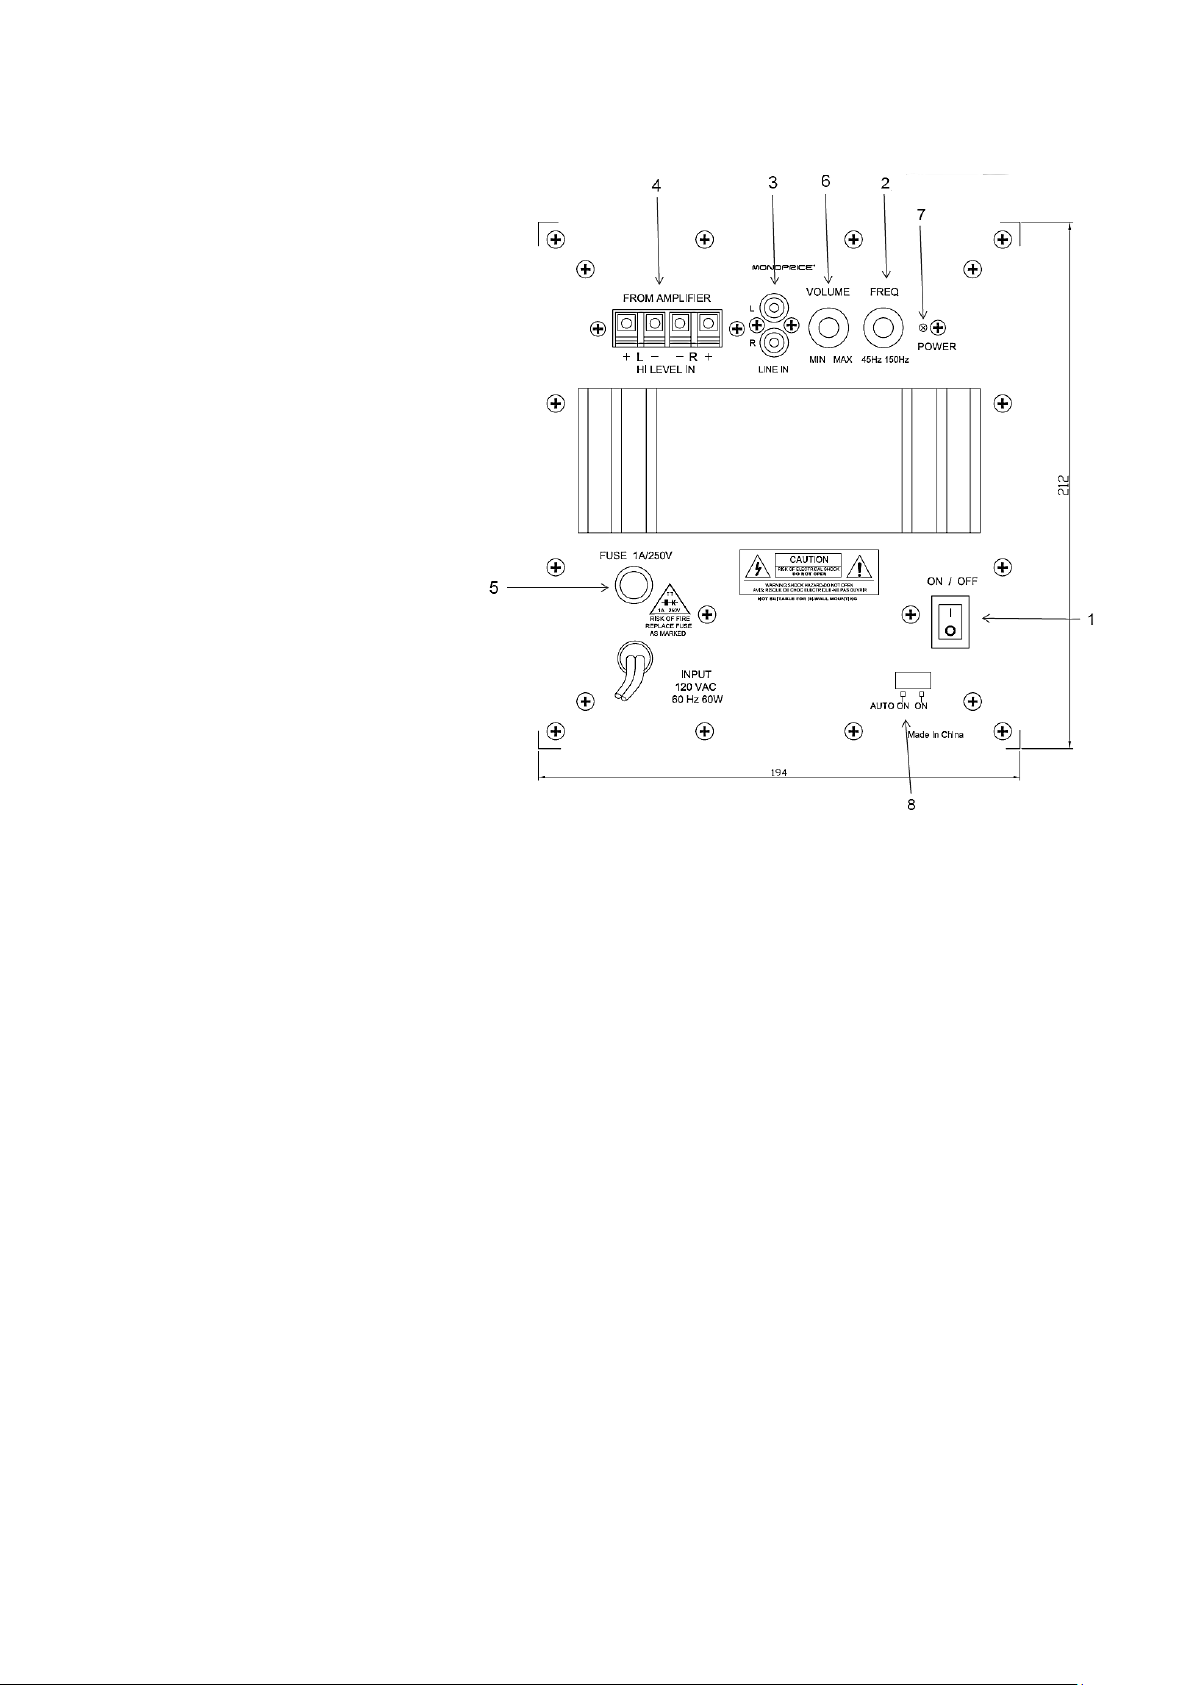
60W POWERED SUBWOOFER (8248) OVERVIEW
1. Power Switch –This 2-position
switch controls the power status
of the subwoofer. OFF: Turns the
unit off. ON: Turns the unit on
regardless of whether a signal is
present or not.
2. Subwoofer Crossover –This
rotary control adjusts a variable
low pass filter to set the upper
frequency at which the output of
the subwoofer begins to roll off.
Continuously variable from 45
Hz, it matches the upper-
frequency characteristics of the
subwoofer to the low-frequency
response of the main stereo
speakers.
3. Line Level Input –These RCA
phono jacks accept a line-level,
full-range signal from the pre-amplifier output of a receiver or pre-amplifier. This full-range signal is
processed and amplified to power the subwoofer.
4. Speaker Level Input –These spring-loaded terminals accept a stereo, speaker-level, full-range signal
from a receiver or power amplifier. This signal is processed and amplified to power the subwoofer.
5. Fuse –For continued protection, always replace the fuse with the same type and size listed.
6. Level Control –This rotary control adjusts the volume level of the subwoofer and is used to balance
its volume with that of the main stereo speakers.
7. Status LED –This light-emitting diode shows the status of the subwoofer electronics. "Red" indicates
that the amplifier is plugged in and the power switch is on.
8. Auto ON Switch –In order to function, the Power switch must be turned on, as indicated by the red
color of the LED. With the Auto ON Switch in the
ON
position, the subwoofer is on at all times and
ready to play programmed material. If the Auto ON Switch is in the
Auto ON
position and no audio
signal is received, the subwoofer will go into
Standby Mode
to conserve power. When an audio signal
is detected, the subwoofer will switch itself into the fully ON mode and begin playing the
programmed material. After about 2 minutes during which no signal is detected, the subwoofer will
return to
Standby Mode
.
NOTE: If you plan to be away for an extended time or if the subwoofer will not be used, you may want
to turn off the Power Switch.