Montgomery Ward Chef Tested KYS-376 User manual

Instruction Manual
Item No.: 729685
120V, 60Hz, 1350W
Wards.com 1•888•557•3848
Montgomery Ward Customer Service
1112 7th Avenue, Monroe, WI 53566
8:00 am to Midnight, Monday through Friday
by
Wards.com 1•888•557•3848
by
®
®
MODEL: KYS-376
Wards
Exclusive
cipes
Inside!
Indoor/Outdoor Grill with Stand

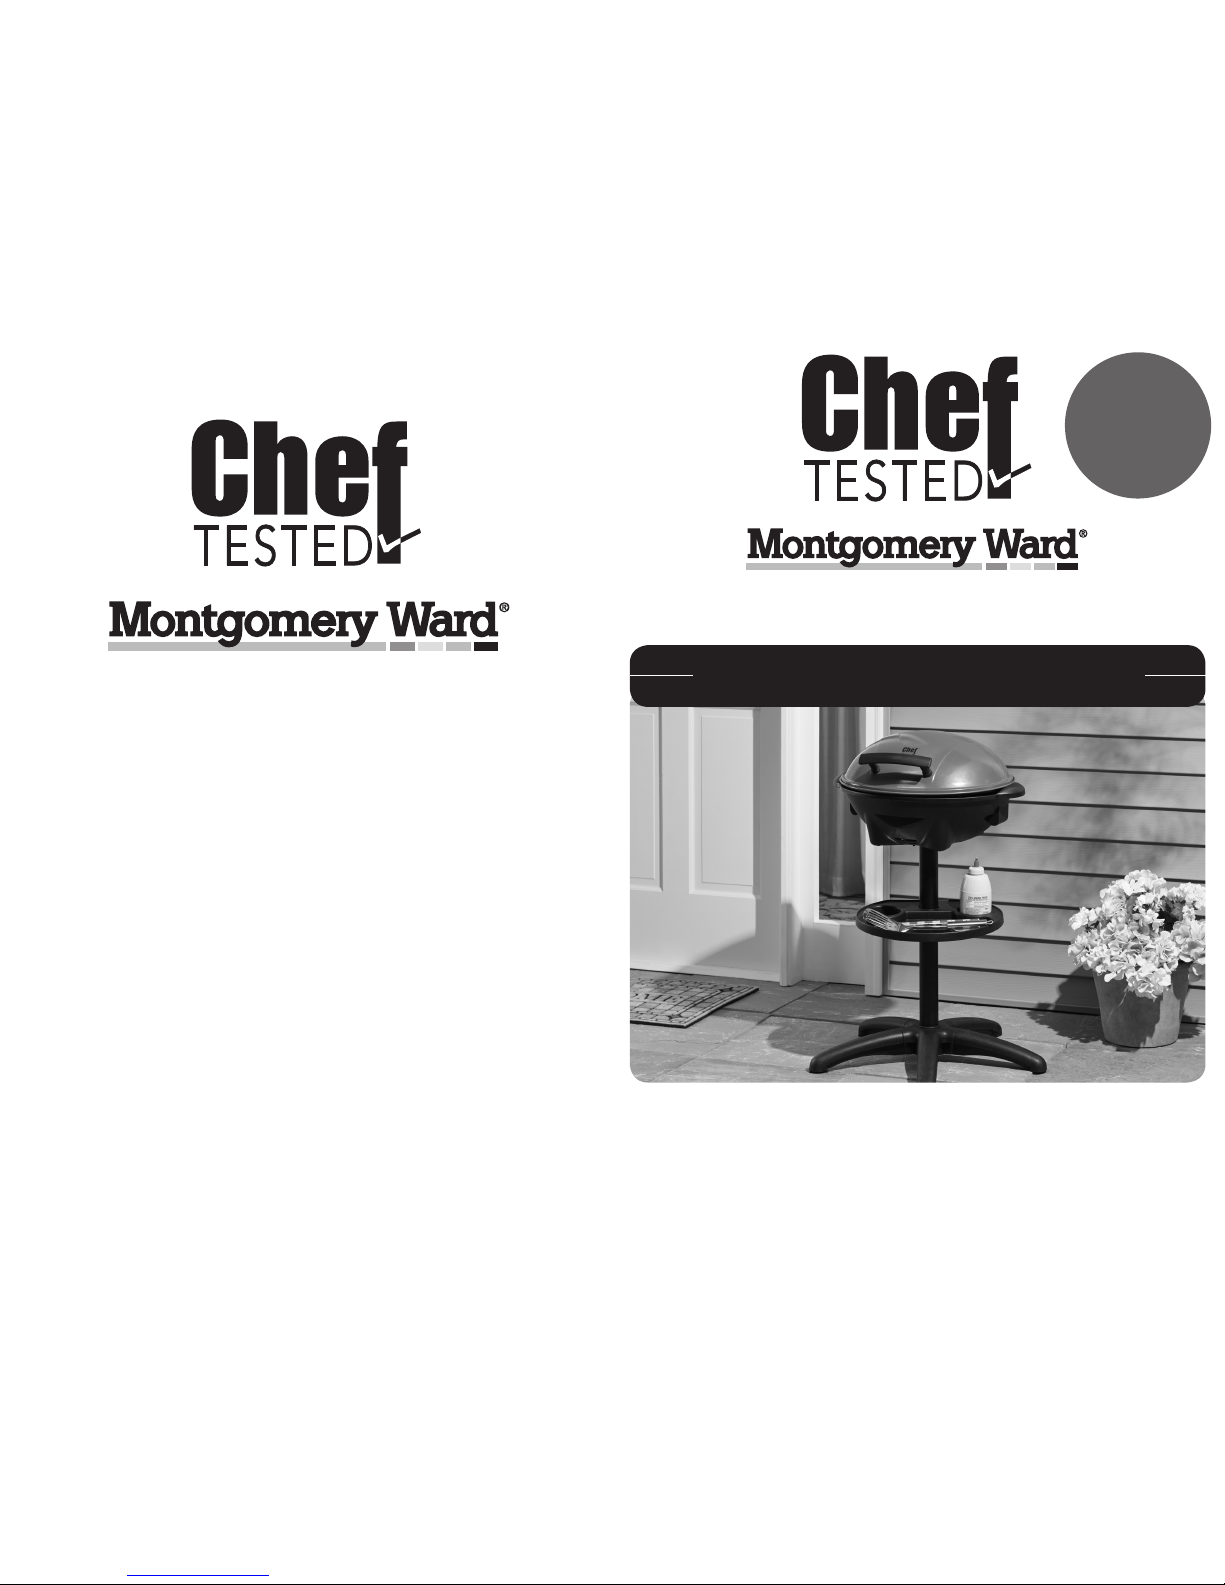
Thank you for purchasing your Chef Tested®Indoor/Outdoor Electric Grill
with Stand by Montgomery Ward®. Put through the paces by the experts,
it will perform to the highest standard, time after time, with all the conve-
nience, easy cleanup and durability you rely on from Wards.
We guarantee it!
Grill outdoors during good weather or indoors when Mother Nature isn’t
cooperating. No more messy charcoal or expensive propane to purchase.
You are going to love the convenience and versatility of this grill!
3
PLEASE READ THESE INSTRUCTIONS BEFORE USE
Basic safety precautions should always be followed when using this product.
WARNING: TO AVOID THE RISK OF ELECTRICAL SHOCK, ALWAYS MAKE
SURE THE PRODUCT IS UNPLUGGED FROM THE ELECTRICAL OUTLET
BEFORE ASSEMBLING, DISASSEMBLING, RELOCATING, SERVICING OR
CLEANING
1. Close supervision is necessary when this appliance is used by or near children.
2. Do NOT touch hot surfaces. Use any handles or knobs. Always use oven mitts
to place, move, remove or serve food from hot grill surface.
3. Grill surface will be hot and should not be touched during use or just after use.
CAUTION: During cooking and when placing, moving, or removing or serving
food from hot grill surface, food may splatter hot grease causing burns or injuries.
Grease may also splatter on table or surface near cooking area. Always protect
surface around cooking area accordingly.
EXTREME CAUTION must be used when appliance is in use and when placing/
moving/removing/serving food from grill surface. Parts and food are HOT!
4. Do NOT pour cold water or place frozen food on grill surface.
5. To protect against electrical shock, do not place cord, plug or base of appliance
in water or other liquid.
6. Always attach plug to appliance first, then plug cord into the wall outlet. To
disconnect, turn any control to MIN, then remove plug from wall outlet.
7. Do NOT let cord hang over edge of table or counter or touch hot surfaces.
8. To disconnect the temperature regulator from electrical outlet, pull directly on
the plug; do NOT pull on the power cord.
9. Do NOT plug/unplug the temperature regulator into/from electrical outlets with
wet hands.
10. Unplug from outlet when not in use and before cleaning. Allow to cool before
moving, cleaning or removing parts. Do NOT place grill plate in cold water.
11. Do NOT leave appliance unattended when in use, when appliance is cooking,
when appliance contains hot food or when appliance is still hot.
12. Do NOT use accessory attachments not intended for this unit. The use of
accessory attachments or parts not intended for the grill may cause personal
injury or damage to the appliance. Any other parts or accessories not intended
for use with this appliance is strictly prohibited and will void warranty.
13. This appliance will NOT function if connected to a timer or an independent
remote control.
by
ank you
for your
purchase!
Important Safeguards........................3-4
Polarized Plug ...................................... 4
Parts & Features................................... 5
Assembly Instructions........................6-8
Before Using for the First Time............. 9
How to Use........................................... 9
Cleaning & Care ................................. 10
Recipes..........................................11-15
Warranty & Return Information......16-17
Table of Contents
21•888•557•3848
Wards.com
Important Safeguards
PLEASE SAVE THESE INSTRUCTIONS
THIS APPLIANCE IS FOR HOUSEHOLD USE ONLY
© 2016 Montgomery Ward, Inc. All rights reserved.
®

41•888•557•3848
Wards.com
45
Parts & Features
Polarized Plug
This appliance has a 3-prong polarized plug. Do not attempt to modify the plug in
any way.
SHORT CORD INSTRUCTIONS
1. A short power supply cord is provided to reduce the risk resulting from
becoming entangled in or tripping over a longer cord.
2. Longer detachable power supply cords or extension cords are available and may
be used if care is exercised in their use.
3. If a long detachable power cord or extension cord is used:
• The marked electrical rating of the detachable power supply cord or extension
cord should be at least as great as the electrical rating of the appliance.
• If the appliance is of the grounded type, the extension cord should be the same
type 3-wire.
• The longer cord should be arranged so that it will not drape over the countertop
or tabletop where it can be pulled on by children or tripped over.
PLASTICIZER WARNING
CAUTION: To prevent Plasticizers from migrating from the finish of the countertop
or tabletop or other furniture, when using the grill on the countertop, place grill in
support bracket. Failure to do so may cause the nish to darken. Permanent
blemishes may occur or stains can appear.
Important Safeguards (cont’d)
14. Be sure legs are assembled and fastened properly.
15. Household use only, not for commercial use.
16. This appliance can be used outdoors and indoors. If using indoors, the grill
should only be used in a well ventilated area.
17. Do NOT place on or near a hot gas or electric burner, or in a heated oven.
18. If unit malfunctions during use, shut down immediately and discontinue use. Do
NOT attempt to service any part of the appliance. This product has no user-
serviceable parts. All parts for this appliance must be used according to this
instruction manual.
19. Do NOT use appliance for other than intended use.
1. Grill Hood
2. Handle
3. Grill Plate
4. Grease Collecting Bowl
5. Grill Base
6. Condiment Tray
7. Upper Stand Tube
8. Spacer Ring
8a. Threaded Rod
9. Lower Stand Tube
10a. Stand Foot (5)
10b. Stand Base
11. Handle
12. Controller Socket
13. Detachable Temperature Regulator
with Cord
14. Temperature Indicator Light
15. Grill Socket
16. Washer Hardware
17. Screw Hardware
18. Support Bracket
1
2
3
4
5
6
7
8
8a
9
10b
10a
16
17
15
14
13
12
11

Install the screw (b) into upper tube (7),
and then put the condiment tray on the
upper tube (making sure that the tray is
secured well).
41•888•557•3848
Wards.com
45
Assembly Instructions
7
61•888•557•3848
Wards.com
Install the stand feet (10A) into the stand
base (10B) properly. There will be a
“click” sound when the stand foot is fixed
completely.
Place the washer (16) onto the stand
base, and then install the screws (17) into
the washer to attach the stand feet and
stand base firmly.
Install half of the threaded rod (a) in the
lower tube (9). Put the spacer ring (8)
on the lower tube (9) and assemble both
tubes together; ensure that they are
secured well.
Assembly Instructions (cont’d)
Connect the grill stand base (10) and the
lower tube (9) together to form the
complete grill stand. (The grill can be
used with or without this stand).
Place the bowl-shaped base (5) onto
the grill stand. (Making sure that the
grill stand is placed on a dry, flat, stable
surface.)
Put the grease collecting bowl (4) into the
bracket supplied for it in the base of the
grill, buckle the hole of grease collecting
bowl onto the screw to secure it well (The
grease collecting bowl can be filled with a
little water to make it easier to clean.)
1
2
3
4
5
6
7

9
81•888•557•3848
Wards.com
CAUTION: Risk of suffocation - keep all packaging and plastic bags out of the
reach of children.
1. Remove all parts from the box and discard packaging.
2. Wash the grill plate (3), grease collecting bowl (4) and grill hood (1) thoroughly.
The grill plate and the grease collecting bowl are both dishwasher safe.
NEVER immerse the detachable temperature regulator (13) in water.
3. Dry each component thoroughly before use. This applies especially to the
appliance socket (15).
4. Heat the grill to its maximum setting for about 3–5 minutes, with the grill hood
closed and without putting any food on it.
Note: You may notice a slight odor and/or a small amount of smoke. This is normal
and should dissipate after first use. Let unit cool down before restarting it. Ensure
room is well ventilated during this operation and during use, if using indoors.
Before Using for the First Time
Assembly Instructions (cont’d)
Place the grill plate (3) on the base (5).
Insert the grill socket (15) into the open-
ing intended for it (12), then set the grill
plate horizontally on the appliance base.
8
Install the grill hood (1) into the base (5).
(If you are using the grill in the open air,
position the grill hood so that it acts as a
wind break.)
Push the detachable temperature regula-
tor (13) as far as it will go into the grill’s
socket.
9
10
How to Use
NOTE: If using grill indoors on countertop, remove stand and place grill in support
bracket.
1. With the temperature setting* at its lowest setting, plug the cord on the tem-
perature regulator into an electrical outlet.
2. Set the temperature regulator (13) to the desired temperature level (it usually
takes about 3 minutes to heat up).
3. The temperature indicator light (14) will go out as soon as the desired
temperature has been reached.
4. Carefully place food on the grill plate (3). Cooking time will depend on type of
food being cooked and personal taste.
5. During cooking, oil may accumulate in the drip tray. This should be checked
regularly and emptied as needed to avoid overflow.
6. Unplug the power cord after each use and let the grill cool down completely
before moving, cleaning or disassembling.
NOTE: The grill plate has a nonstick coating. Take care not to scratch the coating
during grilling.
*Temperature Settings:
Min 0°
1 200°
2 250°
3 300°
4 350°
Max 400°
Table of contents
Other Montgomery Ward Grill manuals
Popular Grill manuals by other brands

Landmann
Landmann Avalon PTS Plus 5.1 Plus 12122 Assembly and operating manual

Kenyon
Kenyon B70200 owner's manual

Better Homes and Gardens
Better Homes and Gardens GBC1486W owner's manual

Orbegozo
Orbegozo GR 2300 instruction manual

bora
bora PT11 Operating and installation instructions

Klarstein
Klarstein 10031664 manual

Garland
Garland MWE3W Installation and operation manual

Char-Broil
Char-Broil 463722714 Product guide

MPM
MPM MOP-03 user manual

Kenmore
Kenmore 415.16123800 Use and care guide

Tucker Barbecues
Tucker Barbecues GTR Series Assembly, installation and operating instructions

Monogram
Monogram ZGG540NCP1SS owner's manual