manuals.online logo
Brands
  1. Home
  2. •
  3. Brands
  4. •
  5. Montpelier
  6. •
  7. Cooker
  8. •
  9. Montpelier MSC50W User manual

Montpelier MSC50W User manual

Other Montpelier Cooker manuals

Montpelier SCE50W User manual

Montpelier

Montpelier SCE50W User manual

Montpelier MSC60FW User manual

Montpelier

Montpelier MSC60FW User manual

Montpelier MEL50W User manual

Montpelier

Montpelier MEL50W User manual

Montpelier MDF100K User manual

Montpelier

Montpelier MDF100K User manual

Popular Cooker manuals by other brands

Logik LFTG50A12 installation manual

Logik

Logik LFTG50A12 installation manual

Smeg SUK61CMA5 user manual

Smeg

Smeg SUK61CMA5 user manual

Rayburn 200G/L Gas Fired Cooker Installation and servicing instructions

Rayburn

Rayburn 200G/L Gas Fired Cooker Installation and servicing instructions

VacPak-It SV158 manual

VacPak-It

VacPak-It SV158 manual

Electrolux N7E Installation and operating manual

Electrolux

Electrolux N7E Installation and operating manual

Electrolux EKE6100 Instruction book

Electrolux

Electrolux EKE6100 Instruction book

ARO SHC5065 instruction manual

ARO

ARO SHC5065 instruction manual

Baumatic BCE905SS user manual

Baumatic

Baumatic BCE905SS user manual

Bosch HCE744350R instruction manual

Bosch

Bosch HCE744350R instruction manual

Modena FC 7645 SGM User manual book

Modena

Modena FC 7645 SGM User manual book

Stanley Donard 60 Installation and operating instructions

Stanley

Stanley Donard 60 Installation and operating instructions

Bartscher 201TC manual

Bartscher

Bartscher 201TC manual

Parkinson Cowan 50 GR/BU installation instructions

Parkinson Cowan

Parkinson Cowan 50 GR/BU installation instructions

Creda S150E Installation and user instructions

Creda

Creda S150E Installation and user instructions

Creda HB48309 instructions

Creda

Creda HB48309 instructions

Bosch HCE743220F instruction manual

Bosch

Bosch HCE743220F instruction manual

Tricity Bendix SE545P manual

Tricity Bendix

Tricity Bendix SE545P manual

NEFF E1461A2/01 Instructions for use

NEFF

NEFF E1461A2/01 Instructions for use

manuals.online logo
manuals.online logoBrands
  • About & Mission
  • Contact us
  • Privacy Policy
  • Terms and Conditions

Copyright 2025 Manuals.Online. All Rights Reserved.

50cm Single Cavity Ceramic Cooker
MSC50W - White
Please read these instructions carefully before attempting to install or use this appliance.
We recommend that you keep these instructions in a safe place for future reference.
Installation and Operating Instructions
THE PERFECT BALANCE OF FUNCTION AND STYLE
LAUNDRY - DISHWASHING - COOKING - COOLING
Thank you for choosing this Montpellier Freestanding Cooker.
Our Cookers has been designed to provide you with the best combination of style, reliability and performance to
give you years of trouble-free use.
You may be familiar with a similar product, but please take time to read these instructions carefully before installing
or using your Freestanding Cooker to ensure you get the most from your purchase.
We recommend that you keep this manual in a safe place for future reference.
Your Freestanding Cooker is covered by a comprehensive two year Parts & Labour
Guarantee. In the unlikely event that you experience a problem with your Cooker,
you can rest assured that you are fully protected against the cost of repairs for the
first 24 months . Please note that any claim must be accompanied by the model
reference number, serial number and proof of purchase.
To activate your guarantee, you will need your product serial number. This can be
found on the rear of the machine.
There are two ways to register your Guarantee:
•Online: Visit the Support page on our website and complete the online Product
Registration form. www.montpellier-appliances.com
•By Post: Simply detach and ll in the form provided, attach a stamp and send
it in the post. Don’t forget to include your e-mail address so that we can send
conrmation through to you.
Welcome
Note: We are unable to take registrations over the phone.
ACROSS ALL OUR MODELS
YEAR
GUARANTEE
PA R T S & L A B O U R
www.montpellier-appliances.com
Description
of
the
Appliance
Cooktop
Control Panel
Handle Oven
Door
t
de-
Oven Ligh
Rack Gui
Grill pan
Handles et
Oven Sh elf
,--
-
-
-
-
ll
�
-
I
..
�
_J
�) 
CONTENTS:
Section 1. Installation
Section 2. Safety Advice
Section 3. Operating the Appliance
Section 4. Maintenance
Section
1.
Installation
-Remove all packaging and protective film from the appliance.
-Position the appliance in a dry atmosphere.
-The following image is provided as a guide for installation – your installer will carry out
the installation in accordance with the current regulations.
-Your installer will connect the power cable in accordance with the current regulations.
To install this appliance, please proceed as follows:
1.1. Choosing a location for your oven
When choosing a location for your oven, ensure that there are no flammable or
combustible materials in the close vicinity, such as curtains. You may be required to
make changes to the area surrounding your oven.
You must ensure a minimum gap of 50mm between the edge of the hotplate and an
adjacent wall. You must ensure a minimum distance of 750mm between the hotplate
and overhanging cupboards or a cooker hood (see below image).
Note: Do not site your oven next to a cooling appliance.
1.2. Electrical Connection
Power Output
Oven Bottom Element
Oven Top Element
Grill Element
2 x 145mm Heaters
2 x 180mm Heaters
1 x 180mm Rapid Hotplate
-1000W
-1000W
-1600W
-2 x 1200W
-2 x 1700W
-2000W
This appliance has a power rating in excess or 3000W and therefore
must be ‘hard wired’ to a suitable fused point adjacent to the appliance
housing and protected with a 25 amp fuse. Please note that a switchable
spur should be accessible above the work surface to allow the power to
be turned off by the consumer.
Your installer will connect this appliance in accordance with current
regulations using the correct grade of electrical cable and making a
suitable connection between the fused spur and the electrical
connection block on the rear of the appliance.
Section 2. Safety Advice
-Please read this booklet thoroughly before installing and switching on the
appliance. The manufacturer accepts no responsibility for incorrect
installation and usage.
-This appliance is guaranteed for Domestic Use Only.
-The appliance is not intended for use by persons (including children) with
reduced physical, sensory or mental capabilities, or lack of experience and
knowledge, unless they have been given supervision or instruction
concerning the use of the appliance by a person responsible for their
safety. Children should be supervised to ensure that they do not play with
the appliance.
-This appliance must only be used for cooking/heating foods and liquids.
Do not use it for any other purpose.
-If using an adaptor, this must be used in accordance with the
manufacturers instructions and ensure that the electrical circuit is not
overloaded as this could cause overheating.
-Do not twist or bend the cables, and keep them away from hot surfaces.
-Following installation make sure that the power cable is not trapped
underneath the appliance.
-Keep the appliance surfaces clean. Failure to do this could lead to the
appliance malfunctioning.
-The surface of this appliance will get hot during use. The surface of this
appliance will remain hot after it has been turned off.
-If the power supply cord is damaged, it must be replaced by a qualified
person in order to avoid a hazard.
Section 3. Operating the Appliance
3.1. Control Panel
3.2. Oven Functions
You are able to select various difference Oven Functions (explained below) by
adjusting the Oven Function knob on the control panel (shown above).
Oven Lamp
Only the oven light will be turned on. This light will remain on until turned off.
Static Cooking Function
The oven's thermostat and warning lights will be turned on, the lower and upper
heating elements will start to heat.
Lower Heating Function
The oven's thermostat and warning lights will be turned on, the lower heating
element will start to heat.
Upper Heating Function
The oven's thermostat and warning lights will be turned on, the upper heating
element will start to heat.
Gas Mark to °F & °C – Temperature Conversion
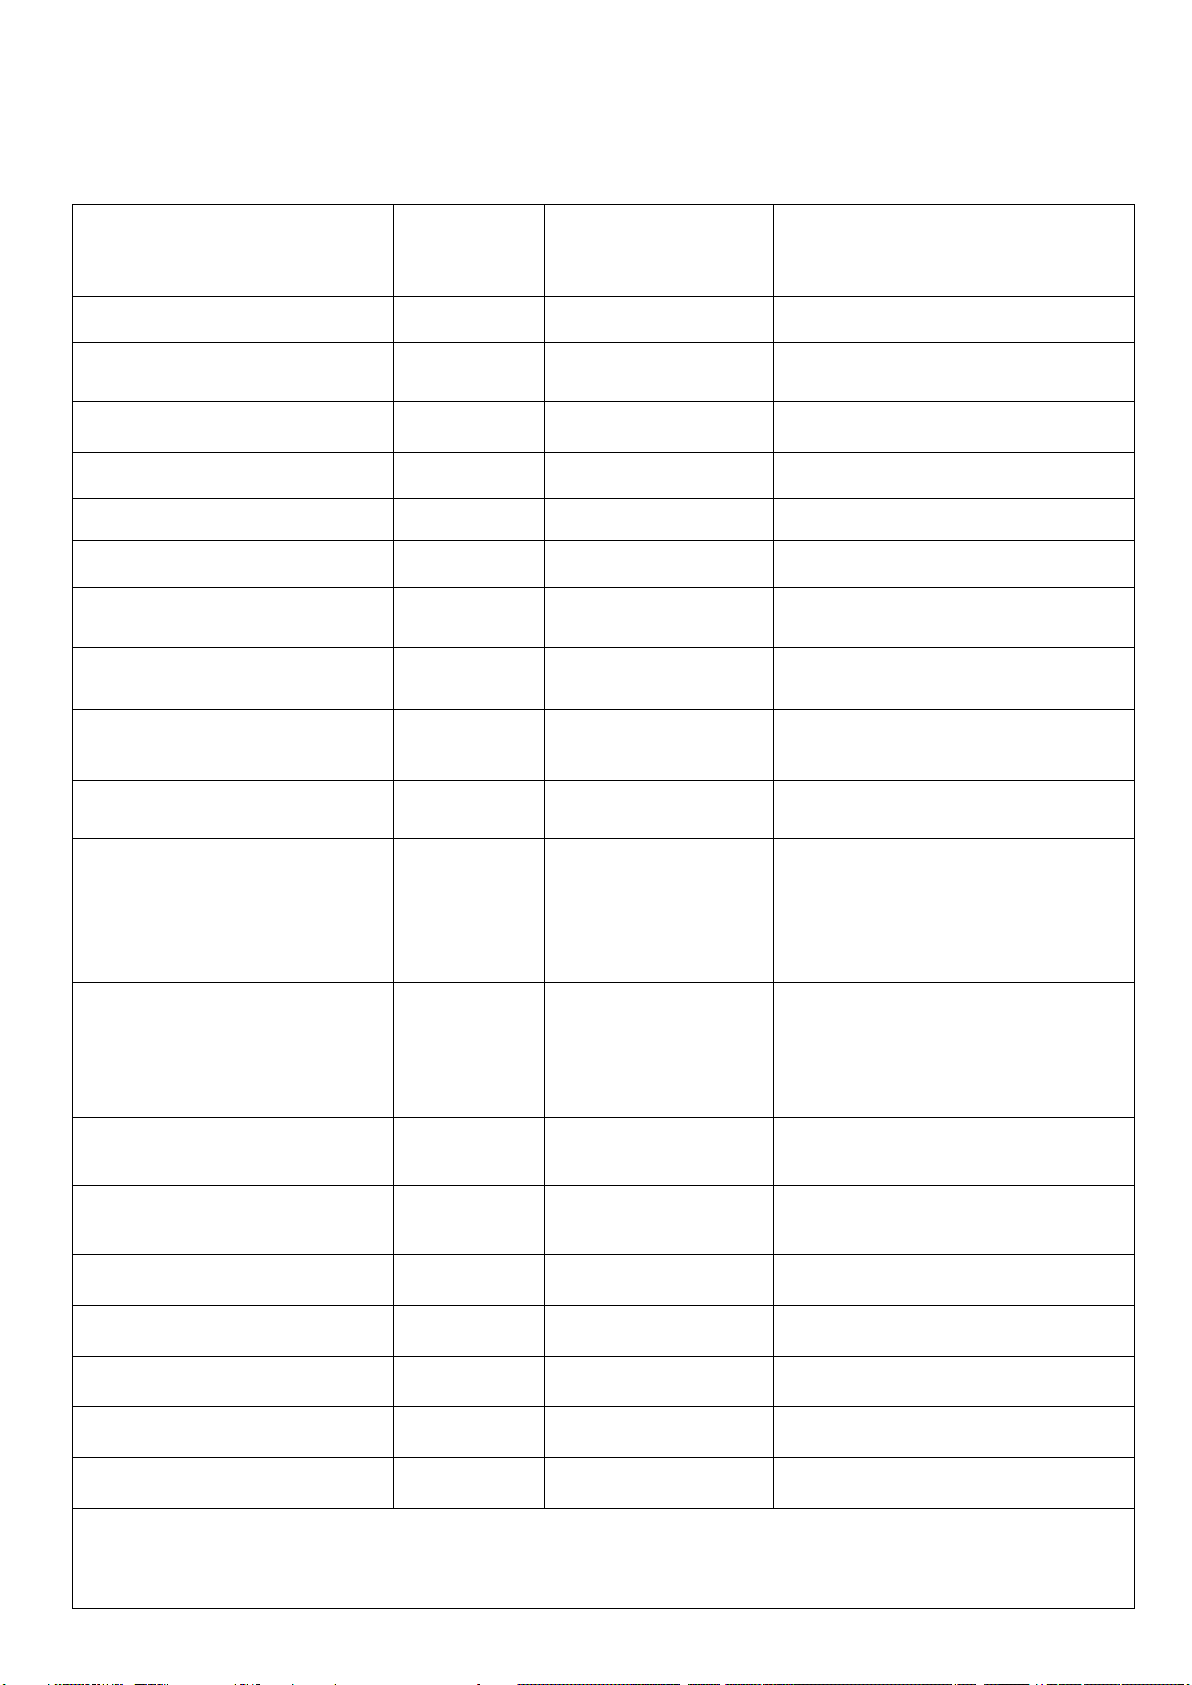
All timings given are purely as a guide. Timings may always vary due to personal methods, size of food being
prepared and the temperature of said food stuffs. We always recommend following the cooking guidelines on
your meat products and packets. For additional information, please call Montpellier on 03333 234 474.
Food Type Rack
Position Temperature Cooking Time
Small Cakes 1 to 3 180 - 200°c 15-20 mins
Biscuits 3 180 - 200°c 12-15 mins
Fruit Cakes 3 135-145°c 4hrs - 4hrs 45 mins
Sponge Cakes 2 180 - 200°c 50 mins
Bread 2 or 3 190°c 20-30 mins
Rolls 3 200°c (5) 180°c (15-20) 5 mins/15-20 mins
Beef Rib (Bone in/out) - 4 - 8
pounds (lb) 3 140-150°c
23-30/39-43 mins min per lb - Allow
to rest for 3-5 mins.
Beef - Eye round roast - 2 - 3
pounds (lb) 3 140-150°c 20-22 mins min per lb - Allow to rest
for 3-5 mins.
Beef Tenderloin Roast - 4 - 6
pounds (lb) 3 200°c 35 - 45 mins Total
Roast Lamb 3 140-145°c
20 - 26 mins per lb - Allow to rest for
at least 3 mins
Roast Chicken (Whole Chicken) 4
-8 pounds (lb) 3 170°c
20 - 30 mins per lb - Check the
internal temperature in the
innermost part of the thigh,
innermost part of the wing & thickest
part of the breast.
Roast Turkey 3 170°c
20 - 30 mins per lb - Check the
internal temperature in the
innermost part of the thigh,
innermost part of the wing & thickest
part of the breast.
Roast Pork: Loin, Shoulder, Leg -
Bone In 3 140°c 20-25 mins per lb - Allow to rest for
at least 3 mins
Roast Pork: Loin, Shoulder, Leg -
Boneless 3 140°c 22-33 mins per lb - Allow to rest for
at least 3 mins
Roast Potatoes 2 or 3 180°c 55 mins
Roasted Vegetables 2 or 3 160°c 25 - 35 mins
Casseroles/Bakes 2 or 3 140-150°c 2 - 3 hours
Fish (Whole) 3 180°c 20-30 mins
Pasta Bake 2 or 3 180°c 25-35 mins
We always recommend Pre-Heating. Firstly, set the required temperature and allow the oven to get to
temperature (up-to 15 minutes) before placing food in the cavity.