MoreBeer BrewSculpture User manual

1
Single–Tier Manual • MoreBeer.com • 1–800–600–0033
Single-Tier
BrewSculpture™ Manual
The
MoreBeer!
Warning
BrewSculpturestm are designed for outdoor use only. Hot water and open flames are dangerous
and can lead to serious injury or death. Please practice safe brewing at all times.
Invoice Number:

2 Single–Tier Manual • MoreBeer.com • 1–800–600–0033
Single–Tier Manual • MoreBeer.com • 1–800–600–0033
Table of Contents
Page 2
• Table of Contents
Page 3
• Introduction
• Tools Required For Setup and Maintenance
Page 4–5
• Setting Up Your
MoreBeer!
Single-Tier BrewSculpture
Page 6–15
• Brew Day on Your Single-Tier BrewSculpture
Page 15–16
• Cleaning & Storing Your Single-Tier BrewSculpture
Page 16–17
• FAQ
• Tips & Tricks

Single–Tier Manual • MoreBeer.com • 1–800–600–0033
3
Single–Tier Manual • MoreBeer.com • 1–800–600–0033
Congratulations!
You now officially own a
MoreBeer!
Single-Tier BrewSculpture. These systems are the next level in homebrewing, and are
designed to make your upcoming brew days convenient, efficient, and easier. The Single-Tier BrewSculpture is our most
popular system, with a large increase in not only home breweries, but commercial breweries as well! In this manual,
we’ll go over the proper setup of your BrewSculpture, how we recommend you use it, how to clean it and proper stor-
age. We’ll hopefully be able to answer most of your questions in this manual, however, if there’s anything that you’re
not seeing or have questions about after reading through, please don’t hesitate to give our customer service team a call
or email – we’re here to help!
Toll Free: 1.800.600.0033 Or Email: [email protected]
Cheers!
So you’ve just received your Single-Tier BrewSculpture,
and like a kid during their birthday, you’ve torn through
the wrapping, and have all of your new toys lying in front
of you. Once you’ve gotten through it all, you should be
looking at the following items:
• 1 x – Stainless Steel Single-Tier Stand
• 3 x – Stainless Steel Heavy Duty Kettles
• 1 x – False Bottom Screen For Mash Tun
• 1 x – Sight Gauge For Hot Liquor Tank
• 1 x – Stainless Steel Sparge Arm Assembly
• 1 x – Copper Heat Exchanger
• 2 x – March Pump Assembly
• 1 x – Whirlpool Assembly on Boil Kettle
• 6 x – Tubing Setups
• 2 x – Casters (Two Caster Wheels Total)
• 1 x – Wheelbarrow Arm (Under Boil Kettle)
• Gas Piping Assembly and Burners
If you ordered the digital package, your sculpture should
include all of the above items, as well as the following:
• 1 x – Control Panel
• 1 x – Combination Valve / Solenoid Valve for Hot Liquor
Tank Burner Assembly
• 2 x – Thermowells for Digital Temperature Probes
Tools Required For
Setup and Maintenance
• 1 x – Hot Liquor Tank Float Switch Assembly
• 1 x – Stainless Steel Sparge Arm Float Switch Assembly
• 2 x – Temperature Probes For Control Panel / Thermow-
ells (Hot Liquor Tank and Mash Tun)
NOTE: Your digital BrewSculpture will not include an ex-
tension cord for the control panel. Due to us not knowing
how far your BrewSculpture will be from an outlet, we do
not include this. Please purchase a standard three-prong
extension cord of the appropriate length to power your
digital BrewSculpture separately.
Most of these items should have come assembled; how-
ever some of them may require adjusting or assembling.
If any of these items appear to be missing, please notify
our customer service team. Tools that may be required for
assembling and maintenance are:
• Flat Head Screwdriver (Hose Clamps)
• Phillips Head Screwdriver (Pump Head)
• Crescent Wrench (Quick Disconnects, Ball Valves)
• Plumber’s / Teflon Tape (Any Male Pipe Threads)
• Line Brush (Tubing Assemblies)
• White Scrub Pads (Cleaning Kettles and Frame)
• Extension Cord (Needed For Pump Assembly or Control Panel)
Introduction

4 Single–Tier Manual • MoreBeer.com • 1–800–600–0033
Single–Tier Manual • MoreBeer.com • 1–800–600–0033
Setting Up Your
Single-Tier BrewSculpture
With all of the included items and aforementioned tools in front of you, you’re ready to setup your BrewSculpture.
These instructions are for the basic setup of all Single-Tier BrewSculptures. There will be an extended list of
setup parts and instructions for our Digital Single-Tier BrewSculptures at the bottom of this section. Let’s start
at the right of the BrewSculpture, and work our way to the left…
The far right burner location is going to be where we position the hot liquor tank. The hot liquor tank is the
vessel that will heat and store your sparge water, which is used to rinse all of the sugars from the grains in
the mash tun, and into the boil kettle after you’ve finished mashing. This kettle will be placed on the bottom
burner tier, and will need five items installed on it. These are: A ball valve and quick disconnect on the bottom
coupler, a stainless steel maximizer on the inside of that bottom coupler, a sight gauge adapter to the coupler
on the side of the kettle, the sight gauge will install in this adapter’s small 1/8" hole, and last, but not least,
your 3" Face x 2" Probe thermometer. You’ll also need to install the heat exchanger in the hot liquor tank prior
to re-circulating your mash and sparging.
The middle burner location is where you’ll position your mash tun. Your mash tun is where all of the grains
will be during the mashing and sparging process, and will receive five things during setup: A ball valve and quick
disconnect combination, a 3" Face x 6" Probe (the probe will protrude into the grain bed), the perforated false
bottom screen, and a stainless steel maximizer. First, install the ball valve after wrapping plumber’s tape on the
bottom coupler. Next, screw the stainless steel maximizer into the inside of the bottom coupler, with the bend
in the tube aimed down toward the bottom of the kettle. With this in place, take the perforated false bottom
screen, and insert it into the kettle with the single-handle side facing upward. It is important that this rests
flat on the bottom, with minimal gapping between the screen and the sides of the kettle. Once this is in place,
we’re ready to screw the thermometer into the top coupler using 3–4 wraps of plumber’s tape. We’ll attach the
stainless steel sparge arm assembly to the side of the mash tun after we’ve doughed-in.
The left burner location is going to be where your boil kettle goes. You’ll be able to tell your boil kettle and
mash tun apart from the hot liquor tank, as the boil kettle will have two MPT ports in the kettle. With this
kettle in front of you, we’ll want to install four things: Two ball valves and quick disconnects, the 3" Face x 2"
Probe thermometer, and the stainless steel elbow. One ball valve will thread on to the bottom coupler (using
3–4 wraps of plumber’s tape on the kettle’s male threads), the thermometer will thread into the top coupler
(also with 3–4 wraps of plumber’s tape on the thermometer’s male threads), and the elbow will thread into the
inside of the bottom coupler’s threads, inside the kettle (no plumbers tape required - if it leaks it will just be
leaking inside the kettle). The second ball valve will install on your whirlpool coupler, and the ½" MPT x 3/8"
Barb elbow will install to the inside of this coupler, facing sideways.
Your March Pump assemblies should come with mounting brackets pre-mounted to the frame. To install your
March Pumps, simply slide the pumps’ mounting plate into the BrewSculpture-mounted bracket. Your pump
should be installed so the "inlet" faces down towards the ground and the pump "outlet" faces up. Note: The
pump outlet will be labeled on your pump head with the word "out".
The casters and control panel (not a standard option) should come pre-mounted. If these are not included
or installed, please call our customer service department.

Single–Tier Manual • MoreBeer.com • 1–800–600–0033
5
Single–Tier Manual • MoreBeer.com • 1–800–600–0033
Digital Single-Tier
Additional Equipment Installations
If you ordered a Digital Single-Tier BrewSculpture, you’ll also need to install the following pieces of equipment
prior to use:
Hot Liquor Tank:
The hot liquor tank will also need to have the float switch assembly (on stainless bracket – not the sparge arm)
installed and plugged into the left side of the control panel. This will plug into the input labeled “HLT”. Then,
you’ll need to install the 3" thermowell into the remaining coupler, wrapping 3–4 layers of Teflon tape around
the male pipe threads. Insert the thermowell labeled “HLT Temp” into the thermowell, and plug it into the
right side of the control panel.
Mash Tun:
The mash tun will also need to have its thermowell installed, however this thermowell should measure longer
in length, so as to reach closer to the center of the grain bed. The temperature probe labeled “MT Temp” will
plug into the port on the left side of the control panel labeled “MT Temp”. The final port on your control
panel is where the sparge arm float switch wire will plug in, once the sparge arm is ready to be installed (after
doughing-in).
Pump:
The pumps will need to be plugged into the power box on the control panel, rather than into the wall. Make
sure the “Pump” light is NOT on prior to plugging in, to avoid running the pump dry!

6 Single–Tier Manual • MoreBeer.com • 1–800–600–0033
Single–Tier Manual • MoreBeer.com • 1–800–600–0033
So you’ve gotten your whole BrewSculpture setup, and can’t wait to start brewing! We’ll go through the process
of doing so, and will try to help keep your brew day as quick, easy, and efficient as possible. We would like to
start by recommending that once all of your kettles have been setup, you may want to do a water run starting
with 4–5 gallons in your mash tun and hot liquor tanks. Re-circulate the water in the mash tun, then move the
tubing around to mimic a sparge into your boil kettle. This is not only done to remove any dust or stainless
shavings from manufacturing, but is also recommended so that you understand how everything connects and
It’s important to have the following items ready at the start of your brew day:
Wort Chiller — Used at the end of your boil to quickly cool your wort to yeast pitching temperatures.
Measuring Bucket — To measure your mash and hot liquor tank water volumes, and to act as a sanitizer bucket
throughout the brew after this has been performed.
Propane Tank — Should be at least 2/3 full for a standard brew day.
“BBQ” Lighter — Should be long enough to keep hands away from burners while lighting.
Ingredients — May sound like a no-brainer, but it’s better that you make sure all grains / hops are there prior
to starting!
Fermenters — It’s best to have your fermenter or fermenters cleaned and ready to sanitize before the brew, but
if not, have them around so they can be cleaned during the brew.
Other Tools — Spoon, mash paddle, refractometer, note pad, etc.
Brew Day on Your
Single-Tier BrewSculpture

Single–Tier Manual • MoreBeer.com • 1–800–600–0033
7
Single–Tier Manual • MoreBeer.com • 1–800–600–0033
flows prior to brewing with wort. Another thing to look for while performing the water run is any leaky threads
or tubing – better to leak water than wort!
At this point, all of your kettles should be setup, and now you probably have a couple pieces of equipment
sitting around. These would be your pieces of tubing with quick disconnects, the copper heat exchanger and
your stainless steel sparge arm. The stainless sparge arm will install on the mash tun’s kettle wall, and the height
is adjustable.
With all of your kettles setup, all other items in front of you, and a craving to brew like you’ve never had before,
let’s get started! We’ll want to use a measuring bucket to measure the appropriate amount of water for our
mash tun. There are different grist ratios that work well for different brewers and breweries. If you’re using long
tubing lines, you may want to start with more water (since there will be some liquid that is not in contact with
the grains while it recirculates through your tubing). With our Single-Tier BrewSculpture, we recommend start-
ing with a 1.3–1.4 grist ratio, and moving up or down from there. This number is how many quarts of water
per pounds of grain you’ll be using. An example of how to find out the amount of water you’ll need (or how
to get your grist ratio) is below. Let’s say your recipe for 10 gallons will include 20lbs of grain. In order to find
out how much water (in gallons) you’ll need in the mash tun, we’ll use this equation:
1.3(qts) x 20(lbs) = 26qts / 4(4 qts in a gallon) = 6.5(gallons)
We’ll want 6.5 gallons in contact with our 20lbs of grain to achieve a 1.3:1 grist ratio. If we were to fill our
kettle with 6.5 gallons though, we wouldn’t have it all in contact with the grains. There will be what we call
“dead space” under the false bottom: Water that is not in contact with grain. We’ll need to account for that
in our equation, and add that volume of dead space to our 6.5 gallons. In our 15 gallon kettles, we’ll have
approximately 2 gallons underneath the false bottom. Therefore, we’ll want to measure out 8.5 gallons to
achieve a 1.3 grist ratio. In our 26 gallon kettles, we’ll have approximately 2.25 gallons underneath the false
bottom, and will also have more grain (larger batch), so the equation should be re-run with 2.25 gallons of
dead space in mind.
Below are instructions for a brew day on a standard Single-Tier BrewSculpture. If you have a Digital Single-Tier
BrewSculpture, please see pages 11–15.
Once we have our strike water in our mash tun, we can attach the propane tank and fire up the mash tun burner.
We’ll want to heat it up to a temperature above what you’re actually hoping to mash at, as that temperature will
drop once the room temperature grain is introduced and stirred in. This temperature drop will be dependent on
how much grain will be used, how much water you have in the mash tun, and what the ambient temperature is
where you’re brewing. Due to this, it’s hard to recommend how far above your mash temperature you’ll want
to heat your water to prior to doughing-in. A wide, general range would be between 6–12 degrees above what
you’re hoping to mash at. Example: If you’d like to mash at 150°F, dough-in at 156°F–162°F.
While your mash tun water is heating up, let’s measure out our sparge water in our hot liquor tank. We recom-
mend using slightly more than the desired end volume in your hot liquor tank. For example – if you’re hoping to
end with 11 gallons in your boil kettle prior to transferring to your fermenters, measure out 13–14 gallons into
your hot liquor tank. This volume mixed with the volume you’ll be putting into your mash tun will combine to
Brew Day
Instructions By Model
Standard Single-Tier Brew Day

8 Single–Tier Manual • MoreBeer.com • 1–800–600–0033
Single–Tier Manual • MoreBeer.com • 1–800–600–0033
be more than enough for the pre-boil volume in your boil kettle. NOTE — These measurements are general, and each
batch or brewer will vary. We highly recommend taking good notes and using these in future batches to perfect your brewing style
and recipes. We’ll be aiming for around 10°F above the targeted mash temperature for our sparge water during
mash. Since we’ll be re-circulating our mash through the heat exchanger in the hot liquor tank, we don’t want
it to be the same temperature (then you’ll slowly lose mash temperature), but we also don’t want it to be too
hot, as this could pull astringency from the grain husks, or potentially halt enzyme activity.
Once we’ve gotten the mash tun to the desired “strike temperature” (the temperature that the grain will strike
the water while doughing-in), it’s time to dump and stir the grain into the mash tun. Start pouring the grain
into the mash tun, distributing it as evenly as possible and stirring constantly with a mash paddle. This is done
to help prevent dough balls and clots that will reduce efficiency, and possibly contribute to a stuck sparge.
With all of the grain inside the mash tun, double check the temperature to make sure it’s where you want it,
and attach the stainless steel sparge assembly. At this point in time, we’ll want to start our timer for one hour,
or however long you’ll be mashing for, and connect the appropriate tubing for recirculation.
The Flow of the Tubing
Re-Circulating the Mash:

Single–Tier Manual • MoreBeer.com • 1–800–600–0033
9
Single–Tier Manual • MoreBeer.com • 1–800–600–0033
From the mash tun’s ball valve, we’ll run the longest length of tubing down to the March Pump inlet. Run
one of the other tubing lengths with (2) quick disconnect fittings from the pump outlet to the heat exchanger
inlet (right female QD), and the other one of those tubing lengths from the outlet (left male QD) of the heat
exchanger to the inlet of your sparge arm assembly. You’re now ready to re-circulate your mash! Meanwhile,
the hot liquor tank will probably be getting close to our target temperature soon, so keep an eye on that and
turn the burner off once we’ve reached that temperature.
The conversion from mashing to sparging is rather simple. We’ll want to close the mash tun’s ball valve, as well
as the ball valve on the March Pump and sparge arm. Move the tubing running from the mash tun’s ball valve
to the hot liquor tanks ball valve. Take one of the tubing lengths with (2) quick disconnects and connect the
Mash Tun ball valve to the inlet of the left side pump. Take another tubing length with (2) quick disconnects &
connect the outlet of the left pump to the boil kettle ball valve. With the hot liquor temperature at 170°F (or
slightly higher), open the hot liquor tank and March Pump ball valves all the way. Now crack the sparge arm
assembly’s ball valve and turn on the pump. The liquid level should now be dropping in the hot liquor tank,
while rising in the mash tun. Once 2–3" has gathered on top of the grain bed, open the boil kettle ball valve,
and crack the mash tun ball valve – now we’re sparging!
We want to make sure that during the sparge we do not over fill our mash tun, while also not running the
The Flow of the Tubing
Sparging:

10 Single–Tier Manual • MoreBeer.com • 1–800–600–0033
Single–Tier Manual • MoreBeer.com • 1–800–600–0033
Once we have our mash water in our mash tun, we can attach the propane tank, plug the BrewSculpture into
your wall, and fire up the mash tun burner. We’ll want to heat it up to a temperature above what you’re actually
hoping to mash at, as that temperature will drop once the room temperature grain is introduced and stirred
in. This temperature drop will be dependent on how much grain will be used, how much water you have in the
mash tun, and what the ambient temperature is where you’re brewing. Due to this, it’s hard to recommend
how far above your mash temperature you’ll want to heat your water to prior to doughing-in. A wide, general
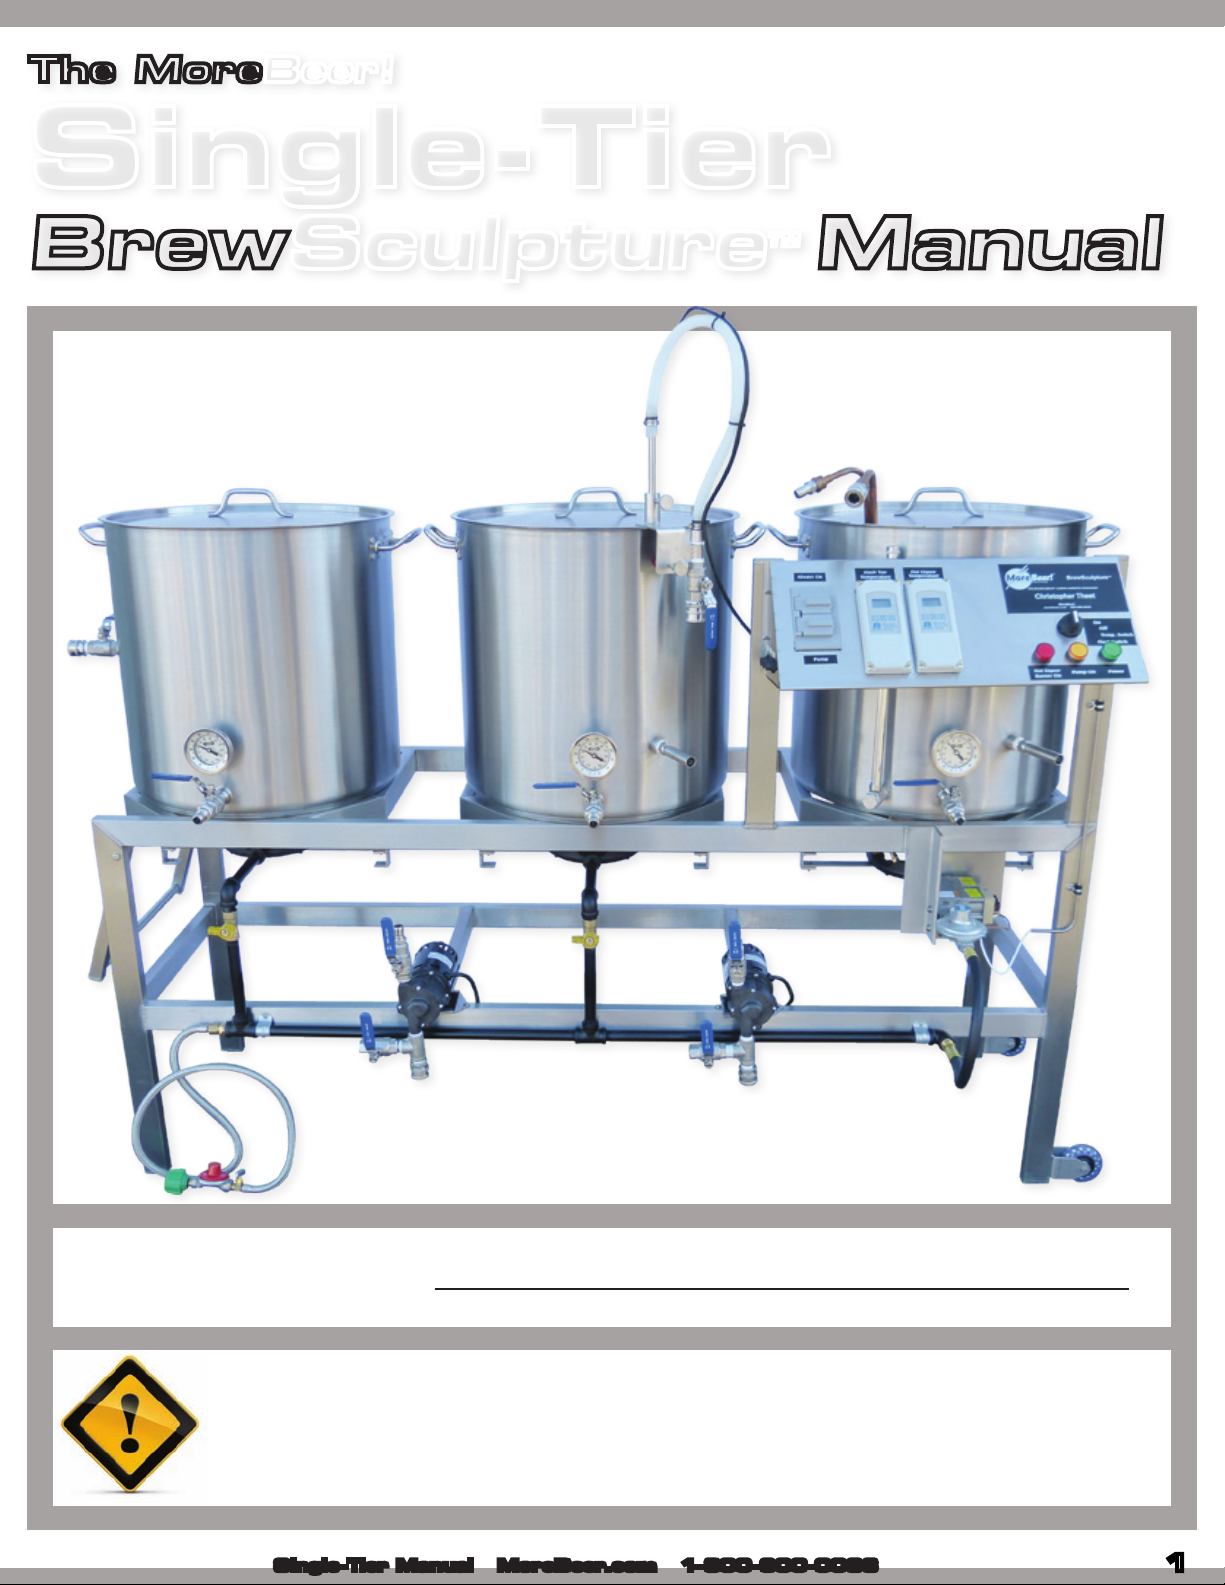
Digital Single-Tier Brew Day
grain bed dry. This will take a little fine tuning of the ball valves on both the hot liquor tank and mash tun. The
sparge process should take between 45–75 minutes, so if it seems like your hot liquor tank will be dry after 20
minutes, it’s best to close both ball valves a little more to slow down the flow. Finding that perfect flow rate
may take a few batches, so make note on how far open you have the valves, and how long it took to sparge at
that position.
Once we’ve filled our boil kettle past the thermometer probe, it’s time to fire up that burner to bring our wort
to a boil! It’s best to have the burner turned up all the way while getting to a boil, however once we achieve
a boil we may want to turn it down to help prevent a boil over. Make sure to close the ball valves of your hot
liquor tank, mash tun, and boil kettle once the desired volume has been collected in your boil kettle.
At the very beginning of the boil, you’ll most likely experience the “hot break”. This is identifiable by a layer
of foam forming on the top of your wort, and is a good thing unless it spills all over your BrewSculpture and
kettle! To prevent the hot break from a “boil-over”, either reduce the heat or spray the foam with water out
of a spray bottle. Blowing on the foam can help a little also, but only if the heat has been reduced first. You
could try using foam control, or “FermCapS” (our part number AD290). Just add a couple of drops when this
foam starts to form, and this should help reduce it. After getting through the hot break, start your timer for
the length of the boil you’ll be doing. 60, 75, and 90 minutes are generally the most common boil times, but
depending on your brewing style and recipe, other times may be appropriate also. Through the boil, you’ll be
adding your hops, adjuncts, and other ingredients as the recipe calls for them. NOTE: Whole leaf hops will need
to be put into a mesh bag, as they will clog the ball valve if they’re not contained. While your wort is boiling, you can save
time by connecting the long piece of tubing to the mash tun ball valve, and open it allowing any extra liquid
drain into a bucket/drain.
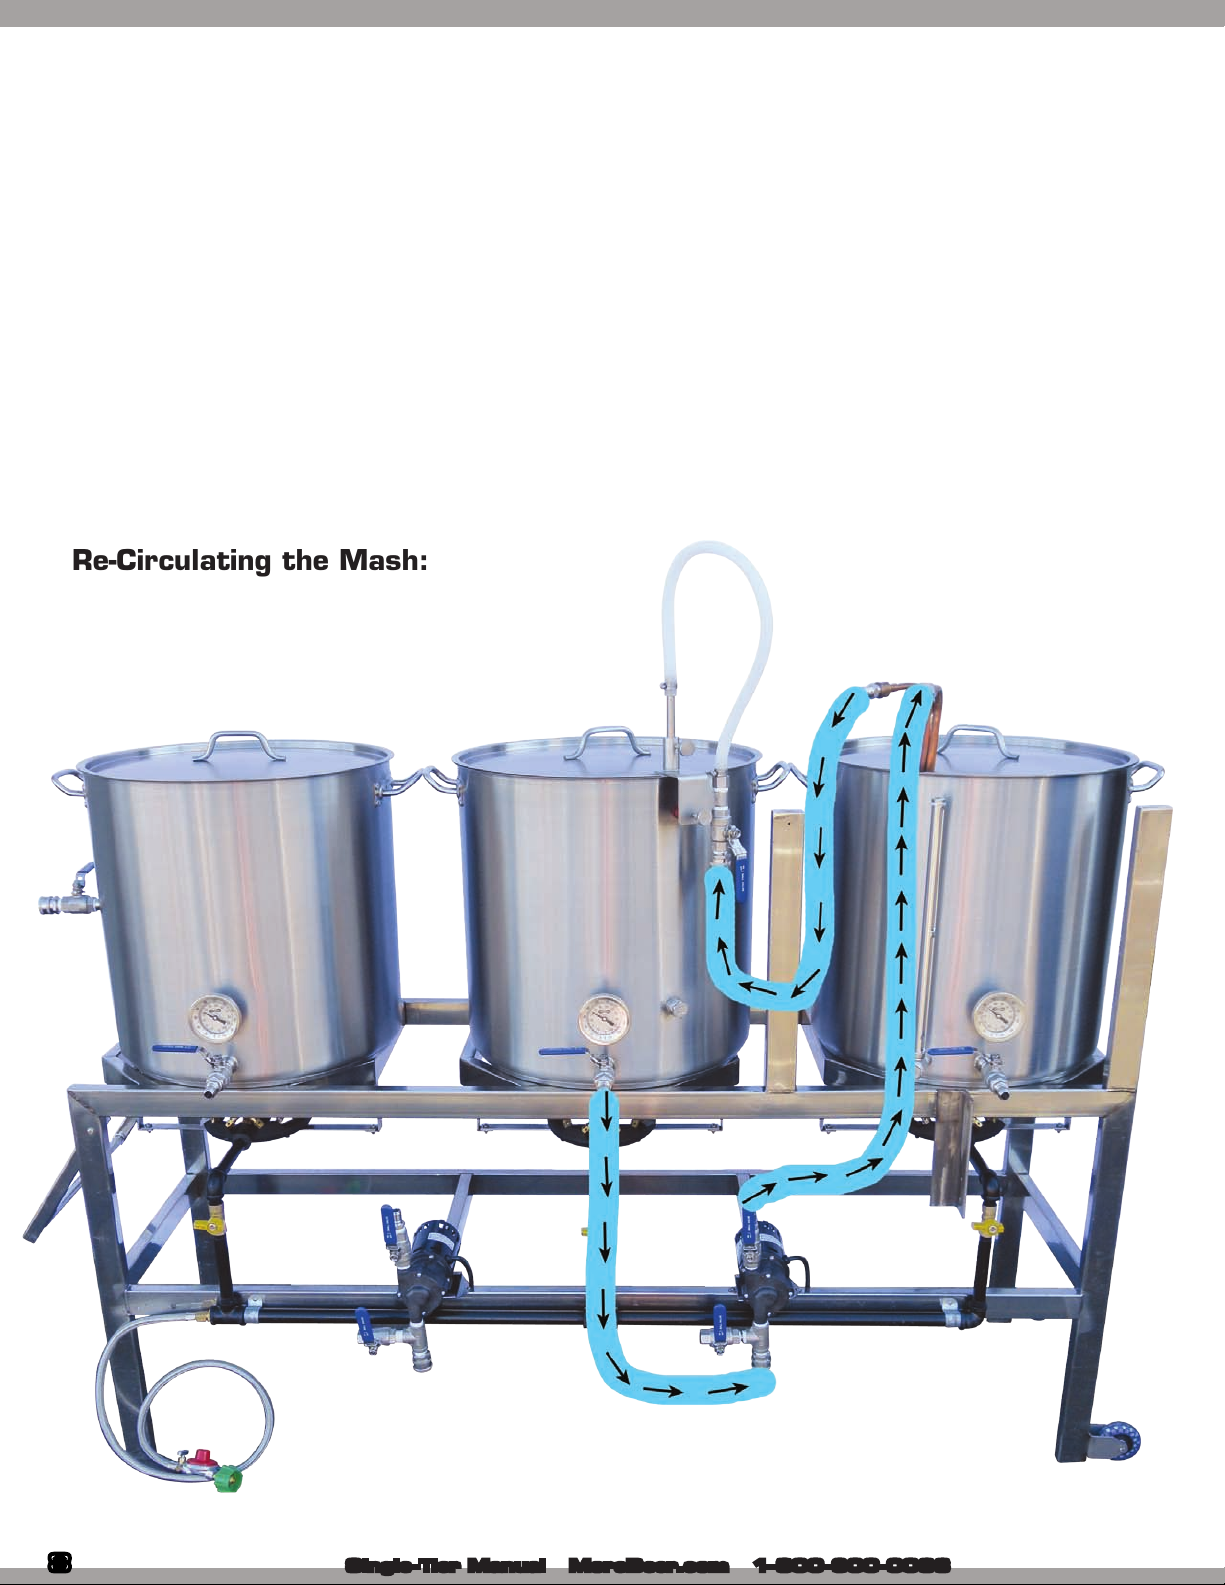
With about 15 minutes left in the boil, we’ll want to start the whirlpool re-circulation. While the whirlpool
will be ineffective until we turn the flame off and kill the boil, re-circulating through your tubing, pump, and
potentially your plate or counterflow wort chiller will help ensure that any possible wild yeast or bacteria that
happened to be there is killed by the boiling temperature of the wort.
At the end of the boil, we’ll turn the flame off and allow the whirlpool to run for 1–2 minutes. After the 1–2
minutes is up, you can turn the pump off, and allow the whirlpool to settle. The reason we want to create this
whirlpool is to accumulate all of the hop sediment, grain particles that made it through during sparge, extra
proteins, etc. in the center of the boil kettle. Allow the whirlpool to settle in the center of the kettle for about
15 minutes (you can crack the boil kettle lid open to see if it’s still swirling around – if not then you’re ready to
transfer). If you’re using an immersion chiller, you’ll want to wait until your wort is at the desired temperature
prior to transferring. If you’re using a plate or counterflow chiller, you’ll be ready to transfer through the chiller
once the whirlpool has settled. To transfer into your fermenter(s), you’ll want to close the whirlpool ball valve,
disconnect the quick disconnect, and run that length of tubing to your fermenter(s). Make sure the kettle and
pump ball valves are open, and turn the pump on! NOTE: Transferring at a slightly slower rate will help ensure that
you do not create too much suction on the inside of your boil kettle, which will help keep the hop sediment to remain in the
center of the boil kettle.

Single–Tier Manual • MoreBeer.com • 1–800–600–0033
11
Single–Tier Manual • MoreBeer.com • 1–800–600–0033
1. Turn on the propane supply.
2. Turn the multifunction valve to “Pilot”, located to the left of the burner behind the shield, and is labeled:
On, Off, and Pilot.
3. Press in and hold the multifunction valve knob and light the pilot light at the burner.
4. Continue pressing in the valve knob for 45 seconds.
5. On releasing the valve knob, the pilot should stay lit. If not, check the thermocouple to ensure that it is
in the flame of the pilot. Do not use the system if you suspect a malfunction.
6. Once the pilot stays lit, turn the multifunction valve to On. BE CAREFUL - as this will ignite the burner.
Make sure your face, hands, clothing, and anything flammable are away from the burner BEFORE turning
the valve to the "On" position.
While your mash tun water is heating up, let’s measure out our sparge water in our hot liquor tank. We
recommend using slightly more than the desired end volume in your hot liquor tank. For example – if you’re
hoping to end with 11 gallons in your boil kettle prior to transferring to your fermenters, measure out 13 to
14 gallons into your hot liquor tank. This volume mixed with the volume you’ll be putting into your mash tun
will combine to be very close to the appropriate pre-boil volume in your boil kettle. NOTE: These measurements
are general, and each batch or brewer will vary. We highly recommend taking good notes and using these in future batches to
perfect your brewing style and recipes. We’ll be aiming for around 10°F above the targeted mash temperature for our
sparge water. With the hot liquor tank float switch and temperature probe installed in the kettle and plugged
into the control panel, we’re ready to set our controller. Pushing the “SET” button will begin this process, and
you’ll have the option to choose Fahrenheit or Celsius. Press the “SET” button again to view the current set
point. This can be raised or lowered with the arrow buttons, and should be set to where you want your hot
liquor tank’s temperature at. Pressing the “SET” button again will allow you to change the differential. The
differential will allow a “swing” of temperature. We recommend keeping this at “1” – which will turn the burner
on as soon as the temperature falls 1 degree below the set point. Setting the differential at 5 will allow the hot
liquor tank to fall 5 degrees below your set point before turning the burner on. After setting your differential,
press the “SET” button again to choose cooling (C1) or heating (H1). Make sure this is set to heating (H1). At
this point, press the “SET” button again to view the current temperature – nothing should be blinking at this
point. We can also set the mash tun’s controller at this point, but will not want to have the pump plugged in,
Lighting the Pilot:
range would be between 6–12 degrees above what you’re hoping to mash at. Example: If you’d like to mash at
150°F, dough-in at 156°F–162°F.

12 Single–Tier Manual • MoreBeer.com • 1–800–600–0033
Single–Tier Manual • MoreBeer.com • 1–800–600–0033
as it will instantly get turned on and run dry (which is bad!). Everything on the mash tun should be setup the
same as the hot liquor tank, other than the temperature set point (set this to whatever you’d like to mash at).
Once we’ve gotten the mash tun to the desired “strike temperature” (the temperature that the grain will strike
the water while doughing-in), it’s time to dump and stir the grain into the mash tun. Start pouring the grain
into the mash tun distributing it as evenly as possible and stirring constantly using a mash paddle. This is done
to help prevent dough balls and clots that will reduce efficiency, and possibly contribute to a stuck sparge.
With all of the grain into the mash tun, double check the temperature to make sure it’s where you want it, and
install the stainless steel sparge assembly. After the sparge arm is installed, plug the float switch into the control
panel. At this point in time, we’ll want to start our timer for one hour, or however long you’ll be mashing for,
and connect the appropriate tubing.
The Flow of the Tubing
Re-Circulating the Mash:
From the mash tun’s ball valve, we’ll run the longest length of tubing down to the March Pump inlet. Run one
of the other tubing lengths with (2) quick disconnect fittings from the pump outlet to the heat exchanger inlet,
and the other one of those tubing lengths from the outlet of the heat exchanger to the inlet of your sparge arm
assembly. You’re now ready to re-circulate your mash! Meanwhile, the hot liquor tank will soon be getting
close to our target temperature, but will turn off automatically once the set point has been reached. During
the mashing process, we’ll want to have the pump plugged into the “PUMP” outlet, and have the dial on the
right of the control panel switched to “Temp. Switch”.

Single–Tier Manual • MoreBeer.com • 1–800–600–0033
13
Single–Tier Manual • MoreBeer.com • 1–800–600–0033
The conversion from mashing to sparging is rather simple. We’ll want to close the mash tun’s ball valve, as well
as the ball valve on the March Pump and sparge arm. Move the tubing running from the mash tun’s ball valve
to the hot liquor tanks ball valve. Take one of the tubing lengths with (2) quick disconnects and connect the
Mash Tun ball valve to the inlet of the left side pump. Take another tubing length with (2) quick disconnects &
connect the outlet of the left pump to the boil kettle ball valve. With the hot liquor temperature at 170°F (or
slightly higher), open the hot liquor tank and March Pump ball valves all the way. Now crack the sparge arm
assembly’s ball valve and turn on the pump. The liquid level should now be dropping in the hot liquor tank,
while rising in the mash tun. Once 2–3" has gathered on top of the grain bed, open the boil kettle ball valve,
and crack the mash tun ball valve – now we’re sparging!
We want to make sure that during the sparge we do not over fill our mash tun, while also avoiding running
the grain bed dry. The float switch will monitor this for the most part, but we will still need a little fine tuning
of the ball valves on both the hot liquor tank and mash tun. The sparge process should take between 45–75
minutes, so if it seems like your hot liquor tank will be dry after 20 minutes, it’s best to close both ball valves a
little more to slow down the flow. Finding that perfect flow rate may take a few batches, so make note on how
The Flow of the Tubing
Sparging:

14 Single–Tier Manual • MoreBeer.com • 1–800–600–0033
Single–Tier Manual • MoreBeer.com • 1–800–600–0033
far open you have the valves, and how long it took to sparge at that position.
Once we’ve filled our boil kettle past the thermometer probe, it’s time to fire up that burner to bring our wort
to a boil! It’s best to have the burner turned up all the way while getting to a boil, however once we achieve
a boil we may want to turn it down to help prevent a boil over. Make sure to turn off the pump and close the
ball valves of your hot liquor tank, mash tun, and boil kettle once the desired volume has been collected in
your boil kettle.
At the very beginning of the boil, you’ll most likely experience “the hot break”. This is identifiable by a layer of
foam forming on the top of your wort, and is a good thing until it spills all over your BrewSculpture and kettle!
To prevent the hot break from a “boil-over”, either reduce the heat or spray the foam with water out of a spray
bottle. Blowing on the foam can help a little also, but only if the heat has been reduced first. After getting
through the hot break, start your timer for the length of the boil you’ll be doing. 60, 75, and 90 minutes are
generally the most common boil times, but depending on your brewing style and recipe, other times may be
appropriate also. Through the boil, you’ll be adding your hops, adjuncts, and other ingredients as the recipe
calls for them. NOTE: Whole leaf hops will need to be put into a mesh bag, as they will clog the ball valve if they’re not
contained. While your wort is boiling, it may save you time to connect the long piece of tubing to the mash tun
ball valve, and open it allowing any extra liquid drain into a bucket/drain.
With about 15 minutes left in the boil, we’ll want to start the whirlpool re-circulation. During the recirculation
of the wort, we will want to unplug the pump from the “Pump” outlet, and plug it into the “Always On” outlet.
With all tubing connected properly, turn the dial on the control panel to “On”. This should turn the pump on.
To turn it off, simply unplug the pump.
While the whirlpool will be ineffective until we turn the flame off and kill the boil, re-circulating through your
tubing, pump, and potentially your plate or counterflow wort chiller will help ensure that any possible wild
yeast or bacteria that happened to be there is killed by the boiling temperature of the wort.
At the end of the boil, we’ll turn the flame off and allow the whirlpool to run for 1–2 minutes. After this 1–2
minutes is up, you can turn the pump off, and allow the whirlpool to settle. The reason we want to create this
whirlpool is to accumulate all of the hop sediment, grain particles that made it through during sparge, extra
proteins, etc. in the center of the boil kettle. Allow the whirlpool to settle in the center of the kettle for about
15 minutes (you can crack the boil kettle lid open to see if it’s still swirling around – if not then you’re ready to
transfer). If you’re using an immersion chiller, you’ll want to wait until your wort is at the desired temperature
prior to transferring. If you’re using a plate or counterflow chiller, you’ll be ready to transfer through the chiller
once the whirlpool has settled. To transfer into your fermenter(s), you’ll want to close the whirlpool ball valve,
disconnect the quick disconnect, and run that length of tubing to your fermenter(s). Make sure all ball valves
are open, and turn the pump on! NOTE: Transferring at a slightly slower rate will help ensure that you do not create too
much suction on the inside of your boil kettle, which will help to keep the hop sediment remain in the center of the boil kettle,
rather than pulling towards the diverter barb on the side of the kettle.
• The Mash Tun temperature controller will be controlling the pump during your mash process. When the
temperature of your mash falls below the set point on the controller, it will allow the electricity to flow, which
will turn the pump on. This will begin pumping your mash through the heat exchanger, gradually bringing it
back to the proper temperature.
• The Hot Liquor Tank controller will be controlling the solenoid valve in front of your hot liquor tank burner.
When the cooler mash runs through the heat exchanger, this will lower your hot liquor water temperature.
How The Digital Package Works:

Single–Tier Manual • MoreBeer.com • 1–800–600–0033
15
Single–Tier Manual • MoreBeer.com • 1–800–600–0033
When this water temperature drops below your set point, the digital controller will tell the solenoid valve to
open, and the pilot light will ignite the burner until the set point is reached again, at which point the controller
will tell the solenoid valve to close, turning the burner off.
• The dial on the right of the control panel will tell your pump outlet box whether it should be listening to the
mash tun temperature / controller, or the mash tun liquid level / float switch. When in “Temp. Switch”, the
pump will be listening to your mash tun set point. When in “Float Switch”, the pump will be listening to your
mash tun float switch. “Temp. Switch” should be used during mash, “Float Switch” should be used during
sparge.
• While sparging, switch the dial to “Float Switch” mode. The pump will now turn on until the float switch has
risen to the top, at which point it will shut the pump off. As liquid drains from your mash tun into the boil
kettle, the float switch will lower, eventually turning the pump back on, restarting the cycle.
• The hot liquor tank float switch is an extra safety pre-caution. Once the liquid level of the hot liquor tank
goes below the float switch, the burner under the hot liquor tank will not turn on, preventing scorching or
excessive gas consumption.
• The “Always On” outlet will have power running to it as long as your control panel is plugged in and the dial is
switched to “On”. This should be used when you’re boiling your wort and recirculating through the whirlpool
weld. To turn the pump off during this time, simply unplug it, turn the ball valve on the pump outlet (pump
will be on, but won’t be moving wort), or turn the dial to “Off”.
Cleaning is one of the last things that anyone wants to do after finishing a brew day, but anybody that’s put
it off before will tell you, it’s much easier to do right after the brew rather than waiting until your next brew! If
you have the digital BrewSculpture, please make sure to remove and unplug all of the temperature and float
switches at this point in time.
Generally speaking, the hot liquor tank will not need to be cleaned, but may need to be dried out/wiped down,
as nothing but water is ever held in this kettle. Removing and cleaning the sight gauge, maximizer, ball valve
assembly, sparge ring, and thermometer is highly recommended after every brew.
The mash tun will need to be emptied, and having a scoop, mash paddle, or spoon will allow you to scoop
the grain out of the mash tun until it is light enough to dump out. This grain will probably still be hot, so be
careful not to dump it onto yourself or anyone else. Once most of the grain has been dumped, remove the
thermometer and false bottom, and clean these off (do not submerge the thermometer face into water). Remove
the maximizer, but leave the ball valve installed. Fill the kettle with 2–3 gallons of water and scrub any sugars
or grains off the kettle walls with a white scrub pad (our part number CE27) or wash cloth and StarSan. Once
the kettle looks clean and there are no more sugar or grain spots, you can empty all water and remove the ball
valve assembly. All of the subparts of your kettles (other than the thermometers) should be placed in a bucket
of PBW water and allowed to soak for 10–15 minutes. PBW will help to break down any residual sugar or wort
on these parts, and will make them easier to unthread and keep clean.
Your boil kettle will most likely have some foam residue, hop material, and trub adhering to the walls and
bottom. There will also most likely be some liquid left over from the boil, so we recommend dumping that out,
then spraying and wiping the kettle down with a hose and scrub pad until all visual dirt, hops, and residual
sugar have been removed. After the kettle appears clean, remove the ball valve assembly, thermometer, and
elbow from inside the kettle. Again, other than the thermometer, these should be placed in your PBW bucket
and allowed to soak.
Cleaning and Storing
Your Single-Tier BrewSculpture

16 Single–Tier Manual • MoreBeer.com • 1–800–600–0033
Single–Tier Manual • MoreBeer.com • 1–800–600–0033
Below are a few things that we commonly get calls about, have learned over the years, or can recommend to
anyone that is looking to upgrade their system.
FAQ, Tips & Tricks
Q: I connected all of the tubing as suggested in this manual, but even with all of the ball valves completely
open, I can’t get the pump to move the wort! How should I proceed?
A: The pump is not great at moving air, but is excellent at moving liquid! The pump assembly will have a “tee”
fitting on it, with a ball valve on that tee. Try priming the lines by opening and re-closing this ball valve (with
a bucket underneath it…). This will get the pump head full of liquid hopefully, and the air in the rest of the
lines should get pushed out by this liquid. If this doesn’t completely solve the problem, try closing the pump’s
outlet ball valve, remove the tubing, and open / close that valve. After you get a steady stream of liquid exit-
ing, re-attach the tubing and turn the pump on. Just remember – the pump pushes, but does not pull. It will
not suck liquid from one vessel and move it to another, so always have gravity working in your favor to feed
the pump.
Q: My propane tank feels pretty full, but I’m not getting a good flow through my burners – what’s wrong?
A: There could be a couple of things wrong. First – if you’re brewing in a cold ambient temperature, try sub-
merging the bottom half of the tank in a bucket of hot water. The cold temperature affects the density of the
propane, affecting the rate at which the gas can flow. It is also possible that a spider or other bug has gotten
into the gas plumbing, in which case it will need to be removed.
Q: My BrewSculpture doesn’t have a wort chiller – why not?
A: A wort chiller is an item that many brewers may have prior to owning their BrewSculpture. We do offer these,
and our full line of wort chillers can be viewed at www.morebeer.com.
FAQ
Cleaning and drying your kettles and frame shouldn’t be too difficult. Something to keep in mind is that cleaning
your equipment right away will make it easier, and will help keep your BrewSculpture looking newer for longer.
After your brew day, clean up your equipment as soon as possible! To allow your kettles to completely drain/
dry out, you can keep them stored upside down on their respective burner tiers with their lids resting on top (the
bottom of the kettle). Also, storing your propane regulator with a cover or tape over the inlet will help prevent
spiders or other bugs from building a home in your gas system, which could clog the flow of your propane.
Always try to store your BrewSculpture in the best conditions possible. Every 5–6 months it is probably a good
idea to check your thermometers’ calibrations. They most likely have remained accurate, but double checking
is easy and never hurts. To calibrate, you’ll need to have a 1/16" hex key. This will go into the hex nut on the
side of the thermometer, and will adjust the face of the thermometer. While the probe is in a bath of ice water,
check to make sure it’s reading 32–33°F. If not, adjust the hex nut until it is. Then, place the probe in boiling
water and make sure the thermometer is reading 211–212°F NOTE: Boiling temperature is variable by elevation.
Please calibrate the thermometer accurately to your personal elevation’s boiling temperature. Outside in a snow storm or
flood is not an ideal storage spot – a garage is!

Single–Tier Manual • MoreBeer.com • 1–800–600–0033
17
Single–Tier Manual • MoreBeer.com • 1–800–600–0033
Double Batches:
If you want to brew two batches back to back, you’re in for a long day! A trick to shorten it is to
re-fill the hot liquor tank right after sparge, dump the old grain out, and start your second mash us-
ing one pump to re-circulate your mash while the original batch is being whirlpooled by the pump
on the left. By the time your first batch is out of the boil kettle, the second will be ready to sparge!
NOTE: If you’re using an immersion chiller, chilling times may vary.
Marking The Sight Gauge:
Our sight gauges are universal, which means they can be used on our kettles, on converted kegs, on other kettles,
etc. Due to this, we do not have them marked off with how many gallons you have in your kettle. If you wish
to do so, measuring out different volumes of water and marking the sight gauge with a sharpie will allow you
to know how much water you have left in your hot liquor tank during sparging. This could be useful to know
how many gallons per minute you’re sparging at. If you want to sparge in 60 minutes, and you want to sparge
10 gallons in that time, you’ll know that you should be dropping about 1 gallon every 6 minutes.
Knowing Your Boil Kettle Volume:
Since the boil kettle does not have a sight gauge, finding the appropriate pre-boil volume / ending volume isn’t
as easy. A good way to do this is to mark your mash paddle. Simply measure out the particular volumes you
wish to note, and make the appropriate marks on your mash paddle!
Tips & Tricks
Table of contents
Other MoreBeer Brewing System manuals
Popular Brewing System manuals by other brands

Blichmann Engineering
Blichmann Engineering BEPS-MLT-3.5BBL Assembly operation maintenance

Keurig
Keurig K-2500 Use & care guide

Blichmann Engineering
Blichmann Engineering BrewEasy Classic Assembly operation maintenance

Ginnys
Ginnys PC100 instruction manual

PolyKeg
PolyKeg PRO instruction manual

KegLand
KegLand Fermzilla Unitank Series instruction manual