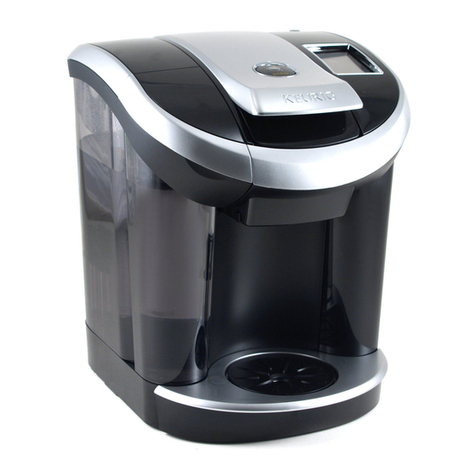
Keurig Hot Commercial Series User manual

A.
Setup
Preparation
0 Remove adhesive tape and
LCD
screen protection label.
Enlevez le ruban adhesif et
['etiquette
de
l'afficheur
ACL.
Unwrap cord and plug into
grounded outlet.
Deballez le cordon et branchez
le systeme d'infusion dans une
prise mise ala terre.
WARNING:The
Kl
50P
brewer requires the use of an external water
filter
such as the Omnipure
KQB
IPN
5572
1.
available from Keurig
Green
Mountain. Inc. Failure
to
use
a
filter
invalidates the brewer warranty.
AVERTISSEMENT :
Le
systeme d'inlusion
Kl
50P
doit etre utilise avec un filtre
a
eau
externe comme le filtre Omnipure
KQB
IPN
55721
de
Keurig Green
Mountain, Inc.
La
non-utilisation d'un filtre annule la garantie
du
systeme d'infusion.
Loosen the two mounting screws located
on
the upper
rear
of the
brewer
and hang the
KQ8
filter
kit assembly.
Tighten the mounting screws [do not over tighten).
Devissez les deux vis
de
montage situees a
l'arriere
du
systeme d'infusion.
en
haut, et accrochez le filtre
KQ8
.
Serrez les vis
de
montage !ne pas trop
serrerl.

connect
to
water supply
reliez a
la
conduite
d'alimentation
en
eau
Connect the 'INLET' port of the
filter
assembly to the local
water
supply.
Connect a long length of tubing
to
the
'
EXIT'
port [do not connect to brewer yeti.
Reliez l'orifice d'alimentation [INLET)
du
filtre a
la
conduite d'alimentation
en
eau.
Branchez
un
long tuyau al'orifice
de
sortie
[EXIT)
du
filtre lne pas brancher
au
systeme d'infusion tout
de
suite
I.
Flush the
water
filter
with at least 4
gallons of
water
by
routing the end of
the
EXIT
tube
to
a container
or
sink then
turn
on
the
water
supply.
Rincez
le
filtre
avec
au
moins
15
litres
d'eau
en
pla~ant
l'extremite
du
tube
de
sortie
[EXIT)
dans un contenant
ou
un
evier, puis coupez l'alimentation
en
eau.
With the
water
supply off, cut the '
EXIT'
tube
to
proper length and connect
to
the Inlet Plumbing Port
on
the brewer.
Turn
on
water supply.
Apres avoir coupe l'alimentation
en
eau,
coupez
le
tuyau a
la
bonne longueur et
raccordez-le a['orifice d
'a
limentation
en
eau
du
systeme d'infusion. Ouvrez
l'alimentation
en
eau.
CAUTION The 1<150P
brewer
is
designed
to
handle local
water
pressures
from
40
psig
up
to
125 psig. Consult a licensed
plumber
for
water
pressures in
your
area.
Use
plumbing
0ttings
and
tubing
speci0ed
to
withstand
125 psig.
ATIENTION .
Le
systeme d'infusion 1<150P est
conc;u
pour
fonctionner
aune pression d'eau maxi
male
de
40
a
125
lb/po'.
Consultez
un
plombier
autorise
pour
connaitre
la
pression d'eau de
votre
region. Utilisez des raccords de
plomberie
et
de
la
tuyauterie
conc;us
pour
resistera
des pressions
de
125
lb/po
www.l<eurig.com
I
www.l<eurig.ca
I i
888.CUP.BREW(287.2739)

Press and release the
Power Switch.
Appuyez
sur
le bouton
de
mise
en
marche.
4min
Wait
until
the screen indicates
"
READY"
[-4
minutes].
Attendez que le message
«
PRET
» apparaisse
al'ecran
[4
minutes].
Lift and
lower
the Handle. Select
brew size and then press the
flashing Brew Button.
Soulevez et abaissez la poignee
du
systeme d'infusion. Choisissez le
format
d'infusion puis appuyez
sur
le
bouton d'infusion [BREW] clignotant.
e
Once
mug is filled,
discard hot
water
.
Une fois la tasse
remplie, jetez l'eau
chaude.

B. Brew Infusion
Place mug
on
Drip Tr
ay.
Lift the Handle.
Placez une tasse
sur
la
cuvette d
"e
gouttage.
Soulevez
la
poignee
du
systeme d'infusion Keurig®.
0 Place chosen K-Cup®
pod
into the K
-C
up
®
Pode
Press the appropriate cup size:
Assembly Housing. Caution: Avoid the sharp 4
oz.,
6
oz.,
8oz.,10
oz.,
or
12
oz
.
needles in the K-Cup®
Pod
Assembly Housing. Then press the flashi
ng
BREW
Button.
Lower the Handle.
Placez
la
capsule K-Cup®choisie dans
le
bo
ltier
du
support acapsule K-Cup®. Attention :
Ne
touchez pas aux aiguilles pointues dans le
boltier
du
support
acapsule K-Cup®. Abaissez
la poignee.
Appuyez
sur
le bouton qui correspond
au
format d'infusion approprie :
118
ml
14
ozl.
177ml16
ozl.
237ml18
oz),
296ml110 ozl.
ou
355ml
11
2
oz).
Appuyez ensuite
sur
le
bouton d'infusion !BREW).
Enjoyl
Savourezl


IMPORTANT
SAFEGUARDS
Safe
Operation &
Use
9
c@u
s
When using electrical appliances, basic
safetyprecautions should
be
followed,
including the following:
1.
Read
all instructions before using.
2.
Do
not touch hot surfaces. Use handles
and knobs when available.
3.
This appliance must
be
properly
installed
and
located
in
accordance
with these instructions before it is used.
4.
The
use
of
accessory attachments
not recommended
by
the appliance
manufacturer may result
in
fire,
electrical shock,
or
injury
to
persons.
5.
Do
not place
on
or
near a hot gas
or
electric burner.
or
in a heated oven.
6.
Do
not use outdoors.
7.
To
protect against fire, electric shock,
and injury
do
not
immerse
cords.
plugs.
or
the appliance in water
or
any other liquid.
8. Use only
water
in
this appliancel
Do
not
use any other liquids
or
foods except as
instructed
in
the Cleaning Instructions
in
this guide.
9.
Turn off and unplug the
brewer
before
cleaning
or
maintenance. Allow
to
cool
before putting
on
or
taking off
parts
and before cleaning the appliance
10. For best operation. plug the appliance
into its own electrical outlet
on
a
dedicated circuit
to
prevent flickering
of
lights. blowing of fuses.
or
tripping a
circuit breaker.
11
.
Do
not operate any appliance with
a damaged cord
or
plug
or
after
the appliance malfunctions
or
is
damaged
in
any manner. Contact your
Keurig Authorized Distributor
to
report
any malfunction of
or
damage
to
the
brewer
.
12.
Do
not let the Power Cord hang
over
the
edge
of
the table or counter,
or
touch
hot surfaces.
13
.
To
disconnect. press the Power Switch
on
the
brewer
to
"OFF" status and then
remove the plug from the
wall
outlet.
14.Close supervision is necessary
when any appliance is used
by
or
near children.
15
.
Do
not
lift
the Handle
while
brewing
is in
progress
.
16.
This appliance is equipped with a Power
Cord having a grounding wire with a
grounding plug.
The
appliance must
be
grounded using a 3-hole properly
grounded outlet.
In
the event of
an
electrical short circuit, grounding
reduces the risk
of
electrical shock.
2
17
. If the outlet is a standard 2-prong
wall
outlet, it is your personal responsibility
and obligation
to
have it replaced with a
properly grounded 3-prong
wall
outlet.
18.
Do
not, under any circumstances, cut or
remove the third [ground) prong from
the Power Cord
or
use
an
adapter.
19. Consult a qualified electrician if
the grounding instructions are not
completely understood,
or
if doubt
exists as
to
whether
the appliance is
properly grounded.
20.
Do
not use the appliance for other than
its intended use.
21
. The Omnipure
KOBA
Water Filters.
Keurig [#5572) are compatible with the
K150P
brewer
and are NSF certified.
22
.Always
brew
with the Removable
Puncture Plate [item
Ton
page
5)
installed. Failure to
do
so
will
result in
a failure to properly brew.
SAVE
THESE
INSTRUCTIONS.
WARNING
TO
USERS
AND
PARENT
S
1.
DO
NOT
permit
c
hildren
to
use
brewer
unless
there
is
adult
supervision.
Brew
er
dispenses
very
hot
water.
2.
SPEC
I
AL
NOTIC
E
FOR
HOT
COCOA
USERS:
IMMEDIATELY
AFTER
USING
A
HOT
COCOA
K-CUP
®
POD,
RUN
a
Hot
Water
Brew
Cycle
without
a
K-Cup
®
pod
to
avoid
the
possibility
of
clogging
the
exit
needle
.
DO
NOT
assume
the
next
user
will
do
this.
CAUTION: There
are
two
sharp
needles that
puncture
the K-Cup®pod, one above the
K-Cup"' Pod
Holder
and the
other
in the bottom
of
the K-Cup®Pod
Holder
.
To
avoid
ri
sk
of
injury
, do not
put
your
fingers
in the K-Cup"' Pod As
sembly
Housing.
CAUTION: There is extr
emely
hot
water
in the K-Cup"' Pod
Holder
during
the
br
ew process.
To
avoid
risk
of
injury
,do not
lift
the Handle
or
open the K-Cup"'
Pod
Assembly
Housing
during
the
br
ewing proces
s.
CAUTION: Please always keep the
br
e
wer
in
its
upright
position to avoid
potential
i
njury
and/or
damage to
your
brewer
.
S
HOR
T
CORD
INSTRUCTIONS: A
shorl
powersupply cord is provided
to
reduce the
risk of becoming entangl
ed
in
or
tripping over a Longer cord
If
an
extension cord
1s
used,
111
th
e marked electrical rating of the cord set
or
extensi
on
cord should
be
at
least as great
as
the electrical rating of the appliance: 121the cord
should
be
arranged so that it
will
not
dr
a
pe
over
th
e
co
untertop or tabletop where
1t
ca
n
be
pulled
on
bychildren
or
tripped
ove
r unintentionally; and
13
1the extension
co
rd must
include a3-pro
ng
grounding plug.
THIS
PRODUCT
IS
FOR
COMMERC
IAL
USE
ON
LY
.
WARNING
RISK
OF
FIRE
OR
&
ELECTRIC
SHOCK
I
DO
NOT
OPEN
•
WARNING
: ·
111·1
··1·
r
s~
r
1r't
'"
·I·
I
KI
:ii· 'I
ii
~11
,
·'•II
1
1•
I'll
!J
111
1\I
LUV·
11
'HI
U~I
R)[R'/,I I
,\f'
.
l',\RI\
,\R
1
IN:i'll·
·H~1\lll
)HIJlll
Ii
Iii
,lllN1
·IY
1\ll
l
i111IN1
ll
)l
l\VICF
Pl
R:iON~F
I
llNI
y 3
TABLE
OF
C
ON
TE
NTS
KEURIG
®
K150P
-
COMMERCIAL
SERIES
SINGLE
SERVE
COFFEE
MAKER
BREWER
OVERVIEW
Helpful
Hints
.......................... ... . ...................... 4
Unpacking
......................................
..
..
..
..... ........... 4
F
eatures
..
..
5
SECTI
ON
1- SETUP & FIRST
BR
EW
Plumbing
Ins
tru
ctions
........................ ................ 6
Setting
Up
Your
Brewer
......................
..
.. ............ . .......... .............7
Brew
i
ng
Your
First
Cup
..................... ................................ 7
Stopping
the
Brew
Proces
s ............
..
.
..
. .8
Adding
Water.
........................ ....................................9
Brewing
Iced
Beverages
&
Hot
Water
...........................................9
SECTI
ON
2 - MENU CONTROLS & INDICATORS
Setting
the
Clock
.....................................
...
...........
11
Programming
Brew
Temperature
...
..............
11
Programming
Brew
Size .............................................................. 12
Programming
On/Off
Feature
s .12
SECTION 3
-CLEA
NING & MAINTENANCE
Cleaning
...................................................... . .
14
Descaling
. ...............................................
..
..... ··················· .
..
15
Draining
&
Sto
rag
e ............................................. ........
17
SECTION 4 -
TRO
UBLESHOOTING.......................... .............
..
18
SECTION 5 - WARRANTY
...
...................
..
.............................
19
Pour
des
directives
en
fran~ais
,
veuillez
vous
rep
o
rter
a
la
page
20.
Record your
brewer
ser
ial number
her
e.
See
unpacking mstruct1ons on page 4 for serial
number
location.
Removing the serial number label from the brewerwtll
void
warranty

Bre
we
r O
verv
i
ew
Helpful Hi
nt
s
1.
Plug the brewer into its
own
grounded outlet.
If
the electric circuit is overloaded with other
appliances. your
brewer
may not function
properly. The
brewer
should
be
operated
on
its own circuit. separate from
other
appliances.
2.
Keep
your brewer turned
..
ON"
at alt times.
To
brew a fresh cup of coffee. tea. hot cocoa.
or
o
th
er
beverage anytime
you
want. we suggest
you keep your
brewer
turned
··oN··
all
the time.
However, the
brewer
is fully
programmable
so
you
can set
11
to
turn
on
and off automatically
to
match your schedul
e.
Or.
if
you
prefer.
se
t the
brewer
to
automatically turn off
after
a period
of
time. Follow the simple instructions
on
pages
1
2-13
to make using the brewer convenient
for you.
3. For the best tasting gourmet coffee, tea, hot
cocoa,
or
other beverage, Keurig recommends
the
use
of filtered water
in
the brewer.
We
also recommend the Omnipure
Filter
Kit.
Keurig 1#5572]
4. Customize Your Si
ze
,Flavor & Brew.
With the choice of over
250
varieties of K-Cup®
pods and 5 brew sizes
(4
oz
..
6
oz
..8
oz
..
10
oz
..
and
12
oz.I
your Keurig®
brewer
gives
you endless options
to
customi
ze
the si
ze.
flavor. and brew thal"s perfect for you. Fora
strong, intense cup, select
an
Extra
Bo
ld
K-
Cup
'"
pod
!with
up
to
30% more ground coffee than
regular
varieties] and brew
th
e size that"s right
for you. The
smaller
the brew size. the more
intense the flavor in your cup. The
larger
the
brew size. the less intense the flavor
in
your cup.
5. Brewi
ng
into atravel mug.
To
brew into a travel mug. simply remove the
Drip Tray Assembly and place the travel mug
on
the Drip Tray Base.
6. Descale the brewer regularly.
Please refer
to
pages
15
and
16
for instructions.
Unpacking
the
Brewer
1. Place the
brewer
box
on
a large steady surface
!such
as
a table
or
countertop]
or
on
the floor.
Open
the
box.
2. Turn the
box
on
its side with the front of the
box
face down.
3. Reach into the box
and
grasp the foam insert
that contains the brewer.
4
4. Carefully pull the foam insert toward
you
and
out of the
box.
The brewerwi
ll
still
be
encased
in
the polyfoam and
be
on
its side.
5.
Remove the top polyfoam packaging material.
6. Carefully
lift
brewer
off of the bottom polyfoam
and place it upright
on
a flat. steady surface.
7. Lift plastic bag off of brewer.
8. Record the
ser
ial
number
for this
brewer
on
page 3 of this guide.
Th
e serial number can
be
found
on
the side of the brewer
box
or
on
the
bottom of the brewer.
9.
Place the
brewer
upright
on
a flat. steady
surface. Remove tape holding Water Reservoir
in
place.
We
recommend you save
all
packing materials
1n
case future shipping of the product is necessary.
WARNIN
G:
Keep
all plastic bags
away
from
children.

Features
K150P
Brewer
K150P
Brewer
A. Handle
B.
Lid
C.
LCD
Screen
D.
K-Cup·
Pod
Assembly Housing
E. Funnel
F.
K-Cup
~
Pod
Holder
IE
and
Fare
the
K-Cup·
Pod
Holder
AssemblyI
G.
Drip Tray Plate
H. Drip Tray
I.
Drip
Tra
y Base
J. Housing
K.
BREW Button
L. PowerSwitch
M. Power Cord
N. Filter Mounting
Bracket
0. Omn1pure
KOBA
Water Filter #5572
5
Back
view
with
optional
Omnipure
KOBA
Water
Filter #5572
connected
.
[not included]
IN
an
d 0 are the
Filler
Kit Assembly]
P.
3/4
Garden Hose
Connector
Part #50
-2
01004-
010
[n
ot included]
a.
Brewer
Inlet Connect
R. Drain Hatch and Knob
S. Drain Tubes and Plugs
T. Removable Puncture Plate

SECTION
1Setup & First Brew
IMPORTANT:
You
cannot use your Keurig®brewer
until
it has been set up for its
first
use.
NOTE:
If the brewer has been exposed
to
temperatures
below freezing, allow the brewer at least two hours
to reach room temperature before brewing. A frozen
or
extremely cold brewer
will
not operate.
CAUTION:
This brewer
is
designed to handle local
water
pressures from
40
psig
up
to
125
psig.
Consult a licensed
plumber
for
water pressures
in
your area. Use plumbing fittings and tubing specified
to withstand
125
psig.
WARNING:
Keurig®requires the use of
an
external
water
filter
such
as
the Omnipure
KOSA
Water
Filter, available from Keurig Green Mountain, Inc.
[#
5572]. Failure to use a
filter
invalidates the
brewer Warranty.
Plumbing
Fitting
Connections
1.
An
external filter IOmn1pure
KQSA
Water
Filter
#55721
can
be
mounted
on
the
rear
surface of the brewer using the mounting screws provided
if1g
.
11.
See
back view
of
brewer
on
page
5.
6
fig.o
fig.f)
2. Loosen the two mounting screws located
on
the
upper-rear
of the
brewer
and hang the
Omnipure
KQSA
Water
Filter
(#55721.
3. Tighten the two mounting screws lbe careful
not to over tighten!.
NOTE:
The Omnipure
KQBA
Water
Filter
[#5572)
assembly comes
with
1/4 FPT
ports
for
both
inlet and
outlet
and the plumbed
water
inlet
to
the
brewer
is 3/4 Male Garden Hose Thread
[fig.
2)
[Invensys solenoid valve). 1/4
OD
LLD
PE
[Linear Low Density Polyethylene) tubing is
recommended [NSF compliant between the
filter
assemblyand the
brewer
.NSF compliant
fittings are recommended such
as
High Density
Polypropylene Type).
4. Connect the "INLET"
port
of
the
filter
assembly
to
the local
waler
supply Ifig.
31.
5. Connect a long length of tubing
to
the
EXIT
Port of the filter assembly.
DO
NOT
CONNECT
TO
THE BREWER YET
6.
The filter needs
an
initial flush
to
clear
any
ca
rbon deposits. Route the long length of
tubing from the
EXIT
port
to
a container
or
sink.
7. Turn
on
water
supply and
allow
at least
4 gallons of
water
to
flush through the
filter !fig.
41.

fig
.
E)
fig
.e
fig.•
8. Turn
off
water
supply.
9.
Cut the tubing
to
proper
length
and connect
to
inlet
plumbing
port
on the
brewer
by using
water
inlet valve 3/4 hose
connector
available
from
Keurig Green Mountain. Inc.
Part
#50-201004-010
!not included) lfig.51.
10
. Turn on
water
supply.
Setting
Up
Your
Brewer
1. Remove
all
pieces of packing tape
from
the
brewer
and
Drip
Tray. Remove the
clear
plastic
film
from
the LCD
Screen.
Unwrap
the
Power
Cord and plug the
brewer
into a
grounded outlet.
Ensure
your
brewer
1s
plumbed I
refer
to
page
61.
2. Turn the
brewer
on. the Power Switch is
located at the top
left
hand side of the
brewer
on
the back. The
brewer's
LCD Screen
will
display the
power
up
welcome
screen
lf1g.
61.
3. The
brewer
will
automatically
fill
the
internal
water
tank
with
water
and then the
water
will
be heated.
This
will
take
about
3
minutes.
During
the heating period,
..
HEATING PLEASE
WAIT"
will
be
displayed on the LCD Screen
lfig.
7)
4. Place a
10
oz.
mug
on the
Drip
Tray Plate.
then
lift
and
lower
the Handl
e.
7
fig.
o
fig.
f)
The BREW
Button
will
now
be
illuminated
.
Press
the BREW
Button
to
start
a cleansing
brew.
NOTE
:
AK-Cup
®pod should not
be
used
for
this sequence.
5. When the cleansing
brew
is complete, the
brewer
will
go into
its
idle state and
will
be
ready to
brew
your
fir
st
K-Cup®pod.
Ready
to
Brew
Your
First
Cup
1. The LCD
Screen
will
be
in its idle state lfig.
Bl.
2.
Lift
the Handle. The K-Cup®Pod
Holder
will
open toward you !fig. 9].
3. Select a K-Cup®pod. ®
NOTE:
Do
not remove the
foil
lid
or
puncture the K-Cup®pod.
4. Place a K-Cup®pod
in
th
e K-Cup®Pod
Holder
Ifig. 1
OJ.
CAUTION:
There are
two
sharp needles that
puncture the K-
Cup
®pod, one above the
K-Cup®
Pod
Holder and the other in the bottom
of the K-Cup®
Pod
Holder.
To
avoid risk of
injury
,
do
not put
your
fingers in the K-Cup
'"
Pod
Assembly Housing.
5.
Lower
the Handle to close the Lid over the
K-Cup"' Pod Holder. !When
it
is closed
comp
letely, the BREW
Button
wil
l flash up
to
60 seconds.]

SECTION
1
Se
tup &
Fi
rst B
rew
fig.o
fig.
f)
6. Place a mug
on
the Drip
Tr
ay
Plate and
select
your
brew
si
ze
lfig.
111.
then
pr
ess
BREW lfi
g.
1
21.
NOTE: If
you
do
not push the
BREW
Button in
60
seconds, the
BREW
Button
will
be
disabled
to prevent accidentalactivation. Re-activate the
BREW
Button
by
lifting
and
Lowering the
Handle completely.
7.There may
be
a
short
pause
prior
to coffee
being dispensed. The entire
brew
process
lasts
for
approximately 1 minute and ends
with
a
burst
of
air
lo remove
all
liquid
from
the K-Cup"' pod.
CAUTION: There is extremely hot water in the
K-Cup
"'
Pod
Holder during the brew process.
To
avoid
risk
of injury,
do
not
lift
the Handle
or open the K-Cup"'
Pod
Assembly Housing
during the brew process.
8.
Th
e end of
brew
is indicated
by
··KEURIG
BREWED ENJOY
.·
9.
Lift
the Handle, remove and
di
spose
of the used K-Cup " pod.
CAUTION: K-Cup
"'
pod
will
be
hot.
10
. Enjoy
your
first
cup of Keurig HOT'"
gou
rm
et coffee, tea, hot cocoa.
or
other
beverage'
fig
.
~
fig.
CD
8
NOTE: Afterbrewing a hot
cocoa
K-Cup
"'
pod
,
we recommend running ahot water brew
cycle without aK-Cup
"'
pod.
11
. Your
brewer
may display "H
EA
TING
PLEASE WAIT" as it heats
water
for the
next
brew
cycle.
Stopping
the
Brew
Process
If you n
ee
d
to
stop the brewing
after
the
process has s
tart
e
d.
press and release
the
Power
Switch
to
turn the
brewer
"OFF.'
The flow of coff
ee
. tea. hot cocoa.
or
other
beverage
wil
l stop and the heating
element
and the
LCD
Screen
wil
l shut off. NOTE:
You
may get less coffee, tea, hot
cocoa
,
or
other
beverage in
your
cup during your
ne
xt
brew
.
We
recommend that
you
perform
a cleansing
brewwith
water
only
after
aterminated brew.
Then your next
brew
will
be
the volume
you
have selected.
fig.
4!)

Add
i
ng
Wate
r
Your
brewer
has been
configured
at the
factory
to
be
direct
plumbed. however.
lhe
brewer
can
also
be
converted into a
pour
over
model
with a Cold Water Tank Spare Part.
To
order. please call
your
Keur1g
Authorized Distributor.
Brewing
Iced
Beverages
Your iced lea and iced coffee taste best when fresh-brewed hol over i
ce.
1.
Fill a
16
oz.
mug
(do
nol use glass) lo the lop
wilh
ice and place a K-Cup ·
pod
into your brewer.
2.Select your brew size. we recommend selecting a 6
oz.
or
8
oz.
brew.
Press the BREW Button.
3.
Stirand enjoyI
IMPORTAN
T:
Do
not brew into a
cup
made of glass.Doing
so
may
cause the
glass
to
crack
or
break.
Brewing
Hot
Water
Your brewer is able
to
produce hot water for use
in
cooking. making soups. oatmeal. etc. Simply lift
and lower lhe Handle
on
the brewerwithout adding
a K-Cup " pod. The BREW Button
will
flash.
Be
su
re
to
have a mug
on
the Drip Tray Plate and then
press the BREW Butlon.
9
SECT
ION
2
Menu
Controls
& Indicators
Menu
Con
tr
o
ls
fi
g.G)
10
seconds
fig.
~
To
en
t
er
the Menu Mode the
brewer
should
be
plugged
in
and the pow
er
must
be
off.
Press and hold
yo
ur
finger
on
the
d1~play
for
about
10
seconds while pressing and releasing
the Power Switch [fig.
131.
Once
the Menu Screen
appears [fig.
14)
remove your finger.
Press any line item
to
enter the set up for that
particular
feature. Please reference the Menu
Nav1gat1on
on
page
10.
If
you
are experiencing
any
problemswith your
brewer, please contact your Keurig Authorized
Distributor.

SECTION 2 Menu Controls & Indicators
Menu
Mode
Navigation
Home
Press "HOME" at any time
to
re
tu
rn
you
r brewer
to
an
idle state.
Clock
Setting the clock is
op
tional.
To
set the clock, follow the
in
structions on
page
11.
Brew
Temp
The brew temperature
1s
pre-set at
193°F.
You
do
not have
to
program the
brew temperature but
you
ca
n adjusl it
up
or
down
by
5~
Simply follow
th
e
instructions on page
11.
B
rew
Size(s)
Five brew sizes are available: 4
oz
., 6
oz
.. 8
oz
..
10
oz
..and
12
oz.
To
program
the brew sizes refer
to
page
12.
Auto OFF
Au
lo Off allows
you
to program
you
r brewer lo automatically turn o
ff
lwo
h
ou
rs after the lasl brew. Refer
to
page 12f
or
pr
og
r
amm
ing instruc
ti
on
s.
ON/OFF
Time
You
can leave your
brewer
on
all
the time and use the Power
Sw
1l
ch
to
turn
1t
off. Or you
ca
n program the
brewer
lo automatically turn on
or
off at a
specific time
as
shown
on
page
12.
10
Language
This brewer is
sh
ipp
ed
w
1lh
English as the default language.
To
change the
language. follow the instructions on page
13.
Contact
The contact setting
fea
tur
es
allows you
to
program the contact 1nformat1on
you need for brewer suppo
rt
and help.
To
program. follow the 1nstruct1ons
on page 1
3.

Setting the
Clock
Setting the clock is optional. When the clock is set, the time
will
appear
on
the
LCD
Home Screen.
NOTE:
You
must set the clock if
you
will
be
programming the Auto On/Off Time feature.
fig
.e 1. From the Menu Mode. press ··cLOCK.··
2. The set clock screen will display
··D
ISABLED
..
1f
the brewer is new
or
if
electrical power has been interrupted.
Press ""DISABLED
..
to
set a
ti
me. Press
··w
repeatedly
to
advance the hour
in
steps
or
ho
ld it down
to
scroll
through the hours
quickly. When
you
have set the hour then
press the
..
M
..
to
set the minutes. press
repeat
ed
ly
to
advance
by
a minute each time
or
keep it pressed
to
scroll
qu
ickly [fi
g.
151.
3. Press ··oK··when
you
are finished.
The clock
is
now set.
4.
The
correct
time should now
be
displayed
on
the
LCD
Home
Sc
reen.
NOTE:
If power is interrupted
to
the brewer, follow the procedure above
to reset the time
as
the clock
will
not
be
visible. Brew size and brew
temperature menu settings
will
be
restored automatically.
All
other
se
ttings
will
be
restored automatically after clock is set.
NOTE:
To
disable the clock,press the time. However, the 'On/Off' time setting
wiltalso
be
disabled.
11
Programming BrewTemperature
(188°-198°
F)
The brewer brews at a preset temperature of 193°F.
You
can adjust this
temperature
up
or
down
by
5
°.
Simply follow the instructions below.
fig
.
CD
1.
From the Menu Mode, press
"BREW TEMP.·
2. The LCD Screen
will
now
display
the
Brew
Temperature
programming
options !fig.
161.
The
temperature
193°F
[initial
setting]
will
be
displayed at the
top of the LCD Screen lo indicate the
current
temperature
setting.
3. Press
the+
symbol
to
increase the
temperature and the -symbol
to
lower
the temperature one degree at a time.
4. Once you have reached your desired brew
temperature. press
··oK.""
The brew
temperature 1s now programmed.
NOTE:
At high altitudes (over 5,000 feet)
if boiling occurs, use the temperature
adjustment (-5°)
to
lowerthe temperature.

SECTION 2 Menu Controls & Indicators
Programmi
ng
Your
Brew
Size
All
brew
sizes are enabled
in
the default setting. If
you
want
to
disable any
brew
size. JUSl press
on
the appropriate 1conls]. Please follow
instrucllons
outlined below.
fi
g.
f>
OK
~
(jJ
QJ
•Gl
~
.:r
~~
'ICZ
t11r..;
1. From the Menu Mode. press
"SET BREW SIZEIS].
2. The LCD
Screen
will
display
all
enabl
ed
brew
sizes.
To
disable a brew size press the icon.
The check
mark
will
change to
an
·x·
1nd1cat
in
g that the
brew
size is disabled
lf1g.
17].
To
enable a
disabled
size.
press
it again.
3. Once
you
have selected yourdesired
brew
s1zelsl.
press ··oK.·· The
brew
sizelsl are
now programmed.
NOTE:
You
can
not delete
all
brew sizes.
To
enable abrew size
you
have already
disabled,
just
press its icon
and
then press
"
OK
."
The
8
oz
.setting is the default brew
size ifaltsizes
have
been disabled.
12
Programm
i
ng
On/Off
Features
The
brewer
provides three modes
so
that you can enioy
gourmet
coffee.
tea
.
hot cocoa.
or
other
beverage
on
your own schedule.
fig
.
~
1. Le
ave
thebrewer "
ON
"
all
the time. The
brewer
can
be
left
on
all
the time
so
that
1t
1s
always ready lo
brew
a fresh cup of gourmet
coffee.
Lea.
h
ot
cocoa.
or
o
th
er
beverage. To
turn
the br
ewer
off al any time, simply press
and release the Power Switch. Press and
release the Power Switch again
to
restore
power
to
the brewer.
You
will
have
to
wait for
the
water
to
heat up before the
brewer
1s
ready
to
brew
.
2.
Program
the
brewer
to "
AU
TOOFF." The
brewer
can
be
programed
to
automatically
turn
off 2
hours
after
the last brew lfig.
18].
a.
From the Menu Mode. press "AUTO OFF."
The LCD
Screen
w
ill
now
display
the
··AUTO
OFF"
programming
option.
b.
To
enable the
"AUTO
OFF" feature. press
"ON." ··ENABL
ED
..
wi
ll
appear
on
the screen
and press ··oK.
··
To
disable the
··AUTO
OFF
..
feature. press ··oFF:· ··DISABLED"
will
appear
on
the screen and press ··oK
...
3.
Program
the
brewer
for
a specific On/Off
Time.
NOTE:
To
use
this programming feature,the clock must beset to the
correct tim
e.

fig.G)
a.
After
setting the
correct
time [see
..
Setting
The Clock
..
page
111.
return
to
the Menu Mode
and press
..
ON/OFF TIME
...
b.
To
set the
ON
time. press
..
DISABLED:·
The display
will
change
to
a time of
day.
Press
··w
to set
th
e
hours
and
..
M
..
to
se
t
the minutes. Once the desired time is set,
press
..
OK'·
lo accept this time.
c.
To
set the
OFF
time. press ··DISABLED
...
The display
will
change
to
a time of
day.
Press
..
H
..
to
set the
hours
and
..
M
..
to
set
the minutes. Once the desired time is set.
press
..
OK
..
to
accept this time [fig.
191.
fig
.
fl>
Language
Settings
The
brewer
is
shipped
with
English as the default
language.
To
change the default to
Fran~ais
or
Espanol. follow the in
structions
outlin
ed
below.
Set Language
1. From the Menu Mode. press
..
LANGUAGE
...
2. The LCD Screen
will
now
display
the
Language
programming
options
[fig.
201.
3. Press the
desired
Language
button.
then
press
··oK
..
to
confirm
your
selection.
13
tig
.
~
Contact
Screen
Settings
fig.e
The contact screen is
pre-programmed
with
the following 1nformat1on:
Keur1g
Green
Mountain, Inc. and www.Keurig.com.
You
can
reprogram
the
brewer
with your contact
information. The
co
ntact screen
will
appear
1n
the screen saver.
1.
From the Menu Mode, press
..
CONTACT
...
The LCD
Screen
will
display
the
Keurig
default
contact
information
!rig.
211.
2. Press the Upper [Company Name! Box. The
Keypad
will
appear
along
with
the
current
information
[fig.
221.
NOTE: Unless changed
by
the user, Keurig contact information
will
be
present
on
the display.
a.
Press
the Delete Key repeatedly
to
remove
cur
rent
information.
Enter
new
information
using the Keypad. NOTE:
To
select Upper
Case
,
Lower
Case
, Numerals, Upper
Case
Accents,
Lower
Case
Accents, press the Keypad Change
Key
located at the bottom center of the screen.

SEC
TI
ON 2 M
enu
Cont
rols &
Ind
icators
fi
g.e
fi
g
.
~
b.
Press
..
OK
..
lo
save
your
changes and
return
to
the Main Contact Screen.
NOTE:
Pressing the Back A
rrow
Key
wilt
return
to
the Main Contact Screen without
saving changes.
3. Press the Mi
dd
le !Phone Number] Box. The
Nume
ral Keypad Mode
will
appear along
with
the
current
informa
tion !fig. 23].
a.
Delete
current
phone number, if any. and
enter
new
information
using the Keypad.
b.
Press
..
OK
..
lo
save
your
changes and
return
to
the Main Contact Screen.
4. Press the Lower
Box
.This
box
can
be
customized
to
contain any information
such
as
web/email address. contact
name, etc !fig.
241.
a.
Delete
or
enter new information using
the Keypad.
b.
Press
..
OK
..
to save
your
changes and
return
to
the Main Contact Screen.
c.
In
the Main Contact Screen !fig.
211.
press
..
OK
..
to
save the updated screen
as
the
default and
return
to
the Menu Screen.
The brewer
is
now fully programmed. Press
..
HOME
..
on
the Menu Screen
to
return your brewer lo its idle state.
SECTION
3 Cleaning & Maintenance
Cleaning
External
Parts
Regular cleaning of the brewer's external components
1s
recommended.
The following secti
on
provides
instruct
i
on
for standard cleaning procedures.
Fo
r in-dep
th
N
SF
certified instructions, please refer
lo
the Cleaning and
Sanit1zat1on
Guide.
14
1. Never immer
se
t
he
brewer
1n
water or other liquids. T
he
Housing
and other
ex
ternal components may
be
cleaned with a damp. soapy,
lint-free. non-abrasive clot
h.
2. The Drip Tr
ay
can accumulate up
to
12
oz.
of overflow. The Drip Tray
and Drip Tr
ay
Plate should
be
periodically inspected and rinsed clean.
To
remove the Drip Tray Assembly. simply slide
1l
toward you. keeping
1l
level al all times
to
avoid spilling. The Drip Tray and Drip Tray Plate
should not
be
placed
in
the dishwasher. They should
be
cleaned with a
damp, soapy. lint-free. non-abrasive cloth and rinsed thoroughly.
fig.
61
Cleaning
the
K-Cup
®
Pod
Holder
Assembly
1.
Cleaning the Parts-The K-Cup·
Pod
HolderAssembly can
be
placed onto the
top shelf of a dishwasher.
NOTE
:
Use
low
temperature cycles
in
the dishwasher.
To
remove the K-Cup'
Pod
Holder
Assembly from the brewer, open the
cover
by
lifting the Handle.

Grasp the
top
of
the K-Cup•
Pod
Holderwith
one hand while pushing up
on
the bottom
of
the
K-Cup
'"
Pod
Holder from underneath with the
other
unt1l
1t
releases !fig
251
After cleaning,
al
ign
the K-
Cup
"'
Pod
Holderwith the opening
3. Cleaning the Exit Needle-
Th
e exit needle is
located
on
the
1ns1de
bottom of the K-Cup'
Pod
HolderAssembly. Should a clog arise due
to
coffee grounds, it can
be
cleaned using a paper
clip
or
s1m
1l
ar
tool. Remove the K-Cup"'
Pod
HolderAssembly and detach the Funnel. Insert
lhe paper clip las shown in fig.
26
)into the exit
needle
to
loosen the clog, then flush with fresh
water. The K-Cup"' Pod Holder Assembly can
be
placed onto the top shelf of a dishwasher.
NOTE:
Use
low temperature
cycles
in
the dishwasher.
4.
Cleaning the Puncture Plate-The Puncture Plate can
be
removed
by
grasping the finger grips of either side and pulling forward Ifig.
271.
Once
removed. spray the Puncture Plate with detergent, brush clean and
rinse if necessary.
Be
sure
to
replace the Puncture Plate after cleaning
to
ensure proper
brewer
operation.
15
CAUTION:
There are sharp needles that puncture the K-
Cup
®
pod
above the
K-Cup®
Pod
Holderand in the bottom of the K-Cup®
Pod
Ho
lder.
To
avoid
risk
of injury, do not put your fingers
in
the K-
Cup
®
Pod
Assembly Housing.
Descaling
Your
Brewer
Depending
on
the
mineral
content
of
your water.
ca
lcium deposits
or
scale may build up
in
your brewer. Scale is non-toxic but if left unattended
can hinder brewer performance. Regularly descaling your brewer every
3 to 6 months helps maintain the heating element, and other internal
parts
lhat come
in
contact with waler. Calcium deposits may build up faster.
making
il
necessary
to
descale
more
often.
Before
you
begin, you
will
need a large ceramic mug, fresh water.
Keurig"' Descaling Solution. and access
to
a sink.
Do
nol use a paper cup.
The following outlines the steps required
to
prepare the
brewer
before the
descaling procedure:
1. Unplug lhe brewer from the power supply.
2. Disconnect
or
interrupt
the external water supply feeding the brewer.
3. Drain
th
e internal hot and cold
water
tank !refer to page
171.
4. Remove the two screws located
on
the back. top. left of the brewer.
Remove the lop cover
to
gain access lo the cold water tank.
5. Pour the entire bottle of Keurig"' Descal1ng Solution into the opening.
Then refill the empty bottle
wilh
bottled
or
filtered water and pour into
th
e opening.
6.
Reconnect the powersupply.
7. Proceed with the descaling procedure
on
page
16.

SECT
I
ON
3 Cleaning & Maintenance
Descaling
Procedure
STEP
1:
FIRST
DESCALING
SOLUTION
RINSE
•
Press
the Power Switch
to
power
on
the brewer.
• Place a
large
mug on the Drip Tray Plate and run a cleansing brew using
the
largest
brew
size.
Do
not add a K-Cup®pod. Pour the contents of the
mug
into the sink.
STEP
2:
SECOND
DESCALING
SOLUTION
RINSE
• Repeat the
brew
process
without
a K-Cup"' pod.
until
'"ADD
WATER"
1s
indicated. Let the
brewer
stand for at least
30
minutes while sti
ll
on.
•
After
30 minutes, discard any residual solution through the drain tubes.
STEP
3:
FRESH
WATER
RINSE
• Ensure the
internal
cold water tank is filled
with
fresh water.
• Place a
large
mug
on
he
Drip Tray Plate and run a cleansi
ng
brew
using
the
largest
brew
size.
Do
not add a K-Cup
·•
pod. Pour the contents of the
mug into the sink.
• Repeat
brew
process
un
til
you
have complet
ed
at least
12
brews using the
largest
brew
size.
You
may need
to
refill
the
co
ld
water
tank at least one
time during this process.
NOTE:
The
cleaning action of Keurig
"'
Descaling Solution may result
in
afoam
dispensed from the brewer. This is natural,
as
the solution is reacting with the
scale insi
de
. For abrewer that is heavily scaled, the brewer may not
fill
properly
after
the descaler is added. If this occur
s,
you
may
se
eonly a
small
or
no
output
dispensed followed
by
the sound
of
air blowing out. If this occurs:
• Turn off and unplug the brewer.
16
• If there is Keurig"' Descaling Solution
in
the cold
water
tank. discard the
contents through the drain tubes. !follow Draining the
Brewer
instructions
on page
171.
rinse the Water Reservoir thoroughly and refill
w1lh
water.
• Plug the
brewer
back in, power on. and repeat the Step 3 Fresh Water
Rinse cycle. The
brewer
should begin
to
function
normally
as the solution
1s
rinsed
ou
t and the scale is removed. If problem persists. allow the
brewer
to
sit unplugged for at least
30
minutes
before continuing
with
the rinse.
For
further descale information
please
contact your Keurig Authorized Distributor.
Service
Beyond these recommended cleaning and maintenance procedures this
brewer is not
user
serviceable. For service, please refer to the
Warranty
section of this guide.
This manual suits for next models
1
Table of contents
Other Keurig Hot Brewing System manuals
Popular Brewing System manuals by other brands

Nostalgia Electrics
Nostalgia Electrics CLITPLS3AQ instruction manual

Keurig
Keurig K-Elite Use & care guide

Speidel
Speidel Braumeister Operating & Brewing Instructions

Breville
Breville BDC455 Instruction book

KegLand
KegLand BrewZilla 35L Gen 4 instruction manual

Blichmann Engineering
Blichmann Engineering 7 BBL Assembly operation maintenance