manuals.online logo
Brands
  1. Home
  2. •
  3. Brands
  4. •
  5. Morphy Richards
  6. •
  7. Iron
  8. •
  9. Morphy Richards breeze User manual

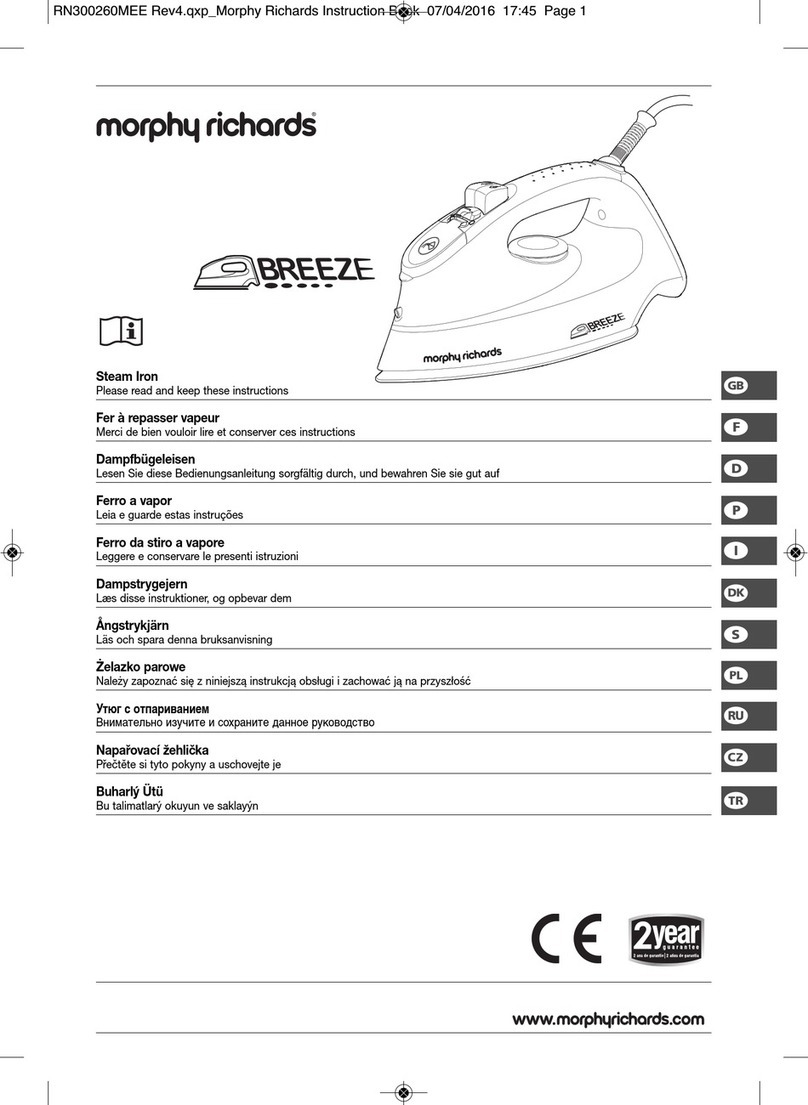
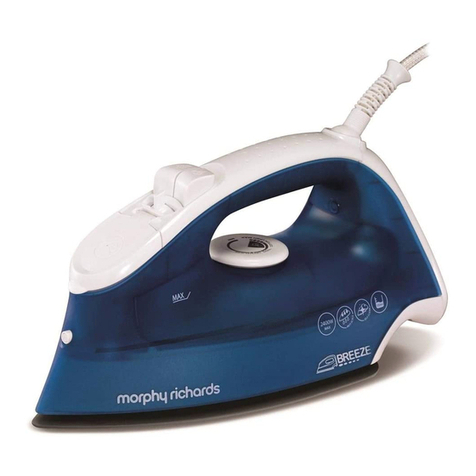
Morphy Richards breeze User manual

g
f
d
p
q
s
}
∂
≈
t
Steam Iron
Please read and keep these instructions
Fer à repasser vapeur
Merci de bien vouloir lire et conserver ces instructions
Dampfbügeleisen
Lesen Sie diese Bedienungsanleitung sorgfältig durch, und bewahren Sie sie gut auf
Ferro a vapor
Leia e guarde estas instruções
Ferro da stiro a vapore
Leggere e conservare le presenti istruzioni
Dampstrygejern
Læs disse instruktioner, og opbevar dem
Ångstrykjärn
Läs och spara denna bruksanvisning
Żelazko parowe
Należy zapoznać się z niniejszą instrukcją obsługi i zachować ją na przyszłość
Утюг с отпариванием
Внимательно изучите и сохраните данное руководство
Napařovací žehlička
Přečtěte si tyto pokyny a uschovejte je
Buharlý Ütü
Bu talimatlarý okuyun ve saklayýn
i
RN300260MEERev5.qxp_M rphyRichardsInstructi nB k04/11/201614:44Page1
All manuals and user guides at all-guides.com
2
• This appliance can be used by children aged from 8 years and
above and persons with reduced physical, sensory or mental
capabilities or lack of experience or knowledge if they have
been given supervision or instruction concerning use of the
appliance in a safe way and understand the hazards involved.
Children shall not play with the appliance. Cleaning and user
maintenance shall not be made by children without supervision.
• Keep the iron and its cord out of reach of children less than
8 years of age at all times.
• The iron must not be left unattended while it is connected to
the supply mains.
• The plug must be removed from the socket before being filled
with water.
• The iron must be used and rested on a stable surface.
• When placing the iron on its heel, ensure that the surface on
which the heel is placed is stable.
• The iron is not to be used if it has been dropped, if there are
visible signs of damage or it is leaking.
• The filling aperture must not be opened during use.
g
• WARNING: Burns can occur from touching hot metal, hot
water or steam.
• WARNING: To avoid electric shock, do not immerse appliance
in water / liquid.
Electrical requirements and mains cable
• Check that the voltage on the rating plate of your appliance
corresponds with your house electricity supply which must be
A.C. (Alternating current).
• Do not operate with a damaged supply cord or grommet, it must
be replaced by the manufacturer, its service agent or similarly
qualified person in order to avoid a hazard.
• Do not let the mains lead come into contact with the hot
soleplate of the iron.
• Should the fuse in the 13 amp plug require changing, a 13 amp
BS1362 fuse must be fitted.
• WARNING: This appliance must be earthed.
P EASE READ A INSTRUCTIONS AND KEEP FOR
REFERENCE
CAUTION!
HOT SURFACE
P EASE BE AWARE
OF HOT SURFACES
HAND E WITH CARE
Treating scalds
• Run cold water over the affected area immediately.
• Do not stop to remove clothing.
• Seek medical advice quickly.
RN300260MEERev5.qxp_M rphyRichardsInstructi nB k04/11/201614:44Page2
All manuals and user guides at all-guides.com
3
g
f
d
p
q
s
}
∂
≈
t
12
9
7
8
4
6
1 32
5
10
11
3
2
10
1
4
2
3
6
5
3
RN300260MEERev5.qxp_M rphyRichardsInstructi nB k04/11/201614:45Page3
All manuals and user guides at all-guides.com
4
4
7
10
11
9
RN300260MEERev5.qxp_M rphyRichardsInstructi nB k04/11/201614:45Page4
All manuals and user guides at all-guides.com
5
g
f
d
p
q
s
}
∂
≈
t
Features
(1) Variable steam switch
(2) Water spray button
(3) Steam boost button
(4) Auto shut-off indicator (certain models only)
(5) Self clean position
(6) Filling hole with cap
(7) Spray nozzle
(8) Soleplate
(9) Temperature dial
(10) Temperature indicator light
(11) Water tank
(12) ron heel
Symbol (120°C Max) Cool (160°C Max) Warm (210°C Max) Hot MAX setting
Control dial positions Do not iron • •• •••
Fabric Nylon, Acetates,
synthetic fabrics
Wool, Polyester
mixtures
Cotton, Linen Rayon,
Rayon mixtures
roning ron on wrong side, if
moisture required, use
damp cloth
(not Acetate)
Fabrics requiring
this setting usually
require steam
pressing.
Steam level setting
(see step 3 of ‘Using
the iron for steam
ironing’)
No steam
(see ‘Dry ironing’)
Low Medium / High High
With water in tank
Dry and spray
Steam/spray/shot of steam
Without water in tank Dry ironing
Temperature guide
Heat setting markings on the temperature dial of all Morphy Richards irons match those of the nternational Textile Care Labelling Code
RN300260MEERev5.qxp_M rphyRichardsInstructi nB k04/11/201614:45Page5
All manuals and user guides at all-guides.com
Before use
Remove any protective cover from the soleplate (8).
Using the iron for steam ironing
1
Make sure the iron is not plugged in. Set the variable steam
switch (1) to ‘ ’. Fill the water tank (11) via the filling hole (6).
IN HARD WATER AREAS, WE RECOMMEND A MIX OF 50%
TAP WATER AND 50% DISTI ED OR DEMINERA ISED
WATER.
Never use battery topping up fluid or water containing any
substances like starch, sugar, fragrant additives or defrosted
water from a refrigerator.
2
Plug in the iron and switch on at the mains.
Set the temperature dial (9) to the temperature required (see
‘Temperature Guide’). Begin with cool fabrics and work up to
higher settings. An iron heats up quicker than it cools down so
you will save time and energy.
Your iron is fitted with a temperature indicator light (10) which will
switch on and off whilst you are ironing.
The temperature indicator light will illuminate until the required
temperature is reached, then it will turn off.
3
Vary the steam output using the variable steam switch (1).
Only use the steam facility onheavy fabrics (midway between 2
and 3-dot, to MAX).
4
For stubborn creases, use the water spray button (2). You may
need to press this a few times to prime the pump.
5
Steam boost
Press (3) for an extra steam boost for stubborn creases / heavy
fabrics.
NOTE: f you need to use the steam boost whilst dry ironing,
check the temperature dial (9) is set within the steam range.
NOTE: For optimum steam quality, do not operate the shot more
than three times in succession.
Features of your iron
Dry ironing
Your iron can be used for dry ironing. Set the variable steam
switch (1 to ‘ ’ and set the temperature dial (8) as desired
(‘Temperature Guide’).
You won’t need water in the tank unless using the water spray or
steam boost features.
6
Vertical steam
Vertical steam is useful for removing creases from hanging
clothes, curtains, etc. Hold the iron between 1cm and 2cm away
from the item and press the steam boost button (3).
Anti-drip system
This prevents water escaping from the soleplate (6) when the iron
is too cold.
During use, the anti-drip system may emit a loud click, particularly
during heat-up or whilst cooling down. This is perfectly normal
and indicates that the system is functioning correctly.
ife long anti-scale system (certain models only)
This system reduces scale deposits and helps prolong the life of
the iron.
Auto shut-off (certain models only)
The iron will automatically shut down if stationary in the horizontal
position for 1 minute, or in the vertical position for 8 minutes.
When auto shut-off is activated, the indicator light (4) will flash.
Gently move the iron and it will reheat. Wait for the iron to heat-up
and continue ironing.
Maintenance
To clean a stainless steel soleplate
We recommend using a generally available gentle chrome, silver
or stainless steel cleaner. Always follow the manufacturer’s
instructions.
To clean a coated soleplate
Do not use scouring powder or solution as this could cause
damage to the coating.
To clean either soleplate type
f any man-made fibres fuse to the soleplate (6), set the iron at the
3-dot position for a stainless steel soleplate, or MAX position for a
coated soleplate, and pass it over a clean piece of cotton to draw
the deposit off the surface.
To clean the exterior
Allow the unit to cool and wipe over with a damp cloth and mild
detergent, then wipe dry.
Emptying and Storage
7
When you have finished ironing, unplug and empty all water from
your iron and set the steam switch at the ‘’position. When cool,
store the iron on its heel with the cord wrapped loosely around the
heel.
Self Clean
Your iron has a built in cleaning system designed to keep the water
valve, steam chamber and steam vents clear of lint and loose
mineral deposits.
1 Half fill the iron with water.
2 Place the iron on its heel.
3 Move the variable steam switch (1) to the ‘MAX’ position.
4 Connect to a mains supply outlet.
5 Set the temperature dial (9) to ‘MAX’. See step 2 of ‘Using your
iron for steam ironing’.
6 The temperature indicator light (10) will illuminate until the required
temperature is reached, then it will turn off. Wait for one more cycle
- the temperature indicator light illuminates and switches off.
7 Disconnect the iron from the mains supply outlet.
8 Whilst the iron is still very hot, hold the iron horizontally over a sink.
9 Whilst still holding the variable steam switch (1) in the self clean
position, gently move the iron back and forth until the water tank is
empty.
WARNING: Steam and boiling hot water will drain from the
6
RN300260MEERev5.qxp_M rphyRichardsInstructi nB k04/11/201614:45Page6
All manuals and user guides at all-guides.com
7
holes in the soleplate. This washes away the scale and
minerals that have built up inside the steam chamber.
10 When cleaning is complete, move the variable steam switch back
to the ‘O’ position.
11 Rest your steam iron back on its heel and allow to fully cool down.
12 Wipe the soleplate (6) with a cold, damp cloth.
After this cleaning operation, empty out any remaining water.
WARNING: Keep hands and body away from the hot water.
WARNING: Do not attempt to descale the soleplate with
descaling products.
Contact us
Helpline
f you are having a problem with your appliance, please call our
Helpline, as we are more likely to be able to help than the store
you purchased the item from. Please have the product name,
model number and serial number to hand when you call to help
us deal with your enquiry quicker.
UK Helpline: 0844 871 0960
IRE Helpline: 1800 409 119
Spares: 0844 873 0726
Talk to us
f you have any questions or comments, or want some great
tips to help you get the most out of your products, join us
online:
Blog: www.morphyrichards.co.uk/blog
Facebook: www.facebook.com/morphyrichardsuk
Twitter: www.twitter.com/loveyourmorphy
Website: www.morphyrichards.com
THIS SECTION IS ON Y APP ICAB E FOR
CUSTOMERS IN UK AND IRE AND
REGISTERING YOUR TWO YEAR GUARANTEE
Your standard one year guarantee is extended for an additional
12 months when you register the product within 28 days of
purchase with Morphy Richards. f you do not register the
product with Morphy Richards within 28 days, your product is
guaranteed for 1 year. To validate your 2 year guarantee register
with us online at www.morphyrichards.co.uk
N.B. Each qualifying product needs to be registered with
Morphy Richards individually. Please refer to the one year
guarantee for more information.
YOUR ONE YEAR GUARANTEE
t is important to retain the retailer’s receipt as proof of
purchase. Staple your receipt to this back cover for future
reference. Please quote the following information if the product
develops a fault. These numbers can be found on the base of
the product.
Model no.
Serial no.
All Morphy Richards products are individually tested before
leaving the factory. n the unlikely event of any appliance
proving to be faulty within 28 days of purchase, it should be
returned to the place of purchase for it to be replaced. f the
fault develops after 28 days and within 12 months of original
purchase, you should contact the Helpline number quoting
Model number and Serial number on the product, or write to
Morphy Richards at the address shown. You may be asked to
return a copy of proof of purchase. Subject to the exclusions
set out below (see Exclusions), the faulty appliance will then be
repaired or replaced and dispatched usually within 7 working
days of receipt. f, for any reason, this item is replaced during
the 1 year guarantee period, the guarantee on the new item will
be calculated from original purchase date. Therefore it is vital to
retain your original till receipt or invoice to indicate the date of
initial purchase. To qualify for the 1 year guarantee, the
appliance must have been used according to the instructions
supplied. For example, crumb trays should have been emptied
regularly.
EXC USIONS
Morphy Richards shall not be liable to replace or repair the
goods under the terms of the guarantee where:
1 The fault has been caused or is attributable to accidental use,
misuse, negligent use or used contrary to the manufacturer’s
recommendations or where the fault has been caused by power
surges or damage caused in transit.
2 The appliance has been used on a voltage supply other than that
stamped on the products.
3 Repairs have been attempted by persons other than our service
staff (or authorised dealer).
4 The appliance has been used for hire purposes or non domestic
use.
5 The appliance is second hand.
6 Morphy Richards are not liable to carry out any type of servicing
work, under the guarantee.
7 Plastic filters for all Morphy Richards kettles and coffee makers
are not covered by the guarantee.
8 Batteries and damage from leakage are not covered by the
guarantee.
9 The filters have not be cleaned and replaced as instructed.
This guarantee does not confer any rights other than those
expressly set out above and does not cover any claims for
consequential loss or damage. This guarantee is offered as an
additional benefit and does not affect your statutory rights as a
consumer.
YOUR INTERNATIONA TWO YEAR
GUARANTEE
This appliance is covered by two-year repair or replacement
warranty.
t is important to retain the retailers receipt as proof of
purchase. Staple your receipt to this back cover for future
reference.
Please quote the following information if the product develops a
fault. These numbers can be found on the base of the product.
Model no.
g
RN300260MEERev5.qxp_M rphyRichardsInstructi nB k04/11/201614:45Page7
All manuals and user guides at all-guides.com
8
Serial no.
All Morphy Richards products are individually tested before
leaving the factory. n the unlikely event of any appliance
proving to be faulty within 28 days of purchase it should be
returned to the place of purchase for it to be replaced.
f the fault develops after 28 days and within 24 months of
original purchase, you should contact your local distributor
quoting Model number and Serial number on the product, or
write to your local distributor at the addresses shown.
You will be asked to return the product (in secure, adequate
packaging) to the address below along with a copy of proof of
purchase.
Subject to the exclusions set out below (1-9) the faulty
appliance will then be repaired or replaced and dispatched
usually within 7 working days of receipt.
f for any reason this item is replaced during the 2-year
guarantee period, the guarantee on the new item will be
calculated from original purchase date. Therefore it is vital to
retain your original till receipt or invoice to indicate the date of
initial purchase.
To qualify for the 2-year guarantee the appliance must have
been used according to the manufacturers instructions. For
example, appliances must have been descaled and filters must
have been kept clean as instructed.
The local distributor shall not be liable to replace or repair the
goods under the terms of the guarantee where:
1 The fault has been caused or is attributable to accidental use,
misuse, negligent use or used contrary to the manufacturers
recommendations or where the fault has been caused by power
surges or damage caused in transit.
2 The appliance has been used on a voltage supply other than that
stamped on the products.
3 Repairs have been attempted by persons other than our service
staff (or authorised dealer).
4 Where the appliance has been used for hire purposes or non
domestic use.
5 The appliance is second hand.
6 The local distributor are not liable to carry out any type of
servicing work, under the guarantee.
7 The guarantee excludes consumables such as bags, filters and
glass carafes.
8 Batteries and damage from leakage are not covered by the
guarantee.
9 The filters have not be cleaned and replaced as instructed.
This guarantee does not confer any rights other than those
expressly set out above and does not cover any claims for
consequential loss or damage. This guarantee is offered as an
additional benefit and does not affect your statutory rights as a
consumer.
AUSTRA IAN WARRANTY
This appliance is guaranteed for 2 years against faulty material,
components and workmanship.
This warranty is in addition and does not affect your statutory rights.
Proof of purchase must be produced for any warranty benefit.
n the unlikely event of any appliance proving to be faulty, securely
pack and return the item to the place of purchase accompanied by
the original receipt or invoice.
Our goods come with guarantees that cannot be excluded under
the Australian Consumer Law. You are entitled to a replacement or
refund for a major failure and for compensation for any other
reasonably foreseeable loss or damage. You are also entitled to
have the goods repaired or replaced if the goods fail to be of
acceptable quality and the failure does not amount to a major
failure.
NOT COVERED BY THIS WARRANTY
(Australian only)
• f the appliance has not been used in accordance with the
manufacturers’ recommendations or nstructions.
• f the fault is deemed to be caused by abuse, misuse, neglect,
modifications or in proper use and or care
Eg: Kettles: Excessive build up of scale.
Toasters: Excessive build up of crumbs or foreign matter etc.
• Connection to incorrect voltage to that stamped on the product.
• Unauthorised repairs.
• Appliance used other than for domestic purposes.
• Excluding bags, filters, glass, carafes, and cutting blades.
• Freight and insurance costs.
f for any reason this item is replaced during the 2 year
guarantee period, the guarantee on the new item will be
calculated from original purchase date. Therefore it is vital to
retain your original receipt or invoice to indicate the date of
original purchase.
Morphy Richards’s policy is to continually improve quality
design and product quality. The company therefore reserves the
right to change any specifications or to carry out modifications
as deemed worthy at any time.
The Australian supplier ASKO Appliances reserves the right to
repair, modify, exchange or replace the faulty appliance with the
same or similar model or product of equivalent value.
RN300260MEERev5.qxp_M rphyRichardsInstructi nB k04/11/201614:45Page8
All manuals and user guides at all-guides.com
9
• Cet appareil peut être utilisé par des enfants âgés d’au moins 8
ans et par des personnes ayant des capacités physiques,
sensorielles ou mentales réduites ou un manque d’expérience
et de connaissance s’ils sont surveillés ou s’ils ont reçu des
instructions concernant l’utilisation en toute sécurité de
l’appareil et comprennent les dangers que cela implique. Les
enfants ne doivent pas jouer avec l’appareil. Le nettoyage et
l’entretien courant ne doivent pas être effectués par des
enfants sans surveillance.
• Tenez le fer et son cordon hors de portée des enfants de moins
de 8 ans.
• Le fer ne doit pas être laissé sans surveillance lorsqu’il est
branché à l’alimentation secteur.
• Débranchez le fer avant de le remplir d’eau.
• Le fer doit être utilisé et posé sur une surface stable.
• Lorsque vous posez le fer sur son talon, vérifiez que la surface
sur laquelle il est posé est stable.
• N’utilisez pas le fer s’il a subi un choc, s’il présente des dégâts
visibles ou s’il fuit.
• L’orifice de remplissage ne doit pas être ouvert en cours
d’utilisation.
f
f
• DANGER : Vous risquez de vous brûler si vous touchez des
pièces métalliques chaudes, de l’eau chaude ou de la vapeur
chaude.
• DANGER : Pour éviter tout choc électrique, ne plongez pas
l’appareil dans l’eau ni dans tout autre liquide.
Alimentation électrique et cordon
d’alimentation
• Vérifiez que la tension indiquée sur la plaque signalétique de
l’appareil correspond à l’alimentation électrique de votre domicile,
qui doit être en courant alternatif (CA).
• N’utilisez pas l’appareil si le cordon d’alimentation est
endommagé. l doit être remplacé par le fabricant, son agent de
service ou une personne qualifiée afin d’éviter tout risque.
• Ne laissez pas le cordon d’alimentation entrer en contact avec la
semelle chaude de l’appareil.
• Si le fusible de la fiche 13 ampères doit être remplacé, vous
devez utiliser un fusible BS1362 de 13 ampères.
• DANGER : Cet appareil doit être mis à la terre.
VEUI EZ IRE TOUTES ES INSTRUCTIONS ET ES
CONSERVER POUR POUVOIR ES CONSU TER
U TERIEUREMENT
g
RN300260MEERev5.qxp_M rphyRichardsInstructi nB k04/11/201614:45Page9
All manuals and user guides at all-guides.com
10
Caractéristiques
(1) Curseur de réglage du débit de vapeur
(2) Bouton de pulvérisation d’eau
(3) Bouton jet de vapeur
(4) Voyant d’arrêt automatique
(uniquement sur certains modèles)
(5) Position d’autonettoyage
(6) Orifice de remplissage et bouchon
(7) Pulvérisateur
(8) Semelle
(9) Bouton du thermostat
(10) Voyant indicateur de température
(11) Réservoir d’eau
(12) Talon du fer
DANGER !
SURFACE CHAUDE
ATTENTION
SURFACES CHAUDES
MANIPU ER AVEC
PRÉCAUTION
Traitement des brûlures
• Faites couler immédiatement de l’eau froide sur la zone touchée.
• Ne prenez pas le temps de retirer les vêtements.
• Consultez un médecin rapidement.
Symbole (120 °C Max) Doux (160 °C Max) Chaud (210 °C Max)
Très chaud
Réglage MAX
Tissu Nylon, acétates, tissus
synthétiques
Laine, mélanges de
polyester
Coton, lin, rayonne,
mélanges avec
rayonne
Repassage Repasser à l’envers, si
une humidification est
nécessaire, utiliser une
pattemouille (pas les
acétates)
Les tissus à repasser
sur cette position
exigent généralement
un repassage à la
vapeur.
Réglage du niveau de
vapeur(voir l’étape 3
« Utilisation du fer pour
le repassage vapeur »)
Pas de vapeur
(voir « Repassage à
sec »)
Bas Moyen / Haut Haut
Avec réservoir plein
Sec et pulvérisation
Vapeur/pulvérisation/jet
de vapeur
Avec réservoir vide Repassage à sec
Positions du
bouton de
thermostat
Ne pas repasser
• •• •••
Guide des températures
Les réglages sur le bouton du thermostat de tous les fers à repasser Morphy Richards correspondent à ceux du code international des
étiquettes d’entretien des textiles.
RN300260MEERev5.qxp_M rphyRichardsInstructi nB k04/11/201614:45Page10
All manuals and user guides at all-guides.com
11
Avant la première utilisation
Enlevez le film de protection qui pourrait se trouver sur la semelle
du fer (8).
Utilisation du fer pour le repassage vapeur
1
Assurez que le fer n’est pas branché. Mettez le curseur de réglage
du débit de vapeur (1) sur ‘ ’. Remplissez le réservoir d’eau (11)
par l’orifice de remplissage (6).
DANS ES RÉGIONS D’EAU DURE, NOUS RECOMMANDONS
UN MÉ ANGE DE 50 % D’EAU DU ROBINET ET 50 % D’EAU
DISTI ÉE OU EAU DÉMINÉRA ISÉE.
N’utilisez jamais de liquide pour batteries ni d’eau contenant
des substances comme de l’amidon, du sucre, des additifs
parfumés, ou encore de l’eau de dégivrage de votre
réfrigérateur.
2
Branchez le fer au secteur.
Réglez le bouton du thermostat (9) sur la température souhaitée
(voir le « Guide des températures »). Commencez par repasser les
tissus exigeant un fer doux avant de passer aux tissus exigeant un
fer plus chaud. Comme un fer à repasser chauffe plus vite qu’il ne
refroidit, vous gagnerez ainsi du temps et vous économiserez de
l’électricité.
Votre fer est équipé d’un voyant indicateur de température (10) qui
s’allume et s’éteint pendant que vous repassez.
Le voyant indicateur de température s’allume jusqu’à atteindre la
température souhaitée puis il s’éteint.
3
Variez la sortie de vapeur à l’aide du curseur de réglage du débit
de vapeur (1).
Utilisez uniquement la fonction vapeur sur les tissus épais
(positions 2-3 points et MAX).
4
Pour les faux plis, utilisez le bouton de pulvérisation d’eau (2).
Vous devez peut-être appuyer sur celui-ci plusieurs fois pour
amorcer la pompe.
5
Jet de vapeur
Appuyez sur le bouton (3) pour obtenir un jet de vapeur
supplémentaire pour les faux plis / les tissus épais.
REMARQUE : si vous devez utiliser le jet de vapeur pendant le
repassage à sec, vérifiez que le bouton du thermostat (9) est sur
la position vapeur.
REMARQUE : Pour obtenir la meilleure qualité de vapeur, n’utilisez
pas le jet de vapeur plus de trois fois de suite.
Caractéristiques de votre fer à repasser
Repassage à sec
Votre fer peut être utilisé pour le repassage à sec. Réglez le
curseur de réglage du débit de vapeur 1 sur ‘ ’ et le bouton de
thermostat (8) sur la température souhaitée (« Guide des
températures »).
Vous n’avez pas besoin d’eau dans le réservoir sauf si vous
utilisez les fonctions de pulvérisation d’eau ou jet de vapeur.
6
Vapeur verticale
La vapeur verticale est utile pour défroisser des vêtements
suspendus, des rideaux etc. Tenez le fer à une distance de 1 cm à
2 cm du tissu et appuyez sur le bouton jet de vapeur (3).
Système antigoutte
Cela empêche l’eau de goutter de la semelle (6) lorsque le fer
n’est pas assez chaud.
Pendant l’utilisation du fer, le système antigoutte peut émettre un
« clic » sonore, notamment pendant le chauffage ou le
refroidissement. Ceci est parfaitement normal et indique que le
système fonctionne correctement.
Filtre anti-calcaire à vie (certains modèles uniquement)
Ce système réduit les dépôts de calcaire et permet de prolonger
la durée de vie du fer.
Arrêt automatique (uniquement sur certains modèles)
Le fer s’arrêtera automatiquement s’il n’est pas utilisé pendant
1 minute en position horizontale ou pendant 8 minutes en position
verticale.
Une fois l’arrêt automatique activé, le voyant (4) clignotera.
Bougez doucement le fer et il chauffera à nouveau. Attendez qu’il
atteigne la température souhaitée et continuez le repassage.
Entretien
Pour nettoyer une semelle en inox
Nous recommandons d’utiliser l’un des nettoyants doux du
commerce pour chrome, argenterie ou inox. Respectez toujours
les instructions du fabricant.
Pour nettoyer une semelle avec revêtement
N’utilisez pas de poudre à récurer ou de solution décapante qui
pourrait endommager le revêtement.
Pour nettoyer un autre type de semelle
Si des fibres synthétiques ont fondu sur la semelle (6), réglez le fer
sur la position 3 points pour une semelle en inox ou la position
MAX pour une semelle avec revêtement, et repassez un morceau
de coton propre pour décoller les fibres de la semelle.
Pour nettoyer l’extérieur
Laissez refroidir le fer et essuyez-le avec un chiffon humide et un
détergent doux, puis séchez-le avec un chiffon sec.
Vidange et rangement
7
Lorsque vous avez terminé votre repassage, débranchez et videz
toute l’eau du fer. Réglez le curseur de réglage du débit de vapeur
sur la position ‘’. Une fois refroidi, rangez le fer sur son talon et
enroulez le cordon autour de celui-ci.
f
RN300260MEERev5.qxp_M rphyRichardsInstructi nB k04/11/201614:45Page11
All manuals and user guides at all-guides.com
12
Auto-nettoyage
Votre fer est équipé d’un système de nettoyage intégré, conçu
pour éliminer les peluches et les dépôts minéraux de la soupape
d’eau, du compartiment à vapeur et des buses à vapeur.
1 Remplissez à moitié le fer d’eau.
2 Placez le fer sur son talon.
3 Mettez le curseur de réglage du débit de vapeur (1) sur la position
« MAX ».
4 Branchez-le sur une prise d’alimentation secteur.
5 Réglez le bouton de thermostat (8) sur « MAX ». Voir l’étape 2
« Utilisation de votre fer pour le repassage à la vapeur ».
6 Le voyant indicateur de température (10) s’allume jusqu’à atteindre
la température souhaitée puis il s’éteint. Attendez un cycle
supplémentaire - le voyant indicateur de température s’allume et
s’éteint.
7 Débranchez le fer de la prise d’alimentation secteur.
8 Bien que le fer soit très chaud, tenez-le horizontalement au-dessus
d’un évier.
9 Tout en gardant toujours le curseur de réglage du débit de vapeur
(4) en position d’auto-nettoyage, manipulez délicatement le fer vers
l’avant et vers l’arrière jusqu’à ce que le réservoir d’eau soit vide
DANGER : a vapeur et l’eau bouillante s’évacueront par les
orifices de la semelle. Cela élimine le calcaire et les minéraux
accumulés dans le compartiment à vapeur.
10 Lorsque le nettoyage est terminé, remettez le curseur de réglage
du débit de vapeur sur la position « O ».
11 Posez votre fer sur son talon et laissez-le refroidir complètement.
12 Essuyez la semelle (6) avec un chiffon froid et humide.
Après ce nettoyage, videz toute l’eau restante.
DANGER : Tenez vos mains et votre corps à distance de l’eau
chaude.
DANGER : N’essayez pas de détartrer la semelle avec un
produit détartrant.
Nous contacter
Service d’assistance
Si vous rencontrez un problème avec votre appareil, veuillez
appeler notre service d’assistance. Nous pourrons certainement
vous aider plus efficacement que le magasin où vous avez
acheté l’article. Munissez-vous du nom de produit, du numéro
de modèle et du numéro de série de l’appareil lorsque vous
nous appelez. Cela nous aidera à traiter plus rapidement votre
demande.
Dialoguer avec nous
Si vous avez des questions ou des commentaires à formuler ou
si vous voulez bénéficier de conseils judicieux pour vous aider
à tirer le meilleur parti de vos appareils, retrouvez-nous en
ligne :
Blog : www.morphyrichards.co.uk/blog
Facebook: www.facebook.com/morphyrichardsuk
Twitter : www.twitter.com/loveyourmorphy
Site Internet : www.morphyrichards.com
VOTRE GARANTIE DE DEUX ANS
Pour la clientèle en France
l est important de conserver le ticket de caisse comme preuve
d’achat. Agrafez votre ticket de caisse à cette notice
d'utilisation; vous pourrez ainsi l’avoir sous la main
ultérieurement.
Merci de donner les informations ci-dessous si votre appareil
tombe en panne. Vous trouverez ces références à la base de
l’appareil.
Numéro du modèle
Numéro de série
Tous les produits Morphy Richards sont testés individuellement
avant de quitter l’usine.
Si un problème survient dans les 24 mois qui suivent l’achat
d’origine, vous devez contacter le magasin où vous avez
acheté votre appareil muni de votre ticket de caisse, celui ci le
renverra à Glen Dimplex France pour expertise.
Sous réserve des exclusions indiquées ci-dessous (1 à 9),
l’appareil défectueux sera alors réparé ou remplacé et
réexpédié dans un délai de 15 jours ouvrables maximum à
compter de son arrivée.
Si, pour quelque raison que ce soit, l’article est remplacé
pendant la période de garantie de deux ans, la période de
garantie du nouvel article sera calculée à partir de la date
d’achat d’origine. Vous devez donc absolument conserver votre
ticket de caisse ou votre facture d’origine pour indiquer la date
d’achat.
Pour bénéficier de la garantie de deux ans, l’appareil doit avoir
été utilisé conformément aux instructions du fabricant. Par
exemple, les fers doivent avoir été détartrés et les filtres doivent
avoir été nettoyés selon les instructions.
Morphy Richards ne sera pas dans l’obligation de remplacer ou
réparer les articles aux termes de la garantie dans les
circonstances suivantes :
1 Si le problème provient d’une utilisation accidentelle, d’une
RN300260MEERev5.qxp_M rphyRichardsInstructi nB k04/11/201614:45Page12
All manuals and user guides at all-guides.com
13
utilisation abusive ou négligente, ou si l’appareil a été utilisé de
manière contraire aux recommandations du fabricant, ou encore
lorsque le problème provient de sautes de puissance ou de
dégâts occasionnés en transit.
2 Si l’appareil a été utilisé sur une alimentation électrique dont la
tension est différente de celle qui est indiquée sur l’appareil.
3 Si des personnes autres que nos techniciens (ou l’un de nos
revendeurs agréés) ont tenté de faire des réparations.
4 Si l’appareil a été loué ou utilisé dans un contexte non
domestique.
5 Si l’appareil est d’occasion.
6 Morphy Richards n’est pas dans l’obligation de réaliser des
travaux d’entretien, quels qu’ils soient, aux termes de la garantie.
7 La garantie exclut les consommables tels que les sacs, les filtres
et les carafes en verre.
8 Les batteries et les dégâts provoqués par leur fuite ne sont pas
couverts par la garantie.
9 Les filtres n’ont pas été nettoyés ou remplacés suivant les
instructions.
Cette garantie ne confère aucun droit à l’exception de ceux qui
sont expressément indiqués ci-dessus, et ne couvre aucune
réclamation pour dommages immatériels ou indirects. Cette
garantie est offerte comme avantage supplémentaire et n’a
aucune incidence sur vos droits légaux en tant que
consommateur.
Pour la clientèle en Belgique
Les produits de Morphy Richards sont produits conformément
les normes de qualité, agrée international. Au-dessus vos droits
légaux, Morphy Richards vous garantit qu’à partir d’achat ce
produit sera sans défauts de fabrication ou de matériels
pendant une période de deux ans.
l est important de conserver votre bon d’achat comme preuve.
Agrafez votre ticket à cette notice d’installation.
Veuillez mentionner ces informations ci-dessous si votre
appareil tombe en panne. Vous trouverez ces informations sur la
base de l’appareil.
Numéro du modèle
Numéro de série
Si, pour quelque raison que ce soit, l’article est remplacé
pendant la période de garantie (deux ans), la période de
garantie du nouvel article sera calculée à partir de la date
d’achat d’origine. l est donc très importants de conserver votre
bon d’achat original afin de connaître la date initiale d’achat.
Cette garantie vaut uniquement quand l’appareil a été utilisé
conformément aux instructions du fabricant. Par exemple, les
appareils doivent être détartrés et les filtres doivent être tenus
propre selon le mode d’emploi.
Morphy Richard ne sera pas dans l’obligation de remplacer ou
réparer les articles aux termes de la garantie dans les
circonstances suivantes
1 Si le problème, prévient d’une utilisation accidentelle, d’une
utilisation abusive ou négligente, ou si l’appareil a été utilisé de
manière contraire aux recommandations du fabricant, ou encore
lorsque le problème provient de source de puissance ou de
dégâts occasionnés en transit.
2 Si l’appareil a été utilisé sur une alimentation électrique dont la
tension est différente de celle qui est indiquée sur l’appareil.
3 Si des personnes, autres que nos techniciens (ou revendeurs
agrées) ont tenté de faire des réparations.
4 Si l’appareil a été loué ou utilisé dans un contexte non
domestique.
5 Si l’appareil est d’occasion.
6 Morphy Richards n’est pas dans l’obligation de réaliser des
travaux d’entretien, quels qu’ils soient, aux termes de la garantie.
7 La garantie ne couvre pas les sachets, filtres et brocs en verre.
8 Les batteries et les dégâts provoqués par leur fuite ne sont pas
couverts par la garantie.
9 Les filtres n’ont pas été nettoyés ou remplacés suivant les
instructions.
Cette garantie ne confère aucun droit à l’exception de ceux qui
sont expressément indiqués ci-dessus, et ne couvre aucune
réclamation pour dommages immatériels ou indirects. Cette
garantie est offerte comme avantage supplémentaire et n’a
aucune incidence sur vos droits légaux en tant que
consommateur.
f
RN300260MEERev5.qxp_M rphyRichardsInstructi nB k04/11/201614:45Page13
All manuals and user guides at all-guides.com
14
• Dieses Gerät kann von Kindern über 8 Jahren, von Personen,
deren körperliche oder geistige Unversehrtheit oder deren
Wahrnehmungsfähigkeit eingeschränkt ist, sowie von Personen mit
mangelnden Kenntnissen oder Erfahrung benutzt werden. Dies gilt
nur unter der Voraussetzung, dass sie beaufsichtigt werden oder
dass sie eine Einweisung in die sichere Nutzung des Geräts und
die damit verbundenen Gefahren erhalten haben. Kinder dürfen
mit dem Gerät nicht spielen. Reinigung und Wartung dürfen ohne
Beaufsichtigung nicht von Kindern durchgeführt werden.
• Bewahren Sie das Bügeleisen und das dazugehörige Netzkabel
niemals in Reichweite von Kindern unter 8 Jahren auf.
• Das Bügeleisen darf nicht unbeaufsichtigt gelassen werden, wenn
es an einer Steckdose angeschlossen ist.
• Vor dem Nachfüllen des Wassertanks muss der Netzstecker aus
der Steckdose gezogen werden.
• Das Bügeleisen muss auf einer stabilen Fläche gebraucht und
abgestellt werden.
• Beim Abstellen des Bügeleisens auf dem Geräterücken muss die
Fläche, auf der der Geräterücken steht, stabil sein.
• Das Bügeleisen darf nicht mehr benutzt werden, wenn es auf den
Boden gefallen ist, wenn daran Schäden sichtbar sind oder wenn
das Gerät undicht ist.
• Die Einfüllöffnung muss während des Gebrauchs geschlossen
bleiben.
d
• WARNUNG: Das Berühren heißer Metallteile und der Kontakt
mit heißem Wasser oder Wasserdampf kann Verbrennungen
hervorrufen.
• WARNUNG: Zum Schutz vor einem Stromschlag das Gerät
nicht in Wasser oder andere Flüssigkeiten tauchen.
Elektrischer Anschluss und Netzkabel
• Stellen Sie sicher, dass die auf dem Typenschild des Geräts
angegebene Spannung mit der Haushaltsspannung hrer
Elektrizitätsversorgung übereinstimmt; es muss eine
Wechselstromspannung (abgekürzt AC) sein.
• Keine Geräte mit einem beschädigten Netzkabel oder Netzstecker
betreiben, diese müssen vom Hersteller, seinem Kundenservice
oder einer gleichermaßen qualifizierten Person ausgetauscht
werden, um Gefahrenquellen zu vermeiden.
• Das Netzkabel darf nicht mit der heißen Heizplatte des
Bügeleisens in Kontakt kommen.
• Falls die Sicherung in dem 13-A-Sicherungshalter ausgetauscht
werden muss, ist eine Sicherung mit 13 A gemäß BS1362 zu
verwenden.
• WARNUNG: Dieses Gerät muss an eine geerdete Steckdose
angeschlossen werden.
A E ANWEISUNGEN DURCH ESEN UND AUFBEWAHREN
RN300260MEERev5.qxp_M rphyRichardsInstructi nB k04/11/201614:45Page14
All manuals and user guides at all-guides.com
15
Eigenschaften
(1) Dampfregler
(2) Wassersprühtaste
(3) Dampf Plus-Taste
(4) Automatische Abschaltanzeige (nur bei bestimmten Modellen)
(5) Position für Selbstreinigung
(6) Einfüllstutzen mit Verschluss
(7) Sprühdüse
(8) Heizplatte
(9) Temperaturregler
(10) Temperaturanzeigelampe
(11) Wasserbehälter
(12) Gerätesockel
d
VORSICHT!
HEISSE OBERF ÄCHE
AUF DIE
HEISSE OBERF ÄCHE
ACHTEN
VORSICHT BEI DER
HANDHABUNG
Behandlung von
Verbrennungen
• Verbrennungen unverzüglich mit kaltem Wasser kühlen.
• Mit dem Kühlen der Wunde auch beim Ausziehen von
Kleidungsstücken nicht aufhören.
• Sofort ärztlichen Rat einholen.
Symbol (120°C Max) Kalt (160°C Max) Warm (210°C Max) Heiß MAX-Einstellung
Position des
Temperaturreglers
Nicht bügeln • •• •••
Stoff Nylon, Azetate,
Synthetik
Wolle,
Polyestermischgewebe
Baumwolle, Leinen,
Kunstseide, Kunstseide-
Mischfasern
Bügeln Auf der Stoffinnenseite
bügeln; wenn
Feuchtigkeit nötig,
feuchtes Tuch (kein
Azetat) unterlegen
Für diese
Temperatureinstellung
ausgelegte Textilien
müssen in der Regel mit
Dampfdruck behandelt
werden.
Dampfstufeneinstellung
(siehe Schritt 3 unter
„Dampfbügeln“)
Kein Dampf
(siehe „Bügeln ohne
Dampf“).
Niedrig Mittel / Hoch Hoch
Mit Wasser im Behälter
Trocken und Sprühen
Dampf/Sprühen/Dampfstoß
Ohne Wasser im
Behälter Bügeln ohne Dampf
Temperatureinstellungen
Die Markierungen für die Temperatureinstellungen, die auf den Temperaturreglern aller Bügeleisen von Morphy Richards zu finden sind,
entsprechen den Zeichen des internationalen Textilpflegestandards.
RN300260MEERev5.qxp_M rphyRichardsInstructi nB k04/11/201614:45Page15
All manuals and user guides at all-guides.com
Vor der Verwendung
Entfernen Sie eine etwaige Schutzabdeckung von der
Heizplatte (8).
Verwendung des Geräts zum Dampfbügeln
1
Stellen Sie sicher, dass das Bügeleisen ausgesteckt ist. Stellen Sie
den Dampfregler (1) auf die Position ‘ ’. Füllen Sie über den
Einfüllstutzen (6) im Behälter (11) Wasser nach.
IN GEBIETEN MIT HARTEM WASSER EMPFEH EN WIR EINE
MISCHUNG AUS 50 % EITUNGSWASSER SOWIE 50 %
DESTI IERTEM ODER ENTMINERA ISIERTEM WASSER.
Verwenden Sie niemals Batterie-Nachfüllflüssigkeit oder
Wasser mit gelösten Stoffen wie etwa Stärke, Zucker oder
Duftstoffe, und vermeiden Sie auch Tauwasser aus dem
Eisschrank.
2
Schließen Sie das Bügeleisen an und schalten Sie den Strom ein.
Stellen Sie den Temperaturregler (9) auf die gewünschte
Temperatur ein (siehe “Temperaturleitfaden”). Beginnen Sie mit
Stoffen, die nicht heiß gebügelt werden und bearbeiten Sie
anschließend die “Heißbügelware”. Ein Bügeleisen benötigt
weniger Zeit für das Aufheizen als für das Abkühlen. Sie sparen
dadurch Zeit und Strom.
hr Bügeleisen ist mit einer Anzeigelampe für die Temperatur (10)
ausgestattet, die sich während des Bügelns aus- und einschaltet.
Die Temperaturanzeigelampe leuchtet auf, bis die gewünschte
Temperatur erreicht ist; anschließend schaltet sich die Lampe aus.
3
Mit dem Dampfregler (1) können Sie den Dampfausstoß
regulieren.
Verwenden Sie die Dampffunktion nur bei schweren Stoffen
(Einstellungen mit 2 und 3 Punkten sowie Einstellung MAX).
4
Bei hartnäckigen Falten die Wassersprühtaste (2) benutzen. Die
Taste muss eventuell mehrmals gedrückt werden, damit die
Sprühpumpe das Wasser richtig ansaugen kann.
5
Dampf plus
Drücken Sie die Taste (3), um einen zusätzlichen Dampfstoß bei
hartnäckigen Falten / schweren Stoffen zu erzeugen.
H NWE S: Wenn Sie die Dampfstoßfunktion beim Trockenbügeln
verwenden, achten Sie darauf, dass der Temperaturregler (9) auf
den Dampfbereich eingestellt ist.
H NWE S: Für einen optimalen Dampfstrahl sollte der Dampfstoß
nicht mehr als drei Mal hintereinander verwendet werden.
Austattungsmerkmale des Bügeleisens
Bügeln ohne Dampf
Das Bügeleisen kann auch zum Trockenbügeln benutzt werden.
Stellen Sie den Dampfregler (1) auf die Position ‘ ’ und den
Temperaturregler (9) nach Bedarf ein (siehe “Temperaturleitfaden”).
Es muss kein Wasser in den Behälter gefüllt werden, sofern Sie
die Wassersprüh- oder Dampfstoßfunktion nicht benutzen.
6
Vertikaler Dampfstrahl
Der vertikale Dampfstrahl eignet sich besonders zum Entfernen
von Knitterfalten aus aufgehängten Kleidungsstücken, Gardinen,
usw. Halten Sie das Bügeleisen mit einem Abstand von 1 bis 2 cm
vom Kleidungsstück entfernt und betätigen Sie die Dampf Plus-
Taste (3).
Tropfschutzsystem
Mit dieser Funktion wird das Entweichen von Wasser aus der
Heizplatte (8) verhindert, solange das Bügeleisen noch zu kalt ist.
Bei der Benutzung gibt das Tropfschutzsystem ein lautes
Klickgeräusch aus, besonders während der Aufwärm- oder
Abkühlphase. Dies ist völlig normal und weist darauf hin, dass das
System korrekt funktioniert.
ebenslange Antikalkfunktion (nur bei bestimmten Modellen)
Dieses System bekämpft Kalkablagerungen und trägt zu einer
längeren Lebensdauer des Bügeleisens bei.
Automatische Abschaltung (nur bei bestimmten Modellen)
Wird das Bügeleisen in horizontaler Lage unbeaufsichtigt
gelassen, schaltet es sich nach 1 Minute ab; wenn es aufrecht
unbenutzt stehen gelassen wird, schaltet es sich nach 8 Minuten
ab.
Bei aktivierter Abschaltung blinkt die Anzeigeleuchte (4).
Zur erneuten Erwärmung des Bügeleisens sachte schütteln.
Warten Sie, bis sich das Bügeleisen erwärmt hat, um weitere
Kleidungsstücke zu bügeln.
Wartung
Edelstahl-Heizplatte reinigen
Wir empfehlen hnen ein mildes Chrom-, Silber- oder
Edelstahlreinigungsmittel, das überall erhältlich ist. Befolgen Sie
stets die Gebrauchsanweisung des Herstellers.
Reinigen der beschichteten Heizplatte
Vermeiden Sie Scheuer- und Lösungsmittel, da die Beschichtung
dadurch beschädigt wird.
Reinigen von unterschiedlichen Heizplatten
Wenn Synthetikfasern an der Heizplatte (8) anhaften, stellen Sie bei
Bügeleisen mit Edelstahl-Heizplatte die Temperatur mit 3 Punkten
bzw. bei Geräten mit beschichteter Heitzplatte die Temperatur MAX
ein und bügeln Sie über ein sauberes Stück Baumwollstoff. Die
Ablagerungen lösen sich dadurch von der Oberfläche der
Heizplatte.
Reinigen des Gehäuses
Lassen Sie das Bügeleisen abkühlen, und wischen Sie es mit
einem feuchten Tuch und mildem Haushaltsreiniger ab.
Anschließend trocken nachwischen.
Entleeren und Verstauen
7
Nach dem Bügeln den Netzstecker ziehen und das restliche
Wasser aus dem Bügeleisen schütten. Stellen Sie den Dampfregler
auf die Position ‘’. Nach dem Abkühlen stellen Sie das
Bügeleisen auf dem Sockel ab und wickeln Sie das Netzkabel lose
um den Gerätesockel.
16
RN300260MEERev5.qxp_M rphyRichardsInstructi nB k04/11/201614:45Page16
All manuals and user guides at all-guides.com
17
Selbstreinigung
Das Bügeleisen ist mit einer eingebauten Reinigungsfunktion
ausgestattet, die dafür sorgt, dass das Wasserventil, die
Dampfkammer und die Dampföffnungen von Fusseln und losen
Mineralablagerungen frei sind.
1 Das Bügeleisen halb mit Wasser befüllen.
2 Das Bügeleisen auf den Sockel stellen.
3 Den Dampfregler (1) auf die Position “MAX” stellen.
4 An eine Steckdose anschließen.
5 Den Temperaturregler (9) auf “MAX” stellen. Siehe Punkt 2 im
Abschnitt “Verwendung des Geräts zum Dampfbügeln”.
6 Die Temperaturanzeigelampe (10) leuchtet auf, bis die gewünschte
Temperatur erreicht ist; anschließend schaltet sich die Lampe aus.
Warten Sie einen weiteren Zyklus ab – die Temperaturanzeigelampe
leuchtet auf und schaltet sich aus.
7 Den Netzstecker des Bügeleisens aus der Steckdose ziehen.
8 Solange das Gerät noch sehr heiß ist, halten Sie es in horizontaler
Lage über ein Spülbecken.
9 Lassen Sie den Dampfregler (1) auf der Position für die
Selbstreinigung und bewegen Sie das Bügelreisen vorsichtig vor
und zurück, bis der Wasserbehälter entleert ist.
WARNUNG: Wasserdampf und kochend heißes Wasser
entweicht aus den Öffnungen der Heizplatte. Auf diese Weise
werden Kalk- und Mineralablagerungen aus der
Dampfkammer ausgespült.
10 Nachdem der Reinigungsvorgang beendet ist, den Dampfregler
wieder auf die Position “O” stellen.
11 Das Dampfbügeleisen wieder auf den Sockel stellen und
vollkommen abkühlen lassen.
12 Die Heizplatte (8) mit einem kalten, feuchten Lappen abwischen.
Nach diesem Reinigungsvorgang das restliche Wasser ausgießen.
WARNUNG: Hände und Körper nicht in Berührung mit dem
heißen Wasser kommen lassen.
WARNUNG: Versuchen Sie nicht, die Heizplatte mit Kalklösern
zu entkalken.
Ansprechpartner
Support
Sollten Sie ein Problem mit hrem Gerät haben, wenden Sie sich
bitte telefonisch an unsere Helpline, da wir hnen sehr
wahrscheinlich besser helfen können, als der Händler, bei dem
Sie das Gerät erworben haben. Halten Sie den Gerätenamen
sowie die Modell- und Seriennummer bereit, wenn Sie uns
anrufen, damit hnen schneller geholfen wird.
Sprechen Sie mit uns
Haben Sie Fragen oder Anregungen oder benötigen Sie
großartige Tipps, um unsere Geräte optimal zu nutzen,
beteiligen Sie sich online:
Blog: www.morphyrichards.co.uk/blog
Facebook: www.facebook.com/morphyrichardsuk
Twitter: www.twitter.com/loveyourmorphy
GESETZ ICHE GEWÄHR EISTUNG
Für dieses Gerät gilt eine Gewährleistung von 2 Jahren.
Als Kaufnachweis sollte die Quittung des Fachhändlers
aufgehoben werden. Heften Sie hren Beleg an die Rückseite
dieser Unterlagen.
Sollte an diesem Gerät ein Fehler auftreten, sind immer
nachfolgende Angaben mitzuteilen. Diese Angaben sind auf der
Unterseite des Geräts zu finden.
Modellnr.
Seriennr.
Vor dem Verlassen des Werks werden alle Morphy Richards
Produkte geprüft. Sollte einmal der Fall auftreten, dass sich ein
Gerät innerhalb der Gewährleistung als fehlerhaft erweist,
wenden Sie sich bitte an unsere Service-Hotline
Falls das Gerät während der 2-jährigen Gewährleistung aus
welchem Grund auch immer ausgetauscht wird, wird zur
Berechnung der Restgarantie für das neue Gerät das Original-
Kaufdatum zugrunde gelegt. Aus diesem Grunde ist es
besonders wichtig, den Original-Kaufbeleg bzw. die Rechnung
aufzubewahren, um das Datum des ursprünglichen Kaufs
nachweisen zu können.
Damit die 2-jährige Gewährleistung geltend gemacht werden
kann, muss das Gerät im Einklang mit den Anweisungen des
Herstellers benutzt worden sein. Beispielsweise muss das Gerät
entkalkt worden sein und gemäß den Anweisungen gereinigt
werden.
Morphy Richards übernimmt keine Verpflichtung zur Reparatur
oder zum Austausch der Waren im Rahmen der
Garantiebedingungen, wenn:
1 der Fehler auf einen versehentlich Gebrauch, Missbrauch,
unachtsamen Gebrauch oder auf einen Gebrauch zurückzuführen
ist, der den Empfehlungen des Herstellers entgegenwirkt oder
wenn der Fehler durch Stromspitzen oder durch Transportschäden
verursacht wurde.
2 das Gerät mit einer Spannung versorgt wurde, die nicht auf dem
Typenschild abgedruckt ist.
3 von anderen Personen als unserem Reparatur- und
Wartungspersonal (oder von einem unserer Vertragshändler)
d
RN300260MEERev5.qxp_M rphyRichardsInstructi nB k04/11/201614:45Page17
All manuals and user guides at all-guides.com
19
Reparaturversuche unternommen wurden.
4 wenn das Gerät für Vermietungszwecke oder nicht allein für
private Zwecke gebraucht wurde.
5 das Gerät aus zweiter Hand stammt.
6 Morphy Richards kann nicht dafür haftbar gemacht werden,
Reparaturarbeiten im Rahmen der Gewährleistung auszuführen.
7 Verbrauchsmaterialien wie Tüten, Filter und Glaskaraffen sind von
der Gewährleistung ausgeschlossen.
8 Batterien und Schäden aufgrund undichter Batterien sind von der
Gewährleistung ausgeschlossen.
9 die Filter nicht gemäß Anleitung gereinigt und ausgewechselt
wurden
Diese Gewährleistung erkennt hnen ausschließlich die Rechte
zu, die ausdrücklich in den oben genannten Bestimmungen
niedergelegt sind und erstreckt sich nicht auf Forderungen
infolge eines Verlustes oder einer Beschädigung. Diese
Gewährleistung wird als zusätzliche Leistung angeboten und
greift hre gesetzlich zuerkannten Rechte als Verbraucher nicht
an.
18
RN300260MEERev5.qxp_M rphyRichardsInstructi nB k04/11/201614:45Page18
All manuals and user guides at all-guides.com
19
19
• Este aparelho pode ser utilizado por crianças com 8 ou mais
anos de idade e pessoas cujas capacidades físicas, sensoriais
ou mentais sejam reduzidas ou que não possuam os
conhecimentos e a experiência necessários, se as mesmas
forem vigiadas e instruídas acerca da utilização do aparelho de
forma segura e compreenderem os perigos envolvidos. As
crianças não devem brincar com o aparelho. As tarefas de
limpeza e manutenção pelo utilizador não devem ser realizadas
por crianças sem supervisão.
• Mantenha sempre o ferro e o respectivo cabo fora do alcance
de crianças com menos de 8 anos de idade.
• Certifique-se de que o ferro de engomar não fica sem qualquer
supervisão enquanto se encontra ligado à tomada de
alimentação.
• O cabo deve ser retirado da tomada de alimentação antes de
encher com água.
• O ferro de engomar deve ser utilizado e colocado sobre uma
superfície estável.
• Quando colocar o ferro de engomar no descanso, assegure-se
de que a superfície sobre a qual este está assente é estável.
• O ferro de engomar não deve ser utilizado se tiver caído ou se
existirem sinais visíveis de danos ou fugas.
• A abertura de enchimento não deve ser aberta durante a
utilização
p
• AVISO: Pode sofrer queimaduras se tocar em peças de metal
quentes, água quente ou vapor.
• AVISO: Para evitar choque eléctrico, não submerja o aparelho
em água ou outro líquido.
Requisitos eléctricos e cabo de alimentação
• Verifique se a tensão indicada na placa de características do
aparelho corresponde à rede elétrica da sua habitação, que deve
ser CA (corrente alterna).
• Não utilize o aparelho se o cabo de alimentação ou o fixador do
cabo estiver danificado; solicite a substituição ao fabricante, a um
agente de assistência ou a um técnico igualmente qualificado
para evitar acidentes.
• Não permita que o cabo de alimentação entre em contacto com a
base quente do ferro.
• Caso seja necessário substituir o fusível na ficha de 13 amperes,
deve ser colocado um fusível BS1362 de 13 amperes.
• AVISO: Este aparelho deve ser ligado à terra.
EIA TODAS AS INSTRUÇÕES E GUARDE-AS PARA
REFERÊNCIA
d
p
RN300260MEERev5.qxp_M rphyRichardsInstructi nB k04/11/201614:45Page19
All manuals and user guides at all-guides.com
20 220
Símbolo (120°C Máx.) Frio (160°C Máx.) Morno (210°C Máx) Quente Regulação MAX.
Regulação de nível de vapor
(consulte o passo 3 de
“Utilizar o ferro para
engomar com vapor”)
Sem vapor
(consulte “Engomagem a
seco”)
Baixa Média/Alta Alta
Engomagem Engomar pelo avesso, se for
necessário humedecer o
tecido utilize um pano
húmido (Não acetato)
Tecidos que exijam
esta regulação necessitam
normalmente de pressão a
vapor.
Tecido Nylon, acetatos, tecidos
sintéticos
Lã, misturas de poliéster Algodão, seda artificial,
misturas de seda artificial
Com água no depósito
Secar e spray
Vapor/spray/disparo de vapor
Sem água no depósito Engomagem a seco
Posições do botão de
controlo
Não engomar • •• •••
Guia de temperatura
As marcações de definição de temperatura no botão da temperatura de todos os ferros de engomar Morphy Richards correspondem às
do Código nternacional para Etiquetagem de Cuidados Têxteis
Características
(1) Botão de vapor variável
(2) Botão de spray de água
(3) Botão de reforço de vapor
(4) ndicador de desligamento automático (apenas para alguns
modelos)
(5) Posição de limpeza automática
(6) Orifício de enchimento com tampão
(7) Bico de spray
(8) Placa base
(9) Botão de temperatura
(10) Luz indicadora de temperatura
(11) Depósito de água
(12) Descanso do ferro
CUIDADO!
SUPERFÍCIE QUENTE
TENHA CUIDADO
COM AS
SUPERFÍCIES
QUENTES MANUSEIE
COM CUIDADO
Tratamento de queimaduras
• Passe imediatamente água fria pela área afectada.
• Não pare para despir a roupa.
• Procure assistência médica rapidamente.
RN300260MEERev5.qxp_M rphyRichardsInstructi nB k04/11/201614:45Page20
All manuals and user guides at all-guides.com

Other manuals for breeze

5

Other Morphy Richards Iron manuals

Morphy Richards TURBOSTEAM 40659 User manual

Morphy Richards

Morphy Richards TURBOSTEAM 40659 User manual

Morphy Richards 40692 User manual

Morphy Richards

Morphy Richards 40692 User manual

Morphy Richards JET STREAM User manual

Morphy Richards

Morphy Richards JET STREAM User manual

Morphy Richards Precise Steam Plus User manual

Morphy Richards

Morphy Richards Precise Steam Plus User manual

Morphy Richards POWER STEAMELITE User manual

Morphy Richards

Morphy Richards POWER STEAMELITE User manual

Morphy Richards JET STREAM User manual

Morphy Richards

Morphy Richards JET STREAM User manual

Morphy Richards 40850 COMFIGRIP IRON User manual

Morphy Richards

Morphy Richards 40850 COMFIGRIP IRON User manual

Morphy Richards TURBO GLIDE User manual

Morphy Richards

Morphy Richards TURBO GLIDE User manual

Morphy Richards Power SteamElite RN42221MUK User manual

Morphy Richards

Morphy Richards Power SteamElite RN42221MUK User manual

Morphy Richards ELITE S User manual

Morphy Richards

Morphy Richards ELITE S User manual

Morphy Richards Comfigrip 40704 User manual

Morphy Richards

Morphy Richards Comfigrip 40704 User manual

Morphy Richards ELITE S User manual

Morphy Richards

Morphy Richards ELITE S User manual

Morphy Richards Comfigrip Advanced 40715 User manual

Morphy Richards

Morphy Richards Comfigrip Advanced 40715 User manual

Morphy Richards TURBOSTEAM 40659 User manual

Morphy Richards

Morphy Richards TURBOSTEAM 40659 User manual

Morphy Richards Jet Stream Series User manual

Morphy Richards

Morphy Richards Jet Stream Series User manual

Morphy Richards breeze User manual

Morphy Richards

Morphy Richards breeze User manual

Morphy Richards Steam Generator ironing system User manual

Morphy Richards

Morphy Richards Steam Generator ironing system User manual

Morphy Richards Saturn Steam User manual

Morphy Richards

Morphy Richards Saturn Steam User manual

Morphy Richards Power Steam User manual

Morphy Richards

Morphy Richards Power Steam User manual

Morphy Richards SEMI-ELECTRONIC 40715 User manual

Morphy Richards

Morphy Richards SEMI-ELECTRONIC 40715 User manual

Morphy Richards 303100 User manual

Morphy Richards

Morphy Richards 303100 User manual

Morphy Richards Cruiser User manual

Morphy Richards

Morphy Richards Cruiser User manual

Morphy Richards breeze User manual

Morphy Richards

Morphy Richards breeze User manual

Morphy Richards IB40550 User manual

Morphy Richards

Morphy Richards IB40550 User manual

Popular Iron manuals by other brands

Marta MT-1143 instruction manual

Marta

Marta MT-1143 instruction manual

Gorenje SIH 1800 BT instruction manual

Gorenje

Gorenje SIH 1800 BT instruction manual

Rowenta PRO MASTER DW8110F1 manual

Rowenta

Rowenta PRO MASTER DW8110F1 manual

Tracity IRTC09 instruction manual

Tracity

Tracity IRTC09 instruction manual

Siemens TS45 Series operating instructions

Siemens

Siemens TS45 Series operating instructions

iGenix POWERSTEAM PRO IG3126 user manual

iGenix

iGenix POWERSTEAM PRO IG3126 user manual

TEFAL PROGRAM 8 400 manual

TEFAL

TEFAL PROGRAM 8 400 manual

Panasonic NI-L70SR - Steam Iron With Micro-Mist Spray operating instructions

Panasonic

Panasonic NI-L70SR - Steam Iron With Micro-Mist Spray operating instructions

Cascade KB-123E instruction manual

Cascade

Cascade KB-123E instruction manual

Premier Iron-A-Way IAW42FWU installation manual

Premier

Premier Iron-A-Way IAW42FWU installation manual

Elnapress 250S instruction manual

Elnapress

Elnapress 250S instruction manual

Herzberg HG-8056 user manual

Herzberg

Herzberg HG-8056 user manual

UFESA PV3300 DELUX AUTOSTOP instruction manual

UFESA

UFESA PV3300 DELUX AUTOSTOP instruction manual

TEFAL ULTRAGLIDE Anti-Calc FV2650 manual

TEFAL

TEFAL ULTRAGLIDE Anti-Calc FV2650 manual

Living & Co IA1476 instruction manual

Living & Co

Living & Co IA1476 instruction manual

Sunbeam SR3100 Pro Steam II Instruction booklet

Sunbeam

Sunbeam SR3100 Pro Steam II Instruction booklet

Philips GC9300 SERIES user manual

Philips

Philips GC9300 SERIES user manual

Rowenta Focus Excel DW83 Series manual

Rowenta

Rowenta Focus Excel DW83 Series manual

manuals.online logo
manuals.online logoBrands
  • About & Mission
  • Contact us
  • Privacy Policy
  • Terms and Conditions

Copyright 2025 Manuals.Online. All Rights Reserved.