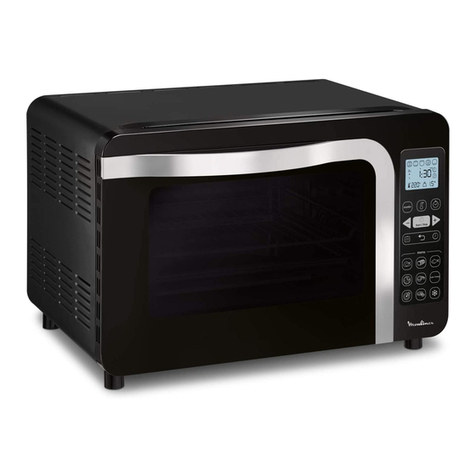
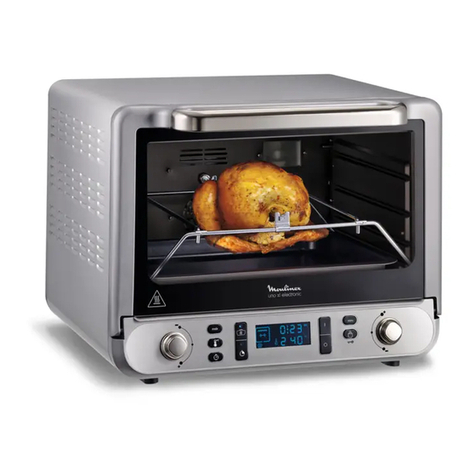
Moulinex 043-2223-6 User manual

6-SLICE / 12” PIZZA TOASTER OVEN
043-2223-6
www.moulinex.ca
FOUR GRILLE-PAIN 6 TRANCHES
/ PIZZA 12 PO
EN FR
USER GUIDE
GUIDE DE L’UTILISATEUR
If you have any questions or concerns please call our Moulinex
toll-free number at 1-888-670-6681.
Si vous avez des questions ou des préoccupations, veuillez
appeler notre numéro sans frais Moulinex au 1-888-670-6681.


contents
important safeguards
product diagram
operating your toaster oven
care and cleaning
04
07
08
17
importantes mises en garde
diagramme du produit
fonctionnement du four grille-pain
entretien et nettoyage
18
21
22
31
contenu

4
EN
When using electrical appliances, basic safety precautions
should always be followed including the following:
1. READ all instructions.
2. DO NOT touch hot surfaces. Appliance surfaces, including the door
and outer surface of the oven are hot during and after operation.
To prevent burns or personal injury, always use oven mitts or
handle and knobs where available when inserting, removing or
handling items from the oven, Alternatively, allow the oven to
cool down before handling.
3. To protect against fire, electric shock and injury to persons, DO
NOT immerse cord, plug, or the oven in water or other liquids.
4. Close supervision is necessary when any appliance is used by or
near children.
5. ALWAYS UNPLUG the oven from power outlet before cleaning, and
when storing. Allow the unit to cool thoroughly before putting in
or taking parts, cleaning or storing.
6. DO NOT operate any appliance with a damaged cord or plug, or
after the appliance malfunctions or has been dropped or damaged
in any manner. Return appliance to the nearest authorized service
facility for examination, repair or adjustment.
7. The use of accessory attachments not recommended by the
appliance manufacturer may result in fire, electric shock or injury
to persons.
8. DO NOT use outdoors or for commercial purposes.
9. DO NOT use this oven for anything other than its intended use.
IMPORTANT SAFEGUARDS
5
EN
10. NEVER let the cord hang over the edge of table or touch hot
surfaces.
11. DO NOT place oven on or near a hot gas or electric burner or in a
heated oven.
12. DO NOT store any materials other than the supplied accessories in
the oven when not in use.
13. A fire may occur if the oven is covered or touching flammable
materials, including curtains, draperies, walls, etc., when in
operation. Do not store any items on top of the appliance when in
operation.
14. When operating the oven, keep a minimum distance of 4 inches
of space on both sides of the appliance. This will allow for ad
equate air circulation and help prevent the possibility of wall
discoloration due to radiated heat.
15. DO NOT cover the oven tray or rack with metal foil. This will cause
overheating of the appliance.
16. Oversized foods or metal utensils must not be inserted in the
appliance as they may create a fire, or risk of electrical shock.
17. DO NOT clean with metal scouring pads. Pieces can break off the
pad and touch electrical parts involving a risk of electrical shock.
18. Extreme caution must be used when moving an appliance
containing hot oil or other hot liquids.
19. Extreme caution should be exercised when using containers
constructed of materials other than metal or glass.
20. DO NOT place the following materials in the toaster oven: card
board, plastic, paper, or other flammable materials.

6
EN
21. To turn toaster oven power Off, switch the Time knob to OFF until
the unit beeps and shuts off, then unplug.
22. To disconnect, turn any control to OFF/STOP, then remove plug
from wall outlet. A short power-supply cord is equipped to reduce
the risk resulting from becoming Entangled in or tripping over a
longer cord.
a) The marked electrical rating of the cord set or extension cord
should be at least as great as the electrical rating of the appli
ance; and
b) The cord should be arranged so that it will not drape over the
countertop or Tabletop where it can be pulled on by children or
tripped over unintentionally.
c) The extension cord should be a grounding-type 3-wire cord.
23. Extension cords are available and may be used if care is exercised
in their use.
24. Use extreme caution when removing tray or disposing of hot
grease.
25. This appliance is for Household Use Only.
Toll free number for Moulinex: 1-888-670-6681

7
EN
PRODUCT DIAGRAM
PDF 文件使用 "pdfFactory Pro" 试用版本创建 www.fineprint.com.cn
Door handle
Upper rack
guide
Lower rack
guide
LCD display
Power indicator
Start/Stop
button
Function adjust
knob
Time/Temp.
adjust knob
Crumb tray Upper and lower
heating elements
Bake pan
Wire rack
Function
Function indicator
Timer
Convection heat
Temperature
Shade setting

8
EN
Before Use
1. Place toaster oven on a dry, flat, level surface such as a
countertop or table.
2. Be sure the sides, back and top of the oven are at least four
inches away from any walls, cabinets or objects on the counter
and table.
3. Remove all accessories and wash them with hot water, a small
amount of dishwashing liquid and nonabrasive sponge or cleaning
pad. Dry thoroughly before placing in the oven.
4. Plug the toaster oven into an electrical outlet.
5. During initial start up, you may detect a slight smell and/or
smoke. Don’t worry this is normal .Turn the temperature to
450°F and let run for approximately 5 minutes to allow the smell
or smoke to dissipate.
The six modes of the toaster oven all have preset temperatures. In the
bake model, the toaster oven temperature is 300°F. The warm mode
temperature is 200°F. The temperature for broil is 450°F.
The preset color shade setting for toaster is 4. The temperature for
pizza is 400°F, and the temperature for cookie is 350°F.
The toaster oven has convection technology for better, more efficient
use of heat. Fan-circulated hot air in the oven cooks food more evenly,
at lower temperatures, and often in less time than does conventional
heating. The convection feature automatically activate for baking,
pizza, and cookie functions.
OPERATING YOUR TOASTER OVEN

9
EN
CautionNever leave toaster oven unattended while it is in
use.
Use Your Toaster Oven
Plug the unit in. The unit will emit two long “beeps” and the LCD will
illuminate. The function option will appear with an indicator on the
preset Bake function. The LCD and the Start/Stop button light will be
illuminated for 1minute and then go out if other buttons or knobs are
pressed or moved.
Note : Once the blue LCD display goes out –you can press or move any
button or knob to “wake up” the display and operate as normal.

10
EN
1. Select function: Turn the function knob to choose the desired
function from 6 options: bake, broil, pizza, warm, cookie, toast.
The indicator arrow will move from function to function as the
knob is turned.
2. Time: Turn the time/temp. knob to increase or decrease the
cooking time. The timer can be set from 1 minute to 120 minutes.
Then press the knob and holding for seconds once to set the
selection.
3. Temperature: Turn the time/temp knob to select the desired
temperature.
Baking
1. Turn the function knob to Bake function. When you select the
bake function, the convection heat will automatically activate.
2. Turn the time/temp. Knob to select desired time. The timer can be
set from 1 minute up to 120 minutes. Then press the knob and
holding for seconds once to set the selection
3. Turn the time/temp to select the desired temperature. For the
bake function, the temperature can be set from 150 to 450°F in
25-degree increments
4. Press the Start/Stop button to start baking. The blue start /
stop button light will illuminate. The LCD display will show the
bake function, the countdown time and temperature. The unit will
begin to work and the timer will start counting down. When the
baking cycle is complete, the unit will emit 3 beeps. The LCD and
the Start /Stop button light will turn off after 1minute.

11
EN
Default Time: 30 minutes.
Default Temperature: 300°F
Note: You can cancel the cooking cycle at any time by pressing
and holding the Start/Stop for 2 seconds.
Broil
1. Turn the function knob to broil function. When you select the
broil function, the upper heating elements will heat.
2. Turn the time/temp. knob to select desire time. The timer can be
set from 1 minute up to 120 minutes. Then press the knob and
holding for several seconds once to set the selection.
3. You do not need to set temp. In the broil mode, the toaster oven
will run at default (preset temp.) 450°F.
4. Press the Start/Stop button to start broiling. The blue start /stop
button light will illuminate. The LCD display will show the broiling
function, the countdown time and the temperature. The unit will
begin to work and the timer will start counting down. When the

12
EN
broiling cycle is complete , the unit will emit 3 beeps . The LCD
and the Start /Stop button light will turn off after 1minute.
Default Time: 20 minutes.
Default Temperature: 450°F
Note: You can cancel the broiling cycle at any time by pressing
and holding the Start/Stop for 2 seconds.
Pizza
1. Turn the function knob to pizza function. When you select the
pizza function, the convection heat will automatically activate.
2. Turn the time/temp. Knob to select desire time. The timer can be
set from 1 minute up to 120 minutes. Then press the knob and
holding for several seconds once to set the selection.
3. Turn the time/temp to select the desired temperature. For the

13
EN
pizza function, the temperature can be set from 350°F to 450°F in
25-degree increments
4. Press the Start/Stop button to start pizza. The blue start /stop
button light will illuminate. The LCD display will show the pizza
function, the countdown time and temperature. The unit will
begin to work and the timer will start counting down. When the
baking cycle is complete, the unit will emit 3 beeps. The LCD and
the Start /Stop button light will turn off after 1minute.
Default Time: 15 minutes.
Default Temperature: 400°F
Note: You can cancel the cooking cycle at any time by pressing
and holding the Start/Stop for 2 seconds.

14
EN
Warm
1. Turn the function knob to warm function.
2. Turn the time/temp. knob to select desire time. The timer can be
set from 1 minute up to 120 minutes. Then press the knob and
holding for several seconds once to set the selection.
3. Turn the time/temp to select the desired temperature. For the
bake function, the temperature can be set from 150°F to 250°F
in 25-degree increments
4. Press the Start/Stop button to start warming. The blue start /
stop button light will illuminate. The LCD display will show the
warm function, the countdown time, the temperature. The unit
will begin to work and the timer will start counting down. When
the warm cycle is complete , the unit will emit 3 beeps. The LCD
and the Start /Stop button light will turn off after 1minute.
Default Time: 20 minutes.
Default Temperature: 200°F
Note: You can cancel the warm cycle at any time by pressing and
holding the Start/Stop for 2 seconds.

15
EN
Cookie
1. Turn the function knob to cookie function. When you select the
cookie function, the convection heat will automatically activate.
2. Turn the time/temp. Knob to select desire time. The timer can be
set from 1 minute up to 120 minutes. Then press the knob and
holding for several seconds once to set the selection.
3. Turn the time/temp to select the desired temperature. For the
pizza function, the temperature can be set from 150 to 450°F
in 25-degree increments .
4. Press the Start/Stop button to start cookie. The blue start /stop
button light will illuminate. The LCD display will show the cookie
function, the countdown time. The unit will begin to work and
the timer will start counting down. When the baking cycle is
complete, the unit will emit 3 beeps. The LCD and the Start/Stop
button light will turn off after 1 minute.
Default Time: 15 minutes.
Default Temperature: 350°F
Note: You can cancel the cooking cycle at any time by pressing
and holding the Start/Stop button.
PDF 文件使用 "pdfFactory Pro" 试用版本创建 www.fineprint.com.cn

16
EN
Toast
1. Turn the function knob to toast function. When you select the
toast function, the color shade setting indicator will become
visible on the LCD.
2. Turn the time/temp. Knob to select desired color shade. The color
shade-setting indicator will show your selection as you turn the
knob. The default color shade setting is 4
3. Press the Start/Stop button to start toast. The blue start /stop
button light will illuminate The LCD display will show the toaster
function, color shade setting. When the toasting is complete,
the unit will emit 3 beeps. The LCD and the Start /Stop button
light will turn off after 1 minute.
The temperature or time is not adjustable for toaster function.
Note: You can cancel the toasting cycle at any time by pressing
and holding the Start/Stop button for 2 seconds.
PDF 文件使用 "pdfFactory Pro" 试用版本创建 www.fineprint.com.cn

17
EN
CARE AND CLEANING
Warning Do not immerse toaster oven in water or any
other liquid.
1. Press the start/off button and remove the plug from the electrical
outlet. Allow oven and accessories to cool completely before
cleaning.
2. All accessories should be washed by hand in hot sudsy water.
Rinse and dry all accessories thoroughly. Using a dishwasher is not
recommended.
3. To clean the crumb tray, slide it out of the oven and brush off
crumbs. Wipe with a damp cloth and dry thoroughly.
4. Baked on stains can be removed with a paste made from baking
soda and water. Rinse and dry thoroughly.
5. Clean the outside with a clean damp sponge or cloth and dry
thoroughly. A non-abrasive liquid cleaner may be used for stub
born stains. Rinse and dry thoroughly. Never immerse toaster oven
in water or any liquid.
Any other service should be performed by an authorized service
representative.
CautionNever use steel wool, scouring pads or abrasive
cleaners to clean any part of the toaster oven interior, exterior or
accessories.

FR
18
Lorsque vous utilisez un appareil électrique, des consignes
de sécurité élémentaires doivent toujours être observées et
en particulier les suivantes :
1. LIRE toutes les instructions.
2. NE PAS toucher les surfaces chaudes. Les surfaces de l’appareil, y
compris la porte et les parois extérieures du four sont chaudes
pendant et après l’utilisation. Pour éviter les brûlures et les
blessures, toujours utiliser des gants de cuisine ou des poignées
isolées pour manipuler la poignée et les boutons et pour intro
duire, enlever ou manipuler des articles dans le four. Sinon, laisser
le four refroidir avant de manipuler.
3. Pour se protéger des chocs électriques, NE PAS immerger le cordon
d’alimentation, la fiche ou le four dans l’eau ni dans tout autre
liquide.
4. Une surveillance étroite est nécessaire lorsque l’appareil est utilisé
par ou à proximité des enfants.
5. TOUJOURS DÉBRANCHER le four de la prise électrique avant de le
nettoyer et de le ranger. Laisser l’appareil refroidir avant d’ajouter
ou d’enlever des pièces, avant de le nettoyer ou de le ranger.
6. NE PAS utiliser un appareil électrique avec un cordon
d’alimentation ou une prise endommagé, quand l’appareil
fonctionne mal ou a été échappé, ou s’il a été endommagé de
quelque manière que ce soit. Retourner tout appareil défectueux
au centre de service Krups agréé le plus près afin qu’il soit ex
aminé, ajusté ou réparé.
7. L’utilisation d’accessoires non recommandés par le fabricant peut
causer un incendie, un choc électrique ou des blessures.
IMPORTANTES MISES EN GARDE

FR
19
8. NE PAS utiliser à l’extérieur ni pour des usages commerciaux.
9. NE PAS utiliser le four pour un usage autre que celui pour lequel il
a été conçu.
10. NE JAMAIS laisser pendre le cordon d’une table ou d’un comptoir
ni entrer en contact avec des surfaces chaudes.
11. NE PAS placer le four sur ou près d’un brûleur à gaz ou électrique,
ni dans un four chaud.
12. NE PAS entreposer des matériaux autres que les accessoires four
nisavec cet appareil à l’intérieur du four lorsqu’il n’est pas utilisé.
13. Un incendie peut survenir si le four est couvert ou est en contact
avec des matériaux inflammables, y compris des rideaux, des dra
peries, des murs, etc., lorsqu’il fonctionne. Ne pas déposer des
articles sur le four lorsqu’il fonctionne.
14. Lorsque le four est en fonctionnement, laisser un espace libre
minimal de 4 pouces de chaque côté du four. Cela permet une
circulation adéquate de la chaleur et aide à prévenir la possibilité
que les surfaces adjacentes ne se décolorent dû à la chaleur par
rayonnement.
15. NE PAS couvrir la plaque de cuisson et la grille du four avec du
papier d’aluminium. Cela entraînerait une surchauffe de l’appareil.
16. Les aliments surdimensionnés et les ustensiles de métal ne
doivent pas être placés dans le four car ils peuvent causer un
incendie ou un risque de choc électrique.
17. NE PAS nettoyer le four à l’aide de tampons métalliques. Des
morceaux pourraient s’en détacher et entrer en contact avec des
pièces électriques, causant un risque de choc électrique.
18. Il faut faire preuve d’extrême prudence lorsqu’on déplace un
appareil contenant de l’huile chaude ou tout autre liquide chaud.

FR
20
19. Il faut faire preuve d’extrême prudence lorsqu’on utilise un
récipient fait d’un matériau autre que du métal ou du verre.
20. NE PAS placer les matériaux suivants dans le four grille-pain :
carton, plastique, papier ou tout autre matériau inflammable.
21. Pour éteindre le four grille-pain, placer la minuterie à « OFF »
jusqu’au bip sonore, puis débrancher.
22. Pour débrancher, placer toutes les commandes à « OFF » puis
retirer la fiche de la prise murale. Un cordon d’alimentation court
est fourni pour éviter les risques qu’il ne s’emmêle ou qu’il ne
fasse trébucher quelqu’un.
a) le calibre du cordon ou de la rallonge doit être au minimum le
même que celui de l’appareil;
b) le cordon doit être placé de telle façon qu’il ne pende pas du
comptoir afin que les enfants ne puissent tirer dessus ou qu’il ne
fasse trébucher quelqu’un;
c) la rallonge doit avoir une mise à la terre à 3 tiges.
23. Des rallonges sont disponibles et peuvent être utilisées si
certaines précautions sont prises.
24. Il faut faire preuve d’extrême prudence lorsqu’on retire le plateau
ou qu’on jette des matières grasses chaudes.
25. Cet appareil est conçu pour une utilisation
domestique seulement.
Ligne sans frais Moulinex : 1-888-670-6681
Table of contents
Languages:
Other Moulinex Oven manuals

Moulinex
Moulinex principio Maxigrill OV185001 User manual

Moulinex
Moulinex ACTIVYS AHK1 User manual

Moulinex
Moulinex Optimo 19L User manual

Moulinex
Moulinex Quick Chef User manual

Moulinex
Moulinex Compact Chef AP1 User manual

Moulinex
Moulinex UNO XL OX6778FR User manual

Moulinex
Moulinex OV2055 User manual

Moulinex
Moulinex OV2066 User manual

Moulinex
Moulinex Delicio Tactile User manual
Popular Oven manuals by other brands

Bosch
Bosch HB.21B instruction manual

LG
LG LWS3081ST - 30in Single Electric Wall Oven User's guide & cooking guide

Smeg
Smeg Oven Instructions for the user

Smeg
Smeg SF700BS instructions

Royal Catering
Royal Catering RC-411 M Use and instruction manual

Miele
Miele MasterChef H 4882 BP Operating and installation instruction