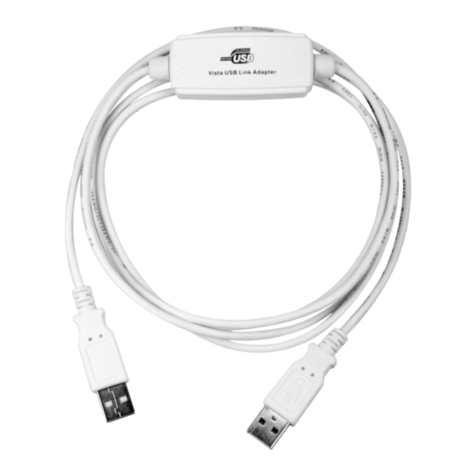
MouseOne ZeroCable User manual

ZeroCable Assembly & Installation
__________

Thank you for purchasing a ZeroCable from MouseOne.
This booklet guides you through the quick and easy assembly and installation of your
ZeroCable.
We suggest you buy replacement mouse skates, as sometimes trying to remove and then later
reapply them fails.
If you have any questions or issues with assembly or installation, email us at: [email protected]
If you’d like us to add a mouse to our list email us at: [email protected]
Table of Contents
Section 1 - Items included in your purchase
Section 2 - Assembling your ZeroCable
Section 3 - Assembling your ZeroCable on a mouse that isn’t in the Mouse Database
Section 4 - Mouse Database
Section 5 - Installing your ZeroCable
Section 6 - How to switch your ZeroCable from one mouse to another

Name of parts
1x ZeroCable
2x black heat-shrink
1x clear heat-shrink
3x JST PH 2.0 5-pin connector

Assembling your ZeroCable
With your purchase we’ve included a ZeroCable, some heat-shrink and a couple of JST 5-pin connectors.
In this section we’ll arrange and assemble these parts so that the cable is ready to be installed on your
mouse.
Step 1 - Thread the ZeroCable through the 2 black heat-shrinks and the 1 clear heat-shrink. Do
not heat them up yet.
Step 2 - Grab one of the JST 5-pin connectors and orient it so
that the completely solid side is facing down and the side with
holes in it is facing up.
Step 3 - On the next page starts the database of all the mice ZeroCable is compatible with. Find
your mouse and note the order of the colors.
Step 4 - One by one insert the colored wires into their designated spots in the JST connector as
specified by the database. The “nothing” signifies that no wire should be inserted in that spot.
The small “hook” on the wires should be facing up when trying to insert them into the JST
connector.
Example:
Mouse: Zowie FK2
Order: nothing black green white red

Assembling your ZeroCable on a mouse
that isn’t in the Mouse Database
If your mouse is not listed in the Mouse Database on page 4, use this guide to attempt to install
ZeroCable on your mouse. We can not guarantee that you will be able to install ZeroCable on every
mouse.
With your purchase we’ve included a ZeroCable, some heat-shrink and a couple of JST 5-pin connectors.
In this section we’ll arrange and assemble these parts so that the cable is ready to be installed on your
mouse.
Step 1 - Thread the ZeroCable through the 2 black heat-shrinks and the 1 clear heat-shrink. Do
not heat them up yet.
Step 2 - Grab one of the JST 5-pin connectors and
orient it so that the completely solid side is facing
down and the side with holes in it is facing up.
Step 3 - Now, take apart the mouse you want to install the ZeroCable on. Remove the original
mouse cable and note the color order of the cables. Make sure the completely solid side of the
original connector is facing down and the side with holes in it is facing up.
Step 4 - The original connector will have 5 wires attached
while our ZeroCable has just 4. The fifth cable is known as a
shield cable. It is black and thicker than the rest of the wires
connected to the JST connector. When noting the color order
of the wires of the original cable, put the shield cable down
as “nothing”. No wire will be connected in the corresponding
spot on the new connector

Step 5 - One by one insert the colored wires into their designated spots in the JST connector as
specified by the color order and placement of the old connector. As a reminder, the “nothing”
signifies that no wire should be inserted in that spot. The small “hook” on the wires should be
facing up when trying to insert them into the JST connector.

Mouse Database
ABKO HACKER A660 - nothing white green black red
Asus ROG Sica - red white green black nothing
Cooler Master MasterMouse MM520 - nothing black green white red
Cooler Master MasterMouse MM530 - nothing black green white red
Cooler Master MasterMouse S - red white green black nothing
Cooler Master Storm Recon - red green white black nothing
Corsair Harpoon RGB - nothing black green white red
Cougar Revenger S - red white green black nothing
Dreammachines DM1 Pro - red black nothing green white
Dreammachines DM3 Mini - nothing black green white red
Endgame XM1 - nothing black white green red
Finalmouse Air58 - red black nothing green white
Finalmouse Scream One - red black nothing green white
Finalmouse Ultralight - red black nothing green white
Finalmouse UL2 - red black nothing green white
Genius Maurus GX - nothing white green black red
Glorious Model O - nothing black green white red
G-Wolves 302 - nothing white green black red
G-Wolves Skoll - nothing white green black red
Logitech G1 - green white red black nothing
Logitech G3 - green white red black nothing
Logitech G100s - green white red black nothing
Logitech G102 - green white red black nothing
Logitech G203 - green white red black nothing
Logitech G300s - green white red black nothing
Logitech G302 - green white red black nothing
Logitech G303 - green white red black nothing
Logitech G400 - green white red black nothing
Logitech G402 - green white red black nothing
Logitech G403 - green white red black nothing

Logitech G502 - green white red black nothing
Logitech G600 - red white green black nothing
Logitech G Pro - green white red black nothing
Logitech MX300 - green white red black nothing
Logitech MX310 - green white red black nothing
Logitech MX500 - green white red black nothing
Logitech MX518 - green white red black nothing
Microsoft Classic Intellimouse (2017) - red white green black nothing
Microsoft IntelliMouse Explorer 3.0 (MLT04) - nothing black green white red
Microsoft IntelliMouse Explorer Pro (3389) - red white green black nothing
Microsoft Intellimouse Optical 1.1 - nothing black green white red
Mionix Avior - nothing black white green red
Mionix Castor - nothing black white green red
Mionix Naos - nothing black white green red
Mionix Naos QG - nothing black white green red
Ninox Aurora - nothing black green white red
Ninox Venator - red black nothing green white
Nixeus Revel - nothing white green black red
Nixeus Revel Fit - nothing white green black red
NKEY 007 Mini - nothing black green white red
NKEY G312 - nothing black green white red
Razer Abyssus 2014 - nothing black green white red
Razer Basilisk - nothing black green white red
Razer Deathadder - nothing black white green red
Razer Deathadder Chroma - nothing black white green red
Razer DeathAdder Elite - nothing black green white red
Razer Imperator - white green black red nothing
Razer Lachesis - green white red black nothing
Razer Lancehead TE - nothing black green white red
Razer Mamba TE - nothing black green white red
Razer Naga (2012) - green white red black nothing
Razer Naga Hex - green white red black nothing
Razer Naga Molten - green white red black nothing
Razer Naga Trinity - nothing black white green red

Roccat Kone Aimo - red black green white nothing
Roccat Kone Pure EMP - nothing black white green red
Roccat Kone Pure Military - nothing black green white red
Roccat Kone Pure Optical - nothing black green white red
Roccat Kone Pure Owl-Eye - nothing black white green red
Roccat Nyth - nothing black white green red
Steelseries [RAW] Frost Blue edition - nothing black green white red
Steelseries Kana2 - green white black red nothing
Steelseries Kinzu - red white green black nothing
Steelseries Rival 100 - nothing black green white red
Steelseries Rival 106 - red black nothing green white
Steelseries Rival 110 - nothing black green white red
Steelseries Sensei - nothing black white green red
Steelseries Sensei 10 - nothing black green white red
Steelseries Xai - red green white black nothing
TT eSPORTS Ventus R - nothing black green white red
Xtrfy M1 - white green black red nothing
Zowie EC1-A - nothing black green white red
Zowie EC1-B - nothing black green white red
Zowie EC1-B DIVINA - nothing black green white red
Zowie EC2-A - nothing black green white red
Zowie EC2-B - nothing black green white red
Zowie EC2-B DIVINA - nothing black green white red
Zowie FK1 - nothing black green white red
Zowie FK1+ - nothing black green white red
Zowie FK2 - nothing black green white red
Zowie S1 - nothing black green white red
Zowie S1 DIVINA - nothing black green white red
Zowie S2 - nothing black green white red
Zowie S2 DIVINA - nothing black green white red
Zowie ZA11 - nothing black green white red
Zowie ZA12 - nothing black green white red
Zowie ZA13 - nothing black green white red

Installing your ZeroCable
Now that you’ve assembled your ZeroCable, it’s time for installation.
Step 1 - Use a hairdryer to loosen the feet of your mouse. Remove the feet.
Step 2 - Unscrew the screws located (generally) underneath where the mouse feet used to be
and remove the top of the mouse.
Step 3 - Remove the original cable from the PCB (the electronic board in your mouse).
Step 4 - Using a hair dryer or lighter heat up one of the black heat-shrinks halfway covering the
paracord material and halfway covering the wires.
Step 5 - Plug the ZeroCable into the PCB (where you removed the old cable)
Step 6 - Line up the second black heat-shrink to be ¼ in the mouse shell and ¾ outside of it
when the shell is closed. Heat the heat-shrink with a lighter or hairdryer.
Step 7 - Line up the clear heat-shrink on top of the black heat-shrink from the previous step.
Position the clear heat-shrink right at the edge (the edge closest to the mouse) of the black
heat-shrink. Heat the heat-shrink with a lighter or hairdryer.
Step 8 - Reassemble your mouse.

Switching your ZeroCable from One Mouse
to Another
Switching your ZeroCable to another mouse is simple. Follow the directions on page 6 to
remove the ZeroCable from the first mouse. Use a small flathead screwdriver to lift up each tab
on the JST 5-pin connector. Carefully remove each wire from the connector. Then, follow the
directions on page 2 to rearrange the wires to the specifications listed in the database. Now
just plug the ZeroCable into the new mouse and reassemble it according to the directions on
page 6.
