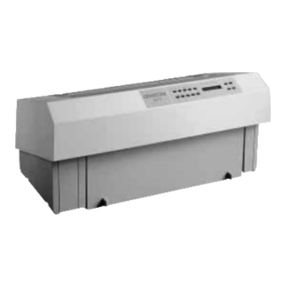
MPI Microline 320 Manual

Chapter 1
Printer Unpacking & Setup
Choose a sturdy table, desk or printer stand to place your printer on when you remove it from
the carton. Remove the styrofoam sides be sure to save all packing materials in case you need
to ship the printer again and check the box for these contents:
1) ML320/321 printer
2) Paper separator
3) Power cord
4) Platen knob
5) Ribbon cartridge
Note: Interface cable and paper are sold separately.
If any of these items is missing or damaged, see your dealer for a replacement.
ML 320/321 ( 96-02-01 )
Mantenimiento Periféricos Informáticos SL C/Canteras, 22 28860 Paracuellos de Jarama Tel: 00 34 917481604 WEB: https://mpi.com.es

Setup Preliminaries
Preliminaries
Don't plug the printer in until its set up and ready to operate.
If there is clear protective film on the access cover, remove the film. Open the access cover
and remove the shipping retainer (1). Be sure to save it with the other packing materials in
case you ship the printer.
ML 320/321 ( 96-02-01 )
Mantenimiento Periféricos Informáticos SL C/Canteras, 22 28860 Paracuellos de Jarama Tel: 00 34 917481604 WEB: https://mpi.com.es

Install The Paper Separator and Platen Knob
Install The Paper Separator and Platen Knob
Open the rear cover of the printer (2). Holding the legs closed against the paper separator,
place the tab on one side of the separator over the stud on the side of the rear cover (3).
Pull gently on the other tab to slide it over the stud on the other side of the rear cover. Then
close the rear cover. Insert the platen knob on the right side of the printer (4). Match the
flatside of the knob to the flat side of the platen shaft.
ML 320/321 ( 96-02-01 )
Mantenimiento Periféricos Informáticos SL C/Canteras, 22 28860 Paracuellos de Jarama Tel: 00 34 917481604 WEB: https://mpi.com.es

Connect to Power and Computer
Connect to Power and Computer
Make sure the printer and computer are both OFF. Plug the power cord into the back of the
printer(5). Plug the other end into a grounded outlet. Plug the interface cable into the parallel
port on the back of your printer(6) Fasten the wire clips to the cable.
- Make sure the outlet is grounded. Do not use an adapter to defeat the grounding.
- These instructions are for the standard parallel interface. If you have the optional serial
interface, see the instructions provided with it. Interface cables are sold separately.
ML 320/321 ( 96-02-01 )
Mantenimiento Periféricos Informáticos SL C/Canteras, 22 28860 Paracuellos de Jarama Tel: 00 34 917481604 WEB: https://mpi.com.es

Install/Replace The Ribbon Cartridge
Install/Replace The Ribbon Cartridge
The printhead can get very hot during extended periods of printing be sure to let it cool off
before you touch it. Be sure the power is off before you move the printhead.
Open the access cover. Position the printhead between the bail rollers (7). Make sure the
bail is closed (bail lever toward back of printer).
Install/Replace the Ribbon Cartridge
ÎBe sure to use only ribbons specifically for MICROLINE 320/321 or MICROLINE 100 Series
printers. Ribbon cartridges for ML390/391 printers look similar, but they will not fit in the ML320/321.
For best result use genuine OKIDATA ribbons, part number 52102001.
If you're replacing the ribbon cartridge, swing the front of the cartridge up off the printhead, then
lift the cartridge out and discard it. Hold the new ribbon cartridge with the knob facing up and the
flat end toward the front of the printer. Place the flat end into the ribbon plate(8) then lower the
front of the cartridge over the printhead until it snaps into place (9). Turn the knob in the direction
of the arrow to take up the slack in the ribbon.
ML 320/321 ( 96-02-01 )
Mantenimiento Periféricos Informáticos SL C/Canteras, 22 28860 Paracuellos de Jarama Tel: 00 34 917481604 WEB: https://mpi.com.es

Set the Headgap
Set the Headgap
The headgap lever (10) by the side of the cartridge adjusts for different paper thicknesses.
Set it to:1 for one- or two-part forms,
2 for three- or four-part forms,
3 for envelopes and extra-thick paper
ML 320/321 ( 96-02-01 )
Mantenimiento Periféricos Informáticos SL C/Canteras, 22 28860 Paracuellos de Jarama Tel: 00 34 917481604 WEB: https://mpi.com.es

Chapter 2
Loading Rear-Feed, Continuous Forms
Loading Rear-Feed, Continuous Forms
- Do not position the left edge of the paper more than 1/2 from the end of the platen. The
paper must cover the groove in the left side of the platen; if it doesnt, the printer will signal
a paper out alarm. There are reference marks on the printer to show the recommended left
edge position for the two most common paper sizes.
Make sure the paper lever is forward, and open the access cover and rear cover to expose the
tractors (1). Pull the lock levers (2) forward and slide the left tractor into position for the paper
size you're using. Slide the right tractor to fit the paper width. Push the levers back to lock them.
Loading Rear-Feed, Continuous Forms
- Check the Addendum ( ) for details on paper specifications.
Open the tractor covers (3).
Pull the paper through the opening between the printer and the rear cover and
place the first two sprocket holes on each side of the page over the pins (4).
ML 320/321 ( 96-02-01 )
Mantenimiento Periféricos Informáticos SL C/Canteras, 22 28860 Paracuellos de Jarama Tel: 00 34 917481604 WEB: https://mpi.com.es

Close the rear cover (make sure the paper separator is flat on the printer), open the guide wire,
and close the access cover (5).
Turn the printer on. The printhead will move and the control panel will light up. The ALARM light
will also come on. Pull the bail lever forward (6). The paper will automatically feed into the printer
and the ALARM light will go out. If paper doesn't feed, check to make sure that the paper lever is
in the forward position.
- Do not use the Form Feed button to load paper.
Push the bail lever back to close the bail (8).
Adjust the top of form (see page 13( )), then press the SEL button ( the SEL light will go on)
and you're ready to print.
ML 320/321 ( 96-02-01 )
Mantenimiento Periféricos Informáticos SL C/Canteras, 22 28860 Paracuellos de Jarama Tel: 00 34 917481604 WEB: https://mpi.com.es

Loading Single Sheets
Loading Single Sheets
Note: If you already have continuous form paper in the printer, tear off any printed pages,
then press the PARK button to back it out of the paper path. The ALARM light will go on
and the SEL light will go off.
Push the paper lever back (1).
Push the guide wire back (2).
Raise the separator to its upright position (3).
Set a sheet of paper on the separator and adjust the guides so that they're barely
touching the edges of the paper. Pull the bail lever forward. The paper will
automatically feed into the printer. (Theres a reference mark on the separator for
the left paper edge.)
Push the bail back (4) and adjust the top of form.
ML 320/321 ( 96-02-01 )
Mantenimiento Periféricos Informáticos SL C/Canteras, 22 28860 Paracuellos de Jarama Tel: 00 34 917481604 WEB: https://mpi.com.es

Setting Top of Form
Setting Top of Form
Note: Make sure the paper is held in place by the bail. If the top of the page is set below the
bail, paper will catch on the bail and cause a jam. The amount you can move the paper down
using this method is limited to avoid potential paper jams.
Make sure the printer is deselected. Hold down the TOF/QUIET button and press:
FORM FEED to move the paper up, or
LINE FEED to move the paper down.
This moves the paper in 0.007 increments. The lower red line on the paper shield shows
the baseline of the current printing position to help you place the top of form.
When the top of form is set where you want it, the position is recorded permanently in
the printers memory even when the printer is turned off until you reset it.
Note: If youre using continuous forms, you can temporarily change the setting to another
location without disturbing your normal setting.
- To do this, first make sure the printer is deselected (press the SEL button if its not).
- Then press the LINE FEED button (without holding down the TOF/QUIET button)
to move the paper to the new location you want to set for the top of form.
- Once youve positioned the paper where you want it, press the TOF/QUIET button to
engage the location as your temporary top of form.
The printer will retain this temporary setting until its turned off. To restore your normal
top of form setting, turn the printer off and then on again.
ML 320/321 ( 96-02-01 )
Mantenimiento Periféricos Informáticos SL C/Canteras, 22 28860 Paracuellos de Jarama Tel: 00 34 917481604 WEB: https://mpi.com.es

Form Tear Off
Form Tear Off
Note: Don't use forms tear off when printing on labels or multipart forms. Labels should only be
fed from the bottom of the printer.
To activate this feature, press the MODE button and use the GROUP, ITEM and SET buttons
to change the FORM TEAR OFF setting to 500 ms (1). (See Chapter 5 ( ) for details on how to
use the menu). Press the MODE button to exit the Menu mode, then use the TOF/QUIET
and FORM FEED or LINE FEED buttons to set the top of form as described above (2).
When you release the TOF/QUIET button, the paper advances to the tear bar, located
under the clear top of the access cover (3).
Note: You can check the initial printing position at any time: press the SEL button, then
press TOF/QUIET; the paper will move down to the initial printing position until you release
the button.
The page stays in the tear off position until the printer receives data; then moves down to
the printing position to print. Afew seconds after printing stops, the paper moves up to the
tear off position.
Note: Some programs pause occasionally while sending data. If the pause lasts more than two
seconds, the paper will advance to the tear off position until more data is received. This extra
paper movement can cause uneven print registration in graphics. If you have this problem, use
the menu to deactivate forms tear off.
ML 320/321 ( 96-02-01 )
Mantenimiento Periféricos Informáticos SL C/Canteras, 22 28860 Paracuellos de Jarama Tel: 00 34 917481604 WEB: https://mpi.com.es

Paper Park
Paper Park
To park continuous-forms paper, tear off any printed pages and press the PARK button (1).
The paper will retract from the paper path. Push the paper lever back to the single sheet
setting (2), and youre ready to insert single sheets.
To return continuous forms to the printer, make sure the paper lever is set for continuous
forms (3).
Pull the bail lever forward (4). The paper will advance to the front of the platen.
ML 320/321 ( 96-02-01 )
Mantenimiento Periféricos Informáticos SL C/Canteras, 22 28860 Paracuellos de Jarama Tel: 00 34 917481604 WEB: https://mpi.com.es

Clearing Rear-Feed Jams
Clearing Rear-Feed Jams
Note: Always turn the printer off before you turn the platen knob!
Turn off the printer. Open the access cover and the rear cover (1).
Turn the platen knob to back the paper all the way out, and remove any torn pieces of paper.
Reload the paper on the tractors (2).
Close the rear cover and the access cover (3).
Turn the printer back on, and press the FORM FEED button.
ML 320/321 ( 96-02-01 )
Mantenimiento Periféricos Informáticos SL C/Canteras, 22 28860 Paracuellos de Jarama Tel: 00 34 917481604 WEB: https://mpi.com.es

If your paper keeps jamming
If your paper keeps jamming, bits of paper are probably stuck in the paper path.
Turn off the printer, and use the platen knob to back the paper out of the printer.
Open the access cover and the rear cover (1).
Fold some continuous-feed paper over three times to produce a page four sheets thick
and load it onto the tractors.
Turn the platen knob to draw the paper around the platen (2) this will bring jammed pieces of
paper up and out so you can remove them -- then back it out again.
Reload regular paper. Close the rear cover and the access cover (3).
Turn the printer on and press the FORM FEED button.
ML 320/321 ( 96-02-01 )
Mantenimiento Periféricos Informáticos SL C/Canteras, 22 28860 Paracuellos de Jarama Tel: 00 34 917481604 WEB: https://mpi.com.es

Single Sheet Feed Jams
Single Sheet Feed Jams
Note: Always turn the printer off before you turn the platen knob!
Turn the printer OFF, then use the platen knob to back the sheet of paper out of the carriage (1).
Pull the bail lever forward to load in a fresh sheet of paper (2).
ML 320/321 ( 96-02-01 )
Mantenimiento Periféricos Informáticos SL C/Canteras, 22 28860 Paracuellos de Jarama Tel: 00 34 917481604 WEB: https://mpi.com.es

Chapter 3
Printer Self Tests
After you've installed ribbon and paper, youre ready to run the self tests. Do this any time
you want to make sure the printer is functioning properly.
- Font Sample Test ( )
- Rolling Ascii Test ( )
ML 320/321 ( 96-02-01 )
Mantenimiento Periféricos Informáticos SL C/Canteras, 22 28860 Paracuellos de Jarama Tel: 00 34 917481604 WEB: https://mpi.com.es

Font Sample Test
Font Sample Test
Holding down LF while turning on the printer produces a limited sample of available print
styles. When complete (one page), the printer stops and the SEL light goes on.
Brief example:
To stop the test, press the MODE button.
ML 320/321 ( 96-02-01 )
Mantenimiento Periféricos Informáticos SL C/Canteras, 22 28860 Paracuellos de Jarama Tel: 00 34 917481604 WEB: https://mpi.com.es

Rolling ASCII Test
Rolling ASCII Test
Holding down TOF/QUIET while turning on the printer produces a continuous sample of
the default print style. To stop the test, press the MODE button.
Note: The self test printout also provides information about your printer. Have this information
at hand if you call for service. ML320 EI A F/W 02.02
ML 320/321 ( 96-02-01 )
Mantenimiento Periféricos Informáticos SL C/Canteras, 22 28860 Paracuellos de Jarama Tel: 00 34 917481604 WEB: https://mpi.com.es
This manual suits for next models
1
Table of contents
Other MPI Printer manuals


