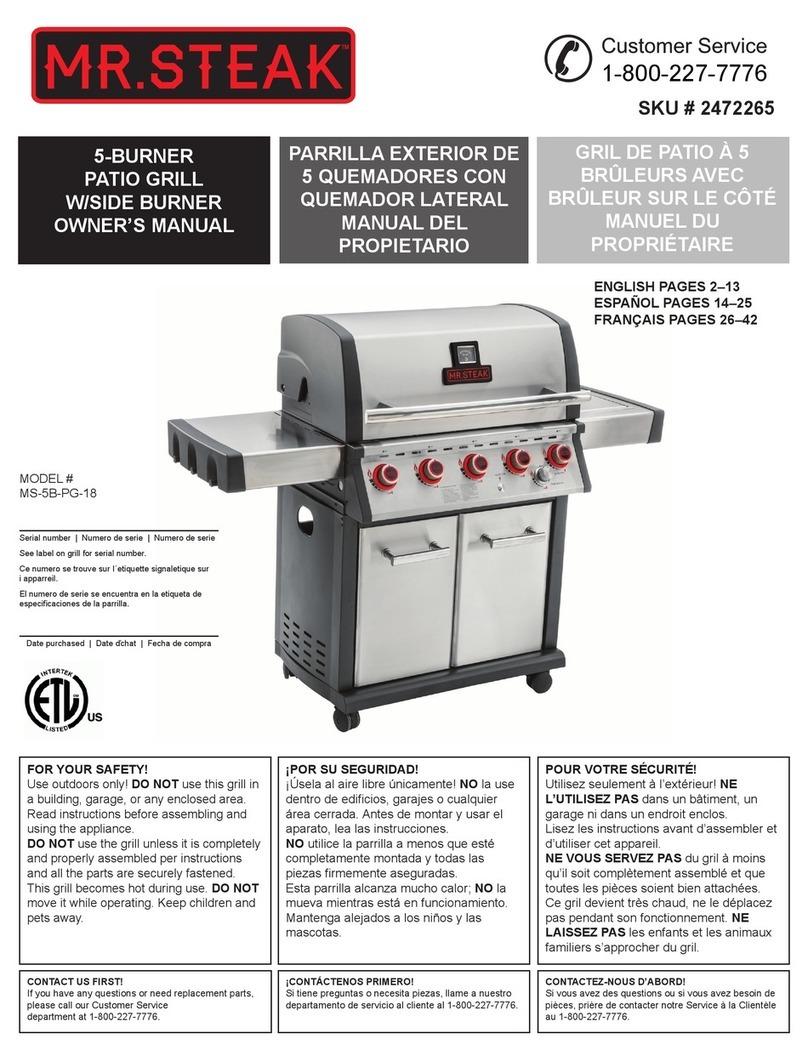
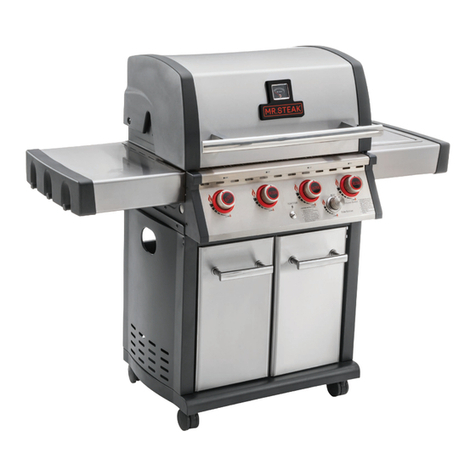
MR. Steak MS-3B-PG User manual

1-800-227-7776
3-BURNER
PATIO GRILL
OWNER’S MANUAL
FOR YOUR SAFETY!
Use outdoors only! DO NOT use this grill in
a building, garage, or any enclosed area.
Read instructions before assembling and
using the appliance.
DO NOT use the grill unless it is completely
and properly assembled per instructions
and all the parts are securely fastened.
This grill becomes hot during use. DO NOT
move while operating. Keep children and
pets away.
¡POR SU SEGURIDAD!
¡Úsela al aire libre únicamente! NO la use
dentro de edicios, garajes o cualquier
área cerrada. Antes de montar y usar el
aparato, lea las instrucciones.
NO utilice la parrilla a menos que esté
completamente montada y todas las
piezas rmemente aseguradas.
Esta parrilla alcanza mucho calor; NO la
mueva mientras está en funcionamiento.
Mantenga alejados a los niños y las
mascotas.
POUR VOTRE SÉCURITÉ!
Utilisez seulement à l’extérieur! NE
L’UTILISEZ PAS dans un bâtiment, un
garage ni dans un endroit enclos.
Lisez les instructions avant d’assembler et
d’utiliser cet appareil.
NE VOUS SERVEZ PAS du gril à moins
qu’il soit complètement assemblé et que
toutes les pièces soient bien attachées.
Ce gril devient très chaud, ne le déplacez
pas pendant son fonctionnement. NE
LAISSEZ PAS les enfants et les animaux
familiers s’approcher du gril.
CONTACT US FIRST!
If you have any questions or need replacement parts,
please call our Customer Service department at
1-800-227-7776.
¡CONTÁCTENOS PRIMERO!
Si tiene preguntas o necesita piezas, llame a nuestro
departamento de servicio al cliente al 1-800-227-7776.
CONTACTEZ-NOUS D’ABORD!
Si vous avez des questions ou si vous avez besoin de
pièces, prière de contacter notre Service à la Clientèle
au 1-800-227-7776.
Serial number | Numero de serie | Numero de serie
See label on grill for serial number.
Ce numero se trouve sur I´etiquette signaletique sur
i apparreil.
El numero de serie se encuentra en la etiqueta de
especicaciones de la parrilla.
MODEL #
MS-3B-PG
Date purchased | Date ďachat | Fecha de compra
ENGLISH PAGES 2–13
ESPAÑOL PAGES 14–25
FRANÇAIS PAGES 26–42
PARRILLA EXTERIOR DE
3 QUEMADORES
MANUAL DEL
PROPIETARIO
GRIL DE PATIO
3 BRÛLEURS
MANUEL DU
PROPRIÉTAIRE
SKU # 2366903

2
WARNING
CAUTION
CAUTION
DANGER
WARNING: Indicates a potentially hazardous situation
which, if not avoided, could result in serious injury or death.
DO NOT attempt to repair or alter the hose/valve/regulator for
any “assumed” defect. Any modication to this assembly will void
your warranty and create the risk of an LP leak and re. Use only
authorized replacement parts supplied by the manufacturer.
Failure to follow all manufacturer’s instructions could result in
property damage and/or serious personal injury.
• This grill should not be used in a building, garage, or any
other enclosed area.
• The use of alcohol or drugs (prescription or non-prescription)
may impair the operator’s ability to properly assemble or
safely operate the grill.
• Always open the grill lid slowly and carefully, as heat and
steam trapped within the grill can cause severe burns.
• Always place your grill on a hard, level surface far away
from combustibles. An asphalt or blacktop surface is not
recommended for this purpose.
• DO NOT leave a lit grill unattended. Keep children and pets
away from the grill at all times.
• DO NOT place this grill on any type of tabletop surface.
• DO NOT use the grill in high winds.
• DO NOT store or use gasoline or any other volatile liquids or
substances within 8 m (25ʹ) of the grill.
• When cooking with oil/grease, do not allow the oil/grease to
exceed 350ºF (177ºC). DO NOT store extra cooking oil in the
vicinity of the grill.
• Any LP cylinder not in use should be stored a minimum of
3 m (10ʹʺ) away from this or any appliance. NEVER ll the
cylinder beyond 80% full. If the above information is not
followed exactly, a re causing serious injury or death may
occur.
CAUTION: Indicates a potentially hazardous situation or
unsafe practice which, if not avoided, may result in minor
or moderate injury.
Read and follow all safety statements, assembly instructions, and
use and care directions before attempting to assemble and use
this grill.
For residential use only. Do not use for commercial cooking.
DANGER: Indicates an imminently hazardous situation
which, if not avoided, will result in serious injury or death.
• Liquid propane (LP) gas is hazardous if handled improperly.
LP is ammable, explosive under pressure, heavier than air,
and pools in low areas. Know its characteristics before using
any LP-fueled product.
• Contact with LP can cause freeze burns to skin.
• This grill is designed for use with LP ONLY.
• NEVER use an LP cylinder with a damaged body, valve,
collar, or footing. (p. 5)
• Dented or rusted LP cylinders may be hazardous and should
be checked by your LP gas supplier.
SAFETY SYMBOLS
The symbols and boxes shown below explain what each
heading means. Read and follow all of the messages found
throughout the manual.
WARNING
WARNING
WARNING
CAUTION
DANGER
FOR YOUR SAFETY
1-800-227-7776

3
DANGER
DANGER
TABLE OF CONTENTS
FOR YOUR SAFETY 2–4
GENERAL INFORMATION AND INSTRUCTIONS 4–5
REGULATOR AND LP CYLINDER CONNECTIONS 6–8
OPERATING INSTRUCTIONS 8–9
CLEANING INSTRUCTIONS 10–11
PARTS & HARDWARE LIST 38
ASSEMBLY INSTRUCTIONS 11, 41–47
TROUBLESHOOTING GUIDE 12
FREQUENTLY ASKED QUESTIONS 13
CALIFORNIA PROP 65
1. COMBUSTIBLE BY-PRODUCTS PRODUCED WHEN
USING THIS PRODUCT CONTAIN CHEMICALS KNOWN
TO THE STATE OF CALIFORNIA TO CAUSE CANCER,
BIRTH DEFECTS, OR OTHER REPRODUCTIVE HARM.
2. THIS PRODUCT CAN EXPOSE YOU TO CHEMICALS,
INCLUDING LEAD, WHICH ARE KNOWN TO THE STATE
OF CALIFORNIA TO CAUSE REPRODUCTIVE HARM.
FOR MORE INFORMATION GO TO
WWW.P65WARNINGS.CA.GOV
3. WASH YOUR HANDS AFTER HANDLING THIS
PRODUCT.
Some parts of this grill may contain sharp edges. Use of
protective gloves during assembly and cleaning is
recommended.
• NEVER store a spare LP cylinder under or near the
appliance or in an enclosed area.
• An overlled or improperly stored cylinder is a hazard due to
possible gas release from the safety relief valve. This could
result in an intense re with risk of property damage, serious
injury, or death.
GREASE FIRES
• Putting out grease res by simply closing the lid is not
possible. Grills are well ventilated for safety reasons.
• DO NOT use water on a grease re. Personal injury may
result. If a grease re develops, turn the grill’s control knob(s)
and the LP cylinder OFF.
• If grill has not been routinely cleaned, a grease re can occur
that may damage the product. Pay close attention while
preheating or burning off food residue to help prevent grease
res.
• The best way to prevent grease res is to regularly clean
the grill, following the instructions found on p. 10.
If you see, smell, or hear gas escaping:
• Shut off the LP supply to the appliance.
• Extinguish any open ame.
• Carefully open the lid.
• If the odor continues, stay away from the appliance and
immediately call your LP supplier or local re department.
If the ames go out while operating the grill:
• Turn the burner controls to the OFF position.
• Carefully open the lid.
• Wait 5 minutes and repeat the lighting procedure.
If the burner goes out, gas will continue to ow out
of the burner and could accidentally ignite with
the risk of serious injury.
WARNING
CAUTION
CAUTION
DANGER
1-800-227-7776

4
1. NEVER attempt to attach this grill to the self-contained LP system of a camper trailer, motor home, or house. This grill
is not intended for use in or on recreational vehicles and/or boats.
2. NEVER use charcoal or lighter uid with an LP grill.
3. DO NOT use gasoline, kerosene, or alcohol for lighting.
4. Only use LP cylinders constructed and marked in accordance with the specication for LP cylinders of the U.S.
Department of Transportation (DOT) or the National Standard of Canada CAN/CSA-B339, Cylinder, Spheres, and
Tubes for Transportation of Dangerous Goods.
5. DO NOT attempt to move the grill while it is operating.
6. DO NOT use the grill unless it is completely assembled as instructed and all parts are securely fastened and
tightened.
7. Keep all combustible items and surfaces at least 90 cm (36") away from the grill at all times.
8. DO NOT use this grill, or any LP product, near unprotected combustible buildings and materials.
9. DO NOT use in the presence of volatile materials and vapors. Keep the grill area clear and free from combustible
materials, gasoline, and other ammable vapors and liquids.
10. DO NOT touch any metal parts of the grill until it has completely cooled (about 45 minutes) to avoid burns, unless you
are wearing protective gear (oven mitt, pot holders, etc.).
11. DO NOT alter this grill in any manner.
12. Clean and inspect the grill’s LP supply hose before each use. If there is evidence of abrasion, wear, cuts, or leaks, call
Customer Service to obtain a replacement supply hose.
13. Move LP supply hoses as far away as possible from hot surfaces and dripping hot grease.
14. Keep the grill’s valve compartment, burners, and circulating air passages clean. Inspect these grill components before
each use.
CAUTION
1-800-227-7776
GENERAL INFORMATION AND INSTRUCTIONS
Your grill has been designed and manufactured to high-quality standards. It will provide you with many years of enjoyment
with a minimal amount of maintenance.
1. Your grill requires reasonable care and attention during operation. It will be hot during cooking. You should never
leave the grill unattended or move the grill when in use.
2. Ensure your grill is on level ground and the locking casters are locked before use.
3. DO NOT lean over the grill or touch the edges of the rebox when in use.
4. DO NOT obstruct the ow of combustion and ventilation air to the grill (See p. 8).
5. Keep the ventilation openings of the cylinder cart underneath the grill free and clear from debris.
6. DO NOT put a grill cover or other ammable material in the storage area of this grill.
7. DO NOT use charcoal briquettes, lava rock, or any type of ceramic product in the gas section of this grill.
CYLINDER SPECIFICATIONS
When purchasing or exchanging a cylinder for your LP grill, it must be constructed and marked in accordance with the
specications for LP cylinders of the U.S. Department of Transportation (DOT) or the National Standard of Canada CAN/
CSA-B339, Cylinder, Spheres, and Tubes for Transportation of Dangerous Goods; be equipped with a listed overlling
prevention device (OPD); and be equipped with a cylinder connection device compatible with outdoor cooking appliances.

C
L
O
S
E
O
P
E
N
5
WARNING
A frosty cylinder valve indicates possible gas overll. Close
the LP cylinder valve and call your LP dealer immediately.
C
L
O
S
E
O
P
E
N
Dust Cap
Collar
GCC Type 1
Shut-off Valve
Pressure Relief Valve
GCC Type 1 Cylinder Valve
Regulator
1-800-227-7776
The cylinder must be equipped with:
• A shut-off valve terminating in a GCC Type 1 cylinder valve outlet
• A GCC Type 1 cylinder valve that prevents gas ow until a positive seal is made
• A collar to protect the cylinder shut-off valve
• A safety relief device having direct communication with vapor space of the cylinder
PROPANE CYLINDER LEAK TEST
A leak test should be done each time an LP cylinder is relled or exchanged. DO
NOT smoke or use any type of ammable material in the area during this leak test.
DO NOT use an open ame to check for leaks.
1. Test outside in a well-ventilated area.
2. Use a paintbrush and a solution of 50% liquid dish detergent and 50% water. DO
NOT use cleaning agents because they can damage the fuel supply parts.
3. Brush the detergent solution onto the areas indicated by the arrows in the
diagram to the right.
4. Developing bubbles indicate a gas leak. If this happens, contact your LP dealer
to secure a replacement tank.
LP CYLINDER (NOT SUPPLIED WITH THIS GRILL)
The LP (Liquid Propane) cylinder meant for use with this grill must have a 20-lb. (9.1 kg) capacity incorporating a
GCC Type 1 cylinder valve and a listed overlling protection device (OPD). This grill is designed to t Worthington-,
Manchester- or SMPC-brand 20-lb (9.1 kg) cylinders. Other brands may t this grill if the top collar and bottom
support ring have similar dimensions.
• DO NOT connect a propane cylinder exceeding this capacity.
• DO NOT connect this grill to an existing #510 POL cylinder valve with left-hand threads.
• DO NOT connect to a cylinder that uses any other type of valve connection device.
The GCC Type 1 cylinder valve can be identied by the large external threads on the valve outlet.
Hand
Wheel

C
L
O
S
E
O
P
E
N
Collar
6
CAUTION
The gas pressure regulator provided with this grill appliance
must be used.
REGULATOR AND LP CYLINDER CONNECTIONS
WARNING
Keep the LP cylinder in the upright position at all times.
GCC 1 Type Connector
Hand
Wheel
This regulator must enter the
cylinder valve in a straight line.
Center the regulator nipple
in the cylinder valve outlet.
1-800-227-7776
• Your regulator is equipped with a GCC Type 1 quick connect system. It will not allow gas to ow until a positive seal
has been made. It has a thermal element that will shut off the ow of gas if the temperature reaches 115ºC (240ºF). It
also has a ow-limiting device that will restrict the ow of gas to 0.28 cubic meters per hour (10 cubic feet per hour).
• This regulator is set for an outlet pressure of 11 inch water column.
• Before each use, check the supply hose for excessive abrasion, wear, cuts, or leaks.
• If any damage is found, call Customer Service to obtain a replacement supply hose.
C
L
O
S
E
O
P
E
N
Remove Dust Cap
TO CONNECT THE REGULATOR AND HOSE TO THE CYLINDER
1. Be sure the propane cylinder is OFF by turning the hand wheel clockwise until it stops.
2. Place the tank under the grill body with the valve facing outward. (See Assembly Instructions
on p. 47 to see how to secure the cylinder to the grill body.)
3. Remove the dust cap from the cylinder valve.
4. Center the nipple of the regulator into the cylinder valve outlet.
5. Turn the black nut clockwise until it stops. Hand tighten ONLY. DO NOT use a wrench.

7
WARNING
1. Before each use, check the LP supply hose for excessive abrasion, wear, or cuts. If any damage is found, call Customer Service
to obtain a replacement supply hose.
2. Always perform the Leak Test (listed below) before using your grill for the rst time, if the cylinder has been changed, or if any gas
supply components have been changed. Also perform this test after the regulator ow-limiting device has been activated, or after
a long period of non-use.
3. DO NOT attempt to connect this grill to the LP system of a camper trailer, motor home, or house.
LEAK TESTING THE GRILL’S REGULATOR, VALVES, HOSES, AND CONNECTIONS
1-800-227-7776
1. Ensure the propane cylinder valve and all burners are turned to the OFF position.
2. DO NOT smoke or use any type of ammable material in the area during this test. DO NOT use an open ame to
check for leaks. DO NOT attempt to light a burner during leak testing.
2. Ensure the regulator is correctly connected to the cylinder.
3. Open the propane cylinder valve by turning the hand wheel counterclockwise one turn. If you hear a rushing sound,
turn the gas off immediately. This may indicate a leak at the cylinder connection. Disconnect the regulator from the
cylinder. Then, reconnect and perform this step again.
4. Mix up a solution of 50% liquid dish detergent and 50% water. DO NOT use any household cleaner solution.
Household cleaning agents can damage fuel supply parts.
5. Brush the dish detergent solution over the following areas: regulator and cylinder connection, supply hose connection
to the regulator, all LP hoses, and all connections to the burners.
6. “Growing” bubbles that develop on any of the parts or connections indicate a gas leak. If this happens, close the LP
cylinder valve by turning the hand wheel clockwise and retighten connections. Test again.
7. If leaks can not be stopped, DO NOT try to repair. Call Customer Service for further instructions or replacement
parts.

8
WARNING
1. Do not use this grill in any enclosed area, such
as a garage, shed, or any overhead structure
or canopy.
2. Operate this grill only in a well ventilated area.
3. DO NOT face the grill directly into the wind.
WARNING
1. Read all lighting instructions before lighting.
2. If ignition does not occur in 5 seconds, turn the burner control knob(s) to OFF, wait 5 minutes, and repeat the
lighting procedures.
CONDO AND APARTMENT RESIDENTS
Check with your building manager regarding building
regulations for patio grills.
OPERATING INSTRUCTIONS
FOR YOUR SAFETY
1. The minimum operating distances around the grill that must be kept free of combustible materials (including
the walls of buildings or building features) are: 91 cm (36") from the sides and 91 cm (36") from the back.
2. DO NOT use this grill in an area with combustible surfaces overhead.
1-800-227-7776
• Always inspect your grill before lighting.
• Replace any hoses that are frayed or cracked.
• Look for anything that could block spaces for ventilation and remove it or move the grill.
• After lighting, check the ame pattern to ensure you have even heat distribution from each burner. If the burners won’t
light, or if the ame pattern (see p. 9) is uneven, see the Troubleshooting Guide on p. 12.
36"
36"

9
LIGHTING THE MAIN BURNERS USING THE GRILL’S ELECTRONIC IGNITION
1. Ensure all burner control knobs are in the OFF position.
2. Turn on the LP by slowly turning the hand wheel on the cylinder valve counterclockwise.
3. Turn the one burner control knob marked with an igniter ame to HIGH.
4. Depress the electronic ignition button and hold down. You should hear a clicking sound, which indicates the electronic
ignition is working.
5. If the burner does not light within 5 seconds, release the electronic ignition and turn the burner control knob to OFF.
Wait 5 minutes for the gas to clear, and repeat steps 1-4. If it still will not light, see the Troubleshooting Guide on p. 12.
6. When lit, turn the control knob to the desired heat setting.
MANUALLY LIGHTING THE MAIN BURNERS WITH THE MATCH LIGHTING STICK
1. Ensure all burner control knobs are in the OFF position.
2. Turn on the LP by slowly turning the hand wheel on the cylinder valve counterclockwise.
3. Place a match in the Match Holder, which is located inside the grill’s cart door.
4. Use the holder to slide the lit match through the cast iron grates and the front of the burner tent to the left of the burner
you want to light.
5. Press and turn the burner control knob to HIGH. Continue to push and hold up to 5 seconds or until the burner lights.
6. If the burner does not light within 5 seconds, turn the burner control knob to OFF and remove the match. Wait
5 minutes for the gas to clear, and repeat steps 3–5.
7. When lit, turn the control knob to the desired heat setting.
TURNING OFF YOUR GRILL
1. Turn all burner control knobs to the OFF position.
2. Turn off the gas supply at the propane cylinder by turning the hand wheel on the cylinder valve clockwise until hand
tight.
1-800-227-7776
BURNER FLAMES
Always evaluate the burner ame patterns after lighting. A good ame
should be primarily blue with a yellow tip and have a minimal amount
of noise. Some yellow tips are OK if they are smaller than 2.5 cm (1").
New burners sometimes have oil residue, which will cause a yellow
ame while burning off the residue. Variations in gas supply, altitude,
weather, and other factors can impact burner performance. Older grills
can also show more yellow ame as food deposits, oils, and fats build
up on the burners.
GOOD BAD
Yellow
Yellow
Light Blue
Light Blue
Blue Blue

10
1-800-227-7776
WARNING
1. DO NOT clean any part of your grill in a self-cleaning oven.
2. DO NOT use oven cleaners, abrasive kitchen cleaners, cleaners that contain citrus products, or mineral spirits.
3. DO NOT use any type of steel or brass bristled brush, except when cleaning the grill’s grates and burner tents.
4. Clean your grill regularly to prevent grease buildup, excessive are-ups, and grease res.
5. Always allow the grill to cool down completely before cleaning.
CLEANING INSTRUCTIONS
STAINLESS STEEL-Clean with multi-purpose, low abrasion, non-phosphorous metal or stainless steel polish
and a soft cloth. Always polish in the direction of the nish. Do not allow grease and dirt to accumulate. Several
products and naturally occurring substances can damage stainless steel nishes. These include, but are not
limited to, swimming pool chemicals (chlorine and bromine), lawn and garden fertilizers, ice-melting products,
seawater or other salt water, urine, bird droppings, and tree sap. Upon contact with these substances,
immediately wash and dry the stainless steel surface, taking care to avoid burns.
GENERAL GRILL CLEANING-Wash exterior surfaces and the inside of the grill lid and grill bottom with a mild
solution made of dish washing detergent and warm water. A cloth, soft non-metallic brush, or plastic cleaning
pad can be used. Rinse thoroughly, wipe, and allow to completely air dry.
COOKING SURFACES-Using a stiff brass bristled brush, wash with a mild solution made of dish washing
detergent and warm water, rinse, and dry. Ensure no loose bristles remain on any cooking surface after
cleaning. Inspect prior to grilling. It is NOT recommended to clean the cooking surfaces while the grill is still
hot.
GREASE CUP AND BASE-Check after each use. Remove and empty the cup when half full. Remove and
clean the base as grease builds up. Both can be washed with a mild solution made of dish washing detergent
and warm water.
BURNERS-It is recommended you clean your burners at least twice a year, or before use when the grill has
not been used in over a month. Small insects and spiders may enter the burner tubes and build nests or spin
webs that can block or reduce the amount of gas owing through the burner. You will usually see a smaller
ame, or a ame that is mostly yellow rather than blue, coming from the burner when this happens. Other
signs include uneven or low heat, or difculty igniting the burners. In cases of severe blockage, this can cause
the ame to burn backwards, and outside of the burner tubes. IF THIS HAPPENS, IMMEDIATELY SHUT
OFF THE FLOW OF LP AT THE CYLINDER BY TURNING THE HAND WHEEL ON THE CYLINDER VALVE
CLOCKWISE. Wait for the grill to cool completely before cleaning the burners.

11
WARNING
Properly seating the burner and valve is vital for safety.
This grill has been made to high-quality standards. If you have any questions not addressed in this manual, or if you need
replacement parts, please call the Customer Service department.
NOTE: The assembly and use of this grill must conform to local codes. In absence of local codes, use the Natural Gas
and LP Instruction Code.
IMPORTANT NOTICE: Read all instructions prior to assembly and use. Read and understand all warnings and
precautions prior to operating your grill.
Preparation
Before starting to assemble the grill, make sure all parts are present. Compare parts with the Parts List on p. 38 and Parts
Diagram on page 41. If any parts are missing or damaged, do not attempt to assemble the product and contact Customer
Service.
Tools Needed:
Phillips Screwdriver
Box-End or Adjustable End Wrench
(Tools are not included)
• Begin assembly following sequential diagrams beginning on p. 42, Step 1.
• Note: the right and left sides of the grill are designated as if you are facing the front of the grill.
ASSEMBLY INSTRUCTIONS
1-800-227-7776
CLEANING THE BURNERS
1. Ensure the gas is turned OFF at the LP cylinder.
2. Remove the cast iron grates, burner tents, and grease tray.
3. Remove the cotter pins located underneath the back end of each burner at the rebox.
4. Lift each burner up and out.
5. Clean the inside of the burner using a stiff wire brush. A straightened metal coat hanger will also work. An
alternative is to use compressed air. Always wear eye protection if using this method. Take care to avoid
altering the burner ports during cleaning.
6. Brush the outer surface of the burner.
7. Ensure all burner ports (holes) are free of debris.
8. Inspect the burners. Replace any burner that has cracks or enlarged ports.
9. Reinstall the burners, making sure the burners seat properly over the valves.
10. Secure the back of the burners to the rebox with the cotter pins.
11. Replace the grease tray, burner tents, and cast iron grates.
12. Perform a Leak Test as instructed on p.7.
GRILL STORAGE
1. Clean your grill before storage.
2. Storage of a gas grill indoors is permissible only if the propane cylinder is disconnected and removed from
the grill.
3. Cover the grill.
4. Follow all instructions for set-up, cleaning, and performing a Leak Test before using the grill after it has
been in storage for an extended period of time.

12
TROUBLESHOOTING GUIDE
PROBLEM ISSUE SOLUTION
Burner will not light. 1. Gas supply is turned off.
2. Out of LP.
3. Regulator is not properly seated
into the cylinder valve.
4. Crimped fuel supply hose.
5. Regulator failure or damaged
hose.
6. Cannot hear the electronic igniter
clicking.
7. Electronic igniter electrode is
coated in grease or dirt.
8. Check the distance from electrode
to the tip of the burner. Electrode
should be 1/8–1/4" (3–6 mm) from
the main burner.
9. Inspect the electrode to be sure it
is not cracked or broken.
10. Blockage in gas system.
11. Burners are misaligned.
1. Turn on gas at LP cylinder.
2. Fill or replace LP cylinder.
3. Remove and reattach regulator.
Hand tighten only.
4. Hose needs to be straightened.
5. Order replacement part and
replace.
6. Replace the battery with “AA” size
battery.
7. Clean with rubbing alcohol.
8. Adjust the tip of the electrode if
needed.
9. Order replacement parts and
replace.
10. Remove insects, spider webs,
or other blockage. Clean if
necessary.
11. Inspect under control panel to
be sure the burners are aligned
properly with the valves.
Irregular ame or yellow ame. 1. New burner may have residual oil.
2. Tubes in burners are blocked.
3. Burners have a high grease or dirt
build-up.
4. Burners are not aligned properly
with valves.
1. Oil will burn off.
2. Clean and remove blockage.
3. Remove and clean.
4. Adjust under the control panel.
Sudden drop in gas pressure or
ames blow out.
Flow-limiting device was activated.
NOTE:
Turn off all burners, and disconnect
the regulator from the LP cylinder.
Wait 10 minutes, and reconnect the
regulator and perform the Leak Test
on p. 7. Slowly turn on the LP cylinder
and relight the grill.
1. Out of LP gas.
2. Excessive fuel ow valve has
tripped, thereby reducing the gas
ow.
3. A ruptured gas hose.
4. Opening the control knobs before
turning on the LP cylinder.
5. Improper purging of cylinder
before cylinder was lled.
6. Wind could be blowing out your
burners.
1. Rell or replace LP cylinder.
2. Turn off all burners, wait 30
seconds, and relight the grill.
3. Inspect and perform a Leak Test
on hose and replace as
necessary.
4. Turn on the LP at the cylinder
before turning on a control knob.
5. See your gas dealer.
6. Move out of the wind.
Excessive are-ups. 1. Burner tents, inside grill grates,
and burners need to be cleaned.
2. Grease tray is full.
3. Inappropriately high heat for
cooking.
4. Direct cooking will produce more
are-ups.
1. Remove, clean, and replace.
2. Remove, empty, and clean.
3. Reduce control knob setting.
4. Try indirect cooking method.
Fire behind control panel. 1. Check burners for obstructions.
2. Burners are misaligned with
valves.
3. Gas is leaking from a faulty
connection or damaged hose.
1. Clean burners.
2. Inspect under control panel and
realign burners.
3. Perform a Leak Test. Tighten or
replace parts as necessary.

13
1-800-227-7776
FREQUENTLY ASKED QUESTIONS
Q: Can I convert my gas grill from one fuel source to another?
No. Your gas grill is manufactured to specic standards developed by CSA (Canadian Standards Association)
for your safety and grilling performance for propane. We do not offer conversion kits nor do we recommend
you change the fuel type.
Q: How are your grills tested?
Our grills are tested and certied by CSA, a leading independent testing center, to meet or exceed various
CSA standards along with various performance standards. The burners and gas line in each grill are also
individually tested when each grill comes off the assembly line just prior to packaging. Each burner is ignited
for this test.
Q: What is the humming noise I sometimes hear coming from my regulator?
The humming sound you can hear is the gas owing through the regulator. There is no need to be concerned
with a low volume of noise.
Q: My grill has a low ame on some burners, or some burners will not light at all. What can cause
this?
This can be caused by the regulator’s ow-limiting device, which is activated by a sudden change in
pressure. Opening the cylinder valve too quickly can cause this. In this case, close the LP cylinder valve and
disconnect the regulator. Let stand for 10 minutes. Reconnect the regulator to the cylinder. Slowly open the
propane cylinder valve. Follow the burner lighting procedures on p. 9, and light the burner furthest from the
cylinder rst. Continue to light the other burners, moving closer to the cylinder.
Q: Can I use ceramic plates, briquettes of any kind, or lava rocks?
No. Your grill is designed for use only with the burner tents. Grease drips down into the tents where it is
burned, creating steam, and additional avor.

14
ÍNDICE
POR SU SEGURIDAD 14–16
INFORMACIÓN GENERAL E INSTRUCCIONES 16–17
CONEXIONES DEL REGULADOR Y
DEL CILINDRO DE PL 18–20
INSTRUCCIONES DE FUNCIONAMIENTO 20–21
INSTRUCCIONES DE LIMPIEZA 22–23
INSTRUCCIONES DE MONTAJE 23, 41-47
GUÍA PARA LA RESOLUCIÓN DE PROBLEMAS 24
PREGUNTAS MÁS FRECUENTES 25
PIEZAS Y LISTA DE COMPONENTES 39
POR SU SEGURIDAD
ADVERTENCIA
PELIGRO
ADVERTENCIA: Indica una situación potencialmente
peligrosa que, si no se evita, podría causar la muerte o
lesiones graves.
Indica una situación potencialmente
peligrosa o práctica poco segura que, si no se evita,
puede provocar lesiones leves o moderadas.
Solo para uso residencial. No utilizar para
preparaciones comerciales
PELIGRO: Indica una situación inminentemente peligrosa
que, si no se evita, podría causar la muerte o lesiones
graves
.
ADVERTENCIA
ADVERTENCIA
PRECAUCIÓN
PRECAUCIÓN
guantes protectores, si es necesario.
Antes de intentar montar y cocinar, lea y siga todas las
instrucciones de seguridad, las instrucciones de montaje
y las instrucciones de uso y cuidado.
PRECAUCIÓN
PRECAUCIÓN
SÍMBOLOS DE SEGURIDAD
Los símbolos y recuadros que se muestran a continuación
explican lo que signica cada encabezado. Lea y siga
todos los mensajes que se encuentran en el manual.
PROPUESTA 65 DE CALIFORNIA
1. LOS SUBPRODUCTOS COMBUSTIBLES PRODUCI
DOS AL USAR ESTE PRODUCTO CONTIENEN
QUÍMICOS QUE SE SABE EN EL ESTADO DE CAL
IFORNIA QUE CAUSAN CÁNCER, DEFECTOS DE
NACIMIENTO U OTROS DAÑOS A LA REPRODUC
CIÓN.
2. ESTE PRODUCTO PUEDE EXPONERLE A PRODUC
TOS QUÍMICOS, INCLUIDO PLOMO, QUE SE SABE
EN EL ESTADO DE CALIFORNIA QUE CAUSA DAÑOS
A LA REPRODUCCIÓN. PARA MÁS INFORMACIÓN,
VISITE: WWW.P65WARNINGS.CA.GOV
3. LÁVESE LAS MANOS DESPUÉS DE MANIPULAR
ESTE PRODUCTO.
Si no se siguen todas las instrucciones del fabricante, podría
resultar en lesiones personales graves y/o daños a las
propiedades.
• Esta parrilla no debe utilizarse en edicios, garajes u otras
zonas cerradas.
• El uso de alcohol o medicamentos (recetados o no receta
dos) puede perjudicar la capacidad del operador de
montar adecuadamente u operar de manera segura la
parrilla.
• Siempre abra la tapa de la parrilla lentamente y con cuida
do, ya que el calor y el vapor atrapados dentro de la
parrilla pueden causar quemaduras graves.
• Siempre coloque la parrilla en una supercie dura y nivela
da lejos de los combustibles. No se recomienda una
supercie de asfalto para este propósito.
• NO deje la parrilla encendida sin vigilancia. Mantenga a
los niños y las mascotas lejos de la parrilla en todo
momento.
• NO coloque esta parrilla sobre ningún tipo de supercie
de mesa.
• NO use la parrilla con vientos fuertes.
PRECAUCIÓN
PRECAUCIÓN

15
• NUNCA almacene un cilindro de PL de repuesto
debajo o cerca del aparato o en un área cerrada.
• Un cilindro sobrellenado o almacenado
incorrectamente es un riesgo debido a la posible
liberación de gas de la válvula de alivio de seguridad.
Esto podría causar un incendio intenso con riesgo de
daños a la propiedad, lesiones graves o muerte.
• Si ve, huele u oye un escape de gas, aléjese
inmediatamente del cilindro de PL/aparato y llame
al departamento de bomberos.
PELIGRO
PELIGRO
ADVERTENCIA
No intente reparar o alterar la manguera/válvula/regulador
este conjunto anulará su garantía y creará el riesgo de una
fuga de gas e incendio. Utilice únicamente las piezas de
repuesto autorizadas suministradas por el fabricante.
ADVERTENCIA
NO almacene ni use gasolina u otros vapores o
distancia de la parrilla.
Al cocinar con aceite/grasa, no permita que el aceite/
grasa exceda los 177 °C (350 °F). NO almacene aceite
de cocina adicional cerca de la parrilla.
Un tanque de propano líquido (PL) (cilindro) no
conectado para su uso debe almacenarse a una
distancia mínima de 3 m (10 pies) de este o cualquier
otro aparato. Nunca llene el cilindro de gas más allá
del 80 %. Si la información anterior no se sigue de
forma exacta, puede ocurrir un incendio que cause
muerte o lesiones graves.
PELIGRO
Si durante el funcionamiento las llamas se
apagan (huele a gas o no se puede ver la llama)
Gire los controles del quemador a la posición de
apagado (OFF)
Abra la tapa
Espere 5 minutos y repita el procedimiento de
encendido.
del quemador y podría encenderse accidentalmente con el
riesgo de lesión.
PELIGRO
PRECAUCIÓN
•
•
•
•
•
•
•
FUEGO DE GRASA
• No es posible eliminar fuegos de grasa con solo
cerrar la tapa. Las parrillas están bien ventiladas
por razones de seguridad.
• NO utilice agua sobre un fuego de grasa. Pueden
producirse lesiones personales. Si se desarrolla
un fuego de grasa, apague la(s) perilla(s) de
control y el tanque de PL.
• Si no se ha limpiado rutinariamente la parrilla,
puede ocurrir un fuego de grasa que podría
dañar el producto. Preste atención durante el
precalentamiento o el quemado de residuos de
comida para asegurarse de que no se produzca
un incendio de grasa.
• La mejor manera de evitar incendios de grasa
es limpiar regularmente la parrilla, siguiendo
las instrucciones que se encuentran en las p.
22.
• El gas propano líquido (PL) es peligroso si se
maneja incorrectamente. El PL es inamable,
explosivo bajo presión, más pesado que el aire
y se asienta en áreas bajas. Conozca sus carac-
terísticas antes de usar cualquier producto de
PL.
• El contacto con el PL puede causar quemaduras
por congelación en la piel.
• Esta parrilla está diseñada para uso con PL
SOLAMENTE.
• NUNCA utilice un cilindro de PL con daño en el
cuerpo, válvula, collar o base. (ver p. 17)
• Los cilindros de PL con abolladuras u óxido
pueden ser peligrosos y su proveedor de gas PL
debe vericarlos.
SI HUELE, OYE O VE UN ESCAPE DE GAS
• Apague el suministro de PL al aparato.
• Extinga toda llama abierta.
• Abra cuidadosamente la tapa.
• Si el olor continúa, manténgase alejado del aparato
y llame inmediatamente a su proveedor de PL o al
departamento de bomberos local.

16
PRECAUCIÓN
INFORMACIÓN GENERAL E INSTRUCCIONES
1. NUNCA intente conectar esta parrilla al sistema de gas propano autónomo de un remolque para
autocaravanas, casa rodante o vivienda.
2. NUNCA utilice carbón o líquido encendedor con la parrilla de gas.
3. NO use gasolina, queroseno o alcohol para encender la parrilla. El cilindro de gas PL debe estar
construido y marcado de acuerdo con las especicaciones para cilindros de gas propano de la norma
nacional CAN/CSA-B339, Cilindros, esferas y tubos para el transporte de productos peligrosos. Esta
parrilla no está diseñada para ser utilizada en vehículos recreativos y/o embarcaciones.
4. NO intente mover la parrilla mientras está encendida.
5. NO utilice la parrilla a menos que esté completamente montada y todas las piezas estén bien aseguradas
y apretadas.
6. Mantenga todos los elementos combustibles y supercies a una distancia mínima de 90 cm (36 pulgadas)
de la parrilla en todo momento.
7. NO use esta parrilla ni ningún producto de gas cerca de edicios y materiales combustibles no protegidos.
8. NO utilice en presencia de vapores. Mantenga el área de la parrilla despejada y libre de materiales
combustibles, gasolina y otros vapores y líquidos inamables.
9. NO toque las partes metálicas de la parrilla hasta que se hayan enfriado completamente (unos 45 minutos)
para evitar quemaduras, a menos que use equipo protector (guantes de horno, agarraollas, etc.).
10. NO altere esta parrilla de ninguna manera.
11. Limpie e inspeccione la manguera antes de cada uso. Si hay evidencia de abrasión, desgaste, cortes
o fugas, se debe reemplazar la manguera antes de poner la parrilla en funcionamiento. El montaje de
repuesto debe ser como lo especica el fabricante.
12. Mantenga las mangueras de gas lo más alejadas posible de las superces calientes que gotean grasa
caliente.
13. Mantenga limpios el compartimento de válvulas, los quemadores y los conductos de circulación de aire de
la parrilla. Inspeccione la parrilla antes de cada uso.
Su parrilla ha sido diseñada y fabricada según los más altos estándares de calidad. Le proporcionará muchos años de
disfrute con una cantidad mínima de mantenimiento.
1. Su parrilla de gas requiere cuidado y atención razonables durante el funcionamiento. Estará caliente durante la
cocción y la limpieza. Nunca deje la parrilla desatendida ni traslade la parrilla cuando está en uso.
2. Asegúrese de que la parrilla esté en terreno nivelado y de que las ruedecillas estén bloqueadas antes de usarla.
3. NO se incline sobre la parrilla ni toque los bordes del marco del fogón ni el protector contra viento cuando esté en
uso.
4. NO obstruya el ujo air de combustión y ventilación a la parrilla (p. 20).
5. Mantenga las aberturas de ventilación del contenedor del cilindro libres y limpias de desechos.
6. NO coloque una manta de parrilla u otro material inamable en la zona de almacenamiento de esta parrilla.
7. NO use briquetas de carbón, roca de lava o cualquier tipo de producto cerámico en la sección de gas de esta parrilla.
1-800-227-7776
Servicio al cliente
ESPECIFICACIONES DEL CILINDRO
Cuando compre o cambie un cilindro para su parrilla de PL, éste debe estar construido y marcado de acuerdo con las
especicaciones para cilindros de gas PL del Departamento de Transporte (DOT) o la norma nacional de Canadá, CAN/
CSA-B339 sobre cilindros, esferas y tubos para el transporte de productos peligrosos. Debe estar equipado con un
dispositivo de prevención de sobrellenado aprobado (OPD) y estar equipado con un dispositivo de conexión del cilindro
compatible con los aparatos para cocción al aire libre.

17
El cilindro también debe estar equipado con:
• Una válvula de cierre que termina en una salida de válvula de cilindro de gas tipo 1
• Una válvula tipo 1 que evita el ujo de gas hasta que se hace un sello positivo
• Un collar para proteger la válvula de cierre del cilindro
• Un dispositivo de alivio de seguridad que tiene comunicación directa con el espacio de vapor del cilindro
ADVERTENCIA
CILINDRO DE GAS PL (NO SE SUMINISTRA CON ESTA PARRILLA)
El cilindro de gas PL (propano líquido) diseñado especícamente para ser usado con esta parrilla debe tener una
capacidad de 20 libras (9,1 kg) que incorpore una válvula tipo 1 y un dispositivo de protección contra sobrellenado
(OPD).
Esta parrilla está diseñada para cilindros de 20 libras (9,1 kg) de las marcas Worthington, Manchester o SMPC. Otras
marcas pueden funcionar en esta parrilla si el collar superior y el anillo de soporte inferior tienen dimensiones similares.
• NO conecte a un cilindro de propano que exceda esta capacidad.
• NO conecte esta parrilla a una válvula de cilindro POL #510 existente con roscas izquierdas.
• NO conecte a un cilindro que utilice otro tipo de dispositivo de conexión de la válvula.
• Las válvulas de tipo 1 pueden identicarse por grandes roscas externas en la salida de la válvula.
Una válvula de cilindro helada indica un posible sobrellenado de gas.
Cierre la válvula de PL y llame a su distribuidor de PL
inmediatamente.
C
L
O
S
E
O
P
E
N
C
L
O
S
E
O
P
E
N
Tapa antipolvo
Collar
Válvula de cierre tipo 1
Válvula de alivio de presión
Válvula GCC 1 tipo 1
Regulador
PRUEBA DE FUGAS DEL CILINDRO DE PL
Se debe realizar una prueba de fugas cada vez que se rellene o cambie
un cilindro de propano. NO fume ni use ningún tipo de material inamable
en la zona durante esta prueba de fugas. NO utilice una llama abierta para
vericar si hay fugas.
1. Realice las pruebas en espacios exteriores en una zona bien ventilada.
2. Utilice un pincel y una solución de 50% de detergente líquido para
platos y 50% de agua. NO utilice productos de limpieza porque pueden
dañar las piezas de suministro de combustible.
3. Cepille con la solución de detergente en las áreas que se indican con
las echas en el diagrama de la derecha.
4. Si se desarrollan burbujas indica fugas de gas. Si esto ocurre, póngase
en contacto con su distribuidor de propano para asegurar un cilindro
de repuesto.
1-800-227-7776
Servicio al cliente
Rueda
de mano

18
PRECAUCIÓN
CONEXIÓNES DEL REGULADOR Y DEL CILINDRO DE PL
1-800-227-7776
Servicio al cliente
ADVERTENCIA
Mantenga este cilindro de gas en posición vertical en todo momento.
Debe utilizarse el regulador de presi n de gas que se
suministra con este aparato de cocci n al aire libre.
salida de 11 pulgadas de columna de agua.
C
L
O
S
E
O
P
E
N
Collar
Conector GCC tipo 1
El regulador debe entrar en la
válvula del cilindro en línea recta.
Centre la boquilla del regulador en
la salida de la válvula del cilindro.
C
L
O
S
E
O
P
E
N
Retire la tapa
antipolvo
• Su regulador está equipado con un sistema de conexión rápida GCC tipo 1. No permitirá que el gas uya hasta
que se haya hecho un sellado positivo. Tiene un elemento térmico que interrumpirá el ujo de gas si la temperatura
alcanza 115 °C (240 °F). También tiene un dispositivo limitador de ujo que restringirá el ujo de gas a 0,28 metros
cúbicos por hora (10 pies cúbicos por hora).
• Este regulador está congurado para una presión de salida de 11 pulgadas de columna de agua.
• Antes de cada uso, compruebe que la manguera de gas no presente abrasión excesiva, desgaste o cortes.
• Antes de usar la parrilla, reemplace el conjunto de manguera dañado con el especicado en la lista de piezas de la
pág. 39.
CONEXIÓN DEL CILINDRO AL REGULADOR Y LA MANGUERA
1. Asegúrese de que el cilindro de PL esté apagado, girando la rueda en sentido horario hasta el tope.
2. Coloque el cilindro en el gancho debajo del cuerpo de la parrilla con la válvula mirando hacia fuera.
3. (Para ver cómo asegurar el tanque al cuerpo de la parrilla, consulte las instrucciones de montaje en
la p. 23).
4. Retire la tapa antipolvo de la válvula del cilindro.
5. Centre la boquilla del regulador en la válvula del cilindro.
6. Gire la tuerca negra en el sentido de las agujas del reloj hasta que se detenga. Apriete a mano
ÚNICAMENTE. NO use llaves.
Rueda
de mano

19
ADVERTENCIA
1. Antes de cada uso, compruebe que la manguera de suministro de LP no presente abrasión excesiva, desgaste o
cortes. Antes de usar la parrilla, reemplace el conjunto de manguera dañado con la manguera especicada en la
lista de piezas de la pág. 39.
2. Siempre realice la prueba de fugas (que se indica a continuación) antes de utilizar la parrilla por primera vez, si se
ha cambiado el cilindro o si se han cambiado componentes del suministro de gas. Igualmente, realice esta prueba
si se ha activado el dispositivo limitador de ujo del regulador o después de un largo período sin uso.
3. NO intente conectar esta parrilla al sistema de PL de una casa rodante o remolque.
PRUEBA DE FUGAS DEL REGULADOR, LAS VÁLVULAS, LAS MANGUERAS Y CONEXIONES
DE LA PARRILLA
1. Asegúrese de que la válvula del cilindro de PL y todos los quemadores estén apagados.
2. NO fume ni use ningún tipo de material inamable en la zona durante esta prueba. NO utilice una llama
abierta para vericar si hay fugas. NO encienda los quemadores durante las pruebas de fugas.
2. Asegúrese de que el cilindro de PL esté conectado al regulador.
3. Abra la válvula del cilindro de gas PL girando la rueda en sentido antihorario una vuelta. Si oye un ruido de
torrente, apague el gas inmediatamente. Puede indicar una fuga en la conexión del cilindro. Desconecte el
regulador del cilindro. A continuación, vuelva a conectar y realice este paso nuevamente.
4. Mezcle una solución de 50% de agua y 50% de detergente líquido para platos. NO utilice ninguna solución
para limpieza doméstica. Los agentes de limpieza doméstica pueden dañar las partes de suministro de
combustible.
5. Con ayuda de una brocha, cubra las siguientes áreas con la solución de detergente para platos: conexión
del regulador y el cilindro, conexiones de la manguera de gas al regulador, todas las mangueras de gas y
todas las conexiones de gas al quemador.
6. Las burbujas “crecientes” que se desarrollan en cualquiera de las partes o conexiones indican una fuga
de gas. Si esto sucede, cierre la válvula del tanque de LP girando la rueda en sentido horario y vuelva a
apretar las conexiones. Realice la prueba de nuevo.
7. Si no se pueden detener las fugas, NO intente hacer reparaciones. Llame al servicio de atención al
cliente para obtener más instrucciones o piezas de reemplazo.
1-800-227-7776
Servicio al cliente

20
1. No utilice esta parrilla en zonas cerradas,
garajes, cobertizos o bajo cualquier tipo de
estructura aérea o cubierta.
2. Utilice esta parrilla solamente en una zona bien
ventilada.
3. No coloque la parrilla directamente frente al
viento.
1. Antes de encender la parrilla, lea las instrucciones.
2. Si el encendido no ocurre en 5 segundos, apague los controles de los quemadores, espere 5 minutos y
repita el procedimiento de encendido.
RESIDENTES DE APARTAMENTOS
Y CONDOMINIOS
Consulte con el administrador del edcio acerca
de sus reglamentos para la realización de
barbacoas.
ADVERTENCIA
ADVERTENCIA
INSTRUCCIONES DE FUNCIONAMIENTO
• Inspeccione visualmente siempre su parrilla antes de encenderla.
• Reemplace cualquier manguera que esté deshilachada o agrietada.
• Retire cualquier cosa que pueda bloquear los espacios de ventilación de la parrilla o coloque la parrilla en otro sitio.
• Después de encenderla, compruebe el patrón de llama para asegurarse de que tiene una distribución de calor
uniforme para cada quemador. Si los quemadores no se encienden o si el patrón de llama (ver p. 9) no es regular,
consulte la sección de resolución de problemas en la p. 24.
1-800-227-7776
Servicio al cliente
91 cm
91 cm
POR SU SEGURIDAD
1. Las distancias mínimas alrededor de la barbacoa que deben mantenerse libres de materiales
combustibles, incluyendo las paredes de los edicios o características deedicios son:
distancia de los lados: 91 cm (36 pulgadas); y distancia de la parte posterior: 91 cm (36
pulgadas).
2. NO coloque este aparato de gas donde haya superces combustibles en la parte superior.
This manual suits for next models
1
Table of contents
Languages:
Other MR. Steak Grill manuals
Popular Grill manuals by other brands

Bakers Pride
Bakers Pride DANTE CG Installation and operating instructions

New Braunfels
New Braunfels 10301601 Product guide

Weber
Weber GENESIS II SX-335 owner's manual

BORETTI
BORETTI TONELLO user manual

Ernesto
Ernesto EMWG 230 A1 Operating instructions and safety instructions

Grandhall
Grandhall CCH07A090 Operator's manual

Scarlett
Scarlett SC-EG350E05 instruction manual

Newport
Newport A10-918 owner's manual

Char-Broil
Char-Broil 14202002 Product guide

Falcon
Falcon STEAKHOUSE PLUS G1528 User instructions

Fiesta
Fiesta Outdoor Gas Barbeque / Grill use and care manual

KitchenAid
KitchenAid 730-0819G Installation Instructions and Use & Care Guide