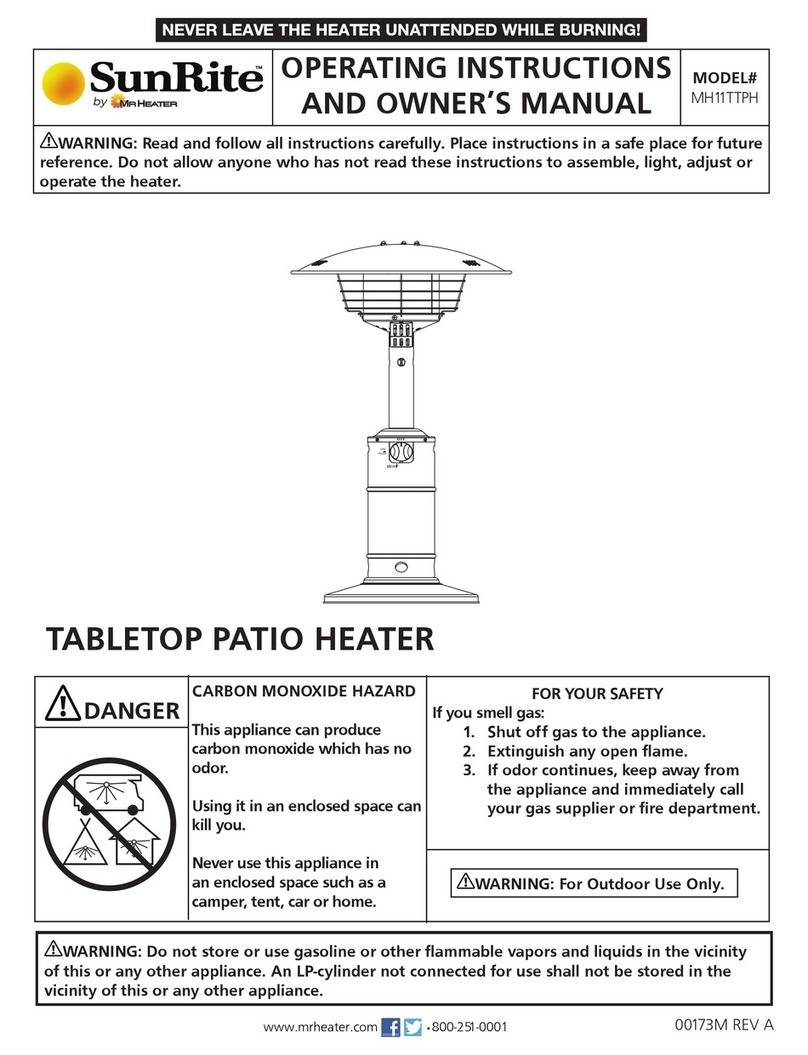
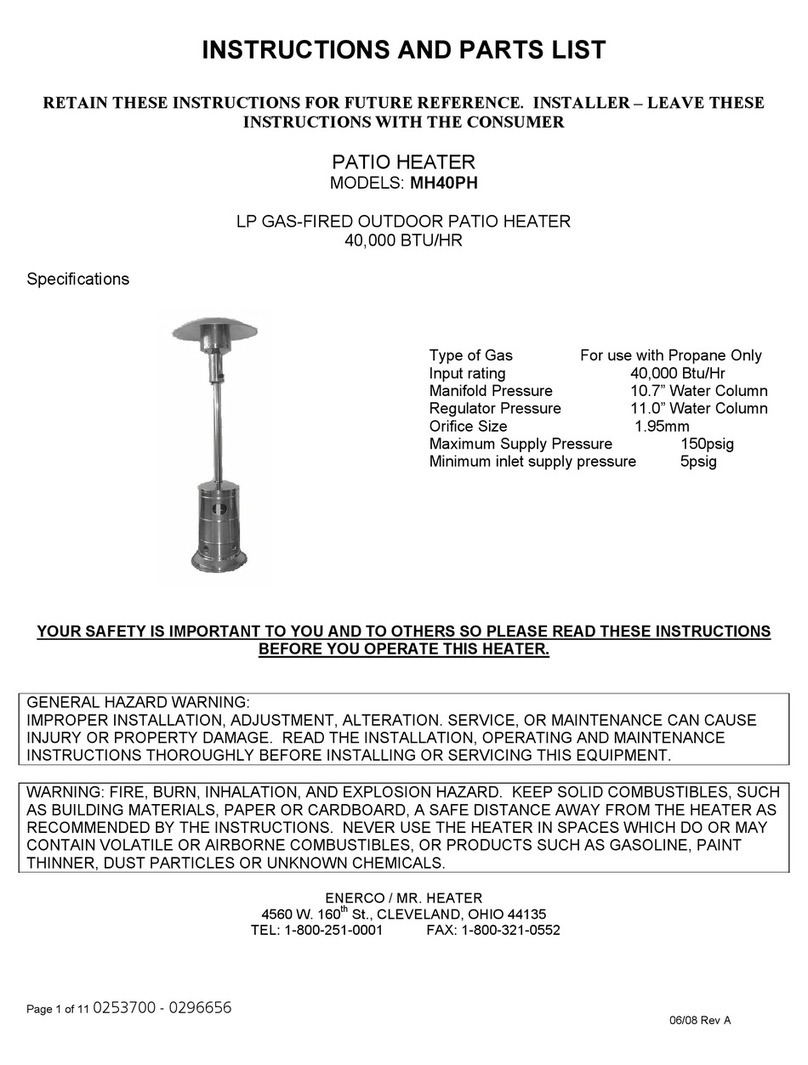
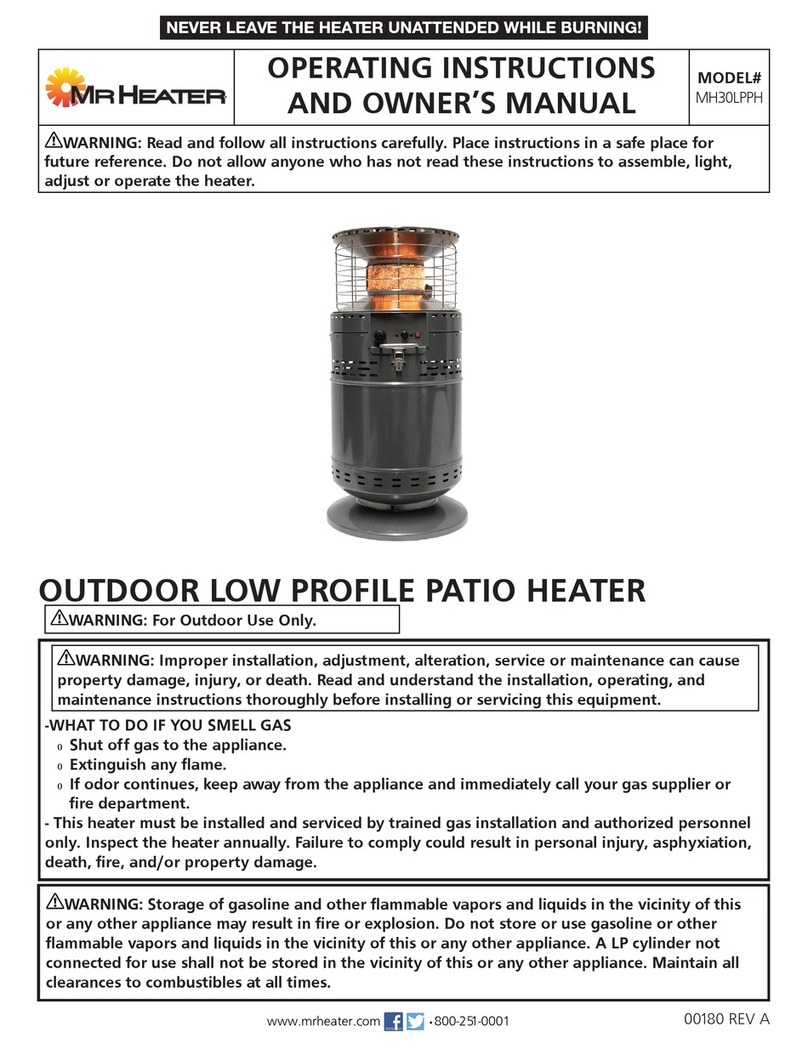
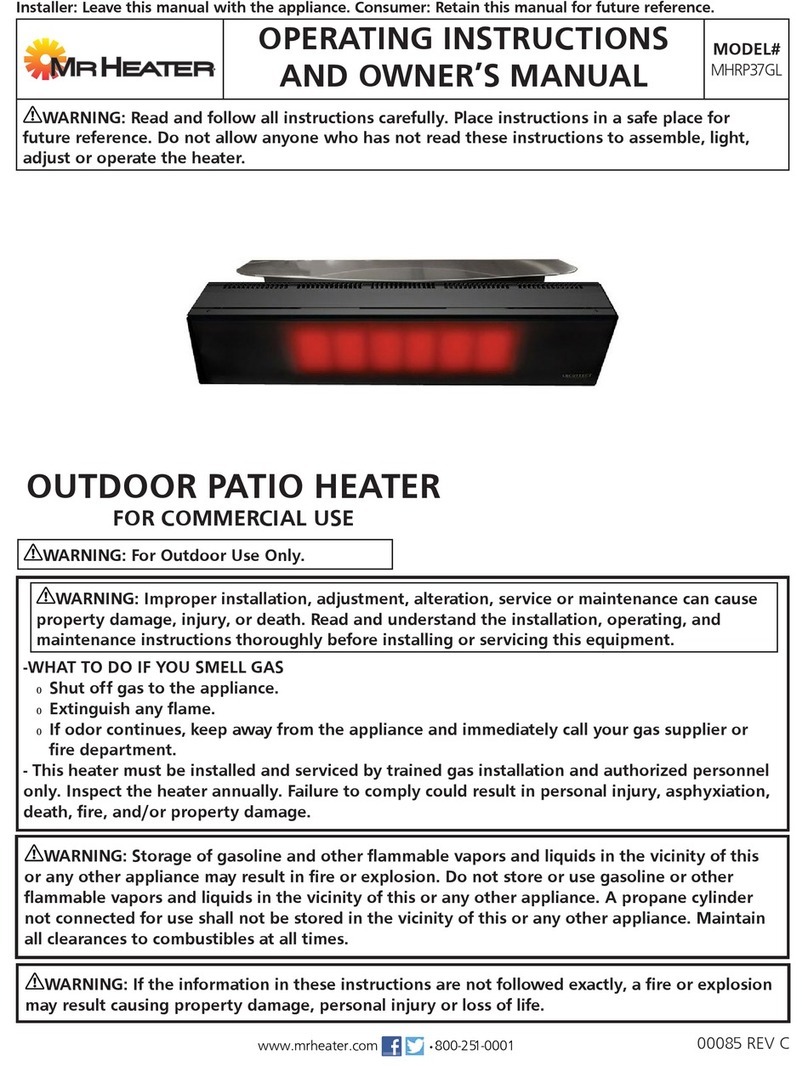
MrHeater SunRite MH48PH Assembly instructions

OPERATING INSTRUCTIONS
AND OWNER’S MANUAL MODEL#
MH48PH
WARNING: Read and follow all instructions carefully. Place instructions in a safe place for future
reference. Do not allow anyone who has not read these instructions to assemble, light, adjust or
operate the heater.
Installer: Leave this manual with the appliance. Consumer: Retain this manual for future reference.
WARNING: Improper installation, adjustment, alteration, service or maintenance can cause
property damage, injury, or death. Read and understand the installation, operating, and
maintenance instructions thoroughly before installing or servicing this equipment.
-WHAT TO DO IF YOU SMELL GAS
ǞShut off gas to the appliance.
ǞExtinguish any flame.
ǞIf odor continues, keep away from the appliance and immediately call your gas supplier or
fire department.
- This heater must be installed and serviced by trained gas installation and authorized personnel
only. Inspect the heater annually. Failure to comply could result in personal injury, asphyxiation,
death, fire, and/or property damage.
WARNING: Storage of gasoline and other flammable vapors and liquids in the vicinity of this
or any other appliance may result in fire or explosion. Do not store or use gasoline or other
flammable vapors and liquids in the vicinity of this or any other appliance. A LP cylinder not
connected for use shall not be stored in the vicinity of this or any other appliance. Maintain all
clearances to combustibles at all times.
OUTDOOR PATIO HEATER
00141
www.mrheater.com •800-251-0001
WARNING: For Outdoor Use Only.

Outdoor Patio Heater 2Operating Instructions and Owner’s Manual
WARNING:
YOUR SAFETY IS IMPORTANT TO YOU AND TO OTHERS,
SO PLEASE READ THESE INSTRUCTIONS BEFORE YOU
OPERATE THIS HEATER.
WARNING:
FIRE OR EXPLOSION HAZARD
Failure to follow safety warnings exactly could result
in serious injury, death or property damage. Be sure to
read and understand the installation, operation, and
service in this manual. Improper installation, adjustment,
alteration, service or maintenance can cause serious
injury, death or property damage.
WARNING:
FIRE, BURN, INHALATION, AND EXPLOSION HAZARD.
KEEP SOLID COMBUSTIBLES, SUCH AS BUILDING
MATERIALS, PAPER, OR CARDBOARD, A SAFE DISTANCE
AWAY FROM THE HEATER. AS RECOMMENDED BY
THE INSTRUCTIONS NEVER USE THE HEATER IN SPACES
WHICH DO OR MAY CONTAIN VOLATILE OR AIRBORNE
COMBUSTIBLES, OR PRODUCTS SUCH AS GASOLINE,
SOLVENTS, PAINT THINNER, DUST PARTICLES OR
UNKNOWN CHEMICALS.
LANGUAGES
ENGLISH .......................................................... 1 - 16
SPANISH.............................................................17-32
FRENCH......................................................... 33 - 48
CONTENTS
PRODUCT SPECIFICATIONS ........................................... 2
PACKAGE CONTENTS.................................................... 3
HARDWARE CONTENTS ................................................ 3
PREPARATION ............................................................... 4
SAFTETY INFORMATION ............................................... 4
ASSEMBLY INSTRUCTIONS............................................ 5
OPERATING INSTRUCTIONS ........................................ 10
CARE AND MAINTENANCE.......................................... 11
TROUBLESHOOTING.......................................................12
REPLACEMENT PARTS LIST.......................................... 14
WARRANTY ................................................................ 16
WARNING:THIS PRODUCT CAN EXPOSE
YOU TO CHEMICALS INCLUDING LEAD AND LEAD
COMPOUNDS, WHICH ARE KNOWN TO THE STATE OF
CALIFORNIA TO CAUSE CANCER AND BIRTH DEFECTS
OR OTHER REPRODUCTIVE HARM. WASH HANDS AFTER
HANDLING. VISIT WWW.P65WARNINGS.CA.GOV
WARNING: Fuels used in liquefied propane
gas appliances, and the products of combustion of such
fuel, can expose you to chemicals including benzene, which
is known to the state of California to cause cancer and
cause birth defects or other reproductive harm, for more
information go to www.P65Warnings.ca.gov
GENERAL INFORMATION
RETAIN THIS MANUAL FOR FUTURE REFERENCE.
FOR QUESTIONS, PROBLEMS, MISSING PARTS BEFORE
RETURNING TO RETAILER PLEASE CALL WITH MODEL NUMBER
AND SERIAL NUMBER OF HEATER:
1-800-251-0001
MONDAY-FRIDAY 8-5 EASTERN TIME
OR E-MAIL USING THE MR. HEATER WEBSITE:
WWW.MRHEATER.COM
In order to provide the best service possible Mr. Heater is
now giving you more ways to get in touch with us. Find
informational videos at:
Facebook: www.facebook.com/mrheaterproducts/
Twitter: https://twitter.com/MrHeater
WARNING: DO NOT STORE OR USE GASOLINE
OR OTHER FLAMMABLE VAPORS AND LIQUIDS IN THE
VICINITY OF THIS OR ANY OTHER APPLIANCE.
SAFETY
PRODUCT SPECIFICATIONS
MH48PH
Certification CSA
Height Overall 86.6 in.
Reflector Diameter 31.5 in.
Rated Heat Input 48,000 BTU/HR
Fuel Propane/LP
Gas Supply 20-lb. LP-Gas Cylinder
Manifold Pressure 11 in. W.C.
Injector Size (Diameter) 2.14 mm
Safety Features Thermocouple & Tilt Switch
Gas Supply Pressure Max. 150 PSI, Min. 5 PSI

Outdoor Patio Heater 3Operating Instructions and Owner’s Manual
PACKAGE CONTENTS
Part Description QTY
A Top Dome 1
B KD Dome 4
CBurner Assembly 1
DUpper Pole 1
E Deck Ring 1
FLower Pole 1
GCylinder Assembly 1
H Base 1
IWheel Assembly 1
A
B
C
D
E
F
G
H
I
HARDWARE CONTENTS
AA
FF
BB
GG
CC
HH
DD
II
EE
JJ
M8 x 15 mm
Bolt
Qty. 2
M5 x 8 mm
Silver Bolt
Qty. 12
AAA-Battery
Qty. 1
Wing Nut
Qty. 3
Shroud Fix
Bracket
Qty. 6
M5 Nut
Qty. 12
Reflector
Spacer
Qty. 3
M8 Nut
Qty. 2
M5 x 10 mm
Bolt
Qty. 18
M6 x 10 mm
Bolt
Qty. 4
KK
M8 x 149 mm
Nail
Qty. 1

Outdoor Patio Heater 4Operating Instructions and Owner’s Manual
PREPARATION
Before beginning assembly of product, make sure all parts are
present. Compare parts with package contents list and hardware
contents list. If any part is missing or damaged, do not attempt
to assemble the product.
Estimated Assembly Time: 30 minutes
Tools Required for Assembly (not included): Phillips screwdriver
and adjustable open wrench.
SAFETY INFORMATION
Please read and understand this entire manual before
attempting to assemble, operate or install the product.
• The installation must conform with local codes or, in the
absence of local codes, with the National Fuel Gas Code,
ANSI Z223.1/NFPA 54, Natural Gas and Propane Installation
Code, CSA B149.1, or Propane Storage and Handling Code,
B149.2.
DANGER:
• Young children should be carefully supervised when they
are in the area of the item.
• Keep the ventilation opening(s) of the cylinder enclosure
free and clear from debris. Use this appliance in a well-
ventilated space only. Do not use it in a building, garage or
any other enclosed area.
• Use this appliance in outdoor areas described below:
a. With walls on all sides, but at least one permanent
opening at ground level and no overhead cover.
b. Within a partial enclosure that includes overhead
cover and no more than two walls. These walls may be
parallel or at right angles to each other.
c. Within a partial enclosure that includes overhead cover
and no more than two walls. The following shall apply:
i. One wall that is equivalent to at least 25% of the
total wall area is completely open.
ii. 30% or more in total of the remaining wall area is
open and unrestricted.
• Store the cylinder outdoors in a well-ventilated area (not in
a building, garage, or other enclosed area) out of the reach
of children.
• Do not store a spare LP-gas cylinder under or near this
appliance.
• Never fill the cylinder beyond 80 percent full.
CAUTION:
• Minimum clearance to the combustible materials is 44 in.
• If you don’t feel the heater is on a stable surface, use a
ground screw to fix the base of the heater on the surface
where the heater is installed. Fix the base on an incline no
wider than 15 degrees.
• This heater is equipped with a battery-operated ignition
device; please refer to the Assembly Instructions.
• Any guard or other protective device removed for servicing
the heater must be replaced prior to operating the heater.
• More frequent cleaning may be required as necessary. It
is imperative that the control compartment, burners and
circulating air passageways of the heater to kept clean.
• Keep the appliance area clear and free from combustible
materials, gasoline and other flammable vapors and liquids.
• Inspect the visible portion of the hose before each use of
the appliance. When portions of the hose are located within
the confines of the heater post, instructions to inspect
the entire hose assembly at least annually. If disassembly
is required, the instructions shall also include the proper
procedure for leak checking the connections upon re-
assembly.
• More frequent cleaning may be required as necessary.
It is imperative the control compartment, burners and
circulating air passageways of the heater are kept clean.
• Keep this manual for future reference and to educate new
users of this product.
WARNING:
• Perform a leak test with a soapy solution:
a. To check gas connections.
b. After connecting a new cylinder.
c. Upon re-assembly after disassembly.
Please refer to the leak test procedure indicated in
this instruction manual.
• Replace the hose assembly prior to the appliance being put
into operation if there is evidence of excessive abrasion or
wear, or if the hose is damaged. The pressure regulator and
hose assembly supplied with the appliance must be used.
The replacement hose assembly/regulator shall be that
specified by the manufacturer.
• Place the propane hose with regulator assembly out of
pathways where people may trip over it or in areas where
the hose will not be subjected to accidental damage.
• The cylinder used must include a collar to protect the
cylinder valve.
• Installation and repair should be done by a qualified service
person; the heater should be inspected before use and at
least annually by a qualified service person.
• Do not obstruct the flow of combustion and ventilation air.
• The LP-gas supply cylinder to be used must be:
a. Constructed and marked in accordance with the
Specifications for LP-gas cylinders of the U.S.
Department of Transportation of Dangerous Goods
and Commission, CAN/CSA-B339, as applicable;
b. Provided with a listed overfilling prevention device;
and
c. Provided with a cylinder connection device
compatible with the connection for the appliance.
• Disconnect the cylinder when the appliance is not in use.
• Storage of an appliance indoors is permissible only if the
cylinder is disconnected and removed from the appliance.
• Materials or items when stored under the heater will be
subjected to intense heat and could be seriously damaged.
• Clothing or other flammable materials should not be hung
on the heater, or placed on, under or near the heater.
• Children and adults should be alerted to the hazards of high
surface temperatures and should stay away from the item to
avoid burns or clothing ignition.
• Place the dust cap tightly on the cylinder valve outlet
whenever the cylinder is not in use. Install only the type
of dust cap on the cylinder valve that is provided with the
cylinder valve. Other types of caps or plugs may result in a
propane leak.

Outdoor Patio Heater 5Operating Instructions and Owner’s Manual
1
HI
CC AA
2
H
DD JJ
3
G
I
DD
Door
ASSEMBLY INSTRUCTIONS
1. With the base (H) upside down, attach wheel assembly (I)
using M8 x 15 mm bolts (AA) and M8 nuts (CC).
HARDWARE USED
HARDWARE USED
HARDWARE USED
AA
DD
DD
CC
JJ
M8 x 15 mm Bolt
M5 x 10 mm Bolt
M5 x 10 mm Bolt
M8 Nut
Shroud Fix Bracket
X 2
X 5
X 5
X 2
X 5
2. Turn the base (H) right-side up, then attach shroud fix
brackets (JJ) using M5 x 10 mm bolts (DD).
3. Attach cylinder assembly (G) using M5 x 10 mm bolts (DD)
through the Shroud Fix Brackets.
Note: The doors on the cylinder assembly (G) should be on
the opposite side of the Wheel Assembly (I).

Outdoor Patio Heater 6Operating Instructions and Owner’s Manual
4
F
E
G
EE
Back
5
C
BB
6
C
D
DD
HARDWARE USED
HARDWARE USED
HARDWARE USED
EE
BB
DD
M6 x 10 mm Bolt
Reflector Spacer
M5 x 10 mm Bolt
X 4
X 3
X 3
4. Attach lower pole (F) to cylinder assembly (G) using M6 x
10 mm bolts.
Note: Ensure the pole is straight. Then put the deck ring
(E) through the lower pole on top of cylinder assembly (G)
to cover connection.
5. Insert reflector spacers (BB) into the top of burner assembly
(C).
6. Thread the regulator & hose assembly preassembled to
burner assembly (C) through the upper pole (D).
6.1. Thread the regulator & hose assembly into and
through the upper pole (D).
6.2. Screw burner assembly (C) onto upper pole (D) until
the holes on bottom of burner assembly (C) are aligned to
the holes on top of upper pole (D). Secure them together
by using three M5 x 10 mm bolts (DD). Ensure they are
fully tightened.

Outdoor Patio Heater 7Operating Instructions and Owner’s Manual
7
D
F
DD
FF
A
8
B
GG
GG
FF
9
C
II
BB
HARDWARE USED
HARDWARE USED
HARDWARE USED
FF
GG
DD
II
M5 x 8 mm Silver Bolt
M5 Nut
M5 x 10 mm Bolt
Wing Nut
X 12
X 12
X 3
X 3
7. Feed the regulator & hose assembly and connect upper
pole (D) to the lower pole (F).
7.1. Feed the regulator & hose assembly into and through
the lower pole assembly.
7.2. Screw upper pole (D) onto lower pole (F) until the
holes on upper pole (D) are aligned to the holes on top of
lower pole (F). Secure them together by using three M5 x
10 mm bolts (DD). Ensure they are fully tightened.
8. Attach KD domes (B) to each other using M5 nuts (GG)
and M5 x 8 mm silver bolts (FF). Complete dome assembly
by attaching top dome (A) to KD domes (B) using M5 nuts
(GG) and M5 x 8 mm silver bolts (FF).
9. Attach dome assembly to burner assembly (C) by securing
wing nuts (II) to reflector spacers (BB).

Outdoor Patio Heater 8Operating Instructions and Owner’s Manual
10
11
HARDWARE USED
KK M8 x 149 mm Nail X 1
10. Insert nail (KK) into the hole of the base. Hammer it in
until the it stands straight, and tighten it into ground with
a wrench.
11. Connect the preassembled regulator assembly from burner
assembly (C) to a 20-lb. LP-gas cylinder (sold separately).
Line up threads on cylinder fitting with those on regulator
and rotate clockwise until tight.
HAND TIGHTEN ONLY. DO NOT USE ANY HAND TOOLS TO
MAKE THIS CONNECTION. Be careful not to cross threads
when screwing in fitting.
To disconnect the LP-gas cylinder, first make sure the
cylinder valve is in the “OFF” position. Then, turn the knob
on the regulator assembly counterclockwise until it is loose.
WARNING: Before connecting, be sure there is no debris
caught in the head of the LP-gas cylinder regulator valve or
in the head of the burner and burner ports.

Outdoor Patio Heater 9Operating Instructions and Owner’s Manual
G
12
13
HH
-+
12. Attach strap inside of cylinder assembly (G) to secure
cylinder. Then, close doors on cylinder assembly (G) to
complete installation.
13. To install the battery (HH), unscrew the igniter cap
preassembled to burner assembly (C). Insert battery
(HH) into the igniter, ensuring the positive “+” end faces
outward, then replace the igniter cap.

Outdoor Patio Heater 10 Operating Instructions and Owner’s Manual
OPERATING INSTRUCTIONS
Checking For Leaks
1. Make leakage solution by mixing 1-part liquid dish soap
and 3-parts water.
2. Spoon or brush several drops (or use squirt bottle) of the
solution onto the gas hose/regulator and regulator/cylinder
and hose connections.
3. Turn on gas cylinder valve. Inspect the connections and
look for bubbles.
a. If no bubbles appear, the connection is safe.
b. If bubbles appear, there is leakage. Loosen and re-
tighten this connection. If it still leaks, please call
customer service.
Lighting Instructions
1. Turn the LP gas cylinder valve OFF. Push the control knob
on the pole in, turn OFF, and wait 5 minutes for any gas to
clear.
2. Turn the tank valve ON. Push control knob in and rotate
to PUSH. Then push the igniter button and control knob
until the burner is ignited. If igniting the burner for 5
seconds continuously but the burner fails to remain lit or
is extinguished, repeat step 2 after 5 minutes. Complete
shutoff period before relighting.
3. Once the burner has lit, continue to hold the control knob
in for 30 seconds, and then release.
4. Turn the control knob from LOW to HIGH until the desired
heat setting is achieved.
5. Visually check the burner flame against the illustrations to
the right:
a. Flame should be blue with slight yellow tips.
b. You should see a smaller flame in LOW position than
seen on HIGH. Perform flame check prior to each use.
If only low flame is seen, refer to “Burner flame is low”
in the “TROUBLESHOOTING”.
For complete shutdown:
1. Please turn the knob to “PUSH” position first, then push
and turn to “OFF” position for complete shut off.
2. Turn the LP gas tank valve OFF before removing the LP gas
tank.
In any case of failure of normal ignition, please use a lighter
(sold separately) to reach the burner for ignition through the
hole on the bottom of burner diffuser. Or insert a match from
the back side of the burner assembly opposite to the control
panel.
WARNING: If at any time you are unable to light burner and
smell gas, wait 5 minutes to allow gas to dissipate before
attempting to light heater.
WARNING: DO NOT touch or move heater for at least 45
minutes after use. Allow emitter and dome to cool before
touching.
WARNING: Avoid inhaling fumes emitted from the heater’s
first use. Smoke and odor from the burning of oils used
in manufacturing will appear. Both smoke and odor will
dissipate after approximately 30 minutes. The heater should
NOT produce thick black smoke.
1
2

Outdoor Patio Heater 11 Operating Instructions and Owner’s Manual
CARE AND MAINTENANCE
• Abrasive cleaners will damage this product.
• Never use oven cleaner to clean any part of heater
• Do not clean any heater part in a self-cleaning oven. The
extreme heat will damage the finish.
• More frequent cleaning may be required as necessary.
It is imperative that control compartment, burners and
circulating air passageways of the heater be kept clean.
• Spiders and insects can create a dangerous condition that
may damage heater or make it unsafe. Keep burner area
clean of all spiders, webs or insects. Clean burner holes by
using a heavy-duty pipe cleaner. Compressed air may help
clear away smaller particles.
• Inspect heater before each use.
• Have heater inspected annually and repairs should be made
by a qualified service person.
• Check heater immediately if any of the following conditions
exist:
a. The smell of gas in conjunction with extreme yellow
tipping of burner flames.
b. Heater does not reach proper temperature.
c. Heater’s glow is excessively uneven.
d. Burner makes popping noises during use.
NOTE: A slight pop is normal when burner is
extinguished.
• Carbon deposits may create a fire hazard. Keep dome and
emitter clean at all times.
• Do not clean heater with combustible or corrosive cleaners.
Use warm, soapy water.
• Do not paint engine, engine access panel or dome.
• This heater should be thoroughly cleaned on a regular
basis.
• After a period of storage and/or non use, check for leaks,
burner obstructions and inspect for any abrasion, wear,
cuts to the hose.
Cleaning
• Wipe surfaces clean with mild dish detergent or baking
soda.
• For stubborn surfaces use a citrus citrus-based degreaser
and a nylon scrubbing brush.
• Rinse clean with water.
NOTE: While cleaning the unit, be sure to keep the area
around the burner and pilot assembly dry at all times. Do
not submerge the control valve assembly. If the gas control
is submerged in water, do NOT use it. It must be replaced.
TIP: Use high high-quality automobile wax to help maintain
the appearance of the heater. Apply to exterior surfaces
from the pole down. Do not apply to emitter screen or
domes.
Maintenance
• Keep exterior surfaces clean clean.
• Air flow must be unobstructed. Keep controls, burner
and circulating air passageways clean. Signs of possible
blockage include:
»Gas odor with extreme yellow tipping of flame.
»Heater does NOT reach the desired temperature.
»Heater glow is excessively uneven.
»Heater makes popping noises.
NOTE: In a salt salt-air environment (such as near an ocean)
ocean), corrosion occurs more quickly than normal. Frequently
check for corroded areas and repair them promptly.
• Battery replacement: Use a an alkaline AAA battery.
Storage
Between uses or during periods of extended inactivity:
• Turn Turn control knob to “OFF”.
• Disconnect LP cylinder and move to a secure, well well-
location outdoors.
• Store heater upright in an area sheltered from direct
contact with inclement weather (such as rain rain, sleet ,
hail, snow, dust and and debris).
NOTE: Never leave LP gas tank exposed to direct sunlight
or excessive heat.
• If desired, use cover (L) to protect the heater and help
prevent buildup in air passages.
CAUTION: Wait until heater is cool before covering.

Outdoor Patio Heater 12 Operating Instructions and Owner’s Manual
Symptom Possible Cause Corrective Action
Burner doesn’t light 1. Gas pressure is too low.
2. The orifice is blocked.
3. Control knob is not in “PUSH” position.
1. Turn the gas cylinder valve “OFF” and
replace the cylinder.
2. Clear blockage.
3. Turn control knob to “PUSH” position.
Burner flame is low. 1. Gas pressure is low.
2. Control knob is not positioned at “HIGH”.
3. The burner jet is partially blocked.
4. Outdoor temperature is less than 40˚F and tank is less
than 1/4 full.
5. Supply hose is bent or kinked.
1. Turn the gas cylinder valve “OFF” and
replace the cylinder.
2. Position the control knob at “HIGH”.
3. Clear blockage.
4. Use a full gas cylinder.
5. Straighten the hose.
Carbon buildup 1. Seasonal accumulation. 1. Wipe off before lighting.
Thick black smoke 1. Blockage in burner. 1. Remove blockage and clean burner inside
and outside.
TROUBLESHOOTING

Outdoor Patio Heater 13 Operating Instructions and Owner’s Manual
THIS PAGE INTENTIONALLY LEFT BLANK
ESTA PÁGINA INTENCIONALMENTE SE DEJA EN BLANCO
CETTE PAGE A ÉTÉ INTENTIONNELLEMENT LAISSÉE VIERGE

Outdoor Patio Heater 14 Operating Instructions and Owner’s Manual
REPLACEMENT PARTS LIST FOR MODEL MH48PH
When ordering parts include the complete unit model number listed on the unit rating plate.
1
2
12
13
14
15
16
17
18
19
3
7
8
6
4
9
10
11
5

Outdoor Patio Heater 15 Operating Instructions and Owner’s Manual
REF # Description Part#
1TOP DOME 0 0122
2KD DOME 0 0123
3BURNER ASSEMBLY 0 0124
4BURNER CHAMBER ASSEMBLY 0 0125
5INSULATION PLATE 0 0126
6CONTROL PANEL 0 0127
7KNOB 0 0128
8IGNITER 0 0129
9THERMOCOUPLE 0 0130
10 IGNITION PIN 0 0131
11 TILT SWITCH 0 0132
12 UPPER POLE 0 0133
13 DECK RING 0 013 4
14 LOWER POLE 0 0135
15 CYLINDER ASSEMBLY 0 0136
16 SHROUD FIX BRACKET 0 0137
17 BASE 0 013 8
18 WHEEL ASSEMBLY 0 0139
19 HARDWARE PACK 00140
REPLACEMENT PARTS LIST FOR MODEL MH48PH
SEE BACK PAGE FOR PARTS ORDERING INFORMATION

Outdoor Patio Heater 16 Operating Instructions and Owner’s Manual
OPERATING INSTRUCTIONS
AND OWNER’S MANUAL MODEL#
MH48PH
READ INSTRUCTIONS CAREFULLY: YOUR SAFETY IS IMPORTANT TO YOU AND TO OTHERS.
Read and follow all instructions. Place instructions in a safe place for future reference. Do not allow anyone
who has not read these instructions to assemble, light, adjust or operate the heater.
WARNING:
USE ONLY MANUFACTURER’S REPLACEMENT PARTS. USE OF ANY OTHER PARTS COULD
CAUSE INJURY OR DEATH. REPLACEMENT PARTS ARE ONLY AVAILABLE DIRECT FROM THE
FACTORY AND MUST BE INSTALLED BY A QUALIFIED SERVICE AGENCY.
PARTS ORDERING INFORMATION:
PURCHASING: ACCESSORIES MAY BE PURCHASED AT ANY MR. HEATER LOCAL DEALER OR
DIRECT FROM THE FACTORY
FOR INFORMATION REGARDING SERVICE:
Please call Toll-Free 800-251-0001 • WWW.MRHEATER.COM
Our office hours are 8:00 AM – 5:00 PM, EST, Monday through Friday.
Please include the model number, date of purchase, and description of problem in all communi-
cation.
LIMITED WARRANTY:
The company warrants this product to be free from imperfections in material or workmanship,
under normal and proper use in accordance with instructions of The Company, for a period of
one year from the date of delivery to the buyer. The Company, at its option, will repair or replace
products returned by the buyer to the factory, transportation prepaid within said one year period
and found by the Company to have imperfections in material or workmanship.
If a part is damaged or missing, call our Technical Support Department at 800-251-0001.
Address any Warranty Claims to the Service Department, Mr. Heater, Inc., 4560 W. 160TH ST.,
CLEVELAND, OHIO 44135. Include your name, address and telephone number and include de-
tails concerning the claim. Also, supply us with the purchase date and the name and address of
the dealer from whom you purchased our product.
The foregoing is the full extent of the responsibility of the Company. There are no other war-
ranties, express or implied. Specifically there is no warranty of fitness for a particular purpose
and there is no warranty of merchantability. In no event shall the Company be liable for delay
caused by imperfections, for consequential damages, or for any charges of the expense of any
nature incurred without its written consent. The cost of repair or replacement shall be the ex-
clusive remedy for any breach of warranty. There is no warranty against infringement of the like
and no implied warranty arising from course of dealing or usage of trade. This warranty will not
apply to any product which has been repaired or altered outside of the factory in any respect
which in our judgment affects its condition or operation.
Some states do not allow the exclusion or limitation of incidental or consequential damages, so
the above limitation or exclusion may not apply to you. This Warranty gives you specific legal
rights, and you may have other rights which vary from state to state.
Mr. Heater, Inc. reserves the right to make changes at any time, without notice or obligation, in
colors, specifications, accessories, materials and models.
PRODUCT REGISTRATION: Thank you for your purchase.
Please log in to http://www.egiregistration.com to register your product.
ENERCO GROUP, INC., 4560 W. 160TH ST., CLEVELAND, OHIO 44135 • 1-800-251-0001
Mr. Heater is a registered trademarks of Mr. Heater, Inc.
© 2021, Mr. Heater. All rights reserved

INSTRUCCIONES DE USO Y
MANUAL DEL USUARIO MODELO#
MH48PH
ADVERTENCIA: Lea y siga cuidadosamente todas las instrucciones. Conserve estas instrucciones
en un lugar seguro para futura referencia. No permita que nadie que no haya leído estas
instrucciones arme, encienda, ajuste o use el calefactor.
CALEFACTOR DE EXTERIOR PARA PATIO
00141
www�mrheater�com •800-251-0001
ADVERTENCIA: Solo para uso en exteriores.
Instalador: Deje este manual con el artefacto. Consumidor: Guarde este manual para futura referencia.
ADVERTENCIA:
La instalación, ajuste, alteración, reparación o mantenimiento inadecuados
puede causar daños materiales, lesiones o la muerte. Lea y comprenda completamente las
instrucciones de instalación, operación y mantenimiento antes de instalar o reparar este equipo.
- QUÉ HACER SI DETECTA OLOR A GAS
ǞCierre el suministro de gas del artefacto.
ǞApague todas las llamas.
ǞSi el olor persiste, manténgase alejado del artefacto y llame inmediatamente a su compañía
de gas o a los bomberos.
- Este calefactor debe ser instalado y reparado únicamente por personal autorizado y capacitado
en artefactos a gas. Inspeccione el calefactor una vez al año. El no hacerlo podría causar lesiones
personales, asfixia, muerte, incendio y/o daños materiales.
ADVERTENCIA: El almacenamiento de gasolina y otros vapores y líquidos inflamables cerca
de este o cualquier otro artefacto puede provocar un incendio o una explosión. No almacene
ni utilice gasolina ni ningún otro vapor ni líquido inflamable cerca de este ni de ningún otro
artefacto. Un cilindro de propano que no esté conectado al calefactor no debe almacenarse cerca
de éste ni de ningún otro artefacto. Mantenga todas las distancias a los combustibles en todo
momento.

Calefactor de exterior para patio 2Instrucciones de uso y manual del usuario
ÍNDICE
ESPECIFICACIONES DEL PRODUCTO ������������������������������ 2
CONTENIDO DEL PAQUETE ������������������������������������������� 3
ADITAMENTOS ������������������������������������������������������������� 3
PREPARACIÓN��������������������������������������������������������������� 4
INFORMACIÓN DE SEGURIDAD ������������������������������������ 4
INSTRUCCIONES DE ENSAMBLAJE�������������������������������� 6
INSTRUCCIONES DE OPERACIÓN ��������������������������������� 11
CUIDADO Y MANTENIMIENTO ����������������������������������� 12
DIAGNÓSTICO DE PROBLEMAS��������������������������������������13
LISTA DE PARTES DE REPUESTO ���������������������������������� 14
GARANTÍA������������������������������������������������������������������ 16
ESPECIFICACIONES DEL PRODUCTO
MH48PH
Certificación CSA
Altura general 220 cm
Diámetro del reflector 80 cm
Consumo de calor nominal 11�750 frigorías/h
Combustible Propano-PL
Suministro de gas Cilindro de gas propano de
20 libras
Presión del tubo colector 27,9 mm CA
Tamaño del inyector (diámet-
ro)
2�14 mm
Características de seguridad Termopar e interruptor de
nivelación
Presión de suministro de gas Max� 150 PSI, Min� 5 PSI
ADVERTENCIA:
SU SEGURIDAD ES IMPORTANTE PARA USTED Y
PARA LOS DEMÁS, ASÍ QUE POR FAVOR LEA ESTAS
INSTRUCCIONES ANTES DE UTILIZAR EL CALEFACTOR�
ADVERTENCIA:
PELIGRO DE INCENDIO Y EXPLOSIÓN
El no seguir exactamente las advertencias de seguridad
podría causar heridas graves, la muerte o daños
materiales� Asegúrese de leer y comprender las
instrucciones de instalación, operación y reparación de
este manual� La instalación, ajuste, alteración, reparación
o mantenimiento inadecuados pueden causar lesiones
graves, la muerte o daños materiales�
ADVERTENCIA:
PELIGRO DE INCENDIO, QUEMADURAS, INHALACIÓN Y
EXPLOSIÓN. MANTENGA LOS COMBUSTIBLES SÓLIDOS
COMO MATERIALES DE CONSTRUCCIÓN, PAPEL O
CARTÓN A UNA DISTANCIA SEGURA DEL CALEFACTOR.
TAL COMO LO RECOMIENDAN LAS INSTRUCCIONES,
NUNCA USE EL CALEFACTOR EN ESPACIOS QUE
CONTIENEN O PODRÍAN CONTENER COMBUSTIBLES
VOLÁTILES O PRODUCTOS COMO GASOLINA,
SOLVENTES, DILUYENTE DE PINTURA O PRODUCTOS
QUÍMICOS DESCONOCIDOS.
ADVERTENCIA: ESTE PRODUCTO PUEDE
EXPONERLO A PRODUCTOS QUÍMICOS, INCLUYENDO
PLOMO Y COMPUESTOS DE PLOMO, QUE DE ACUERDO
CON EL ESTADO DE CALIFORNIA PRODUCEN CÁNCER
Y DEFECTOS DE NACIMIENTO U OTROS DAÑOS
REPRODUCTIVOS. POR MAYOR INFORMACIÓN, VISITE
WWW.P65WARNINGS.CA.GOV
ADVERTENCIA: Los combustibles utilizados
en los artefactos a gas licuado de propano y los productos
de la combustión de dicho combustible pueden exponerlo
a sustancias químicas, incluido el benceno, que según
el estado de California puede provocar cáncer y causar
defectos de nacimiento u otros daños reproductivos. Visite
www�P65Warnings�ca�gov por mayor información�
ADVERTENCIA:
NO ALMACENE NI UTILICE
GASOLINA NI NINGÚN OTRO VAPOR NI LÍQUIDO INFLAMABLE
CERCA DE ESTE NI DE NINGÚN OTRO ARTEFACTO.
SEGURIDAD
INFORMACIÓN GENERAL
GUARDE ESTE MANUAL PARA FUTURA REFERENCIA.
POR PREGUNTAS, PROBLEMAS O PARTES FALTANTES, ANTES
DE RETORNAR EL PRODUCTO A LA TIENDA LLÁMENOS
CON EL NÚMERO DE MODELO Y EL NÚMERO DE SERIE DEL
CALEFACTOR:
1-800-251-0001
DE LUNES A VIERNES DE 8 A 5 PM HORA DEL ESTE.
O ENVÍENOS UN MENSAJE A TRAVÉS DEL SITIO WEB DE MR.
HEATER:
WWW.MRHEATER.COM
IDIOMAS
INGLÉS ������������������������������������������������������������� 1 - 16
ESPAÑOL ������������������������������������������������������ 17 - 32
FRANCÉS ������������������������������������������������������ 33 - 48
Para brindarle el mejor servicio posible, ahora Mr� Heater le
ofrece más formas de ponerse en contacto con nosotros�
Encuentre videos informativos en:
Facebook: www�facebook�com/mrheaterproducts/
Twitter: https://twitter�com/MrHeater

Calefactor de exterior para patio 3Instrucciones de uso y manual del usuario
CONTENIDO DEL PAQUETE
Pieza Descripción Cantidad
A Domo superior 1
B Domo KD 4
C Conjunto del quemador 1
DVarilla superior 1
E Anillo de cubierta 1
FVarilla inferior 1
GConjunto del cilindro 1
H Base 1
I Conjunto de las ruedas 1
A
B
C
D
E
F
G
H
I
ADITAMENTOS
AA
FF
BB
GG
CC
HH
DD
II
EE
JJ
Perno
M8 x 15 mm
Cant� 2
Perno plateado
M5 x 8 mm
Cant� 12
Batería
tamaño AAA
Cant� 1
Tuerca mariposa
Cant� 3
Soporte fijo
para cubierta
Cant� 6
Tuerca M5
Cant� 12
Espaciador para
el reflector
Cant� 3
Tuerca M8
Cant� 2
Perno negro
M5 x 10 mm
Cant� 18
Perno
M6 x 10 mm
Cant� 4
KK
M8 x 149 mm
Uña
Cant� 1

Calefactor de exterior para patio 4Instrucciones de uso y manual del usuario
PREPARACIÓN
Antes de comenzar a ensamblar el producto, asegúrese de
tener todas las piezas� Compare las piezas con la lista del
contenido del paquete y la lista de aditamentos� No intente
ensamblar el producto si falta alguna pieza o si estas están
dañadas�
Tiempo estimado de ensamblaje: 30 minutos.
Herramientas necesarias para el ensamblaje (no se incluyen):
destornillador Phillips y llave de tuercas ajustable�
INFORMACIÓN DE SEGURIDAD
Lea y comprenda complet amente este manual antes de intentar
ensamblar, usar o instalar el producto�
• La instalación debe cumplir con los códigos locales o, en su
defecto, con el Código nacional de gas combustible, ANSI
Z223�1 /NFPA 54 y con el Código nacional de instalación de
gas propano y gas natural C SA B149�2, o con el Código de
manejo y almacenamiento de propano, B149�2 B149�2�
PELIGRO:
• Se debe supervisar cuidadosamente a los niños pequeños
cuando se encuentren en el área del artículo.
• Mantenga despejadas y limpias las aberturas de ventilación
del compartim iento del cilindro. Use este aparato
solamente en espacios bien ventilados. No use en edificios,
garajes ni otras áreas cerradas.
• Utilice este aparato en las áreas exteriores que se describen
a continuación continuación:
a. Con paredes en todos los lados, pero con al menos una
abertura permanente a nivel del suelo y sin cubierta
superior.
b. Dentro de un área parcialmente cerrada que incluya
una cubierta superior y no más de dos paredes. Estas
paredes deben ser paralelas o en ángulos rectos con
respecto a la otra.
c. Dentro de un área parcialmente cerrada que incluya
una cubierta superior y no más de dos paredes. Se
aplica lo siguiente:
i. Una pared que equivale al 25% del área total de la
pared está completamente abierta.
ii. 30% o más en total del área de la pared restante
está abierta y sin restricciones restricciones.
• Almacene el cilindro en exteriores, en un área con buena
ventilación (no en un edificio, garaje ni cualquier otra área
cerrada), alejado del alcance de los niños.
• No almacene un tanque de gas PL de reserva debajo o cerca
de este aparato.
• Nunca llene el tanque más allá del 80% de su capacidad
capacidad.
ADVERTENCIA:
• Haga una prueba de detección de fugas con una solución
jabonosa:
a. Para revisar las conexiones de gas.
b. Después de conectar un cilindro de gas nuevo.
c. Al volver a ensamblar luego de desensamblar.
Consulte el procedimiento de detección de fugas
indicado en este manual de instrucciones.
• Reemplace el conjunto de la manguera antes de hacer
funcionar el aparato si hay prueba de abrasión o desg aste
excesivos o si la manguera está dañada. Se debe usar el
regulador de presión y el conjunto de la manguera que
se suministra con el aparato. El conjunto de la manguera/
regulador de repuesto debe ser el especificado por el
fabricante fabricante.
• Coloque la manguer a de propano con el conjunto del
regulador alejados de sendas en que las personas puedan
tropezarse o de áreas en las que la manguera pueda ser
sujeto de daños accidentales.
• El cilindro utilizado debe incluir un anillo para proteger su
válvula.
• Un técnico calificado debe instalar, reparar y hacer una
inspección del calentador antes del primer uso y al menos
una vez al año.
• No obstruya el flujo del aire de combustión ni d e
ventilación.
• El cilindro de suministro de gas PL que usará debe ser:
a. fabricado y marcado según las especificaciones para
cilindros de gas PL del Departamento de transporte
de mercancías peligrosas y la Comisión, CAN/CSA
CSA-B339, según corresponda;
b. equipado con un dispositivo de prevención de
sobrellenado homologado y
c. equipado con una conexión de cilindros compatible
con la conexión para el aparato.
• Desconecte el cilindro cuando el aparato no esté en uso.
• Puede almacenar la unidad en interiores so lo si desconecta
y retira el cilindro del aparato.
• Los materiales o artículos, cuando se almacenan bajo el
calentador, pueden verse sujetos al calor intenso y dañarse
seriamente.
• No se debe colgar ropa ni otros materiales inflamables del
calentador ni colo carse sobre este , debajo o cerca de él.
• Tanto niños como adultos deben estar informados sobre
los peligros de la alta temperatura de la superficie y deben
permanecer alejados del artículo para evitar quemaduras o
incendio de la ropa.
• Coloque la tapa para p olvo con firmeza en la salida de
la válvula del cilindro cada vez que este no esté en uso.
Instale en la válvula del cilindro solamente la tapa para
polvo que se incluye con esta. Otros tipos de tapas o
tapones pueden causar una fuga del propano.
Table of contents
Languages:
Other MrHeater Patio Heater manuals
Popular Patio Heater manuals by other brands

EUROM
EUROM GOLDEN 2000 AMBER SMART instruction manual

Napoleon
Napoleon TERRACE AND PATIO HEATER User installation and operation guide

Legacy Heating
Legacy Heating PH02-S owner's manual

Nexgrill
Nexgrill 920-0049 Installation instructions and owner's manual

Sonnenkonig
Sonnenkonig Saturn user manual

Creda
Creda CSP2 instructions