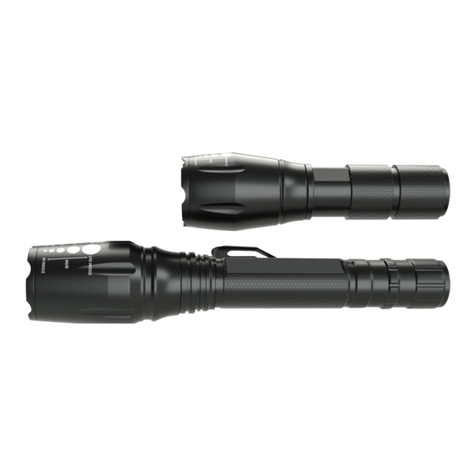
MsForce 310A User manual

Led Flashlight
User Manual
Led Flashlight
User Manual
User manual guide booklet.indd 1 2/21/2017 17:06:34

Copyright © 2017 by DanForce.
All rights reserved. Except as permitted under the U.S. Copyright Act of 1976, no part of this
publication may be reproduced, distributed, or transmitted in any form or by any means, or stores in
a database or retrieval system, without the prior written permission of the publisher.
Published by DanForce.
Visit our Web site at www.DanForce.com
Hello, and well done on the wise purchase
of your LED Tactical Flashlight Deluxe Set.
| 2|
User manual guide booklet.indd 2 2/21/2017 17:06:36

We believe it’s a real asset to your travel kit or tactical tools set,
and is the best thing to own, when you’re left in the dark.
It’s the number one accessory for camping excursions, challenging hiking trips,
exhaustive explorations, military operation and law enforcement. It’s also there
for you when the lights go out and it can be your trusty tool in a dark corner.
The thinking behind the set of LED Tactical Deluxe Flashlights is really impressive
and demonstrates a lot of wisdom in terms of understanding your need.
When you open it, you will see that its two superior flashlights feature 2000
and 1000 lumens brightness, respectively.
Together, they define the versatility needed in a flashlight.
The bigger one is able to illuminate long distances if you are walking in the field,
searching for a missing team member or exploring dark streets.
The smaller one is lighter and handy when you're engaging any outdoor activity.
It is also suitable to use with a weapon.
The two settings of ‘strobe’ with intermittent signals and ‘SOS’, which features an
emergency signal may be a life saviour in a dangerous situation.
The flexibility of controlling brightness is an excellent feature.
You can select high, medium or low, with the flick of a single switch, which is
designed to control whatever spotlight or illumination you might need for close
observation or distant exploration of any site you are visiting. There is also a
zoom feature in these flashlights, which works much as the zoom of a camera or
set of binoculars does, enlarging or reducing the strength of the beam.
Attach these torches to your belt, backpack hook or hang them on your wrist,
so you cannot drop them by accident.
Those waterproof and corrosion resistant torches will last a lifetime.
Use the nylon bag provided to pack them.
It will help you to keep them in good condition.
The bag can be used to pack other essentials as well.
Having read all of that, do you have any other questions about these
fantastic flashlights?
Warmly and in good light,
The DanForce Team
| 3|
User manual guide booklet.indd 3 2/21/2017 17:06:39

When you buy an MsForce product, it is vital that you remember that
your money is completely safe.
We are confident with our products that are carefully checked by the DanForce team
that is why we offer a lifetime guarantee with each one of them.
What does this mean to you? Quite simply, that we will refund you 100% of the price
at any time in the product’s life when you may feel that you don’t like it any longer, for
whatever reason.
We don’t think you’ll have to use this offer because if we know anything about you
at all, you will just love these flashlights as much as we do.
There are several tips to follow to troubleshoot problems with your torch before
you make a warranty claim. You can find them in the end of this booklet.
Also check out the customer service section on our website:
www.DanForce.com
EXCLUSIONS: This warranty does not cover any of the following: Damage to or failure of the
flashlight or any component thereof due to disassembly, alteration, misuse, battery leakage
or lack of maintenance. MsForce disclaims any responsibility for incidental or consequential
damages. Some jurisdictions (countries, provinces, and states) do not allow exclusion or
limitation of implied warranties, incidental or consequential damages and/or limitations on
transferability, so the above limitations and exclusions may not apply to you.
WARNINGS:
AVOID EYE INJURY - Do not stare directly into beam or point it directly into anyone's face.
Doing so for more than a few seconds could cause retinal damage. Not recommended for use by
children under fourteen years of age.
Any battery may leak harmful chemicals which may damage skin, clothing or the inside of the
flashlight. TO AVOID RISK OF INJURY, DO NOT LET ANY MATERIAL LEAKED FROM A BATTERY
COME IN CONTACT WITH EYES OR SKIN.
Any battery may rupture or explode if put in a fire or otherwise exposed to excessive heat.
TO AVOID RISK OF INJURY, DO NOT EXPOSE BATTERIES TO EXCESSIVE HEAT.
To reduce the risk of personal injury or harm to your flashlight, take the following precautions:
* Use only 18650 lithium batteries from a reputable manufacturer * Do not use different brands
of batteries in the same flashlight * When replacing batteries, always replace the whole set *
Do not try to recharge batteries that are not specifically designed to be recharged * Warning:
batteries must be inserted correctly. Failure to do so could cause permanent damage to the
LED module * Follow battery manufacturer's instructions as to proper handling, storage and
disposal of batteries * Carefully follow the steps listed under INSPECTION AND MAINTENANCE.
| 4|
User manual guide booklet.indd 4 2/21/2017 17:06:40

This is what you see when you open the set.
1. The head assembly of the flashlight is something you should never take apart or
attempt to modify, if you wish to keep the warranty valid.
2. This is the Barrel or LED Assembly which also should not be fiddled with, in the
interests of the stability of the flashlight and the validity of its warranty.
3. This is the Lip Seal, also known as the O-Ring.
4. This is the Switch Assembly, which is also known as the Tailcap, and should also
not be experimented with or taken apart for safety reasons and in the interests
of the warranty.
5. This is the plastic battery sleeve.
How do you start using your flashlight?
It’s easy. First of all remove the Tailcap, turning it counter clockwise.
Then insert one Battery – a 18650 Lithium-ion battery does the trick.
The battery’s “+” end should go first. Remember that the
batteries must be fully charged before you insert them, and
the charging can take about three to four hours.
Now you can reattach the Tailcap.
Your flashlight is ready to be tested.
You will find the switch button at the end of the Tailcap.
It looks like this
Press it. And.... let there be light!
| 5|
User manual guide booklet.indd 5 2/21/2017 17:06:43

| 8|
Got it? It’s pretty simple. All you do is insert the battery into the charger slots, making
sure that the positive and negative sides of the battery correspond with the LED
indicators in the charger.
Now attach the charger’s power cord and plug it into a wall outlet.
You will know the batteries are charging because a blue light will blink.
Don’t charge your batteries overnight or leave the charger going with batteries in it
and forget about it.
If you have put the batteries in incorrectly, they will not charge at all.
When the batteries have been successfully charged, the three blue lights on the
charger will stop blinking and will remain a solid blue.
If the indicator light doesn’t come on and you have definitely inserted the batteries in
the right way, there might be a problem with the contact between the battery and the
charging contact point. Spin the batteries on the charger until the lights stabilize.
The MsForce premium 18650 lithium-ion batteries have protection against
overcharging, over discharging and short-circuiting. It’s known as PCB protection and
it will prevent you from being able to damage the batteries if you are charging them
incorrectly. With this charger, you can recharge the batteries up to 500 times.
User manual guide booklet.indd 8 2/21/2017 17:06:49

| 9|
User manual guide booklet.indd 9 2/21/2017 17:06:51

Look after your flashlights by doing the following: From time to time, check to make
sure your battery isn’t leaking anything, such as gases or fluids.
These can be corrosive and will damage your flashlight from the inside.
As a rule, make it a habit to remove the batteries from the flashlight at least once
a month and have a careful look at the inside of the flashlight to make sure there’s no
corrosion going on there.
But if you don’t use your flashlight often – say, only when there’s a power failure in
your house – it’s a good idea to completely remove the batteries from it, and to store
them separately.
This is a good trick to avoid wasting the battery and to make sure that it will never
corrode the inside of your flashlight.
If you use the flashlight often, place a drop of petroleum jelly on all its threads and
rubber lip seals about every six months.
This will keep it oiled, maintained and working as it should.
If your flashlight is often exposed to water, lubricate it with petroleum jelly more often.
If you’re still having hassles with these flashlights, try these troubleshooting tips first:
TAKING CARE OF YOUR FLASHLIGHT:
PROBLEM
SOLUTION
The ashlight
doesn’t switch on It is probably due to the batteries
not functioning.
Check:
have you fully charged the
batteries? Is there still life in
the batteries? When you put the
batteries into the charger, does
the blue light switch on?
| 10 |
User manual guide booklet.indd 10 2/21/2017 17:06:53

PROBLEM
PROBLEM
SOLUTION
SOLUTION
Still no luck
The ashlight
will not stay on
If you’ve followed all the above
instructions and you still have no
joy from your ashlight,
it’s time to make a claim
on your warranty.
Or email us on
Support@DanForce.com
This might be because
the tailcap is faulty.
Remember that the metal that
comes into contact with the barrel,
tailcap and battery terminals is a
conductor and should be shiny metal
with no dirt or corrosion. Clean any
obstructions from the metal,
and try again.
| 11 |
User manual guide booklet.indd 11 2/21/2017 17:06:56

Customer Service
www.DanForce.com
Support@DanForce.com
User manual guide booklet.indd 12 2/21/2017 17:06:57
This manual suits for next models
1
Table of contents
Other MsForce Flashlight manuals